TEV Wahine 1/35 Build

Advert

TEV Wahine 1/35 Build

Home Forums Scratch build TEV Wahine 1/35 Build

Viewing 25 posts - 301 through 325 (of 411 total)
  • Author
    Posts
  • #95757
    Richard Simpson
    Participant
      @richardsimpson88330

      It seems a shame to pull the plug on a build blog that has now been running for 6 years but as Ray suggests, it shouldn't become hard work, you should enjoy doing it. If it is too much then take a break and return to it when you are refreshed.

      I can't see any evidence of anyone being offended so perhaps you have misunderstood some of the feedback. This is always a challenge when none of us knows the background, experience, expertise etc.. of the people we are talking to. I think here most tend to be a friendly bunch who are more than happy to add comments, suggestions or even guidance, which may well sometimes be at someone who might have more expertise than they have. The trouble is they do not know this at the time.

      I think if you take comments in the positive and supportive manner in which they were undoubtedly given you won't go far wrong on this forum.

      I also tend to agree with Ray as regards glassing a hull.  I can see the sense in glassing the outside but completely sealing both sides of the wood with a medium that is notoriously inflexible when the wood is almost certainly going to flex in some way throughout its life seems to be tempting fate.  I certainly would not consider starting again but I may be tempted to remove as much of the internal glass coating as I could get to then simply repair the cracks.

      I'm not sure I understand your comment regarding the difference between the matting on one side and the tissue on the other unless you are referring to possible different thicknesses of resin creating different levels of heat?  The heating process does seem to be relatively quick during curing and I'm not sure what the differential in temperature would be but I do tend to think that completely encasing it on both sides, then warming it up may lead to flexing of the wood, which will fight against the rigid resin. 

      We have all been there, but we have all found a way around these things and sorted them out somehow.

      Edited By Richard Simpson on 27/05/2021 17:50:03

      Advert
      #95760
      Colin Bishop
      Moderator
        @colinbishop34627

        Hi Richard,

        I agree with Ray, please reconsider your decision as a lot of people have been really enjoying the build and want to see it continue.

        I think the gap in your postings has resulted in people forgetting a lot of the earlier detail in a 30+ page thread going back to 2015 and the recent postings simply zeroed in on your report of lower hull issues in isolation. Hence the comments about wood problems.

        I have just spent a while reading through the whole thread again and I think you are wrong in interpreting comments as negative. On the contrary, all the comments on the build from page one have been universally positive and most express sincere admiration for your work.

        Looking at your original construction description and photos, the splits in the lower hull appear difficult to explain. It is conventional plank on frame using western red cedar and should have given no problems at all.

        However, reading further reminded me that after glassing the inside and applying tissue to the inside you detached the lower hull from the sheeted topsides and removed much of the supporting framing, (inc. all cross beams?), relying on the GRP/Cedar/Tissue 'sandwich' to maintain the shape. (Page 18). This in turn reminded me of problems I have experienced with several kit review models I have made which featured GRP hulls. In almost all cases the hull had distorted after being removed from the mould and boxed up for sale. In most instances this manifested as the hull sides curling in to a considerable extent and in some cases the bottom would bow up amidships as well.

        It is a common problem and caused by the hull continuing to cure after mould removal. The solution is to force the hull back into shape either by judicious internal framing or forcing the deck into place and then applying heat from a hair dryer. The hull will then cool and take on the desired shape. A bow in the keel can usually be cured by forcing it flat with a heavy weight and again applying gentle heat. Some internal framing and the deck still needs to be in place to maintain the desired shape.

        These are usually polyester resin hulls but it is quite possible that epoxy exhibits similar plasticity. If so then your glassing, by a combination of curing, thermal movement (with ambient temperature changes) and removal of some of the original support has permitted a degree of movement which has overstressed the ‘sandwich’ and resulted in the splits. Wahine is an unusually large model and this sort of problem might not be apparent in the smaller models which most people build and sheath in GRP where stresses would be much less.

        I am no expert but I suspect that this may be at the root of the problem. Like Ray, I’m not a great enthusiast for glass sheathing as I don’t like mixing materials with different thermal coefficients. I have done it on the LitePly hull Fairey powerboat kits but they are only a couple of feet long. My 48 inch Fishery cruiser has a balsa planked lower hull and ply upper hull but the ‘plating’ is in fact gumstrip paper saturated in shellac. All natural material and no problems!

        With Wahine it is difficult to be definitive but it does seem that the root of the problem is the GRP/cedar sandwich and its supporting structure. I can’t believe the application of the cedar planks to the original frames should have been an issue. Your replacement lower hull may well be better off with conventional sealing and paint finishes which match the wood.

        Colin


        Edited By Colin Bishop on 27/05/2021 18:47:25

        #95766
        Richard H Dunn
        Participant
          @richardhdunn

          Thanks guys for the comments, as you can see my issue with reading people has become more obvious now than I thought then,I am seriously borderline paranoid which I hate to admit but Richard it was you I thought I had last offended by my possibly over done response to your help.
          I felt I had also upset Bob at a few points to…see…I cant read these situations well.
          if people can forgive me if and when I do this then I will continue, I am already 3 layers into the hull sandwich now.

          #95767
          Tim Rowe
          Participant
            @timrowe83142

            Excellent news!

            Like Colin, I re-read the entire thread yesterday evening and it is clear that everyone is rooting for you.

            Tim R

            #95768
            Bob Abell 2
            Participant
              @bobabell2

              Just water under the bridge, Richard

              Welcome back to the Forum. friend

              Bob

              #95771
              Richard Simpson
              Participant
                @richardsimpson88330

                Richard I would suggest that you just make the assumption, not always advisable I know but fairly safe here, that most posts made on this forum and in particular this thread are given in the spirit of positivity and support. Perhaps when things don't go the way you were hoping you get a little disheartened and negative about the whole project. Don't worry we have all been there and we still continue to make mistakes with our builds!

                As an example I am in the process of converting a ready made clinker built open boat into a steam powered RC model. I made an absolute mess, after an hour and a half, of drilling for the stern tube and ended up with the propeller on the water line. After a lot of swearing out came the wood glue and a couple of turned down dowels to plug the ends then, when I have taken a few deep breaths I will try again, learning from the first disaster. We all do it.

                Good to see you are progressing again and continuing the thread.

                #95773
                Richard H Dunn
                Participant
                  @richardhdunn

                  Ok well here we go then, round two of the lower hull,I am going to state right here that I am not going to carve the inside of the hull, I thought about it but I think the extra wood will make for a stronger hull, not to mention the steps will probably come in handy, this is my 4th B&b hull but I have never done one this way with multiple lengths per hull, the alignment system seems to work , certainly within 1 mm accuracy so not going to complain about that as it has to be carved yet.

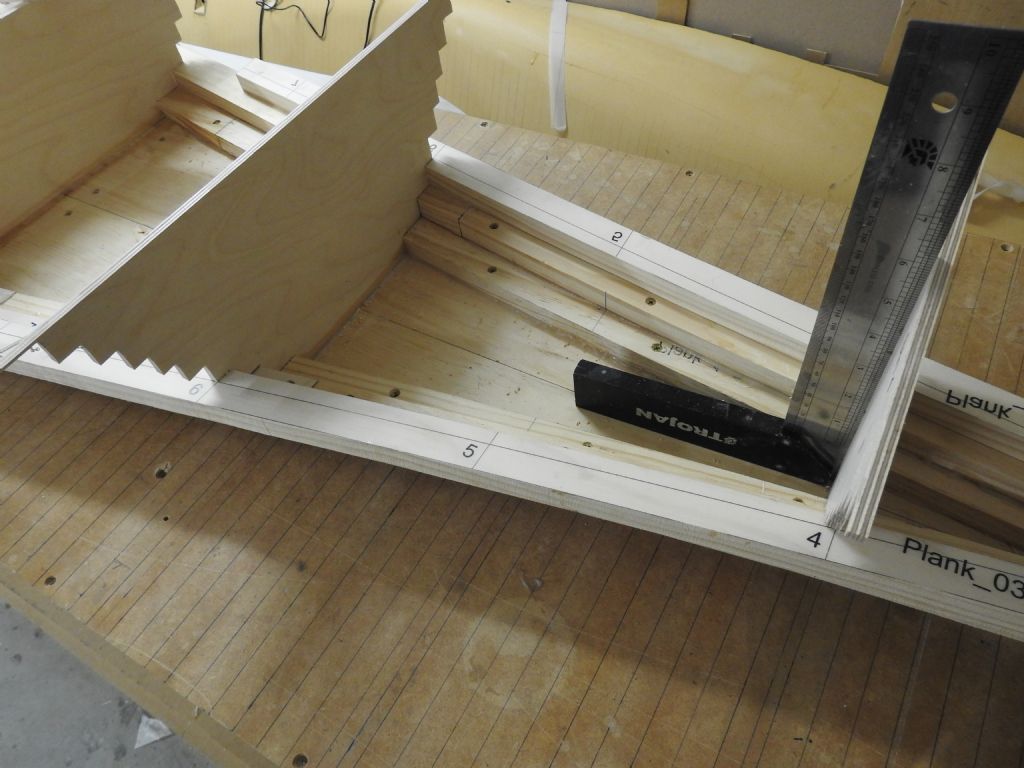
                  Here area couple of shots of the first plank, or bottom being glued down to the building board, I have also added some rather heavy aluminium beams to the board as my old one did not stay straight, I have 2 x 4m lengths of 125mm x 25mm x 3mm on each side.

                  dscn8512[1].jpg

                  This second shot shows the stern 3 layers sitting in place but you can see the staggering of the joints, this is all being glued with industrial epoxy.

                  I am screwing the layers and using cross span beams clamped down to the building board side bearers to ensure planks remain level as they pile up, removing screws as I go and filling with epoxy as I apply glue, the hull will still be plated in some way so the carved surface will not be directly seen.
                  of course I could still end up making this a plug but not sure yet

                  dscn8513[1].jpg

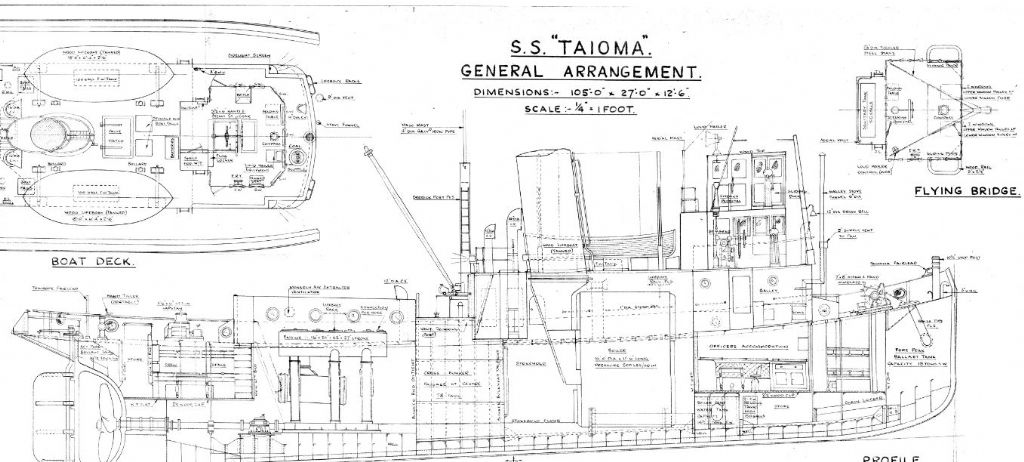
                  This is the support tug model I had always planned to build alongside the Wahine, I just never started it.
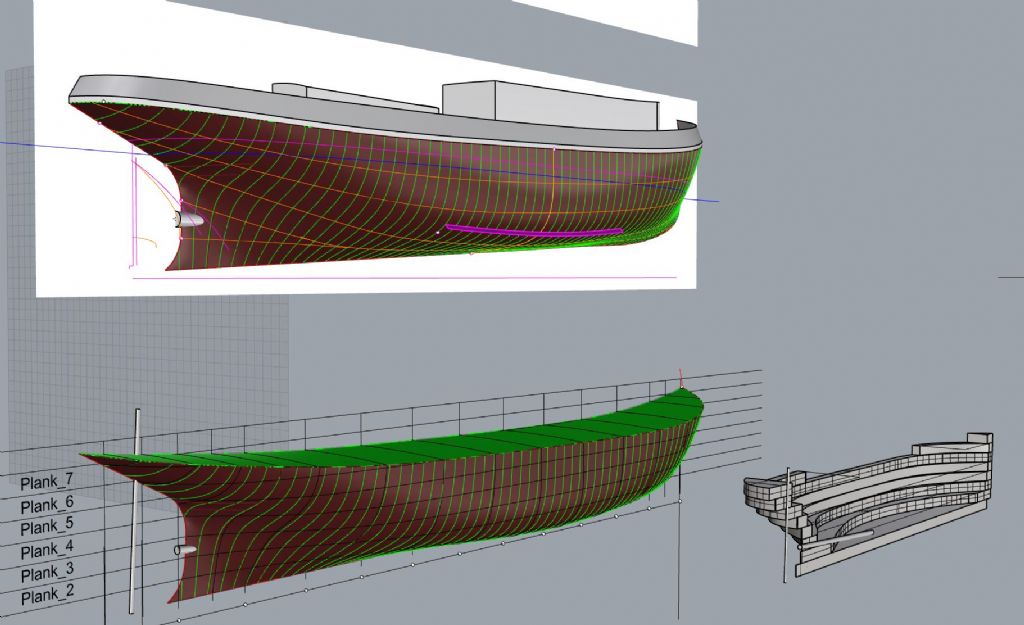
                  It is the "Tapuhi", formally "Empire Jane" one of the old Empire Tugs, I was very very lucky to find builders planks and GA for these tugs, there were2 of them the other called Empire Shirley and they are sisters.
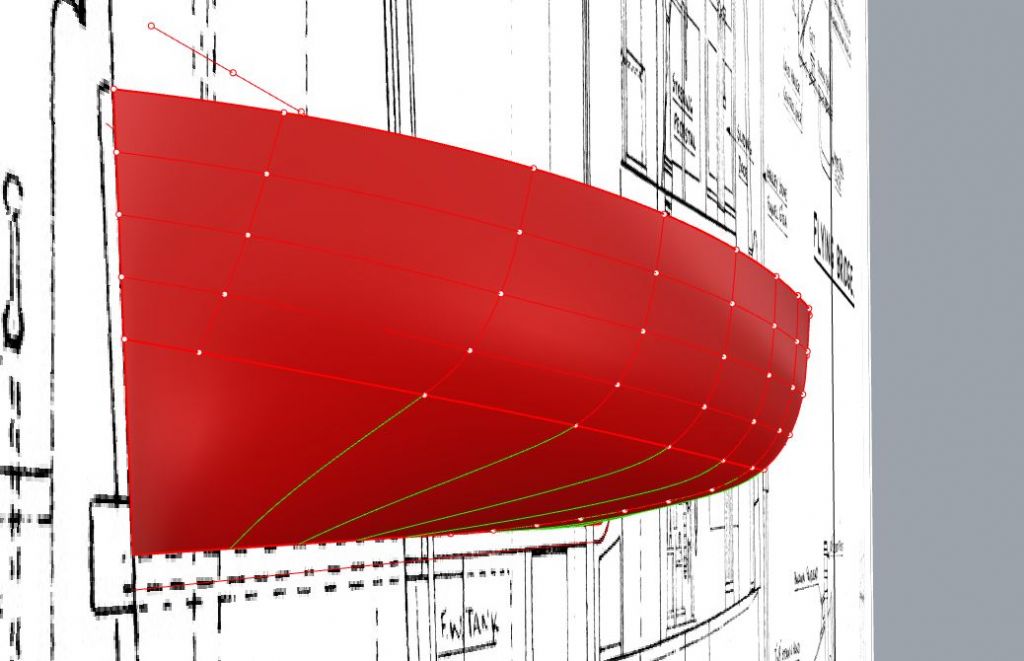
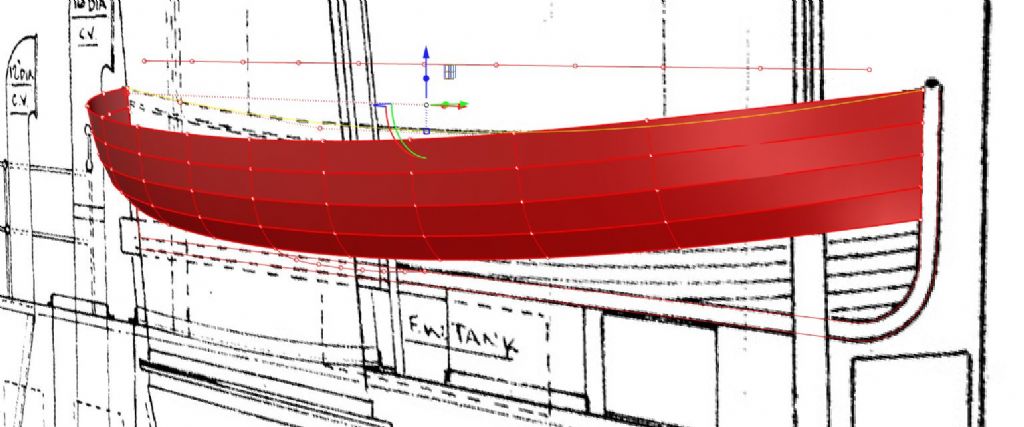
                  I only had 3 sections of the tug but along with the lines of Cervia I was able to develop the lines in Cad.

                  dscn8514[1].jpg

                  dscn8515[1].jpg

                  tapuhi_01.jpg

                  Edited By Richard H Dunn on 28/05/2021 09:59:14

                  #95774
                  Richard H Dunn
                  Participant
                    @richardhdunn

                    Now I have looked all over the internet for plans of a double ended 18 ft clinker lifeboat, Richard you reminded me to ask about this.
                    Does anybody have lines or plans of one of these? , it is for the above tug, at 1/35 scale, I am tempted to try and do it in the proper fashion but not sure yet. here is a small version of part of the GA to assist.

                    tug.jpg

                    #95775
                    Bob Abell 2
                    Participant
                      @bobabell2

                      Richard

                      For any info on Lifeboats, speak to Neil Harvey Pritchard……..Re your request for Double pointed ended Liifeboats info

                      He`s on this thread quite often

                      Bob

                      #95776
                      Colin Bishop
                      Moderator
                        @colinbishop34627

                        Different sort of lifeboat Bob.

                        Colin

                        #95777
                        Colin Bishop
                        Moderator
                          @colinbishop34627

                          Richard,

                          Quaycraft have a good reputation for their resin cast lifeboats and feature the 18ft double ender in several scales. If you can't find the drawings you need then it might be worth considering getting one of these and using it as a 3D representation for making your own model.

                          **LINK**

                          I used a couple of their boats on my Fishery Cruiser to save time on finishing a very long standing project.

                          quaycraft.jpg


                          Colin

                          Edited By Colin Bishop on 28/05/2021 11:29:04

                          #95780
                          Richard Simpson
                          Participant
                            @richardsimpson88330

                            There is a drawing of a ship's lifeboat sold by Brown, Son & Fergusson here:

                            https://skipper.co.uk/catalogue/item/ships-boats-30-feet-double-ended-lifeboats-and-30-feet-transom-sterned-work-boat

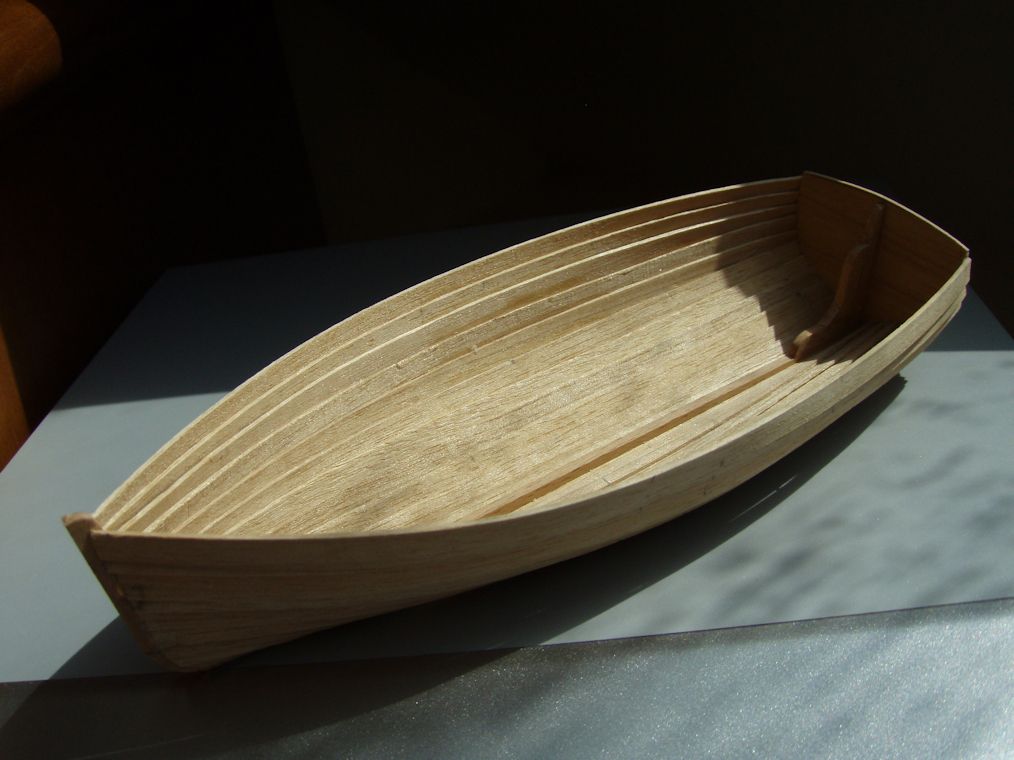
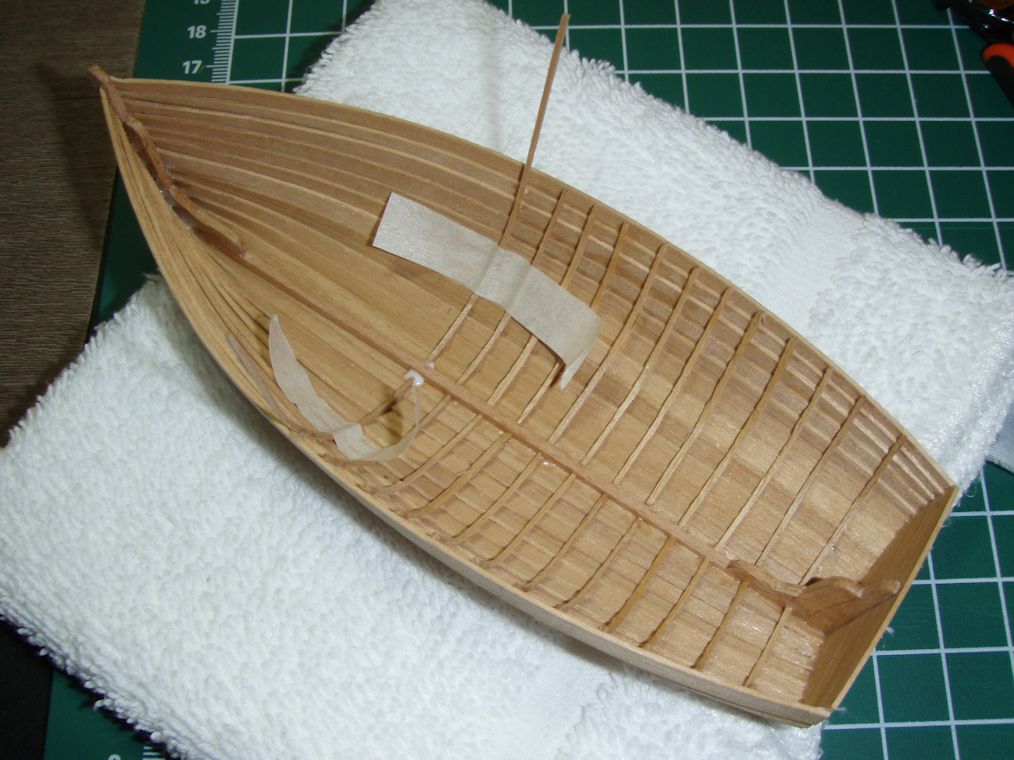
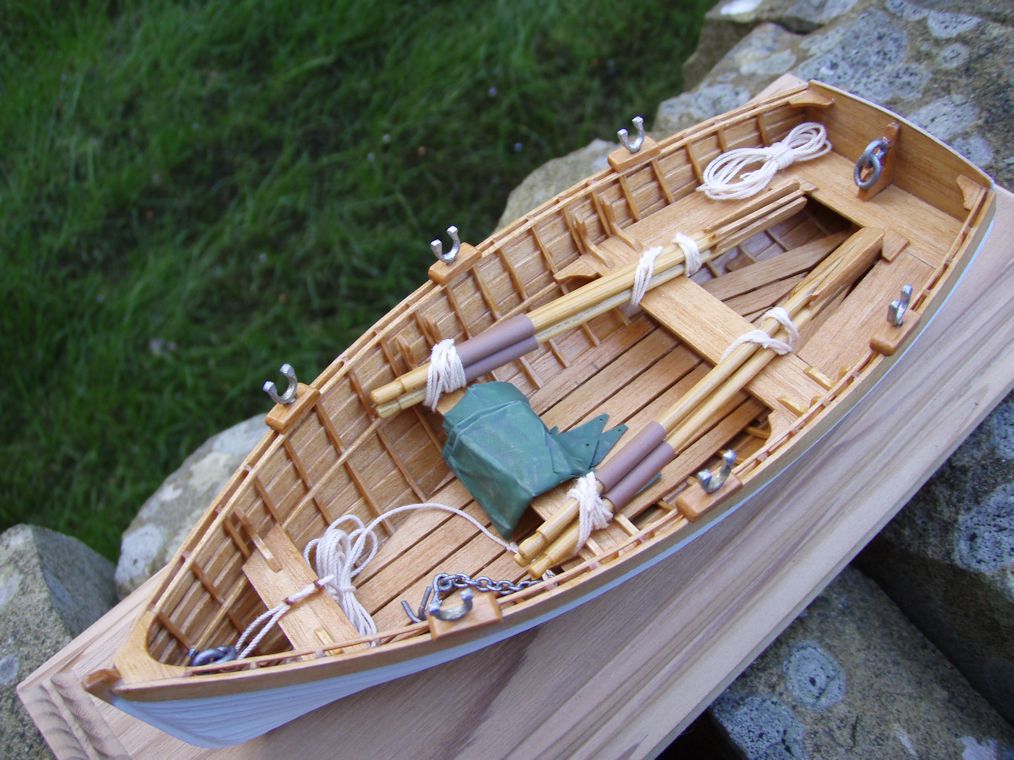
                            I actually adapted one of their plans for a Smacks Dinghy to make it double ended:

                            https://skipper.co.uk/catalogue/item/ships-boats-smacks-dinghy-or-beach-boat

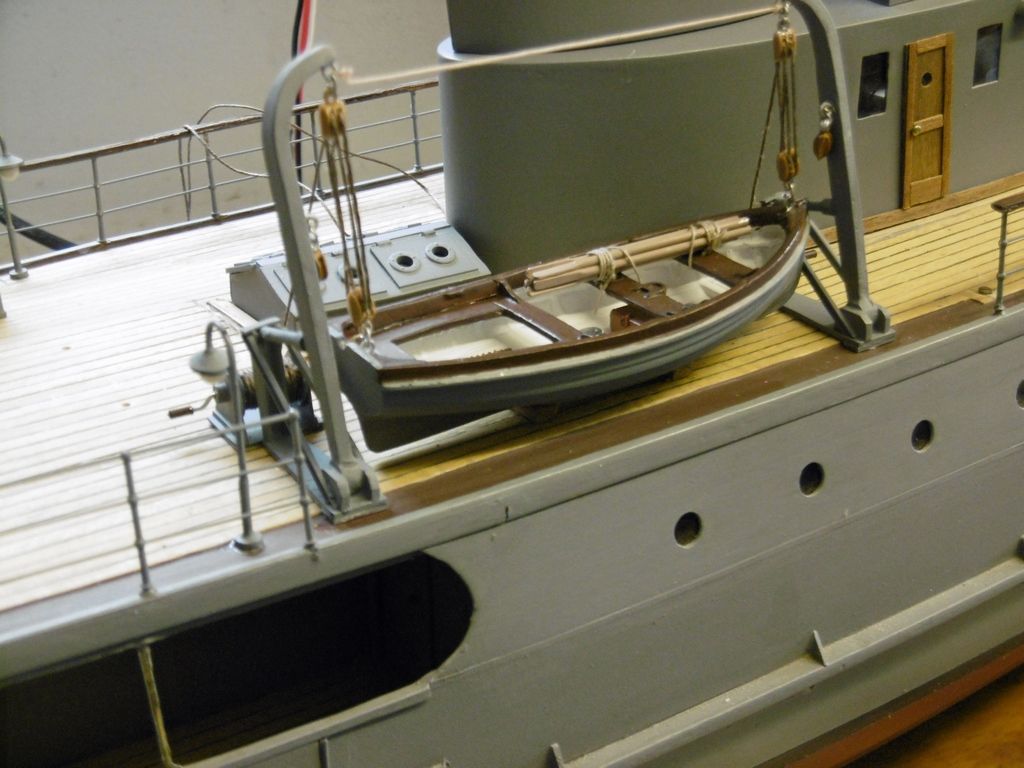
                            and built this from it:

                            img_0035.jpg

                            #95800
                            Richard H Dunn
                            Participant
                              @richardhdunn

                              That boat is beautifully executed!, it looks complete and clean, what scale is that at, can I ask?
                              That is exactly what I need right there,
                              Those plans might be the go, do they do digital copies or do you wait fora hard copy to be sent out, shame they don't give a preview on the site.

                              If I can end up with something like that I will be very happy, mine will be about 157mm long.

                              The Quaycraft boats don't do 1/35 which is a shame but I did pick the scale, 1/32 would have been too big for my space, 1/35 just fitted


                              Edited By Richard H Dunn on 28/05/2021 22:11:05

                              Edited By Richard H Dunn on 28/05/2021 22:12:14

                              #95801
                              Richard Simpson
                              Participant
                                @richardsimpson88330

                                If I remember rightly the original drawing was by a Harold Underhill.

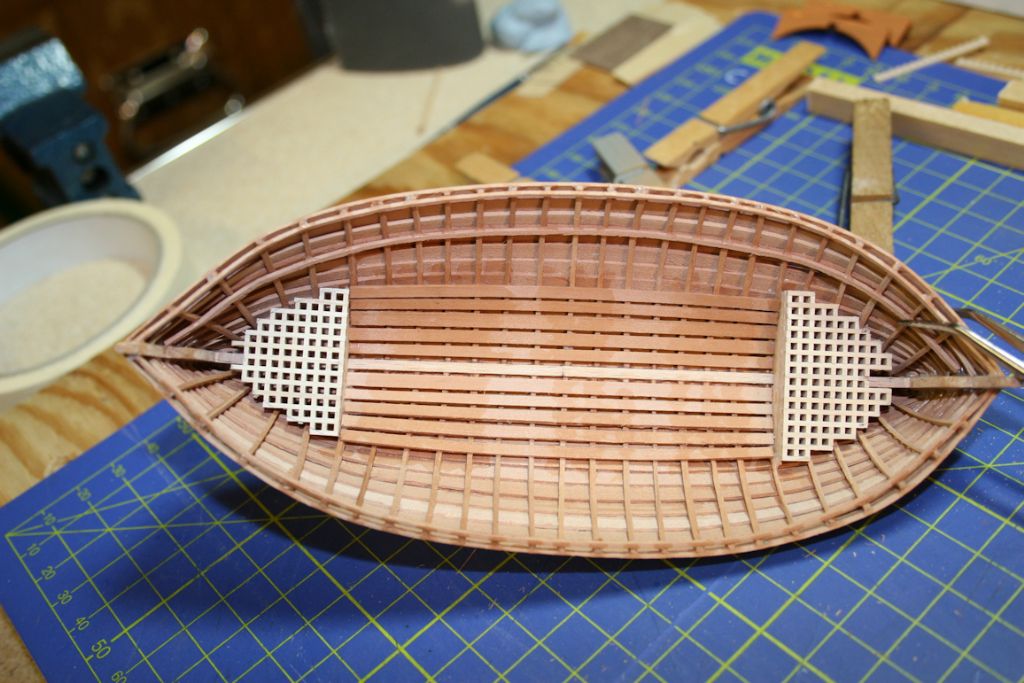
                                First of all I made the dinghy with a transom after adjusting the station profiles and making a set of formers. Then I built the dinghy onto the jig with 5mm x 1mm planks in a clinker construction before removing it and adding the internal detail.

                                Then I modified the jig to make it double ended and repeated the process. The scale is 1/32nd.

                                I don't think they do the plans digitally but it might be worth sending them a message and asking if they will scan them for you.

                                28-06-08-02benainconstruction304.jpg

                                04-07-08-05benainconstruction313.jpg

                                07-07-08-01benainconstruction314.jpg

                                20-07-08-02benainconstruction331.jpg

                                29-07-08-05benainconstruction340.jpg

                                Edited By Richard Simpson on 28/05/2021 22:41:05

                                #95802
                                Richard Simpson
                                Participant
                                  @richardsimpson88330

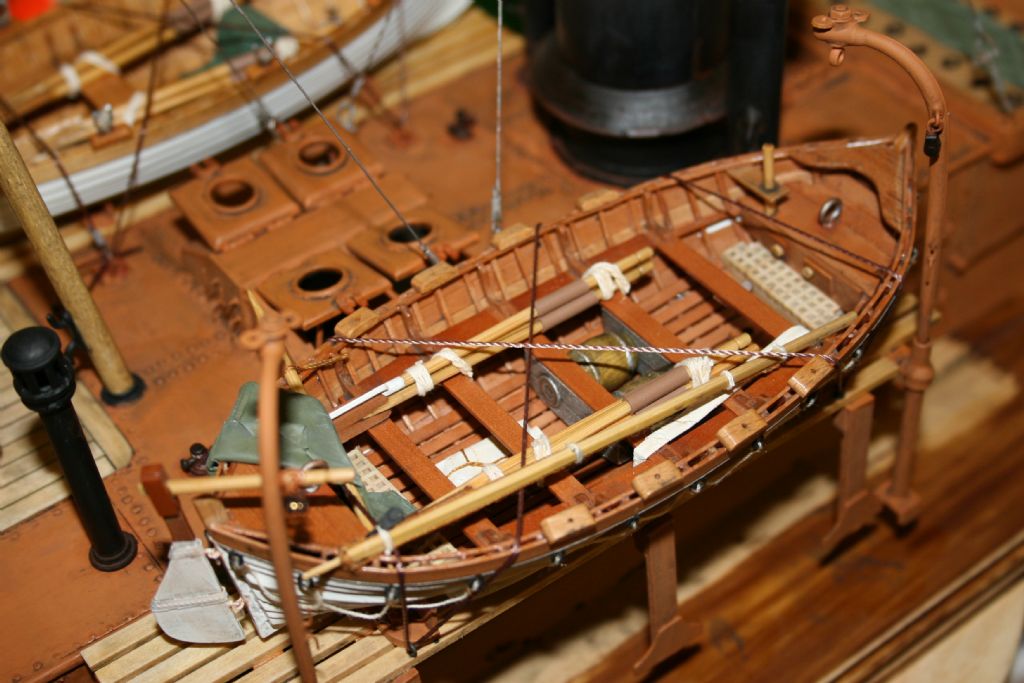
                                  And a couple more with one of the lifeboat at the end.

                                  19-08-08-03benainconstruction352.jpg

                                  26-09-08-11benainconstruction400.jpg

                                  20-03-09-09benainconstruction455.jpg

                                  #95804
                                  Richard H Dunn
                                  Participant
                                    @richardhdunn

                                    Wow that is nice.

                                    I have decided I have enough info to get the lines of the boat and have plenty of info on the construction of clinker boats so have drawn my own plans for this, at least I can develop each plank shape this way as well.

                                    I traced the plan and profile from the GA and used photos to get the midship section, that is all you need to doa boat like this and then its splitting up the girth etc etc.

                                    I should be able to use some .5mm birch ply for the planking.

                                    sections.jpg

                                    plank lofts.jpg

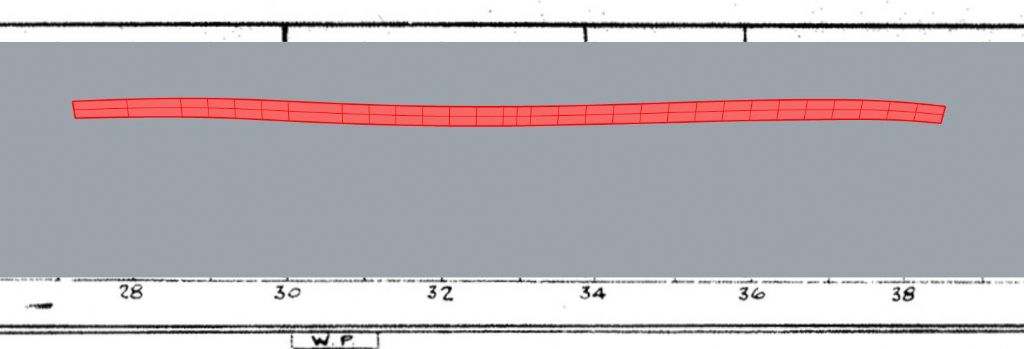
                                    developed plank.jpg

                                    #95814
                                    Eddie Lancaster
                                    Participant
                                      @eddielancaster

                                      Hi. Richard, thank you for the info. Re the dinghy drawings,I have been looking for something like that for sometime now. Although I fear mine will not match your excellent build, also thanks for the rigging article in the current issue of MB. even more inspiration, the magazine is looking more like an extension of this forum with all the articles that are coming from the people we know on here, long may it continue, I feel that the mag is now back on course.

                                      Regards.

                                      Eddie.


                                      Edited By Eddie Lancaster on 29/05/2021 17:36:55

                                      #95819
                                      Richard Simpson
                                      Participant
                                        @richardsimpson88330

                                        Thanks for the words of support Eddie, its always good to hear that the effort is appreciated by the readers.  I'm particularly glad you liked the rigging article as I enjoyed doing that one.

                                        Edited By Richard Simpson on 29/05/2021 22:44:24

                                        #95820
                                        Richard H Dunn
                                        Participant
                                          @richardhdunn

                                          I just went to subscribe to the magazine finally and its still broken after all these months, it does not let you enter the email or passwords and just tells you its wrong.

                                          Edited By Richard H Dunn on 30/05/2021 06:38:28

                                          #95821
                                          Richard H Dunn
                                          Participant
                                            @richardhdunn

                                            And just tried a new account made under my wife's name, we can both log into site with them but as soon as we try to subscribe to magazine, it all goes south, this will not be helping matters with sales..I give up.


                                            Edited By Richard H Dunn on 30/05/2021 06:38:40

                                            #95822
                                            Richard H Dunn
                                            Participant
                                              @richardhdunn

                                              I have sent a message to the help @mb email address again, hopefully I can get this sorted and do my bit to support the mag.

                                              Edited By Richard H Dunn on 30/05/2021 08:45:13

                                              #95844
                                              Richard H Dunn
                                              Participant
                                                @richardhdunn

                                                Some updates to the layer gluing

                                                dscn8521.jpg

                                                Top layers are just sitting on top as you can see here.

                                                Note, one of the cracks in first hull behind under paper strip hanging over it. about 5 other exist, mainly where the flat of bottom rises up and  on turn of bilge

                                                dscn8522.jpg

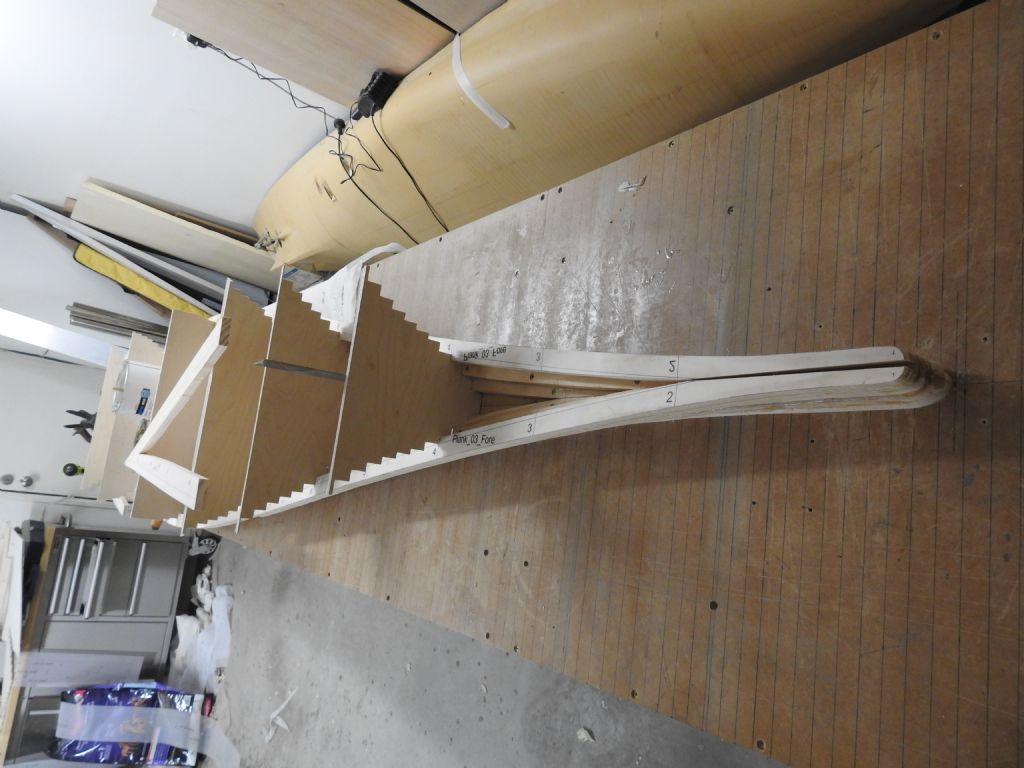
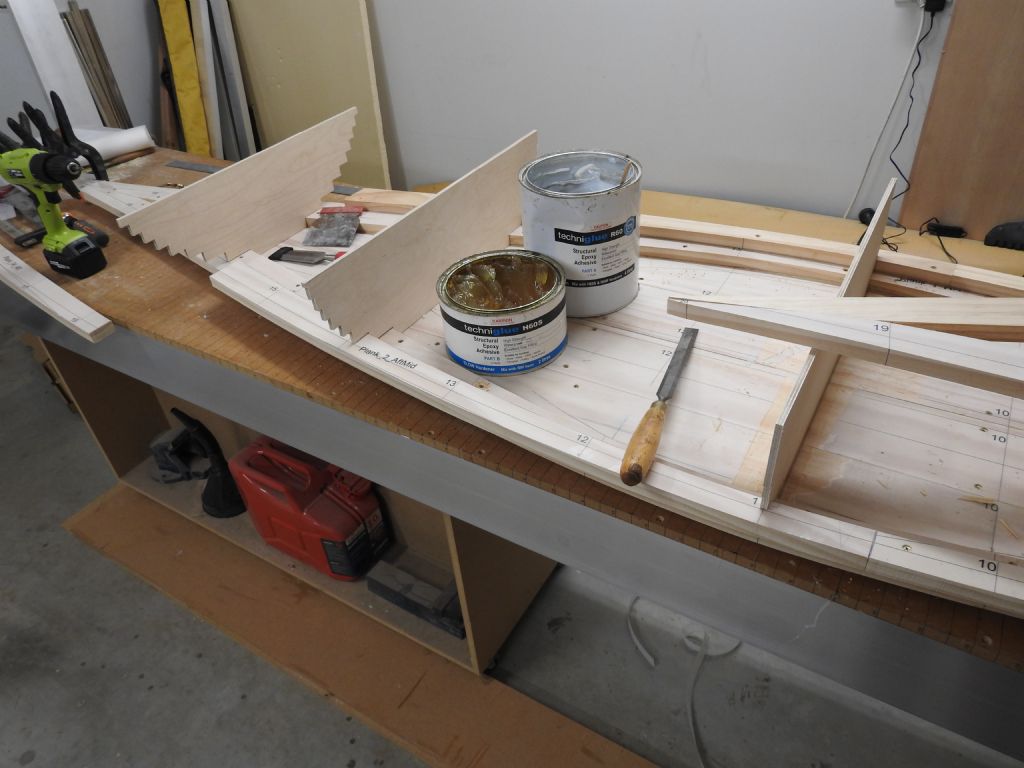
                                                This shot shows the alignment system quite well.

                                                The Bulkheads are very carefully cut on scroll saw and temporarily placed to provide stops to the layers in a athwartships direction with every part having at least 2 bulkheads to sit against.

                                                The drafting film still glued to the top shows the inner line of the next layer while dry fitting and screwing each part into place, when gluing is ready the inner line on the film is traced with a knife and the film over the glue area is peeled off and the wood wiped with acetone to remove traces of spray on glue..

                                                You can hopefully see here how accurate it is, the worst case is if when cutting out some parts the wood springs out of shape a little , but due to the 2 ways of checking alignment they can be pulled back into line and screwed off.
                                                you would be surprised how little wood this used to get all the parts fora hull this size.
                                                I expect this to take another 3-4 weeks to complete and then carving can begin.
                                                The bottom will also have some support rails running athwartships on every station extending up 2 layers to provide more strength to the bottom.

                                                The layers are 19.1mm thick currently.

                                                I am going to simplify the prop shafts to the conventional tube with 2 bronze bearings at each end which will extend from outside bossing to motor coupling , the holes for these can be done into one layer luckily and done accurately once that layer is on, in this case layer 4, the bottom is layer 0 the shaft holes will be more channels,(square) cut into layer with the vertical angle done with a ramped guide.

                                                The shaft length from outside bossing to coupling is 600mm so plenty of support and I imagine very little chance of wandering off.

                                                dscn8523.jpg

                                                This is the adhesive being used, it is a staple of furniture and boat-builders in Australia, with about a 6-8 hour cure time.

                                                Edited By Richard H Dunn on 31/05/2021 02:41:22

                                                #95845
                                                Richard Simpson
                                                Participant
                                                  @richardsimpson88330

                                                  I don't think I have ever seen bread and butter construction done so neatly and accurately. Beautifully built. Such a shame that you could not repair the first hull as that looks superb as well.

                                                  #95854
                                                  Richard H Dunn
                                                  Participant
                                                    @richardhdunn

                                                    Yeah tell me about it, all that planking wasted and sanding and fairing,,, I'm going to cry.
                                                    The hard part will be when I have to get rid of the old hull and cut it up.

                                                    #95855
                                                    Richard H Dunn
                                                    Participant
                                                      @richardhdunn

                                                      Guys a few months ago I was talking to Simon Higgins from Propshop, he was going to make my Lateral Thruster units for me and I have stopped hearing from him, its like he has dropped off the face of the earth, has anybody heard from him, I am a little worried with Covid and all.


                                                      Edited By Richard H Dunn on 01/06/2021 06:38:48

                                                    Viewing 25 posts - 301 through 325 (of 411 total)
                                                    • Please log in to reply to this topic. Registering is free and easy using the links on the menu at the top of this page.

                                                    Code of conduct | Forum Help/FAQs

                                                    Advert

                                                    Latest Replies

                                                    Home Forums Scratch build Topics

                                                    Viewing 25 topics - 1 through 25 (of 25 total)
                                                    Viewing 25 topics - 1 through 25 (of 25 total)

                                                    View full reply list.

                                                    Advert

                                                    Newsletter Sign-up