Returning modeller

Advert

Returning modeller

Home Forums Beginners Returning modeller

  • This topic is empty.
Viewing 25 posts - 76 through 100 (of 367 total)
  • Author
    Posts
  • #91553
    James Hill 5
    Participant
      @jameshill5

      Morning Malcolm,

      Thank you for your reply,

      I understand what you mean by shrouding the wiring and not having things moving around. I put the pictures up to see if things would work the way I`d done it, ( and it has ), so , not having any experience of this, I`m quite pleased. I can progress further when the new prop arrives and am interested to see what the figures will be on a test in the bath. Once satisfied, I can then look to making things properly secure before going on the water.

      Thank you for your suggestions which are duly noted,

      Jim.

      Advert
      #91726
      James Hill 5
      Participant
        @jameshill5

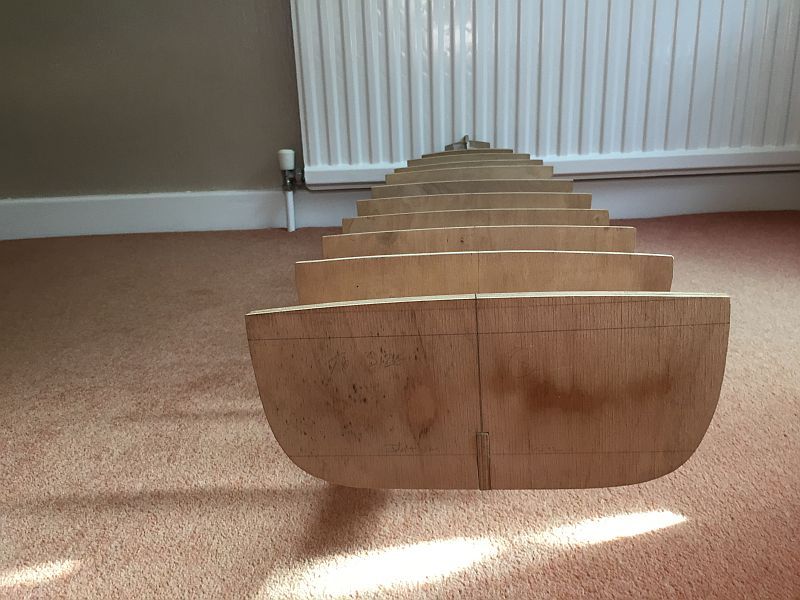
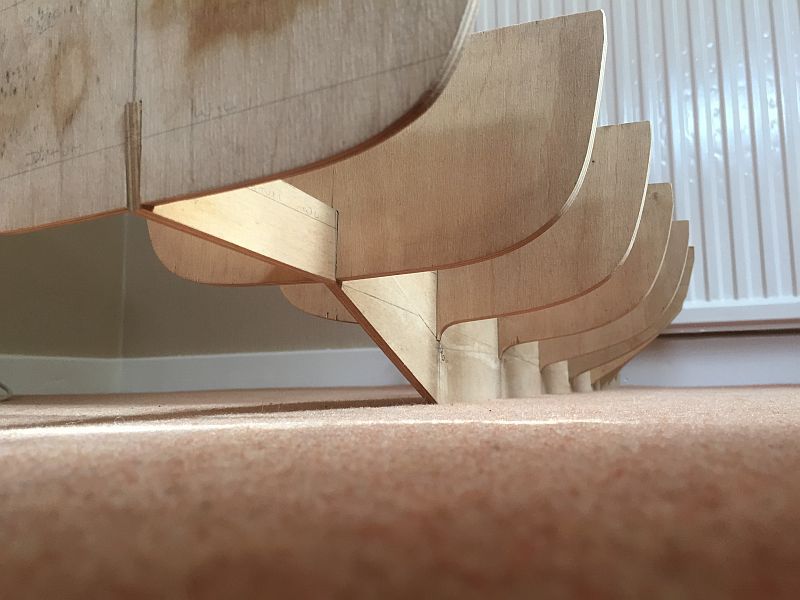
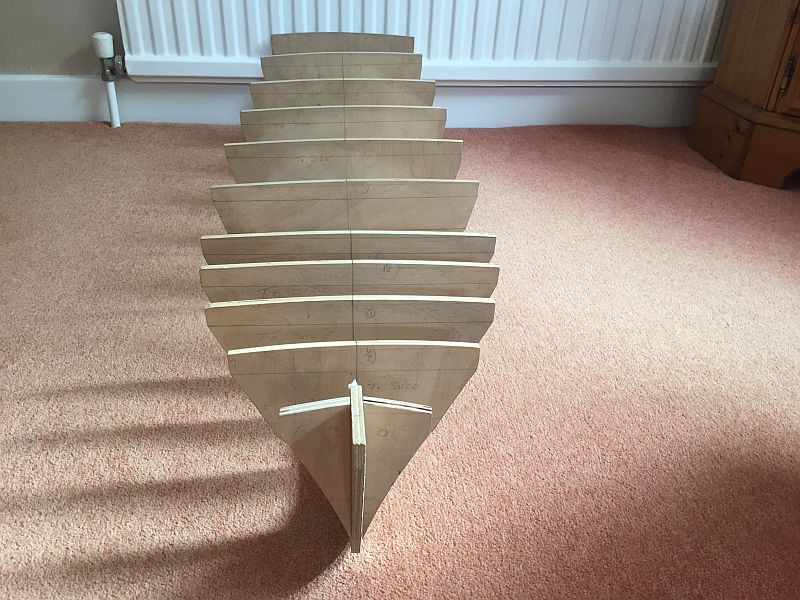
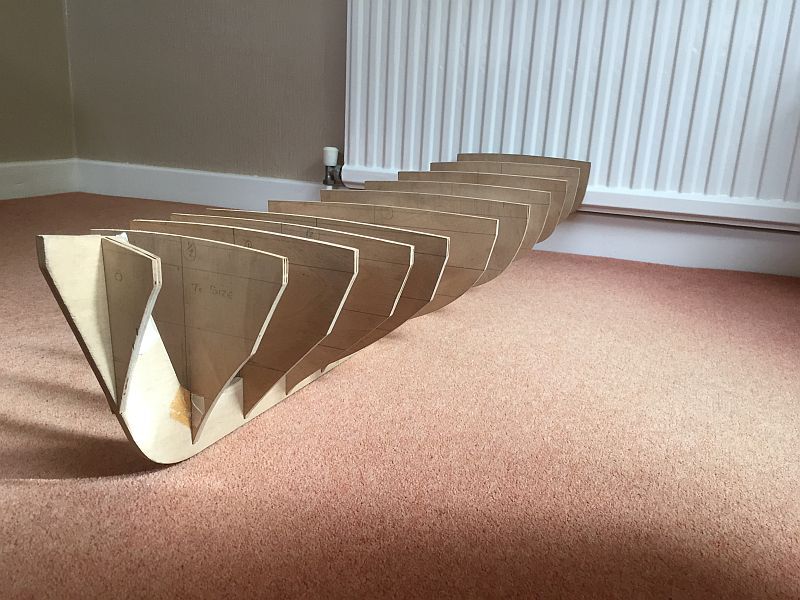
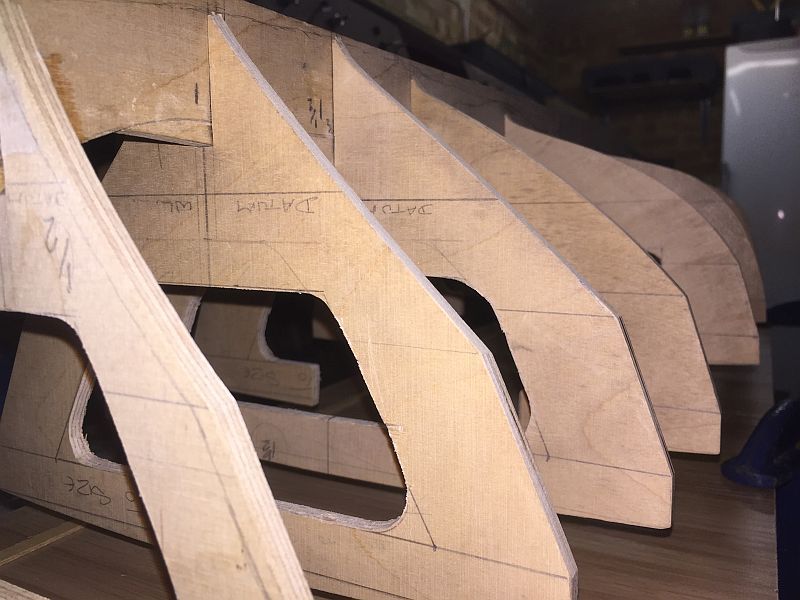
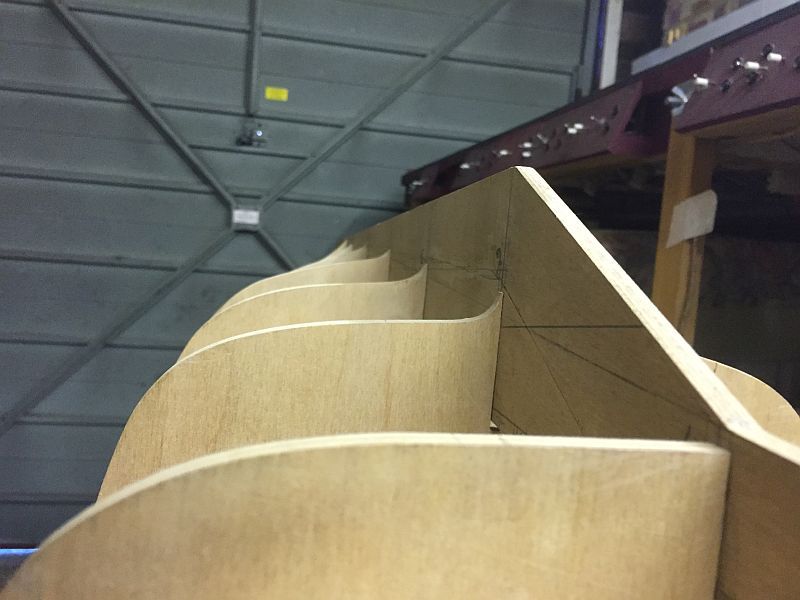
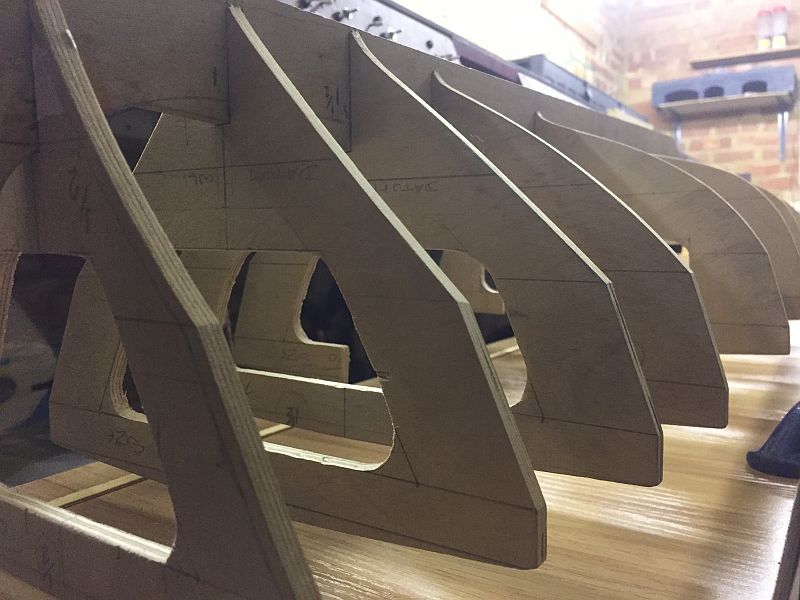
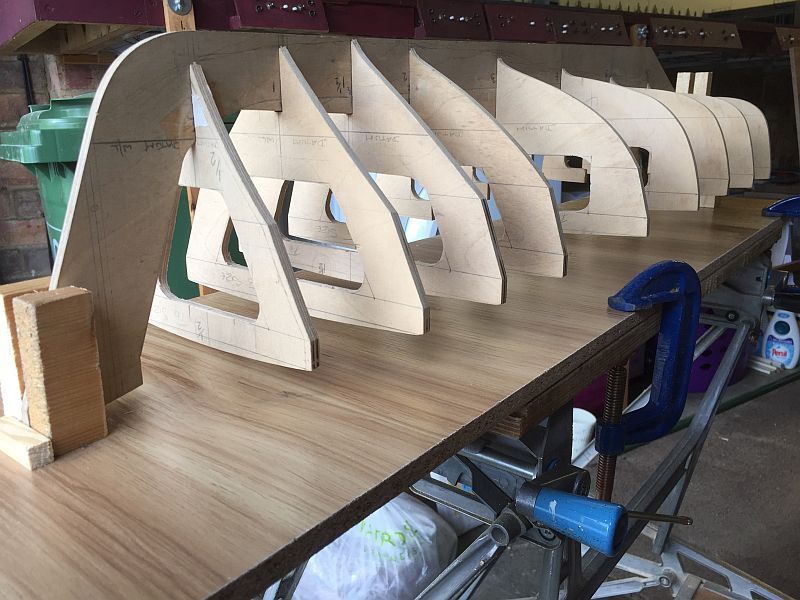
        img_8322s.jpgimg_8321s.jpgimg_8318s.jpgTaken a few pictures of early days of what is intended to be the next build.

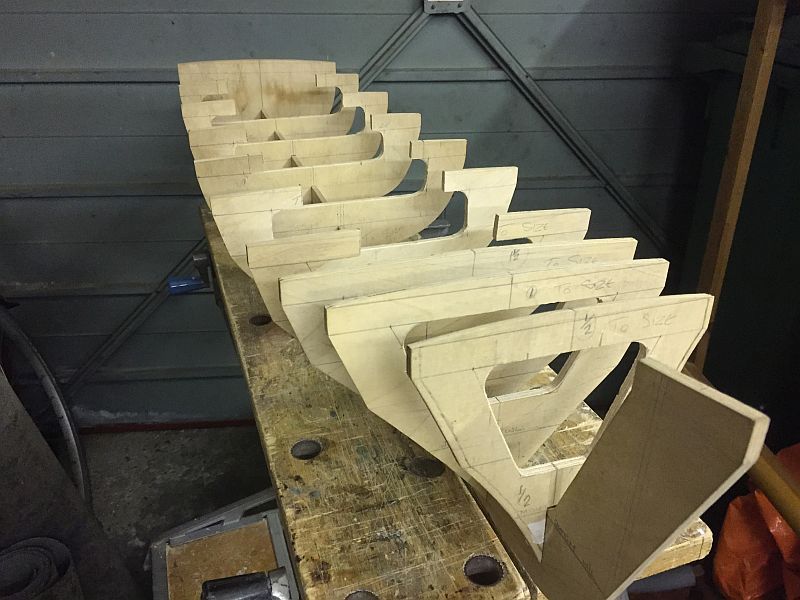
        It`s a model of the Pilot Boat at Portsmouth. 40" long with an 11" beam , so a nice size model. I`ve two 540 motors that I can use but will need gearing down. Not sure whether to use one per prop shaft or one motor and drive ( somehow ) the twin shafts.

        I intend to try building the superstructure in plasticard on a wooden drop in frame. I originally thought of using sheet ply ( 1/32" ) on the hull but now think planking it might be easier.

        First thing , cut out the middle of the bulkheads and decide where the power will be situated.

        Jim.img_8317s.jpg

        #91777
        Dave Cooper 6
        Participant
          @davecooper6

          Jim – just catching up on the thread, and, a few extra items on the electrical /radio side :

          Like you, I had a broken battery connector on my Futaba /Acoms Tx. Mine was a spiral wound one rather than a flat tab that you reported. (I was checking the audio by-pass filter at the time and caught my sleeve in it !). The wire quality to the main PCB is not great and doesn't really like solder – mine has failed twice. I would reinforce carefully with good quality wire and add some heat shrink sleeving for extra support on the repair.

          Dave M recommended 4Max as a supplier for the wattmeter. Although they deal mainly in aircraft stuff they are a really good supplier and give good general advice on chargers, motors etc.

          It's worth looking at the "XT60" type connectors. They are a really nice little unit especially for on-board battery use. There is a 'big brother' as well for carrying the larger currents…

          Dave C

          #91778
          ashley needham
          Participant
            @ashleyneedham69188

            James. Having all the same connectors on batteries and esc’s is a must to allow swapping of these items. I have gone with Deans ‘T’, but having loads of boats this was the most economical option. Having just had experience of the xt60 I would agree with Dave6 this is probably a better connector, expensive, but not if you only have a few models. Ditch the Tamiya ones pronto.

            Your wattmeter simply needs a male plug on the input (goes into female battery connector) and a female on the output. I dare say there is in theory a difference in the amps measured at the motor or at the battery, but I reckon this is minimal. Putting the wattmeter between batt and esc is easy.

            We recently did a static test of Peters big launch and found a 34A draw, but this only showed as 26A when running when the wattmeter was in circuit on the boat out on the pond. Conversely, there was little difference on his airboat vis static/moving.

            Ashley

            #91789
            James Hill 5
            Participant
              @jameshill5

              To Dave Cooper and Ashley,

              Many thanks for your replies.

              Dave, the repair on the Futaba seems to be working ( at the moment ) but I will certainly keep an eye on it. ( maybe I was lucky ). I`ve seen the XT60 connectors advertised so I will be looking into that.

              Ashley. The wiring in the boat has now been sorted ( as to positioning etc ) and the watt meter works ( just connected to the battery ). I still can`t test the boat in the bath yet as I`m still waiting for the prop. You have suggested xt60 connectors as well so definitely worth a look.

              On the next proposed build, because of the fairly large gaps between the bulkheads and after the stringers have been put in, I`m thinking of planking vertically instead of normal practice. Is this an acceptable way of doing things? or would I be giving myself a problem?. I realise some may suggest adding more bulkheads but I just wondered.

              I`ve been looking through the albums at some of the pictures showing glass cloth over the finished planking. Do you cloth inside and outside the hull or just the outside and how many layers would be sufficient? I ask all this as I`ve not tried this method before. Another sortie to venture into.!

              I had a read of Dave Milbourn`s` article on using more than one motor. Another first hopefully.

              Many thanks again gents for your replies and advice,

              Jim.

              #91790
              Ray Wood 3
              Participant
                @raywood3

                Hi Jim,

                If you mean by vertical planking diagonal planking at 45 degrees ? You still need stringers to glue onto, your hull transitions from a single chine at the front into a round bilge displacement at the stern, if you do double diagonal planking in the true sense like an mtb there is no real need to worry about glass clothing, if you use say 1/32" birch ply, obeche is great for the stringers you will need.

                Have a look at the various types of planking in my album "Rays Boats" for examples.

                If it was my boat I'd go for balsa planking and glass cloth & epoxy resin.

                Regards Ray


                Edited By Ray Wood 2 on 09/10/2020 11:49:57

                Edited By Ray Wood 2 on 09/10/2020 11:50:53

                #91794
                James Hill 5
                Participant
                  @jameshill5

                  Hi Ray, thank you for your reply.

                  It is on your album photos that I was looking at the cloth treatment. I double planked Surfury when I built that ( as per prototype ) so I`ve had experience of that method . The second layer gives a considerable glue area. I was just curious to know much the cloth made a better job of sealing the hull.

                  Stringer positions are still to be marked out and I`ve got two sheets of 1/32" marine ply I could use for the planking.

                  Regards,

                  Jim.

                  #91795
                  Ray Wood 3
                  Participant
                    @raywood3

                    Hi Jim,

                    I would not glass cloth a birch ply boat as the double layer makes a strong hull as you know, the only glass cloth I've used is on balsa planked boats, the big tug Cullamix is balsa glass covered and weighs 35 lbs just polyester resin and cloth inside.

                    Regards Ray

                    #91797
                    James Hill 5
                    Participant
                      @jameshill5

                      Hi Ray,

                      I was looking at Cullamix in your album. A very nice model but I didn`t realise it was that heavy. My TID is 20 lb but the weight makes it sail nicely.

                      Regards,

                      Jim.

                      #91798
                      Ray Wood 3
                      Participant
                        @raywood3

                        Hi Jim,

                        I enjoyed building Cullamix super drawings to work from 👍 25lbs of cast iron ballast in the bilges 😀

                        What does your new boat look like ??

                        Regards Ray

                        #91800
                        James Hill 5
                        Participant
                          @jameshill5

                          Hi Ray,

                          The new boat hopefully is a model of the Pilot boat at Portsmouth. Seen it many times when down at Southsea on days out so I thought I`d have ago at modelling it. Vosper Thornycroft dug some plans out of their archive drawings and sent me a copy. Only the hull lines, no superstructure. I`ve got photos taken when one was out of the water on blocks, which was handy.

                          There are a couple of pictures in my album. Only just got going with it at the moment so not a lot of progress yet.

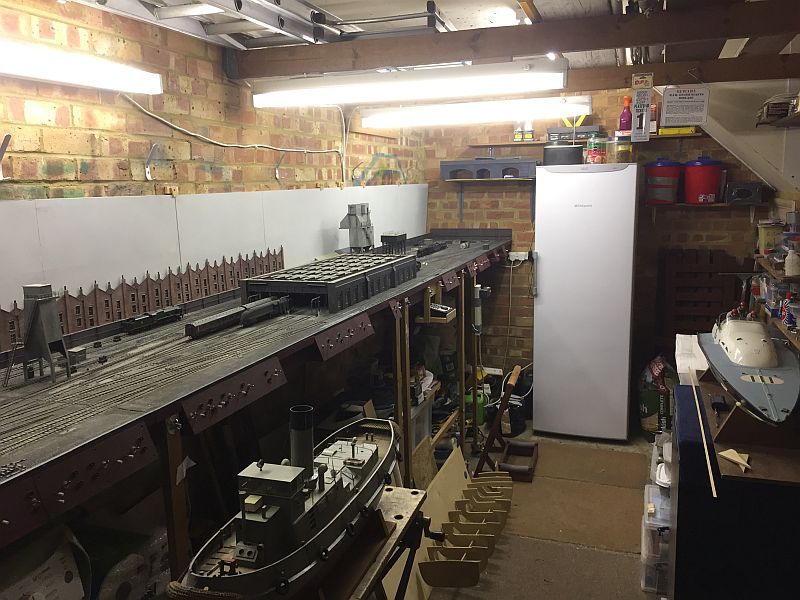
                          The garage is filling up with a model railway and now boats. needs a sort out.smiley

                          Regards, Jim.

                          #91801
                          James Hill 5
                          Participant
                            @jameshill5

                            Just had a look at the sheets of plywood I have. 1/16" thick, not 1/32" as I thought, so I need to look at some reducing of the bulkheads required to accommodate the extra thickness.

                            Not something I wanted to do really.

                            Jim.

                            #91802
                            Ray Wood 3
                            Participant
                              @raywood3

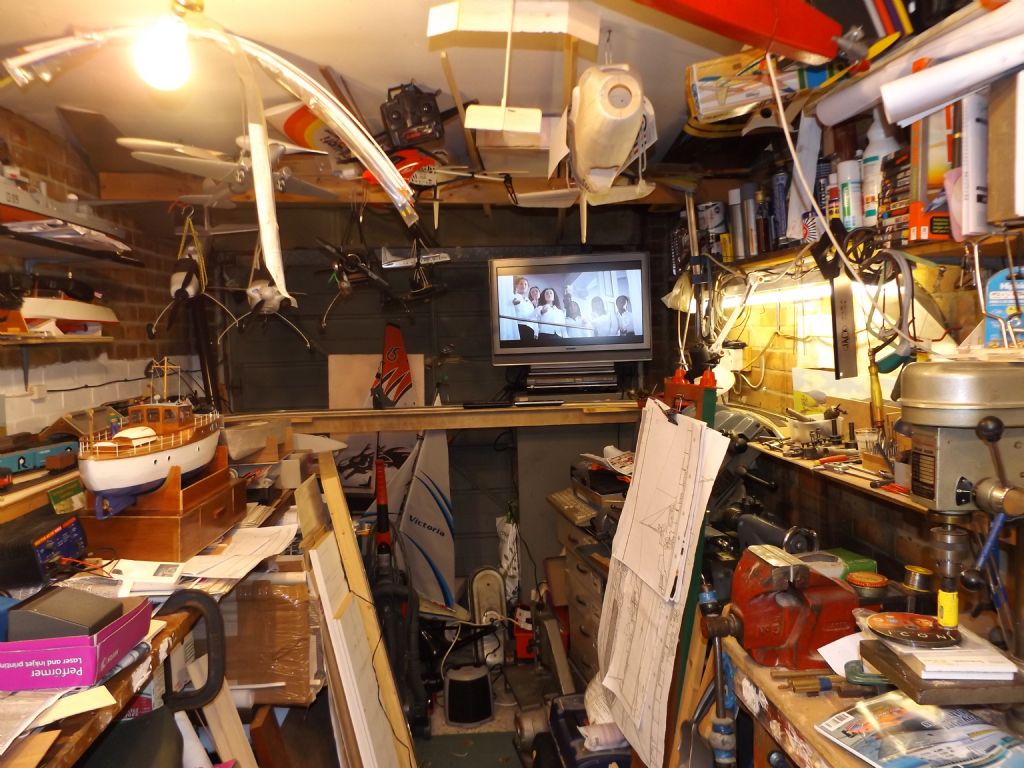
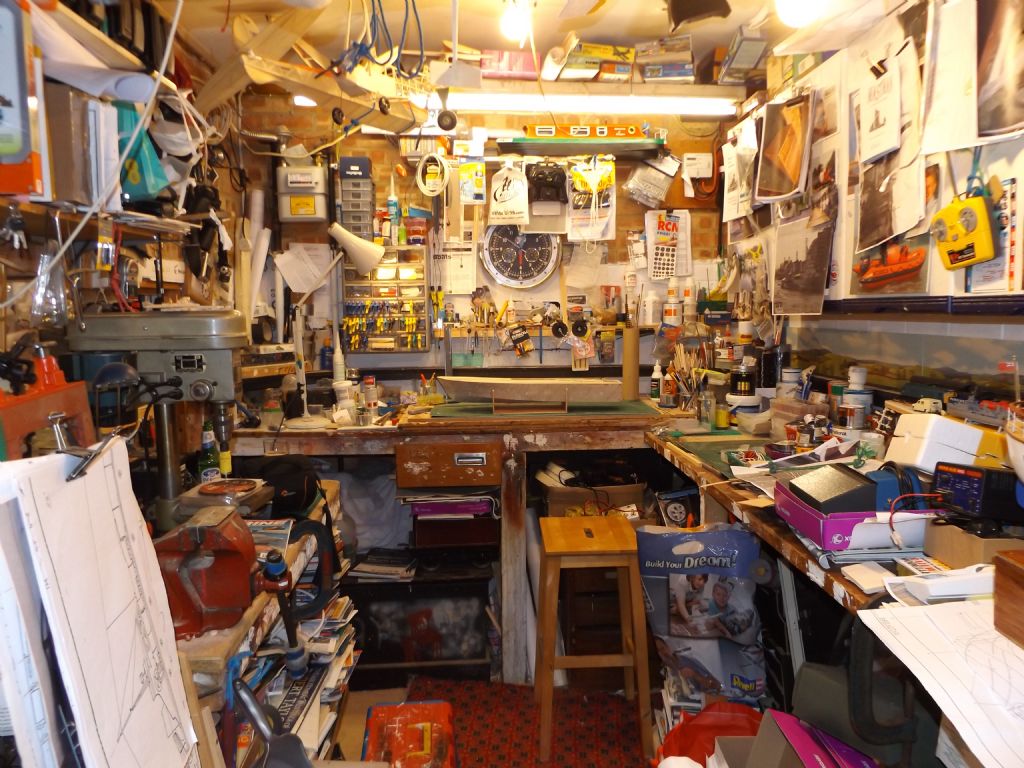
                              workshop 1.jpgHi Jim,

                              Nobody will notice the boat being 1/16" wider ! !

                              Yep, boats ,planes & trains 👍

                              Regards Rayworkshop 2.jpg

                              #91803
                              James Hill 5
                              Participant
                                @jameshill5

                                smiley. Now that`s a workshop and a half!! Ray. I bet you know where everything is as well!

                                I`ll stick a picture of mine up in a minute.

                                Jim.

                                #91804
                                James Hill 5
                                Participant
                                  @jameshill5

                                  img_8340s.jpgHi Ray,

                                  My garage not quite so busy as your workshop.img_8334s.jpg

                                  #91808
                                  Ray Wood 3
                                  Participant
                                    @raywood3

                                    Hi Jim,

                                    To be fair it's taken 35 years for my garage to get like that !! The balsa dust plays havoc with running my trains round the outside !! I'm loving the motive power depot/engine shed on your layout 😀👍most of my boats live up in the loft.Regards

                                    Great difficulty finding anything most of the time 😲

                                    I also envy your beer fridge !!

                                    Regards Ray

                                    Edited By Ray Wood 2 on 10/10/2020 15:19:50

                                    #91822
                                    James Hill 5
                                    Participant
                                      @jameshill5

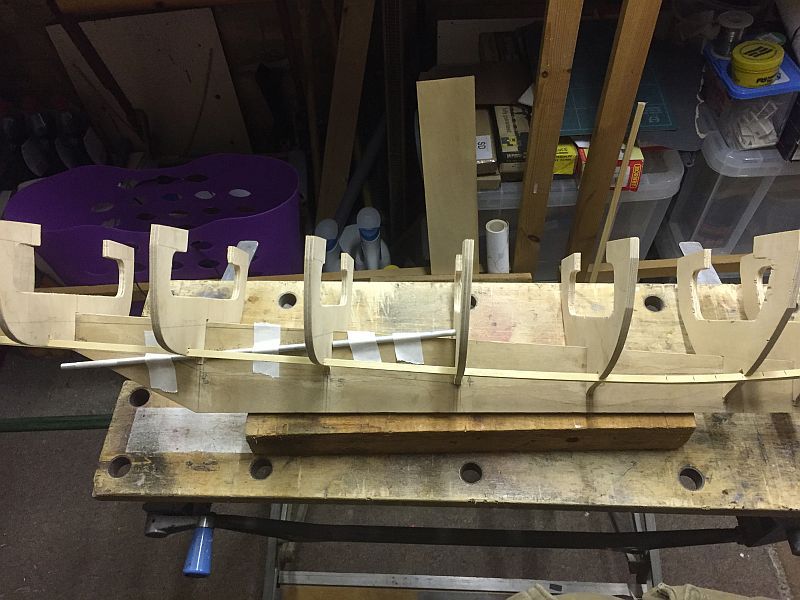
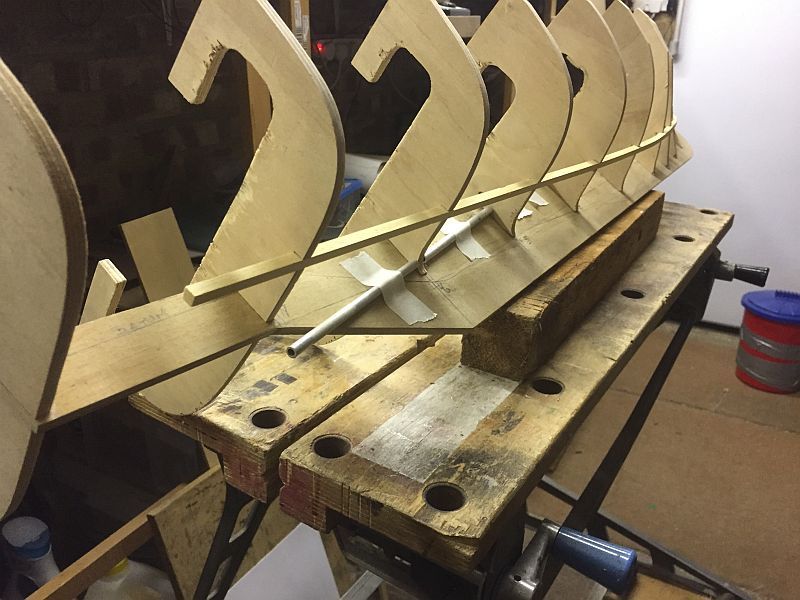
                                      img_8370s.jpgimg_8369s.jpgimg_8367s.jpgimg_8365s.jpgA bit of a close up on the shape of the hull.

                                      I`ve just started to mark out stringer placings on the bulkheads but I`m still scratching my head over the best method of planking. I`m using a length of 1/32" ply 1/4" wide to mark out with and I have to say, it follows the hull shape quite nicely. Maybe diagonal plank from the stern to as far forward as is comfortable, then plank differently from there to the bow. I`ve looked at several album pictures from different people and what was of interest was Ray Woods MTB ( I think ) planked in a way similar to my thinking at the bow while trying to keep the shape. Needs a bit of thought.img_8364s.jpg

                                      #91823
                                      James Hill 5
                                      Participant
                                        @jameshill5

                                        Had another look at Rays picture. Not upright planking but a more vertical angle which might suit me.

                                        Jim.

                                        #91886
                                        James Hill 5
                                        Participant
                                          @jameshill5

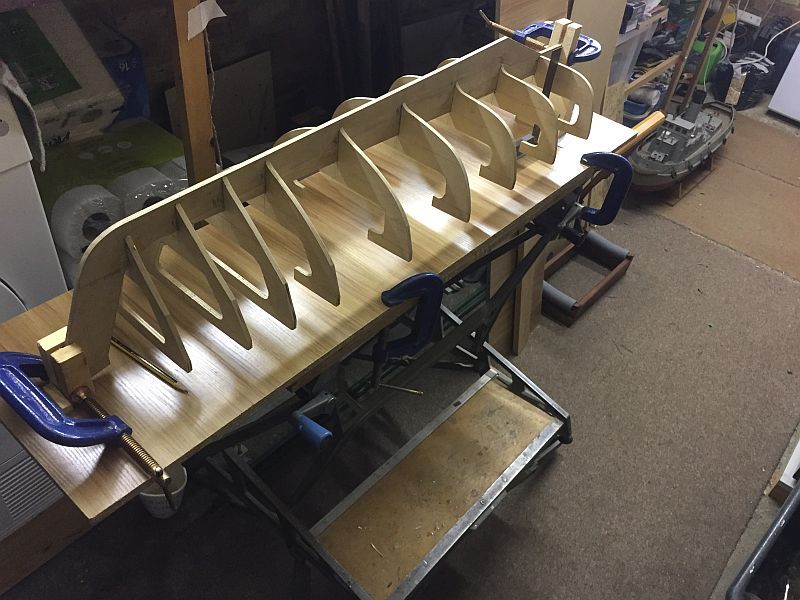
                                          img_8390s.jpgimg_8389s.jpg

                                          #91887
                                          James Hill 5
                                          Participant
                                            @jameshill5

                                            Now I`ve started working out where stringers will go, I need to find the right position for the motors.

                                            At present I`ve used some scrap pieces of tubing layed along the prop shaft line and it looks like the shafts will be quite long ones, about 18" long.The two motors I`m thinking of using are M500`s from Mtronik. These are 6-12v motors running at 4700 rpm at 12v. As the boat is only a work boat, not high speed, these motors seem adequate.I`m not sure of prop diameter yet as I need to make some test discs up but they could be around 25mm but that could change.

                                            I`d like to get the motors as low down in the hull as I can so there needs to be more cutting out required. I`m using two old.540 motors for positioning.

                                            If anyone can see any glaring errors, please shout.smiley

                                            Many thanks,

                                            Jim.

                                            #91888
                                            Ray Wood 3
                                            Participant
                                              @raywood3

                                              Hi Jim,

                                              Looking good so far the only thing I would do next is the gunwale stringers to hold the bulkheads in place and try 1/8" x 1/4" obeche stringers they go round the corner easier than your 1/4" x 1/4" which your having to cut make lots of cuts in to bend, only a suggestion as always

                                              Regards Ray

                                              #91889
                                              Colin Bishop
                                              Moderator
                                                @colinbishop34627

                                                With such long shafts there is a risk of 'whipping' in the tube if there are only two bearings. A possible option is to have a shorter tube and then support the exposed inboard end of the shaft with a separate bearing close to the motor.

                                                Modelboatbits offer a choice of 4mm or 5mm shafts and matching size tubes, both in a variety of lengths.

                                                **LINK**

                                                olin

                                                #91892
                                                James Hill 5
                                                Participant
                                                  @jameshill5

                                                  Ray and Colin, thanks for suggestions.

                                                  Ray, everything is dry at the moment , I just need to get things marked out and cut , but I will look at what you`ve said. I still need to be able to take things apart to mark out slots ( maybe ) for the prop shaft positions. A way to go yet.

                                                  Colin, the possible whipping in such long shafts was my thought too so I`ll take a look at the link you gave me to see what I might be able to do. This is where you need an engineering workshop where you could make things to suit. Not something I have the space for I`m afraid, but I`ll get round it.

                                                  Regards,

                                                  Jim.

                                                  #91894
                                                  Colin Bishop
                                                  Moderator
                                                    @colinbishop34627

                                                    James. it is a doddle! I have just done it on my latest model, no fancy engineering needed on a relatively sedate model.

                                                    The short tube takes care of the two aft bearings. It is very easy to make the third one. All you need is a short length of brass tube to fit closely over the shaft. Once the shaft is in position in the tube, slide this over the shaft at the inboard end and fix it in position with some wood attached to the hull underneath and alongside in a sort of loose crutch and glue in position with epoxy. being careful not to exert any pressure on the shaft while the glue sets.You then have a third bearing which runs freely. A touch of grease does the rest.

                                                    Sometimes bodges like this can be just as effective as model engineering. Basically you are just running the shaft in a close fitting sleeve to steady it. That is all you need.

                                                    Colin

                                                    #91901
                                                    James Hill 5
                                                    Participant
                                                      @jameshill5

                                                      Thank you Colin for that idea. You`ve obviously had success with it.

                                                      My other thought was similar, one long shaft ( yet to be measured properly ) but two bearing tubes , one behind the other with the shaft through both and then carefully set in place. Similar to your original suggestion. A bit expensive but might work.

                                                      Regards,

                                                      Jim.

                                                    Viewing 25 posts - 76 through 100 (of 367 total)
                                                    • Please log in to reply to this topic. Registering is free and easy using the links on the menu at the top of this page.

                                                    Code of conduct | Forum Help/FAQs

                                                    Advert

                                                    Latest Replies

                                                    Home Forums Beginners Topics

                                                    Viewing 25 topics - 1 through 25 (of 25 total)
                                                    Viewing 25 topics - 1 through 25 (of 25 total)

                                                    View full reply list.

                                                    Advert

                                                    Newsletter Sign-up