The world's leading magazine for all model boating interests
Moonbeam
Moonbeam
Home › Forums › Sailing Models › Moonbeam
- This topic is empty.
-
AuthorPosts
-
10 May 2017 at 06:51 #70946
Banjoman
Participant@banjomanWell, we have now fixed our upcoming removal for mid-June, and plan to start packing boxes in two weeks time. It is quite obvious that I will not have the time to finish my Moonbeam build before then, so maiden sailing now looks likely to happen in maybe late August or early September.
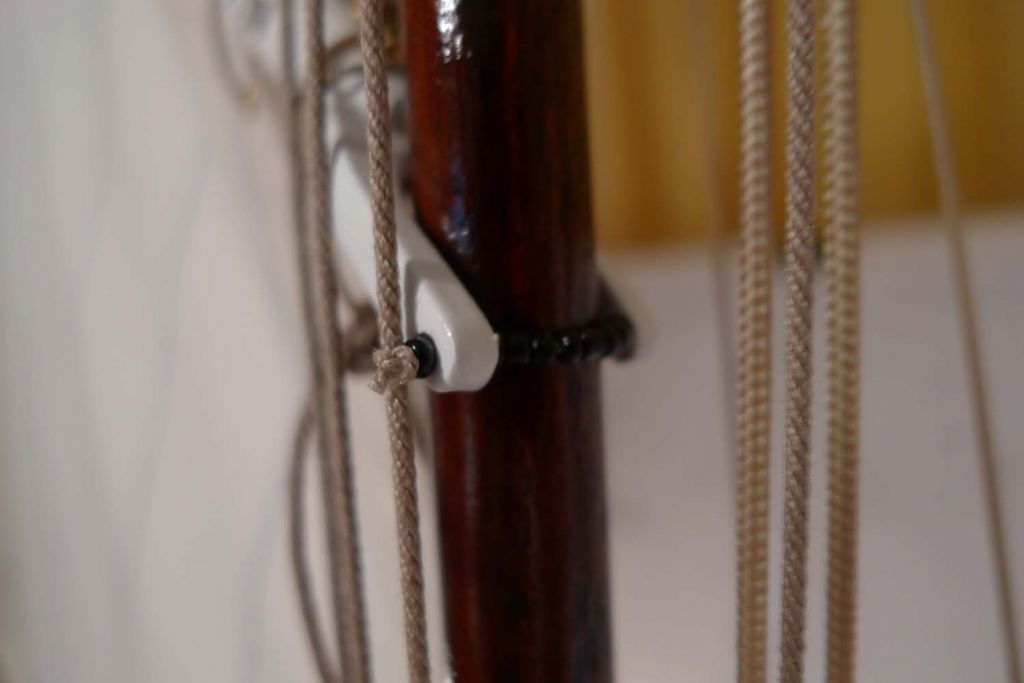
Other preparatory work has also kept me very busy, but I have been able to find the occasional moment for getting on with the build, and have among other things added a parrel …
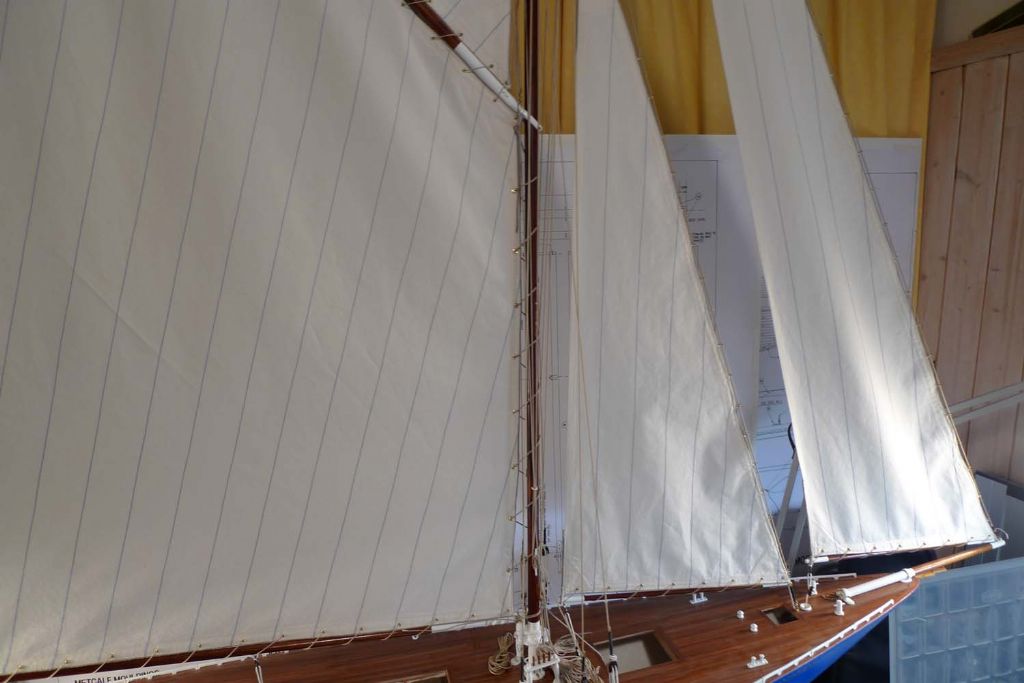
… and laced the main luff to the mast.
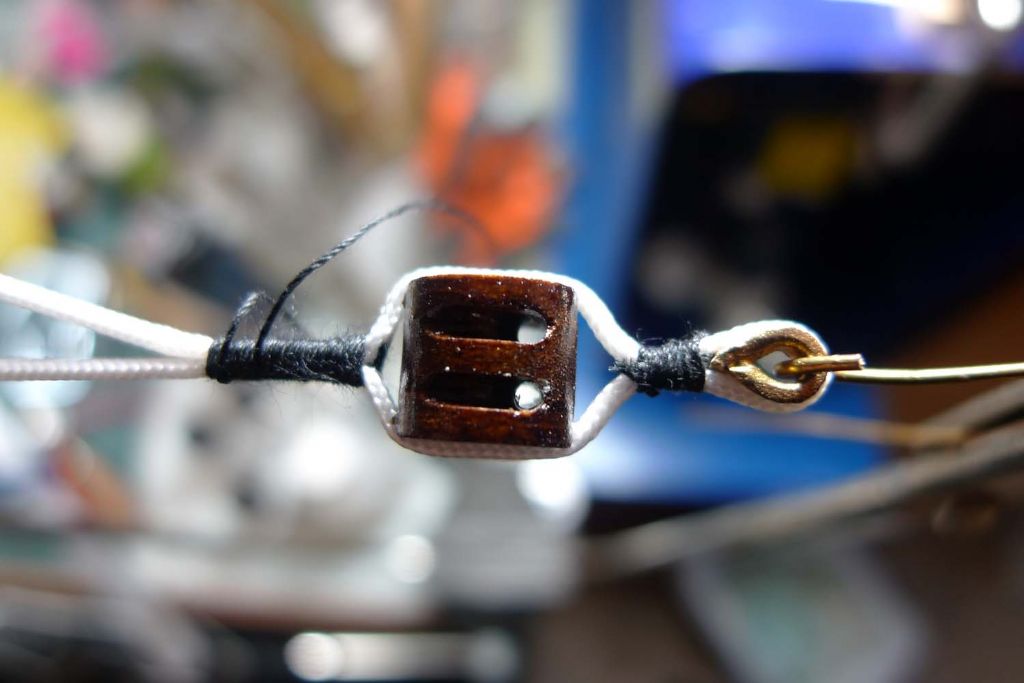
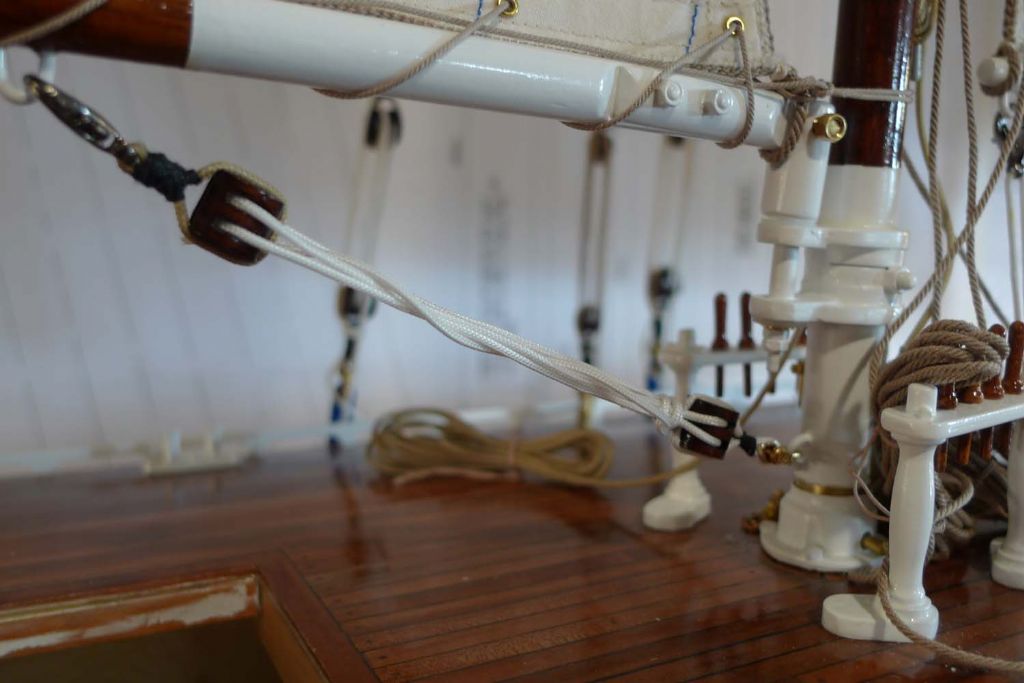
I have also made up a couple of double blocks, one of which I stropped with a thimble to the standing end …
… of the kicking strap line.
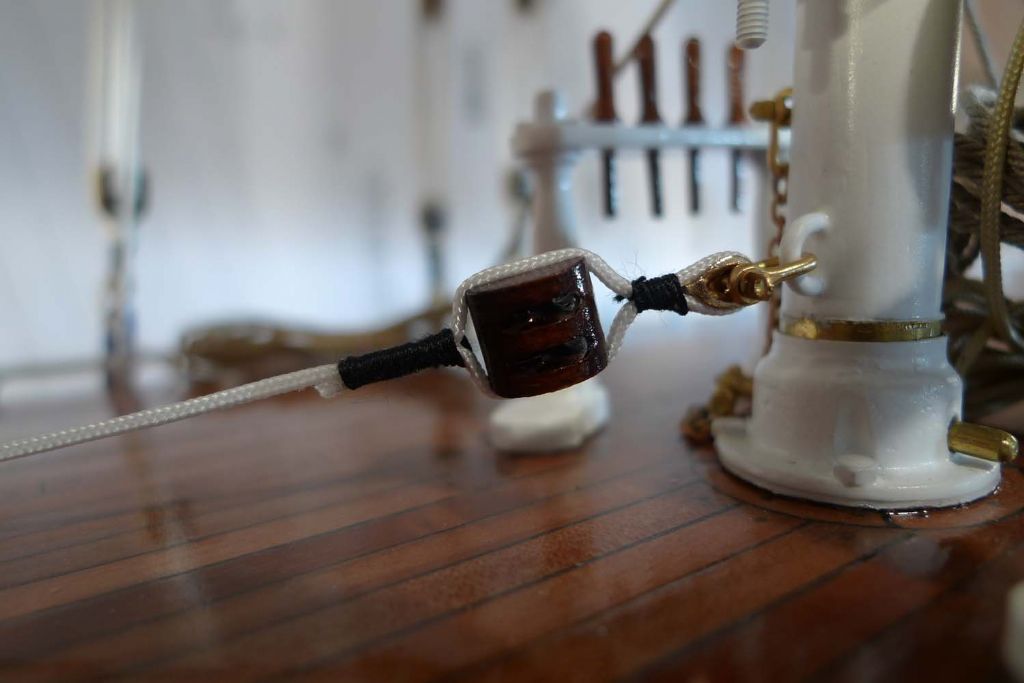
The second block was stropped to a miniature carabiner, and the whole thing set up to the boom and mast.
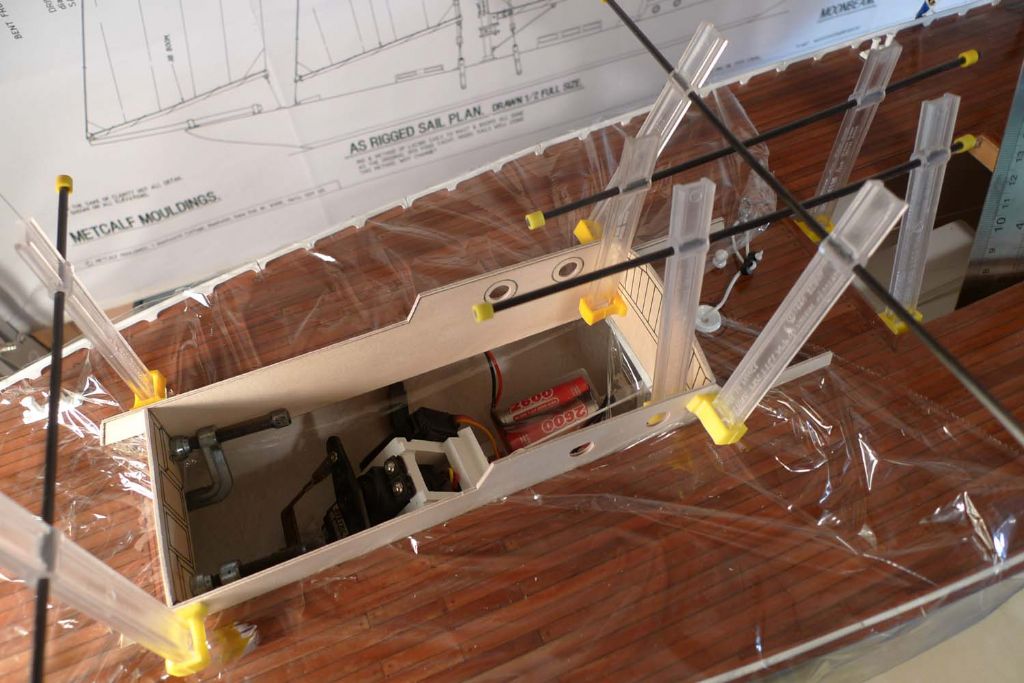
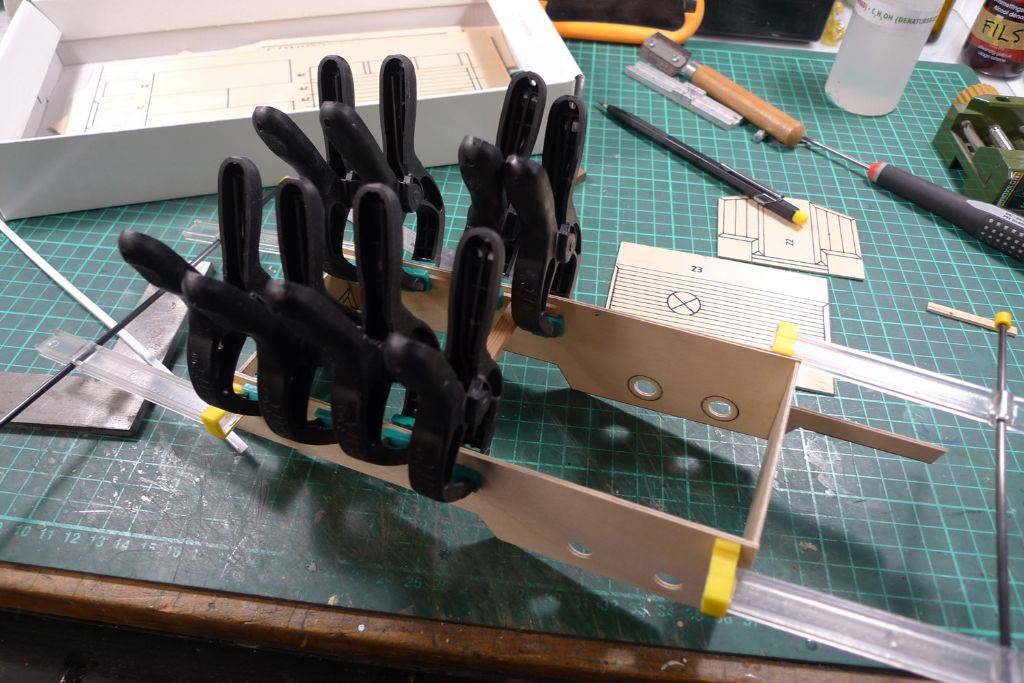
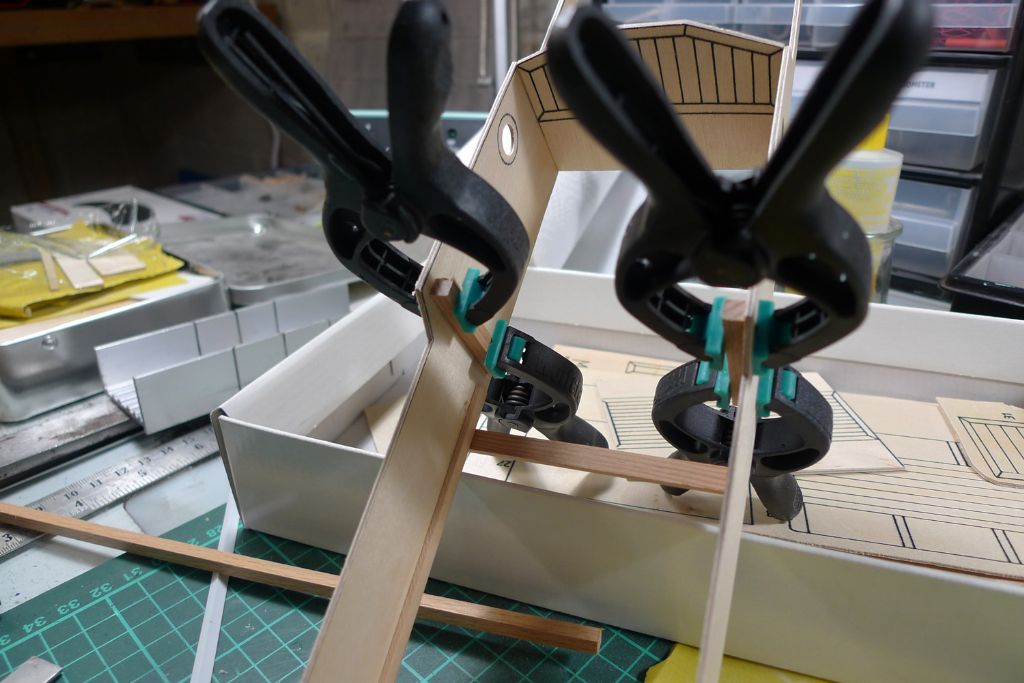
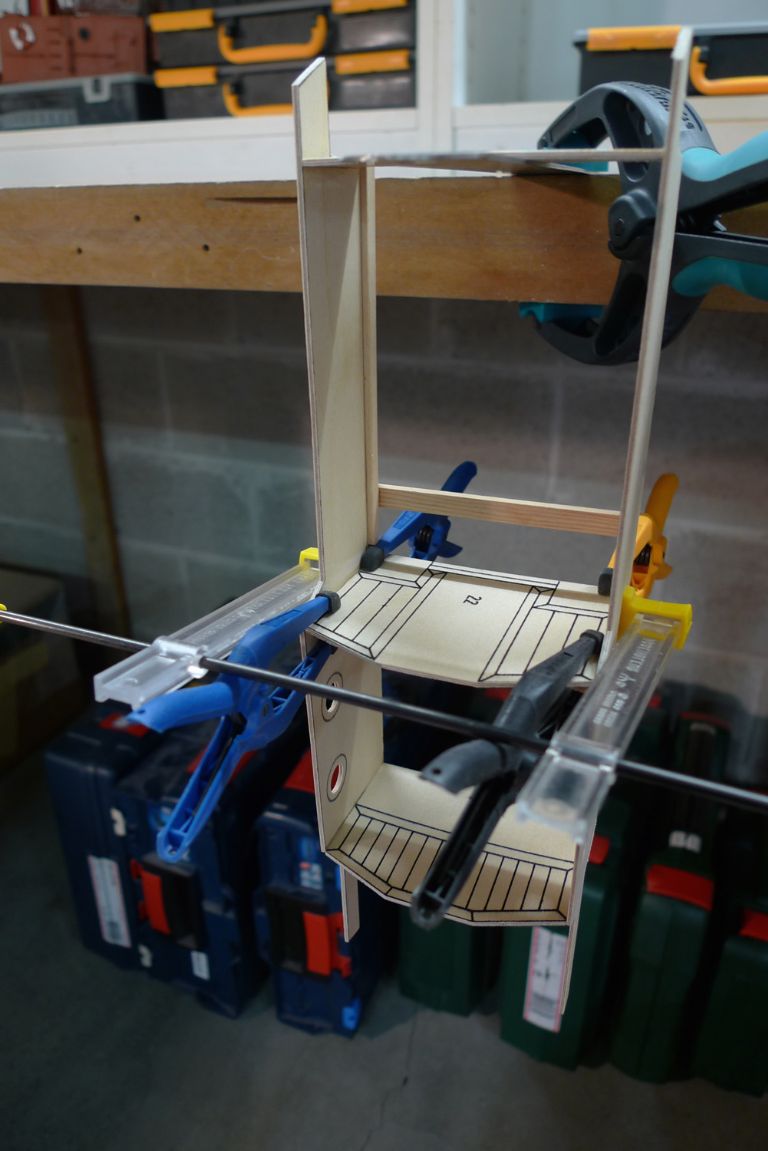
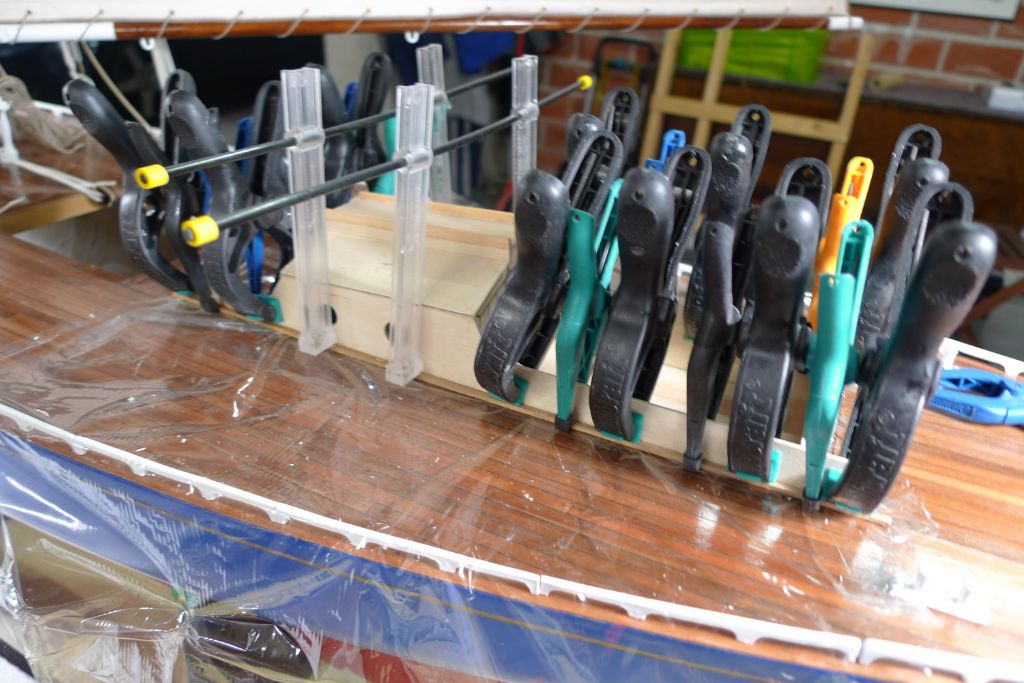
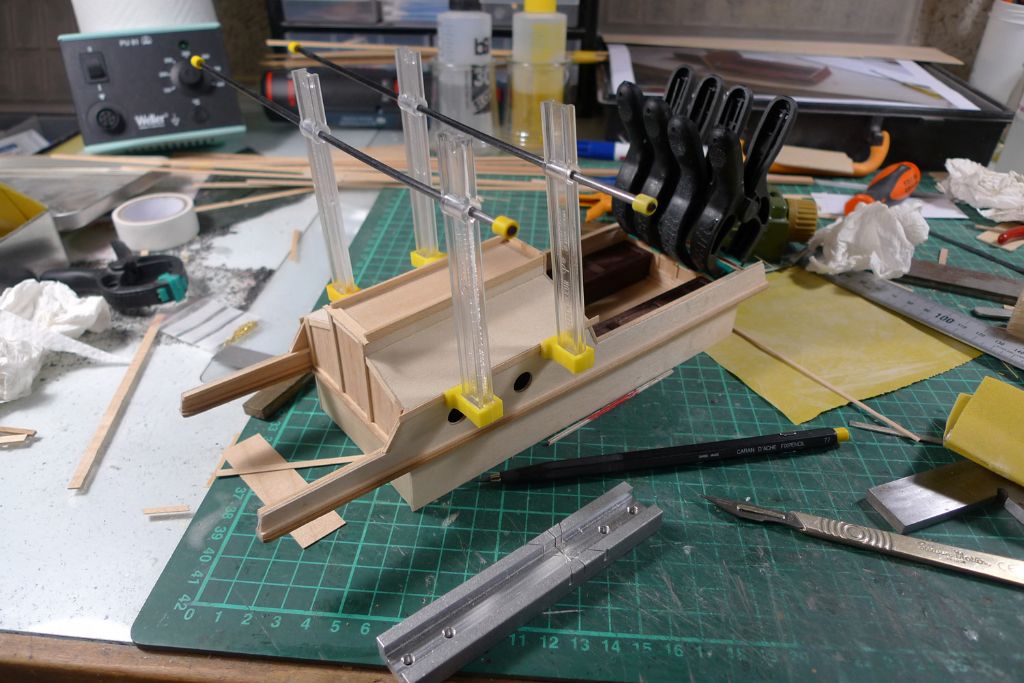
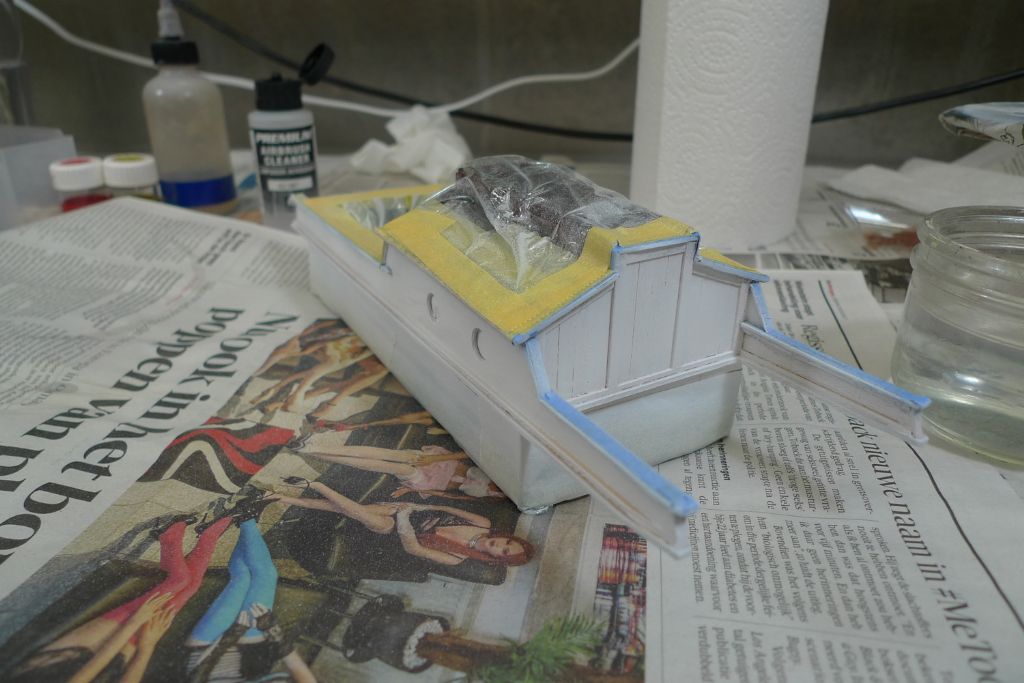
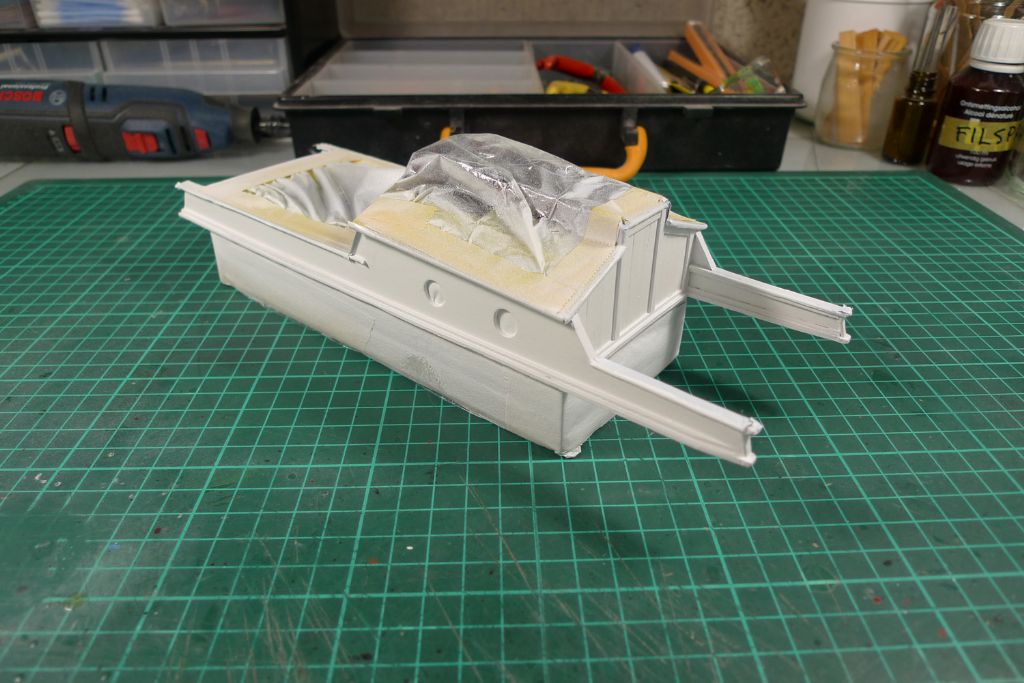
I have also made a first start at the cockpit-and-cabin assembly by glueing together the initial four pieces (the clingfilm is of course there tomake sure I don't inadvertently glue anything to the hull) …
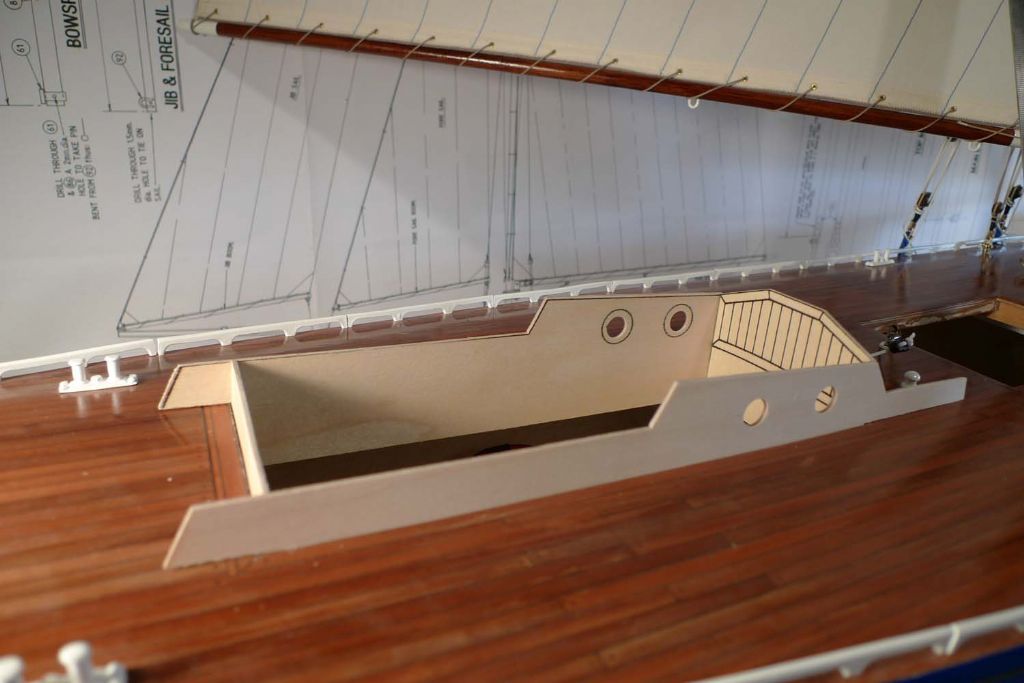
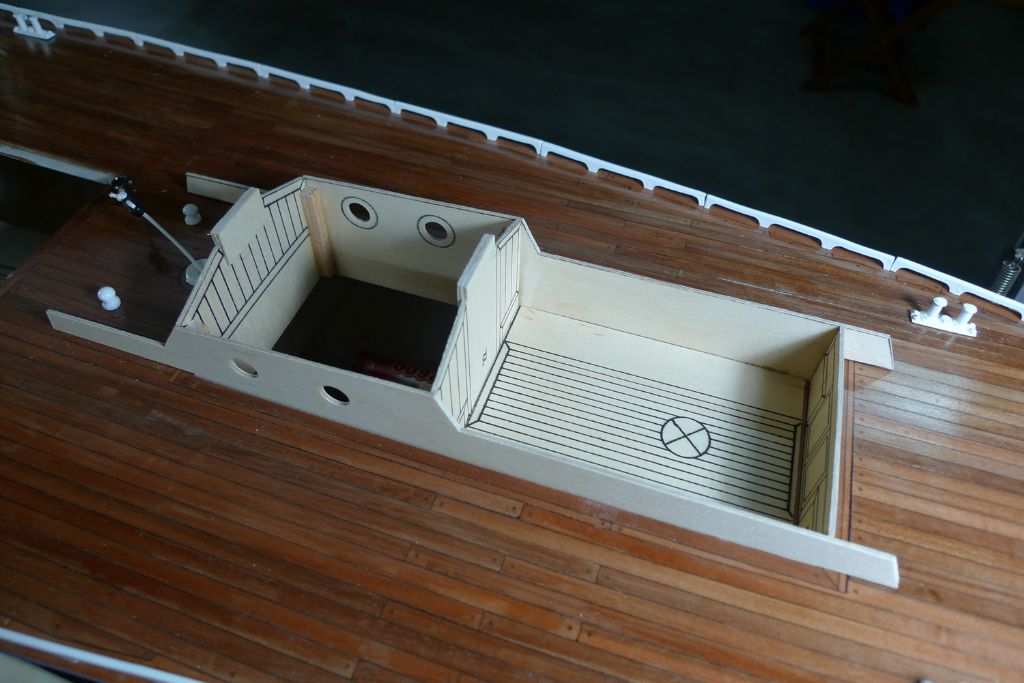
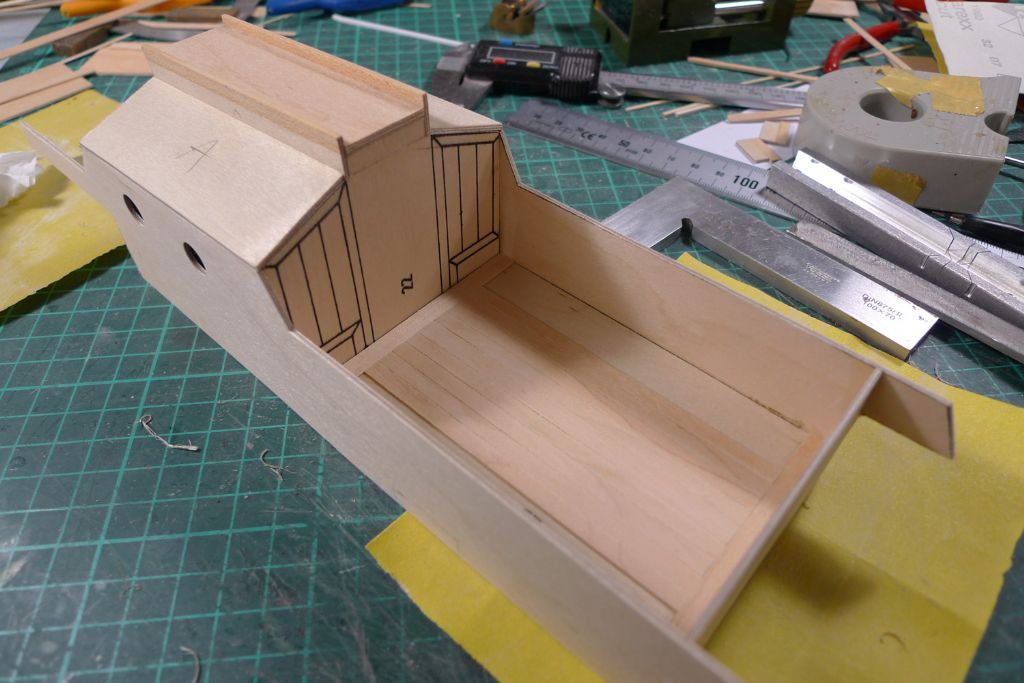
… to create the basic structure. As I intend to paint certain bits rather than stain them, and to panel any bits that should be stained with strip wood rather than to rely on the pre-printed panelling, I will not bother with which way round I glue any given piece of plywood.
To be continued …
Mattias
12 June 2017 at 10:10 #71386Bob Abell 2
Participant@bobabell2Come on, Banjo
Let's have an update please?
Bob
12 June 2017 at 11:51 #71389Dave Milbourn
Participant@davemilbourn48782Well, we have now fixed our upcoming removal for mid-June, and plan to start packing boxes in two weeks time. It is quite obvious that I will not have the time to finish my Moonbeam build before then
I would have thought Mattias's hands are pretty full with this, Bob.
DM
13 June 2017 at 13:11 #71396Banjoman
Participant@banjomanBob,
Warmest thanks for your interest!
Dave is indeed and alas spot on! The main removal is tomorrow, but my models and most of my tools and other model-making stuff has already been stashed away in a corner of the new house for several weeks, in part because I do not particularly care to entrust them to the movers (nice chaps though they surely are) but also because I needed to get them out of they way from my old workshop so that there'd be enough elbow room in there for packing and for dismantling the furniture …
How long it'll take me before I have my new workshop set up and running I don't really know, but before I can make any sort of priority of that we need to have the upstairs sorted to at least a reasonable level of order and comfort, so whatever you do, Bob, please don't hold your breath waiting for updates on my Moonbeam just yet …

However, sooner or later the build and this thread will be continued

Mattias
3 August 2017 at 13:34 #72330Banjoman
Participant@banjomanWell! I'm (sort of) back again after moving house!
I'm afraid I've not yet gotten back to actual model building, so this posting is not so much an update on Moonbeam build progress (there's been literally none since May 10th), but rather a reply to Ray Wood's kind comment in another thread earlier today.
Anyway: the move has gone very well indeed, although getting settled in and unpacking have taken rather longer than expected, mainly, I think, because these things tend do do so. Some additional delays were also caused, though, by my coming down with what the doctors suspect (tests and check-ups are still in progress, so diagnosis is as yet only preliminary) is an auto-immune illness called Parsonage-Turner Syndrome. The bad news is a certain amount of muscular atrophy in my right shoulder and arm; the good news is that in most cases, it passes of its own accord with full or nigh-on full recovery in a couple of years time. Oh, and a certain amount of time has also been lost fighting weeds in the garden …

However, yesterday the very last of the upstairs removal boxes was unpacked, and I am now free to start getting my workshop set up down in the basement. Tonight I plan to get my existing workshop shelving units set up so that I can at least unpack all the boxes and temporarily stow away their content so that the floor and wall spaces that they presently occupy in what will be the workshop are liberated. Once that is done, I can get the remainder of my existing furniture (tables, benches and chests of drawers) in some sort of place and start thinking about what more I would like to add in the form of furniture etc.
Given my excessive optimism on the upstairs front, I am loath to attempt any prognosis for how long all this'll take, but if I manage to achieve at least a semblance of order within the next few weeks, I might find that that is good enough to allow me to settle down and finish the Moonbeam build while there's still hope for clement enough weather for a maiden sail this year. Or I might feel that things are not yet sufficiently well organised to allow a relaxed and un-hurried build to happen, in which case it'll all just have to wait. The important thing, I think, is to avoid any (sense of) hurry, just because the finishing line is, as it were, in view; I want to be as attentive during these last stages as I have been throughout the previous ones.
So: once there is enough progress to warrant a proper progress report, well, there'll be one!
To be continued …
Mattias
Edited By Banjoman on 03/08/2017 13:34:33
Edited By Banjoman on 03/08/2017 13:35:07
Edited By Banjoman on 03/08/2017 13:35:40
Edited By Banjoman on 03/08/2017 13:36:38
5 August 2017 at 10:09 #72415Bob Abell 2
Participant@bobabell2Welcome back to the Land of thr Living, Banjo
We've missed your daily helpings of self inflicted punishment!
Only pulling your leg, matey
Bob
14 October 2017 at 09:48 #73624Banjoman
Participant@banjomanAnd, well … well, once more!
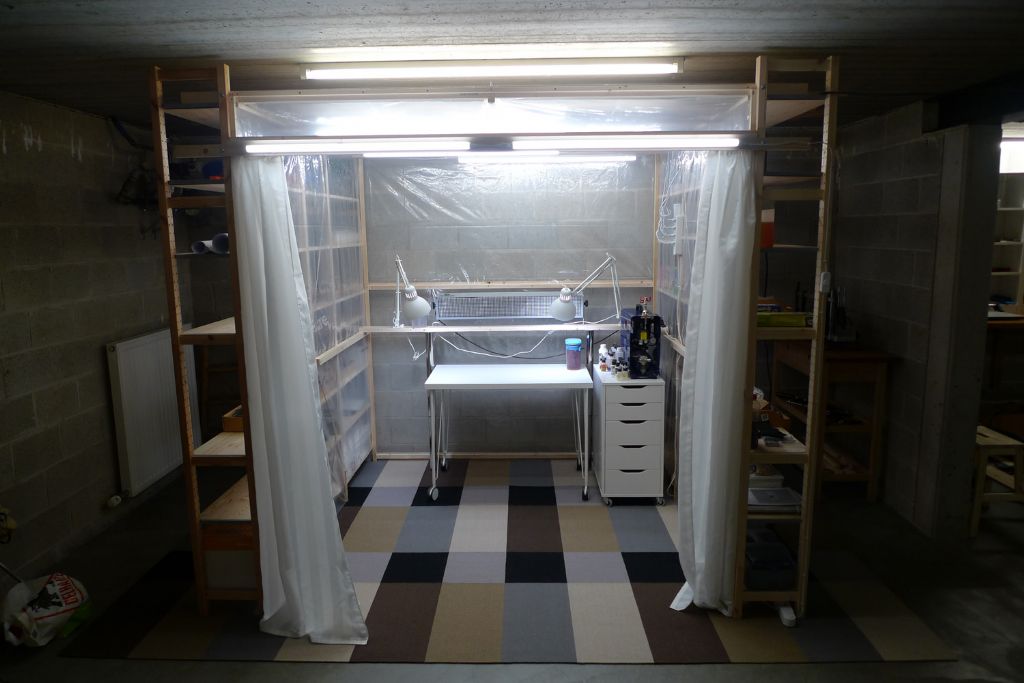
Since my last posting in this thread I have been, not exactly hard but definitely at work getting my workshop set up! The main reason why this has taken me almost two months is that I paint with an airbrush …
How is that? When I moved out of my old workshop, I noticed that over the years a considerable amount of paint dust had accumulated, settling on just about any exposed surface. In most cases it could be wiped off, but not always; in particular plastics tended to be permanently discoloured.
I do most emphatically not want a repeat performance in my new workshop, in part because it is a bother but primarily because the house is rented, not ours, and one needs to be more careful with that which is not one's own.
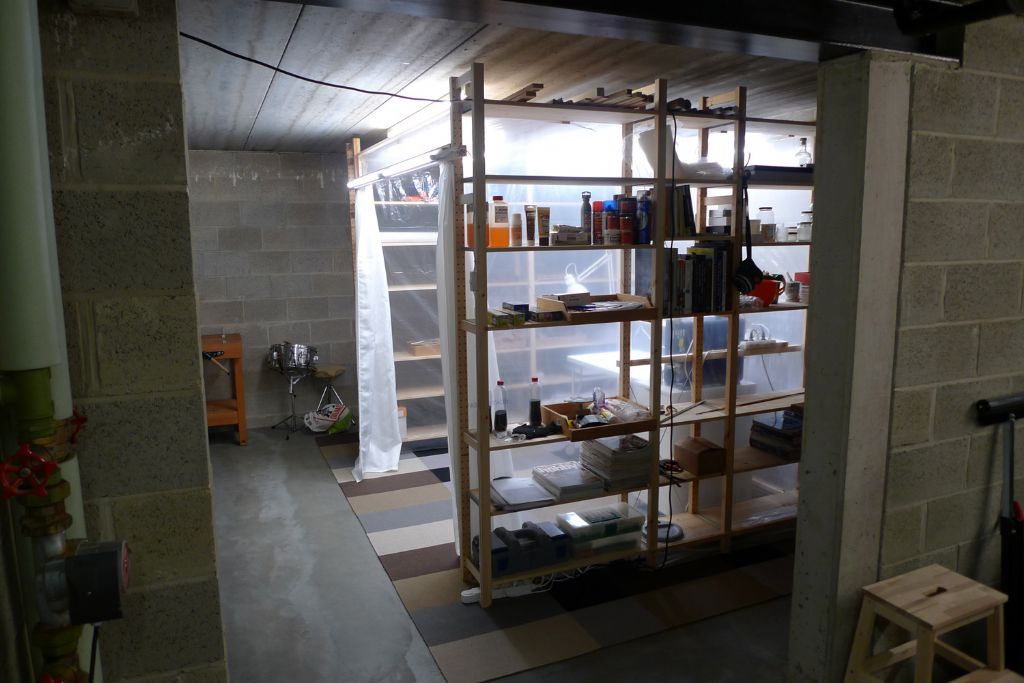
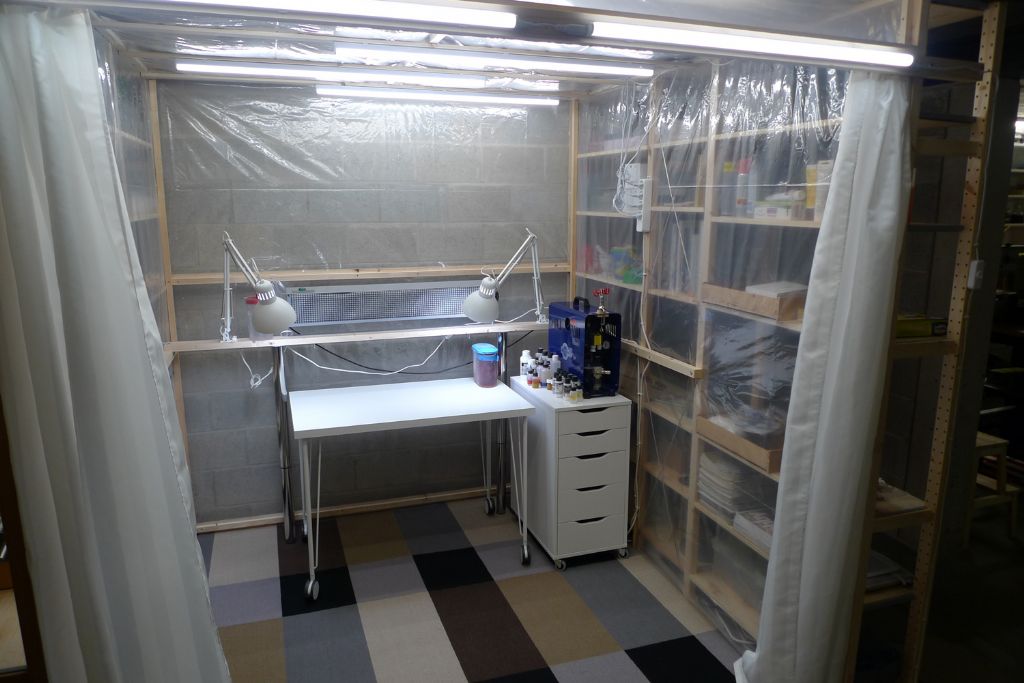
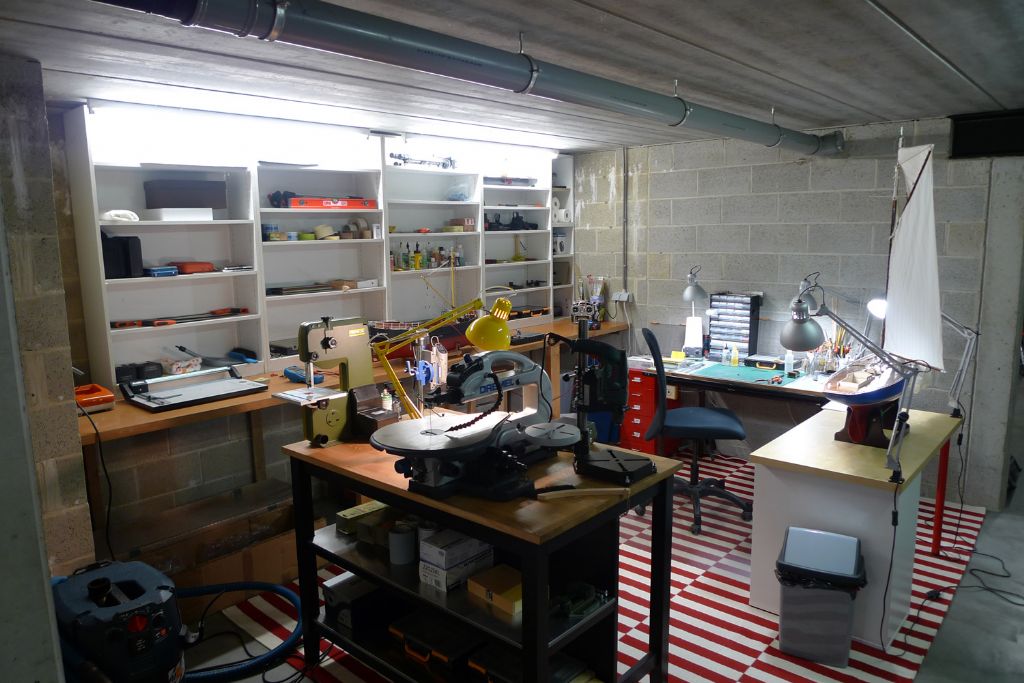
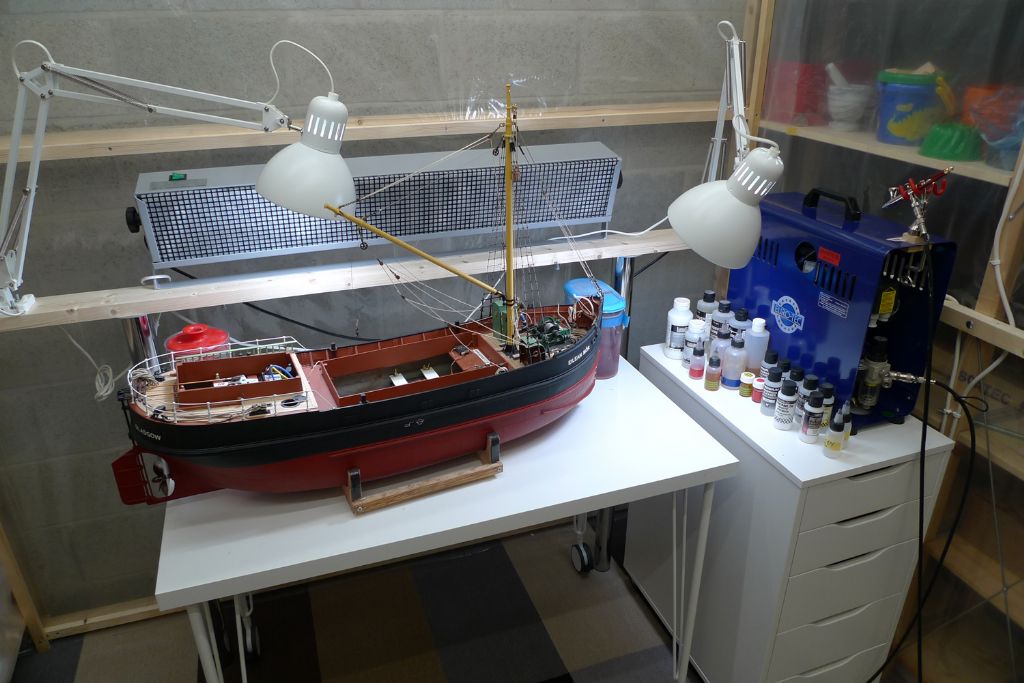
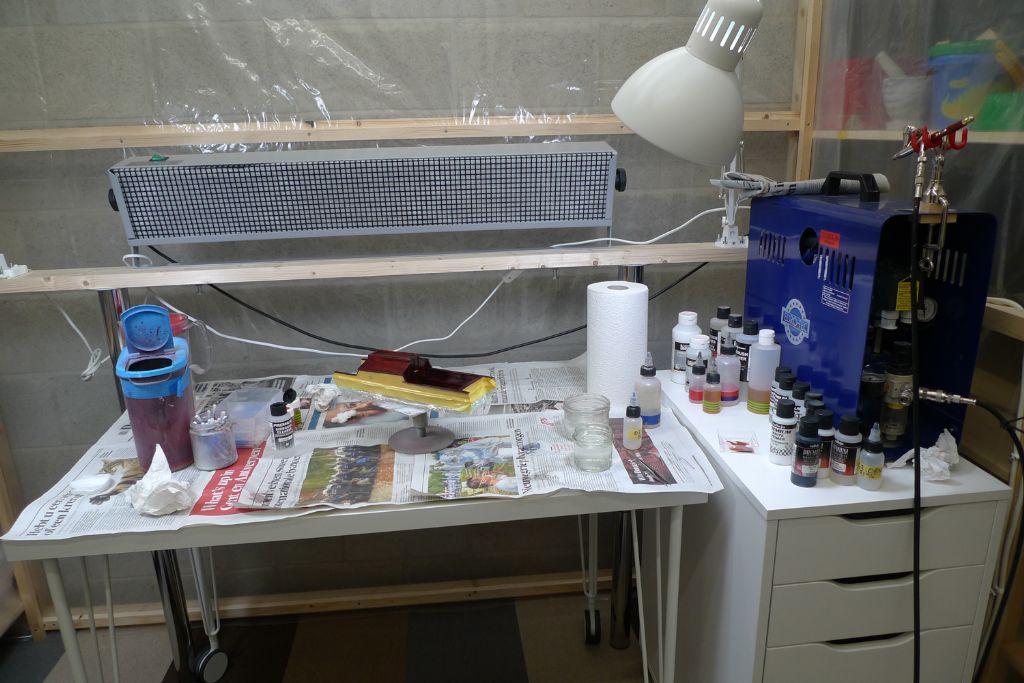
Anyway, I have room enough and to spare down there in the basement (68 m2 in total, not counting the garage!), so I decided to set up a dedicated spray booth, sealed off from the rest of the workshop. To this end, I got two sections of Ivar shelving from Ikea …
… placed them two metres apart in parallell to each other, and connected them with a framework of light timber.
The interior was clad with builders' plastic sheet …
… and four bars of LED lighting was added that, together with the two table lamps, give me a nominal light flow of 8,400 lumen in there with a colour temperature of around 5000 K. Good lighting is of course also pretty much a prerequeisite for paint jobs to be succesful …
Above and behind the table, I have also installed a filtered fan that should hopefully help gather in the paint dust generated when airbrush painting …
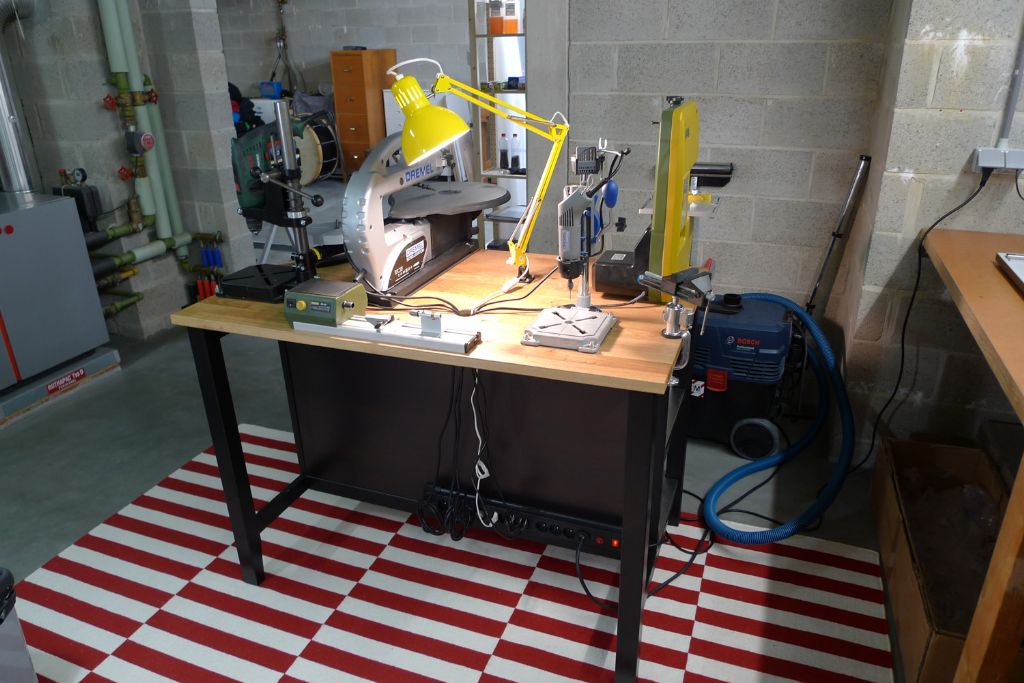
In the bargain bin at Ikea, I was also lucky enough to find at half the price an ex-exhibition model of their Stenstorp free-standing kitchen island, which I have converted to a power tool bench to which most of my machines have now been bolted down.
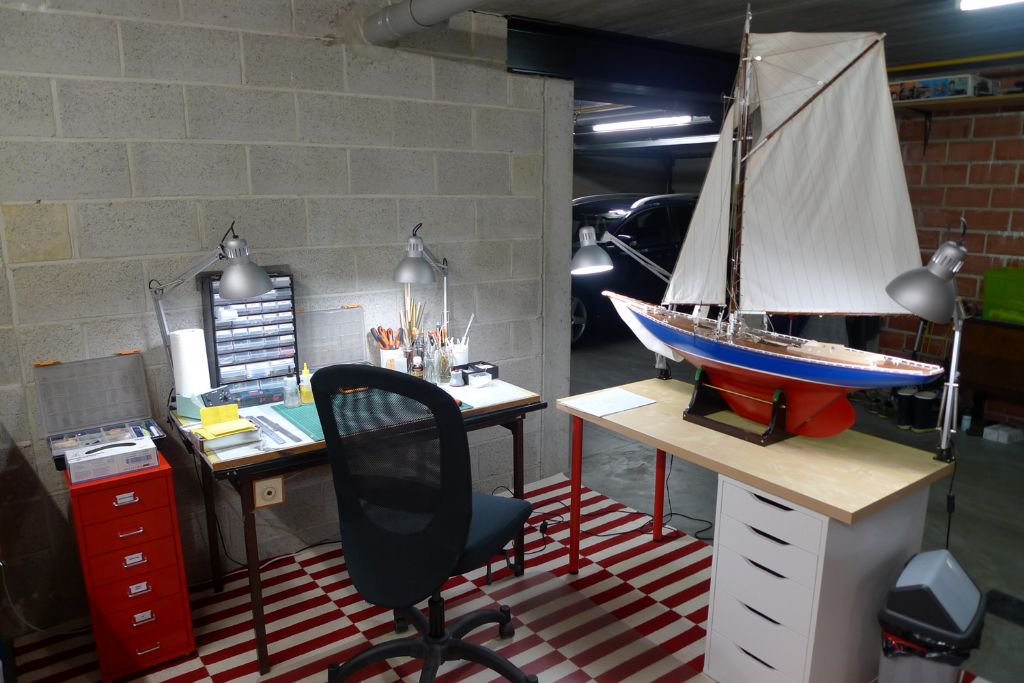
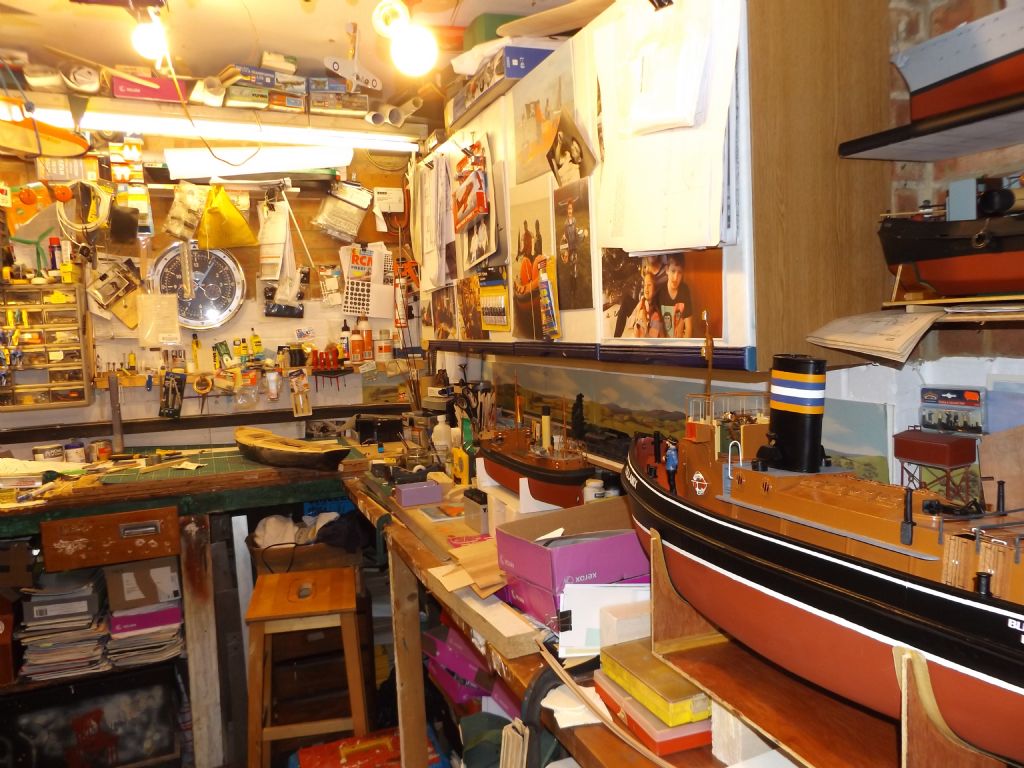
Finally I re-installed my old work tables from the previous workshop …
… to this general effect. The shelving and work bench against the wall were already in place, and thus belong to the house, not me, but this does of course not detract from their usefulness (except that I would not be able to modify them should I want to, which I don't think I will) …

This is where I was twelve days ago – since then I have also gotten back to actual model building, but I'll report on that in the next couple of posts. In the meanwhile, I'll just say the usual …
To be continued …
Mattias
Edited By Banjoman on 14/10/2017 09:48:52
Edited By Banjoman on 14/10/2017 09:50:02
Edited By Banjoman on 14/10/2017 09:51:58
14 October 2017 at 10:54 #73626Banjoman
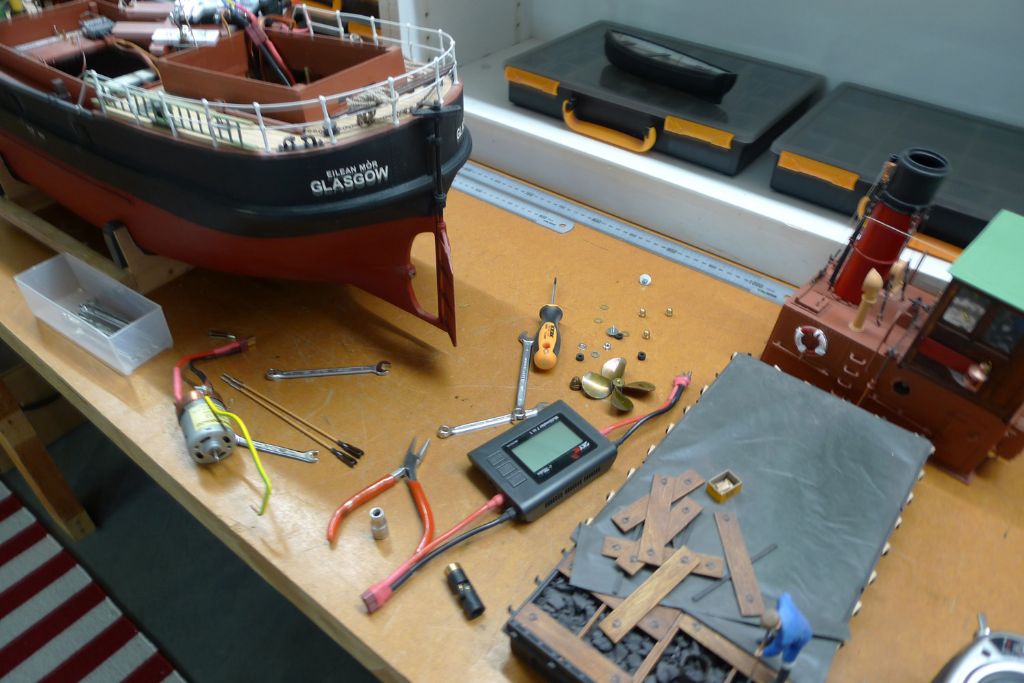
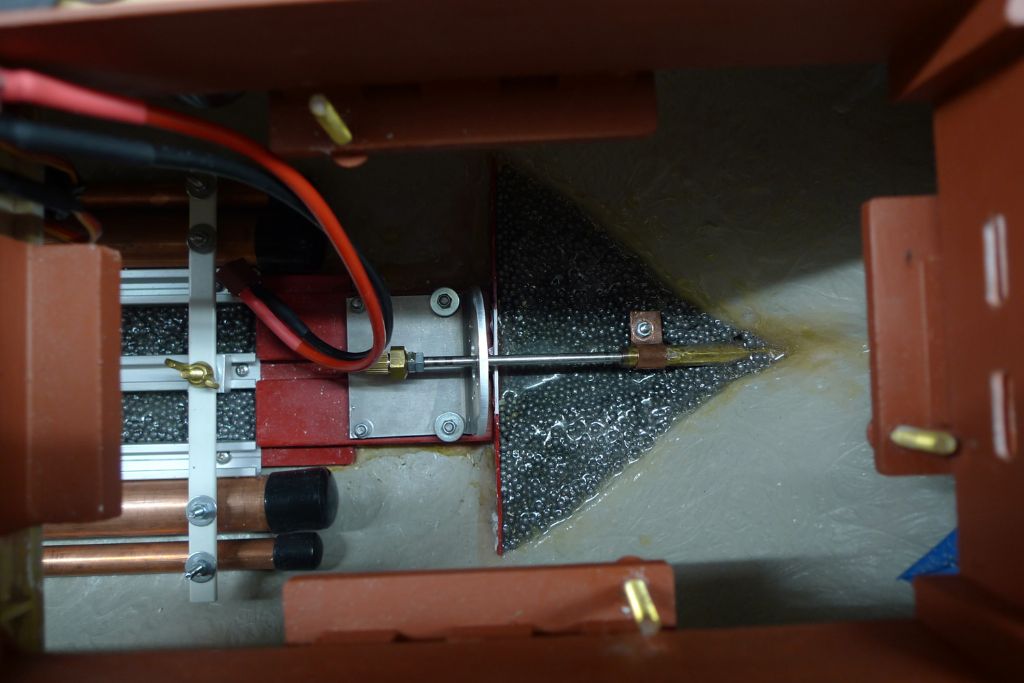
Participant@banjomanSo! My first proper job of work was some much-needed TLC on my Eilean Mòr puffer. The propeller was removed, the rudder disconnected and the electronics platform got out of the way to allow me to take out the motor …
… and remove the prop shaft for cleaning and re-greasing. For the latter, I use small quantities of ball bearing vaseline of which I still have a two-thirds full tube left over from my youthful days of moped ownership and tinkering.
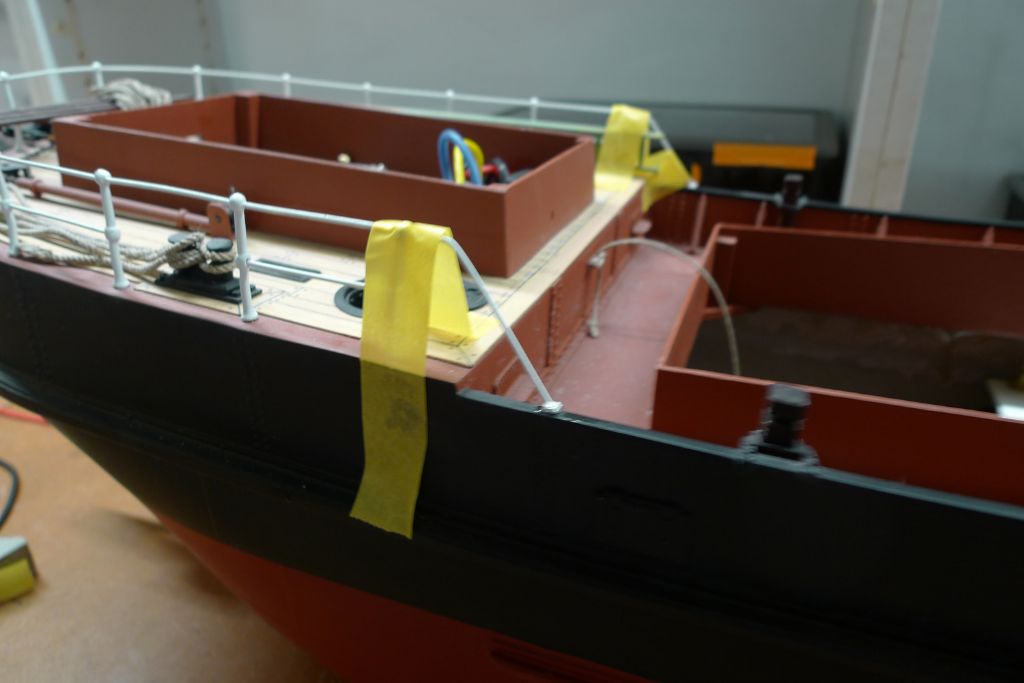
I also re-glued the forrard ends of the quarterdeck railings that had come loose …
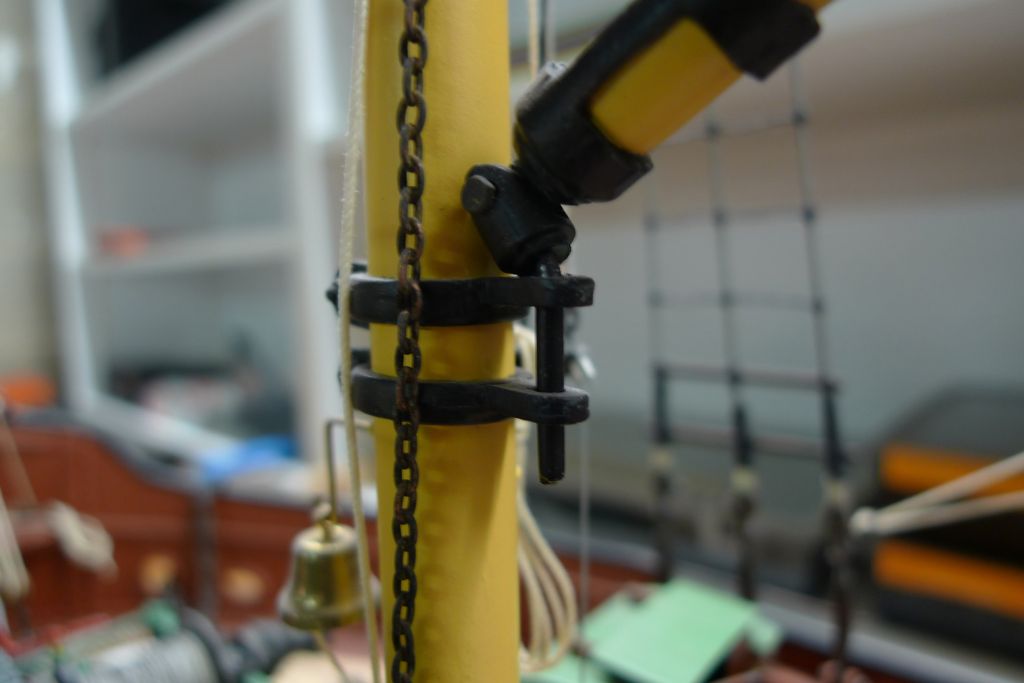
… and then set about sorting a small problem with the boom gooseneck. I have since learned my lesson, and no longer trust in white metal if anyy sort of load or strain will be involved, but was not so experienced when this particular gooseneck was put together.
As the photo shows, the white metal swivel pin had started to bend …
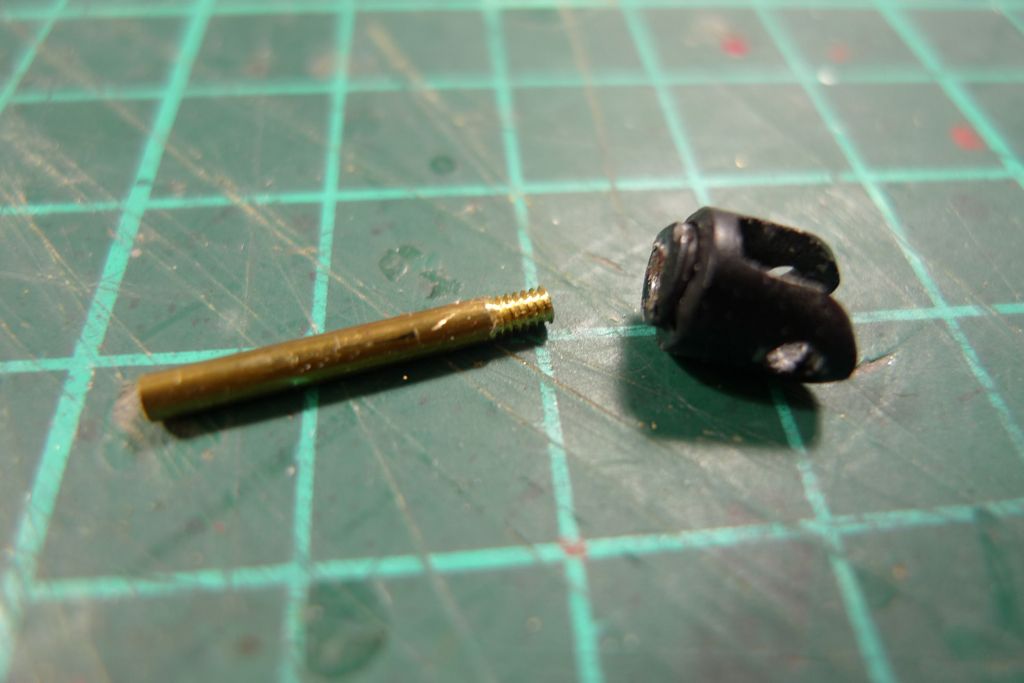
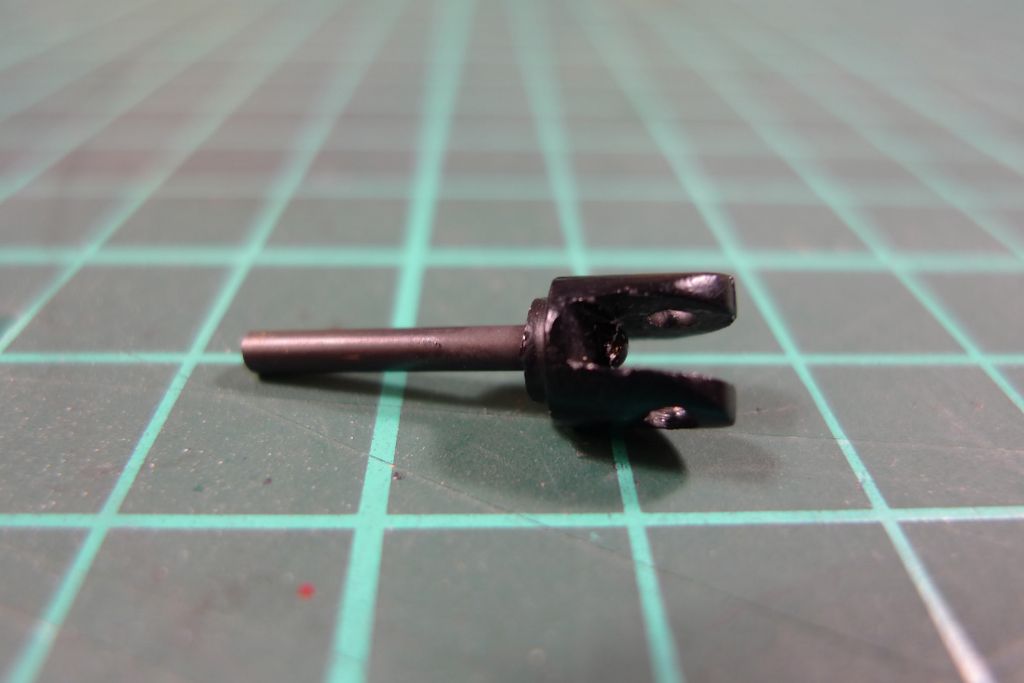
… so I cut it off and replaced it with a brass pin, screwed and expoxied into the swivel head …
… once the brass had been chemically blackened.
Finally some minor paint repair was carried out, mainly were the railings had been re-glued, and the whole ship then dusted down with a soft brush and and airflow from the (unloaded) airbrush in front of the running ventilator.
To be continued …
Mattias
15 October 2017 at 20:43 #73643Banjoman
Participant@banjomanBut back to the proper subject of this thread, namely Moonbeam!
All that remains to be sorted is the four superstructures: the cockpit-and-cabin, two skylights and a hatch cover.
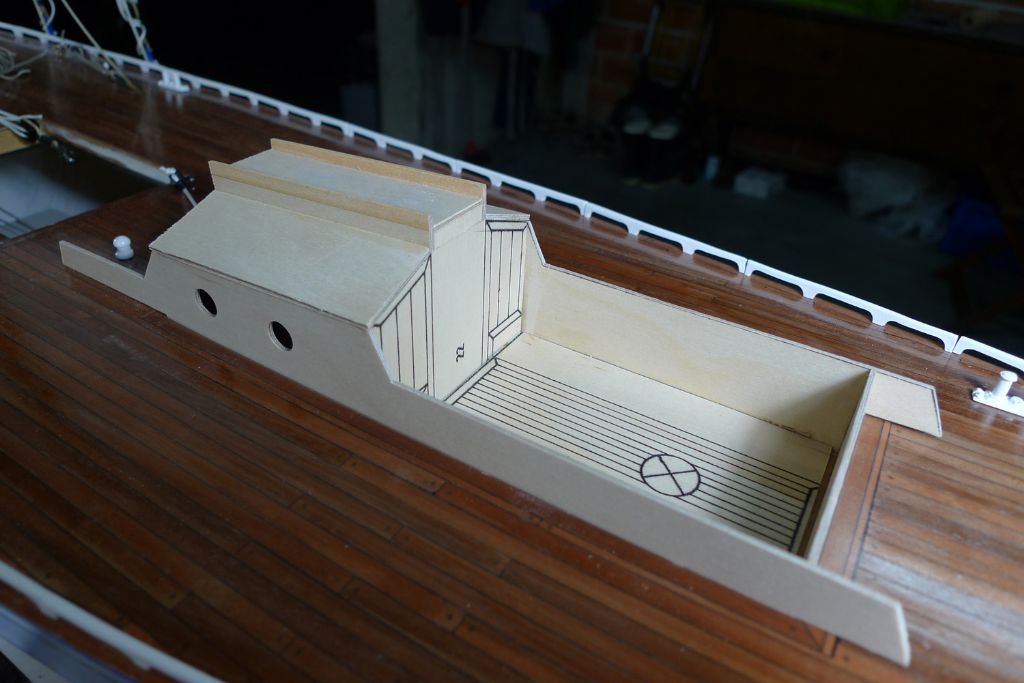
I'd made a start on the cockpit already back in May, so that is where I took up the gauntlet anew. The kit comes with printed plywood parts for these superstructures, and although I do not intend to make any use of the printed fake plank patterns, I will certainly use the plywood parts as a base.
So far I've mainly been adding various reinforcement stringers …
… in places where they won't be visible …
… and also glued in the main bulkheads …
… and the cockpit floor.
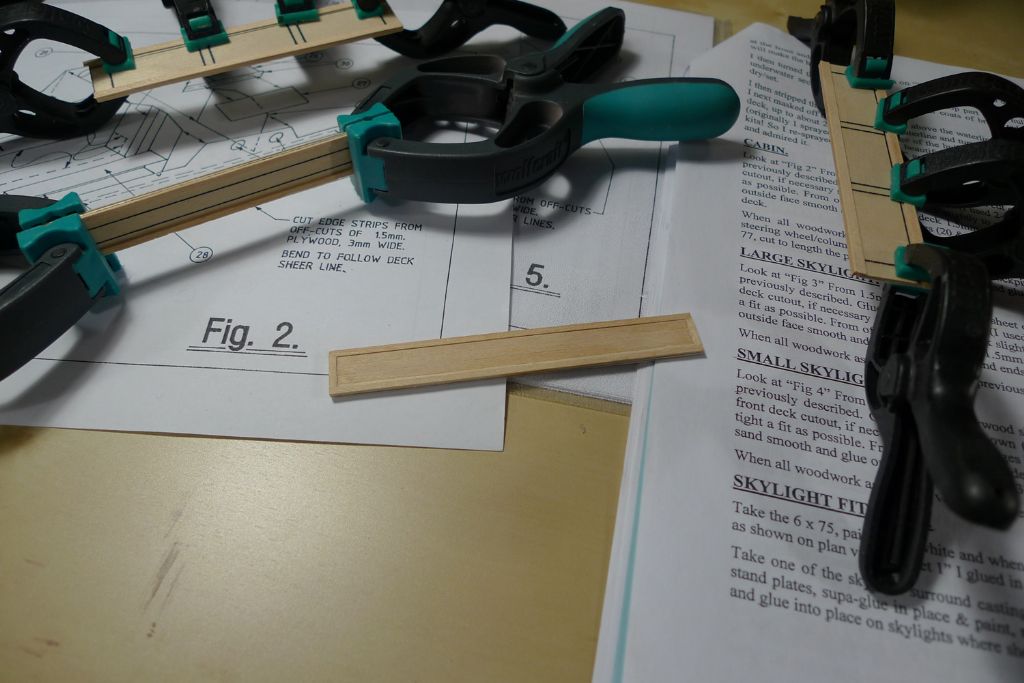
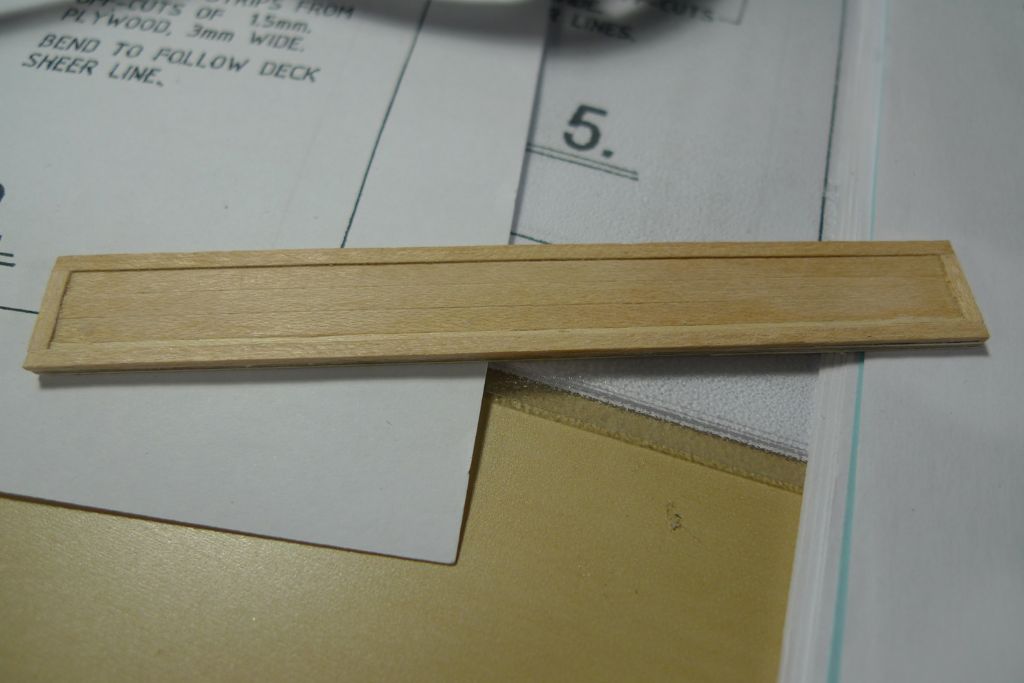
As a first step towards prettying up those parts that will be visible, I next clad the exterior of the parts that will make up the cockpit benches in some strip wood …
… later to be stained, of course …
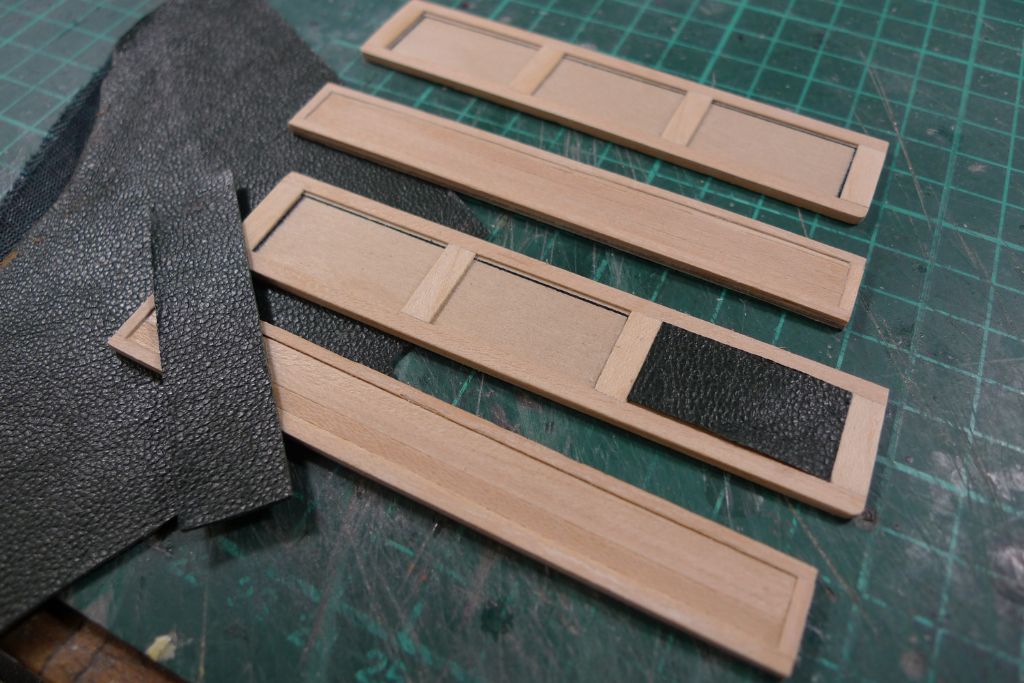
… and then begun cutting out pieces of dark green leather to make up the seats.
To be continued …
Mattias
16 October 2017 at 16:17 #73661 Ray Wood 3Participant@raywood317 October 2017 at 07:03 #73669
Banjoman
Participant@banjomanHi Ray,
It is indeed very nice, and quite a luxury, to have that much space, with room to spare if/when needs of expansions arise (as they will, sooner or later, I'm sure; if nowt else, I've spent the last few years ogling lathes but never before had room enough to house one). The rest of the house is rather nice too, I think, but I will not deny that the basement was a powerful argument in favour of signing the lease …

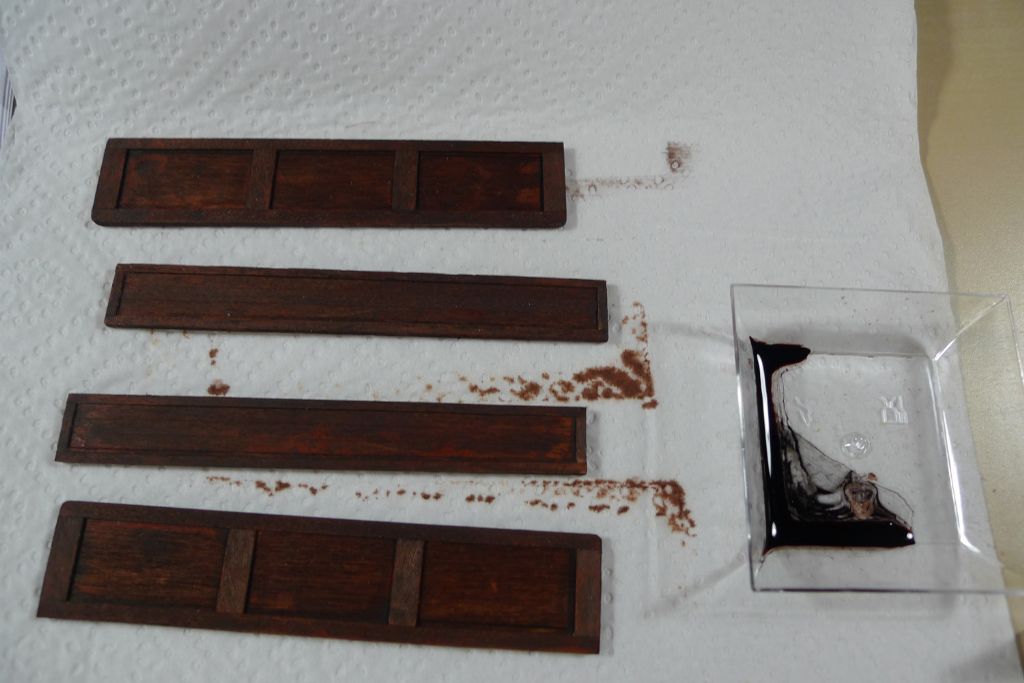
Work on the cabin/cockpit continues, and the bench parts have now been giving two coats of mahogany stain, which looks a bit dull at the moment, but should hopefully ome to life once I apply some gloss varnish …
… and the cabin has now been roofed in with 1.5 mm plywood. On top of this, I'll add some prettier wood for a better look (as a careful look will show is already the case for what will be the visible parts of the sliding hatch runners), but this now provides the basic structure to be clad.
To be continued …
Mattias
17 October 2017 at 07:36 #73670Bob Abell 2
Participant@bobabell2Welcome back, Banjo
You are indeed an absolute perfectionist!
Just look at your new Workshop!………Spotless!…….It's almost a sin to make any dust etc
I'm pleased you haven't finished Moonbeam off, during your long absence
I've not made much progress with my latest build lately, got too many family health distractions at the moment
Getting a lathe is essential, in my opinion, but the choice is mind boggling
The little dinky lathes made in China would be OK for the little bits and pieces, but not robust enough for say, Live steam loco building etc
All the best, Banjo
Bob
Edited By Bob Abell on 17/10/2017 07:37:23
17 October 2017 at 08:09 #73672 Ray Wood 3Participant@raywood3
Hi Mattias
Bob is spot on, happiness is having a lathe, it saves you from having to buy all those little bits & pieces, the only problem is repetition I turned 10nr 3 different sized pulleys last night !!! for my Cullamix steering

Its worth buying a good one so you can get the accessories long term, that's why I bought a Myford. The ML10 is worth a look, slightly smaller and probably 2nd hand.
Regards Ray
23 October 2017 at 07:24 #73767Banjoman
Participant@banjomanBob and Ray,
Apologies for not replying to your comments before! As you say, Bob, there is a lot to chose from, and the parameters to be taken into consideration are legion. Things such as size, quality, service, spare parts, accessories need all to be balanced against each other and then weighed up against price and as realistic as possible an estimate of current and future needs.
I would absolutely love to have a Myford, Ray — they come up trumps on most of the criteria for choice that I can think of, but — alack and alas! — also arrive with a rather hefty price tag attached! The original Myford company went into administration some years ago, but the brand and all existing stock of parts and accessories where taken over and there are now new machines being made (**LINK**) — at something like £8,000 or £9,000 a pop! Myford also sells completely refurbished older machines at around half the price of a new one (https://www.myford.co.uk/acatalog/Used-Lathes.html), so still a lot of money, although a very interesting alternative.
There are of course many second hand Myford (and other) lathes out there, at varying prices, but there one enters trickier territory. From what I understand these were and are high quality machines, but even quality will eventually get worn, and for my part I don't really have the knowledge or experience needed to evaluate at a second-hand lathe for wear and tear or to estimate renovation costs — or, for that matter, to undertake such a renovation. Of course one can always dream of finding the proverbial one previously owned by a careful vicar who only used it on Sundays to polish up his church's brass candle sticks and now being sold for a hymn provided it goes to a good home … but I'm not holding my breath!
Also, most used Myfords are, I think, to be found in the UK, so going to look at one (not to mention picking one up) is not really summat I could do on the spur of the moment, and also I believe many (most?) of them are in Imperial configuration and would require a metric conversion set, as although I know and understand Imperial measures well enough, I would find it a bit too much of an additional challenge to either learn to actually work in Imperial or to constantly recalculate every measure.
Nowt is of course impossible, and when I get to the point of actually finding and buying a lathe, I will look very long and very hard at all possible avenues that I can find … but that won't be for tomorrow anyway, as I have a very long list of tools and equipment I want to invest in, several of which have priority on a lathe, and I have to save up for everything.
We'll see! In the meantime, drooling and dreaming is, as always, free …

Mattias
Edited By Banjoman on 23/10/2017 07:25:35
Edited By Banjoman on 23/10/2017 07:26:22
Edited By Banjoman on 23/10/2017 07:27:02
23 October 2017 at 09:05 #73769Bob Abell 2
Participant@bobabell2Hello Banjo and fellow engineer Ray
Just having a natter about my Myford Lathe days
I bought my ML7 in 1977 'ish, 2nd hand for the princely sum of £51.00 and gave it away to a good cause in 2007
It went to a special evening workshop class run by Manchester Air and Space museum as a class for budding Engineers
The bearings were beginning to show signs of wear and I seem to remember, a replacement set was something in the order of £300!
At the time, I'd been admiring the flashy, all singing, all dancing Chineses Lathes, which were ideal for Model Boat work and handled by Chester Lathes
Settled on a 3 1/2" swing lathe……….With every thing on it!…….And every accessory too………For £400 approx
It made the Myford look like a Dinosauer!……….That's why it was given away
At the time, Myford didn't want it at any price
The new lathe is nowhere near as robust as the Myford, but makes up for it's short comings with the novel features And the apparent good value for money
If I had a second chance, I would have bought a larger model with a Milling Machine Combo addition
All the best in your search for the perfect lathe, Banjo
Bob
23 October 2017 at 09:24 #73770 Ray Wood 3Participant@raywood3
Hi Bob & Mattias
My first lathe was a well used ML7 I bought in 1990 second hand from a dealer for £1000.00, once you get to know your machine you can compensate for the backlash etc to do reasonable work, My second machine the Myford Super 7 has a gearbox, very nice but I'm quite up to screw cutting, this was 15 years old but like new for £1500.00 with a stand, happy days. As Bob says about the imported Chinese machines they are fine for model engineering, but once you have a lathe you'll realise you need a vertical milling machine aswell for machining flat surfaces, so a combination machine lathe/mill as sold by Machine Mart over here is probably the best option.
Regards Ray
23 October 2017 at 10:20 #73773Banjoman
Participant@banjomanHello again Bob and Ray,
many thanks for your comments! We'll see where it all eventually ends up — as I said, there are other things higher on my list of tools to get — but once it happens, one brand that at least seems very interesting from a price/quality perspective is the German Optimum; their machines (**LINK**) are built in China, but at the brand's own production plant. Their second smallest lathe, the 100 mm (i.e. just under 4"
 OPTIturn TU 2400 V (http://www.optimum-maschinen.de/produkte/drehmaschinen/optiturn-tu-2004v/index.html) has a recommended retail price of just €1,600, i.e. about £1,350. A very attractive price given the specs, I'd say …
However. That's for later. Now, back to Moonbeam!
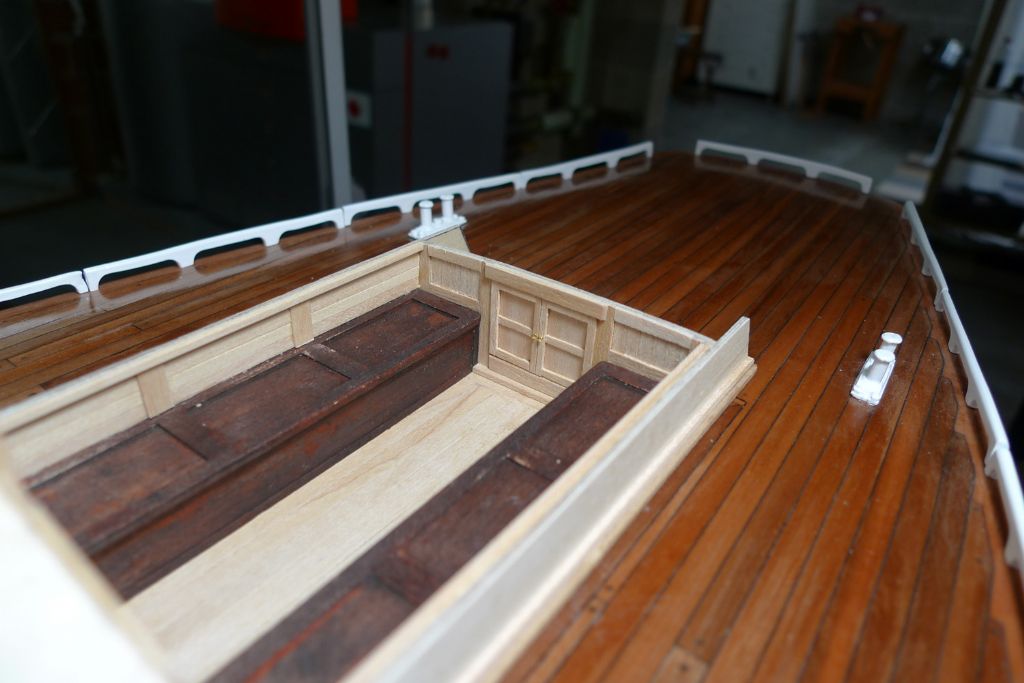
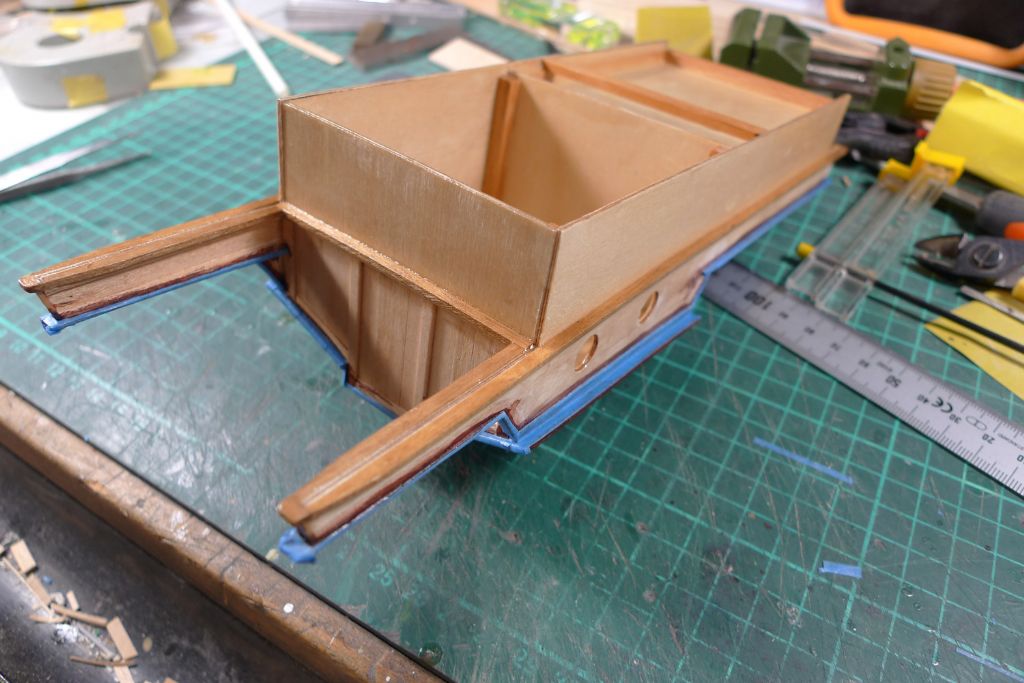
Since my previous posting I've kept busy cladding the basic plywood cabin and cockpit structure, starting with the cockpit floor …
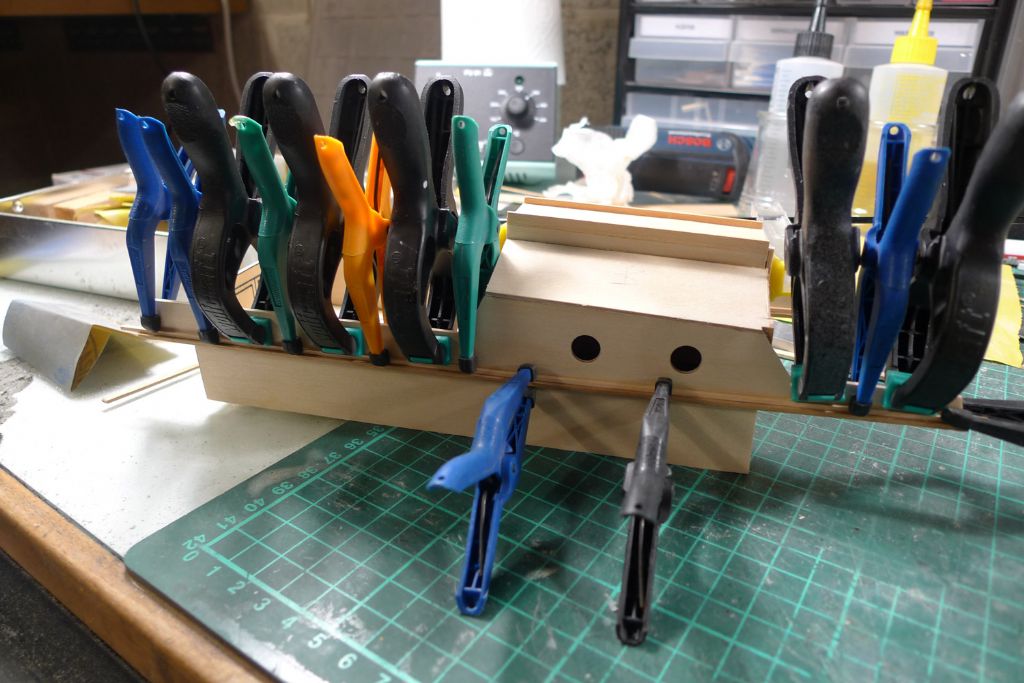
… and then moving on to the stringers around the outside level with the deck. To make sure that these follow the camber and sheer of said deck, I glued them on in situ, with some kitchen foil in between to guard against any excess glue fouling the deck, or the stringers getting stuck where they shouldn't.
To reinforce the fairly narrow glue joints, but also for estethic purposes, I then added a second set of narrower stringers …
… on top of the first ones.
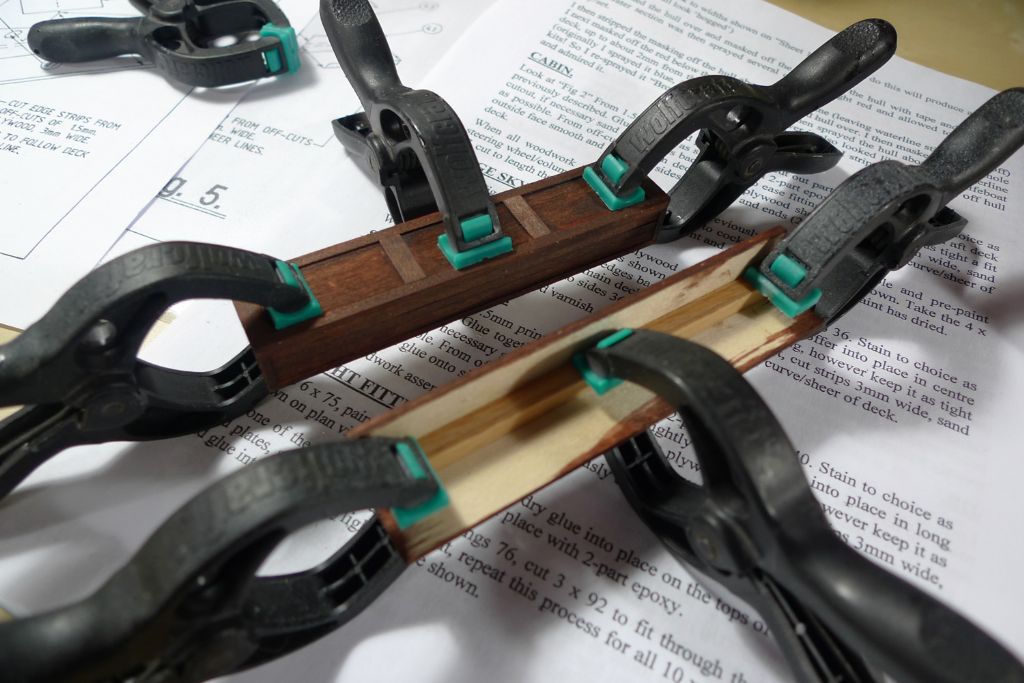
I also assembled the cockpit seats …
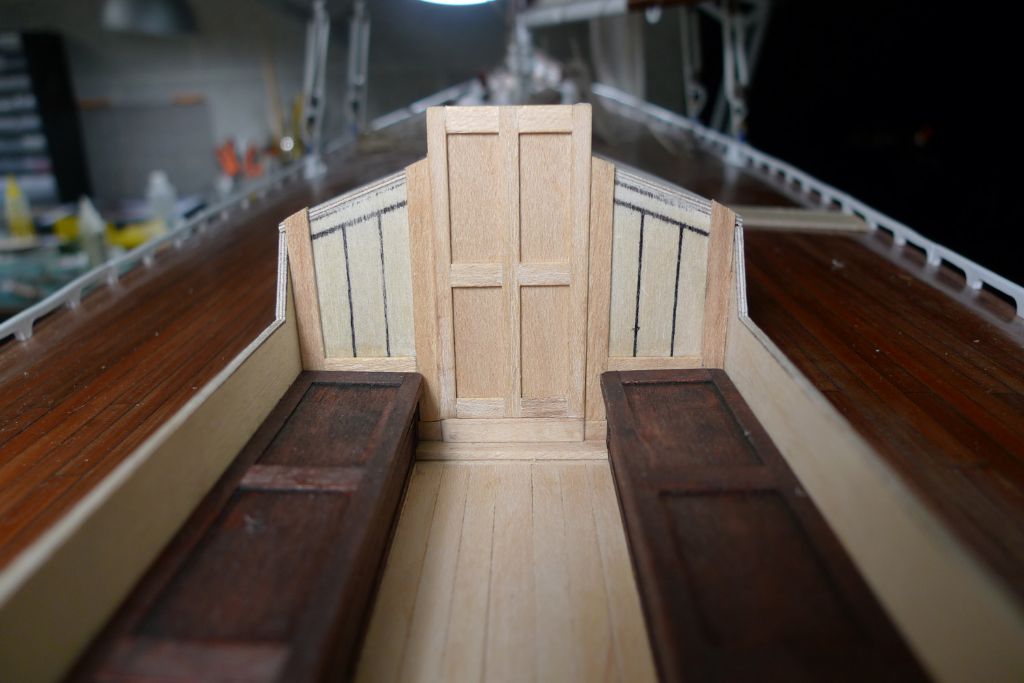
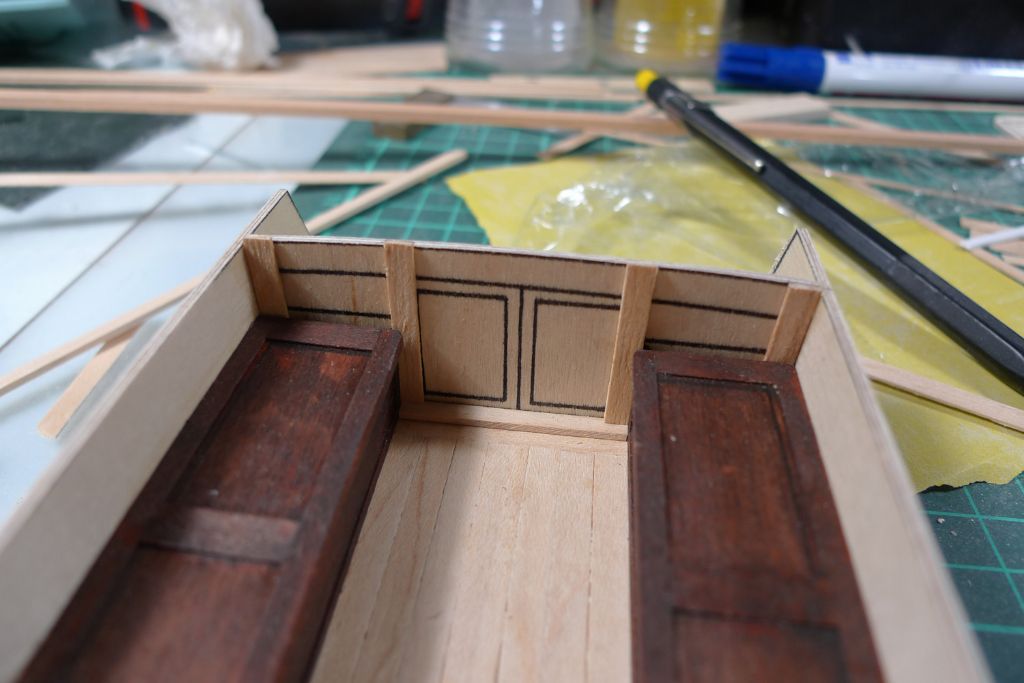
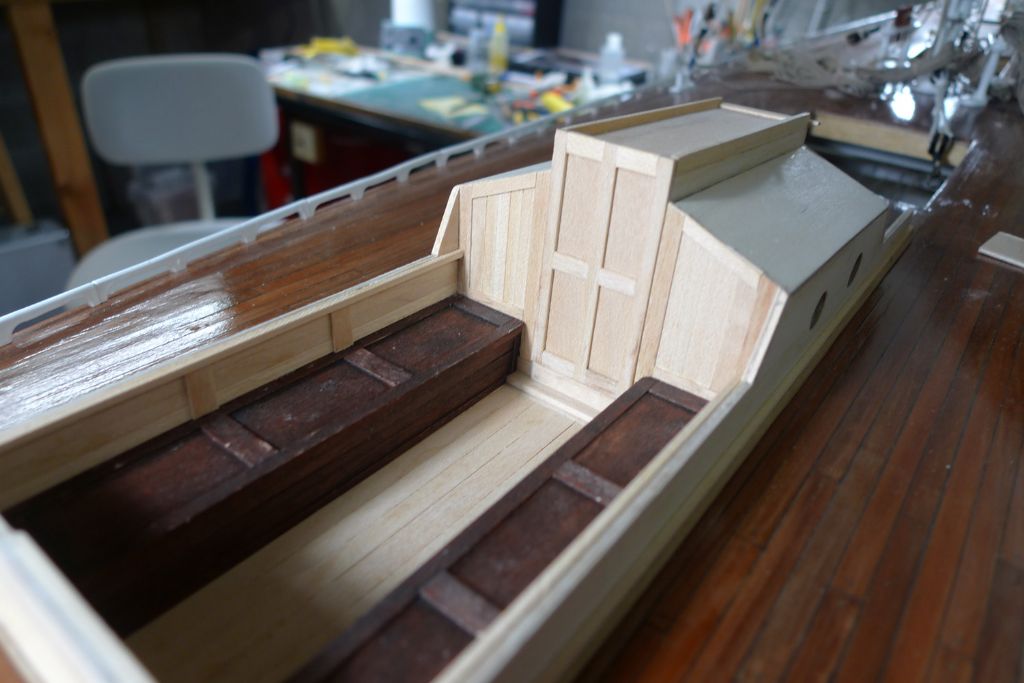
… and began timbering the cabin bulkheads on both the forrard …
… and the aft sides. The cabin doors are just for show; although it would have been possible to have them open, I didn't want to create a possible pathway for water ingress, so just made up a set of dummy doors (brass doorknobs will be added later).
The aft cockpit bulkhead got a similar treatment …
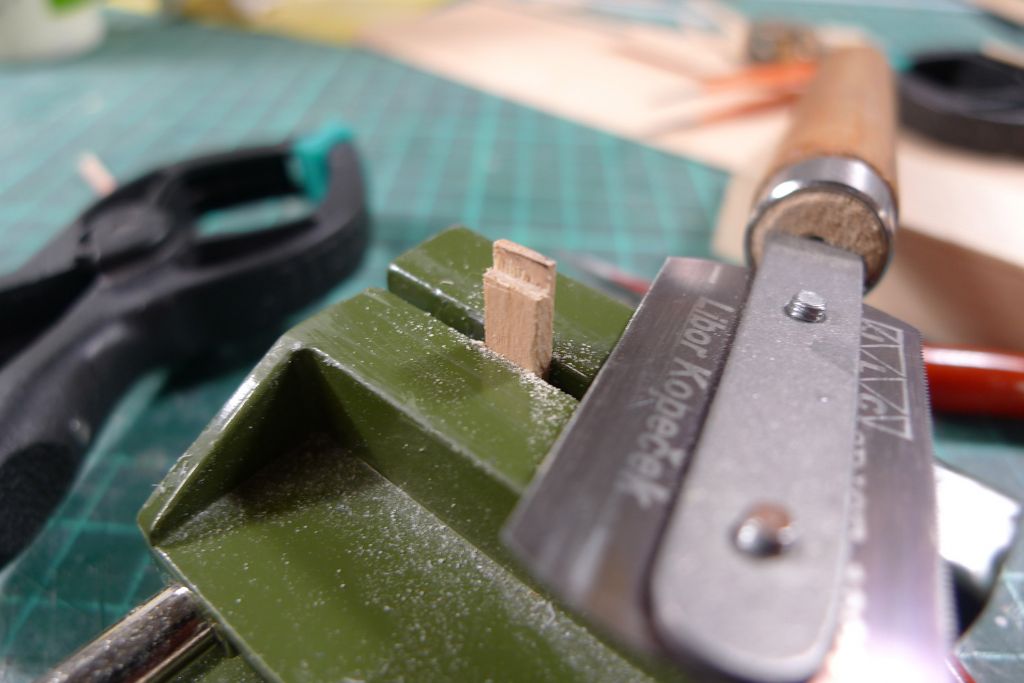
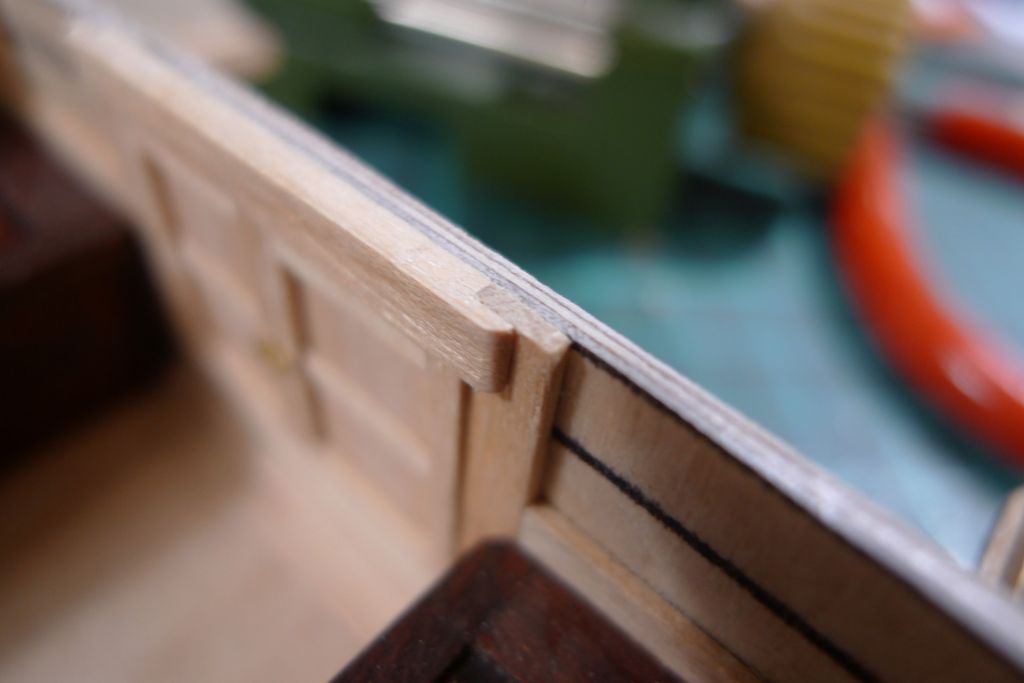
… including a rebated …
… lintel piece …
… for the equally dummy locker doors.
A few more details need to be sorted, and then it'll be time to add the cabin roof pieces, the sliding hatch (also a dummy) and to cap the cockpit edges before moving on to staining, painting and varnishing.
To be continued …
Mattias
Edited By Banjoman on 23/10/2017 10:20:47
Edited By Banjoman on 23/10/2017 10:21:07
26 October 2017 at 06:27 #73816Banjoman
Participant@banjomanThe cladding work continues …
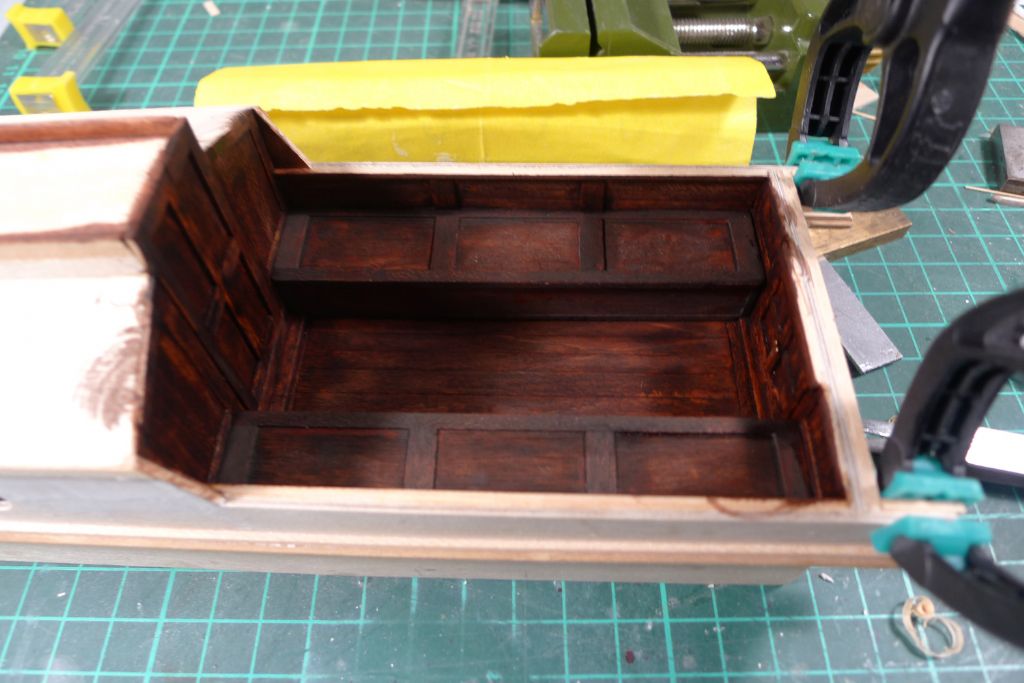
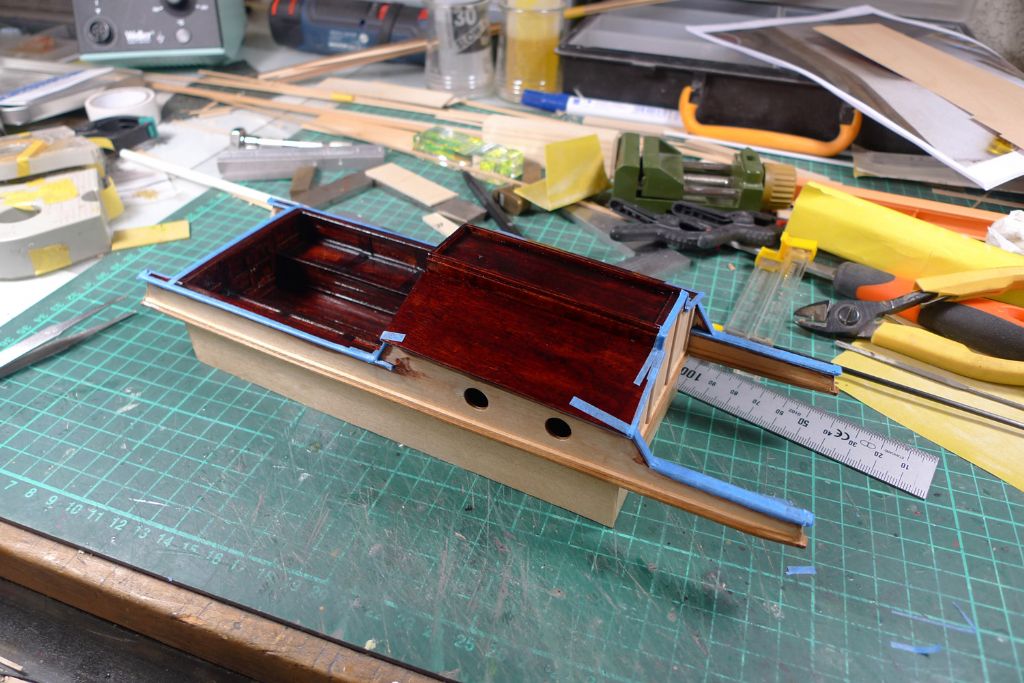
… and I have also given the the cockpit interior two coats of mahogany stain.
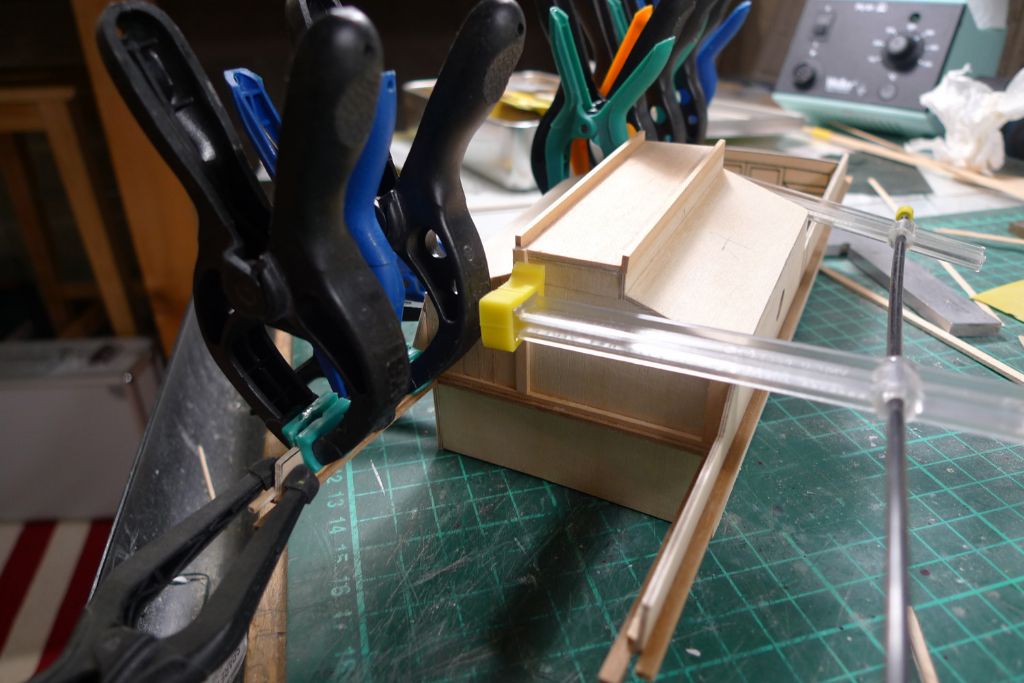
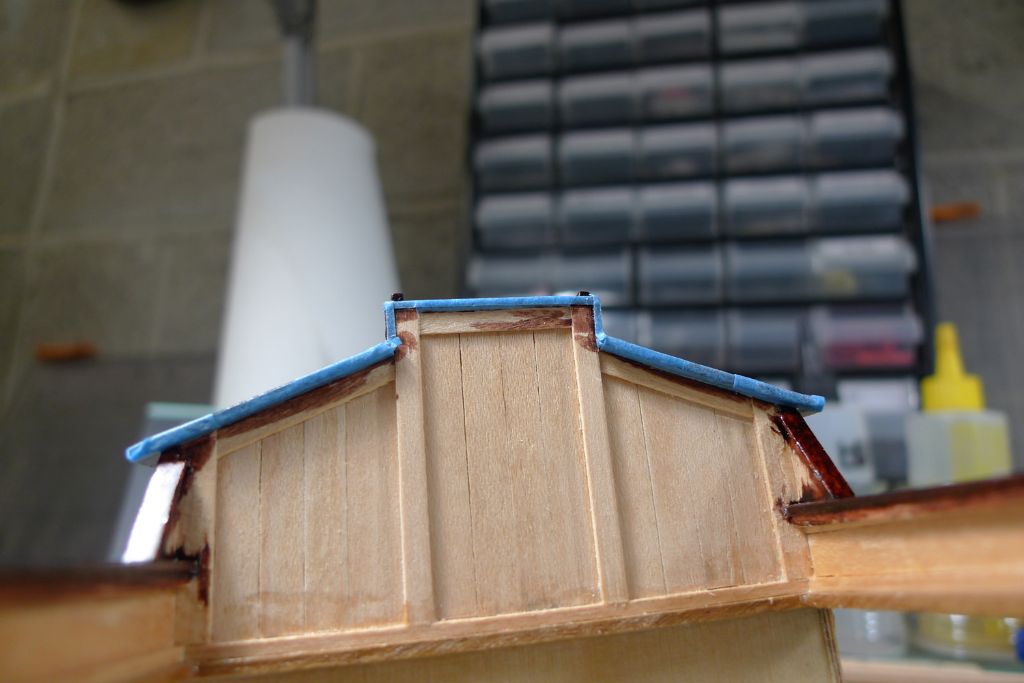
With the top edges capped, both aft …
… and forrard of the cabin …
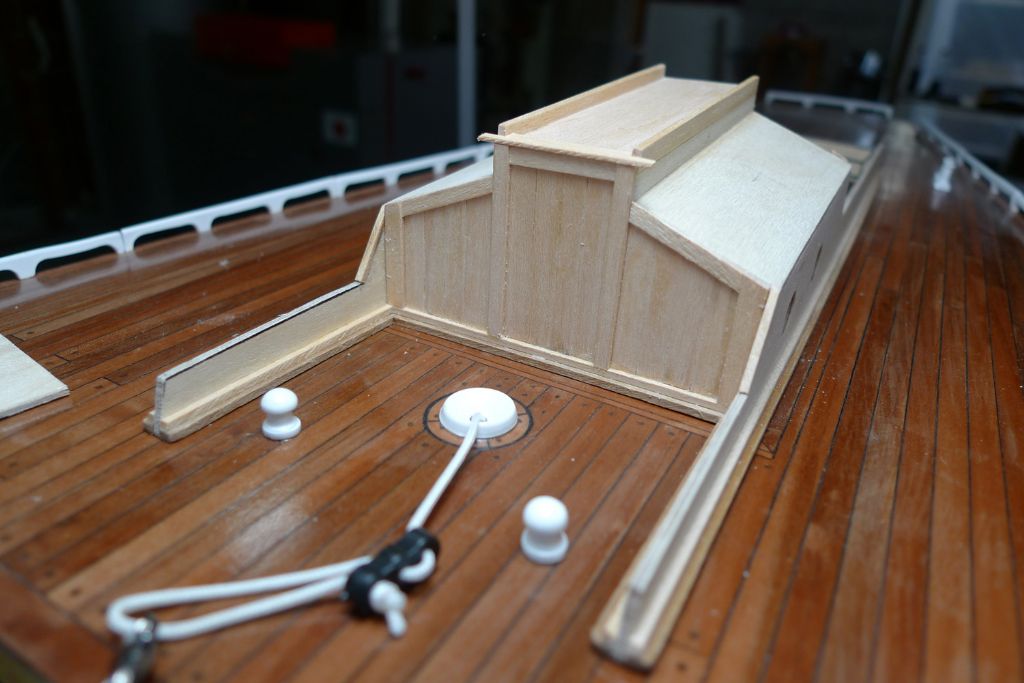
… I've also been able to glue down the two roof pieces. Except fo9r making up the dummy sliding hatch, this pretty much finsihes the woodworking bit of the cabin and cockpit assembly.
Next up, it'll be time to finish off the staining and then to add sadning sealer and paint as needed …
To be continued …
Mattias
26 October 2017 at 07:08 #73817Bob Abell 2
Participant@bobabell2Very nice furniture workmanship, Banjo……Your model is a super advert for the kit manufacturer?
If you had your lathe, you could have added a few brass portholes in the end walls?
Have you had a test float in the bath yet?……It must be tempting
All the best
Bob
26 October 2017 at 09:03 #73820Banjoman
Participant@banjomanThank you very much, Bob!

If i had had a lathe, I could indeed have made brass portholes from scratch; as it is, I will most certainly add brass portholes in the openings I've made for that precise purpose on either side of the cabin, but they will be (or rather are, as I got them already a year or so ago) store bought.
As for test float in the bath, there hasn't been one since December last year (see p. 27 of the thread: **LINK**), but once the build is finished, it is fairly likely that I'll have one more go in the tub for a final check of everything …
Mattias
26 October 2017 at 19:35 #73837Banjoman
Participant@banjomanNot much more done today, but at least the remaining parts of the cabin and cockpit that I intend to stain have been, well, stained. Once this has dried, it'll be time to get on with sealing and/or painting the rest …
Oh, and although the stain may look a bit dull at the moment, I know from experience that it'll spring to life once there's sufficient varnish on top of it …
To be continued …
Mattias
29 October 2017 at 16:27 #73899Banjoman
Participant@banjomanSo, having spoken of varnish, 'twas indeed also time to start applying said substance!
Although it would in theory have been equally possible to varnish the stained woods once the other bits had been painted, I did have my reasons for not waiting with this job.
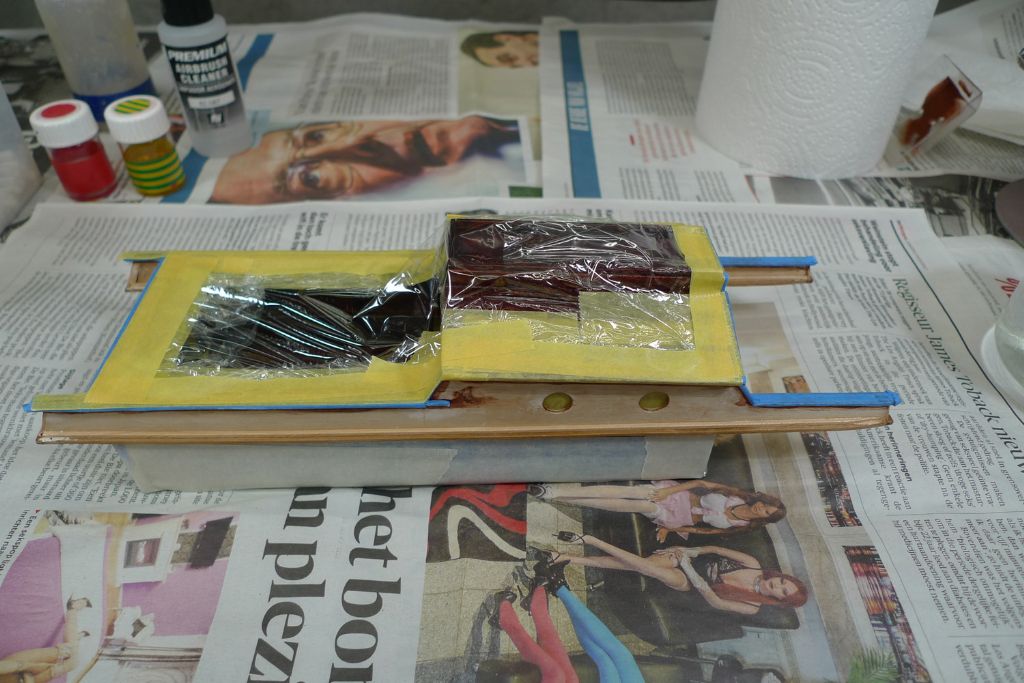
For painting, the stained areas must be masked off, and masking tape on unvarnished stained wood has, I have noticed, a tendency to take some stain with it when removed, creating very visible differences of depth of colour.
Stain can of course be reapplied, but it would be fairly tricky to do so here without risking a miscolouring of adjacent painted areas.
Thus varnish first, and paint afterwards!
To avoid a build-up of additional thickness on the areas to be painted later on, these were first masked off in their turn, after which a total of six coats of gloss varnish have been applied to all the stained wood. I plan to do one more coat today, and then I'll see again tomorrow and possible the day after that if (and if so, how many) further coats are needed …
To be continued …
Mattias
Edited By Banjoman on 29/10/2017 16:28:12
3 January 2018 at 14:16 #74815Banjoman
Participant@banjomanWell! 'tis back again that I am, after a couple of months where I've largely been otherwise occupied – the trip to England that included meeting Dave Milbourn at the the IMBS comes to mind, as does a number of gigs with the band and of course the general run-up to Christmas.
I've not completely abandond model building during these months, although progress has been slow until the last week or so, but I've spent what time there was on building rather than on reporting on said building.
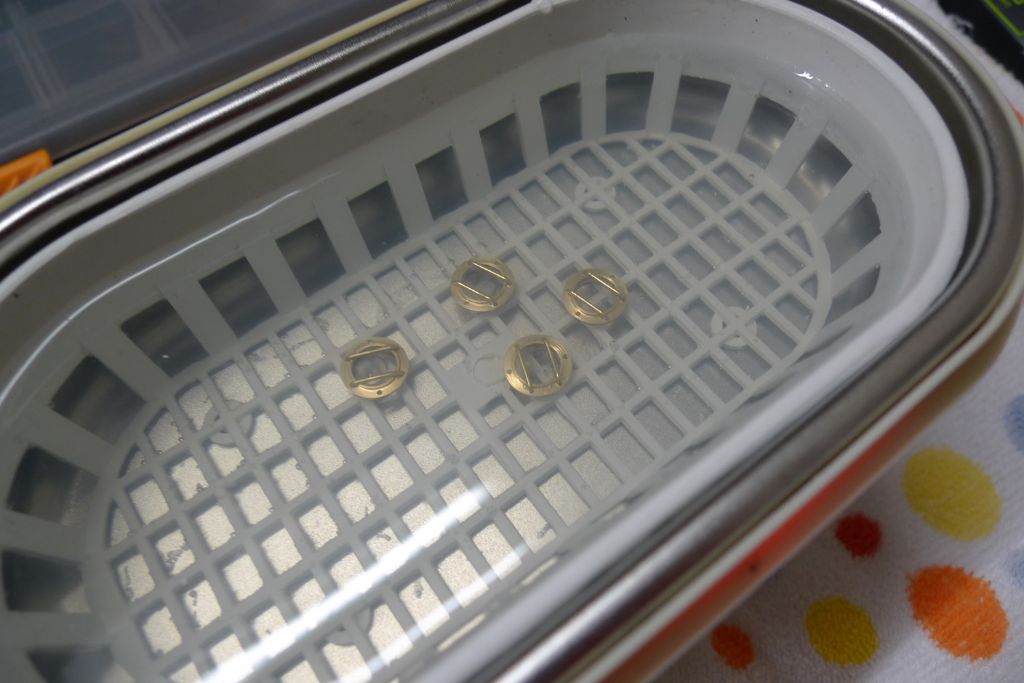
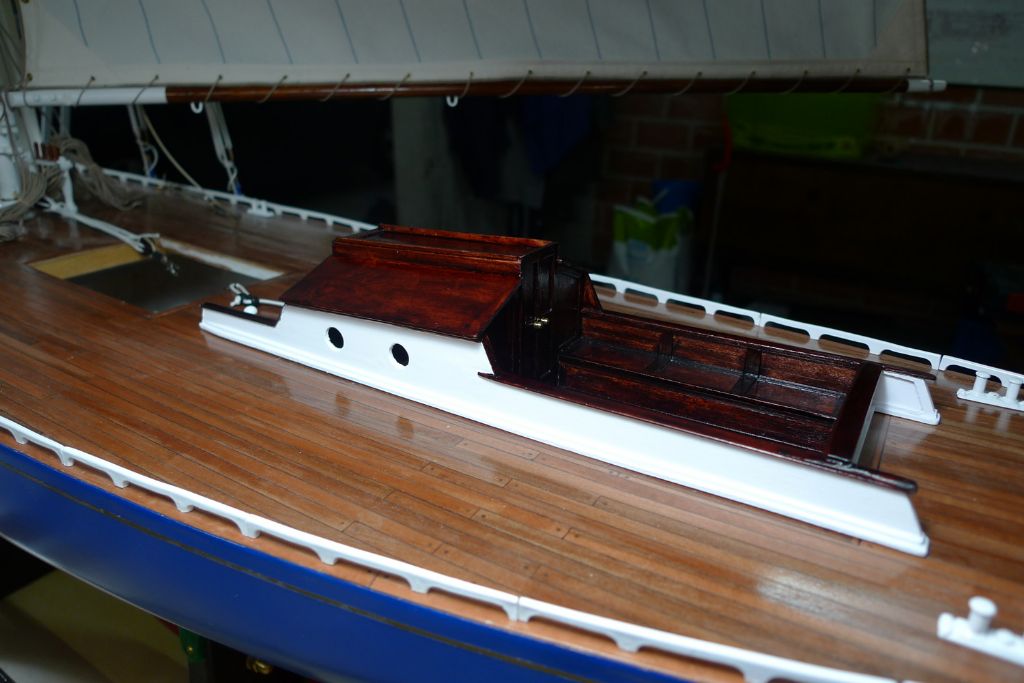
Anyway, back in October, Bob asked about brass portholes for the cabin structure, and here they are (as bought from Modelling Timbers) in the ultrasonic bath after having been polished …
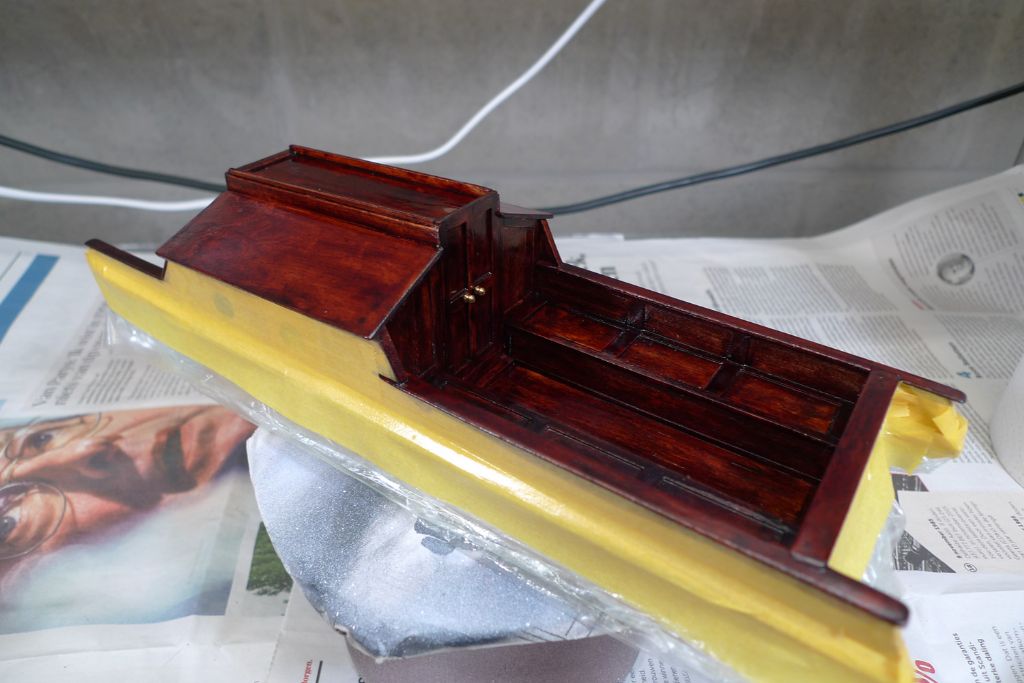
However, before they could go in, said cabin had to be painted, so it was time to start masking off …
… and masking off …
… and msking off …
… and masking off …
… and masking off (whew!) …
… until the structure was ready for painting, first with white primer …
… and then with four coats of white topcoat …
… to produce this.
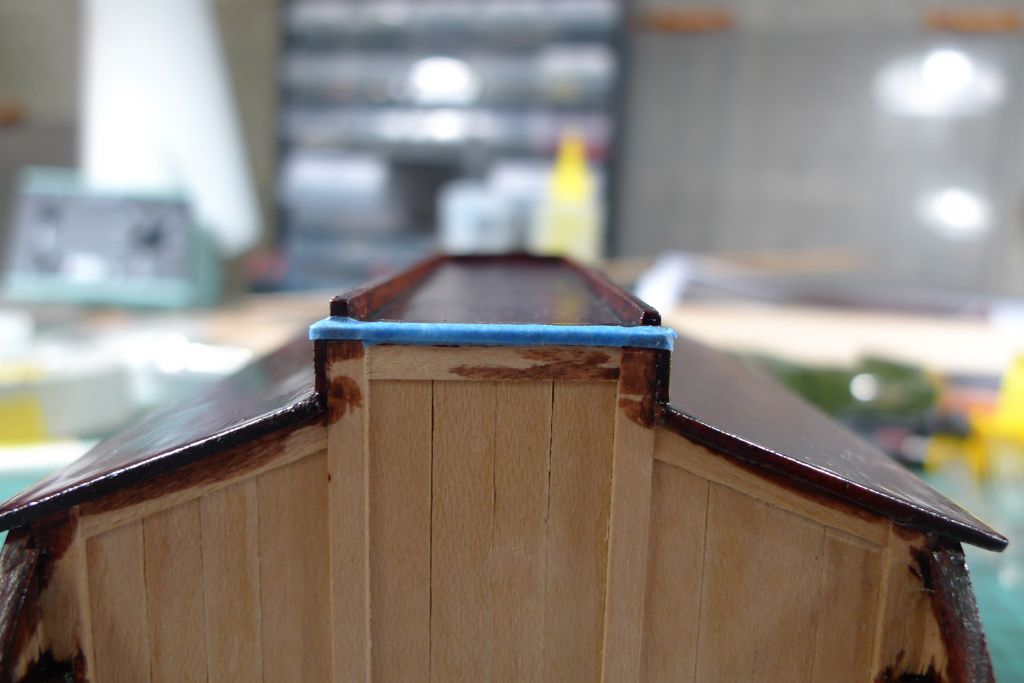
As I had feared all along, careful as I had been in masking off, the under edges of the stained and varnished timbers where mostly too narrow (between 0.5 and 1 mm) to allow the masking tape to seal them off completely …
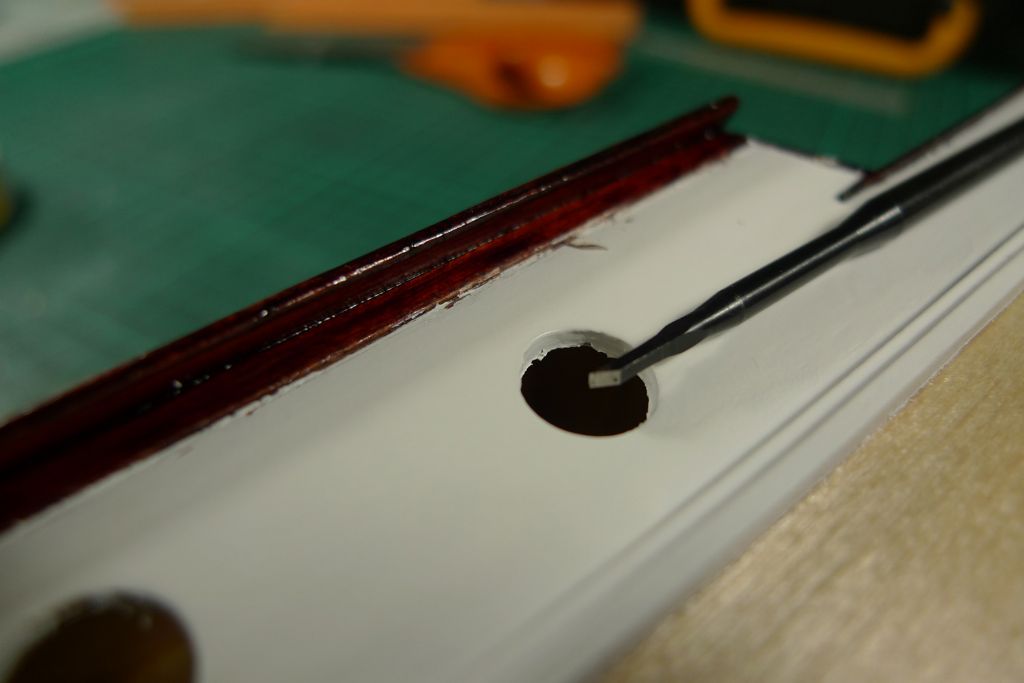
… so I got out the 1 mm wide chisel, and used the back of the edge as a scraper, to slowly scrape away the offending paint, after which the paint work was tocuhed up as needed with a brush.
The end result (no photo, I'm afraid), although not quite up to snuff, will, I think, look good enough from beyond a foot or so, and thus shall have to do.
To be continued …
Mattias
Edited By Banjoman on 03/01/2018 14:17:12
3 January 2018 at 16:22 #74820 Ray Wood 3Participant@raywood3
Hi Mattias
Great quality work from you as always
 what is next on the slipway ??
Regards Ray
3 January 2018 at 16:46 #74821Banjoman
Participant@banjomanHello Ray,
Warmest thanks for your kind words! Once I've finished Moonbeam, which really shouldn't be too long, now, I intend to scratch build a Fairey Huntsman 31 from Dave Milbourn's plans …
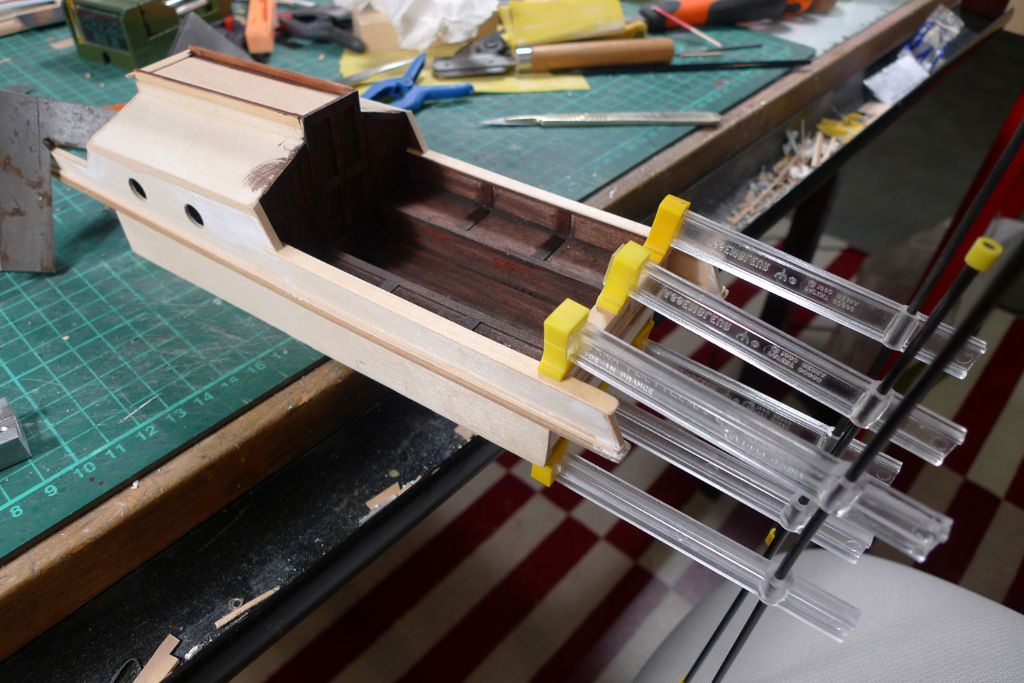
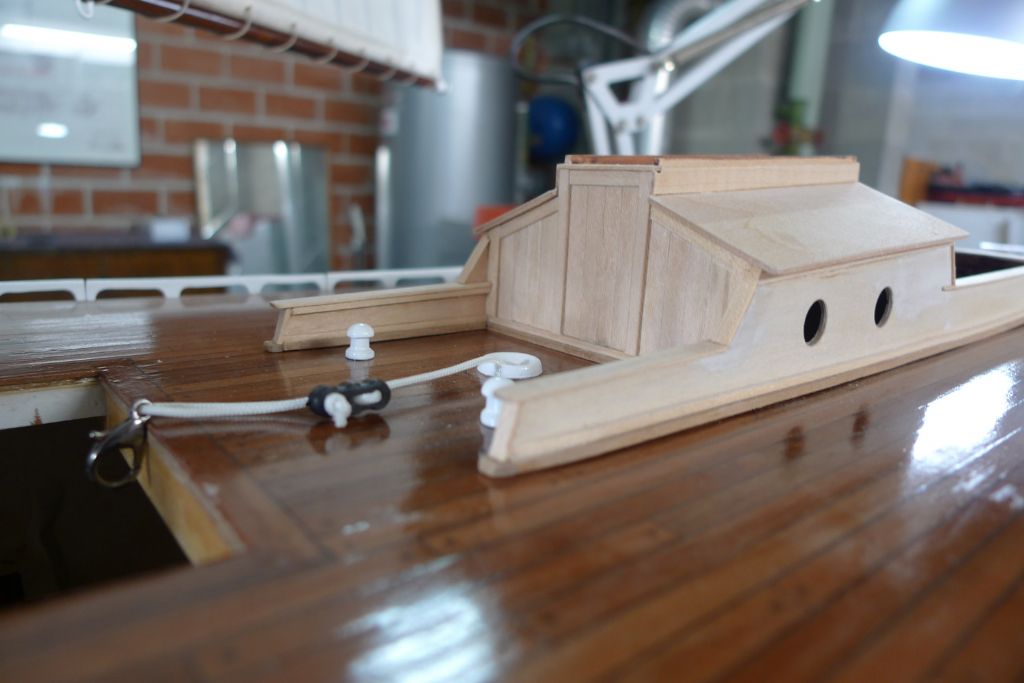
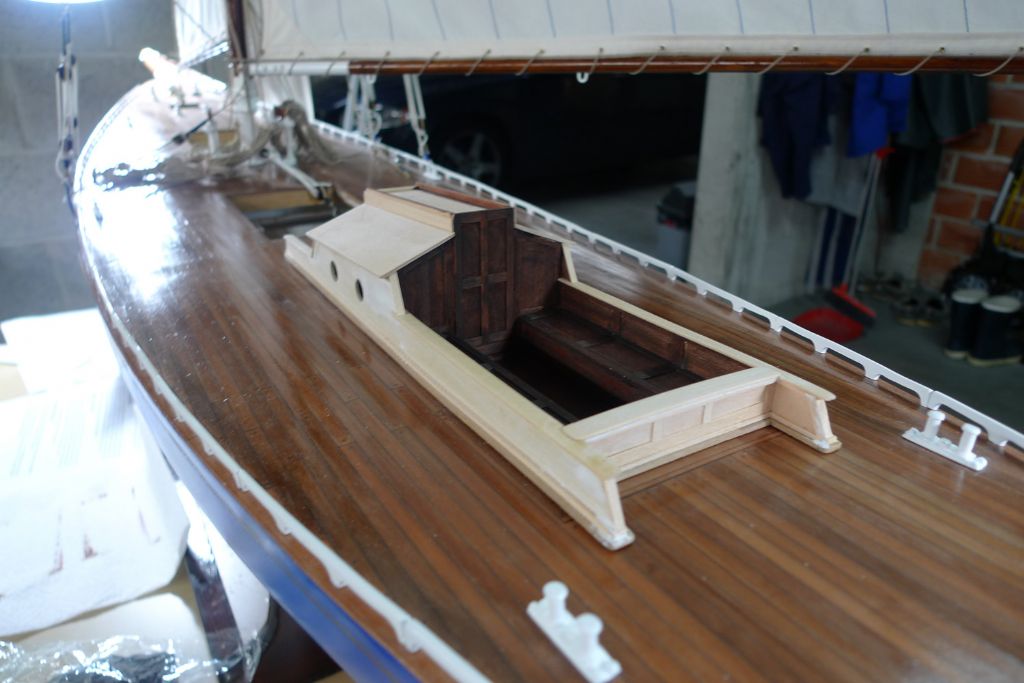
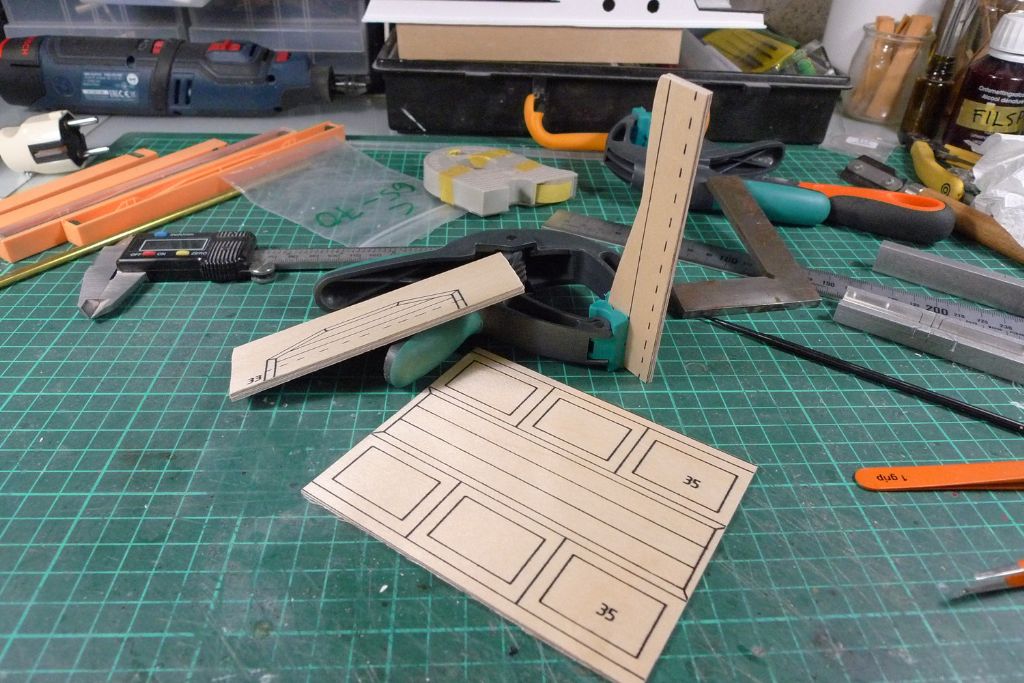
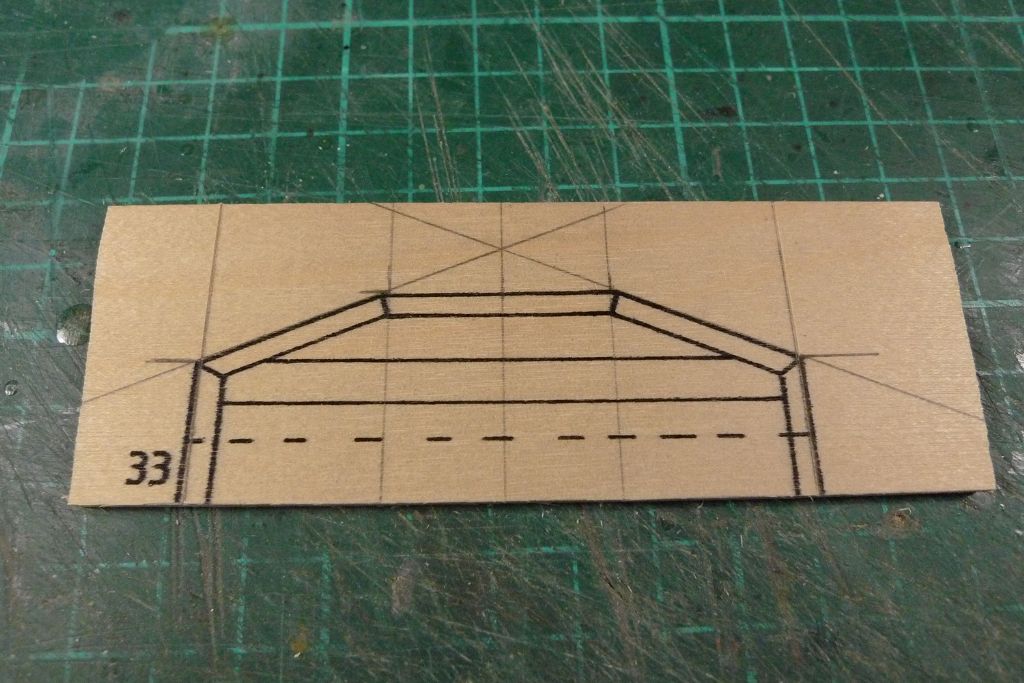
In the meantime, with the cabin and cockpit coming along, it was time to get started on the first of the two skylights. As with the prvious superstructure, I decided to use the provided, pre-printed plywood to make up the basic structure only, and therefore set about cutting out the requisite parts. To this end, the blanks for the sides and short ends were paired up and temporarily glued together at a couple of points outside of the material to be actually used. This of course allows me to cut out both parts together at the same on the bandsaw, creating two parts in one go that are as identical as makes no difference.
I then double-checked all measures and angles on the short sides, and compared them to the actual measurements of the hatch opening …
… before cutting them out.
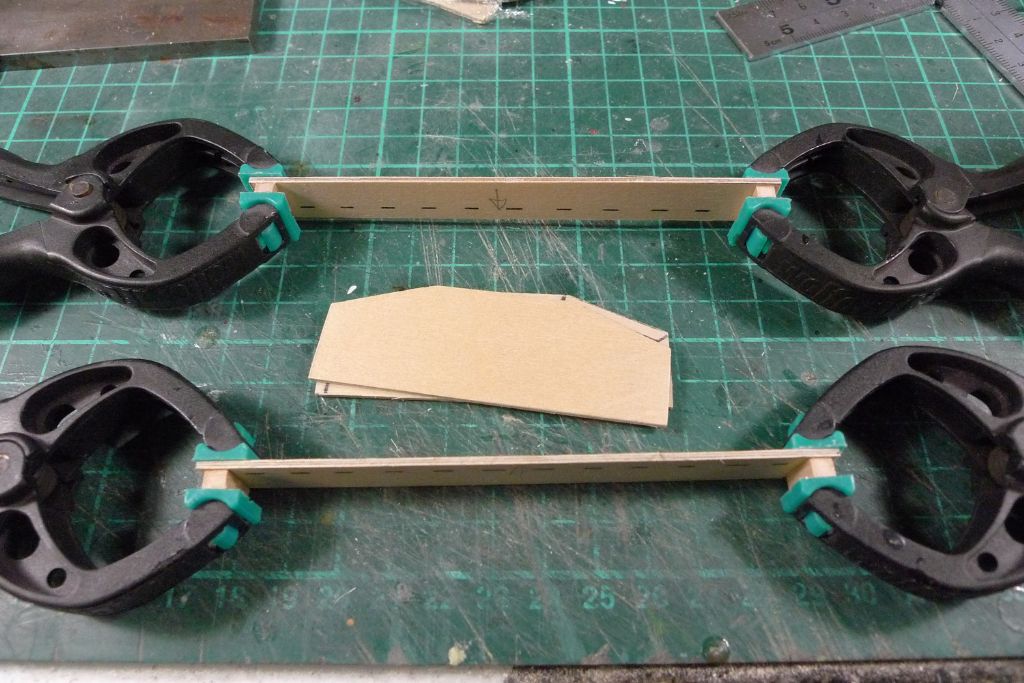
Next, I glued corner reinforcements to the insides of the long sides …
… and, once those joints had gone off, glued on the short ends as well.
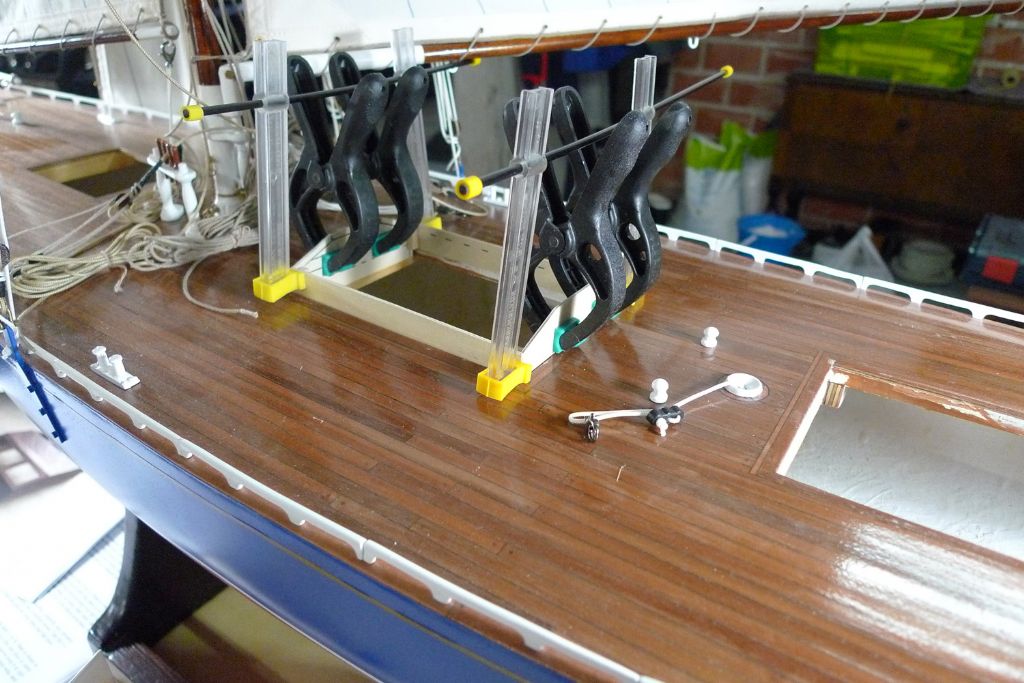
While waitin for various glue joints to go off, I prepared a simple jig from a piece of thin plasticard …
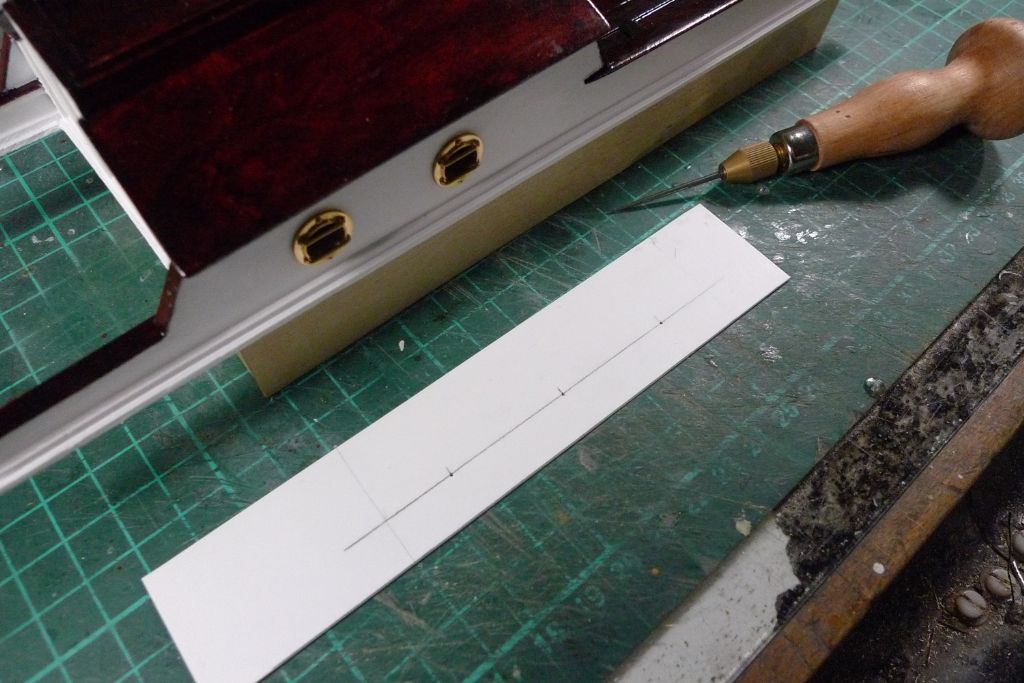
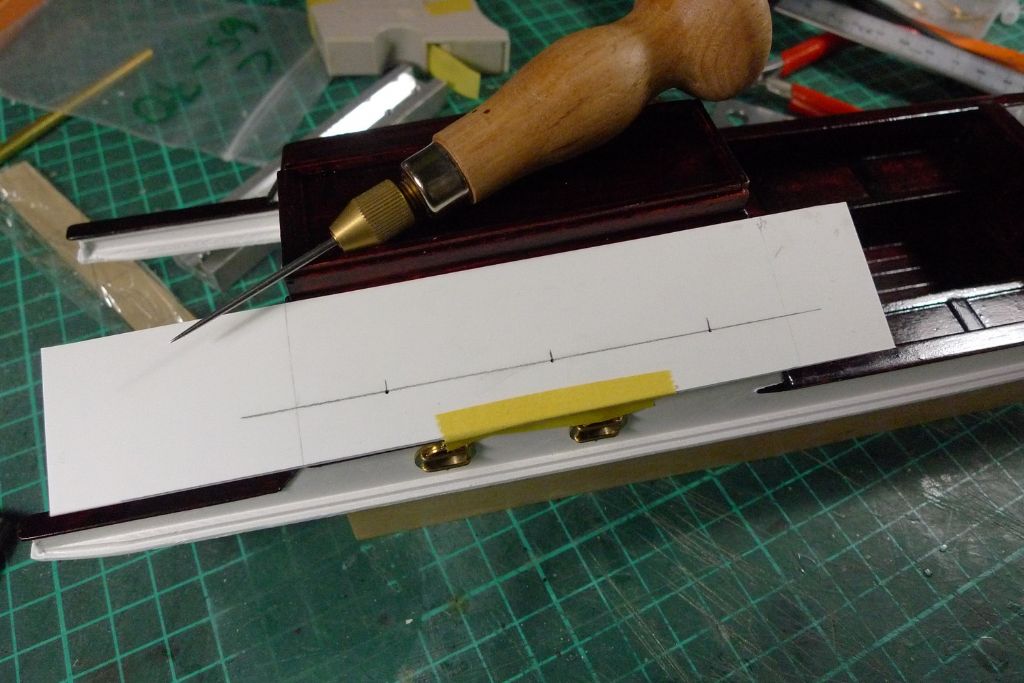
… and used it to prick out on both sides of the cabin roof …
… the places to drill for …
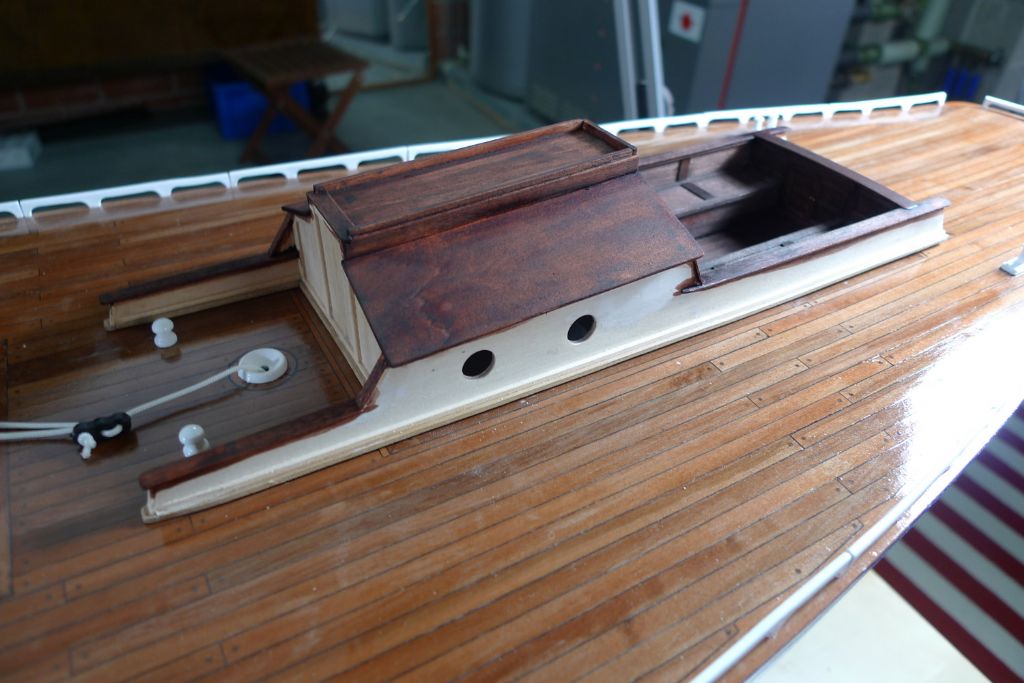
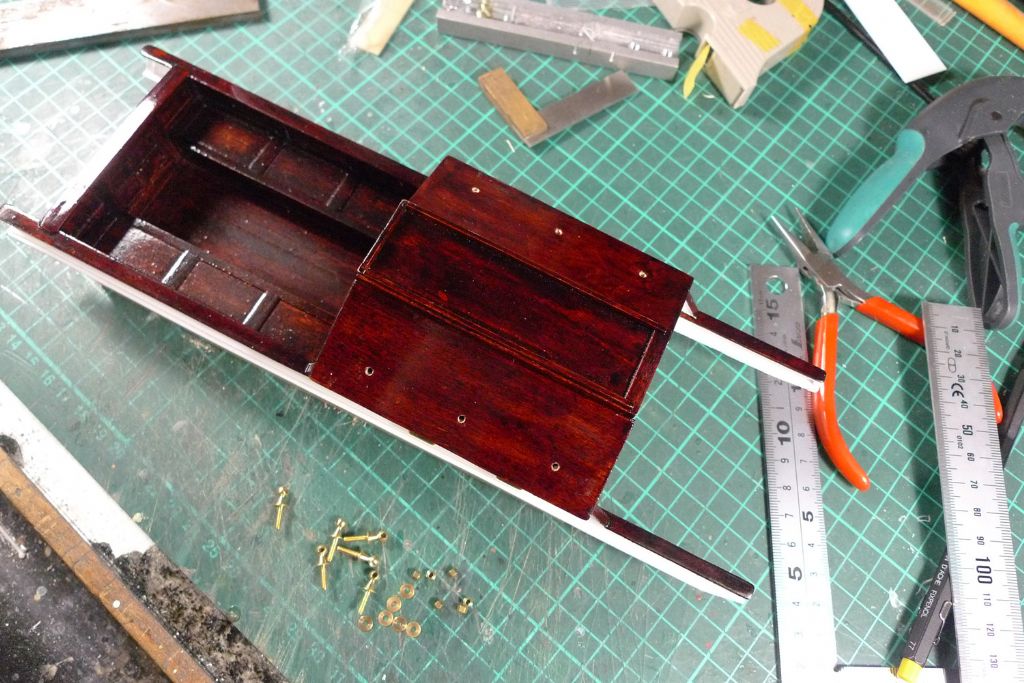
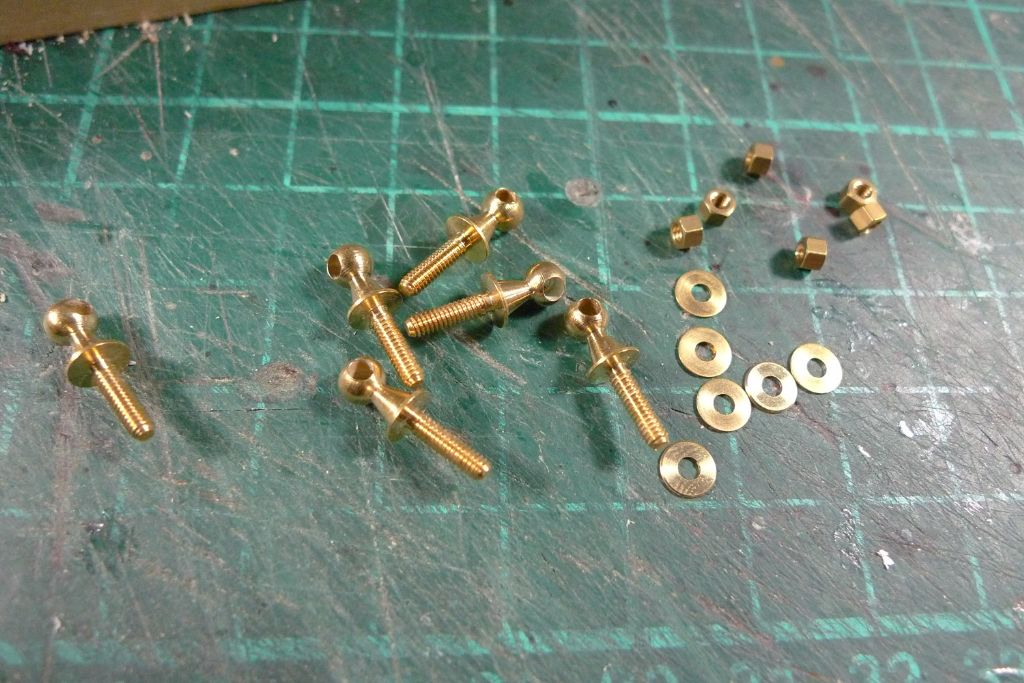
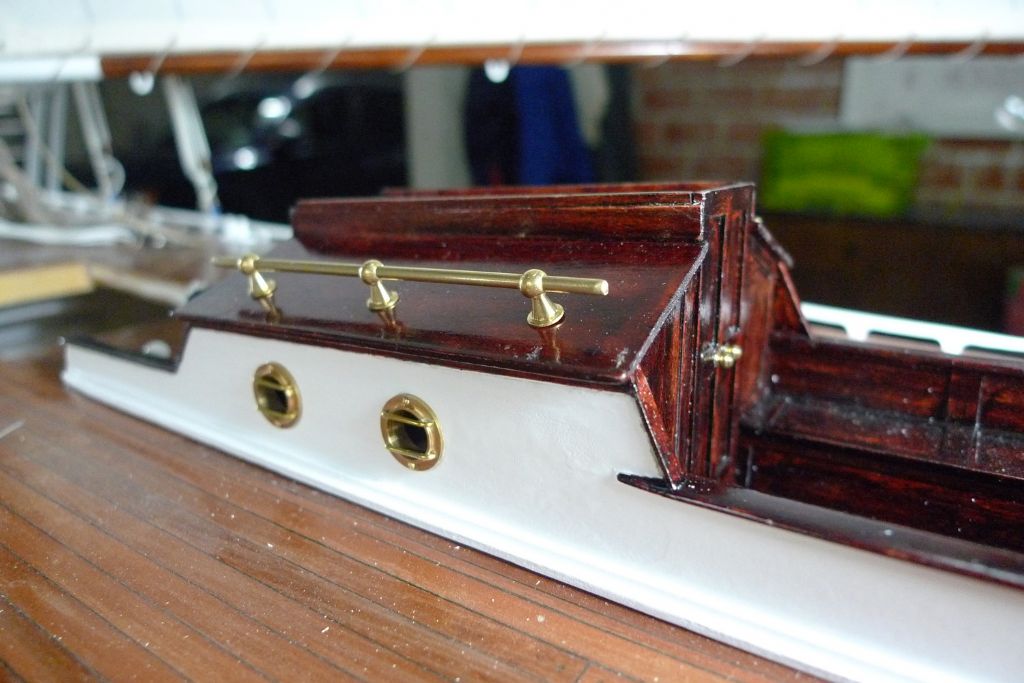
… the six hand ail supports. These are not original kit parts – the kit calls for wooden hand rails – but as I quite like the effect of brass against dar, varnished wood …
… I got these from Dieter Knupfer (**LINK**) in Germany; connected by lengths of brass rod, I think they look rather nice …

As the photo shows, the brass portholes had also been glued in place by now.
To be continued …
Mattias
-
AuthorPosts
- Please log in to reply to this topic. Registering is free and easy using the links on the menu at the top of this page.
Code of conduct | Forum Help/FAQs
Latest Replies
Home › Forums › Sailing Models › Topics
-
- Topic
- Voices
- Posts
- Last Post
-
-
Fairey Huntsman 31
1
2
…
5
6
Started by:
 Chris Fellows
in: Build Blogs
- 14
- 139
-
3 hours, 28 minutes ago
 Chris Fellows
-
Fairey Faun
1
2
3
Started by:
 Chris Fellows
in: Build Blogs
- 7
- 58
-
3 hours, 50 minutes ago
 Chris Fellows
-
Vic Smeed’s Silver Mist
1
2
…
32
33
Started by:
Bob Abell 2 in: Scratch build
- 4
- 822
-
4 hours, 29 minutes ago
 Tony Hadley
-
Fairey Huntsman 28
1
2
…
7
8
Started by:
 Chris Fellows
in: Build Blogs
- 1
- 195
-
5 hours, 58 minutes ago
 Chris Fellows
-
Eezebilt RAF Fire Boat
Started by:
Tim Cooper in: Build Blogs
- 2
- 3
-
6 hours, 33 minutes ago
 Dave Reed
-
Feathered Friends
Started by:
 Chris Fellows
in: Soapbox
- 3
- 7
-
9 hours, 40 minutes ago
 Chris Fellows
-
4D Modelshop
Started by:
Keith Long in: Scratch build
- 6
- 7
-
10 hours, 8 minutes ago
 Chris Fellows
-
John Cobb’s Crusader
1
2
…
7
8
Started by:
 Paul T
in: Scratch build
- 1
- 192
-
1 day, 6 hours ago
 John W E
-
Complex Automata
Started by:
 Colin Bishop
in: Soapbox
- 1
- 1
-
2 days, 8 hours ago
 Colin Bishop
-
RAF Fireboat ID
Started by:
 Dave Reed
in: Collectors’ corner
- 8
- 24
-
3 days, 9 hours ago
Tim Cooper
-
TID steam tug 42″ – PN Thomas drawing enlarged
1
2
Started by:
 Ray Wood 3
in: Scratch build
- 8
- 33
-
4 days, 3 hours ago
 Richard Simpson
-
Lady of Skye (puffer)
1
2
Started by:
 mick east
in: Build Blogs
- 9
- 43
-
4 days, 13 hours ago
 Richard Simpson
-
Building a hull.
Started by:
 mick east
in: Scratch build
- 7
- 10
-
6 days, 12 hours ago
 Ray Wood 3
-
Todays Boating
1
2
…
210
211
Started by:
 ashley needham
in: All things floating
- 84
- 5,252
-
1 week ago
 Colin Bishop
-
Sea Rover Restoration
Started by:
harry smith 1 in: Collectors’ corner
- 4
- 10
-
1 week ago
 Richard Simpson
-
WORKSHOP LIGHTING
Started by:
 John W E
in: All things floating
- 9
- 18
-
1 week, 1 day ago
 Colin Bishop
-
Mayhem Website Down
Started by:
 Colin Bishop
in: All things floating
- 4
- 10
-
1 week, 4 days ago
 Colin Bishop
-
MAGGIE M trawler
Started by:
 sammyk
in: Buy/Sell or Trade
- 2
- 3
-
1 week, 4 days ago
 sammyk
-
meter
Started by:
 Alasdair Allan
in: All things floating
- 5
- 16
-
1 week, 6 days ago
 Chris Fellows
-
River Queen 2”- 1’.
Started by:
Richard B in: Steam powered models
- 5
- 7
-
1 week, 6 days ago
Richard B
-
Deluxe Superphatic Glue.
Started by:
 Colin Bishop
in: All things floating
- 4
- 12
-
2 weeks ago
 Chris Fellows
-
How to add photos to your posts
Started by:
 Colin Bishop
in: Adding Images to Forum Posts
- 3
- 16
-
2 weeks ago
Len Morris 2
-
Cataract
Started by:
Bob Wilson in: Soapbox
- 2
- 4
-
2 weeks, 1 day ago
 Colin Bishop
-
The mighty tug Wattle
1
2
3
Started by:
 mick east
in: Build Blogs
- 10
- 61
-
2 weeks, 1 day ago
 Richard Simpson
-
Clyde Puffer Glenaray
1
2
3
Started by:
 Alasdair Allan
in: Build Blogs
- 6
- 57
-
2 weeks, 4 days ago
 Alasdair Allan
-
Fairey Huntsman 31
1
2
…
5
6
-


