The world's leading magazine for all model boating interests
Moonbeam
Moonbeam
Home › Forums › Sailing Models › Moonbeam
- This topic is empty.
-
AuthorPosts
-
16 March 2017 at 19:20 #70340
Banjoman
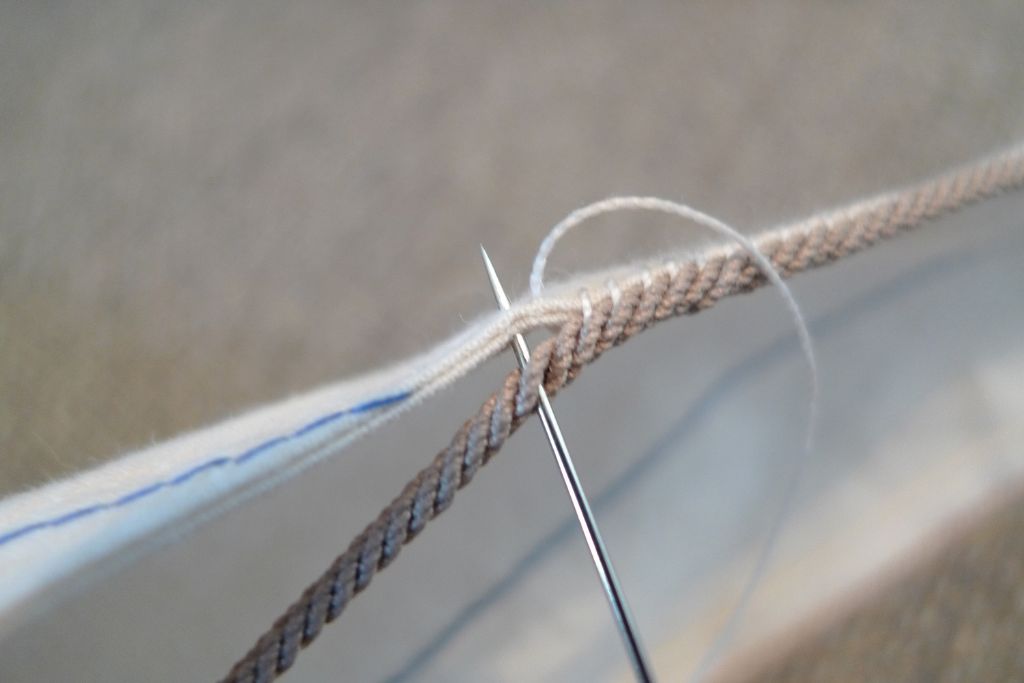
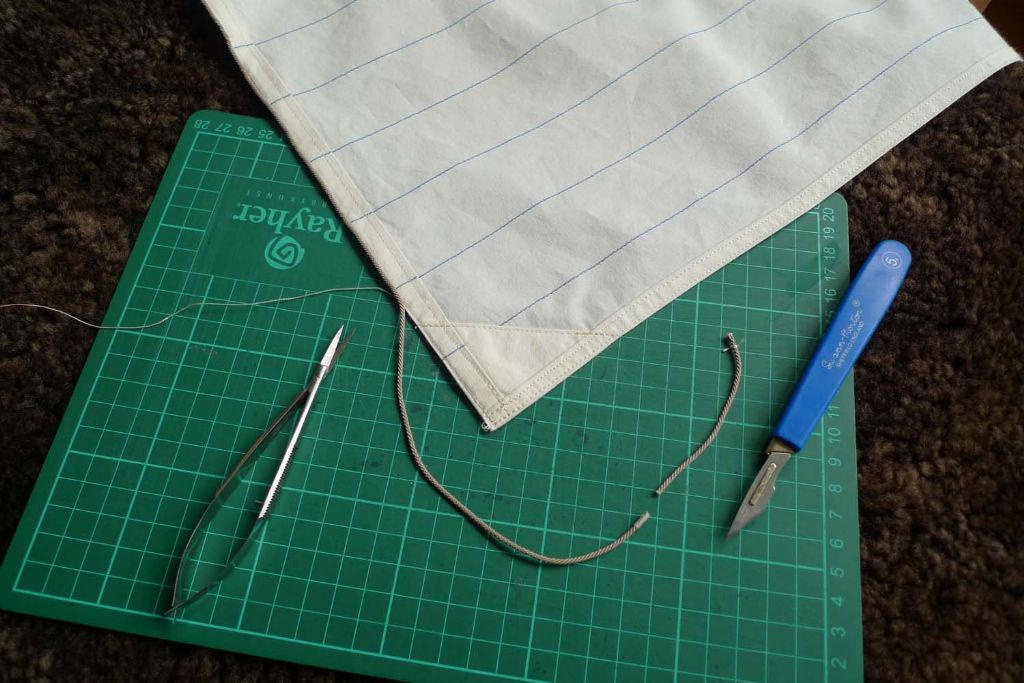
Participant@banjomanThank you very much, Ray! And yes, I can sort of see what you mean – in one way the contrasting white rope looks very nice against the brick red sail, but a more matching colour might have looked even better! But we live and learn … and for my part, I have finally twigged how the boltropes should be sewn on!
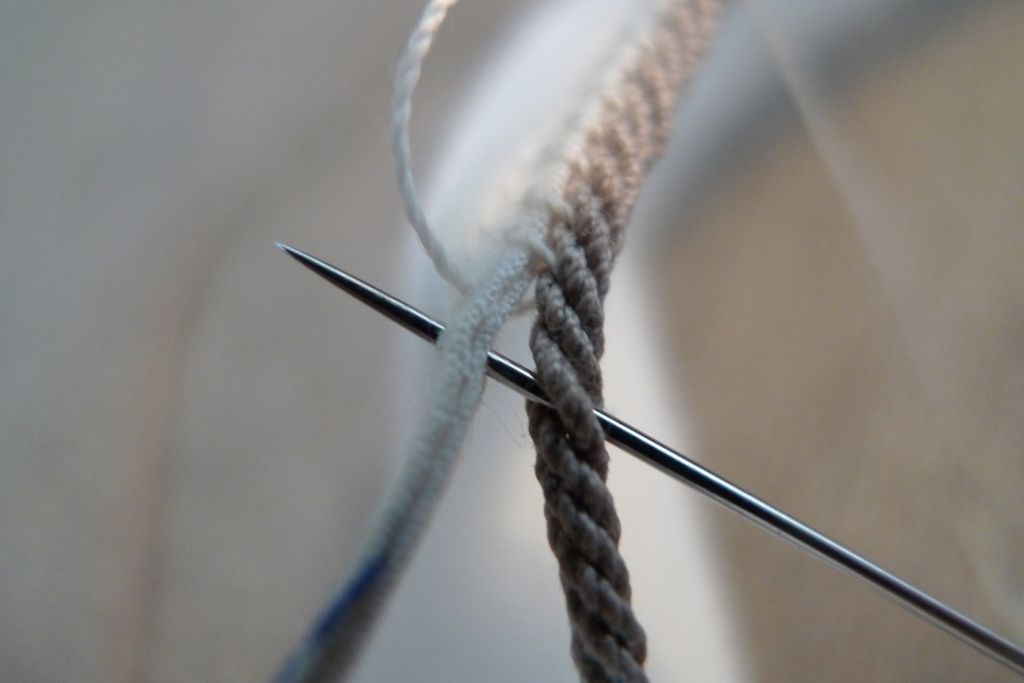
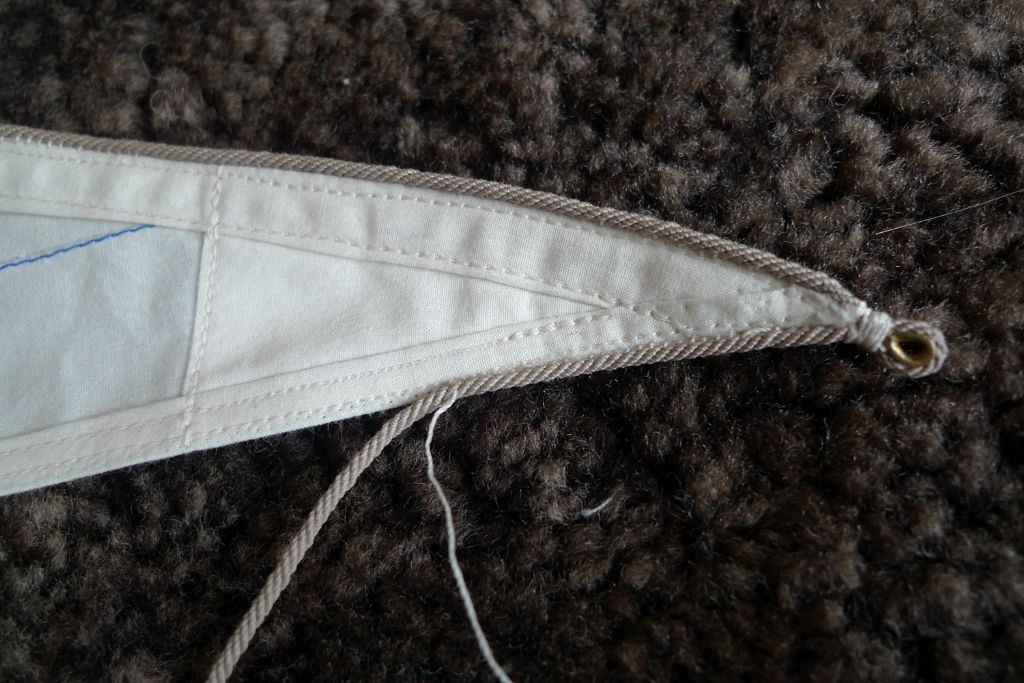
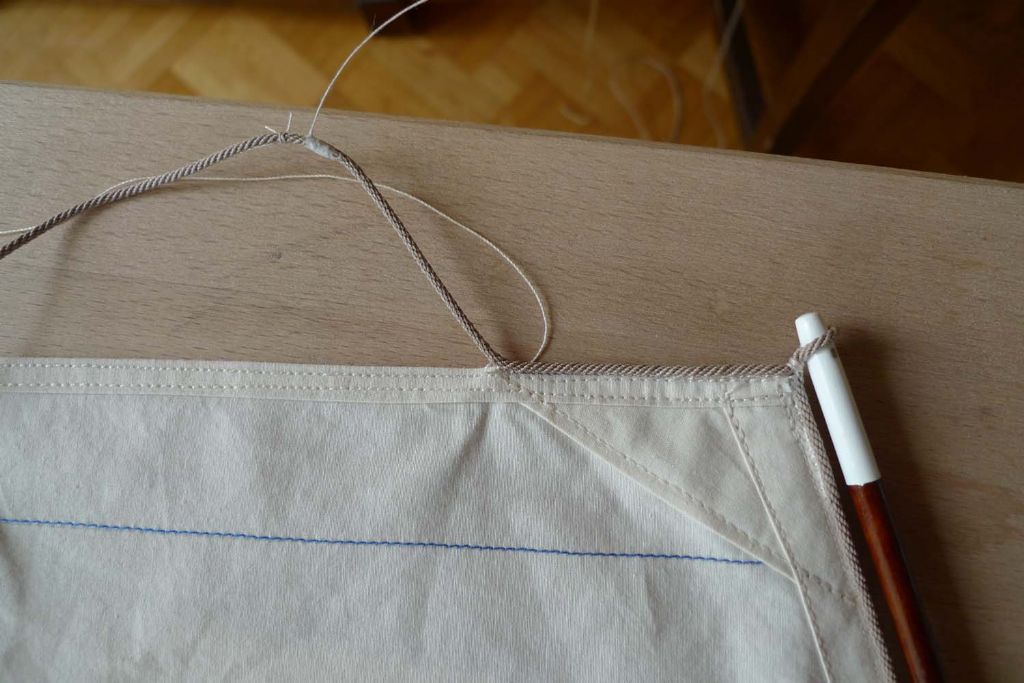
The trick is to actually not pierce the strands of the rope with the needle …
… but to slip it in between the strands, each time one turn of the strands beyond the previous stitch …
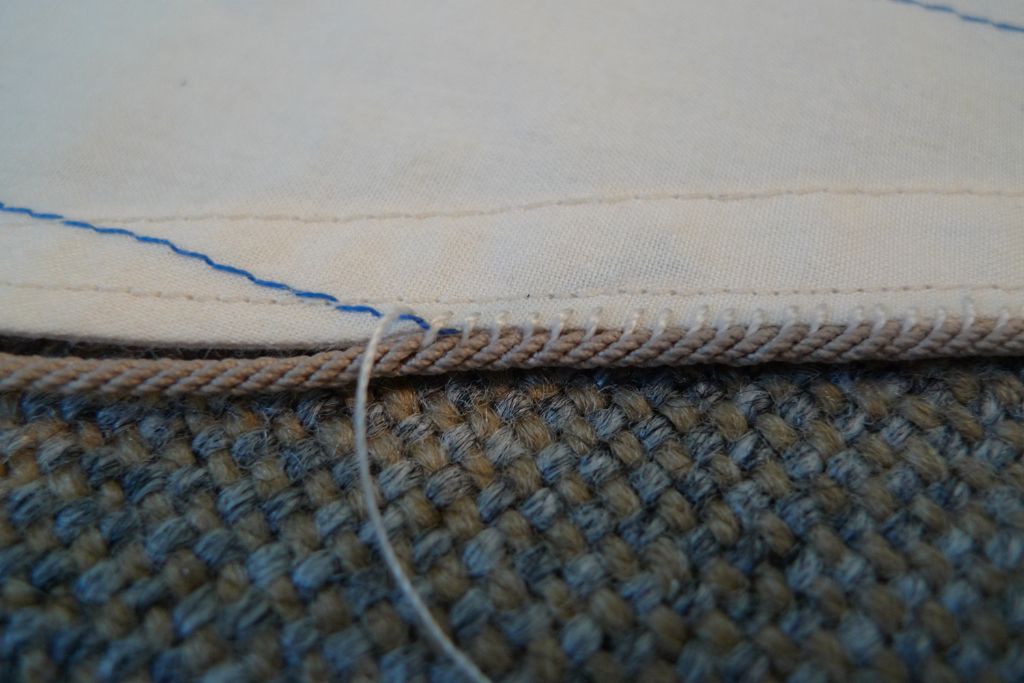
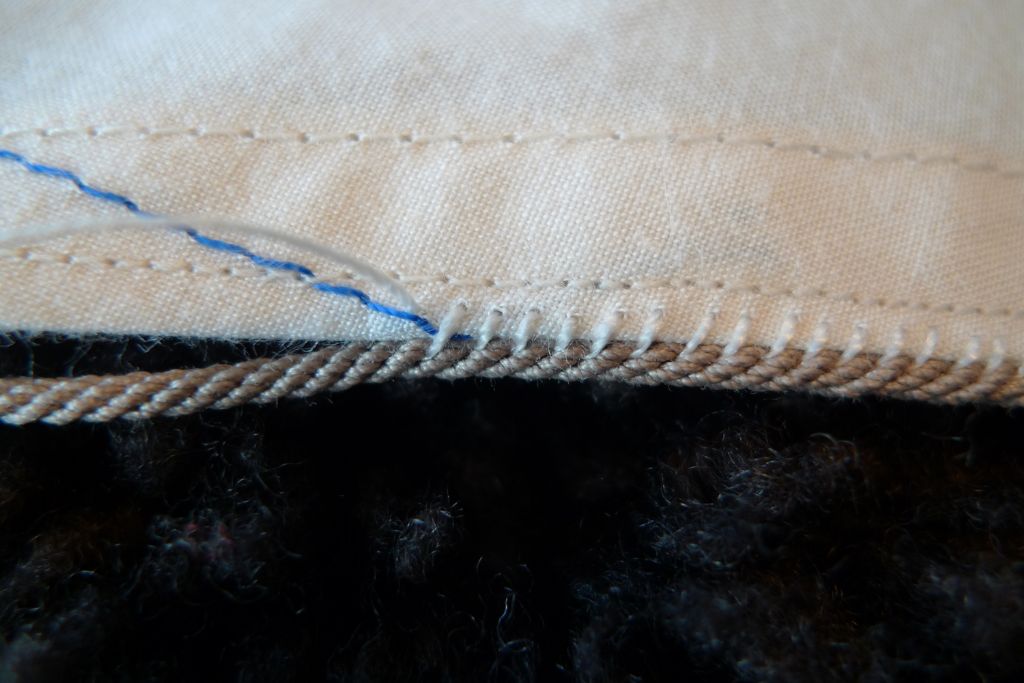
… before taking it through the cloth!
In this way (a) the sewing thread no longer gets itself in a twist when pulled through (yay!), (b) the stitches pretty much automatically become neat and evenly spaced, and (c) the rope comes to lay just where it should, on the port side edge of the sail and sticking out about halfway beyond that edge.
I can't quite remember where, but I seem to recall reading a text about full size practice that pretty much exactly described this technique.
To be continued …
Mattias
Edited By Banjoman on 16/03/2017 19:21:07
Edited By Banjoman on 16/03/2017 19:21:46
16 March 2017 at 19:39 #70341Bob Abell 2
Participant@bobabell2You have the patience of Jobe, Banjo!…….Well done
Very nice stitching
You certainly have passed the long dark hours of Winter, amicably!
Bob
17 March 2017 at 08:16 #70346Banjoman
Participant@banjomanThank you, Bob! We'll have to see, though, how well that patience will hold up — so far I've done about a foot of boltrope stitching, with maybe another 15 feet or so to go … But at least the result looks nice enough to encourage me to, as it were, Carry On Up The Luff …

Mattias
19 March 2017 at 20:49 #70366Banjoman
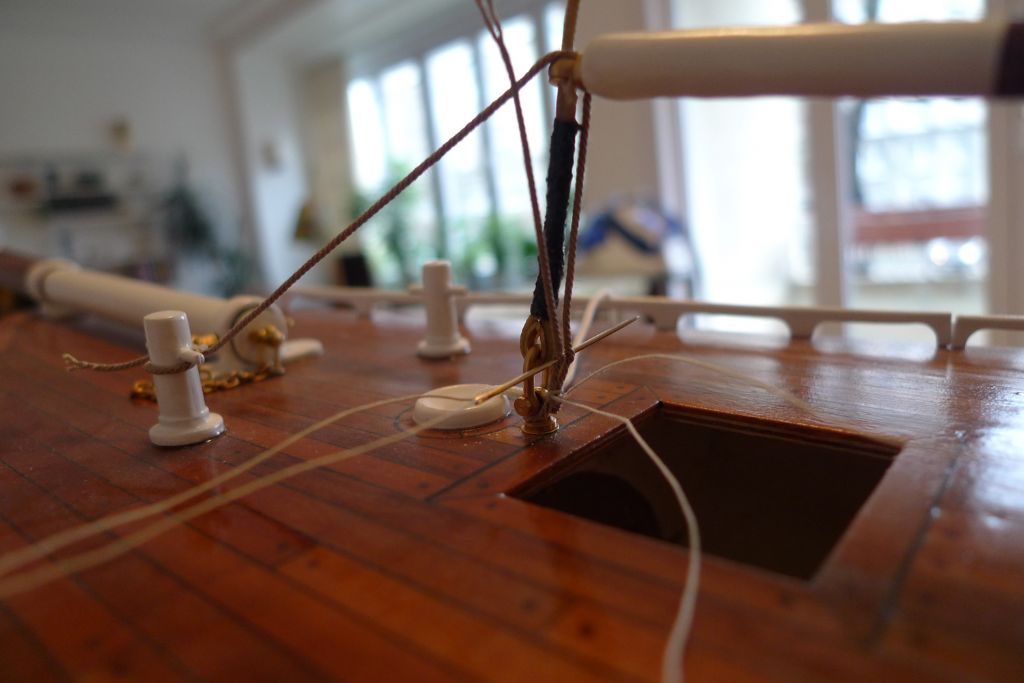
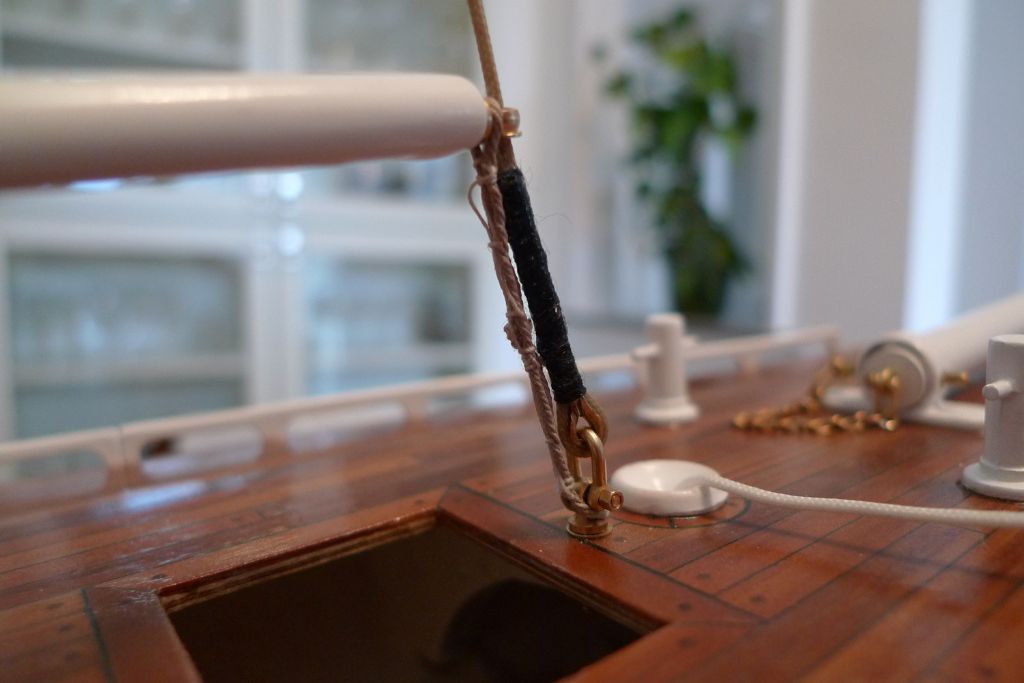
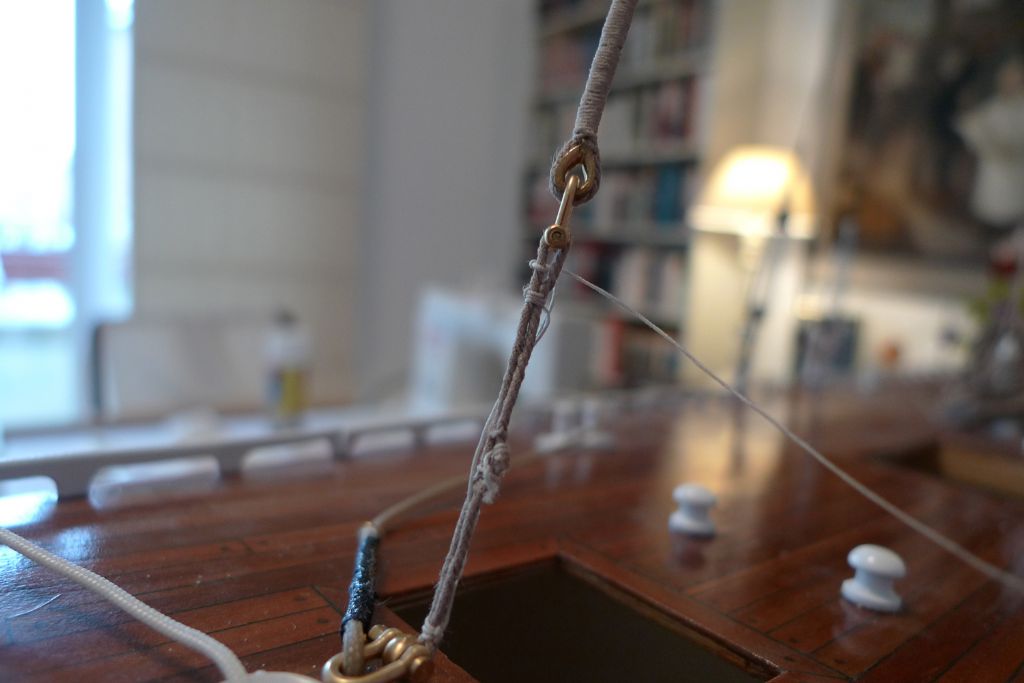
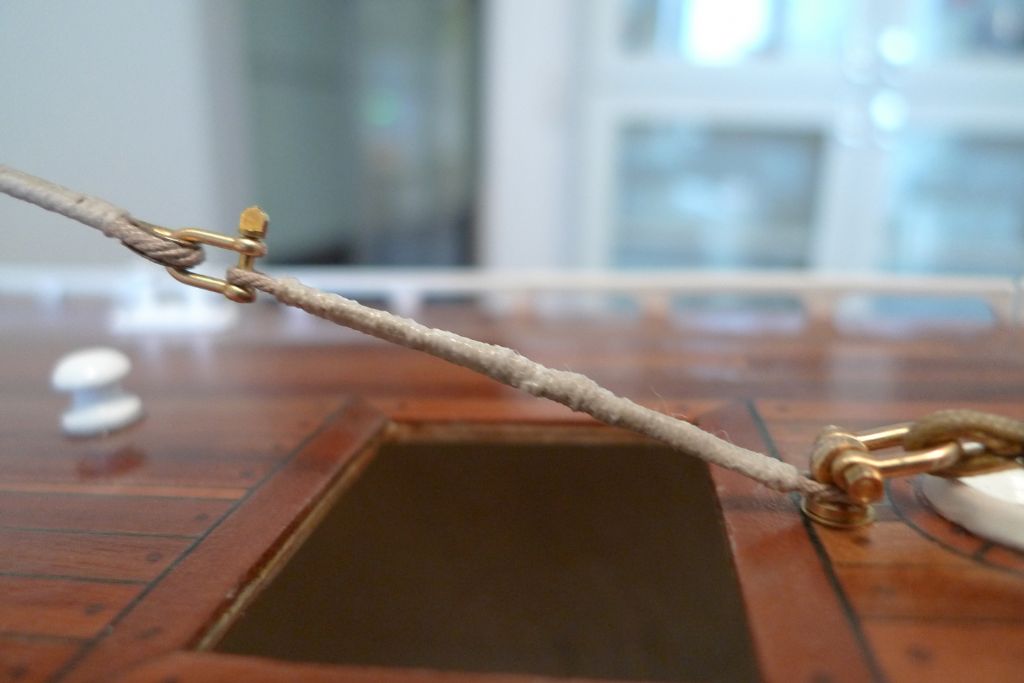
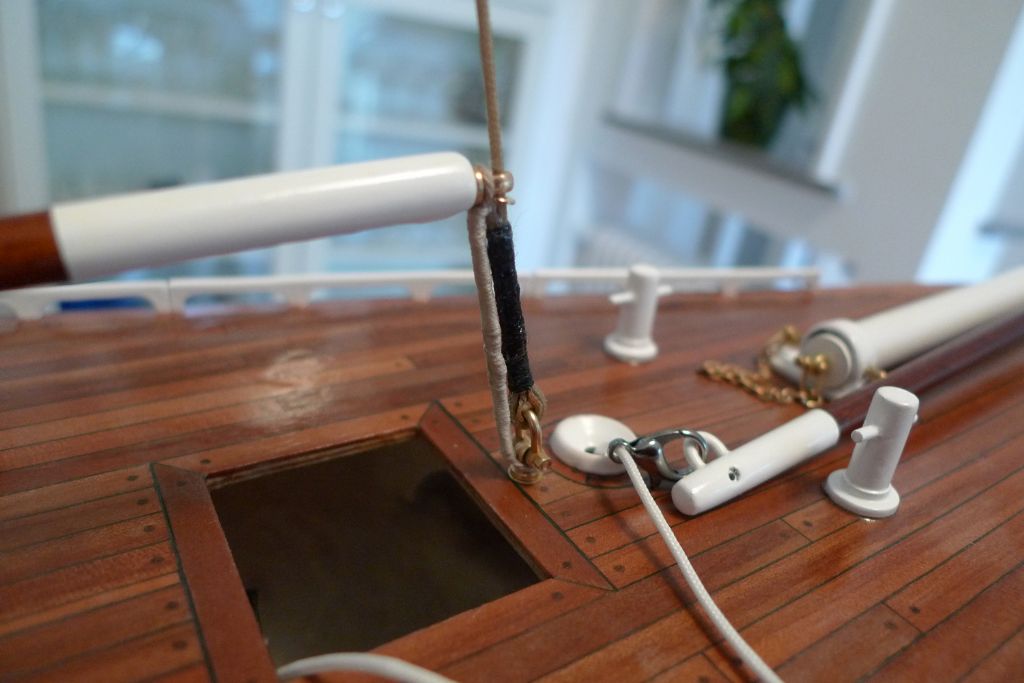
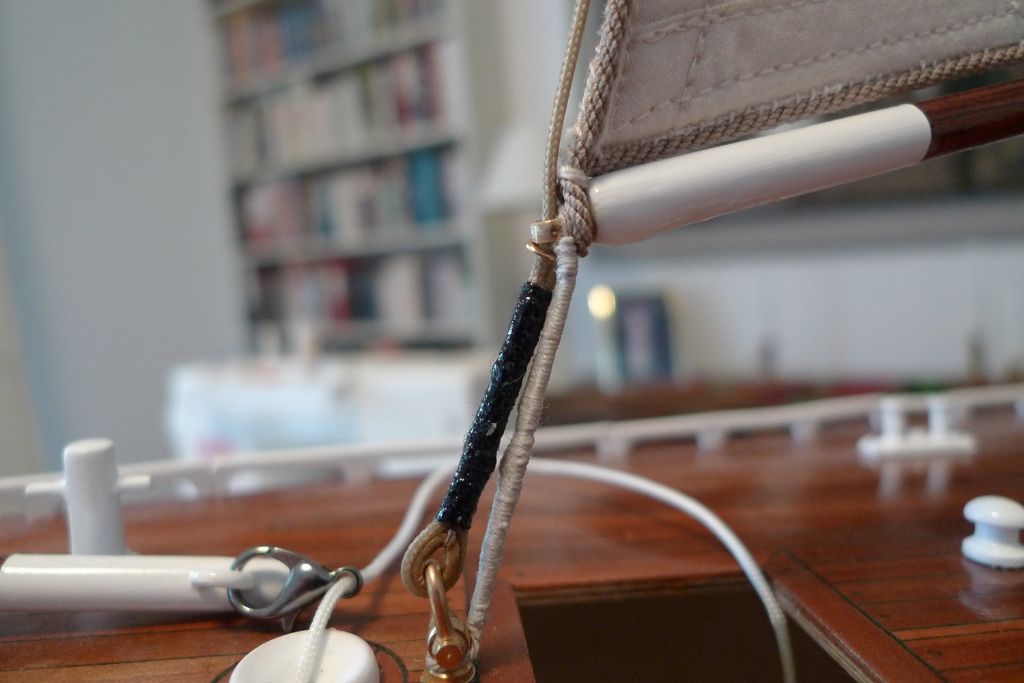
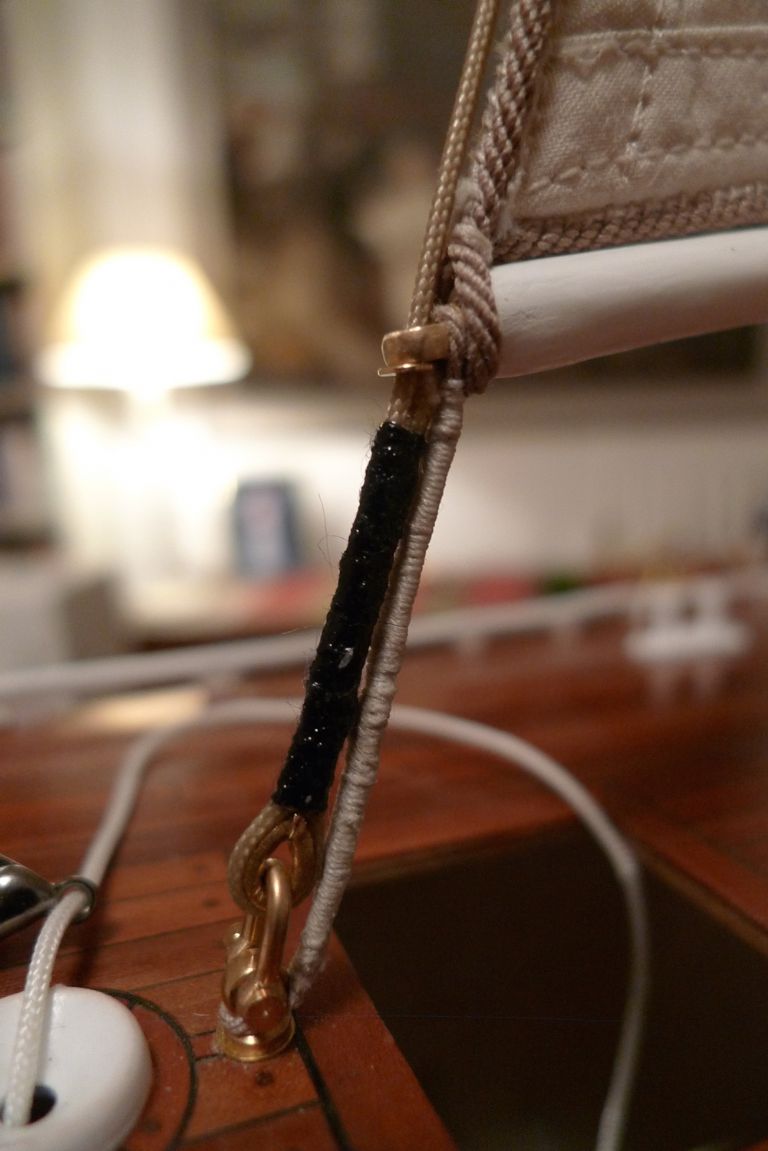
Participant@banjomanFor a change of perspective, but also because it'll be needed in order to check that the foresail sets properly, I decided to take a break from boltrope stitching, and make up the fore boom tack strap.
A short length of 0.88 mm rope was selected, and stitched together around the two eye bolts involved …
… to create the actual strap.
This was then set up taut with the help of the foresail halliard …
… served with 0.10 mm cotton thread and liberally coated with watered-down aliphatic resin …
… to produce a tack strap that'll keep the boom from sliding upwards along the stay under pressure from the wind in the sail.
To be continued …
Mattias
Edited By Banjoman on 19/03/2017 20:50:11
19 March 2017 at 21:22 #70367Banjoman
Participant@banjomanAnd then … back to stitching! Practice, however, does make if not perfect then at least more proficient, and I am now able to get the boltrope on to the tune of 10 cm per 15 minutes or so, so this afternoon the foresail had advanced to the point where I was about to turn the clew corner.
I had already decided, based both on the sail plan for the kit and on typical such sails as detailed in Terence North's Yacht Sails that I would not put a boltrope on all along the leech.
I therefore unpicked the first 10 cm or so of stitching towards the head end of the leech, in part because this early stitching, made before I'd twigged what technique to use, was not really up to scratch, but mainly because I'd quite simply started too far down the leech.
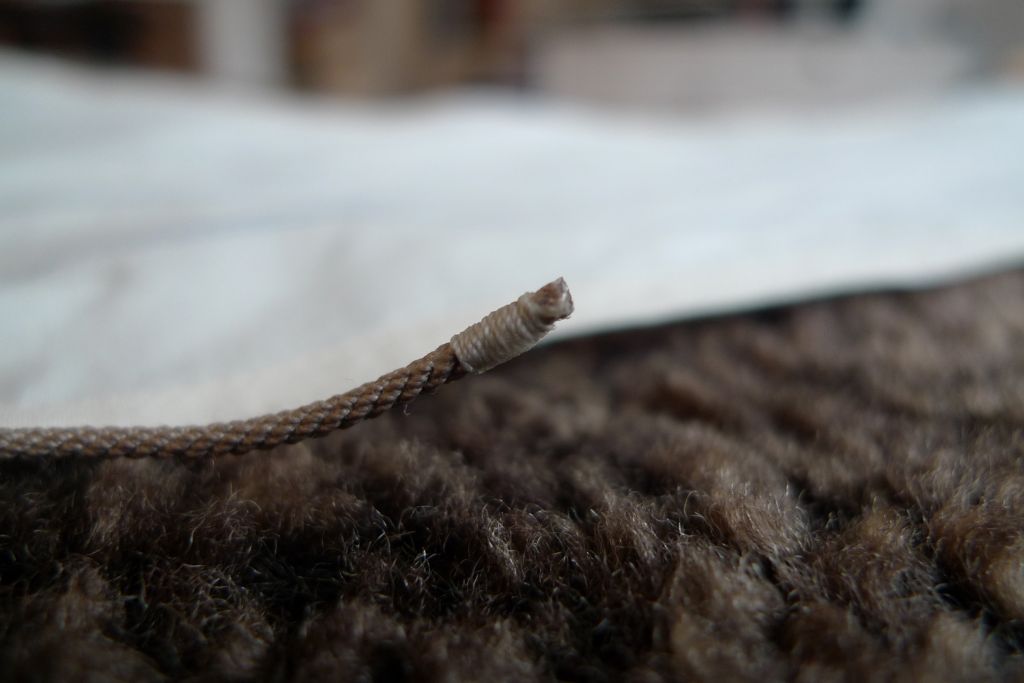
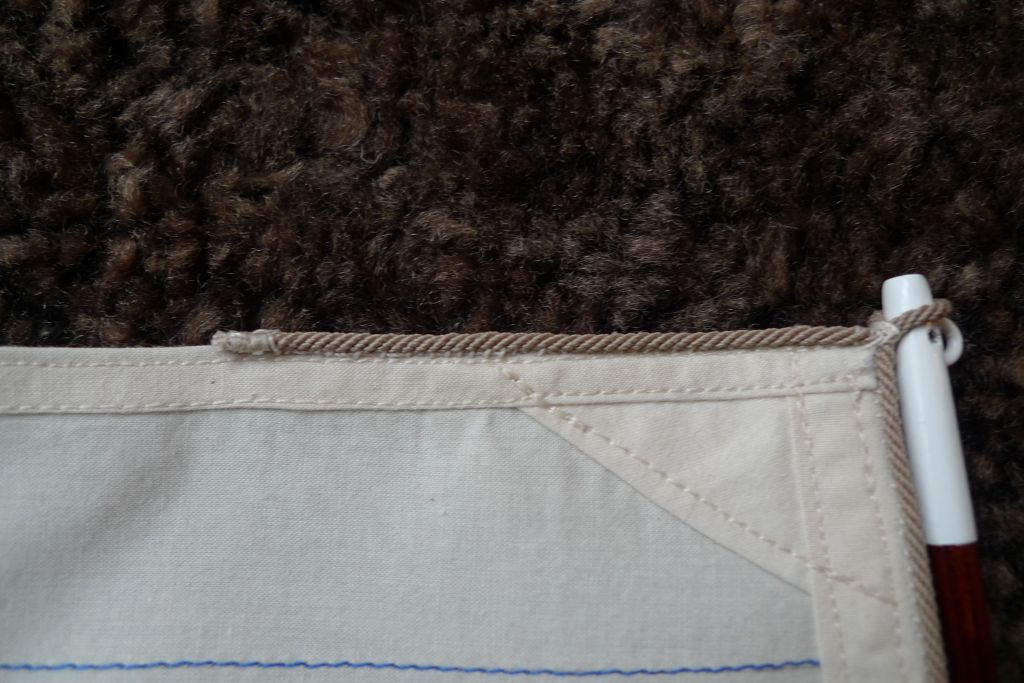
After experimenting on loose pieces of rope for quite a while trying to produce proper tails, i.e. where the rope has been unravelled, thinned out and then laid up again, I came to the conclusion that the results of these tests were far to uneven, and that it was not worth risking the many hours of work put into stitching on the boltropes (in the foresail alone there are more than 800 stitches, and that is the smallest sail) for the sake of having real tails, so I decided instead to just seize the rope ends …
… and stitch them on like that.
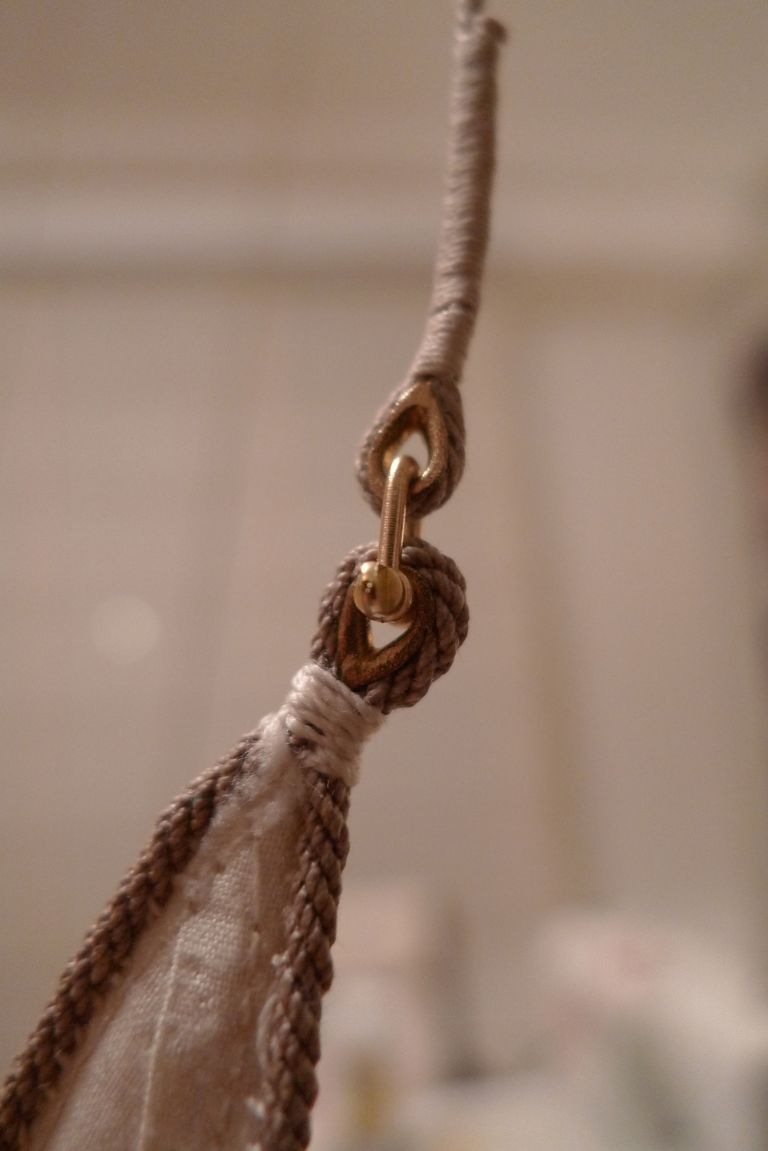
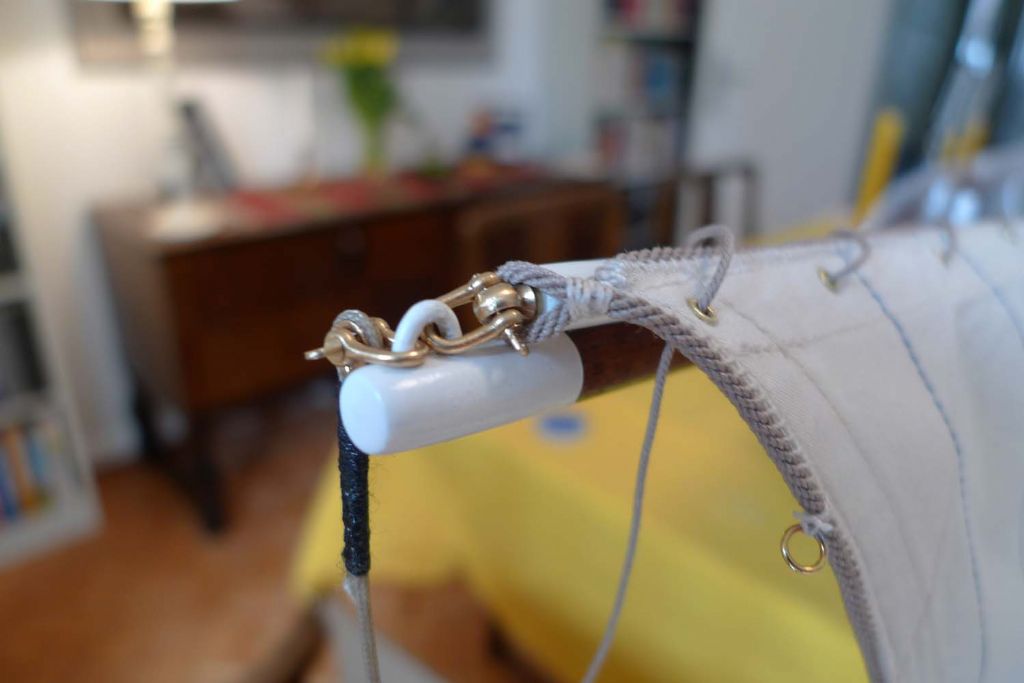
When trying the sail on in the rig, I found that I had made the tack cringle a tad too small, so that it crowded the tack strap which in turn put a rather ugly bend into the stay.
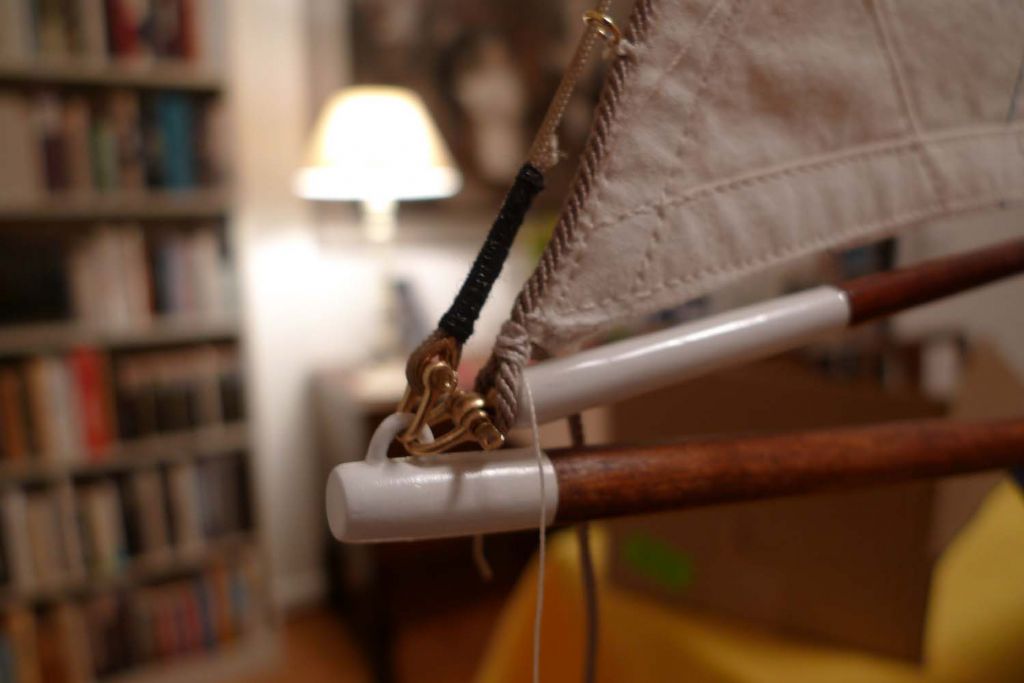
I therefore removed the sail, carefully wetted the cringle, and enlarged it with the help of a conical paint brush shaft, after which it was again time to shackle on the halliard …
… and set the sail anew; this time with a rather better result – this is pretty much what I've had in mind all along!
The sail still needs eyelets added to the foot for lacing it to the boom, and also rings along the luff to serve as hanks to keep it to the stay. For the rest, though, the first sail out of four is now finished …

To be continued …
Mattias
Edited By Banjoman on 19/03/2017 21:23:17
Edited By Banjoman on 19/03/2017 21:26:11
23 March 2017 at 08:34 #70405Banjoman
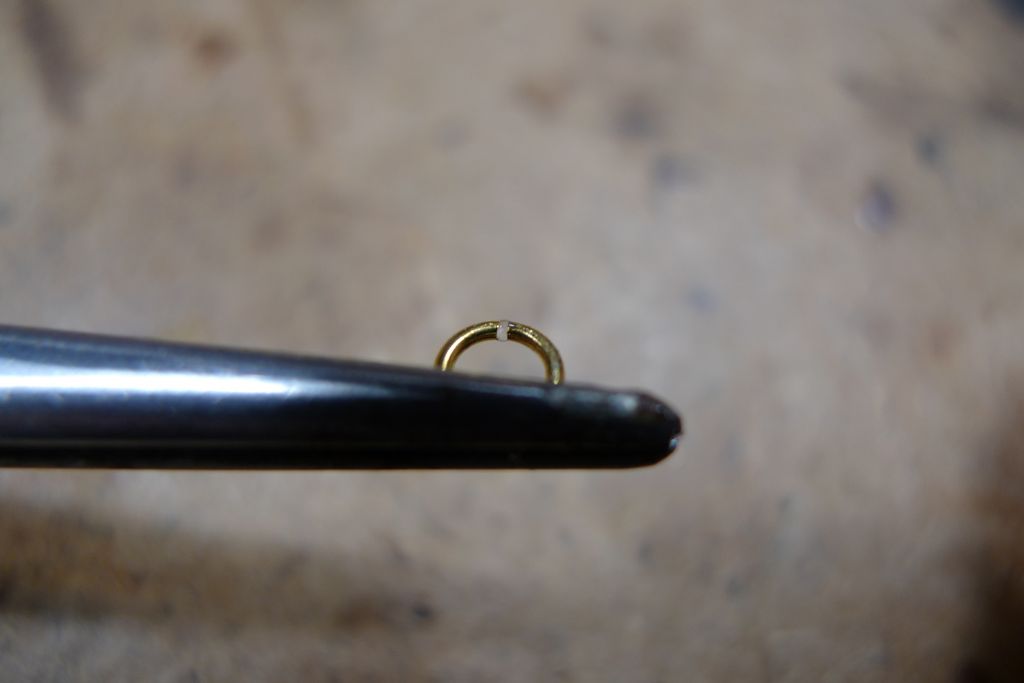
Participant@banjomanAs already mentioned, the luff of the foresail needs hanks added to attach the sail to the forestay, so to this end I got out some 4 mm o/d brass rings; these being open, I added a drop of flux to where the points meet …
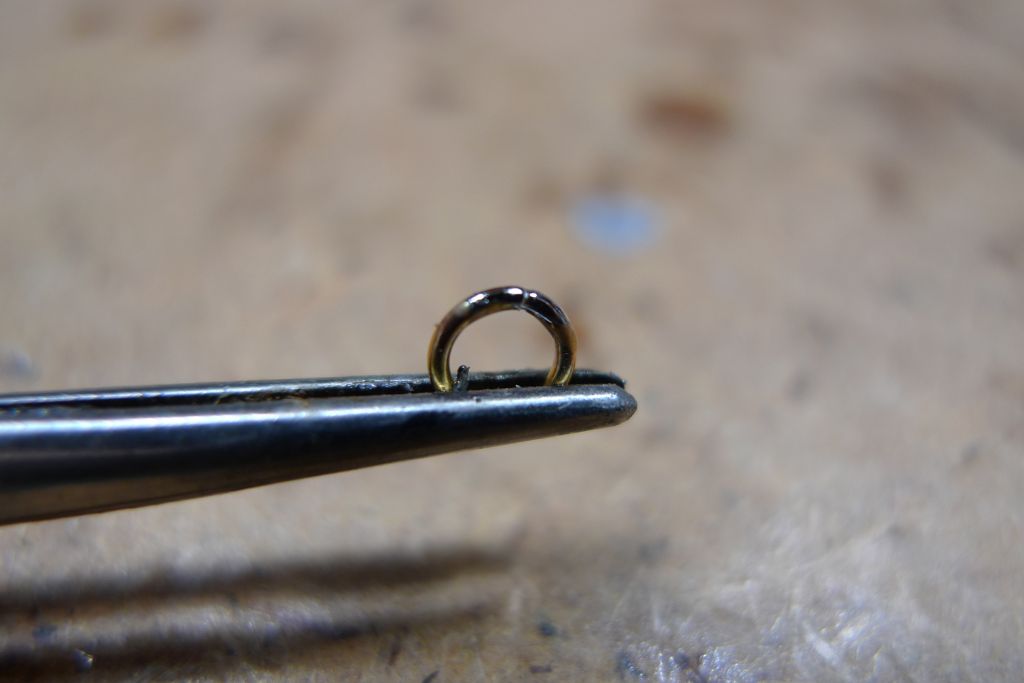
… and soft soldered …
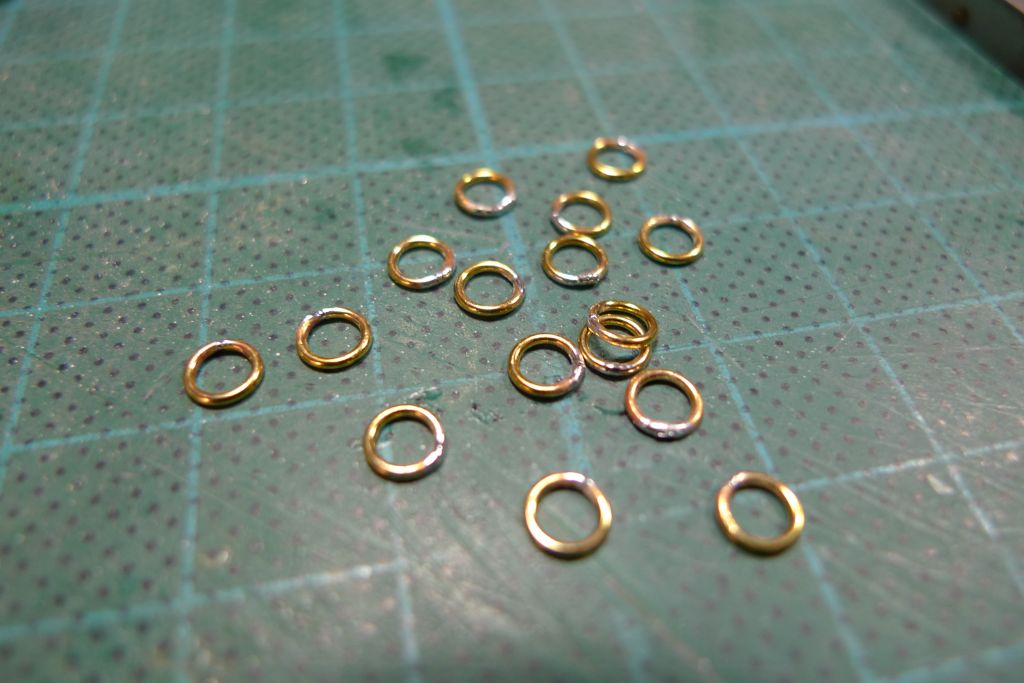
… them closed.
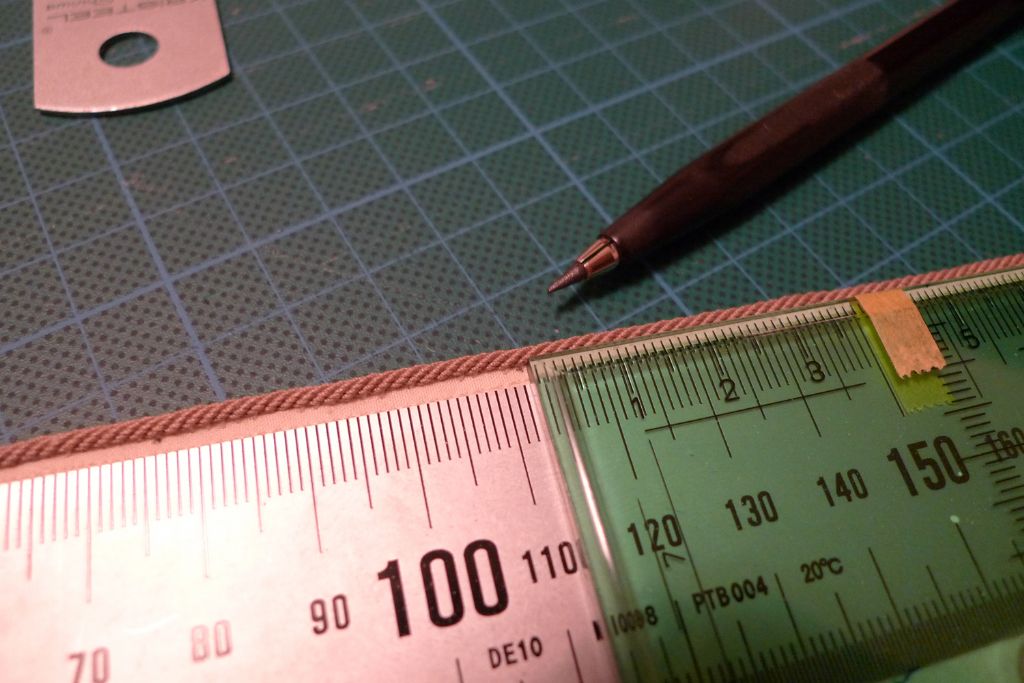
Next, I marked out a series of points 38 mm apart along the inside of the luff rope.
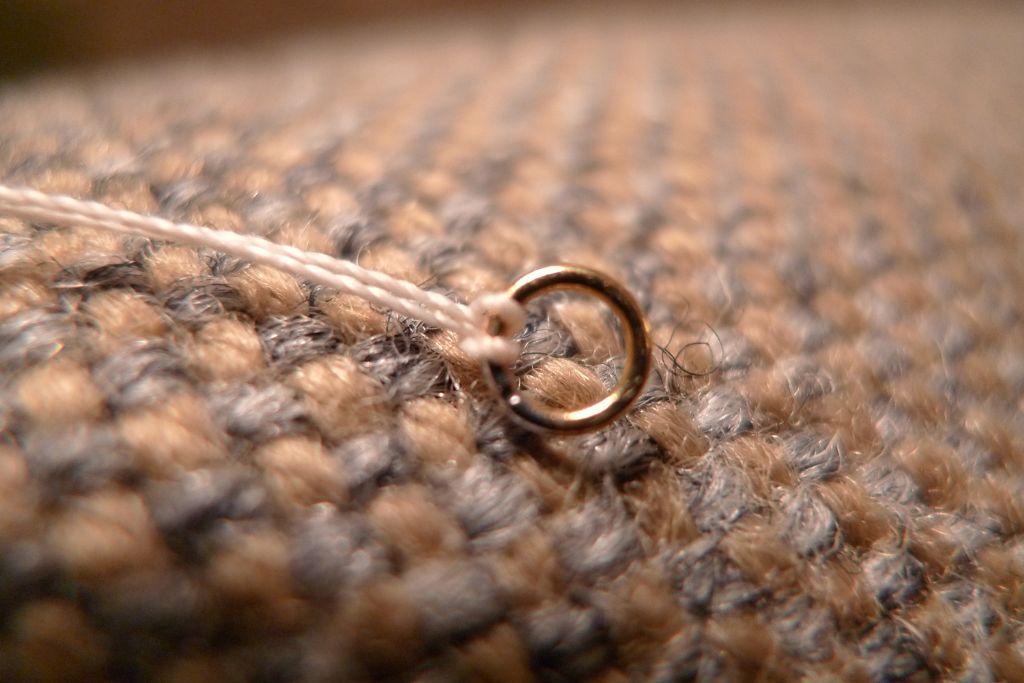
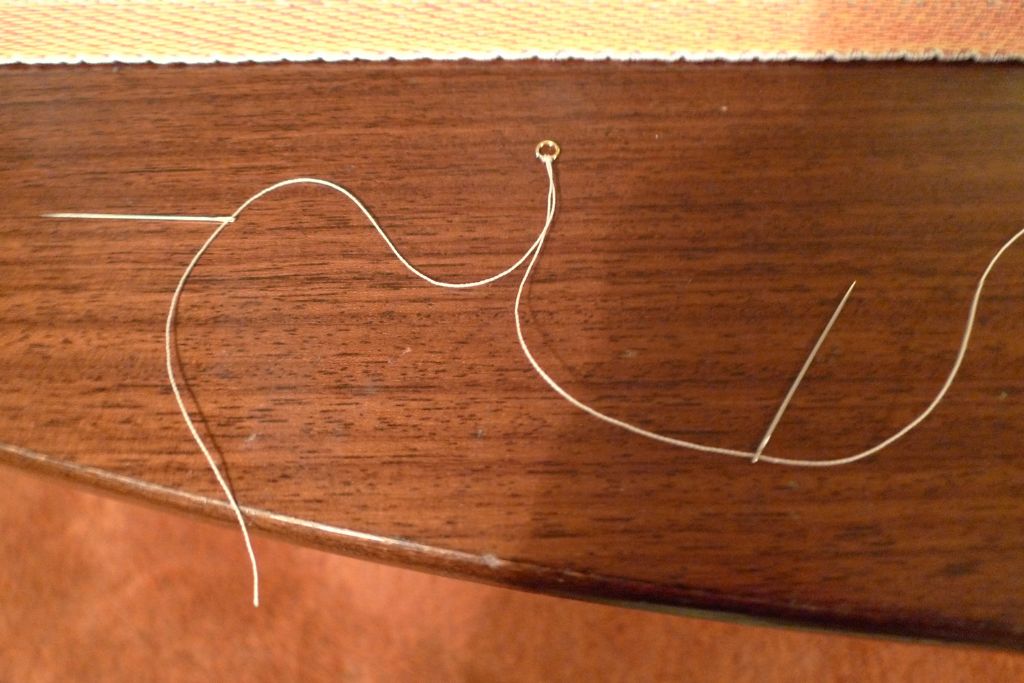
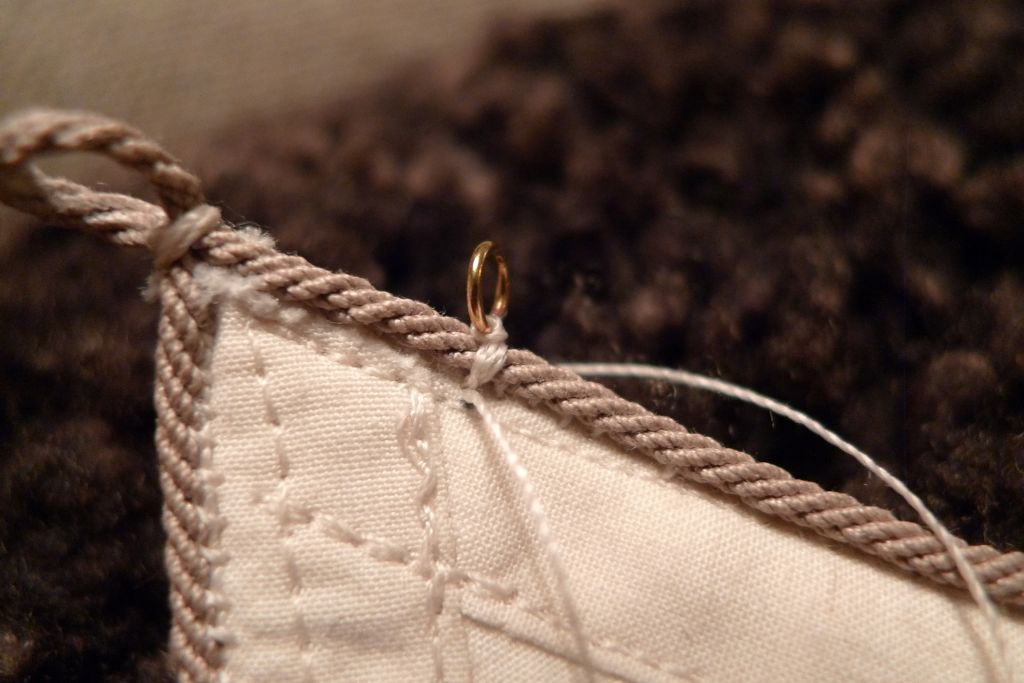
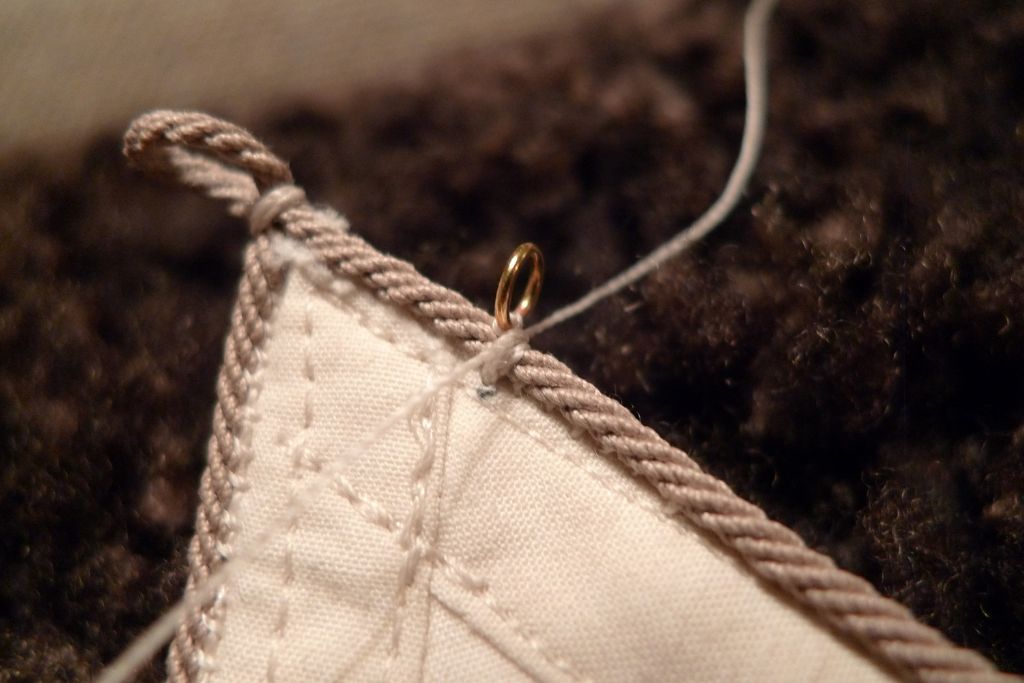
The rings need to be secured in such a manner that they come to sit neatly athwart the luff, i.e. with the opening parallell to the waterline, and nor parallell to the luff. I therefore took a length of sewing thread and secured it to the ring with a loop on itself …
… and then put a sewing needle on both the free ends.
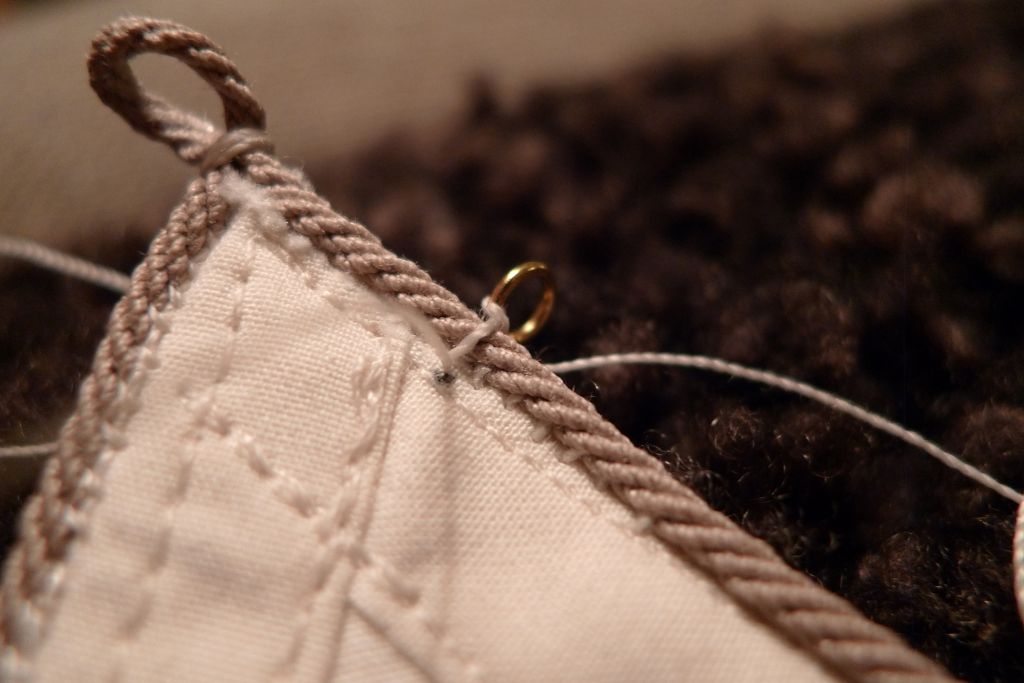
One needle was taken through the sail just below the luff rope from the port side and the other from starboard …
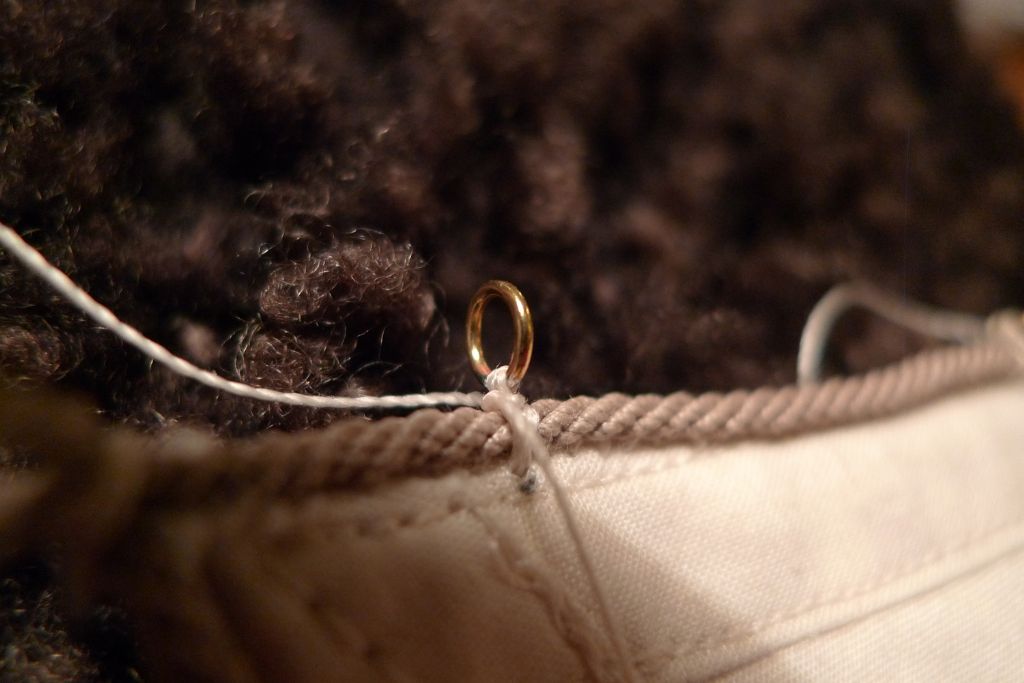
… and both threads then brought across the luff rope (one above, the other below the ring) and agin through the sail …
… after which the needles were removed, and the threads tied off, once above …
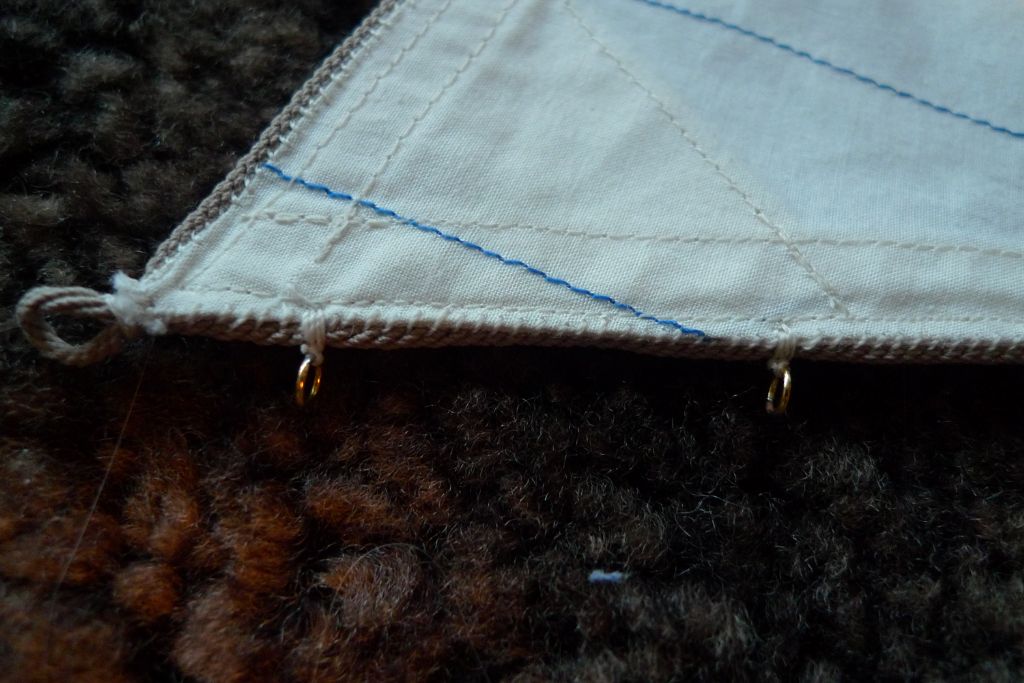
… and twice below the ring.
The knots were then further secured by a drop of diluted aliphatic resin and after that had dried, the loose ends were cut off.
To be continued …
Mattias
24 March 2017 at 19:30 #70422Banjoman
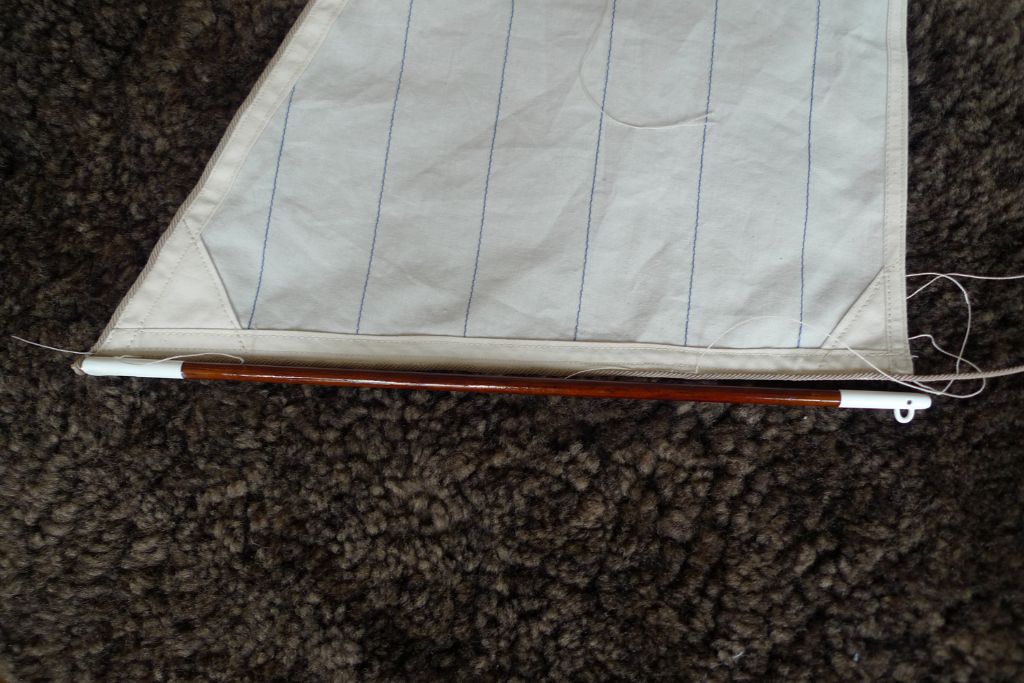
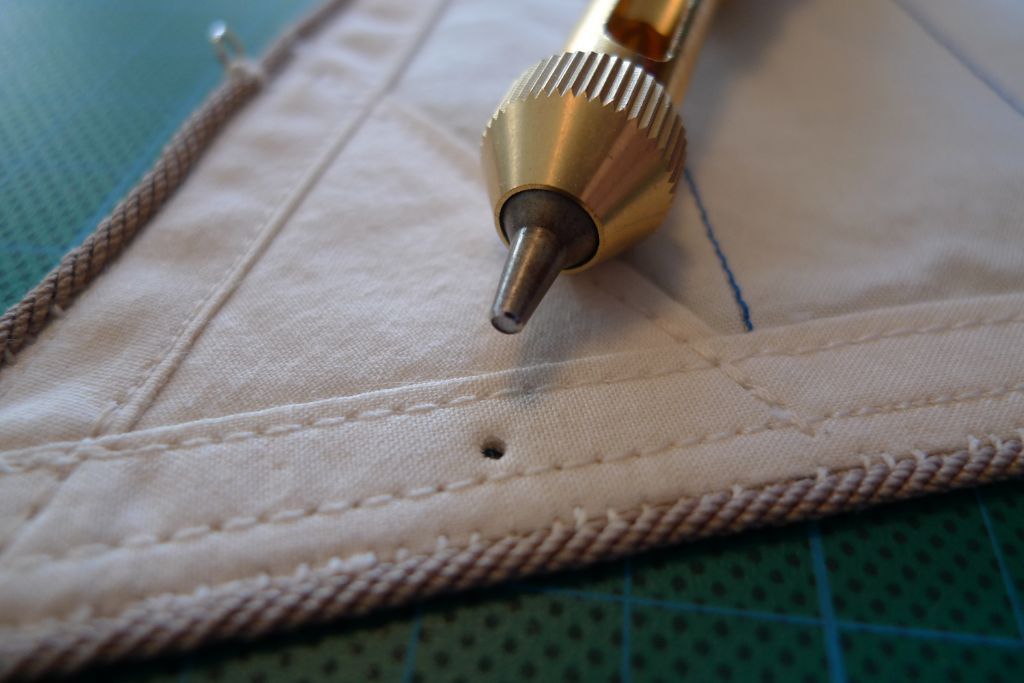
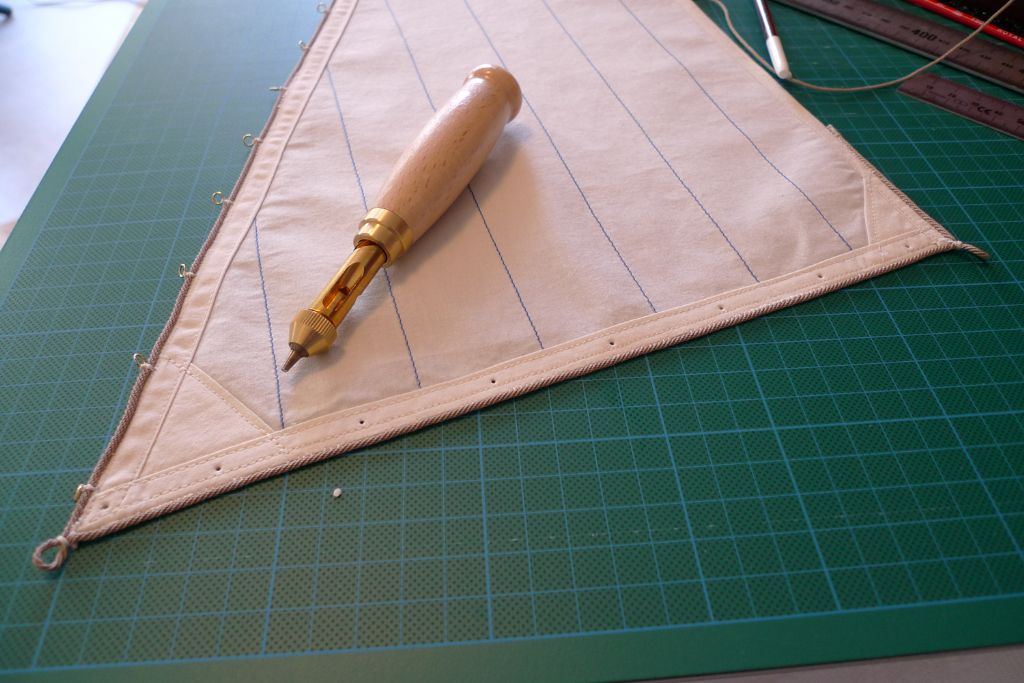
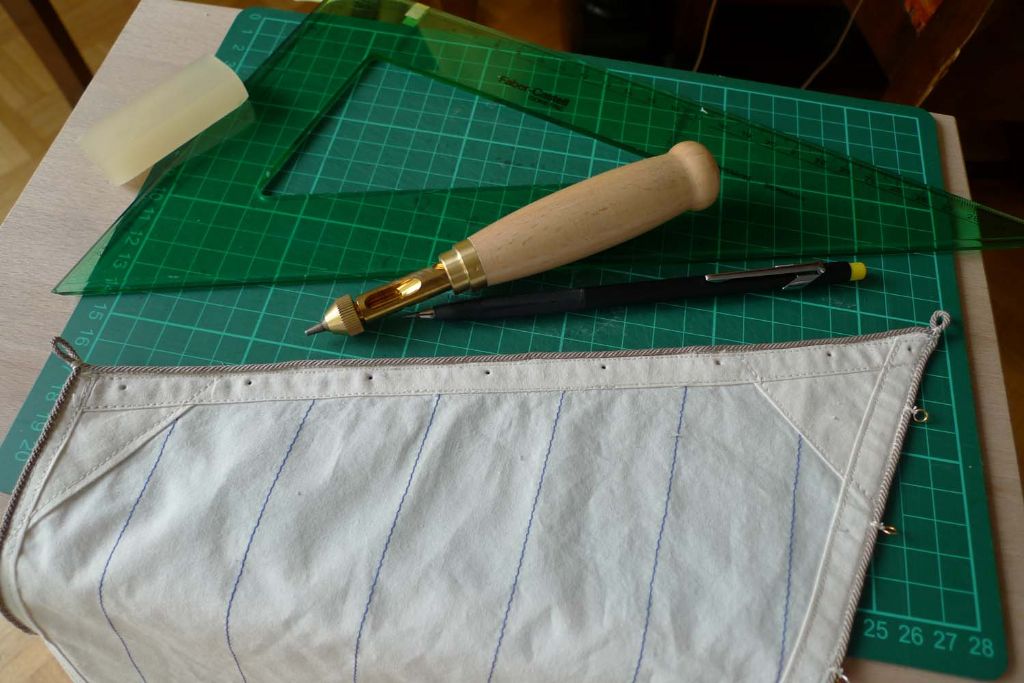
Participant@banjomanWith all 17 luff hanks in place,'twas time to get out the hole punch (or should I say drill – this Japanese hole punch has an inbuilt Archimedean twist, and thus does not need to be punched; it is enough to push the handle down a couple of times), insert the 1.5 mm punch …
… and cut the requisite number of holes in the foot of the sail …
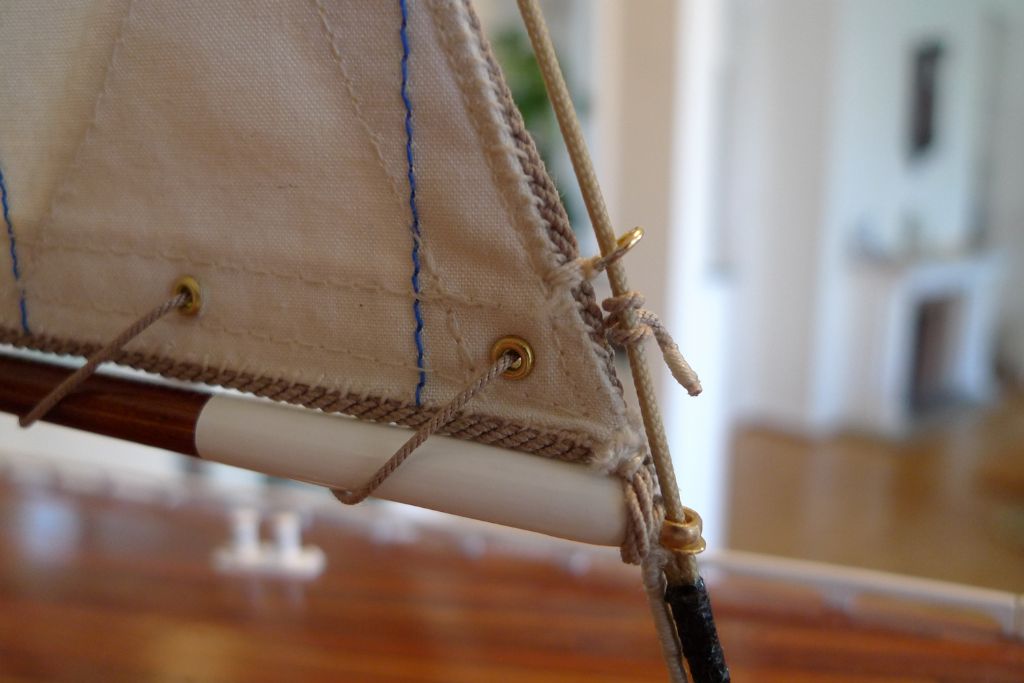
.. to take the eyelets through which the sail is lashed to its boom.
I also cut the sheet to length and closed the loop with a bowsie (to keep it adjustable) after adding a 10 mm carabiner (from the local haberdashery's stand of make-your-own jewellery findings) to attach the whole thing to the boom in an easily detachable manner.
With this sorted, I am happy to say that the foresail is completely finished …
 Just three more sails to go …
To be continued …
Mattias
Edited By Banjoman on 24/03/2017 19:31:37
24 March 2017 at 19:46 #70424Bob Abell 2
Participant@bobabell2Coming along nicely now Banjo
Especially the sail edge ropery!……….I`ve just made that word up!
Another egg sucking tip………When working with fine thread, don`t forget to Bee`s Wax the thread beforehand
It allows the thread to stay put, when necessary…….Very handy when Fly tying
Bob
24 March 2017 at 20:04 #70426Gareth Jones
Participant@garethjones79649Mattias,
You are really annoying my wife. She thought she had done a good job on her Moonbeam but yours it totally outclassing it, especially the sails which are a real work of art.
Gareth
27 March 2017 at 08:35 #70456Banjoman
Participant@banjomanBob,
Thank you very much, both for your kind words and for the beeswaxing tip! I was aware of the utility of beeswax to smoothen down the fibres on thread so that, in particular on smaller scale models, it doesn't look all fuzzy; however, I was not aware that it would also help lock knots! As you know, I tend to secure mine with glue instead, but shall most certainly experiment with beeswax as an alternative to this method!
Gareth,
Oh dear! 'Tis sorry I am, and grateful, for your very kind comments!
Last thursday I finally received the package from Nylet with more sail cloth, and also another small sample from Frank Parsons, this time to show how to do the false tabling on the curved section of the top sail luff. Mr Parsons has really been tremendously kind and helpful, way beyond what a customer can reasonably expect, and I am most grateful to him!
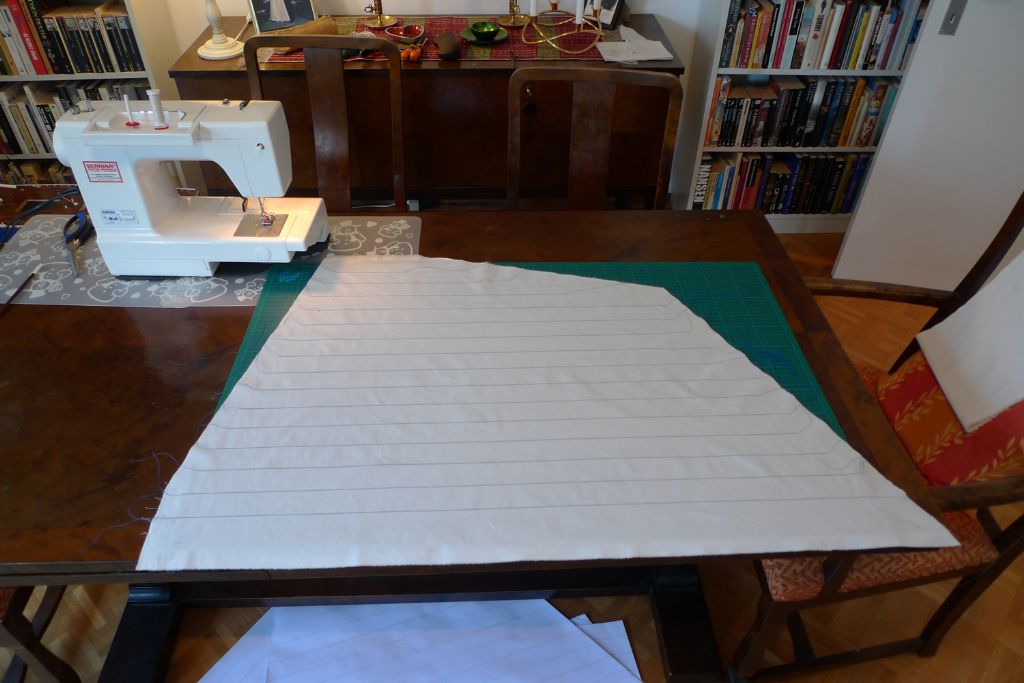
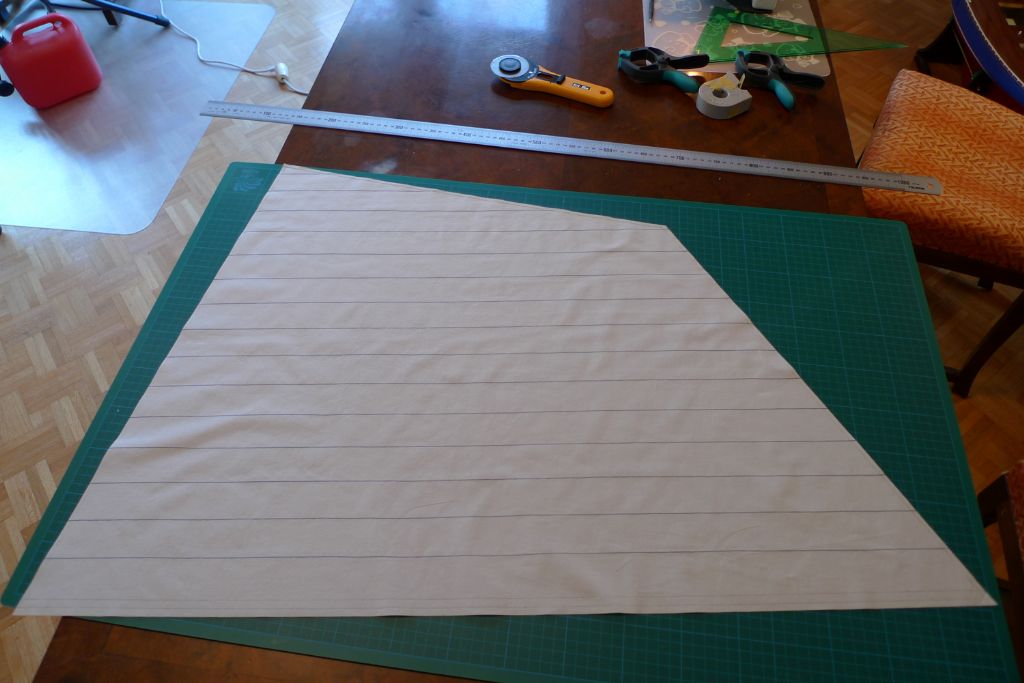
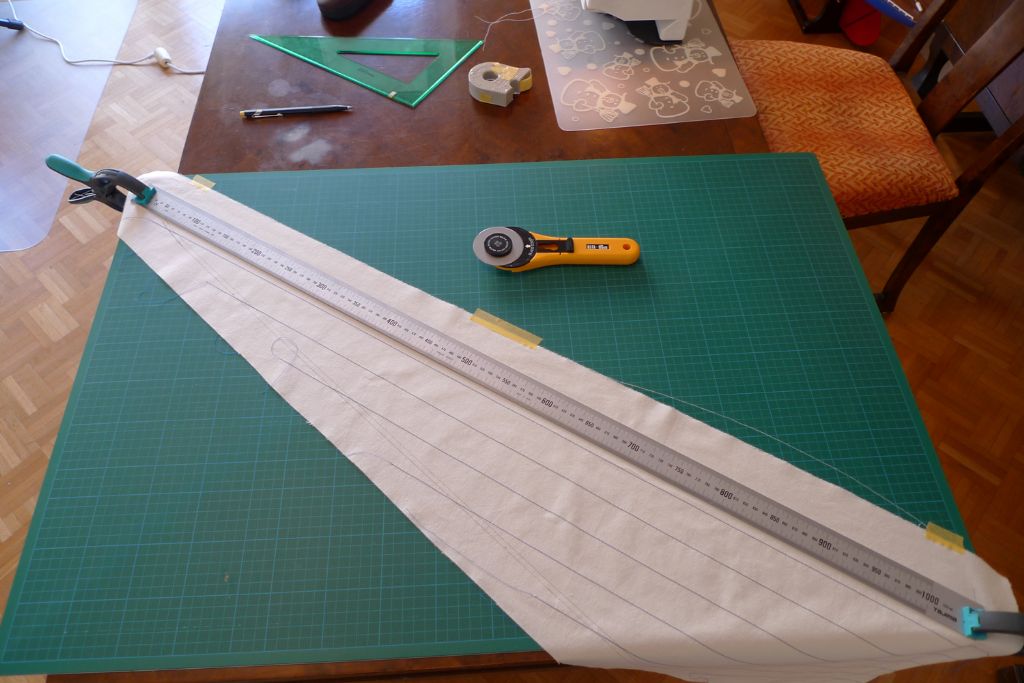
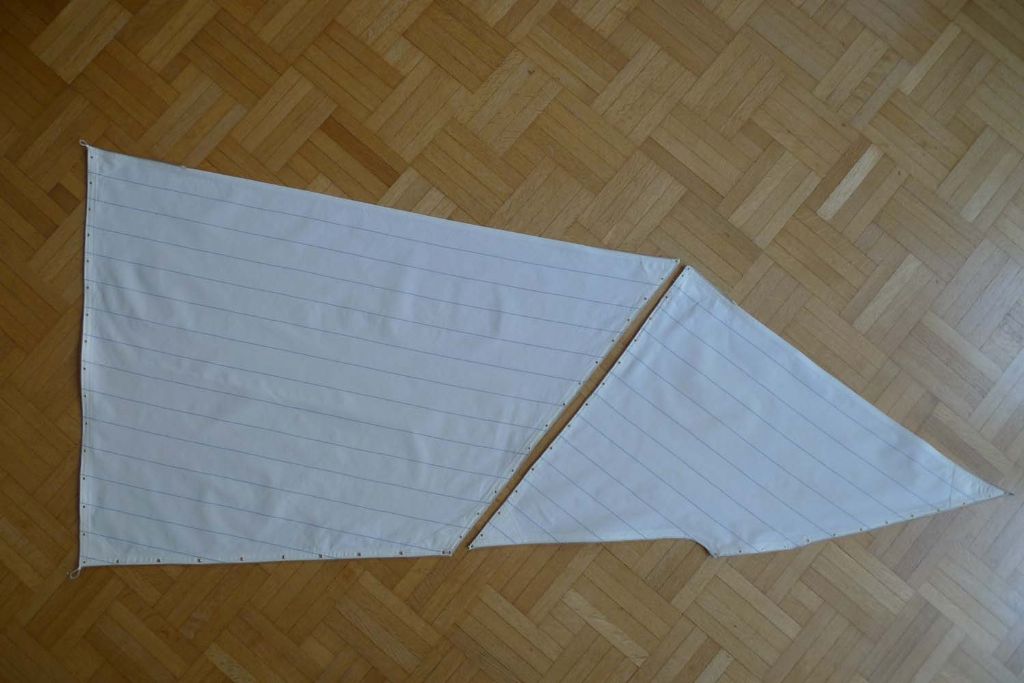
Anyway, with more cloth available, a main sail rough was cut, and the blue thread imitation seams sewn on …
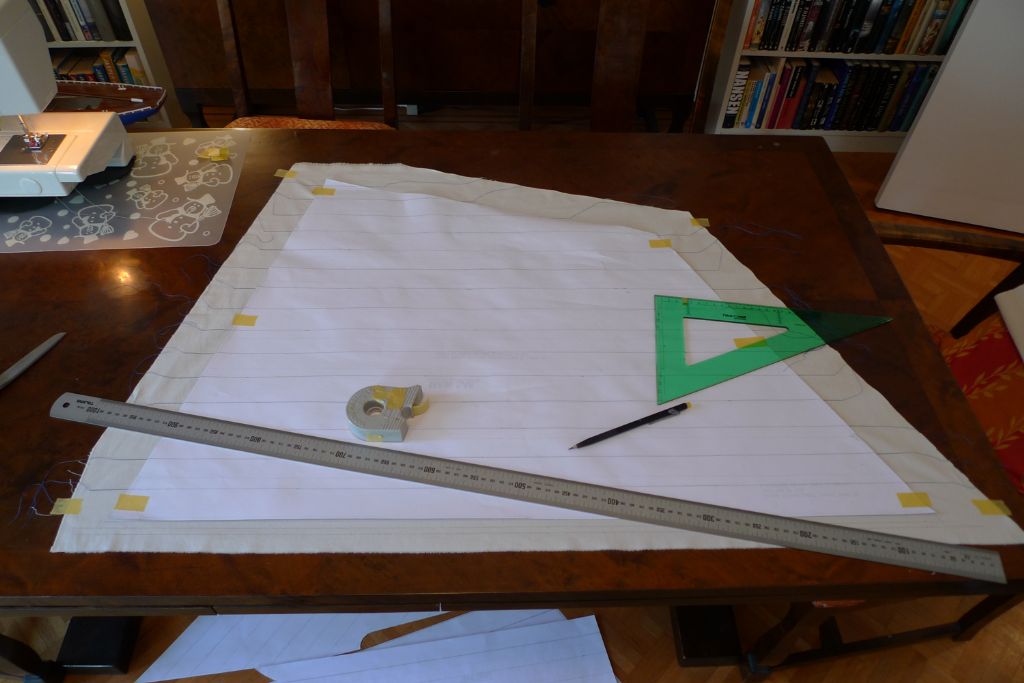
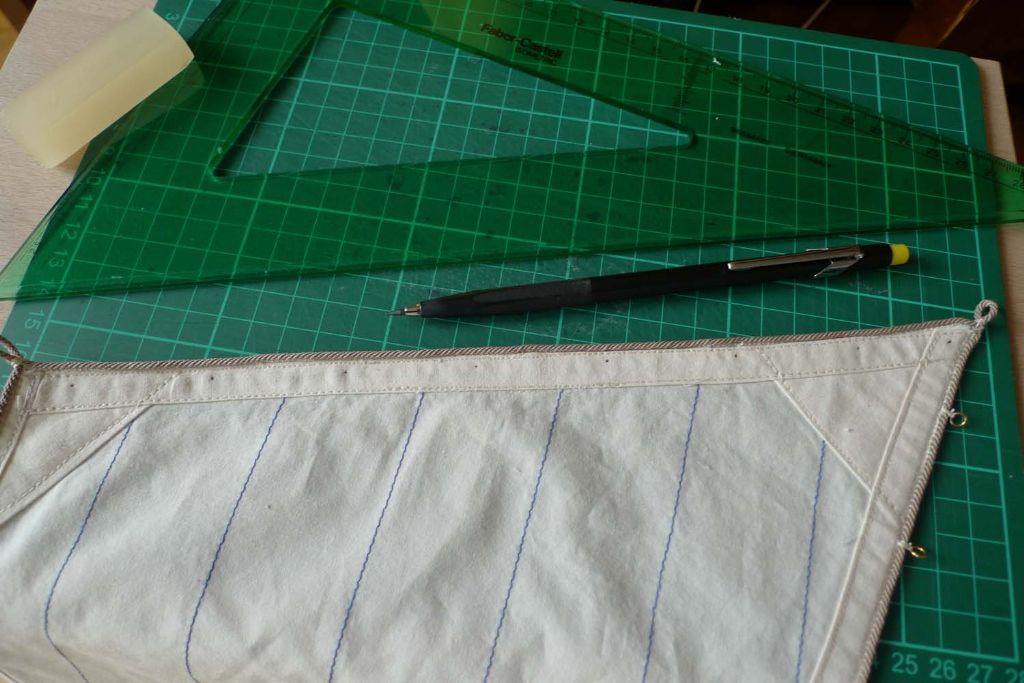
… after which the seam allowances for the tablings and false tablings (aka bias bindings) were marked out with pencil …
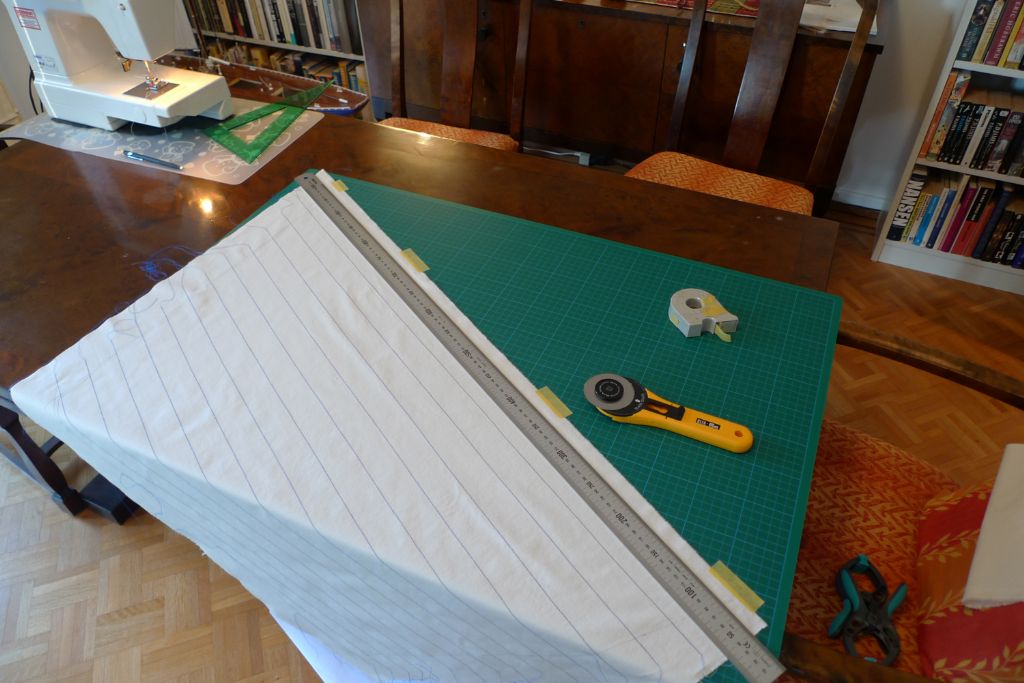
… and carefully cut with a rotary cutter …
… to produce a finished blank.
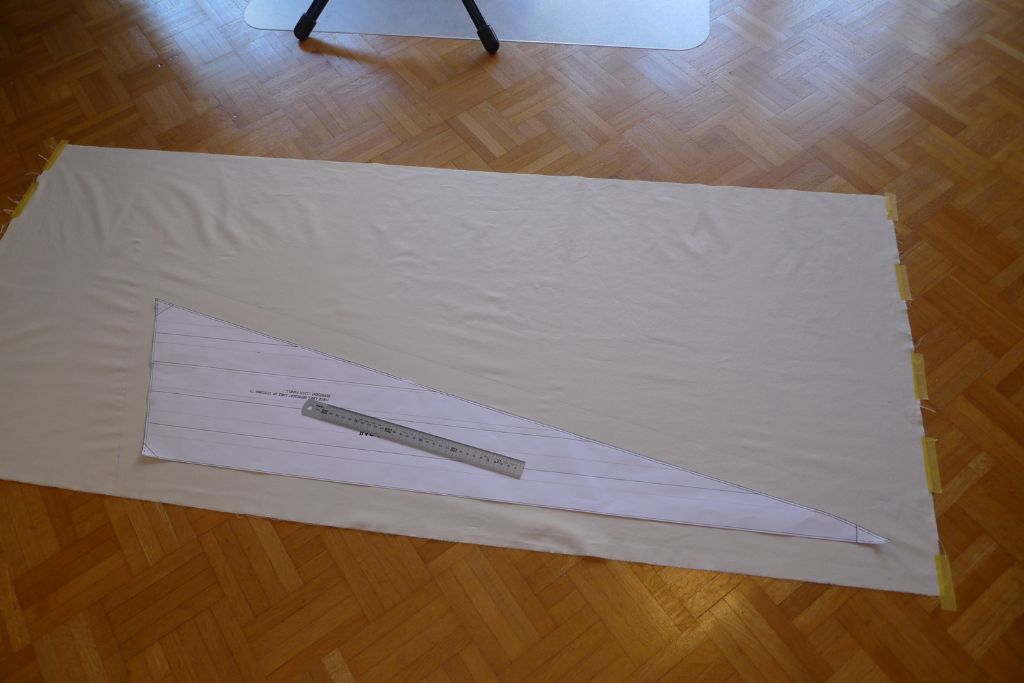
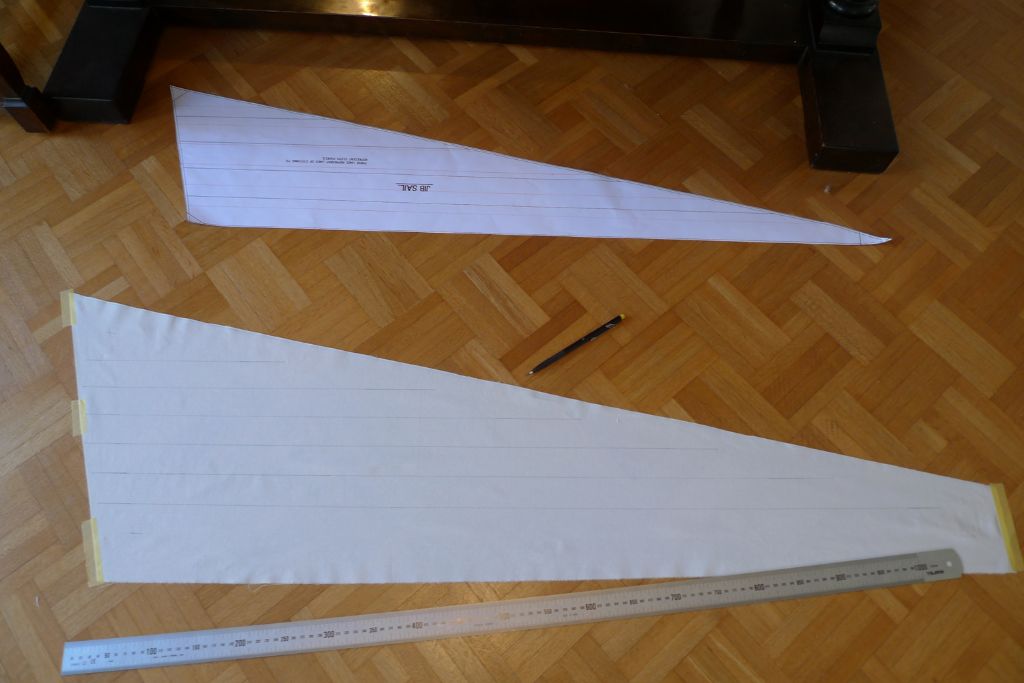
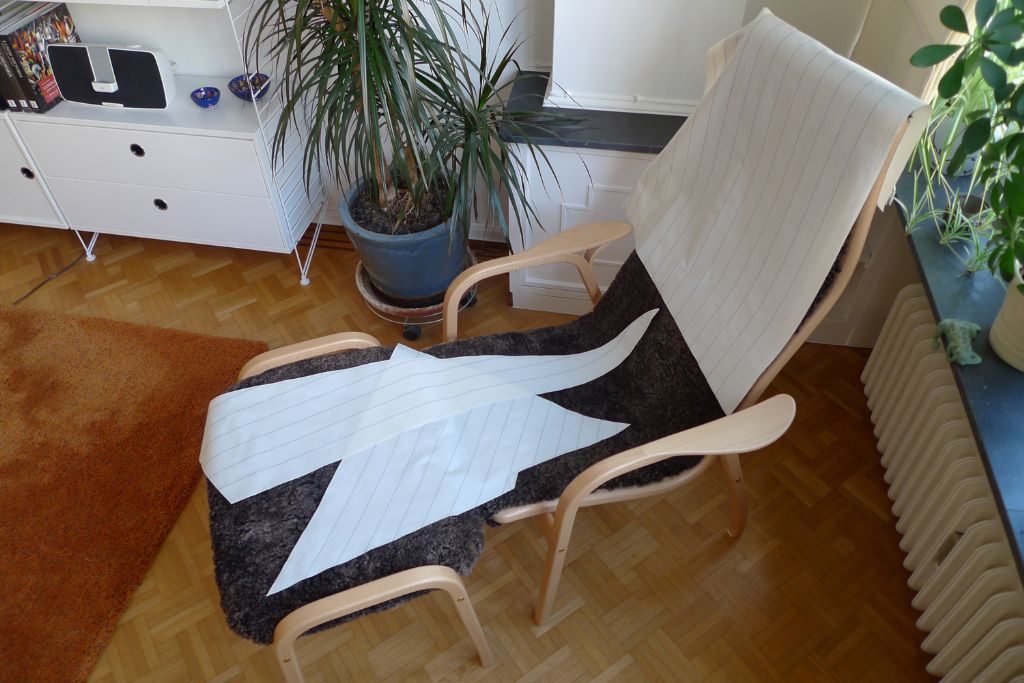
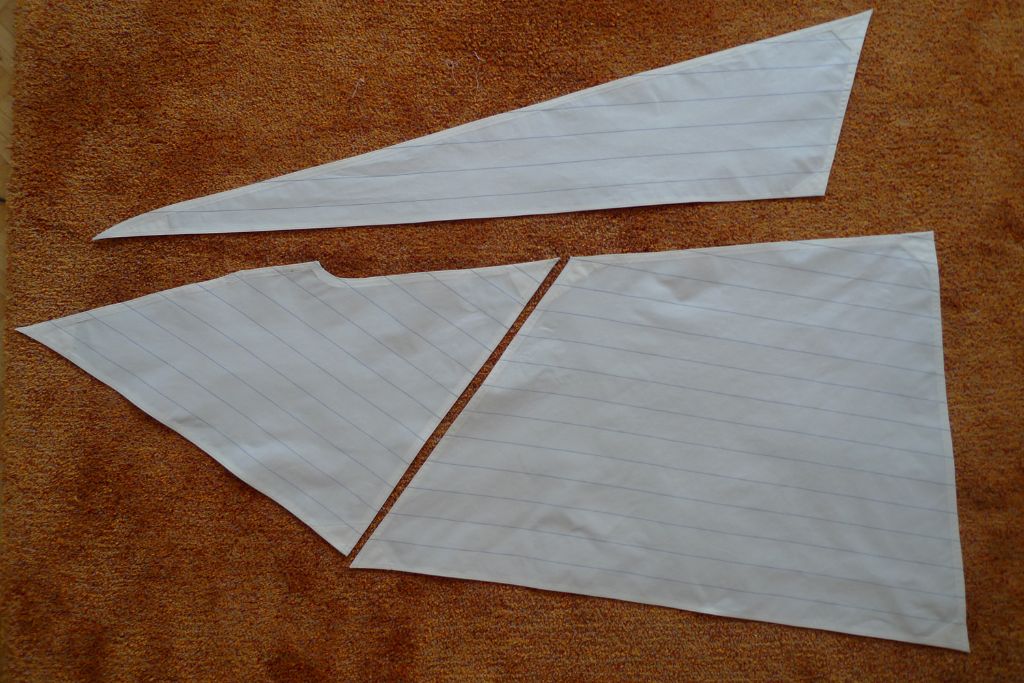
In the meanwhile, I had also realised that I had rather messed up my first attempt at cutting out the jib — instead of including the seam allowances, I had cut the blank to the final shape …
… which of course is not much use. Fortunately, I had enough material left to cut out a new rough, mark it for …
… and sew on the panel seam imitations, add the allowances …
… and cut it to blank shape.
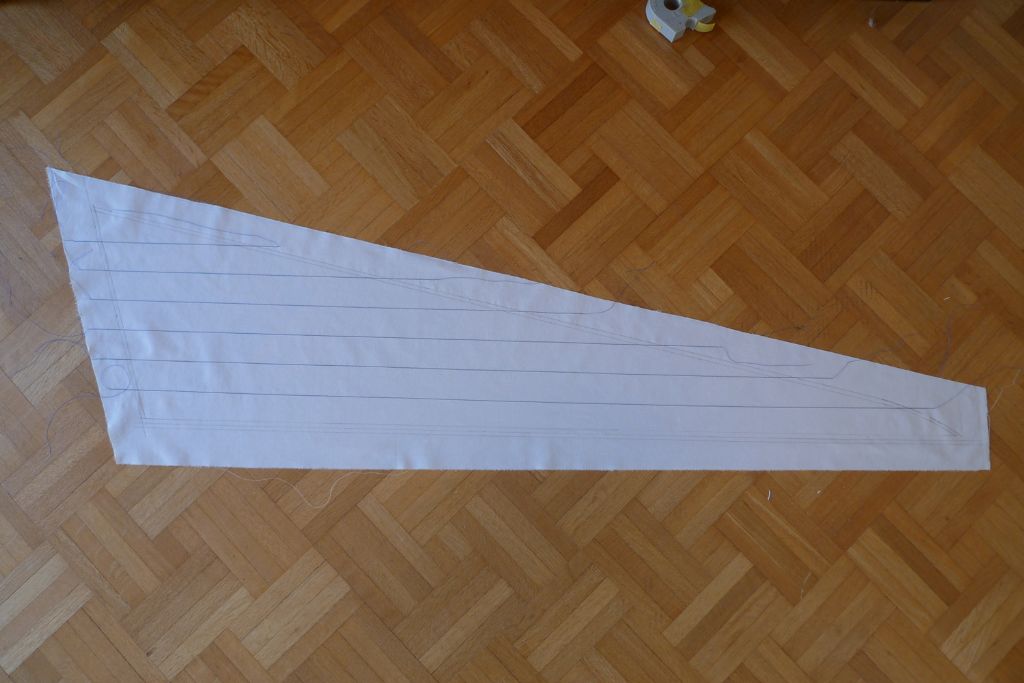
With finished blanks for all three remaining sails, it was back to the sewing machine on Sunday morning for some fairly intensive folding of tablings and edge stitching …
… until I finally had three sails all tabled and ready for the last steps, i.e. the boltropes, eyelets etc.
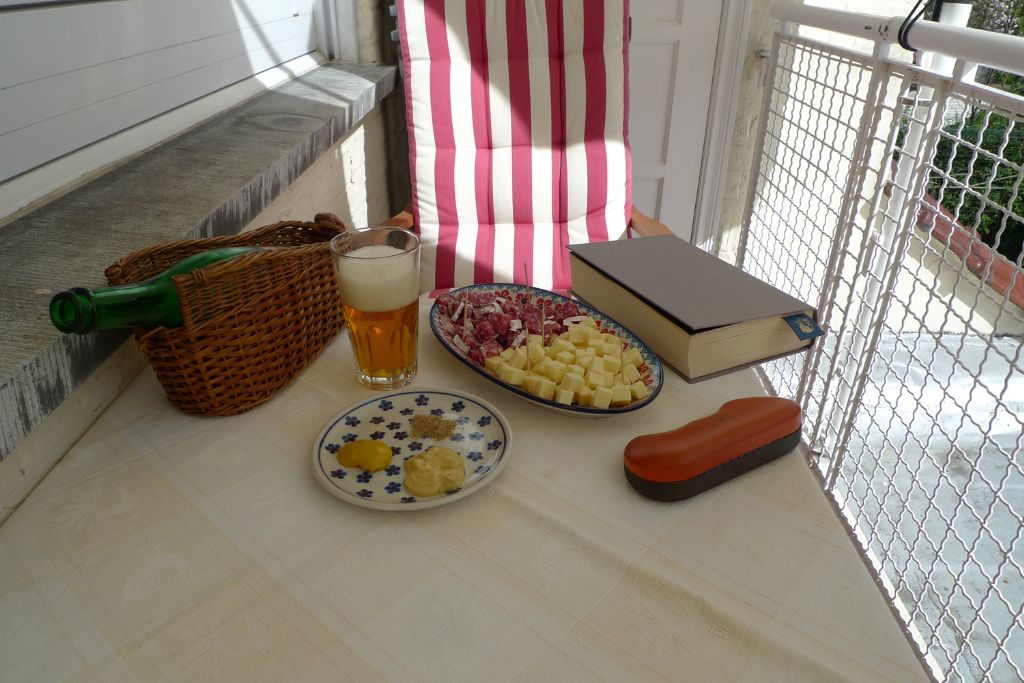
That, however, I felt could wait for another day, and instead I rewarded myself for my many hours behind the sewing machine by an afternoon spent out on the balcony in the lovely spring sunshine and in the company of some Belgian specialities: a bottle of Drie Fonteinen Oude Geuze (the 2015 bottling) and the classic Belgian pub snack portion mixte, i.e. a platter of cubed cheese and salami, served with mustard and celery salt.
To be continued …
Mattias
27 March 2017 at 17:28 #70463Banjoman
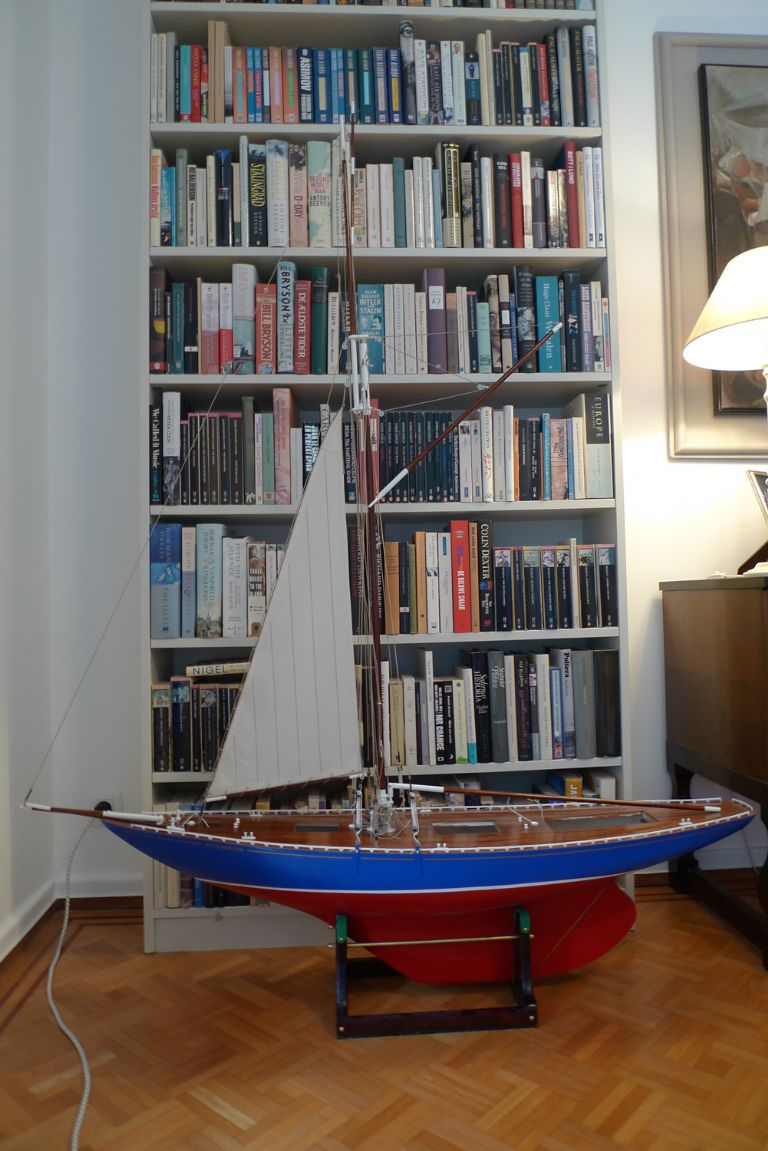
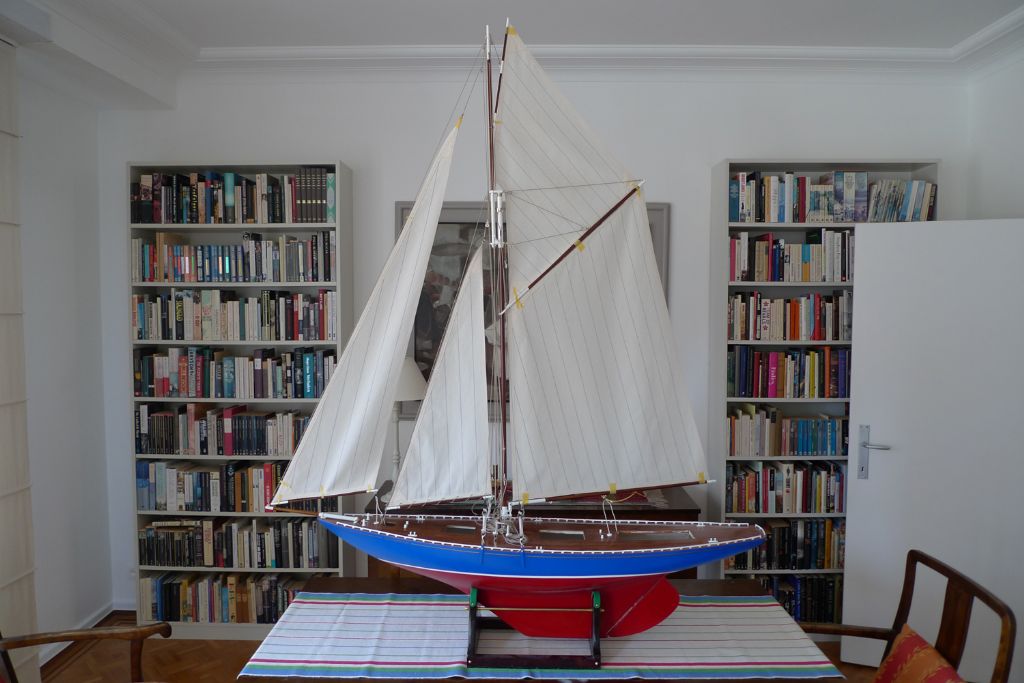
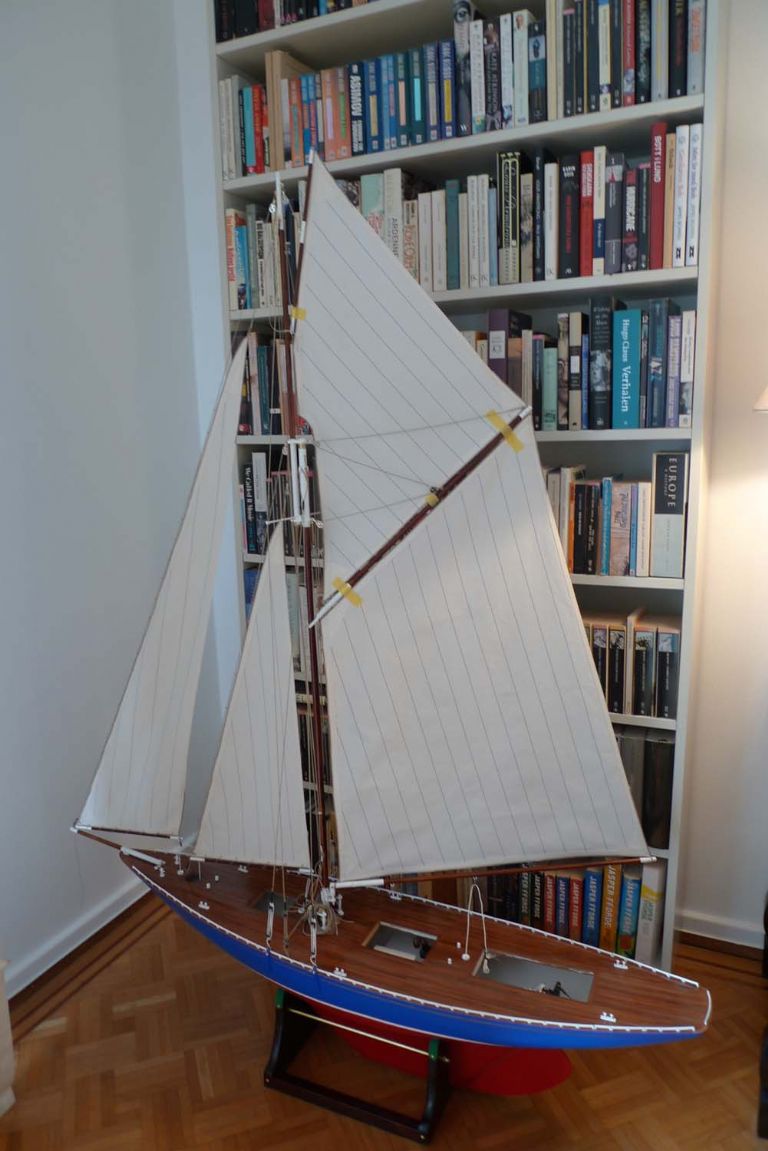
Participant@banjomanWell, before I spend tens of hours sewing on the boltropes and all that, I though it might be a good idea ti just dryfit the sails to the spars with some masking tape to hold them more or less in place; happily, I think I've managed to sew them to near enough the correct measurements.
Some minor adjustement of the various halyards will probably impose itself once the sails have been propely lashed top the spars, but this looks good enough to me already, so its onwards with the stitching …

To be continued …
Mattias
27 March 2017 at 17:38 #70465Dave Milbourn
Participant@davemilbourn48782Mattias
It seems that stitching sails is about as exciting as rubbing down paint before the next coat i.e. seemingly endless. It's as well that the end result will look as good as on your Moonbeam. I didn't realise until now just how big the thing is!
BTW I'm very drawn to your Belgian pub lunch……a beer with a wired champagne cork intrigues me. What sort of cheese is that, and just how do you pronounce "Gueze"?
DM
27 March 2017 at 19:47 #70467Banjoman
Participant@banjomanDave,
I'll answer the simple question first: the cheese is, as local tradition suggests, a nice and creamy but quite un-adventorous young Gouda.
Ans then, one of the important questions in life: how does one pronounce "geuze"?
Firstly, it depends on whether you are a Flemish- or French-speaking Belgian. In the former case, the initial "g" is that soft sort of one, similar to the g:s in for example Van Gogh; in the latter case, it is a standard hard "g".
The "eu" is a long dipthong sound very similar to the English "u" in "church".
Finally, the "ze" is just a longish "s".
So an approximate sort of sound transcription might be "schus" (Flemish) or "gus" (French), provided the "u" is pronounced as in "church".
As to why the wired champagne cork, it is because it is to all intents and purposes a champagne bottle, and has to be in order to handle the pressure that can build up through secondary fermentation in the bottle.
It is also one of the odder beers in the world, for a number of reasons.
For starters, the wort is made from about 65% malted barley and the rest unmalted wheat. Then, only overaged hops are used, which have the preservative qualities, but no flavour, i.e. no bitterness. Furthermore, once the wort has been cooked, no controlled yeast strain is added; instead the wort is left to cool in shallow, open tanks so that the local microorganisms can dive in and get to work, providing what's called spontaneous fermentation.
The result of this process is a beer called lambic. This can either be drunk as such (and will then be pretty much completely flat) or put into oaken vats to further ferment and mature for between one and three years.
To make geuze from the lambic, a number of different age lambics will be selected and blended ("assembled" is the usual word in the trade), and the results bottled in those champagne bottles and left to mature for at least six more months. Provided storage conditions are decent (stable temperature and humidity), there is hardly any upper end to how long a bottle of geuze can be kept. The oldest ones in my cellar are from the late 1990s, and on a couple of occasions I've drunk geuze that was bottled in 1984. There is a marked development of flavour over time, ususally with a somewhat unpleasant sulphuric phase somewhere around the five-year mark, after which it tends to just get mellower and mellower.
The bottles are traditionally served in those wicker baskets, as they've been stored lying down, with the sediments settling on the bottom of the bottle; by not dramatically changing the bottle's position when opening and serving it, the sediments mainly remain settled, and the beer can be served un-troubled.
It is a bit of an aquired taste (I've a friend from the UK who refers to it as "that rubber-band stuff" ), and although in every way a true beer, not with anything ressembling a conventional beer flavour. It is quite acidic, especially when young, often tart, in many ways reminiscent of farmhouse cider, although there are no apples or any part of a cider making process involved.
Should one be interested in trying it, first of all, beware of the commercial varieties! Often referred to in Belgium as "bottle-cap geuze" (because they dont referment in the bottle, so don't need the champers cork), these are often artifically flavoured (even sweetened), and although sort of OK-ish in their own right, if that is what one is looking for, not anyway near the real thing. Only the real stuff can be labelled "oude" (=old) geuze, so that's what to look for for starters.
Secondly, if in Belgium on a Sunday, you could do worse than to visit a pub called In de verzekering tegen de grote dorst ("The Insurance Against Great Thirst"; what's in a name, eh?!) in the small village of Eizeringen, some ten miles or so west of Brussels. They're only open on Sunday mornings, but have probably the greatest selection of lambic beers in the world, and is generally a lovely place; see **LINK**. I was once lucky enough to win three months of free drinks there, although with their limited opening hours, it took some effort to properly profit from my prize.
If you buy a bottle to take home, then let it rest lying down for at least a couple of weeks before drinking it; otherwise it'll pour troubled.
There are several good brands, but my favourites are withour a doubt Drie Fonteinen, Girardin and Boon, in that order. Cantillon are good too, but very tart, to the point of potentially scaring a beginner off the stuff for good. The Mort Subite served at the lovely Brussels pub with the same name is fine, too, but to my mind not as complex and interesting as the other ones.
As you may by now have guessed, I rather like my geuze, and have taken a bit of an interest over the years …

There it is again: you ask a simple question, and get the ruddy encyclopedia thrown at you.
Mattias
Edited By Banjoman on 27/03/2017 19:47:18
Edited By Banjoman on 27/03/2017 19:48:07
Edited By Banjoman on 27/03/2017 19:48:52
Edited By Banjoman on 27/03/2017 19:50:15
Edited By Banjoman on 27/03/2017 19:51:17
27 March 2017 at 23:17 #70468Dave Milbourn
Participant@davemilbourn48782Mattias
So in English that might be "gersh"? As Mr Abell might say, a case of ships and aeroplanes.
However, beer that tastes of rubber bands rather puts me off the idea but many thanks for taking the trouble to try to improve my education. I think I shall stick to Blue Monkey "Infinity" **LINK** if for no other reason than it isn't £18 for a bottle.
Dave M
28 March 2017 at 09:32 #70469Banjoman
Participant@banjomanDave,
Yes, I think "gersh" is a fairly good approximation! As for the rubber bands, that is of course pure defamation on the part of a non-convert (with a wee bit of pulling-mattias's-chain thrown in for good measure); I think that anyone whose taste in beers goes beyond a lager chilled within an inch of its life is likely to enjoy a geuze. And while it may be quite expensive to get it via mail order, the prices here for a normal bottle are perfectly reasonable. Yes, it'll be more than a glass of Stella Artois, which is not surprising given the storage times involved, but for a 37,5 cl bottle of Drie Fonteinen or Boon at a pub that carries them, I would expect to pay maybe 3 or 4 euros, while for that 75 cl bottle I had on Sunday, I think I may have paid €6.50 or so when buying directly from the brewer (I usually get a crate of twelve such bottles when the latest bottling is released each year, drink half of them over the summer and lay down the remainder in my cellar).
In other words, if ever you find yourself in a good pub in Belgium that carries the real stuff, I would suggest you give it a try! I'm sure it'll never replace any favourite tipple of yours (and why should it) but I do think you might enjoy the experience at least as a one-off!
Oh, and if you think £18 a bottle is expensive, have a look at this: **LINK** — it is a special edition from Drie Fonteinen that the brewer sold for €25 a bottle when he released it a few years ago. Of course, the asking price on eBay will not necessarily be met, but still …
Mattias
Edited By Banjoman on 28/03/2017 09:32:46
Edited By Banjoman on 28/03/2017 09:33:47
28 March 2017 at 10:33 #70470Dave Milbourn
Participant@davemilbourn48782Six pounds isn't ridiculously expensive for a pint-and-a-half of rare Belgian wheat beer. We pay maybe £2 for a 33cl bottle of Leffe in a supermarket and that's nothing special by way of Trappist-style beers. I would draw the line a long way before shelling out £250 a bottle though.
When I was bound apprentice in famous Gloucestershire – Bristol, actually – we happily paid what was the equivalent in "old money" of 38p/pint for genuine German-brewed Lowenbrau in the Mauritania Beer Keller on Park Street when regular Courage bitter was 10p/pint. Apprentices have always been reckless on pay-days! These days some folk will pay £6 for a pint of Fosters 'boy's beer' in Central London. Maybe someone should have a quiet word with them about real ale…DM
19 April 2017 at 14:43 #70683Banjoman
Participant@banjomanWell! I've not had much to add to this thread for the last few weeks, partly because we've been kept pretty busy getting our apartment ready to be put up for sale, but mainly because most of the model work I've been doing has been in the form of stitching on more bolt ropes, and there is, I think, a limit to the amount of fascination warranted by that process …

However, over Easter I finally got the luff bolt rope on the jib stiched on. To make sure of a good fit to both the stay and the boom, I decided to sew on the luff hank rings before taking the rope around the tack …
… thus making it fairly straightforward to get the tack cringle just the right size.
The bolt rope was then stitched on along the foot, the clew cringle made up and finally the boltrope was taken up along the leech, the end point whipped …
… and then cut off just beyond the whipping, and the final two inches stitched on to the leech as well.
It was then time to mark out …
… and cut the holes for the eyelets …
… and, once these had been put in, to lace the sail to its boom and shackle the boom to the bowsprit.
Next up, the stay was rove through the hanks, and the halliard shackled to the head cringle-and-thimble …
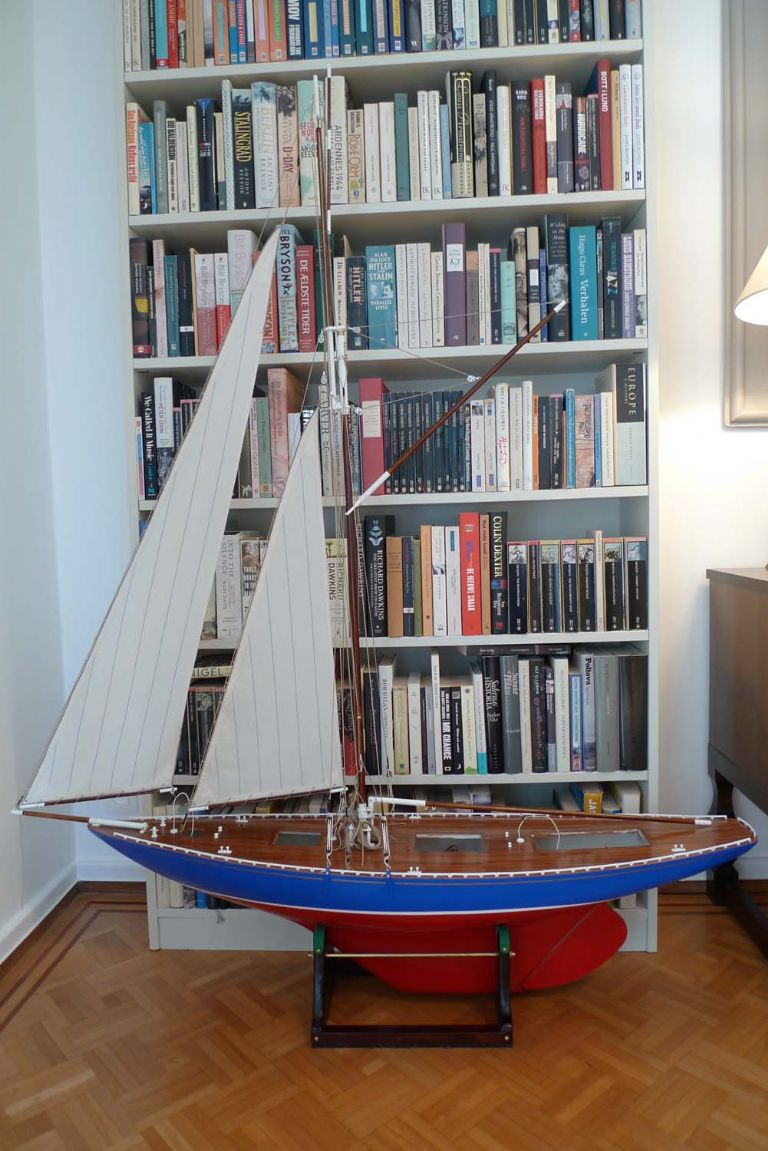
… ater which the stay was set up and the sail fully hoisted.The sheet still needs to be shortened and set up with a bowsie, while the lashing line shall be whipped and cut to final length, but for the rest the jib is now ready, too.
Hence it is on to the mainsail …
To be continued …
Mattias
19 April 2017 at 16:43 #70685Bob Abell 2
Participant@bobabell2Excellent work, Banjo
Errrr……..Can I ask a strange question?…….Strange because, l could easily be totally out of order
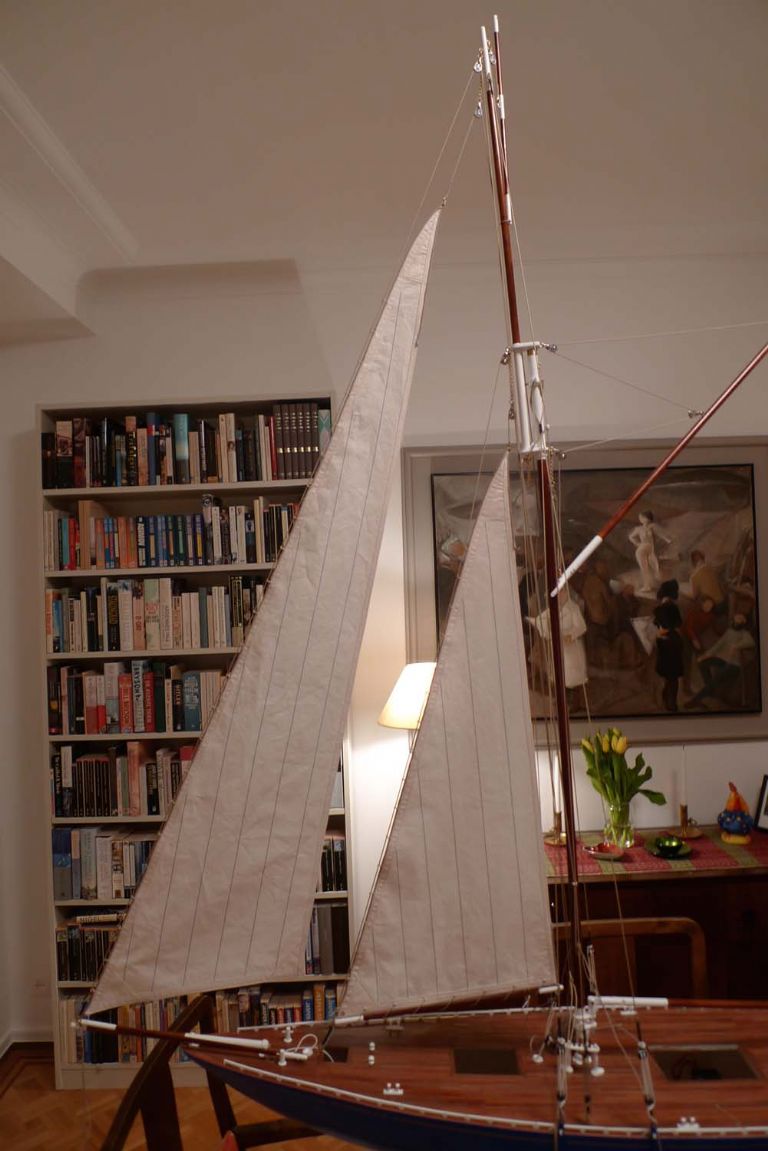
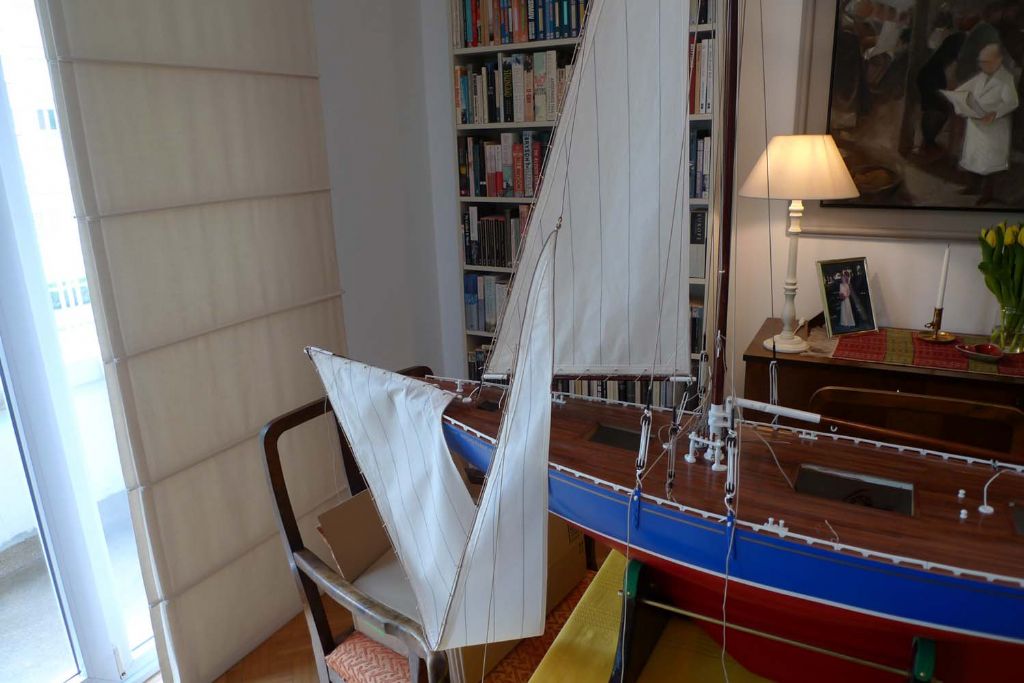
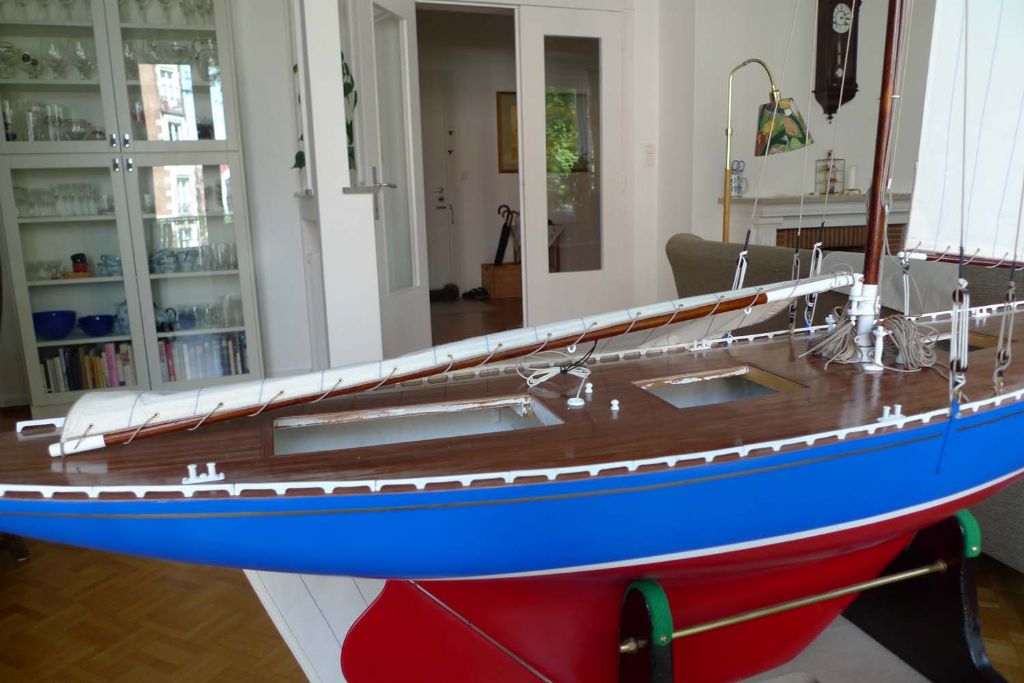
Looking at your latest photo showing the two foresails in position on the hull……..
Are they in their correct position?
Should the bigger sail be at the rear and the small sail, be at the front, but high up?
It's worth a thought?
Bob
Ps……..Don't panic, Mr Mainwaring, I've checked up and you are correct!……….Sorry Banjo
Edited By Bob Abell on 19/04/2017 16:53:55
19 April 2017 at 19:49 #70688Banjoman
Participant@banjomanThank you very much, Bob

No worries – as you already figured out, it seems, this is indeed the way it should be, at least according to the plans and instructions for the kit … Also, there's not all that much choice in the matter: the fore stay has to go to a lower point on the mast than the jib stay, so there will by definition be a smaller area available for the foresail compared to that for the jib. There are certainly full size yacht rigs where the foot of the jib is set higher up on the jib stay than here, and the sail thus so much smaller, but given that both these sails (and the mainsail) are sheeted home with sheets attached to the same loop on the same sail winch, the sheeting points on all three have to be (close to) the same distance from the pivotal point of each one – otherwise, they would move out by different amounts for any given movement of the winch loop.
I'm not entirely sure, but I think keeping the foot of the jib in a similar enough position visavi the deck as the foot of the foresail is an easy way to achieve this, while at the same time ensuring that the two sails and their running rigging won't tangle with each other when tacking.
Anyway, I've kept as close as I've been able to to the instructions here, so it will hopefully be alright …

Mattias
24 April 2017 at 10:42 #70750Banjoman
Participant@banjomanWell, my hand stitching is getting if not better, then at least faster; it has only taken me four days to stitch on the entire mainsail boltrope …

The sail is so far only fitted to the boom with the tack and clew cringles, and to the gaff with masking tape; before I go on to putting in the eyelets and lashing it up, I want to get the boltrope onto the topsail as well, as main- and topsail are both supposed to be lashed to the gaff with the same line. I shall also slightly adjust the tack cringle, probably by adding a strop for pulling it just the right distance towards the mast, so that the foot will be well stretched out along the boom. First the topsail, though.
To be continued …
Mattias
Edited By Banjoman on 24/04/2017 10:42:51
1 May 2017 at 09:24 #70819Banjoman
Participant@banjomanWell! If a stitch in time saves nine, I now have some very substantial savings of stitches! On Friday morning, while waiting for an electrician to show up at home, I whipped the final end of the topsail bolt rop, cut of the excess …
… and stitched on the last six inches or so of bolt rope, after which the main and top sails were dryfitted to the spars a last time to check the general fit, and also where to punch for eyelets.
All in all I have put on six meters of bolt rope with approximately 4,300 stitches; a job which has taken me something in the region of 50 hours or so. In comparison, adding the eyelets was a cinch and needed only a few hours of work, after which all the sails were at long last fully made up!

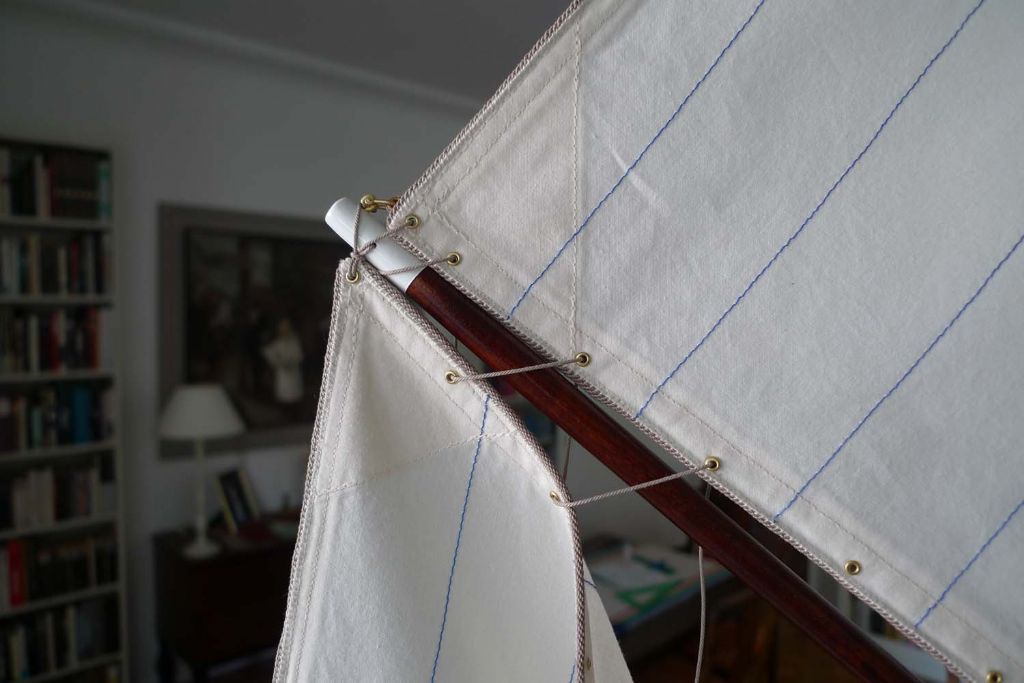
Next up was attaching the final two sails to the spars. First the mainsail foot was secured to the boom with the tack and clew cringles, after which a lacing line was passed through the eyelets …
… and the boom bolted back onto the gooseneck swivel. The tack was then stretcheda little towards the mast with the help of the end of the lacing line taken around the tack cringle.
Next, the topsail head was lashed to the topsail spar …
… and the topsail foot and mainsail head laced to the gaff using a single lacing line.
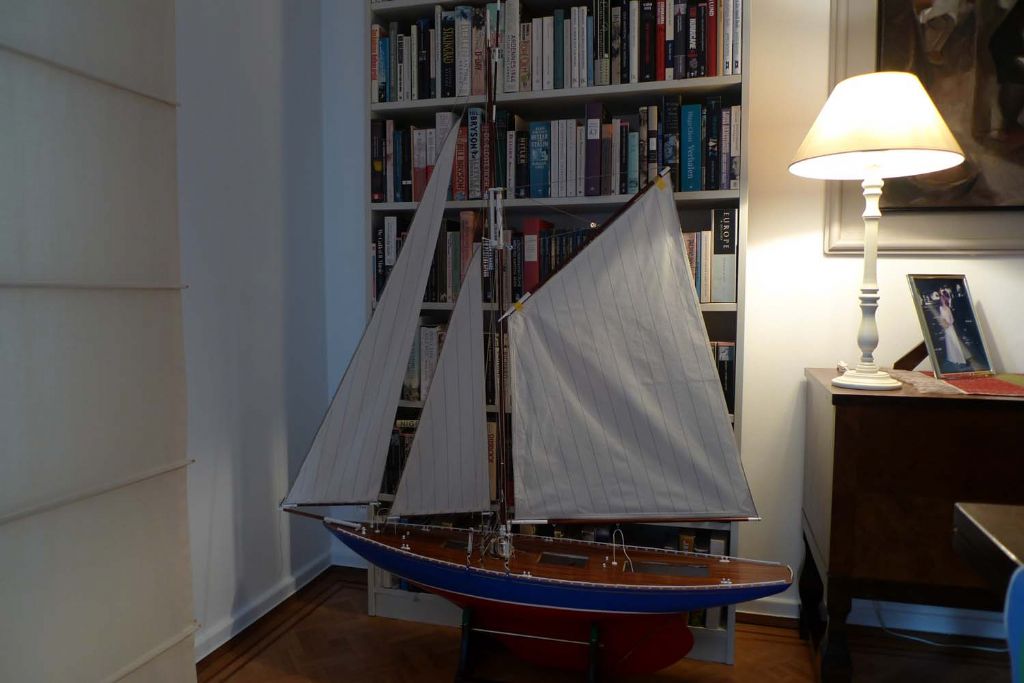
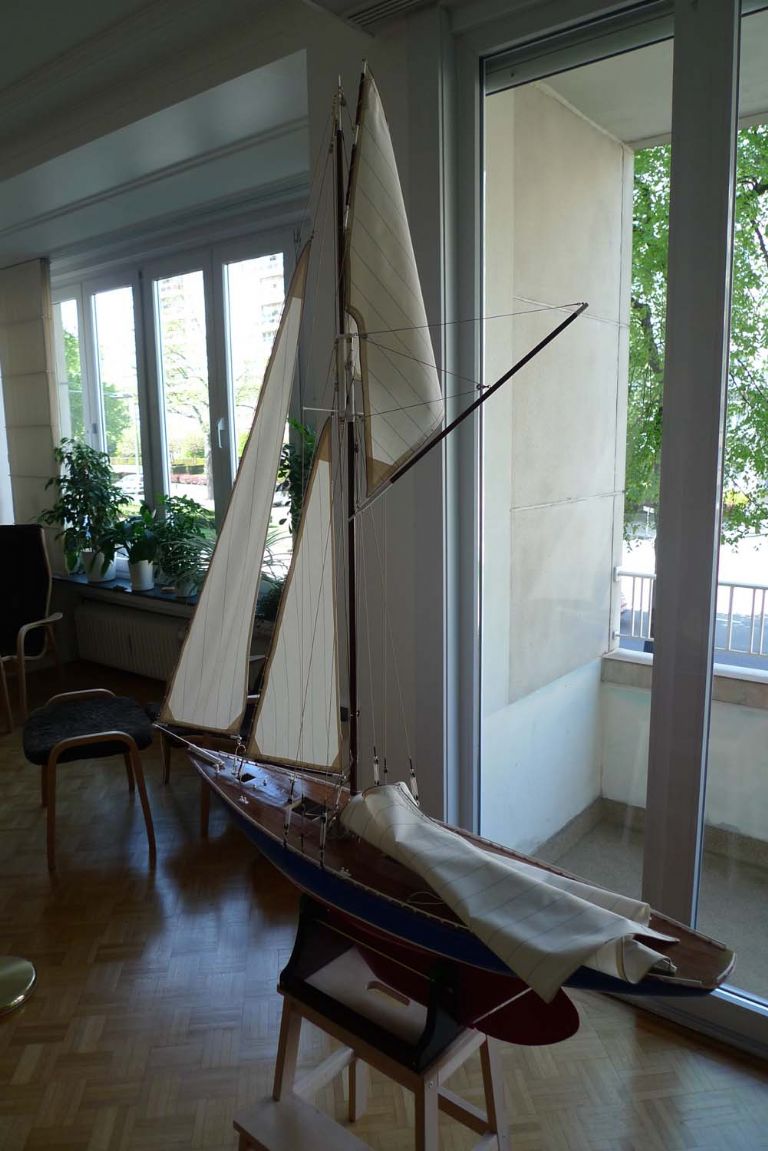
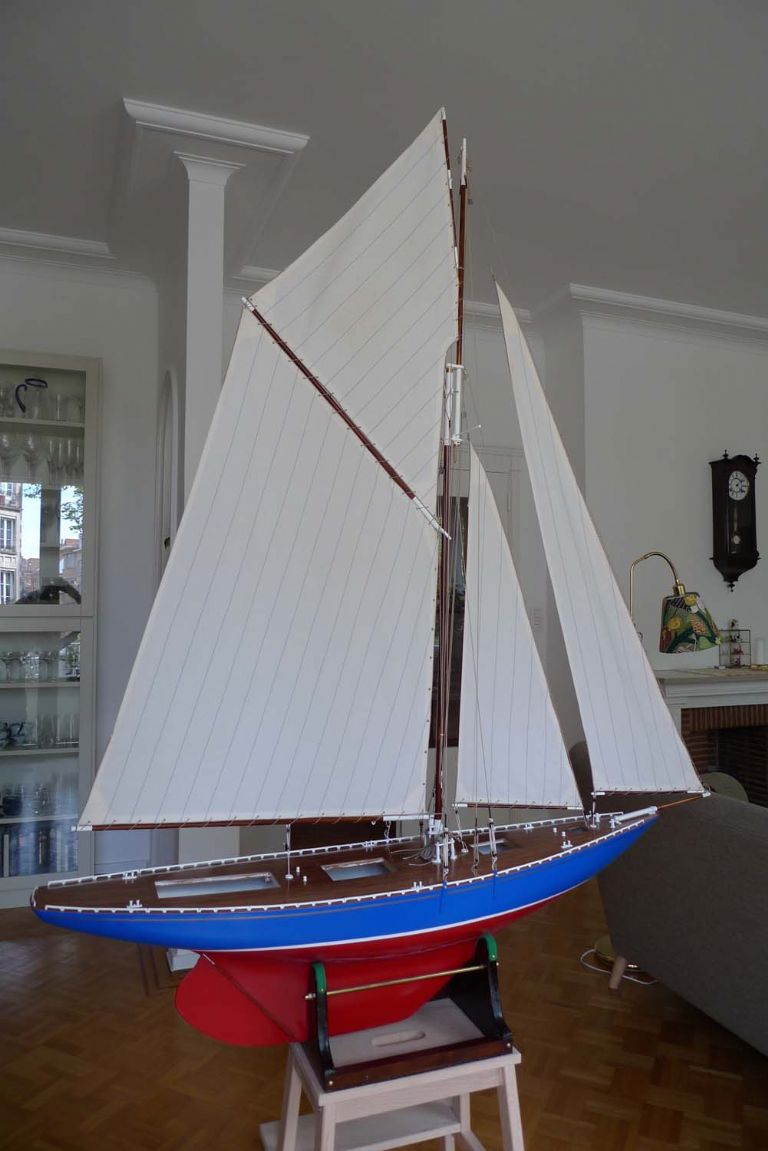
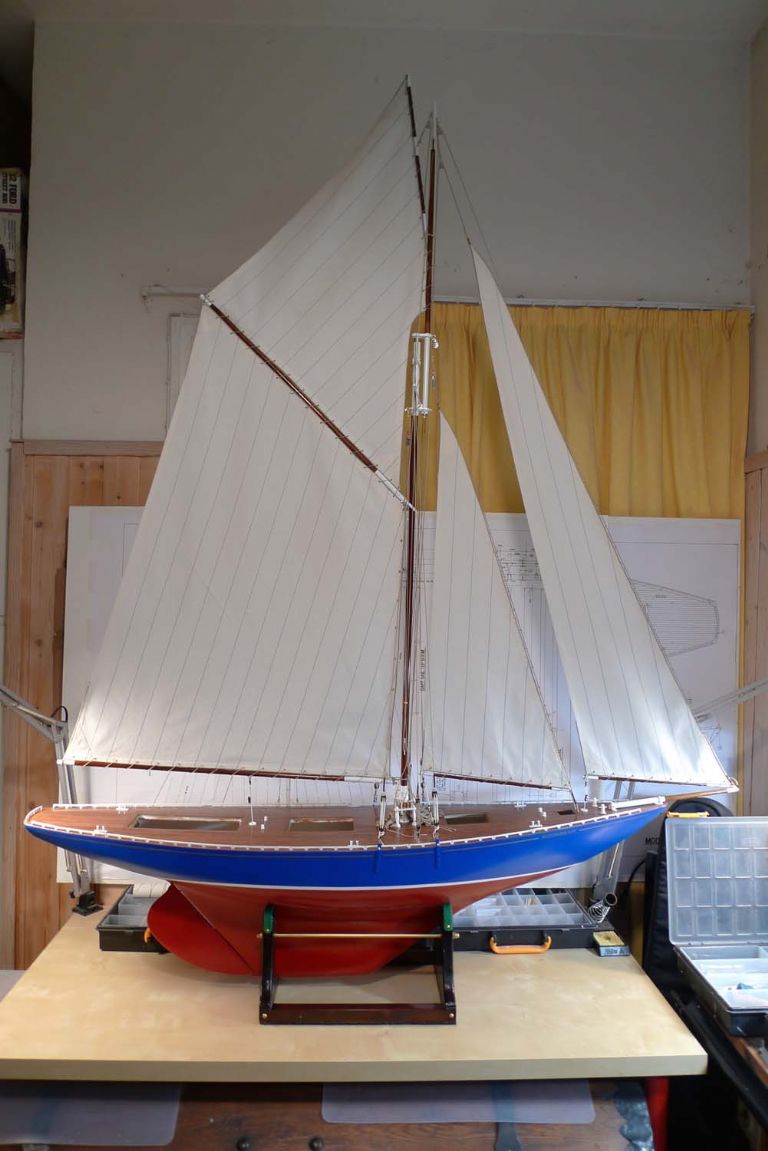
With this, and after some final tweaking of the halliards, all four sails were in place and fully set (excepting a further lacing line to secure the mainsail luff to the mast).
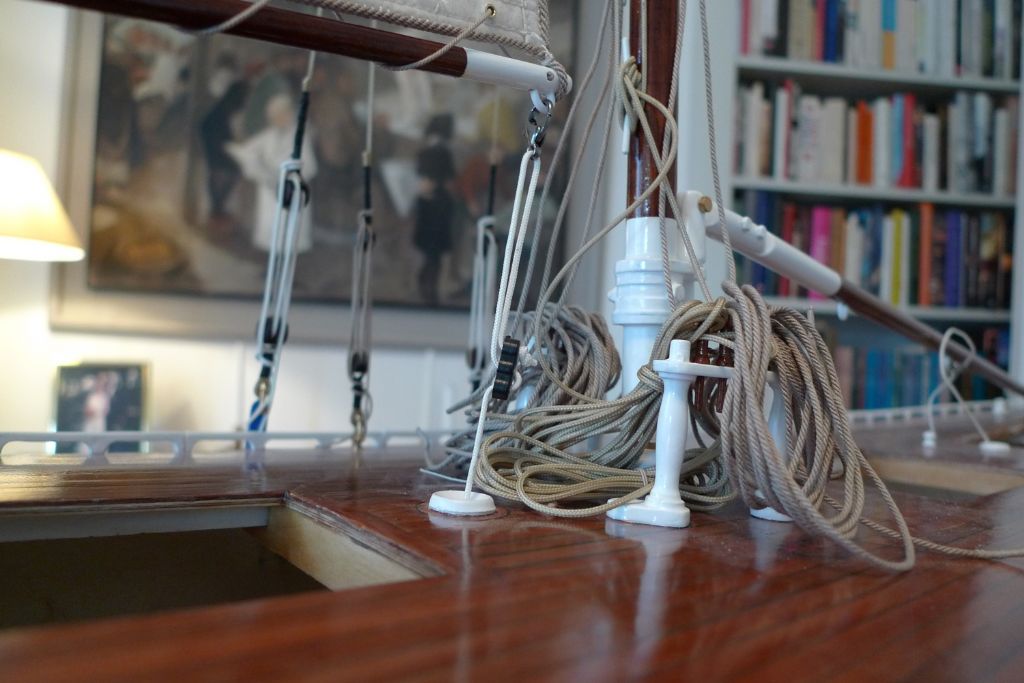
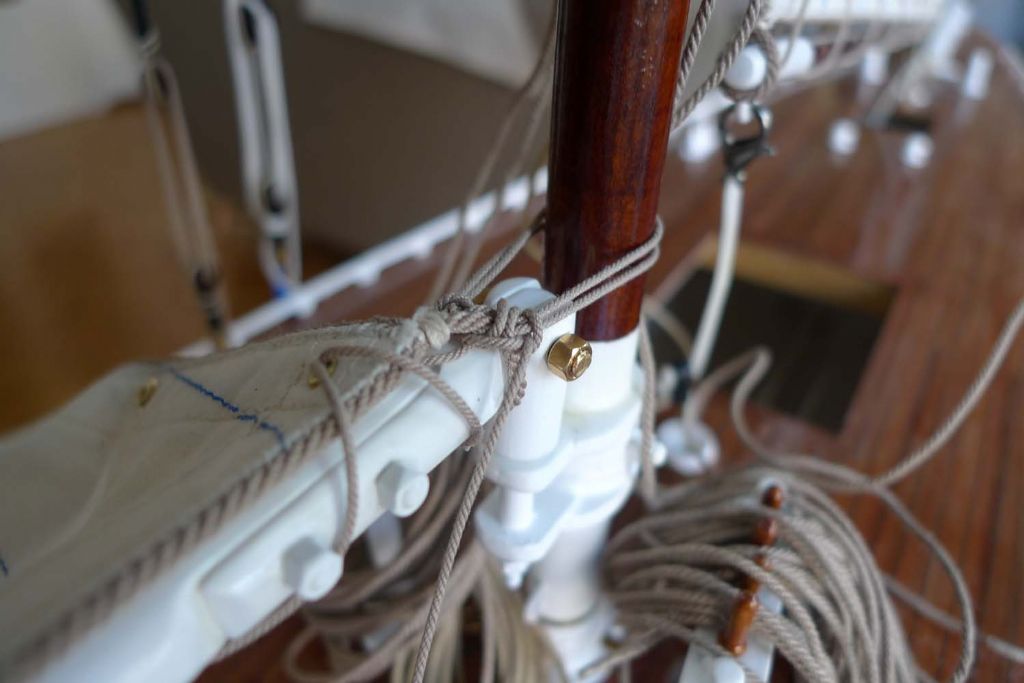
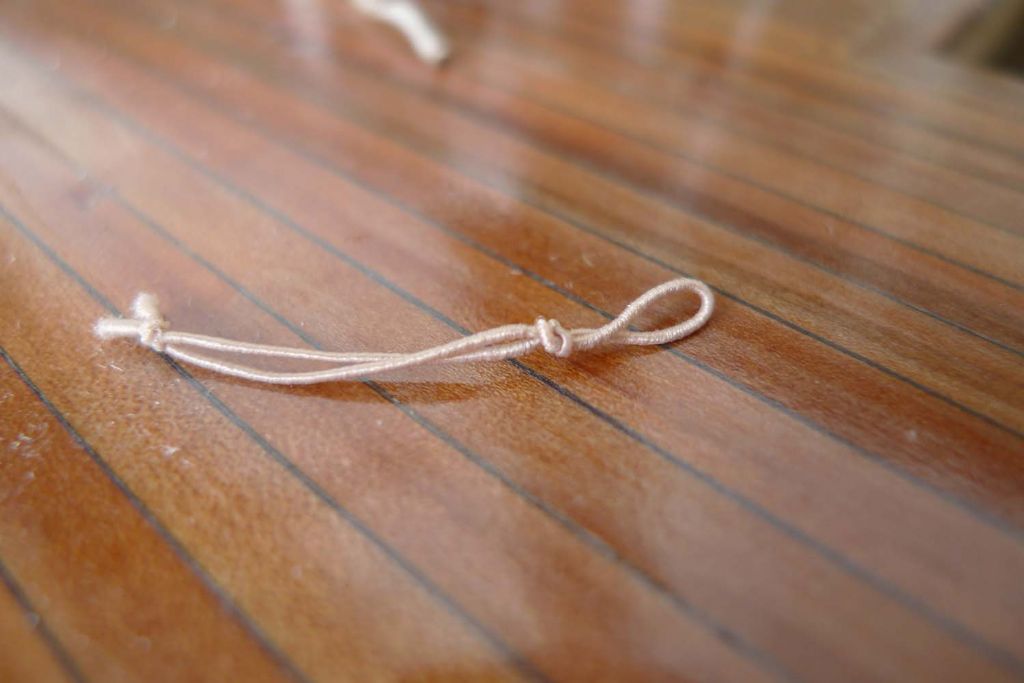
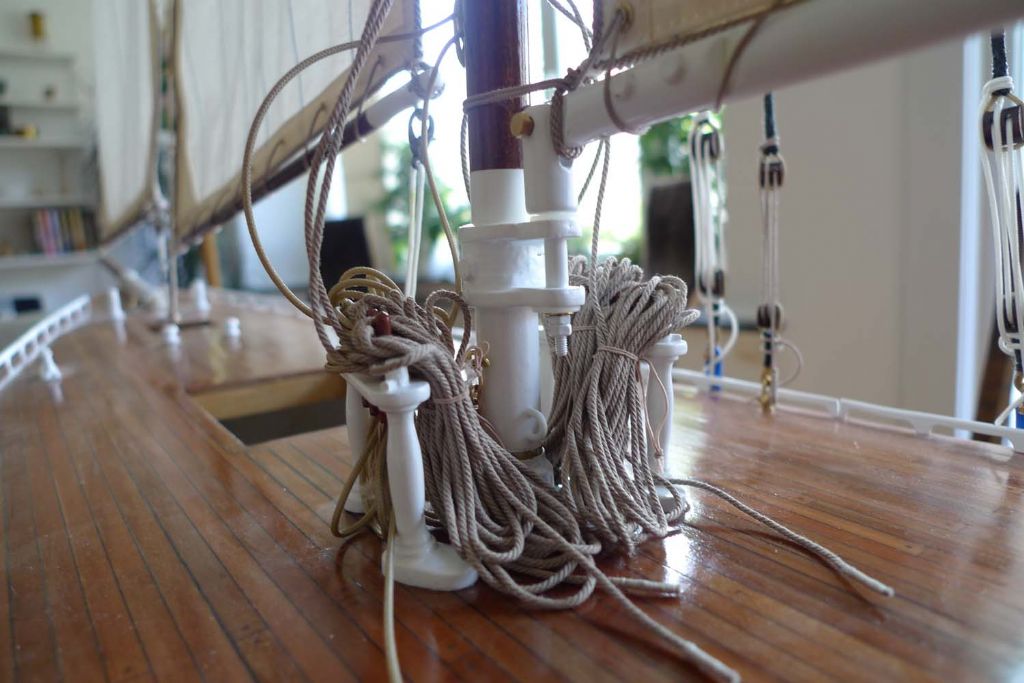
The prettiest and most shipshape way to coil the running ends of the halliards and stays would of course have been to try to follow full size practice, but given the difficullty of doing this at scale (where the lines have practically no weight and rather little friction), and even more given the importance of ease of handling when taking down the rig for transport, I decided to cheat, and so made up some strops from elastic sewing thread …
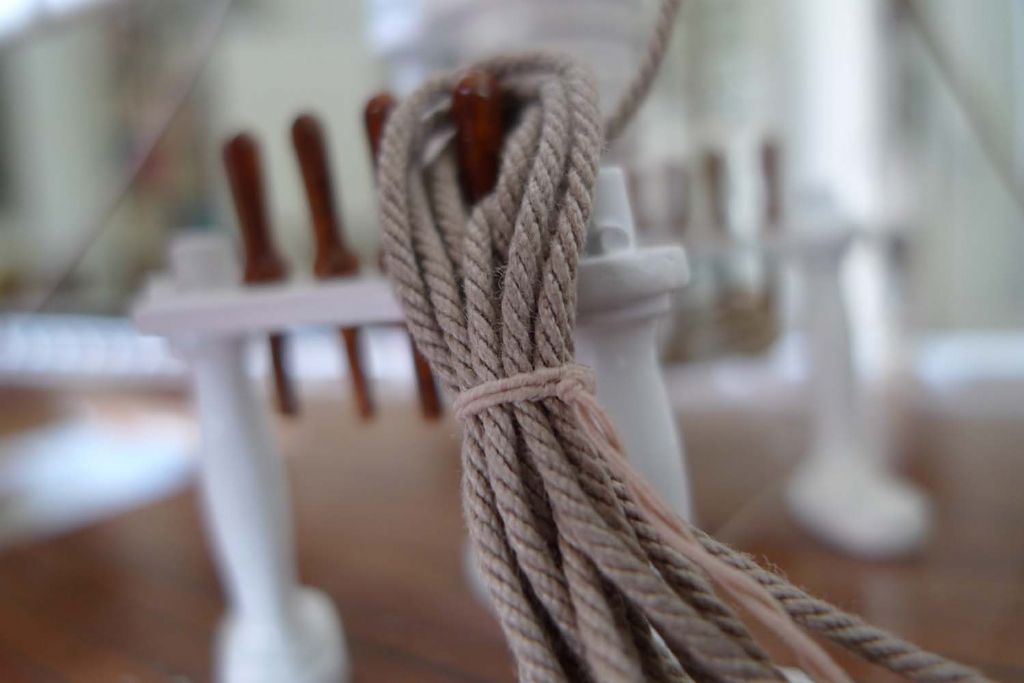
… that were then used to secure each coiled line …
… so that they can without to much difficulty be stowed on and unshipped from the pin rails, at the same time making reasonably sure that no line will trail in the water or risk getting tangled in the sheets while sailing.
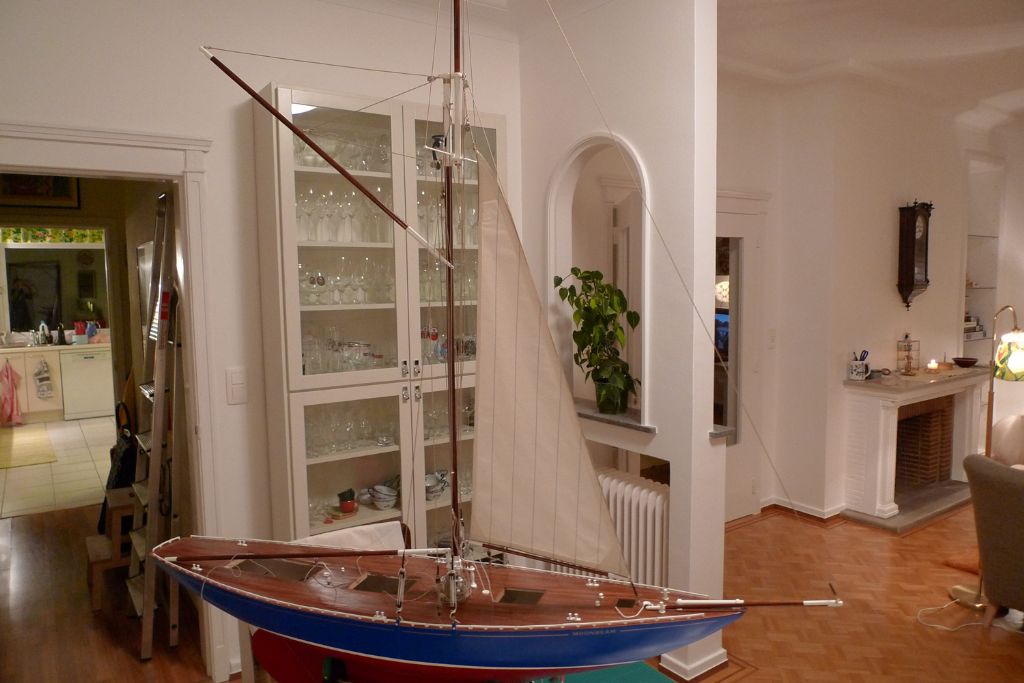
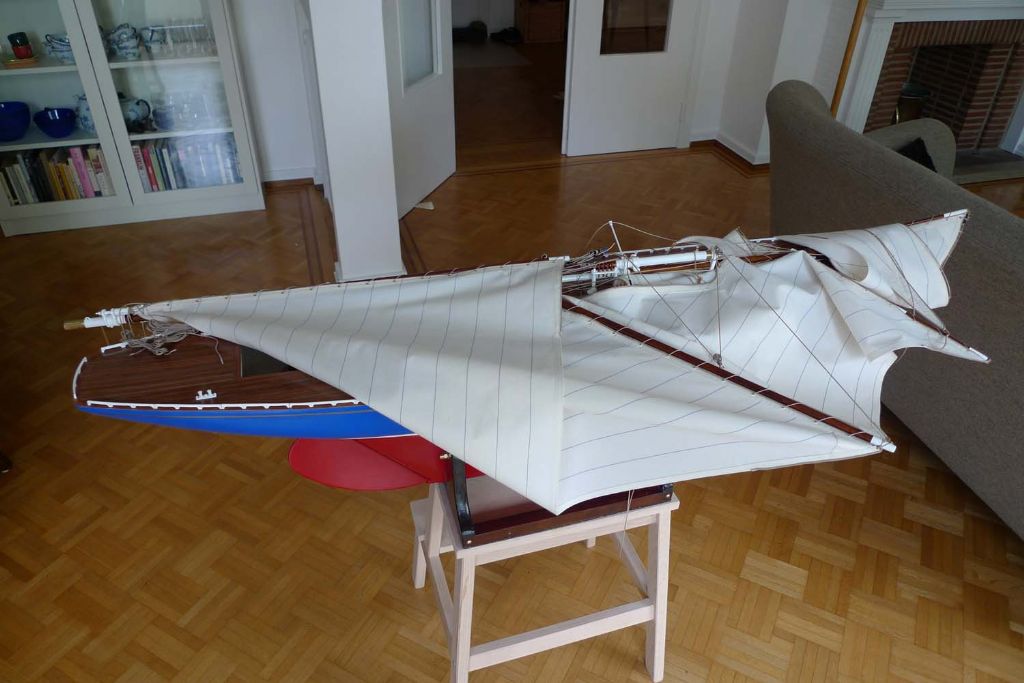
With all this sorted, it was now time to close down the living room sail loft, so the rig was duly collapsed – a job that took less than 30 seconds to do …
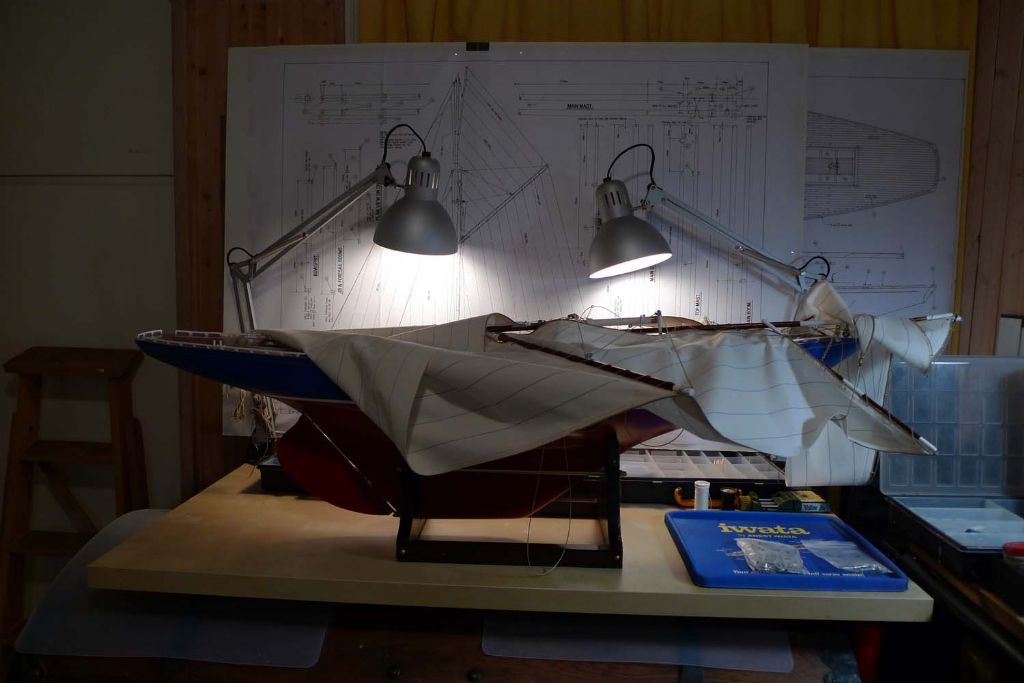
… and Moonbeam carried down to the workshop again …
… where, in about a minute, I had the rig set up again, with everything still just so: all shrouds and stays and halliards precisely as taut as before de-rigging.
I hope that I'll be able to find enough time over the coming weeks and before we move house to finish the remaining job of making up the superstructures; if not, well, she's not going anywhere that I'm not, so sooner or later she'll be finished.
To be continued …
Mattias
1 May 2017 at 13:20 #70824Bob Abell 2
Participant@bobabell2An excellent build, Banjo, from start to finish
A thought has just struck me!
It would be nice to see a few comments from your fellow club members?
I'm sure they will get a warm welcome.
Bob
2 May 2017 at 14:10 #70843Banjoman
Participant@banjomanThank you very much, Bob!

Mind you: I've not yet finished the build, only the rigging! I still have the four superstructures and their fittings to sort out, so there's a few more weeks worth of work involved.
As for my fellow club members, I don't know if any of them are on this forum, but would be inclined to think not, as I suspect they'd be more inclined to join one of the various Dutch language model boat fora. However, I may of course be wrong … Is there by any chance someone on this forum besides me who's a member of the SMCM in Mechelen, Belgium?
Mattias
4 May 2017 at 09:32 #70876Martin Field 1
Participant@martinfield1I used to live near Mechelen, working at Toyota's studios in Nosagem. If I'd known I'd have joined!
Martin
5 May 2017 at 09:08 #70890Banjoman
Participant@banjomanFancy that, Martin! I don't live in Mechelen myself, but the club there is the most conveniently located from where I am, and (more importantly) has good access to an excellent pond at the De Nekker sports and leisure complex. I am also familiar enough with Nossegem — if nothing else, Moens Houthandel there is my preferred lumber merchants …
Mattias
-
AuthorPosts
- Please log in to reply to this topic. Registering is free and easy using the links on the menu at the top of this page.
Code of conduct | Forum Help/FAQs
Latest Replies
Home › Forums › Sailing Models › Topics
-
- Topic
- Voices
- Posts
- Last Post
-
-
Fairey Huntsman 31
1
2
…
5
6
Started by:
 Chris Fellows
in: Build Blogs
- 14
- 139
-
12 hours, 25 minutes ago
 Chris Fellows
-
Fairey Faun
1
2
3
Started by:
 Chris Fellows
in: Build Blogs
- 7
- 58
-
12 hours, 47 minutes ago
 Chris Fellows
-
Vic Smeed’s Silver Mist
1
2
…
32
33
Started by:
Bob Abell 2 in: Scratch build
- 4
- 822
-
13 hours, 25 minutes ago
 Tony Hadley
-
Fairey Huntsman 28
1
2
…
7
8
Started by:
 Chris Fellows
in: Build Blogs
- 1
- 195
-
14 hours, 55 minutes ago
 Chris Fellows
-
Eezebilt RAF Fire Boat
Started by:
Tim Cooper in: Build Blogs
- 2
- 3
-
15 hours, 30 minutes ago
 Dave Reed
-
Feathered Friends
Started by:
 Chris Fellows
in: Soapbox
- 3
- 7
-
18 hours, 37 minutes ago
 Chris Fellows
-
4D Modelshop
Started by:
Keith Long in: Scratch build
- 6
- 7
-
19 hours, 4 minutes ago
 Chris Fellows
-
John Cobb’s Crusader
1
2
…
7
8
Started by:
 Paul T
in: Scratch build
- 1
- 192
-
1 day, 14 hours ago
 John W E
-
Complex Automata
Started by:
 Colin Bishop
in: Soapbox
- 1
- 1
-
2 days, 17 hours ago
 Colin Bishop
-
RAF Fireboat ID
Started by:
 Dave Reed
in: Collectors’ corner
- 8
- 24
-
3 days, 18 hours ago
Tim Cooper
-
TID steam tug 42″ – PN Thomas drawing enlarged
1
2
Started by:
 Ray Wood 3
in: Scratch build
- 8
- 33
-
4 days, 12 hours ago
 Richard Simpson
-
Lady of Skye (puffer)
1
2
Started by:
 mick east
in: Build Blogs
- 9
- 43
-
4 days, 22 hours ago
 Richard Simpson
-
Building a hull.
Started by:
 mick east
in: Scratch build
- 7
- 10
-
6 days, 21 hours ago
 Ray Wood 3
-
Todays Boating
1
2
…
210
211
Started by:
 ashley needham
in: All things floating
- 84
- 5,252
-
1 week ago
 Colin Bishop
-
Sea Rover Restoration
Started by:
harry smith 1 in: Collectors’ corner
- 4
- 10
-
1 week ago
 Richard Simpson
-
WORKSHOP LIGHTING
Started by:
 John W E
in: All things floating
- 9
- 18
-
1 week, 1 day ago
 Colin Bishop
-
Mayhem Website Down
Started by:
 Colin Bishop
in: All things floating
- 4
- 10
-
1 week, 4 days ago
 Colin Bishop
-
MAGGIE M trawler
Started by:
 sammyk
in: Buy/Sell or Trade
- 2
- 3
-
1 week, 4 days ago
 sammyk
-
meter
Started by:
 Alasdair Allan
in: All things floating
- 5
- 16
-
1 week, 6 days ago
 Chris Fellows
-
River Queen 2”- 1’.
Started by:
Richard B in: Steam powered models
- 5
- 7
-
2 weeks ago
Richard B
-
Deluxe Superphatic Glue.
Started by:
 Colin Bishop
in: All things floating
- 4
- 12
-
2 weeks ago
 Chris Fellows
-
How to add photos to your posts
Started by:
 Colin Bishop
in: Adding Images to Forum Posts
- 3
- 16
-
2 weeks ago
Len Morris 2
-
Cataract
Started by:
Bob Wilson in: Soapbox
- 2
- 4
-
2 weeks, 1 day ago
 Colin Bishop
-
The mighty tug Wattle
1
2
3
Started by:
 mick east
in: Build Blogs
- 10
- 61
-
2 weeks, 1 day ago
 Richard Simpson
-
Clyde Puffer Glenaray
1
2
3
Started by:
 Alasdair Allan
in: Build Blogs
- 6
- 57
-
2 weeks, 4 days ago
 Alasdair Allan
-
Fairey Huntsman 31
1
2
…
5
6
-


