Liverpool class Lifeboat, a Metcalf models kit.

Advert

Liverpool class Lifeboat, a Metcalf models kit.

Home Forums Building Kits Liverpool class Lifeboat, a Metcalf models kit.

  • This topic is empty.
Viewing 25 posts - 151 through 175 (of 214 total)
  • Author
    Posts
  • #99734
    neil hp
    Participant
      @neilhp

      whilst waiting for my Liverpool class hull to come home from master sprayer Dave Stavros Jones in a couple of weeks or so, i have been concentrating on refurbishing an old Atlantic 21 kit………

      but tonight i came to a cruicia point in anyones buildl …….

      I finished off a box of Ferrero Rocher, and that ment i could finish a little but important job on my Liverpool Class lifeboat…….

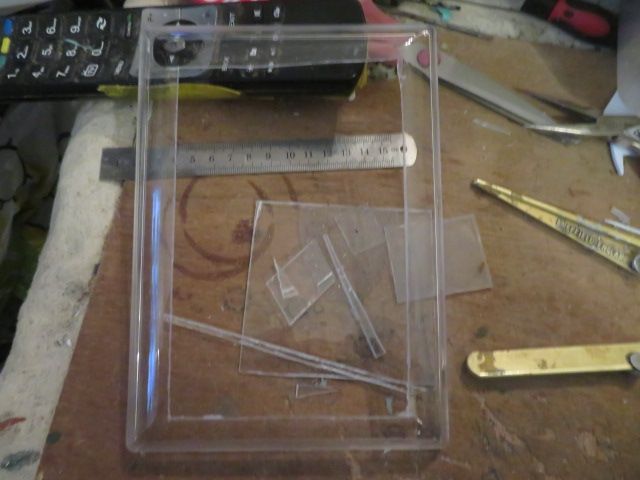
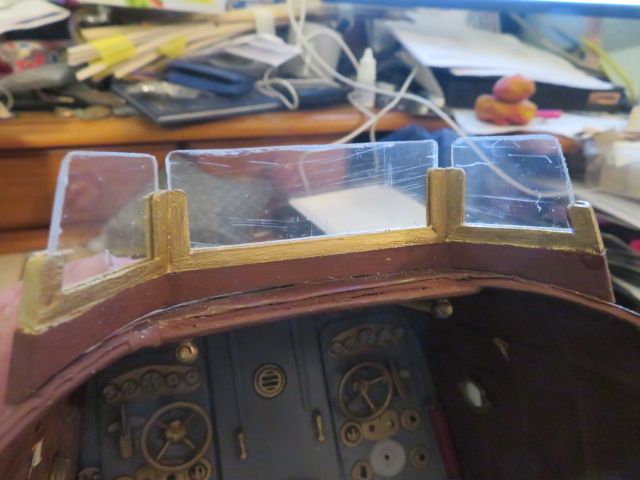
      I could "glaze" the wind screen with the nice 1.0mm thick box they come in….

      and so i did just that………….great stuff Ferrero…….tasty and usefull after the chocs have been devoured.

      img_1743.jpg

      img_1742.jpg

      Advert
      #99963
      neil hp
      Participant
        @neilhp

        Now that my latest Atlantic 21 has been finished apart from fitting the electronics, it's back to the Liverpool class lifeboat.

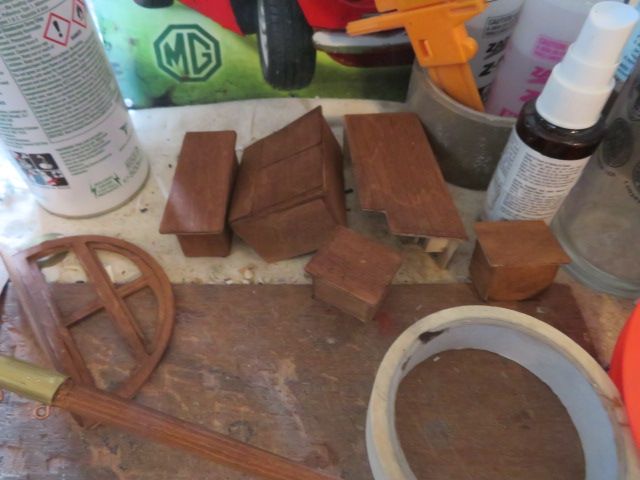
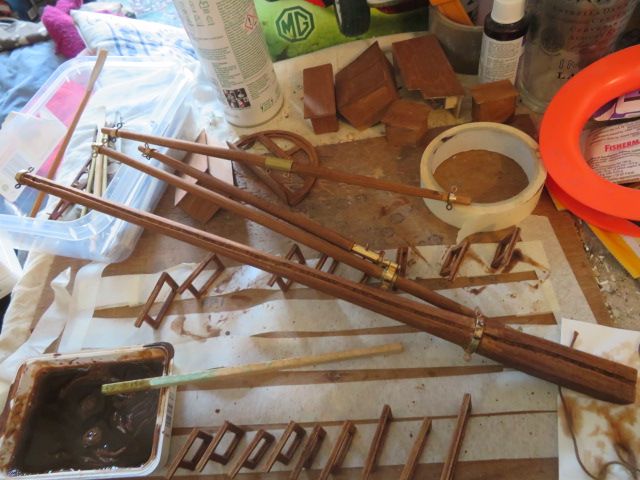
        And today it was time to stain the masts, spars, supports for the benches and the storage lockers at each end of the boat with Colron dark Mahogany..

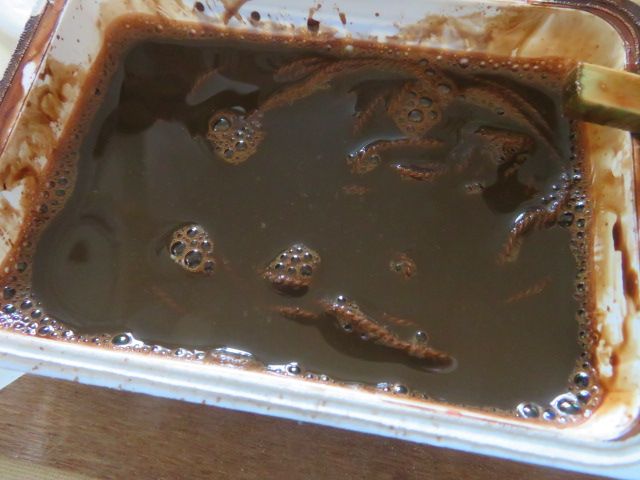
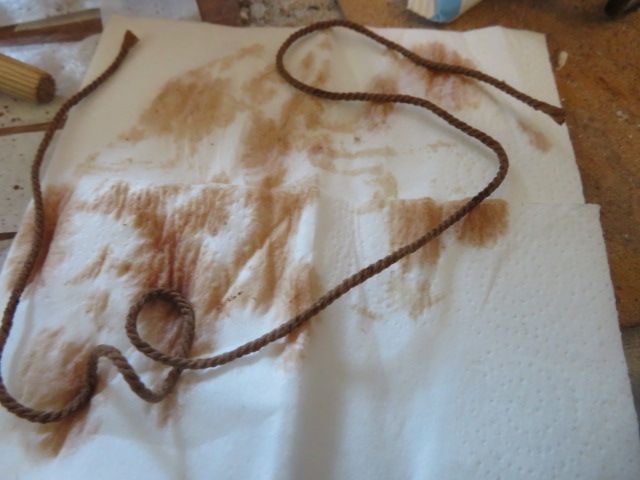
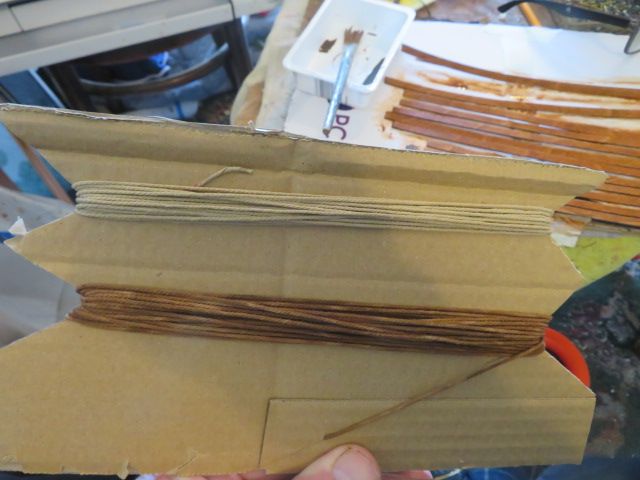
        also, after a practice to see if it worked i put some mahogany stain and water into a little plastic container and put some 2mm cotton trwist yarn into it to stain as the running'standing rigging for masts and sails……..

        been looking on ebay and found exactly the same cotton twist in mahogany shade and it was 5'99 plus postage for 2 meters of the stuff, so checked in my yarn box, and found exactly what i wanted…………saved me a good few quid, the amount i need.

        img_1926.jpg

        img_1927.jpg

        img_1928.jpg

        img_1929.jpg

        img_1930.jpg

        #99964
        gecon
        Participant
          @gecon

          Hi Neil,

          Nice work as allwaysyes

          Good idea about staining rigging thread with water-based stain. I tried spirit based stain last year, and found that the thread became very stiff. Not good for sheets or running rigging. Have some mahogany stain powder in the Colin Archer kit which I was not intending to use for staining the wood, but will soon test it for staining rigging.

          Otherwise I have bought som brown acrylic 'wash' which was recomended by another CA builder in Norway. That's probably similar to water based stain.

          George

          #99971
          neil hp
          Participant
            @neilhp

            It was an old trick my grand dad passed on to me many many years ago., George……….so use it on all my sailing models.

            I AM really stuck now for things to do to the Liverpool until I get my hull back from Dave Stavros Jones, but because Dave has been "off colour" last week, and I am now plagued with it, I can't see that happening soon.

            So any little job I can find to do whilst sitting here in front of the TV feeling pissed off and miserable with myself I will do.

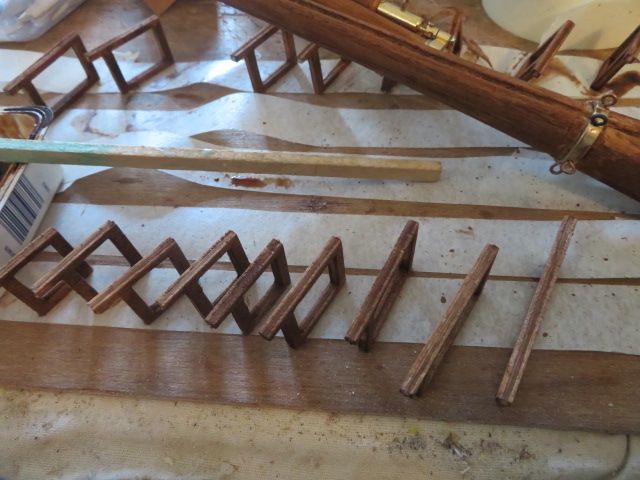
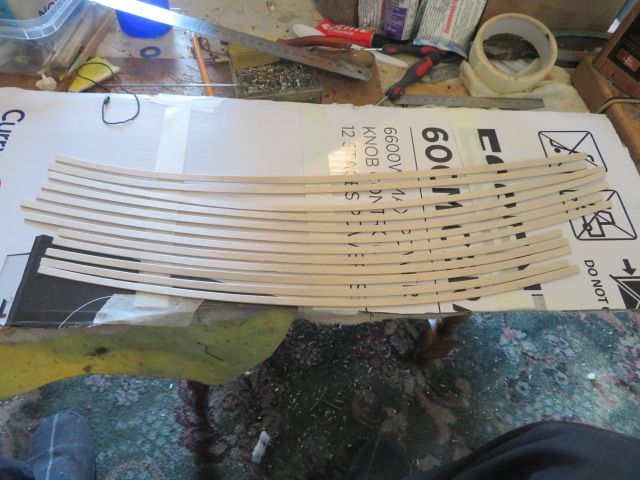
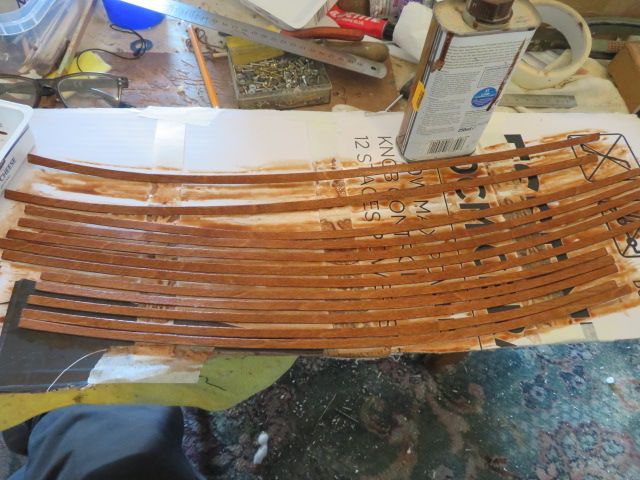
            This morning I laid out the sets of slats for th longitudinal benches down port and starboard sides, ..stuck them to a piece of cardboard box and painted them with a "wash" of water and mahogany stain. gave them two coats on one side and then put them out in the warm sun to dry.

            I'll turn them over once dry and paint the other side the same.

            I also readied the recently stained standing rigging, and the lighter running rigging cord ready as well.

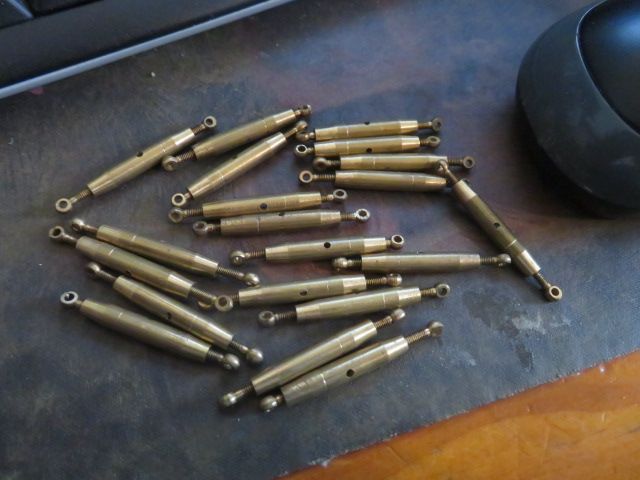
            The working brass bottle screws are on their way from Italy as we speak.

            img_1936.jpg

            img_1939.jpg

            img_1941.jpg

            #99979
            neil hp
            Participant
              @neilhp

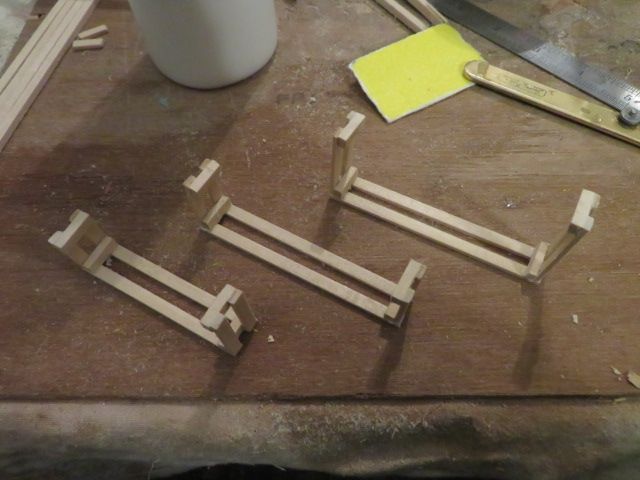
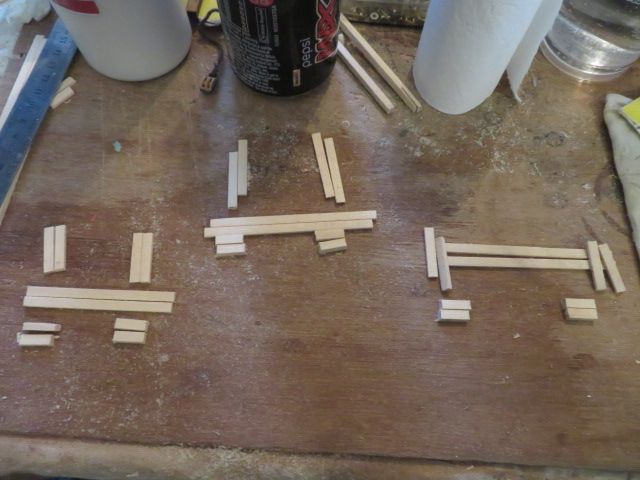
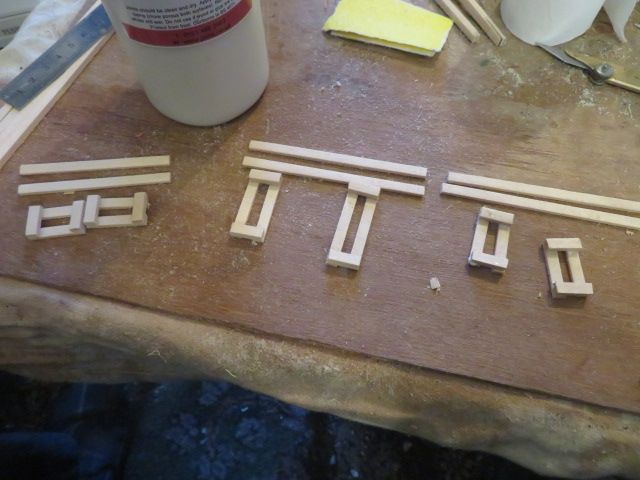
              The parts for the rope bins have been cut to size and will be glue together this evening.

              I bought some new band saw blades at 10 TPI to cut the thin box wood timber I had [ I'm saving the lovely timber supplied in the kit for my next scratch build lifeboat, come 2023] to size.

              They always do and always have come as a 3 "spring" coil and to simply uncoil without slicing your fingers and wrists on the sharp bladed, you cut the zip ties and then drop them to the floor where they happily will un coil themselves.

              Then just a matter of mounting them on the two wheels of the band saw, tension it all up and cut away.

              Which I did friday, as I have done hundreds if not a thousand times for the past 48 years of my career………… AND set to work cutting the softest thinnest piece of box wood.

              Within the first second of offering the 10mm thick timber to the blade, it was "running off"……..just wasn't following a perfect line and veering inwards, and for a new blade this just shouldn't have been happening, but as I was fealing rough I chucked in the towel, and left it all, thinking that the "new" blade from a packet was a duff blade.

              I came in and ordered some new 4/6 TPI blades and left until today when my new blades arived.

              Went out to fit a new blade but before I did, just looked at the "duff" blade, and suddenly realised why the blade wasn't cutting! When it sprung out from its coil, it also sprung inside out, [not looking], I mounted it so that in fact the blade on the down stroke at the table was cutting the timber with the back of each saw blade and not the front sharp edge……

              That will teach me to take my reading glasses out with me so that I can actually see what i'm doing………….but in all honesty, I HAVE NEVER had a blade do that when uncoiling in all my years.

              So the cutting of the timber then went to plan, plainly and easily.all I can say is………….i've neve cut my medium rare steak with the back edge of a butter nife, and that is what it was like.

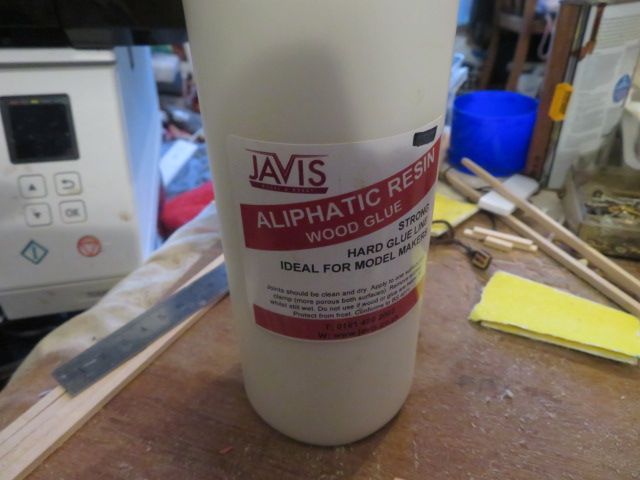
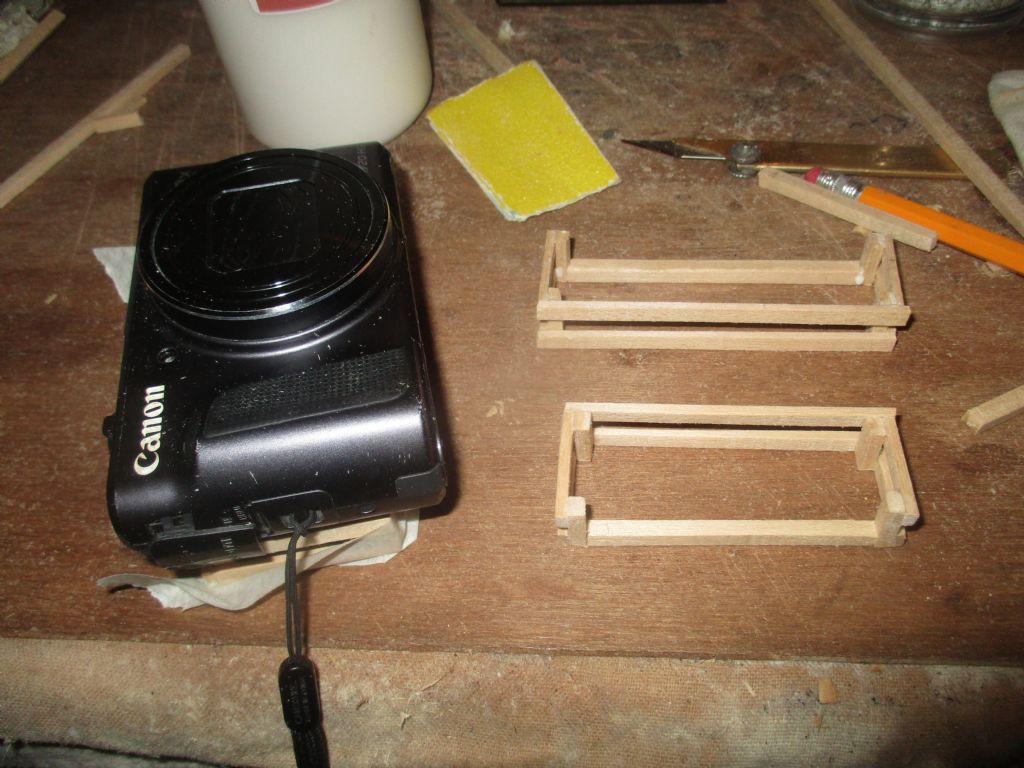
              And the rope bins went together quite easily using aliphatic quick grab waterproof wood resin glue. There is one under the camera but had a very slight twist to it so is gluing square and "flat" with the weight of the camera helping.
              img_1944.jpg

              img_1945.jpg

              img_1947.jpg

              img_1946.jpg

              img_0239.jpg

              #100004
              neil hp
              Participant
                @neilhp

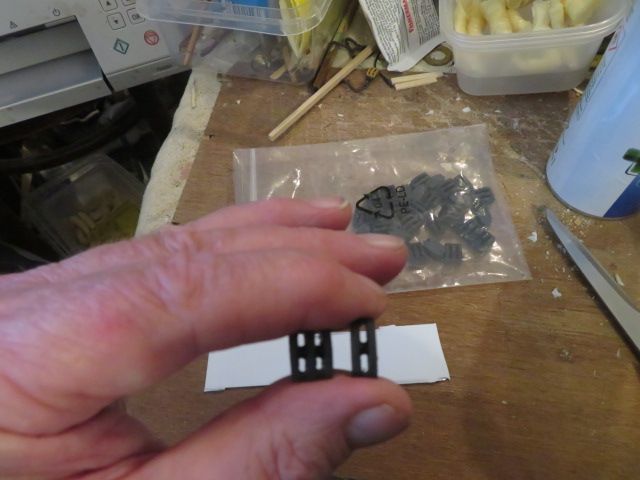
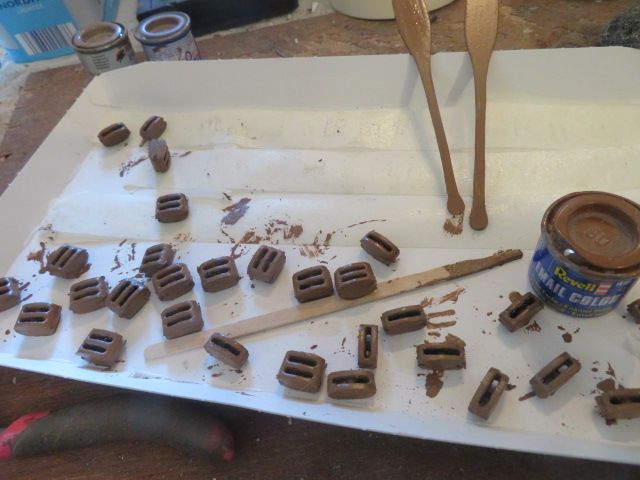
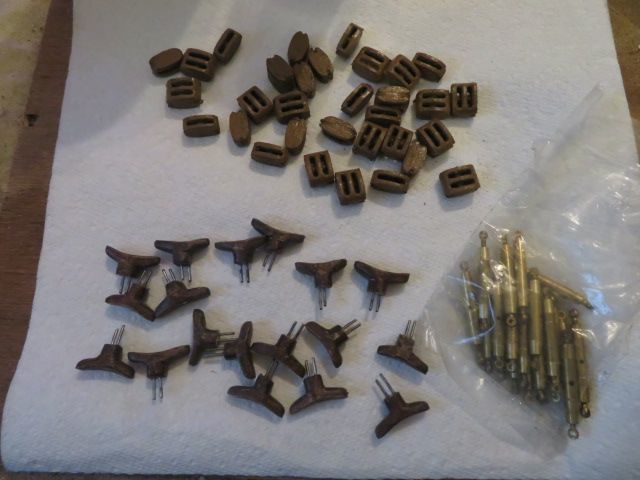
                my new beefier rigging blocks, 3D printed for me by a friend have now been readied for the standing rigging and painted to resemble varnished timber.

                also……On with the Liverpool class, I wanted something chunky and hopefully unbreakable to deal with the rigging in a strong wind……

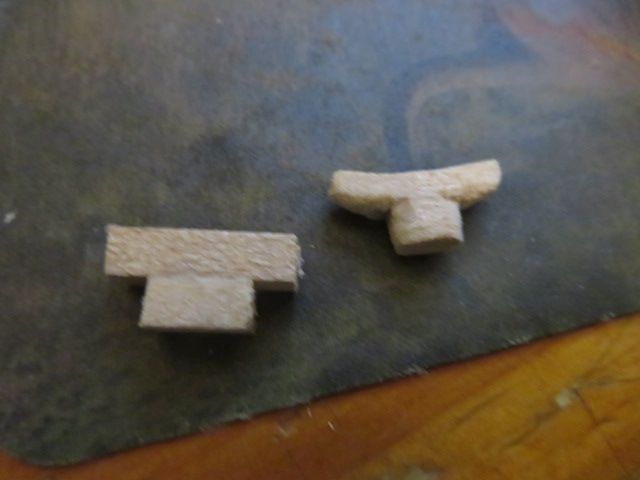
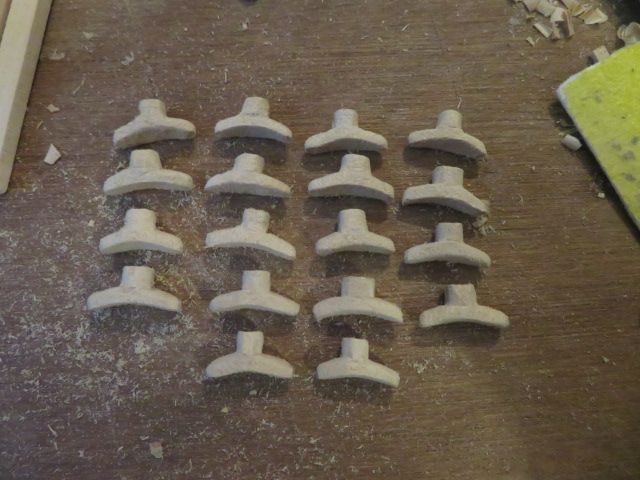
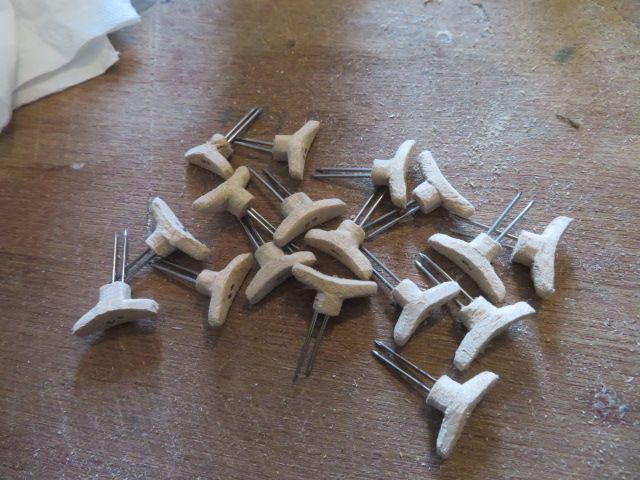
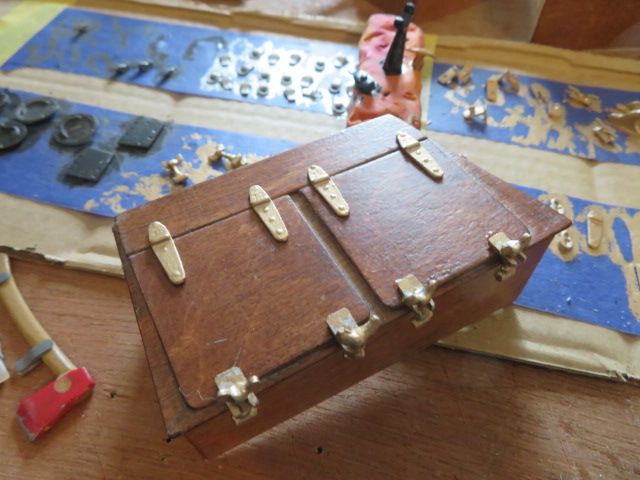
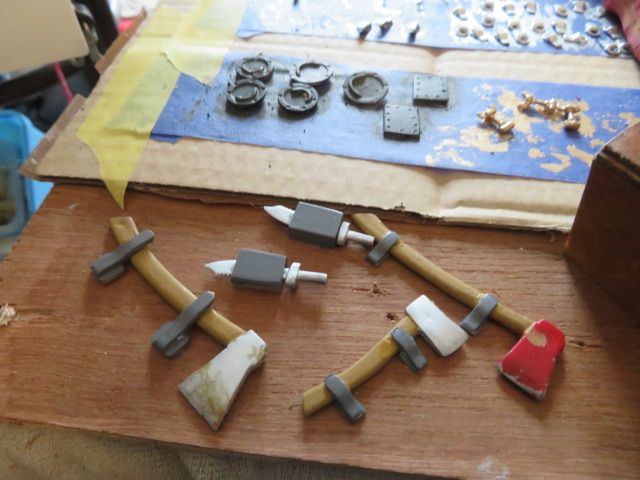
                And so I made some beefier wooden cleats out of fine grained Sycamore that I have in stock amongst my hard woods.

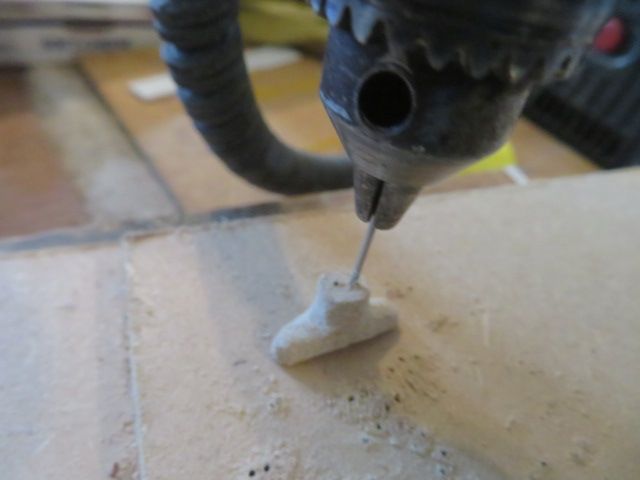
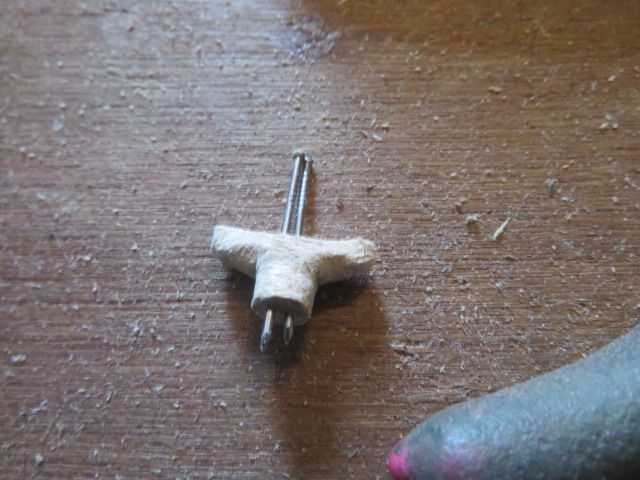
                They were made in two parts, of base and cross piece, then carved and sanded to shape with a swann morton fine scalpal.

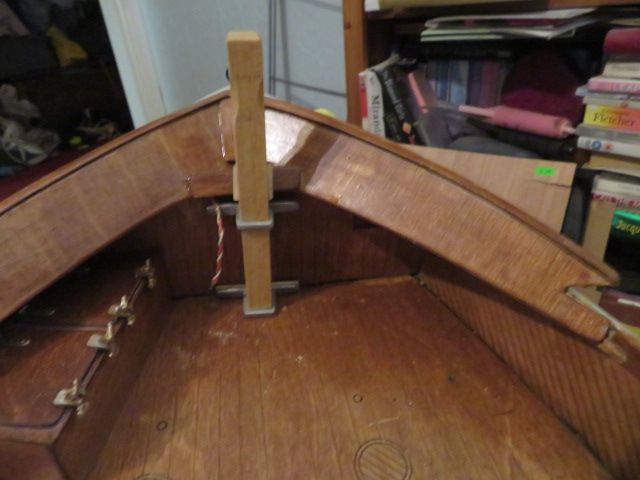
                then drilled two framing pins were driven home and once the hull is home, will be fitted to the masts, bulwarks and end box tops to take the working rigging.
                img_1959.jpg

                img_1962.jpg

                img_1970.jpg

                img_1971.jpg

                img_1974.jpg

                img_1975.jpg

                img_1976.jpg

                #100018
                neil hp
                Participant
                  @neilhp

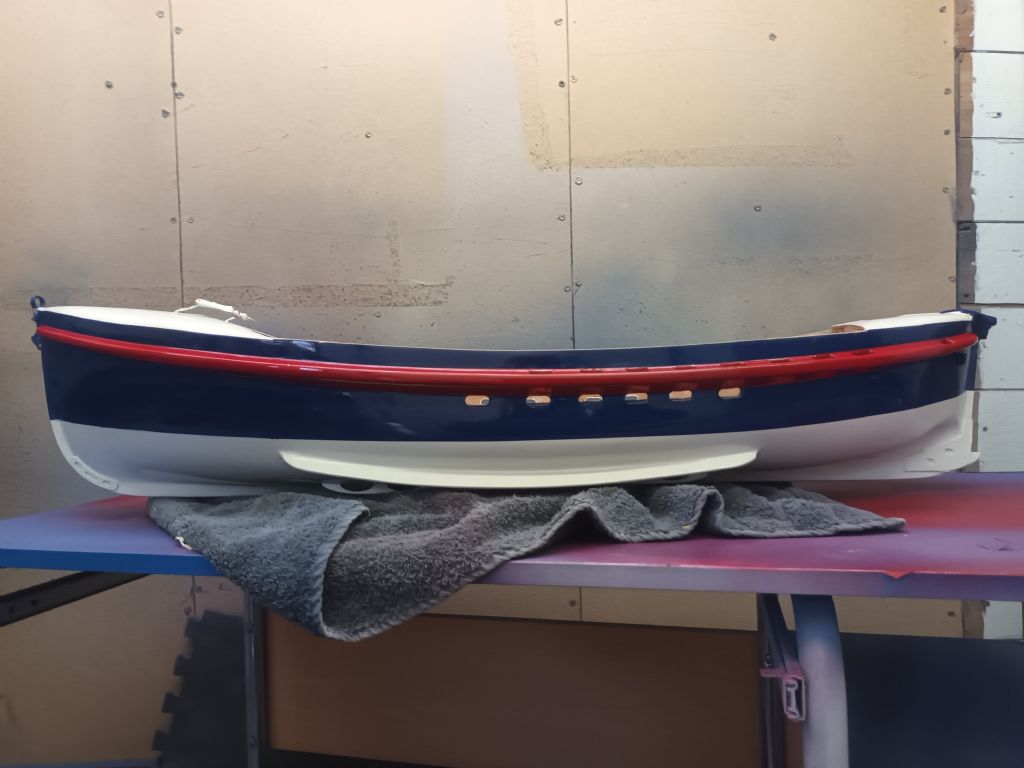
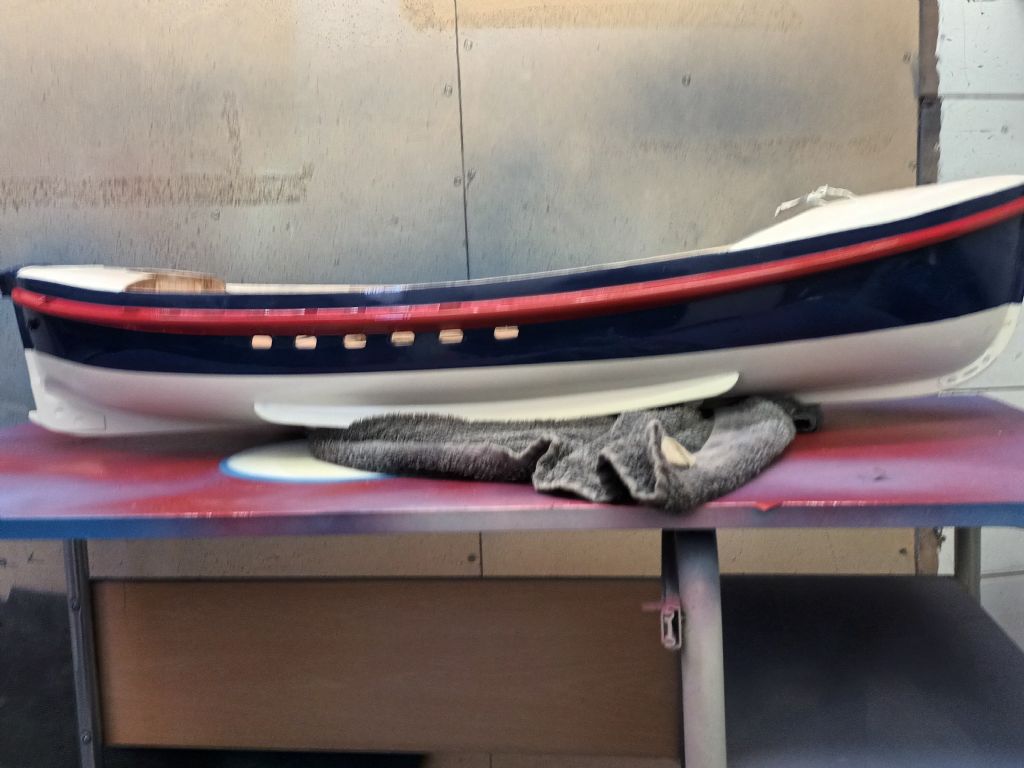
                  ready for lift off………….the hull of my Liverpool will be picked up on monday from Dave Stavros Jones painted and looking resplendant in Red, white and blue.

                  Whilst it has been away i have been working on all the major parts, and today i got together the parts for the rigging……..

                  the bottle screws [turn buckles] turned up from Italy, i stained and painted the wooden fairleads and used wirewool to finish off the surface, and the rigging blocks already paimted wee all put together ready for when i receice the sails back from the machinist in 3 weeks time…..

                  all seems to be coming together well.

                  img_1979.jpg

                  img_1980.jpg

                  #100086
                  neil hp
                  Participant
                    @neilhp

                    my hull has been painted now by Dave Stavros Jones, and i shall be collecting it from Wales on Monday morning, all being well, from our meeting at Conwy RNLI Lifeboat station………a fitting place for a rendesviou, me thinks.

                    now looking forward to cracking on and putting all the fittings on the boat that have been prepared afore hand.

                    Hopefully progress will now be noticeable.

                    277856718_1530274934034709_6043235733435987565_n.jpg

                    277910623_1259229741152922_6678925402725642232_n.jpg

                    #100125
                    neil hp
                    Participant
                      @neilhp

                      now that i have got my boat hull back from Dave in Wales, i can now start putting the boat together,

                      now for something radical with my Liverpool lifeboat.

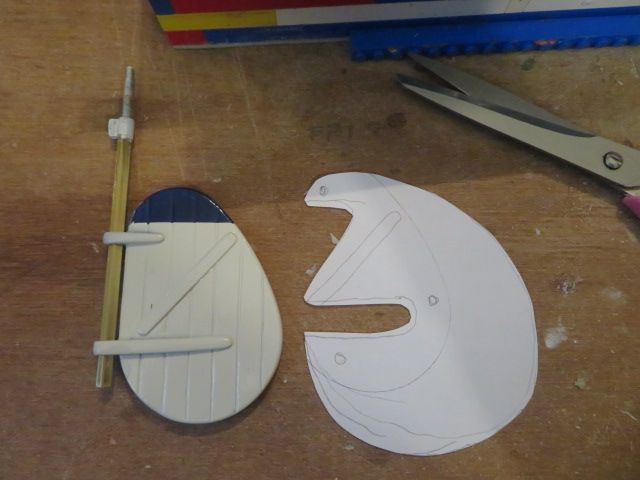
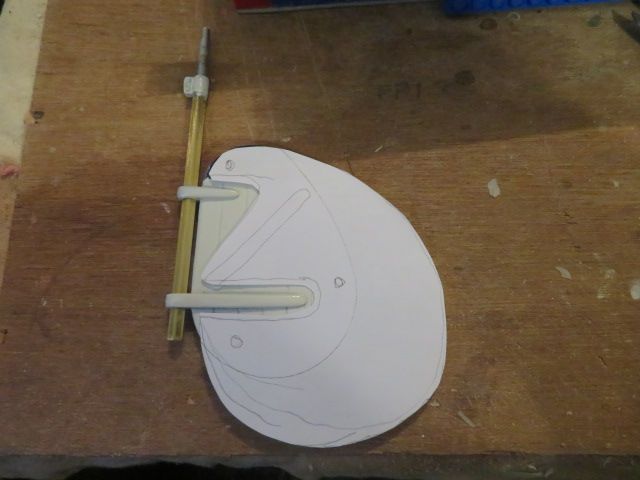
                      as i hope to use the twin motors only for gettng me out of trouble on the Lake Windermere, whilst using the full set of sails for propulsion, i have noticed down at lakes where people are sailing scale fully rigged boats………..most always seem to have over scale rudders…much larger than they should be….

                      and so i have made a template in paper for one with a x 2 surface area.

                      i shall, for the duration and practice sails whilst getting used to the model, fit one to size using 3 x 6BA or equivelant sized srews and nuts to the existing rudder, that once the sail is over be removed and the screw holes plugged.

                      i think that temporary modification will give me good enough control of the boat.

                      i shall make it from 2mm plasticard

                      278294615_10217759128644012_6815944063768986645_n.jpg

                      img_1993.jpg

                      img_1994.jpg

                      #100303
                      neil hp
                      Participant
                        @neilhp

                        been busy the last couple of weeks on a couple of projects that i had to get started on as i want them ready for the Blackpool show in October, but now they are on the way i have got back to the Liverpool lifeboat that i have neglected sinse getting it back from Dave Stavros Jones and its nice new coat of paint.

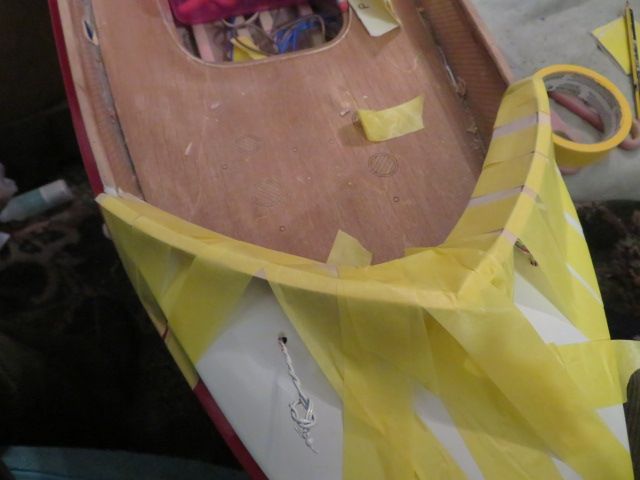
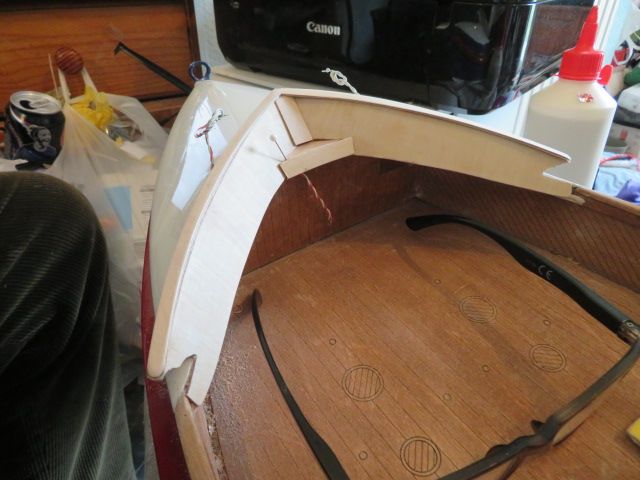
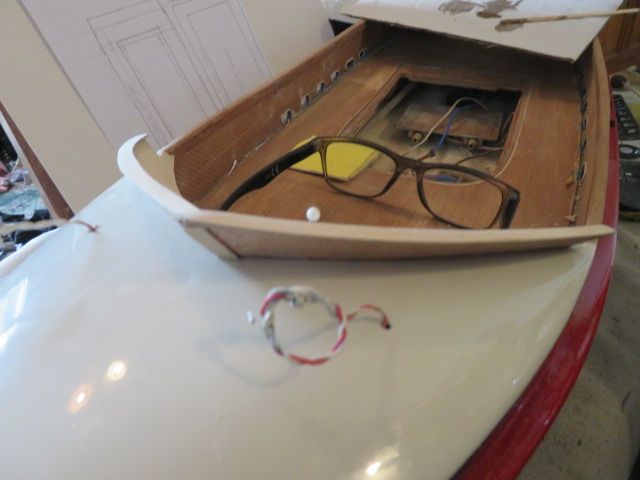
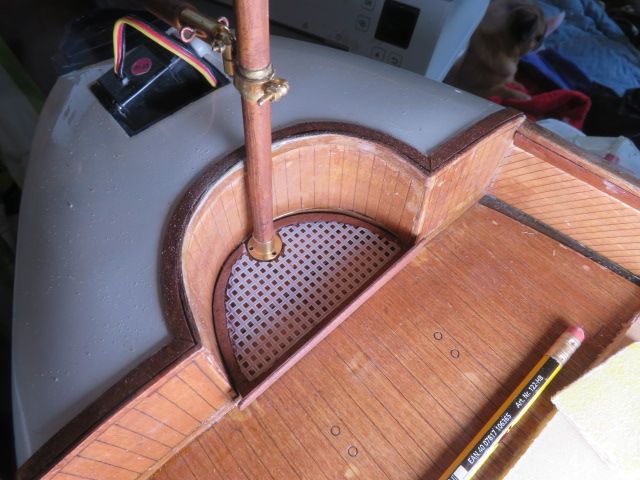
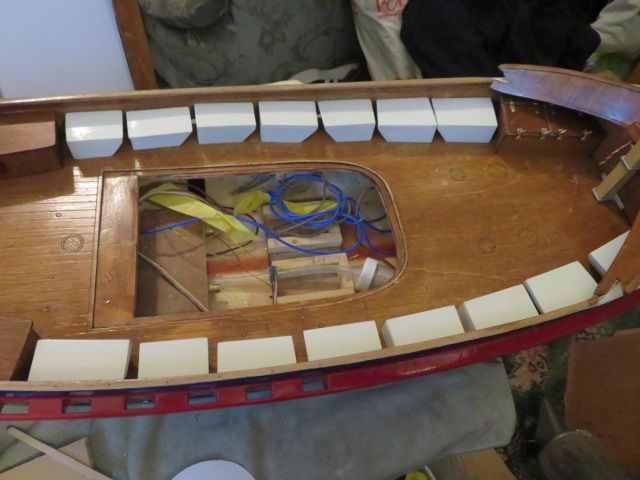
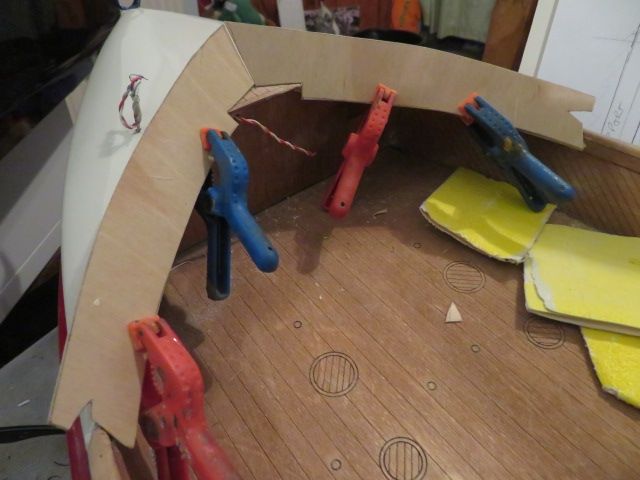
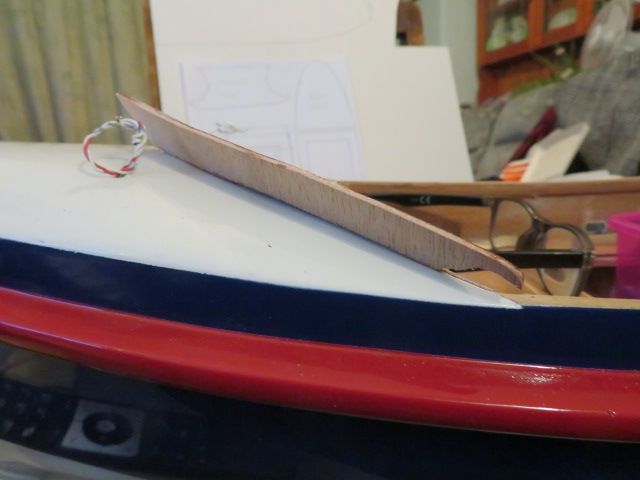
                        and so i have concemtrated on the last part of the build which hasn't been done, whilst the boat was away. And that is the break water on the rear end of the front end watertight box top..

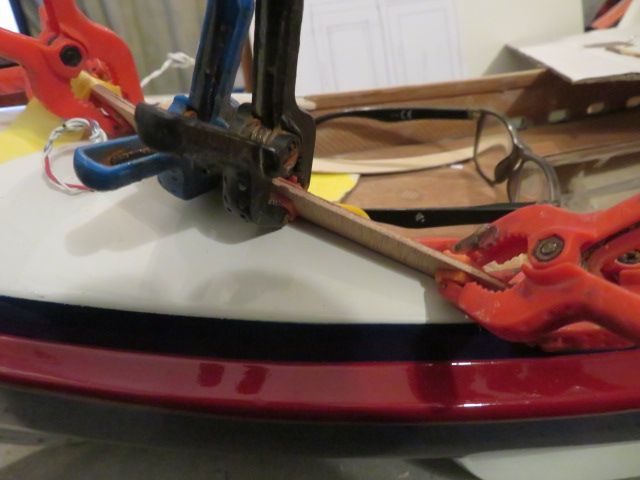
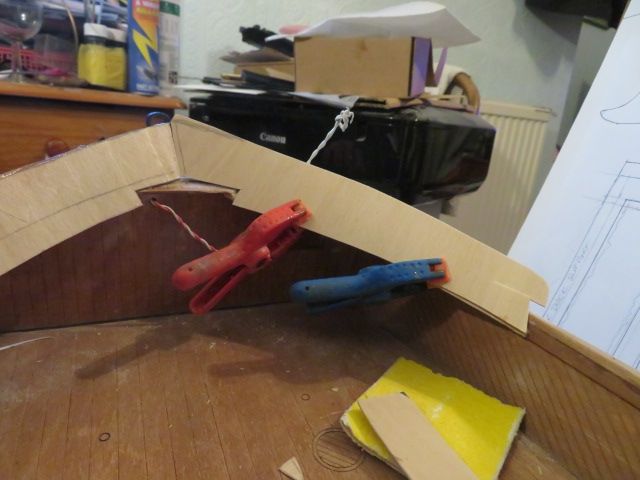
                        constructed of two printed pieces of ply per side and a capping rail on the top, the job went together easily, once support rails were attached to the underside of the grp topping, glued together with aliphatic resin, i'll leave it all tonight to set hard before sanding smooth.

                        once done, the whole of the woodwork can be lightly sanded with 120 grade and then varnished with yacht varnish to protect it all.

                        then, with all the pre prepaired parts whilst the boat was away, plain sailing and a finish date for the end of May.

                        this will give me about 3 weeks practice of sailing a "yacht", which i have never done before, before th Windermere charity sail.

                        img_2098.jpg

                        img_2099.jpg

                        img_2101.jpg

                        img_2102.jpg

                        img_2103.jpg

                        #100308
                        neil hp
                        Participant
                          @neilhp

                          The break water has set, cleaned up and braced, with the finalinner cappings added to make it a very strong and sturdy fixture to take heavy weather….

                          Just needs staining and varnishing, which i am about to do.

                          img_2104.jpg

                          img_2105.jpg

                          Edited By neil howard-pritchard on 27/04/2022 11:21:10

                          #100309
                          Richard Simpson
                          Participant
                            @richardsimpson88330

                            Very neat, good to see this progressing again Neil. When is the big day?

                            #100313
                            neil hp
                            Participant
                              @neilhp
                              Posted by Richard Simpson on 27/04/2022 11:31:13:

                              Very neat, good to see this progressing again Neil. When is the big day?

                              Saturday, 25th June, Richard

                              #100316
                              ashley needham
                              Participant
                                @ashleyneedham69188

                                Great work. I just couldn’t do it,all those little bits..all that repetition!

                                Ashley

                                #100321
                                neil hp
                                Participant
                                  @neilhp
                                  Posted by ashley needham on 28/04/2022 09:49:59:

                                  Great work. I just couldn’t do it,all those little bits..all that repetition!

                                  Ashley

                                  keeps me happy, mate…….far easier than building a big warship such as the Scharnhorst that i built at 1;96 scale years ago…………….now that was boredom personified, lol.

                                  #100326
                                  neil hp
                                  Participant
                                    @neilhp

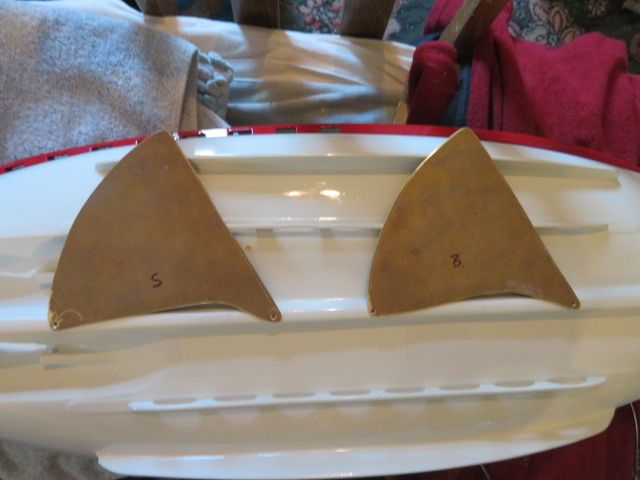
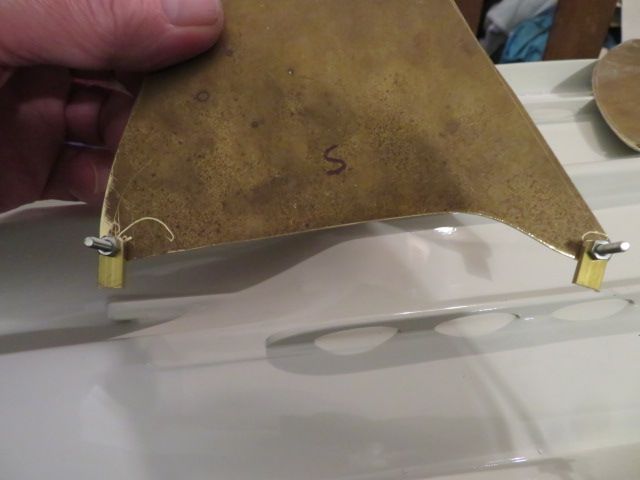
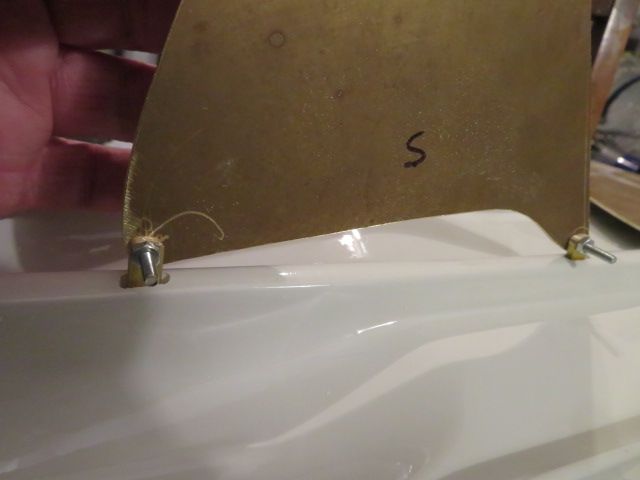
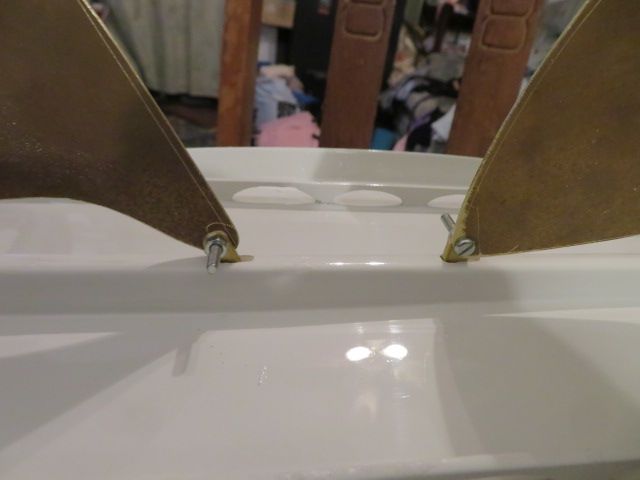
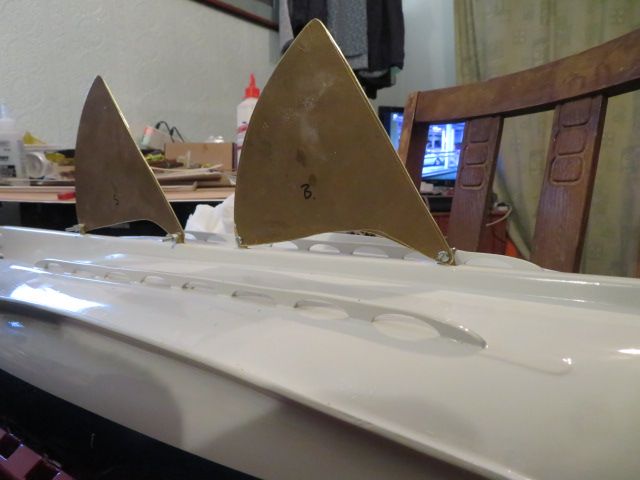
                                    I have fitted the dagger blades and the small brackets were made from some 2mm bar I had in stock.

                                    The blades were drilled with 3mm holes, and then their positions marked on to the keelson.

                                    Then I reamed out a slot for each bracket with leeway either end for the positioning of the brackets once they had been bolted to the blades.

                                    Bolted the brackets to the blades, and filled the slots with 30 minute epoxy and have left them to set.

                                    Once set I will remove the blades and add some epoxy to the slots to fill them up, to give the best hold I can…………………DON'T want them dropping off halfway down Windermere!

                                    The reason i have fitted these blades for the sail is, there is quite a size in sail for the boat, and with no keel as would be fitted to a model or real yaucht is that the blades stop sideways drift if the wind is beam on, just as on the real lifeboats, which were encased inside the hull and only dropped when under sail and not motors.

                                    img_2126.jpg

                                    img_2129.jpg

                                    img_2130.jpg

                                    img_2132.jpg

                                    img_2133.jpg

                                    #100333
                                    neil hp
                                    Participant
                                      @neilhp

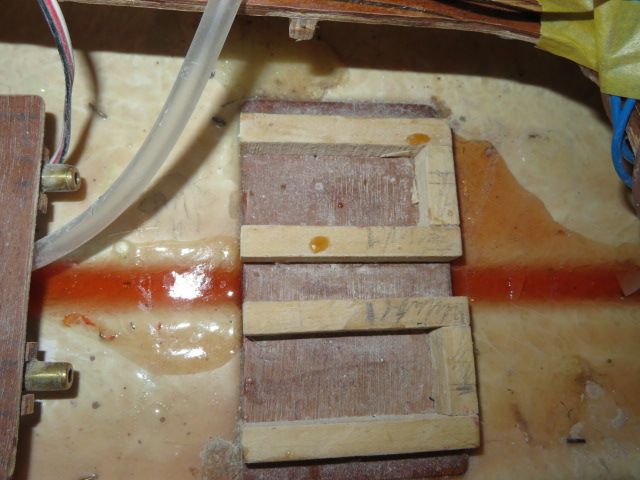
                                      and to finish off the fitting of the brackets, i sealed and gaps or holes in the moulded keelson recess with some grp polyester resin………it was left in the water then for two hours, and not a leak was seen…….a good watertight hull.

                                      the resin is the orange coloured stuff running down the center of the hull.

                                      img_2135.jpg

                                      #100334
                                      ashley needham
                                      Participant
                                        @ashleyneedham69188

                                        Very interesting Neil. Didn’t realise they had dagger boards. The real thing must have occupied a fair bit of room inside the hull?

                                        Ashley

                                        #100336
                                        Ray Wood 3
                                        Participant
                                          @raywood3

                                          Hi Neil,

                                          When you first try sailing her I'd only put the forward dagger board on to stop her going sideways to start with as it's in the right place relative to the centre of effort of the mainsail, If you use the rear one it will just act as a brake and stop her sailing properly. I'm sure your building a nice tall stand for her to sit on ? as the dagger board will be pretty vulnerable and likely to pull those tabs out you have glued in the keel if it gets knocked ??

                                          Regards Ray.

                                          #100352
                                          neil hp
                                          Participant
                                            @neilhp
                                            Posted by ashley needham on 01/05/2022 07:20:07:

                                            Very interesting Neil. Didn’t realise they had dagger boards. The real thing must have occupied a fair bit of room inside the hull?

                                            Ashley

                                            Yes, Ashley, the old self righting carried two, but the motor sailers only carried a fore board, and on Rays knowledge and recomendations, i will just fit the fore board for the Windermere sail.

                                            However Ray, do not worry about the stand………the board will be removeable and will only be fitted once for the actual charity sail……….all other times it will only be sailed on small lakes with motors to fight sideways drift.

                                            #100367
                                            neil hp
                                            Participant
                                              @neilhp

                                              getting there, now that all the construction has been done, other than the rigging section.

                                              img_2144.jpg

                                              img_2145.jpg

                                              img_2146.jpg

                                              img_2152.jpg

                                              img_2153.jpg

                                              #100381
                                              neil hp
                                              Participant
                                                @neilhp

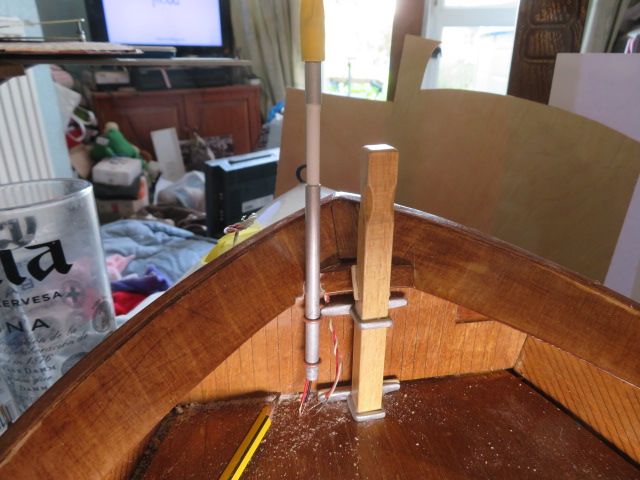
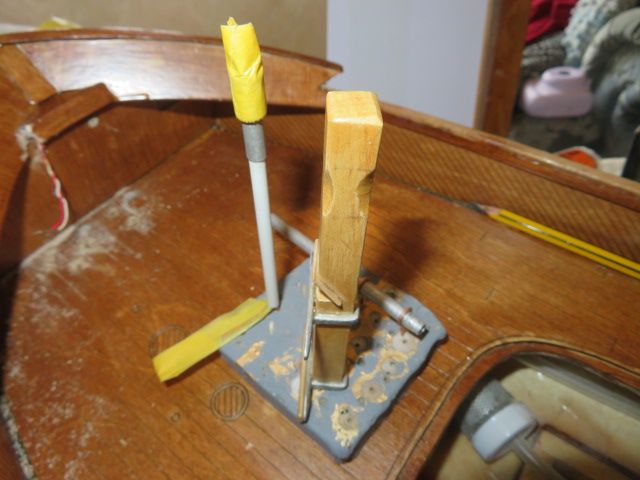
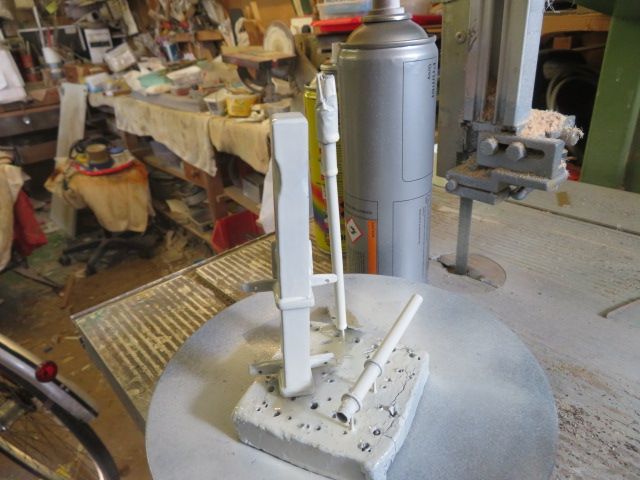
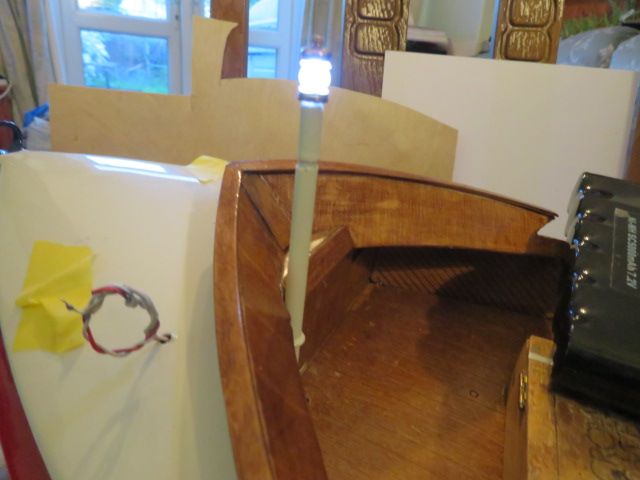
                                                painted the main bow bollard and the parts for the signalling lamp.

                                                the bollard was straight forward, and fits well.

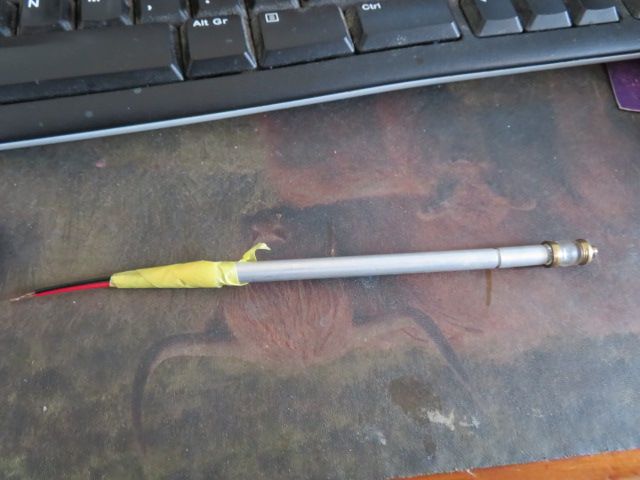
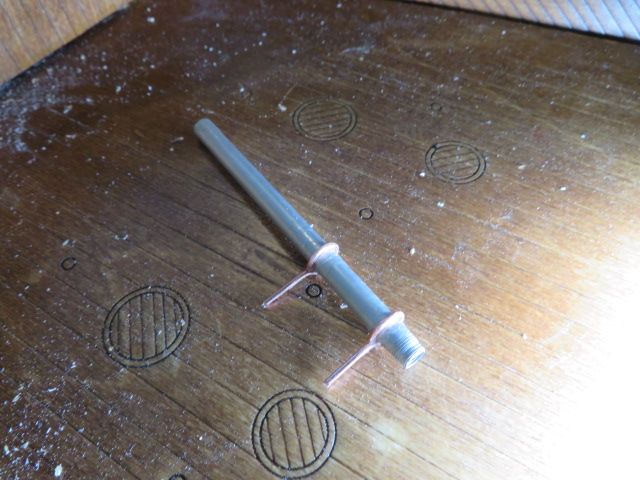
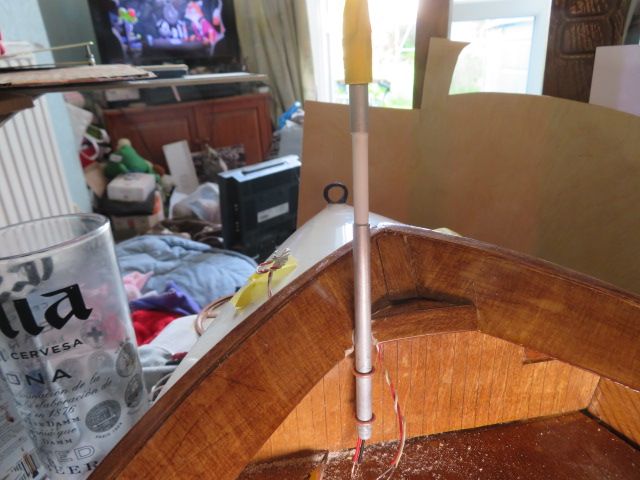
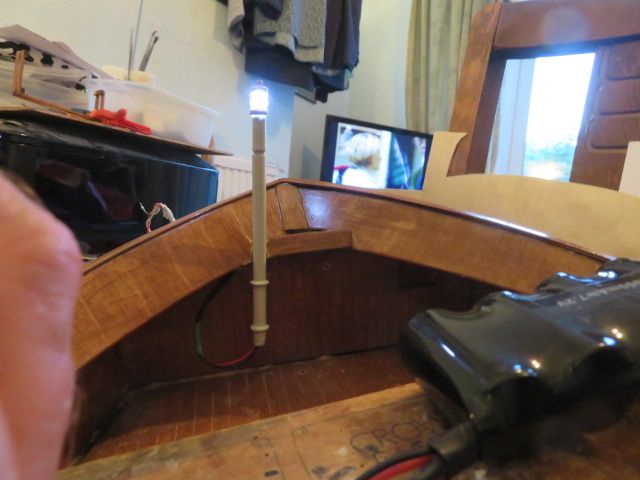
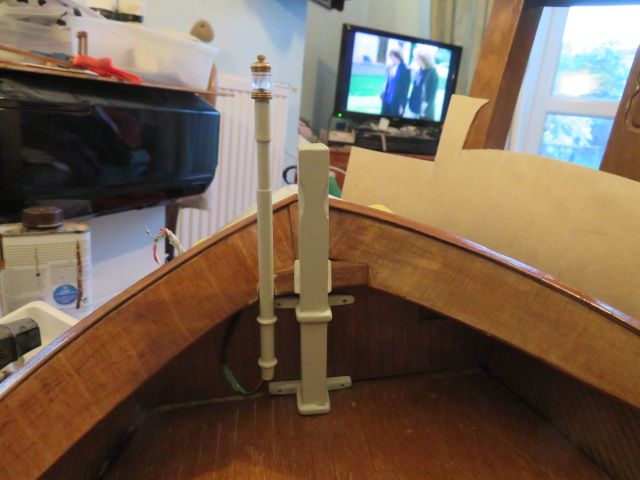
                                                however, the signalling lamp was was more of a challenge as i wanted it to work. And so, if i did the main support in one section i wouldn't be able to mask a lot of the wiringwhich would hang loose, as no way to "stuff" it up into the tube.

                                                and so i made the tube as a concetina by making it in to two parts , one sliding into the other, of the same length.

                                                I mounted a clear all round lamp housing on the top with a small 15mm length of the same tubing as the bottom section to take the width of the resister already fitted to the led. the smaller diameter upper section was then glued into the top larger dia. section, and the middle section then slid into the lower section, so that after the wires were soldered to the main 13 amp electrical cables the light sections could then be extended outwards again to the correct length taking the slack wires with it, thus totally reducing any lying on the deck.

                                                it worked, took me a bit of thought to get it right but am happy with the result.

                                                img_2156.jpg

                                                img_2158.jpg

                                                img_2160.jpg

                                                img_2161.jpg

                                                img_2162.jpg

                                                img_2165.jpg

                                                img_2166.jpg

                                                img_2168.jpg

                                                img_2170.jpg

                                                #100384
                                                neil hp
                                                Participant
                                                  @neilhp

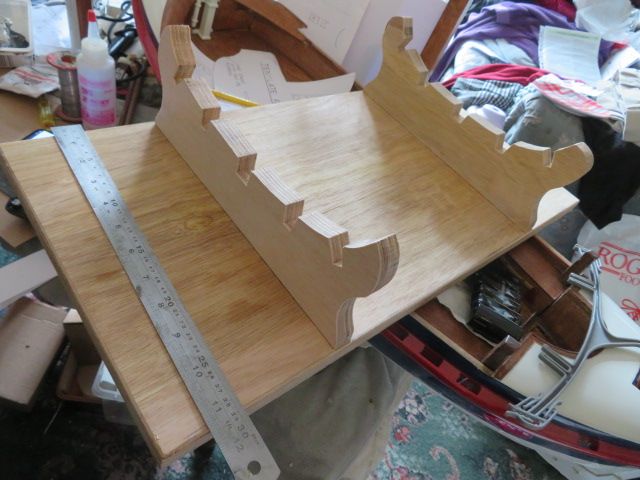
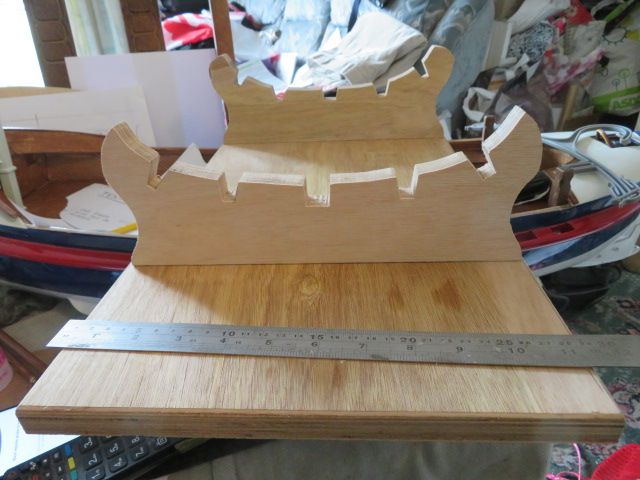
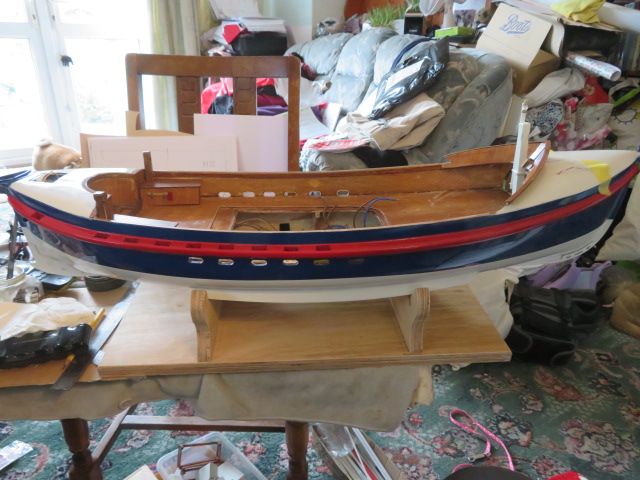
                                                  i don't know why but i always put off making a stand for my models until AFTER i have built the thing.
                                                  but this time i decided tomake it half way through it's build.
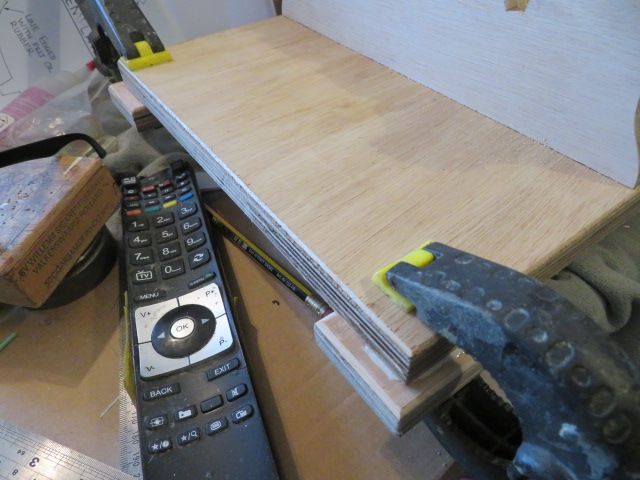
                                                  went along to my local timber merchants and picked out 3 pieces of nicely grained 20mm thick ply and gave it to the machinist…………….his reply was………can't be bothered going in to the office to work out how much……….just put it in your car and drive away,

                                                  thats the sort of timber merchant i like lol.

                                                  So, using the templates in the instructions, cut them out on the band saw, and being a purist, of wood to wood, i used Aliphatic resin to glue the pieces together. once set, i'll screw them together from underneath.

                                                  img_2171.jpg

                                                  img_2172.jpg

                                                  #100385
                                                  neil hp
                                                  Participant
                                                    @neilhp

                                                    and it fits…………..img_2173.jpg

                                                    #100387
                                                    neil hp
                                                    Participant
                                                      @neilhp

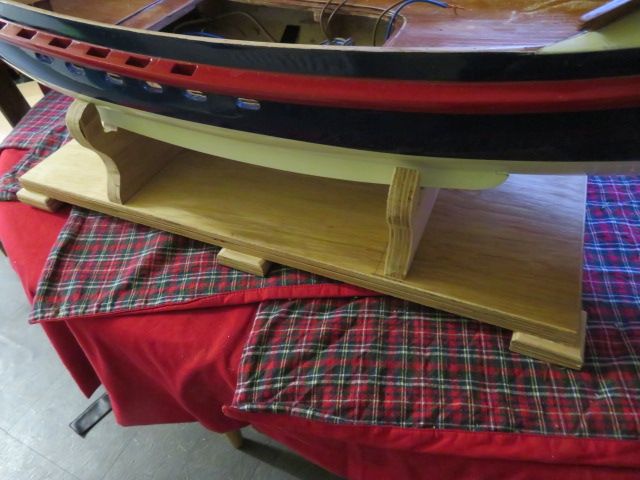
                                                      for anyone making a stand for your boat………….

                                                      a hot tip from someone who learned the hard way and a broken model.

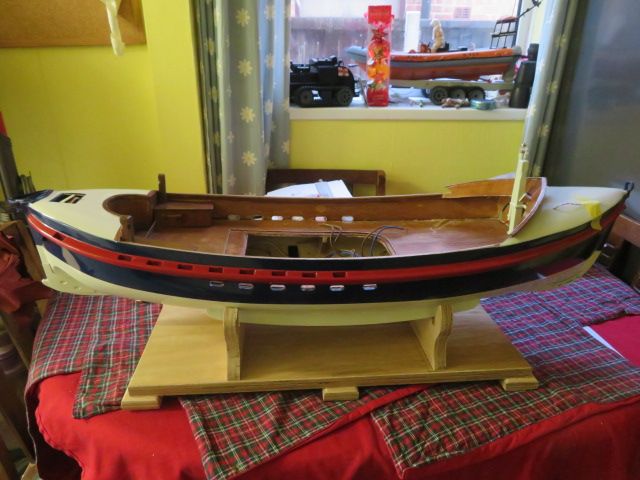
                                                      I now always put feet onto the model, all four corners [of course], and two in the centre of the stand……..

                                                      this is to enable you to get your fingers under the flat base of the stand, or if like me with arthritic fingers you have to slide the stand to the edge of the table so that you can get your fingers under the base at one end, before tipping the stand downwards to get them under the other end, and if like me a little clumsy, you tip it too far down and the boat slides off the stand onto the floor and all the bits fly off or get broken…………..been there done that, had to do the rebuild on a shelter deck trawler 25 years ago…..

                                                      so the addition of such a simple remedy avoids a lot of foul language and heartache.

                                                      And the boat sits well looking graceful.

                                                      img_2174.jpg

                                                      img_2175.jpg

                                                      img_2176.jpg

                                                    Viewing 25 posts - 151 through 175 (of 214 total)
                                                    • Please log in to reply to this topic. Registering is free and easy using the links on the menu at the top of this page.

                                                    Code of conduct | Forum Help/FAQs

                                                    Advert

                                                    Latest Replies

                                                    Home Forums Building Kits Topics

                                                    Viewing 25 topics - 1 through 25 (of 25 total)
                                                    Viewing 25 topics - 1 through 25 (of 25 total)

                                                    View full reply list.

                                                    Advert

                                                    Newsletter Sign-up