Liverpool class Lifeboat, a Metcalf models kit.

Advert

Liverpool class Lifeboat, a Metcalf models kit.

Home Forums Building Kits Liverpool class Lifeboat, a Metcalf models kit.

  • This topic is empty.
Viewing 25 posts - 51 through 75 (of 214 total)
  • Author
    Posts
  • #99065
    neil hp
    Participant
      @neilhp

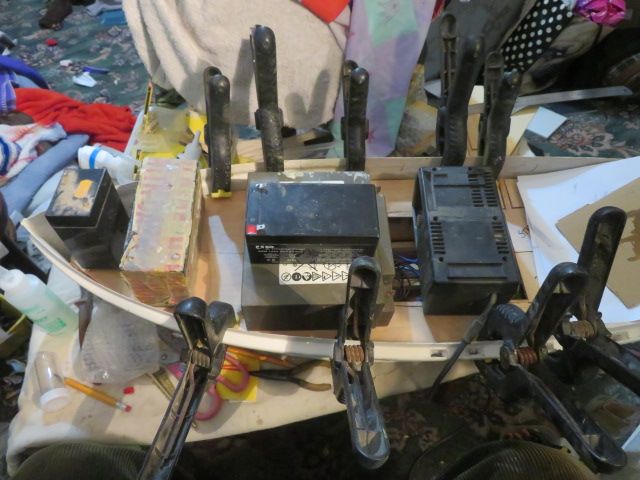
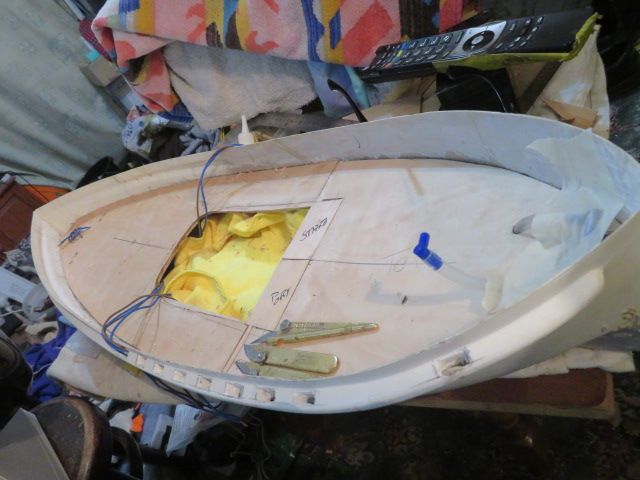
      Started this afternoon steadily working through small jobs that i needed to do before i glue the front 60% of the deck in place finally putting out of reach the pumps and such once the deck is fitted.

      first i hoovered outt all the dust and shavings that had collected so far,

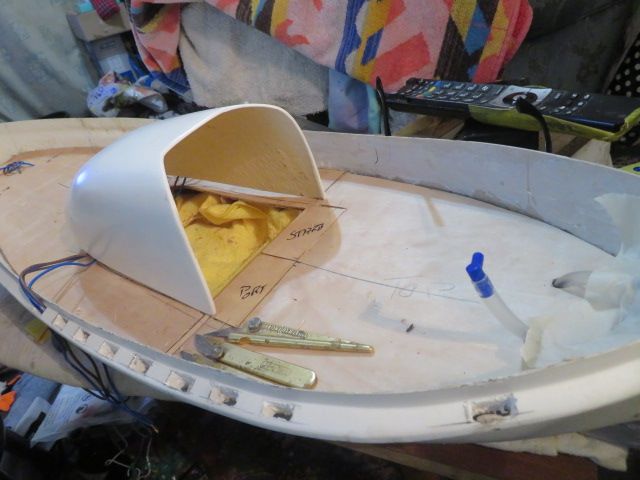
      then i marked out two very small fillets that go onto the edges of the under deck, to give a straight line for the cabin to fit in to.. which are just basically leveling things up.

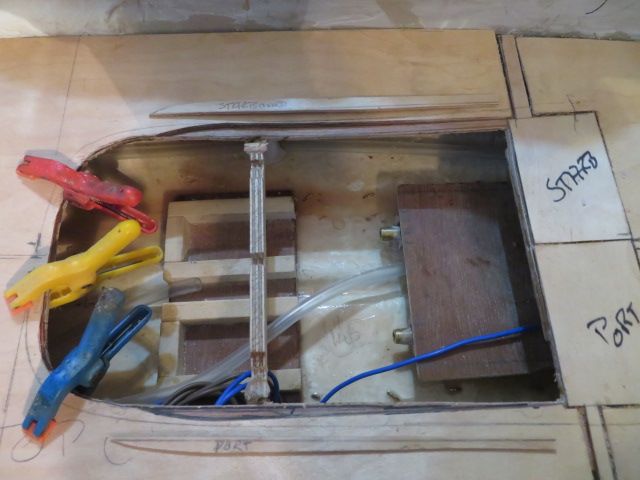
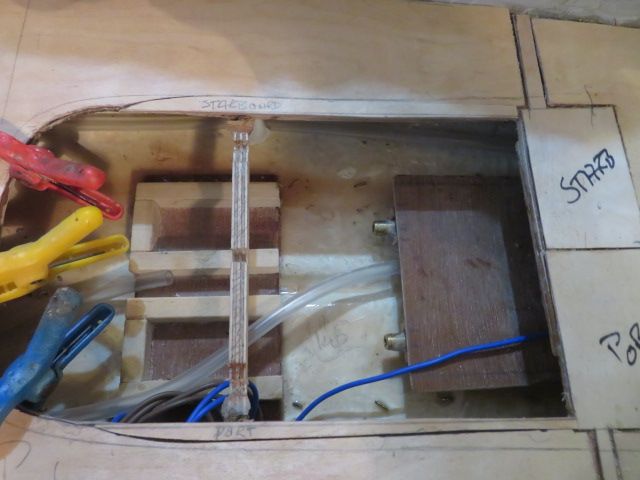
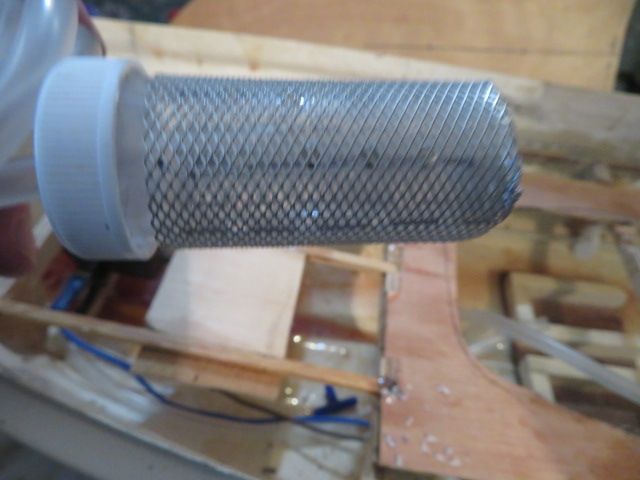
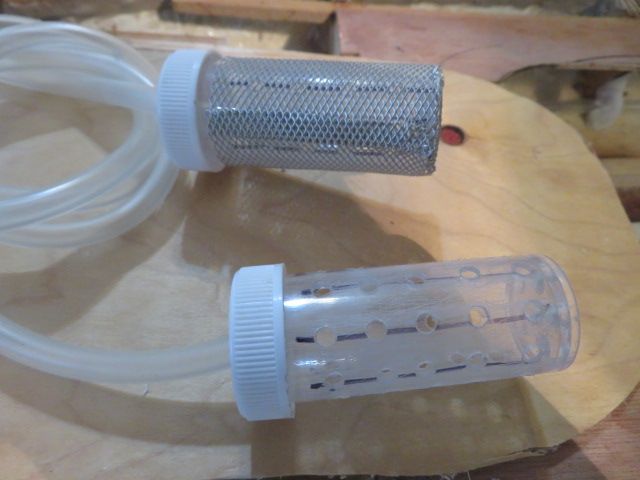
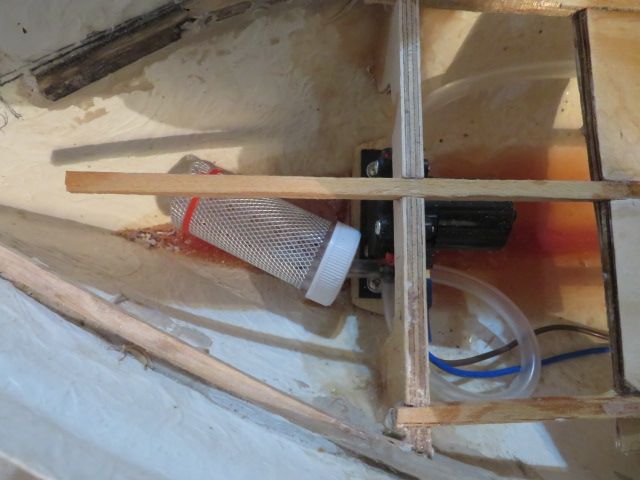
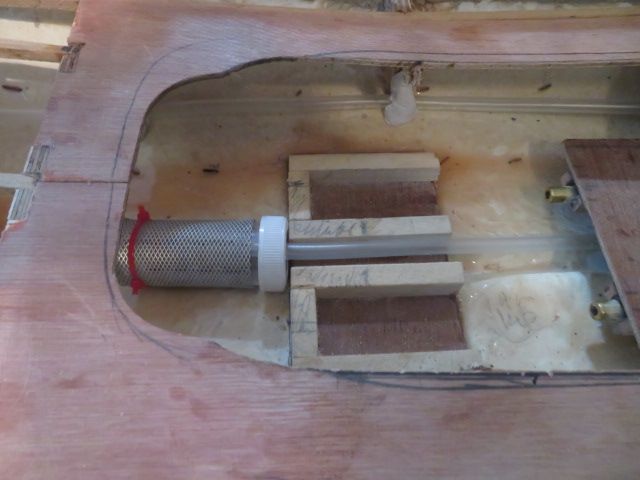
      and then i started on securing the pipework for the releif pumps by securing the starboard pipe to the side of the hull with milliput so it doesn't get everywhere, and making the filters for the ends of the pipes.

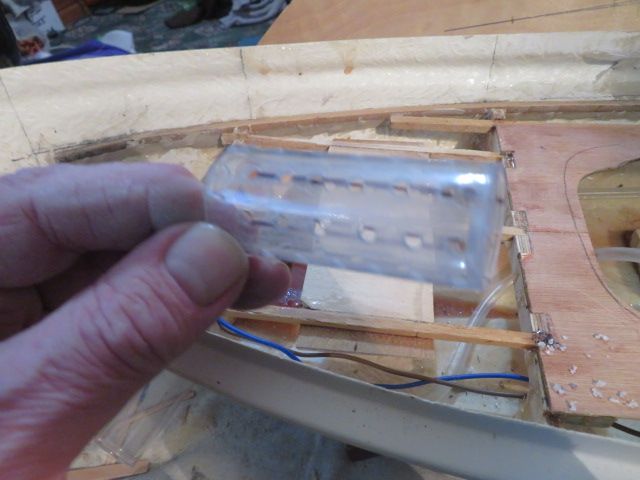
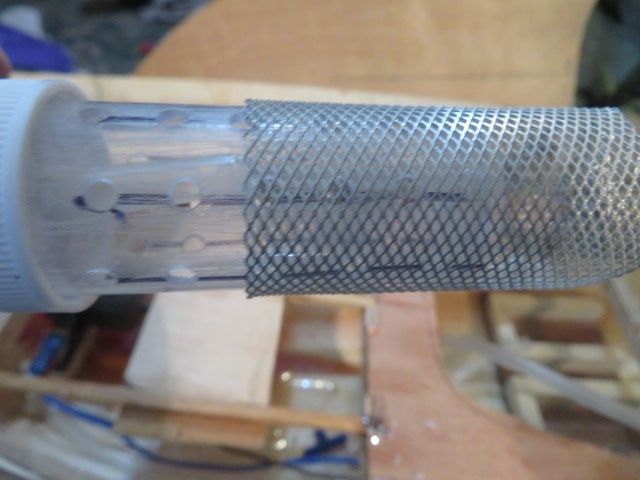
      for the filters i used two small plastic "bottles" that once contained sealing putty for pipes. i never through anything away.

      i drilled holes in the cap, for the pipes, and 3mm holes in the sides and bottom of the bottle to allow wate in to the "filter" and to finally finish the filters off i have put auto bonding repare mesh around one of the bottles. i'll have to go to the car DIY shop tomorrow for some more milliput and mesh to finish the job. once this has all been done i can then route some wiring for the mast and bow navigation lights before glueing the fore deck down permenantly.

      img_1021.jpg

      img_1020.jpg

      img_1019.jpg

      img_1014.jpg

      img_1016.jpg

      img_1017.jpg

      img_1018.jpg

      Advert
      #99075
      Chris Fellows
      Participant
        @chrisfellows72943
        Posted by Pete Nicholson on 06/01/2022 16:12:21:

        Hi Neil, seeing your project, and your determination to stop water ingress, as a complete novice I would value your advice regarding prop shaft/tube sealing. Am building an aeronaut diva and having great difficulty as the tube bushes are not aligned ie. shaft will stick on rotation ( not badly but obvious). When I sort this, I am considering pumping the tube full of flexible shaft grease ( lithium based) but would like your opinion of this, versus just regular light oiling? No instructions on this supplied.

        hope you don’t mind going off topic.

        best regards

        Pete.

        Welcome to the forum Pete. You would be better off posting this in the Beginners section but be warned prop shaft lubrication is a contentious issue! smiley

        Also if you put Lubrication in the search box it will return some relevant posts. Also do a search on the Mahem forum. Harry/Canabus frequents both forums and has just finished a Diva so will be a good source.

        Chris

        #99076
        Richard Simpson
        Participant
          @richardsimpson88330

          Maybe Colin can move this to a new thread in the beginner's section?

          #99084
          neil hp
          Participant
            @neilhp
            Posted by Chris Fellows on 09/01/2022 13:45:05:

            Posted by Pete Nicholson on 06/01/2022 16:12:21:

            Hi Neil, seeing your project, and your determination to stop water ingress, as a complete novice I would value your advice regarding prop shaft/tube sealing. Am building an aeronaut diva and having great difficulty as the tube bushes are not aligned ie. shaft will stick on rotation ( not badly but obvious). When I sort this, I am considering pumping the tube full of flexible shaft grease ( lithium based) but would like your opinion of this, versus just regular light oiling? No instructions on this supplied.

            hope you don’t mind going off topic.

            best regards

            Pete.

            Welcome to the forum Pete. You would be better off posting this in the Beginners section but be warned prop shaft lubrication is a contentious issue! smiley

            Also if you put Lubrication in the search box it will return some relevant posts. Also do a search on the Mahem forum. Harry/Canabus frequents both forums and has just finished a Diva so will be a good source.

            Chris


            I don't mind it remaining on my thread as it gives me a chance to say what i use…………….

            I use normal easy to aquire petrolium jelly..aka vasciline and I mix into the vasciline some carbon powder also easily obtainable on ebay…….the carbon powder and vasciline are squirted into one end of the tube whilst the shaft remains in the other end by loading the mix into a small syringe and squirting in whilst rotating and turning the shaft until it comes out of the end you are squirting the mix into………..in this way, you'll know you have a shaft full……….

            Using this mix I have never had a leak nor a seizure even after sailing on salt water and leaving the boat for months.

            Edited By neil howard-pritchard on 09/01/2022 20:23:51

            Edited By neil howard-pritchard on 09/01/2022 20:24:40

            #99096
            neil hp
            Participant
              @neilhp

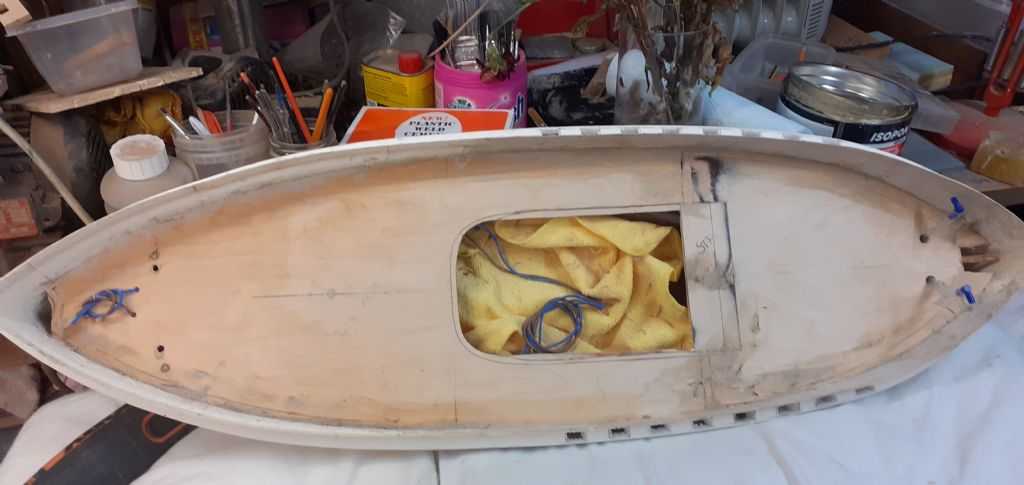
              After much preperation of things beneath the decks on my Liverpool class, I finally felt confident enough to glue down the main under deck, ready for fitting the surrounds to the access apature that will locate the main cockpit,

              The method for doing this to give a watertight fit for the rough passage on Windermere I will be able to explain more clearly once I have lifted all the weights securing the deck to the beams.

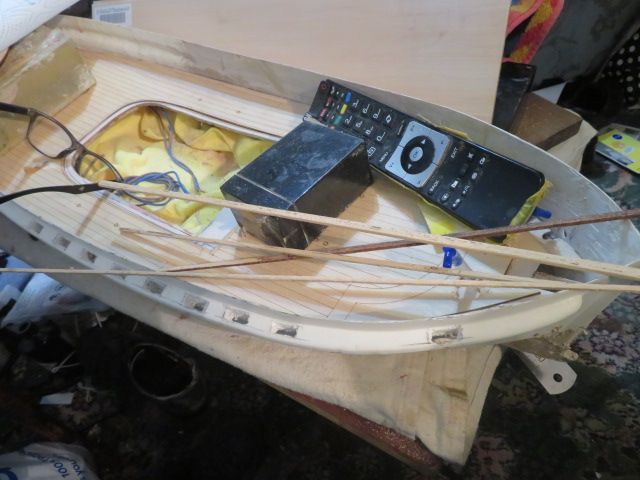
              The wiring is in place for the pumps, as is the wiring for the navigation lights and fore peak signalling lamp. The tubing and filters for the pumps are set into place, and space left for either Nimh or SLA batteries that will power the motors.

              I'll leave the deck to set untill the morning, as i am off to see a moulder about another job………but that is for another day when all will be revealed later.

              img_1028.jpg

              img_1029.jpg

              img_1034.jpg

              Edited By neil howard-pritchard on 10/01/2022 21:02:29

              #99102
              neil hp
              Participant
                @neilhp

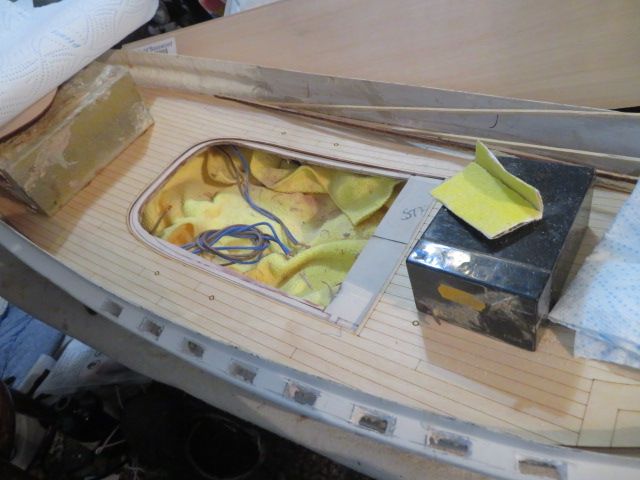
                the weights have been removed, and the underdeck sits firm on the deck beams solid as a rock.

                tomorrow i'll be sanding the deck smooth and then sorting the base for the cockpit and the recess that it and the cockpit will sit into to make watertight.

                once that process is finished, i can get on with all the nice bits that will make this "ugly duckling" that i have made it into at the moment, into the beautiful swan that she will turn in too.

                img_1041.jpg

                img_1042.jpg

                #99105
                neil hp
                Participant
                  @neilhp

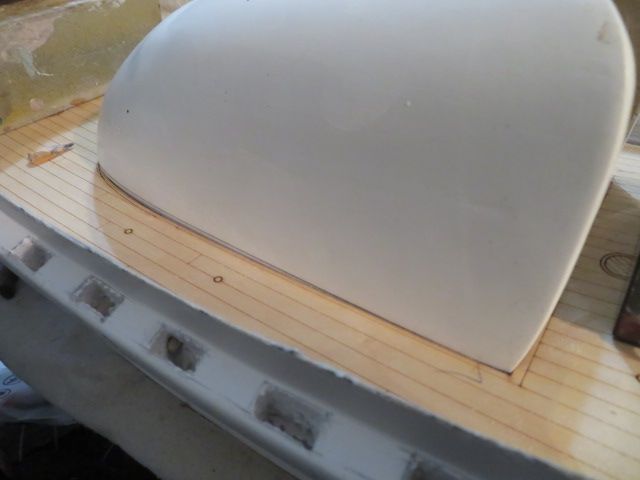
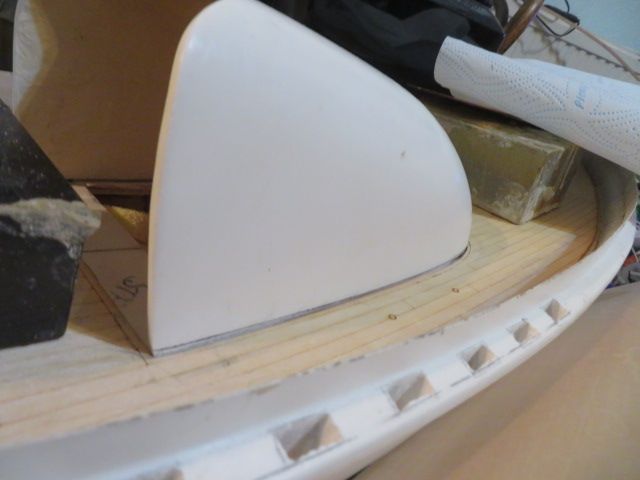
                  All work today was to get the deck opening and the cabin to mate up nicely with the sheer on the deck matching up to the curve on the cabin cockpit base.

                  The "walls" on the sides and rear of the opening were levelled up with probably one of the best power tools I didn't need, but has come in very handy on the few times I have needed one………..my WORX Sonic diamond faced course sander…….brilliant for the jobs you never thought you would need………and a very accurate tool too.

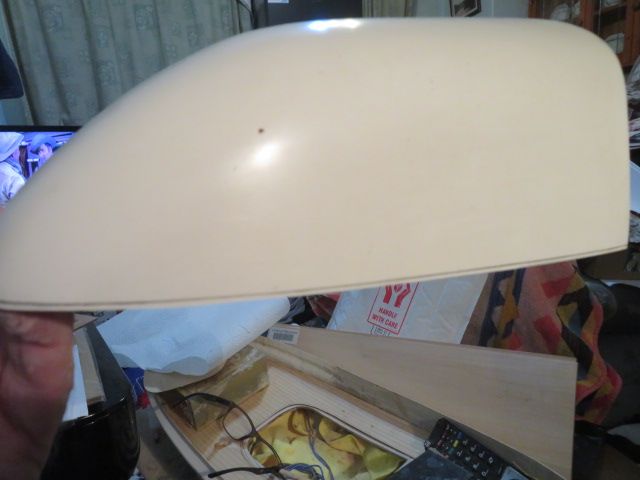
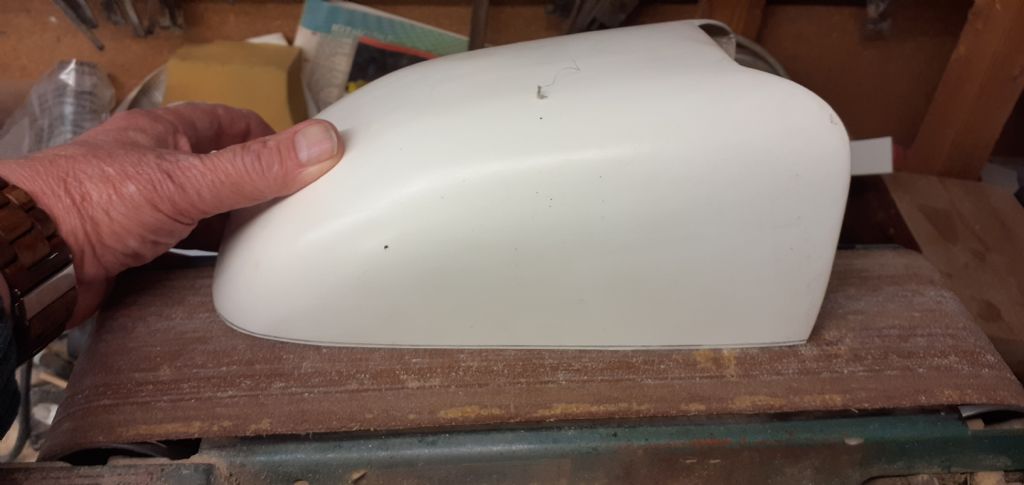
                  Once done, I dry fitted the printed laser cut deck in place using my heavy battery weights and laid the cabin exactly where it should be. There was a slight unevenness between the deck and the cabin base which had to be removed so that the cabin would make that perfect join.

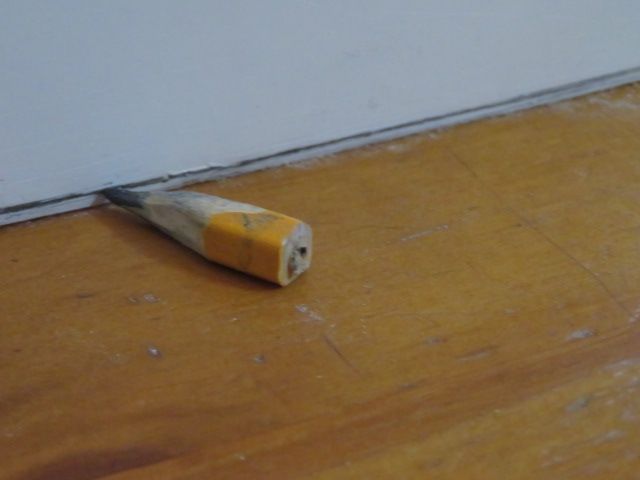
                  And so I turned to my "leveller"……a perfect tool to do the job, and probably the most simple tool that you can ever get hold of, and you can make one yourself.

                  Its a short end to a pencil, with a very shatp pointed lead and a flattened base to the pencil.

                  By placing the flattened base onto the deck and running the pencil around the cabin, you get a perfect parallel line between deck and cabin bottom.

                  Then it's a simple task to then file to either the lowest point where the pencil touches bottom edge of the grp moulding and keep that same distance from the parallel tine to a filed edge………OR TAKE THE HARD WAY and file to the drawn pencil line right around the cabin.

                  I always chose the former, and remove as little grp as possible. and that is what I did, using my bench linisher.

                  Finally I cut some 2 mm square sprue to go on the inside of the cabin edge at the base to hold the deck that covers the hole, which I will be gluing on to the cabin this evening.

                  img_1050.jpg

                  img_1043.jpg

                  img_1044.jpg

                  img_1049.jpg

                  img_1046 (1).jpg

                  20220112_171642.jpg

                  img_1047.jpg

                  #99106
                  Richard Simpson
                  Participant
                    @richardsimpson88330

                    Lovely neat job. Seeing your hand in the shot makes me realise just what a size this model is.

                    #99107
                    neil hp
                    Participant
                      @neilhp
                      Posted by Richard Simpson on 12/01/2022 22:48:16:

                      Lovely neat job. Seeing your hand in the shot makes me realise just what a size this model is.

                      including the rudder sticking out, Richard, its about 37.5 inches long……..not small but certainly not the largest i have built

                      #99119
                      Chris Fellows
                      Participant
                        @chrisfellows72943

                        I've got a few tools that I didn't need and have only used once or not at all! Used my Proxxon drill for the first time a couple of days ago, 4 years after I bought it! Good to have them though for when you do actually have a need for them!

                        Over Christmas I bought a few more tools I didn't need! smiley

                        Build's coming along nicely now.

                        Chris

                        Edited By Chris Fellows on 13/01/2022 16:04:40

                        #99120
                        neil hp
                        Participant
                          @neilhp
                          Posted by Chris Fellows on 13/01/2022 16:02:29:

                          Over Christmas I bought a few more tools I didn't need! smiley

                          Chris

                          Edited By Chris Fellows on 13/01/2022 16:04:40

                          its a desease Chris…………but one day they come in and then you feel justified in spending the money on it, lol.

                          #99121
                          neil hp
                          Participant
                            @neilhp

                            I have now come to a fork in the road regarding the build of the boat, and it all comes down to the point of which route do i taske next.

                            do i carry on fitting the cockpit interior into the boat first so that i can get the sub deck on to the cockpit so that it makes a very watertight fit into the deck, or do i carry on with the hull/decks and other parts first, and then go back to the cabin later. i knew the point of choosing some days ago, and have been thinking hard and long about it, and have finally decided that i am going arse about face to the normal build, and am going to fit out the cabin first. i cannot rectify the cabin once done if i make a mistake, but i can rectify and modify the recess in the deck already cut, if [and there is no reason why i should, if careful] make a balls up of the cabin.

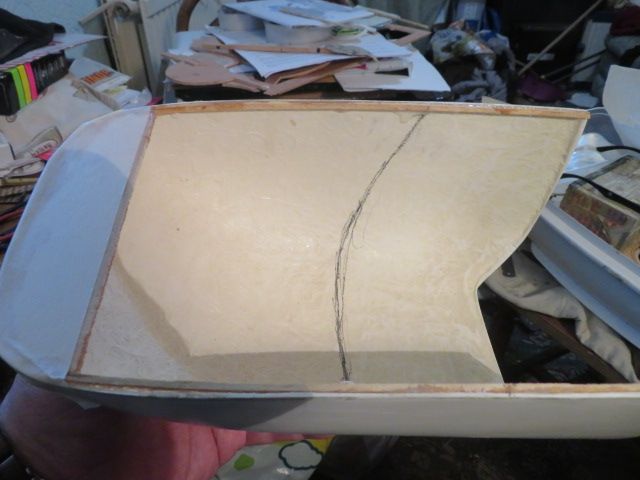
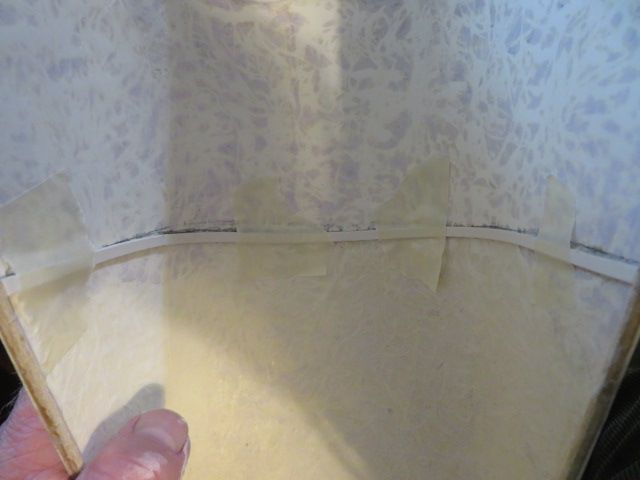
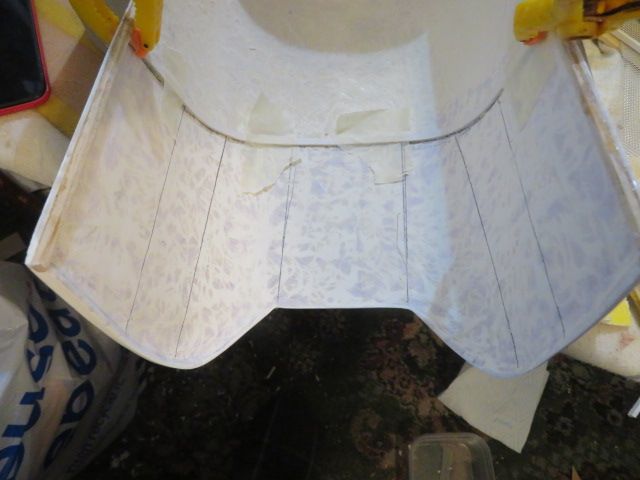
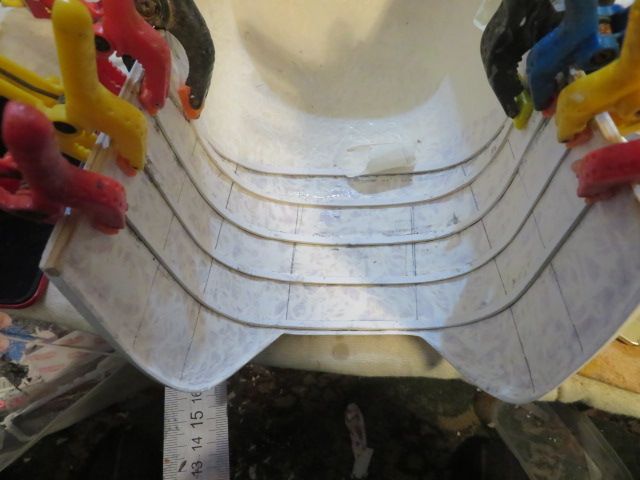
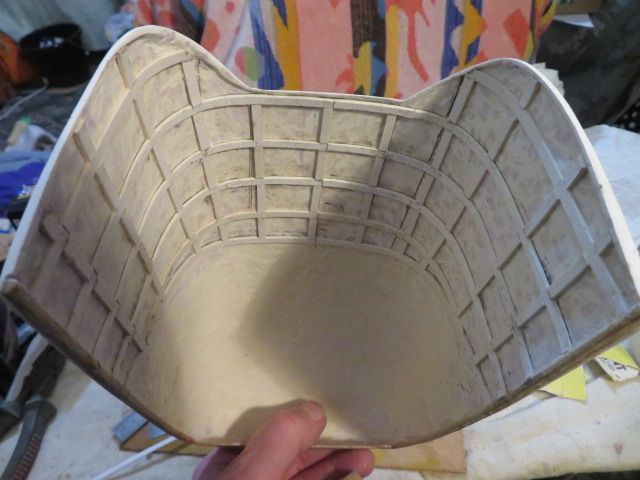
                            so the first part of fitting out the cabin, was to make a support system of two runners to follow the curve of the bottom of the cockpit, ans a fillet of ply which fit into the inside of the cockpit , 2 x 2 mm section and thickness.

                            and this was glued in using 30 minute 2 part epoxy and allowed to set and cure over night.

                            i also marked where the inner watertight bulkhead was to fit up to in pencil. this bulkhead takes all the motor instruments and the engine room w/t door.

                            img_1057.jpg

                            #99122
                            neil hp
                            Participant
                              @neilhp

                              one deviation from my decision which way to go next, was to fill the gap between the deck and the bulwarks with P38 filler.

                              both to enhance watertightness and to give a water gully for shedding water from the raised deck level of the printed deck, yet to be fitted.

                              this has been left to set hard, before sanding off.

                              20220113_153548.jpg

                              #99124
                              neil hp
                              Participant
                                @neilhp

                                And so!, on to the cockpit interior.

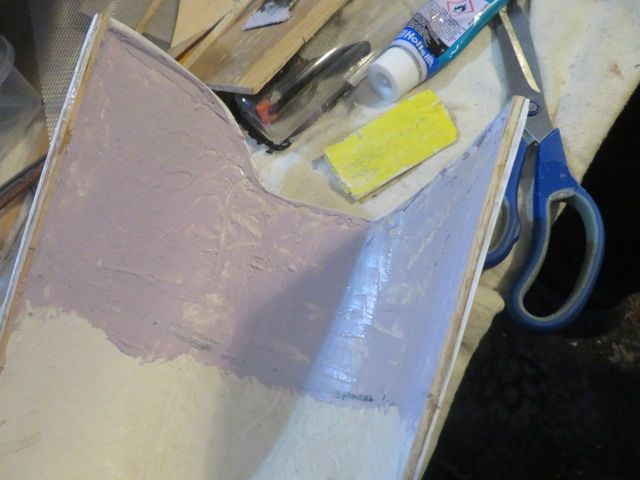
                                first job was to sand the area visible from the bulkhead back to the outer rim of the cockpit aft, as the virgin grp chop strand would be visible to onlookers.

                                i would normally have done this with my Carplan surface putty……..but as usual, couldn't find my tin.

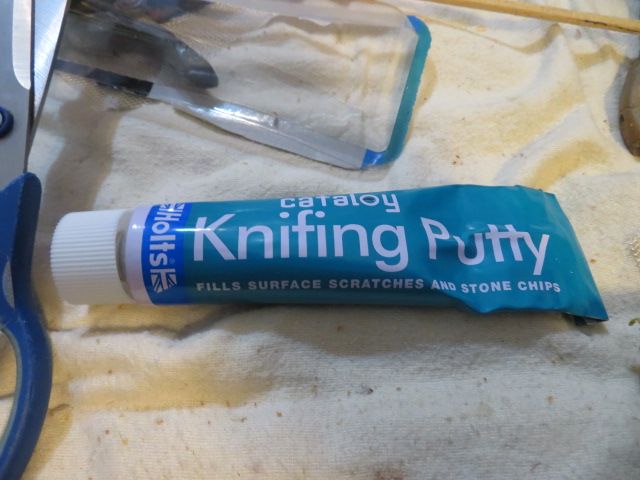
                                and so went out to a local motor factor, who also didn't have any but did have a tube of Holts kniving putty….not the same but it was my only choice.

                                squirted some on to the cabin, but it is stiff to apply and first impressions, i didn't like it, but persevered and covered the whole area needing it after a few more squirts.

                                it says to give it 30 minutes to dry, but i left it 30 mins, and was still rubbery, so i stuck it on the top of the nice warm radiator………an i'll leave it for a couple of hours and then give it a sanding……….if it plucks up, which i have a feeling it might do, i'll remove it and go looking elsewhere for some carplan surface putty which i have used many times and am happy with the finish of.

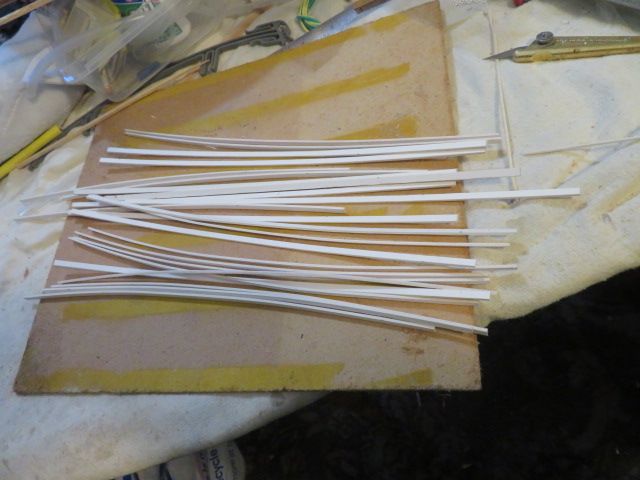
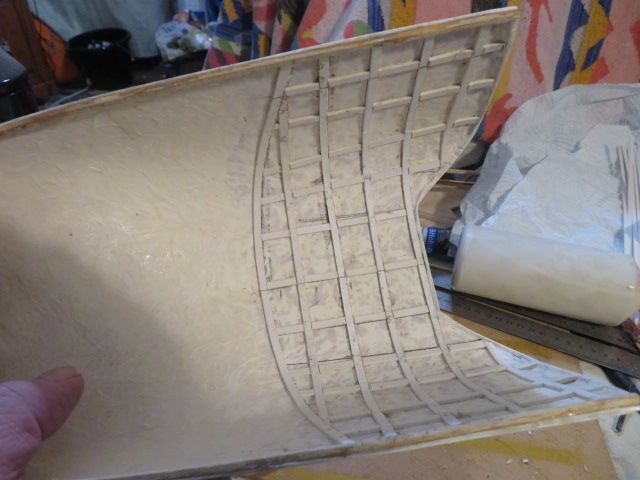
                                finally i cut the interior visible stringers and braces for the cockpit out of 1.5mm picture framing card, which will be glued in once the interior of the cockpit is sanded smooth.

                                img_1058.jpg

                                img_1060.jpg

                                img_1061.jpg

                                #99137
                                neil hp
                                Participant
                                  @neilhp

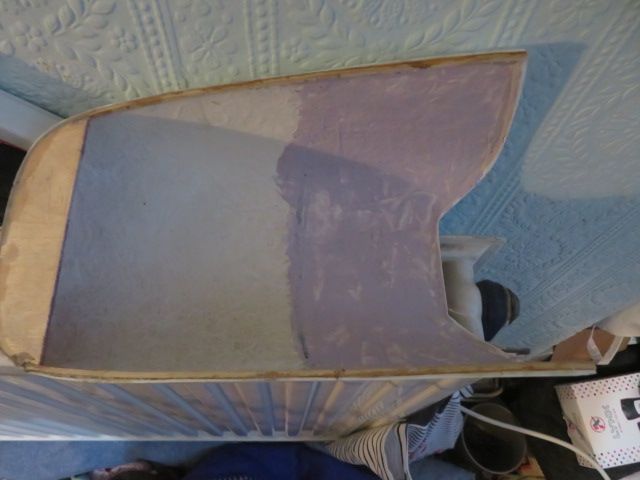
                                  Well i have to admit that Mike Pendlebury who made the comment that the Holts surface filler was a nightmare Dave Stavros Jones joined i and told me to scrape it all off as it was garbage…..so after two and a half hours i began scraping it off and contrary to what the manufacturer states on the tube that it would be hard within 30 minutes and ready to sand…………i could peel it off in strips!

                                  which i did, and getting 95% off i sanded the last bits off, thus achieving a level surface.

                                  on to which i laid the strips of card to make up the frame work for the cockpit.

                                  once i have let the glue set [i used aliphatic resin to secure the card to the grp cockpit] i will paint it all with cellulose wood sealer to harden it all up and give a base to the enamel brown mahogany colour that i will paint the inside section of the canopy.

                                  it has also stiffened up the cockpit considerably which is a big bonus in order to make it all watertight.

                                  img_1063.jpg

                                  img_1067.jpg

                                  img_1068.jpg

                                  img_1069.jpg

                                  img_1070.jpg

                                  img_1071.jpg

                                  #99139
                                  Richard Simpson
                                  Participant
                                    @richardsimpson88330

                                    Very neat Neil. I take it in reality that is a wooden frame that the external diagonal planking is laid over?

                                    #99140
                                    neil hp
                                    Participant
                                      @neilhp
                                      Posted by Richard Simpson on 14/01/2022 09:05:52:

                                      Very neat Neil. I take it in reality that is a wooden frame that the external diagonal planking is laid over?

                                      thats right Richard…….all the old classic lifeboats with the wooden canopies were made in the same way.

                                      if you can access youtube the full restoration of a real life Liverpool class lifeboat called George Elmy is shown in episodes…..the rebuilding of the cabin is shown in one episode.

                                      Fred and George ep.1 – YouTube

                                      #99144
                                      neil hp
                                      Participant
                                        @neilhp

                                        This morning wasn't a great start to a Friday and weekend, as I had a "date" with destiny for a dear friend of mine, and from the turnout at the Crematorium a good friend of many. Even the coxs'n and crewman fron our lifeboat were there as Allan spent many an hour collecting for the station and photographing the crew and boat for publication for the station.

                                        A man called Allan Macfarlane, whom I met a good 15 years ago, when he was serving my daughters and I our favourite sweet………ice cream. at the ferry cafe close to the RNLI Station in Fleetwood. we got chatting and I found he came from one of our favourite haunts as a family, Milport, on Cumbrae, on the Clyde river.

                                        Hit it off and became freinds immediately. I have highlighted his name, as he was a brilliant photographer, and if anyone is interested in photography, his name lives on through his photos on facebook………have a look. **LINK**

                                        So after the service, the best way for me to celebrate his life was to go and have an ice cream on the prom at fleetwood, and wish him good travels where ever he is, in this great universe.

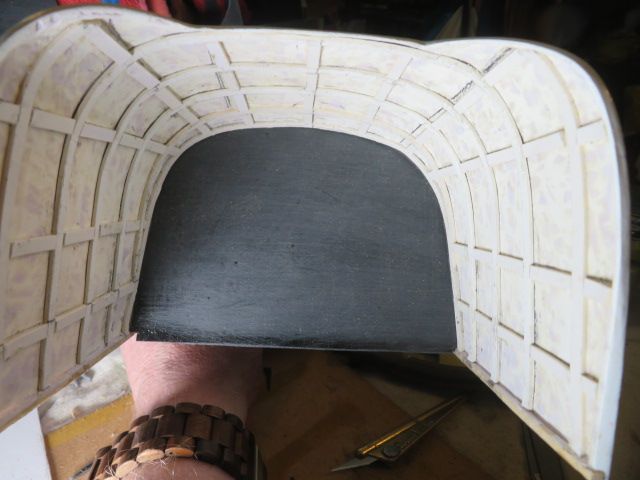
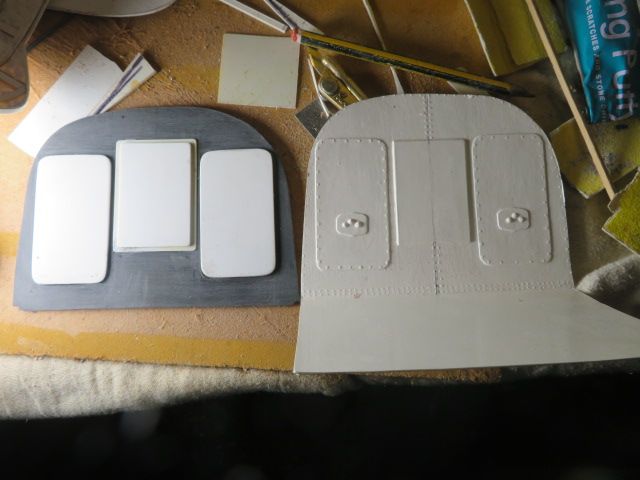
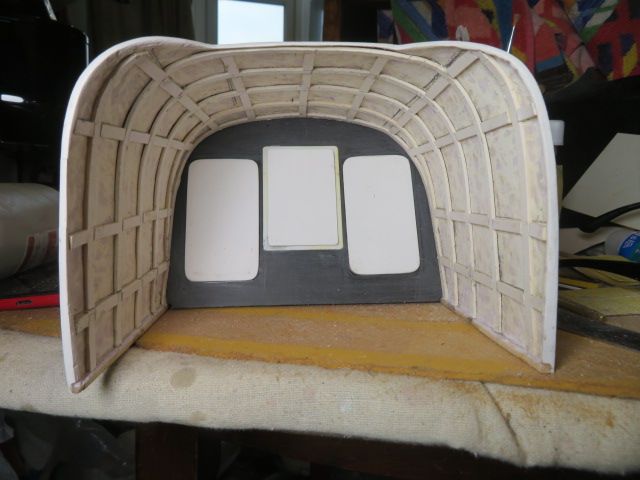
                                        After an hour or so I came home, changed out of my suit, sat down and decided to make a new inner bulkhead for the cockpit, or should I now start calling it the proper name that old crew men on Liverpools did………the "whaleback".

                                        Because of my tinkering with it to get it to fit tightly into the recess I have made on deck, it has widenned by around 5 mm, and as such the grp formed bulkhead and deck were just slightly too narrow.

                                        As such I made a card template for a new bulkhead, shod it with the panels for the motor dials, switches, gear wheels etc from 0.5, 1 and 1.5 mm plasticard, and mounted them on to the 2mm thick bulkhead. and then sat back waiting them to set.
                                        img_1072.jpg

                                        img_1073.jpg

                                        img_1077.jpg

                                        #99145
                                        neil hp
                                        Participant
                                          @neilhp

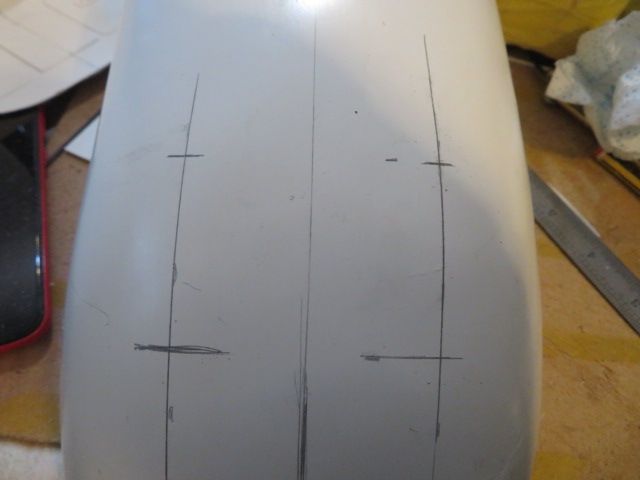
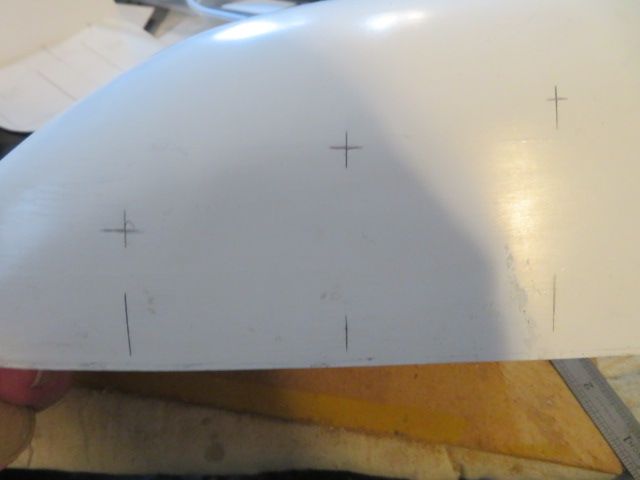
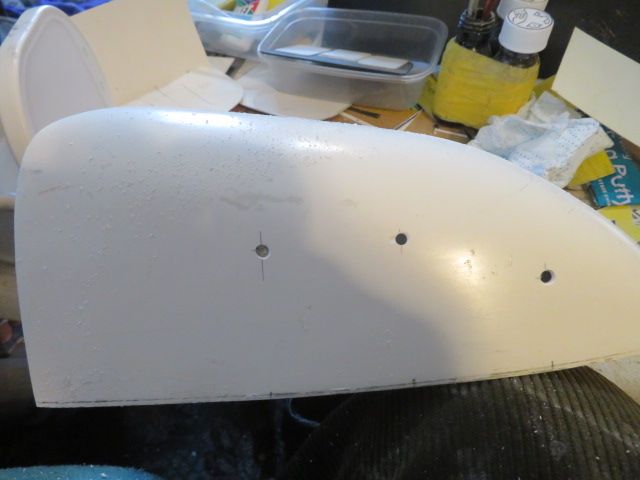
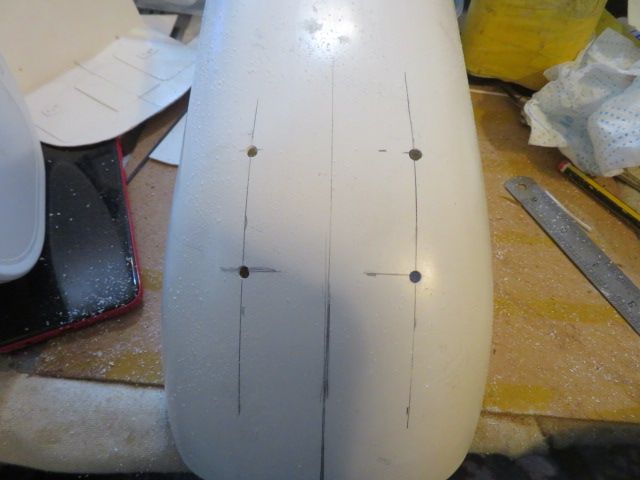
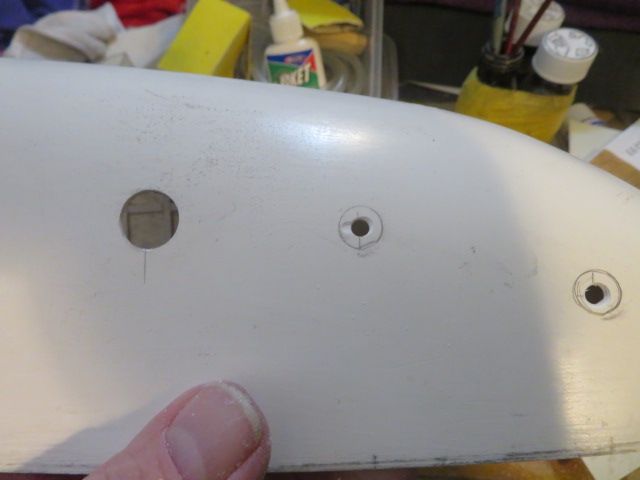
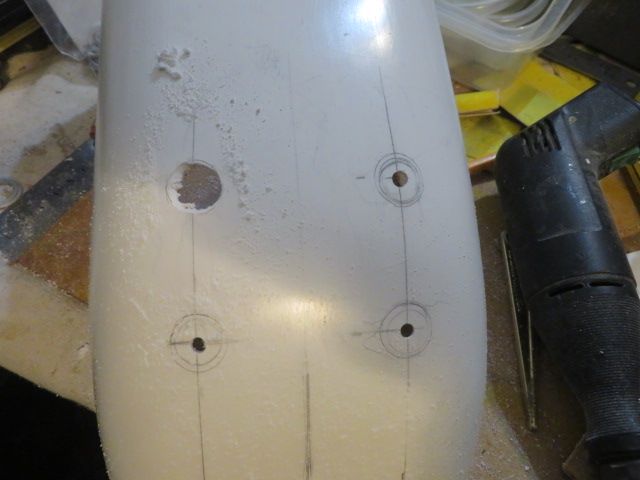
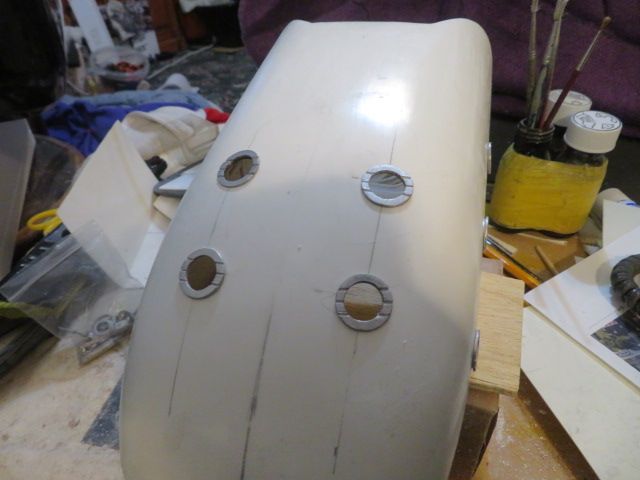
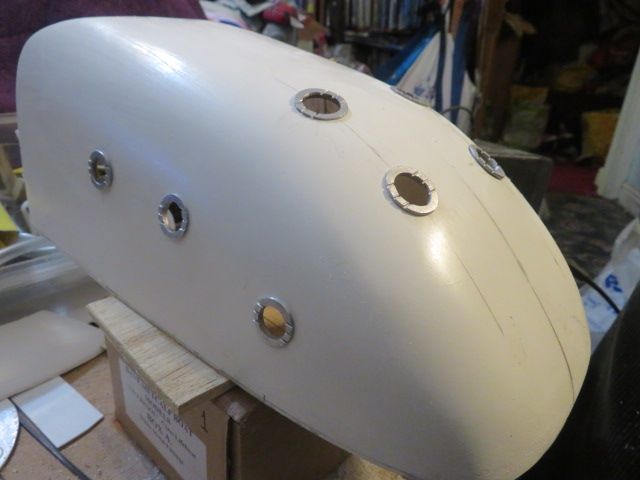
                                          NEXT, were markers and then pilot drill holes for the portholes that will be set into the whaleback once the "timber" planks are glued in place on the structure.

                                          img_1078.jpg

                                          img_1079.jpg

                                          img_1080.jpg

                                          img_1081.jpg

                                          #99147
                                          neil hp
                                          Participant
                                            @neilhp

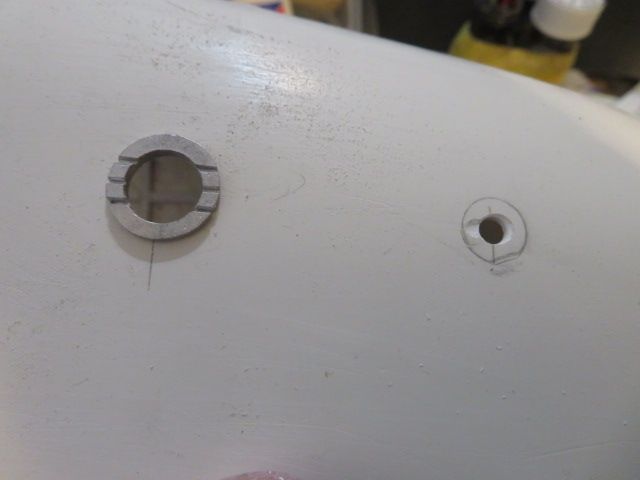
                                            next job on the whaleback was to mark out from the mesurements shown in the diagrams as supplied in the instructions..

                                            drilled and reamed theholes out and then rolled some grit paper into a hard tube and finely sanded them down round until each portlight fit into the holes.

                                            tonight i'll finish detailing the w/t bulkhead.

                                            img_1082.jpg

                                            img_1083.jpg

                                            img_1087.jpg

                                            img_1089.jpg

                                            img_1091.jpg

                                            #99149
                                            gecon
                                            Participant
                                              @gecon

                                              You are a master of your craft Neil. Extremely impressed by all your projects. Of course I'm impressed by all (allmost!) of the projects on the forum. To praise everyone's projects and efforts would only delay the launch of my own project….so back to work…err…play. Most of us are in 'relatively silent admiration' of other's efforts -I think.

                                              George

                                              #99151
                                              neil hp
                                              Participant
                                                @neilhp

                                                george…………your own are superb in their own rights………..your own Colin Archer is in itself a masterpiece. i sold mine because i knew i couldn't do it justice……

                                                and looking at your build i am only glad i did, as i could never have achieved the standart of workmanship that you continually show on your build…but as long as we give enjoyment to others on here that is what it is all about ..we get enjoyment from our own builds but also from whatching others build theirs.

                                                #99152
                                                gecon
                                                Participant
                                                  @gecon

                                                  Well, I'm not sure that I give much enjoyment to others Neil ! Irrespective, I'm posting more progress pics soon -sorry chaps.sad but a build log is necessarily a drawn out affair. At least we have the choice of looking in -or notsmiley.

                                                  George

                                                  #99156
                                                  neil hp
                                                  Participant
                                                    @neilhp

                                                    George, I for one enjoy looking in to your and other peoples builds.

                                                    i dont often comment because there is only so many ways one can keep saying what such brilliant workmanship i see on all of you that build, but i really appreciate the builds myself, as they give such inspiration to myself and others, and very helpful tips on hw to do things as well, and some i would never think of doing in such a way, but are excellent ideas………so keep up the excellent work George, as we all apreciat the builds that come up on here,

                                                    #99157
                                                    neil hp
                                                    Participant
                                                      @neilhp

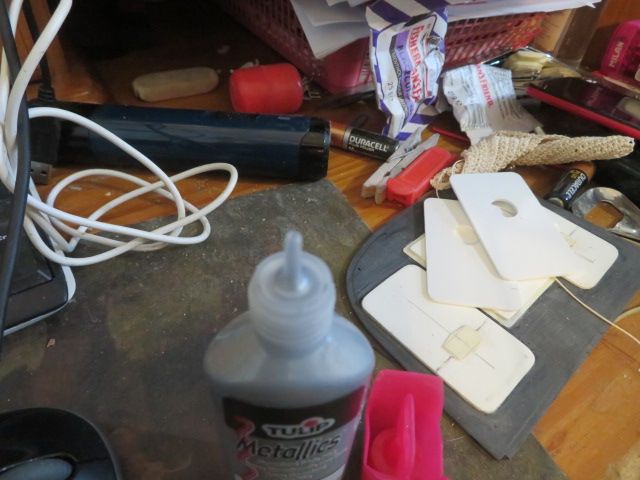
                                                      I left the detailing of the whaleback bulkhead until this afternoon, as I couldnt find my half full tube of favourite rivet maker anywhere, and so had to go to Preston today to buy a new tube.

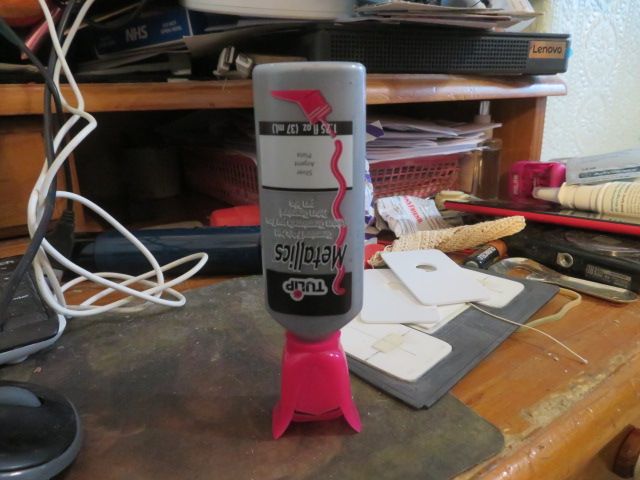
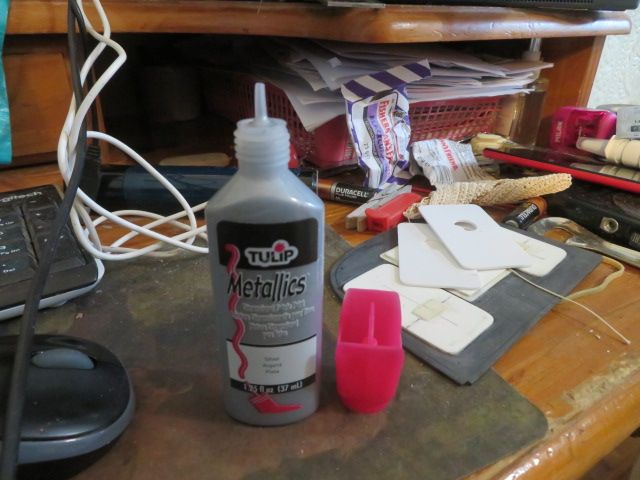
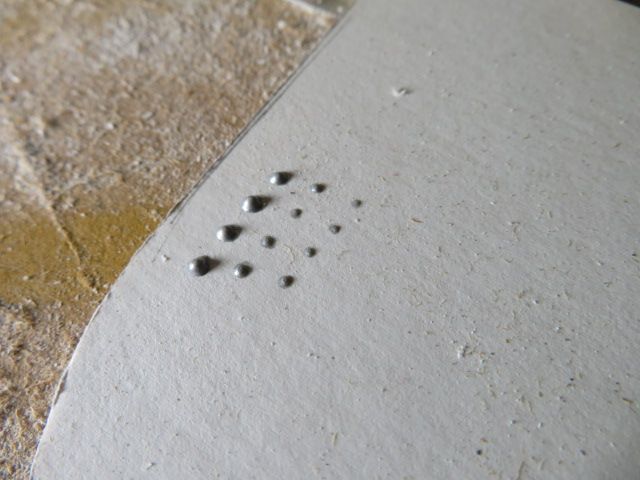
                                                      What I use is an amazing product called TULIP DIMENSIONAL FABRIC PAINT…It dries hard, and waterproof on virtually any surface, and is sprayable or brush paintable.

                                                      The bottle comes with a fine nozzle and is controlable, as it uses capilarity to come out of the nozzle. the longer you keep it on the subject the bigger the blob that comes out, and once cured within the hour of applying becomes hard and paintable.

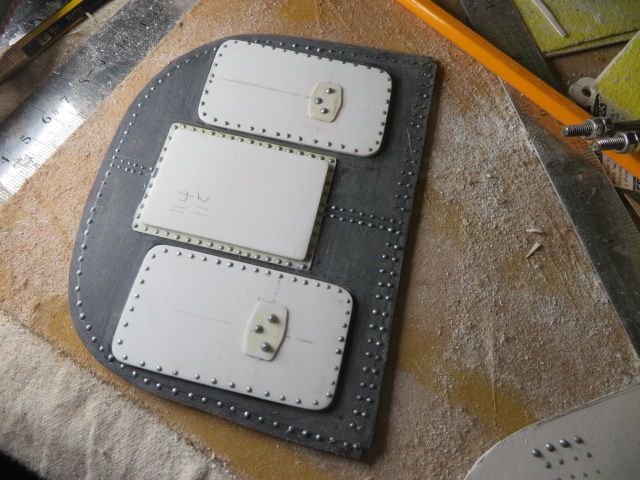
                                                      I buy mine from Hobbycraft, and comes in numerous colours including metalic black, copper, silver and mat alluminium from what I have seen and sells for £2.49 a tube………….and I must get a few thousand rivet heads from one tube easily……….

                                                      No drilling needed….just takes a few minutes practice to get reasonably equal sized rivets in a run.

                                                      And the riveting on the bulkhead was done in just short of 10 minutes…..try that with drilling and then gluing and inserting small rivets…………..I'm all for easy fix's.

                                                      img_1092.jpg

                                                      img_1093.jpg

                                                      img_1094.jpg

                                                      img_1095.jpg

                                                      img_1096.jpg

                                                    Viewing 25 posts - 51 through 75 (of 214 total)
                                                    • Please log in to reply to this topic. Registering is free and easy using the links on the menu at the top of this page.

                                                    Code of conduct | Forum Help/FAQs

                                                    Advert

                                                    Latest Replies

                                                    Home Forums Building Kits Topics

                                                    Viewing 25 topics - 1 through 25 (of 25 total)
                                                    Viewing 25 topics - 1 through 25 (of 25 total)

                                                    View full reply list.
                                                    Advert

                                                    Newsletter Sign-up