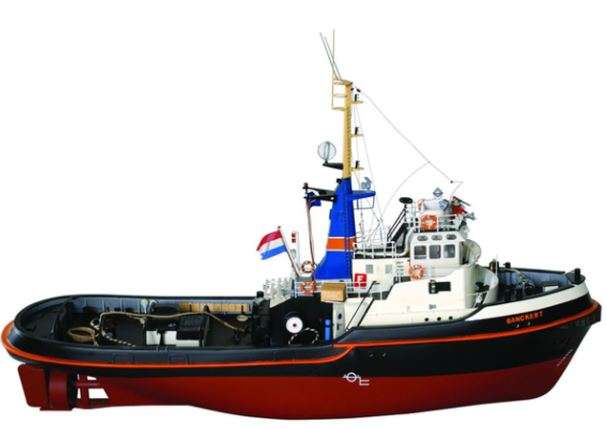
Billings Boats Banckert

Advert

Billings Boats Banckert

Home Forums Building Kits Billings Boats Banckert

Viewing 4 posts - 1 through 4 (of 4 total)
  • Author
    Posts
  • #115207
    bluetobits
    Participant
      @bluetobits


      Hi.

      Like gecon below this post, I’m contributing to Billing’s Xmas fund. This is my first attempt, please be kind.

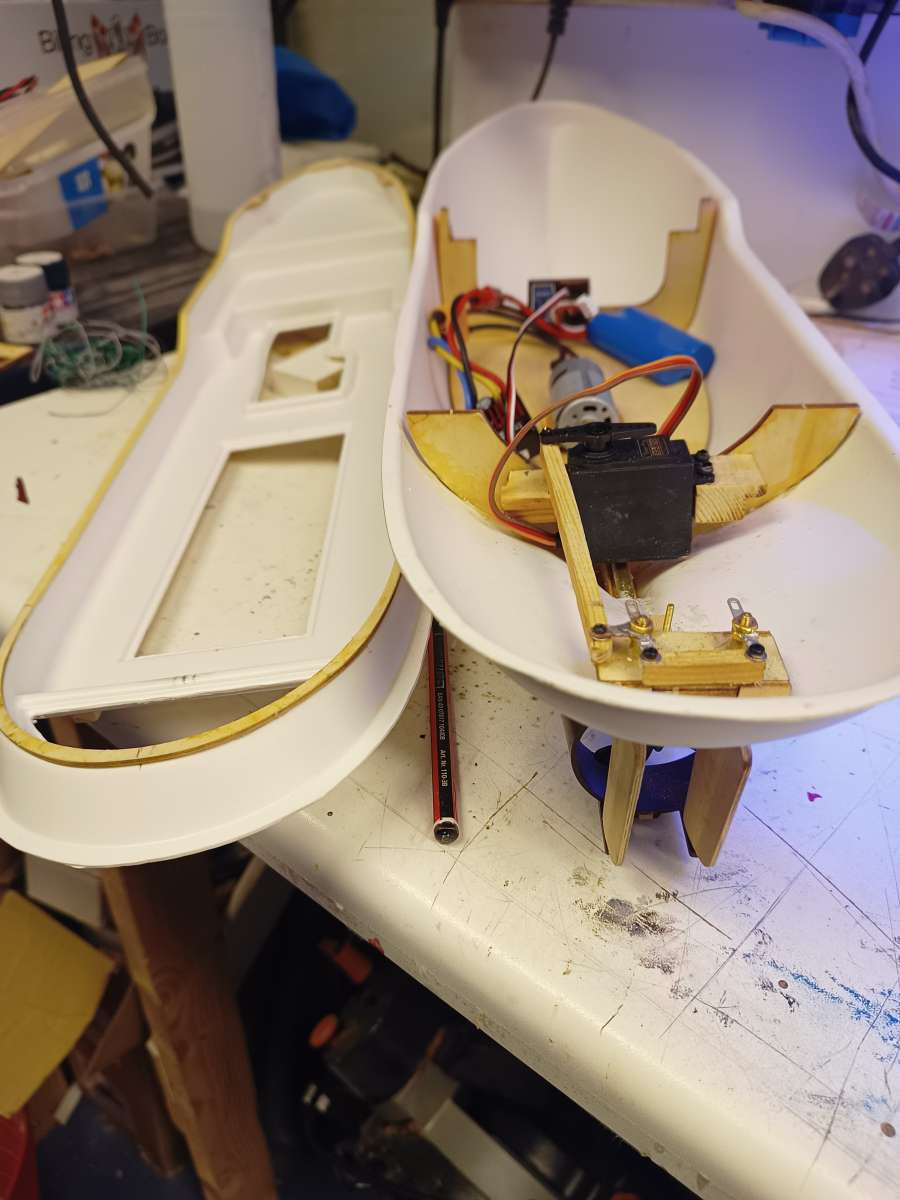
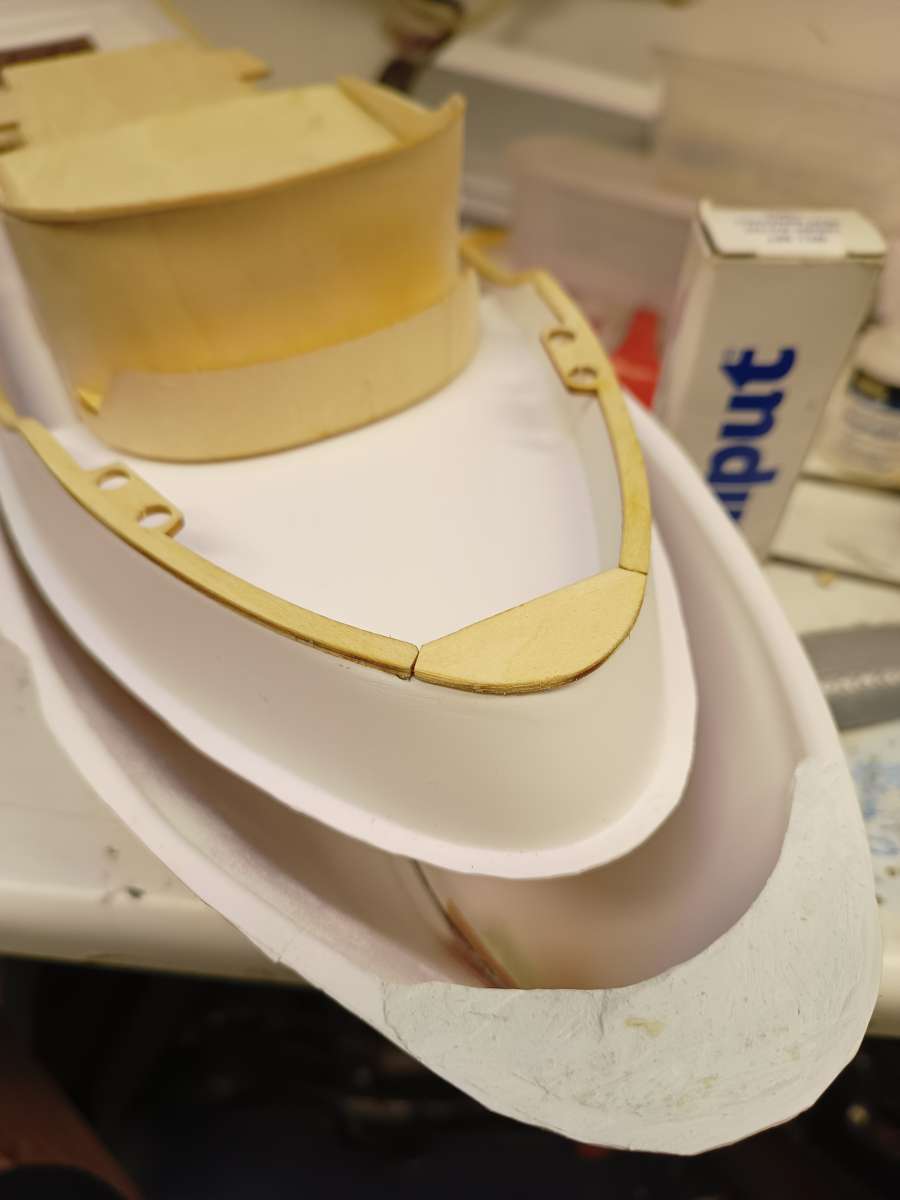
      Is it expected to have to adjust some of the laser cut parts to make things fit in a kit? And by adjust I mean more than a quick rub with sandpaper. Certainly a knife, perhaps not quite a chainsaw. The plastic hull seems about 5 mm smaller than the deck and laser cut plywood parts. I was thinking to glue the deck and hull together(epoxy)  then trimming (sanding) the excess ‘flange’ and glueing the gunwale strip over the joint. It’s going to make getting to the RC and motor gear awkward.  Also the instructions are a bit vague with little in the way of dimensions. Is this all ‘Normal’ for kit building? I find I’m having to dry build up 4 or 5 steps ahead to ensure it’s going to work before reaching for the glue. Of course that raises the question when to use CA, epoxy and PVA? So far I found that CA sticks the hull best but doesn’t gap-fill, waterproof or give any working time, I’m using epoxy and Milliput epoxy clay where waterproofing is required and I’m yet to open the PVA. I’m starting to think about my to venture into the world of paints. I’m thinking of an air brush using Vallejo or acrylic Humbrol  followed by a few coats of matt varnish all over.  I have bought a couple of mini self-priming pumps. I was thinking of using one as a bilge pump (Mosfet electronic water detector) to expel through a flanged hole just under the gunwale. I was thinking of using the other on channel 3 for fire water cannons (replacing the supplied ones with 3D printed versions) with a water pickup under the waterline.

      I would be very grateful for any replies, suggestions or hints.

      Thanks.

      IMG_20231107_163134378Banckert


      Advert
      #115219
      Richard Simpson
      Participant
        @richardsimpson88330

        Hi Steve and welcome to the forum.  Just to try to help with some of your questions.  Firstly, seeing as there are so many, it would be a lot easier to respond to if they were numbered so I’ll try to dig them out of your text.

        So,

        1) Adjusting laser cut parts, yes.  Especially where there is vac formed plastic involved which notoriously is less than perfect or consistent in its final shape.

        2) Are kit instructions vague, yes! Lacking dimensions, yes! Frustrating, yes!, Misleading, yes!

        3) Do you need to work four or five steps ahead, yes!

        4) The plastic used in these vac formed kits is a polystyrene type.  Epoxy I’m afraid does not hold very well.  I have just completed a Billing African Queen and used my go-to glue, Araldite, to glue the frames into the hull only to find the hull simply peeled away from the glue.  I strongly suspect yours will do the same.  The best glue I could find to deal with this was Stabilit Express.  It is expensive but it does seem to grab the plastic significantly better.  I re-glued my frames in the African Queen with Stabilit and it held much better.  It is tricky though as you need to plan and prepare because the glue sets in around five minutes.  If you have a big part to glue you need to get the glue on, get the bits together, adjust, and clamp everything up before it starts to cure.

        5) Glueing wood to the vac formed plastic can be very successful with good old polystyrene cement.  Don’t use the liquid type as it soaks into the wood before it dissolves the surface of the plastic, and don’t use the thin types such as revel Contacta for the same reasons.  The best one is the thick type in the tube.  This does not soak into the wood quickly, fills gaps nicely and dissolves the surface of the plastic to give a good bond.  For your deck and hull joint I would consider this glue.

        6) PVA the best stuff for wood to wood.

        7) I rarely use cyano in model boats for main structural stuff.  It does have its uses in multimedia areas though, such as the boiler and engine in the African Queen.

        I think you would find a read of the African Queen review I did interesting.  It is in Model Boats Magazine, September and October 2023.  Quite often you have to think outside the box and decide as to whether you want to follow the instructions to the letter or, occasionally, do your own thing.  The African Queen instructions show the steering servo in the forward locker.  If you put it there you would have to remove the mast and forward locker door to even see it, but then you could not get to it.  I put mine below the decking.

        While kits usually lead you along the path by the hand and you feel you should be able to relax in the knowledge that all the design work is done for you, quite frequently you need to make modifications yourself.  Sometimes kits can be more work than building from a plan!

        I would take a deep breath and try to pull your hull away from the glued internal frames.  If it does, get some Stabilit Express and lay a thick bead over the outside of all the frames where they meet the hull.  I also see there seems to be gaps between the hull and the tops of the frames.  You need to determine whether the hull needs pulling in to close the gaps or whether the gaps need filling with additional glue.  The hull fit to the deck will determine this.  When you come to glue the deck and hull together you will need a large quantity of small clamps.  I use stainless steel clothes pegs.  When the glue goes on you need to clamp that joint quickly and evenly.  You can go over the joint afterwards with another bead of glue if you have any gaps but quick clamping should avoid that.

        #115303
        Colin Bishop
        Moderator
          @colinbishop34627

          Richard has given some good advice there. Kit manufacturers do vary in the accuracy of their parts and Billings is not one of the best. This is quite an old kit in its previous incarnations and the updating may have introduced discrepancies.

          The priority is to match the deck moulding up with the hull and it is quite possible that the internal frames are not accurate. I would pull the hull away from the frames ( you can always stick it back again!) and see if pulling out the sides helps mate the two mouldings together. If so then you need to add material to the frames to match the new fit.

          As Richard says, you probably need to use a hi tech adhesive such as Stabilit Express or alternatively Fusion from DeLuxe Materials which is similar.

          Fusion

          Article on how to use here

          https://cdn.shopify.com/s/files/1/0131/9341/2666/files/66-71_Deluxe_Fusion_2_35d5019b-4f86-41d1-ac42-debd76b4139f.pdf?v=1629921999

          Clamps are good if you can get them to hold but in this situation it can be equally effective to use lengths of decorator’s masking tape across the deck and down the hull sides while the adhesive cures.

          Let us know how you get on.

          Colin


          #115360
          bluetobits
          Participant
            @bluetobits

            <p style=”text-align: left;”>Hi</p>
             I thought I had sent a reply but it must have disappeared into the ether.

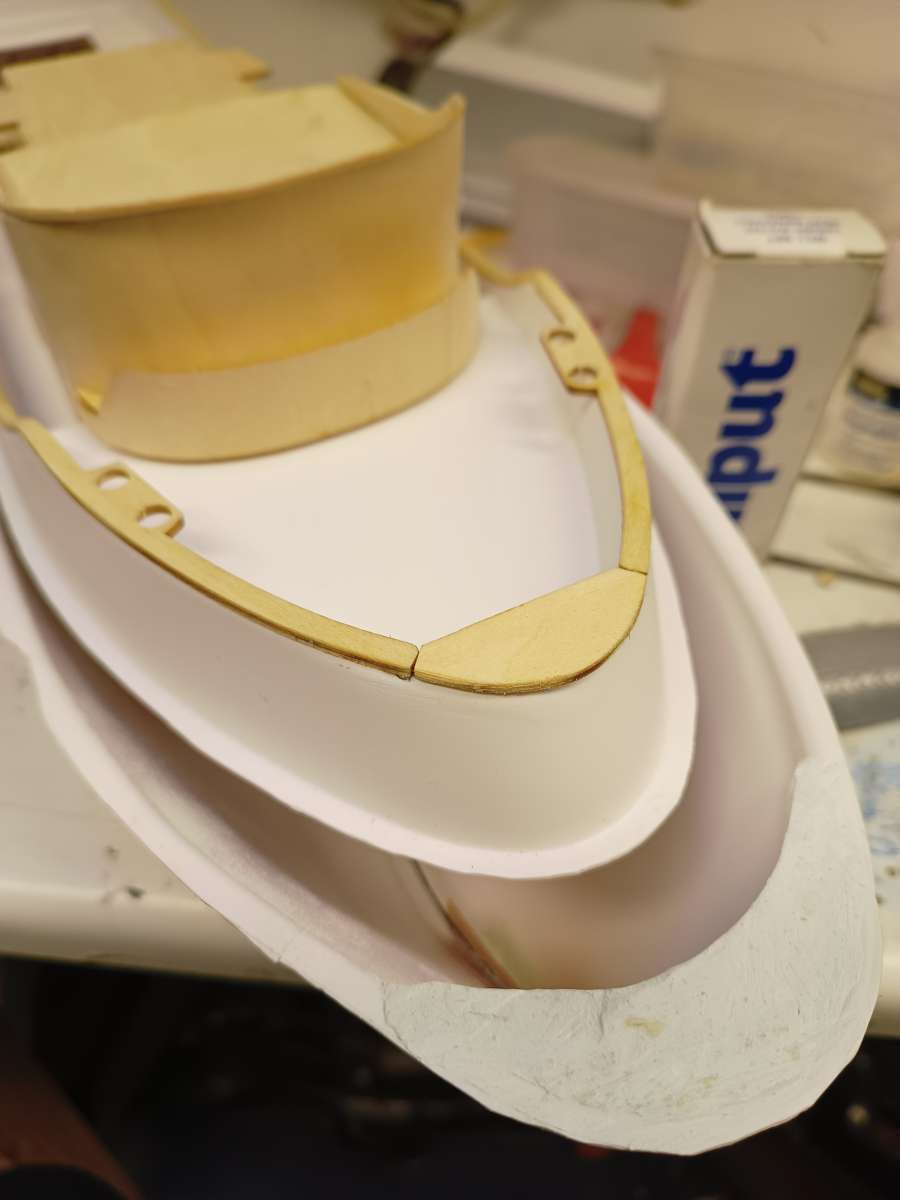
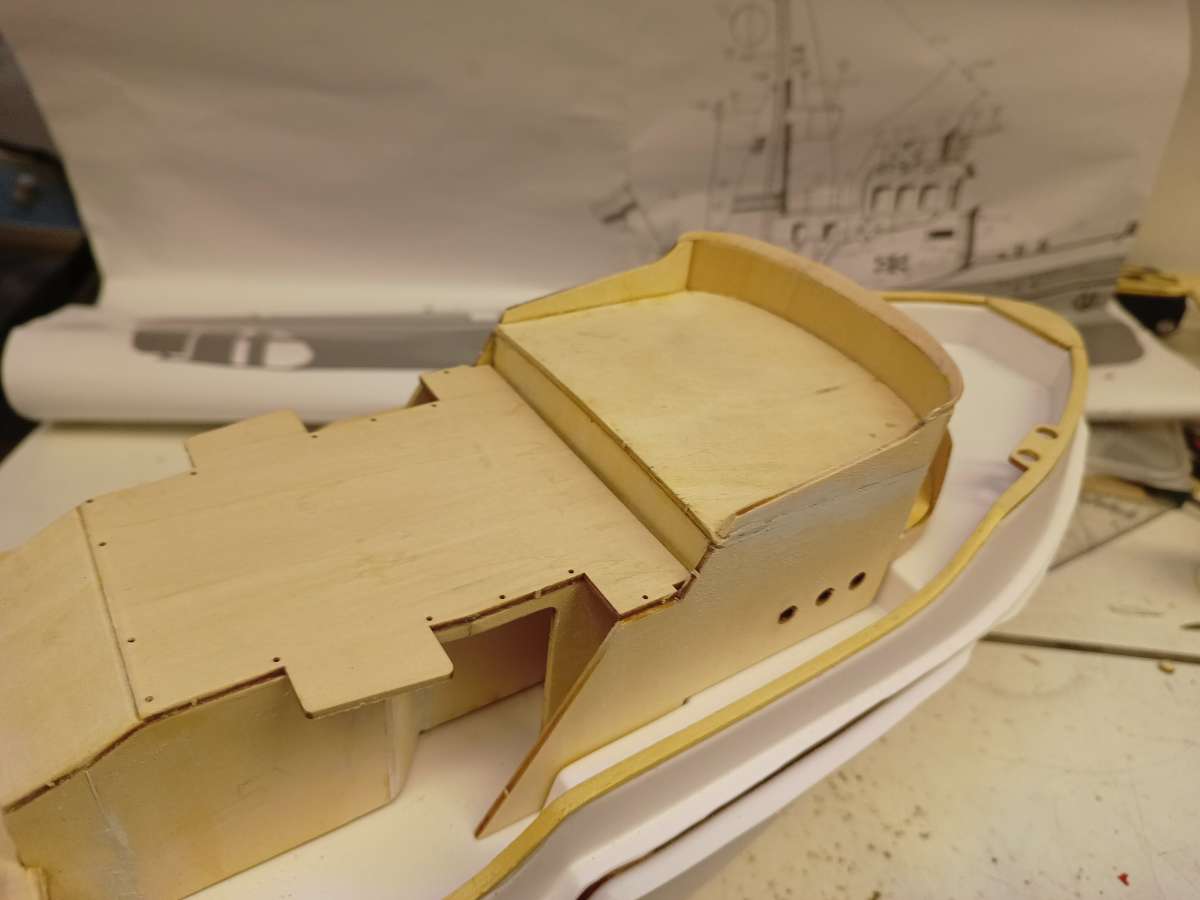
            First thanks Richard and Colin for your replies, advice and words of encouragement. It’s good to know that it’s not senility creeping up on me!  On Richard’s advice I’ve moved and “adjusted” both the formers which now allows me to mate the two halves together to discover that the top deck is 10 mm  shorter than the hull. I’ve widened the bow flange with epoxy putty to provide something to glue to. I may need to reform the deck bow with more putty to make it ‘look’ right.. there’s  parts missing. I suppose it’s probably due to difference between incarnations as Colin suggests. There’s up to 5mm discrepancy in many the timber parts for the cabin construction, possible due to the underside deck moulding. I’m into digital electronics and 3D printing so I’d like to add a few animations such as working fire hoses to create the water arch display I’ve seen from the Liverpool tugs during the tall ships celebration. I’m sure they do something similar in Holland! Making the nav lights work and maybe adding cabin lights and a moving winch are other possibilities. I had a go with PVA and found it difficult to keep parts in position while the glue goes off. I find CA much easier and precise by holding parts in alignment for the few seconds it takes to grip. Especially when curving and attaching wet wood around a former. I’m using Milliput epoxy filler to fill seams. Now that I’m started, and have stopped spending hours trying to find out why things don’t fit, it’s getting easier. I’ve  added a few photos, it’s all still ‘fluid’ at the moment. I’ll post progress every so often.IMG_20231109_114757188IMG_20231109_115255735

            IMG_20231109_114757188

            Cheers!

            Steve

          Viewing 4 posts - 1 through 4 (of 4 total)
          • Please log in to reply to this topic. Registering is free and easy using the links on the menu at the top of this page.

          Code of conduct | Forum Help/FAQs

          Advert

          Latest Replies

          Home Forums Building Kits Topics

          Viewing 25 topics - 1 through 25 (of 25 total)
          Viewing 25 topics - 1 through 25 (of 25 total)

          View full reply list.

          Advert