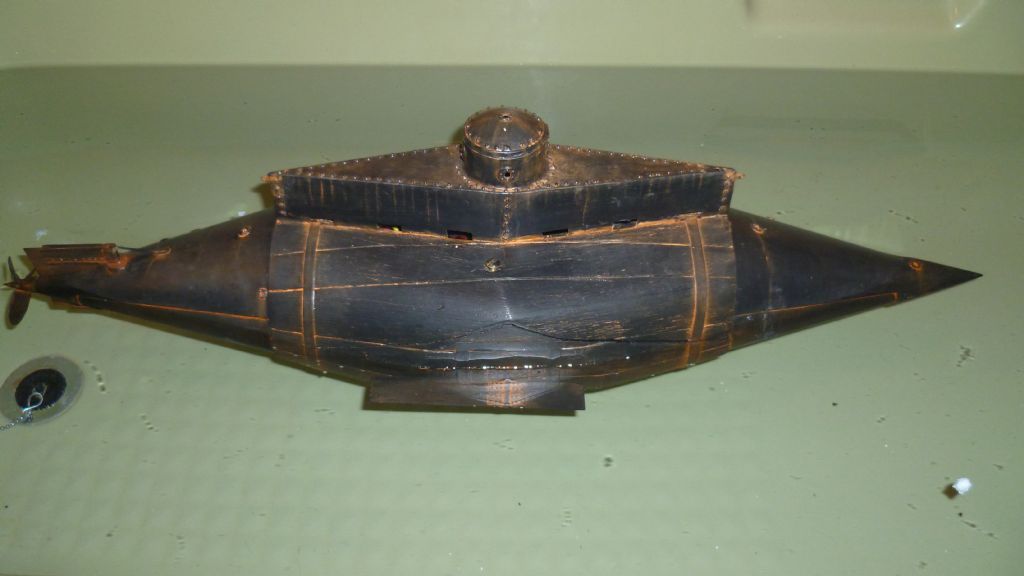
Resurgam Submarine

Advert

Resurgam Submarine

Home Forums Scratch build Resurgam Submarine

  • This topic is empty.
Viewing 25 posts - 151 through 175 (of 227 total)
  • Author
    Posts
  • #52628
    Len Morris 2
    Participant
      @lenmorris2

      Hi Amy,

      Also thought about a screw thread system but decided to try a direct servo movement for simplicity. It works a treat and is quick if required (images of crews running through U boats spring to mind).

      In theory, at neutral buoyancy only a small shift in weight will alter the trim so I'm hoping 300 grams will be enough. With everything else that has got to go into the hull there's not really any space left for more movement.

      The master plan is to get her in the water as a surface boat and test all the systems (and we are getting dangerously close)! She will then be as Garrett designed her, a dynamic diver. I doubt she will go under on her scale sized hydroplanes. I've got some 'clip on blades' that my marine architect mates tell me are the correct size to mimic the full sized boat. When we get there it will be interesting!

      To start with (because I really don't have a clue what's going to happen) I'm going to keep the weight shift and hydroplanes separate. The nice thing is that my RC gear has no end of servo mixing functions so it will be very interesting to experiment.

      Either way, mi boat has ballast tanks and will dive statically. The whole bow section is reserved for the installation. Just need to work out how to do it. My brain hurts!

      Len

      Advert
      #52665
      Len Morris 2
      Participant
        @lenmorris2

        Hi Everybody,

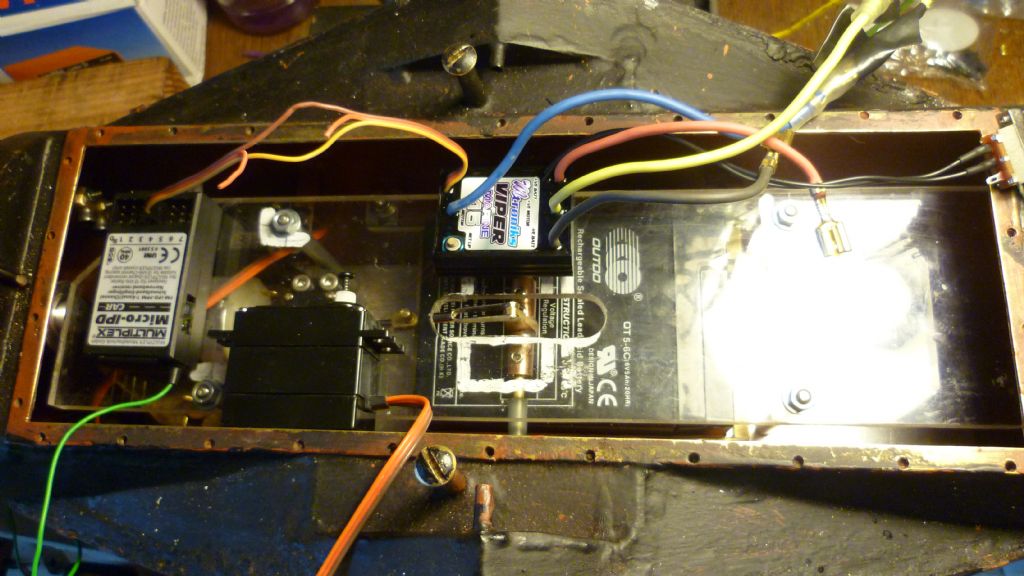
        The second deck is now fitted and I just need to get the hydroplane servo and R/C gear screwed down.

        second deck 007.jpg

        As an aside while this is going on can anybody explain what this lot really means?

        second deck 006.jpg

        I don't think floating use refers to model boats and I don't think cycle use refers to my bicycle!

        Len

        #52786
        Len Morris 2
        Participant
          @lenmorris2

          Hi Everybody,

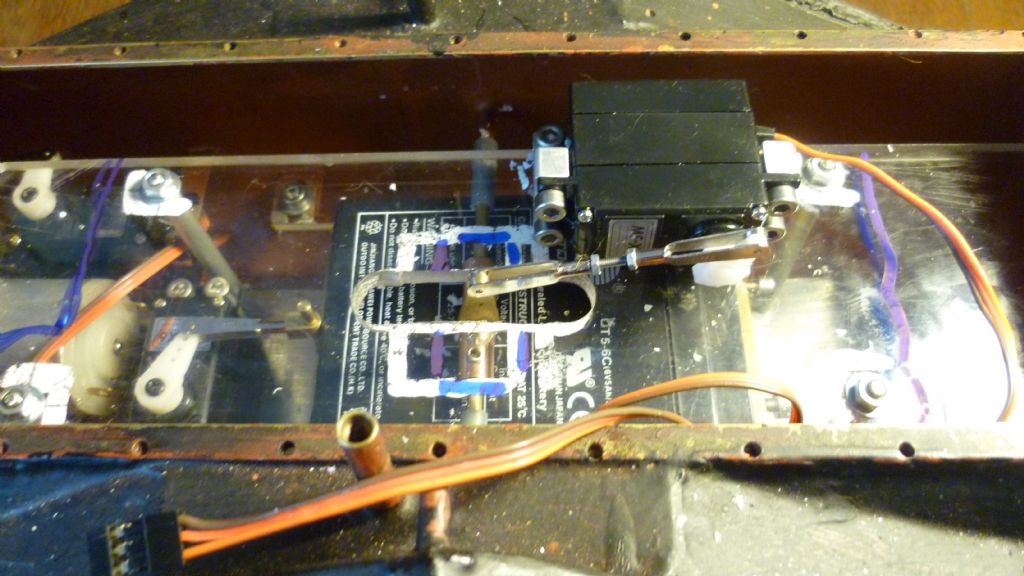
          The hydroplane servo is now in place and I have horizontal wraggley bits! The job is effectively done for a dynamic diving boat. The next step is a clean up, the wiring and then ballast trials in the Great Float bathroom. On my local lake she might just go under on her hydroplanes. Managed to keep the bow section clear for the static diving kit. Now getting quite excited!hydroplanes 001.jpg

          On my next post she'll be in the water!

          Len

          #52788
          Dave Milbourn
          Participant
            @davemilbourn48782

            "Floating" refers to a battery which is there just in case it's needed e.g. for emergency lighting. It will spend most of its time supplying little or even no current. Often it will be charged automatically by the same circuit to which it's connected e.g. in a home alarm system base unit.
            "Cyclical use" is a battery which is regularly charged up and discharged – or cycled – such as those used in our models. A separate charger is usually required. Batteries used in these two modes require different charging voltages as shown.
            DM

            #52803
            Len Morris 2
            Participant
              @lenmorris2

              Hi Dave, thanks for that. Now understand.

              In the old days we would have used the terms 'standby and normal' for the usage. Need to come up to speed with modern day gobbledegook!

              Len

              #52805
              Amy jane September
              Participant
                @amyjaneseptember49770

                Oooohh I'm started to get excited!

                I'm betting she works a treat!

                #53070
                Len Morris 2
                Participant
                  @lenmorris2

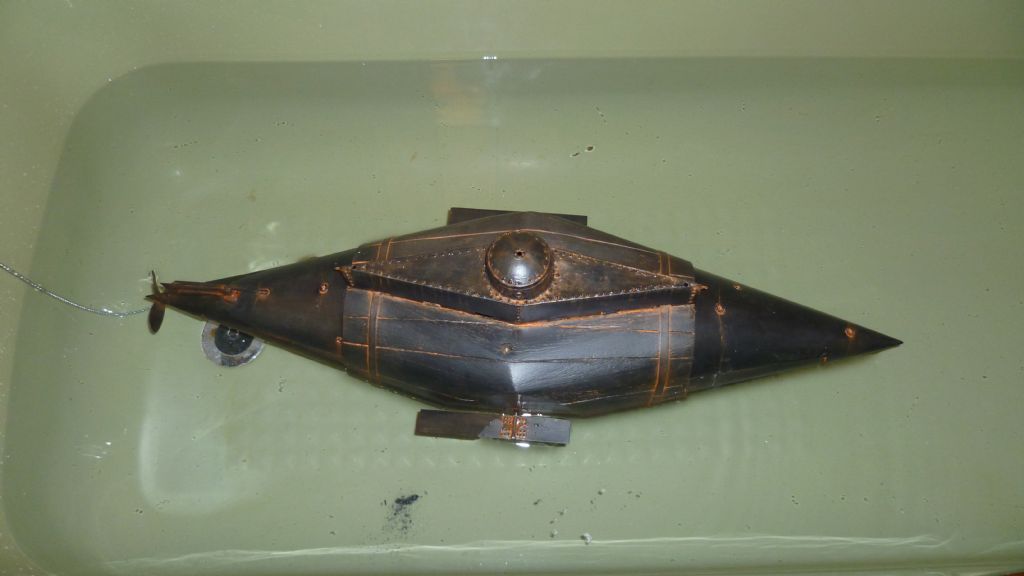
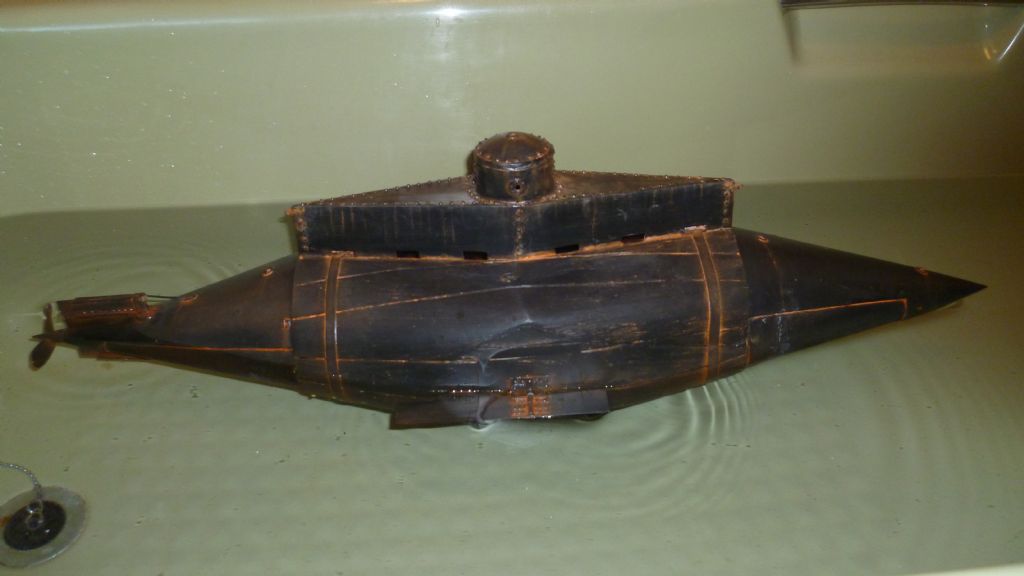
                  She Floats! Was getting nervous about the weight that was poring on but I think I got mi sums right. A bit stern heavy but I expected that. Slightly down on the port side. My bit of lead pipe should sort both problems. All the bits that waggle do so. Plan now is to tidy up everything, get the ballast right, and chuck her in the pond.

                  no idea 655.jpg

                  no idea 656.jpg

                  If she goes under on her hydroplanes (as is) then full marks to Garret. If she doesn't then the next bit of the plan is to scale the size of the hydroplanes to account for all the size reduction and see if she'l go under. Even if she does mi static diving system is still going to be fitted.

                  She floats. Now I just make her sink!

                  Len

                  #53080
                  Amy jane September
                  Participant
                    @amyjaneseptember49770

                    Yay! Looks like you're going to need a fair bit of that pipe though! Can't wait for the test dive!

                    smiley

                    #53103
                    Len Morris 2
                    Participant
                      @lenmorris2

                      Won't need that much lead pipe Amy. Don't forget that all the central wood cladding is a 3 mm veneer over her ballast tanks and in the pictures she was totally dry. I can take onboard about 2 kg of water which should sink her like a stone. Plan is to use the lead to trim her, flood the tanks to get the right water line and then lock them off. Sail about Garrett style at just positive buoyancy and see what the hydroplanes do. Hope to get this done in the next few weeks.

                      Len

                      #53113
                      ashley needham
                      Participant
                        @ashleyneedham69188

                        My experience with a dynamic diver is that overall ballast trim is all,and even now I can spend 20 mins adjusting the trim to effect a decent dive performance. When you do go out, you will need loads of small trimmy bits that can be attached to the hull or otherwise added without taking the boat out the water and taking off hatches and so on, or you be there all day!

                        I can normally make an educated guess about likely behaviour of odd things, but this is anyone`s guess. You have a perfectly symmetrical nose, giving equal up and down lift at probably any depth, and dive planes centrally located. I would say they are too small, but you just never know…

                        I would maximise the dive experimentation time of the first voyage by taking along something to temporarily extend the dive planes with, and tape to hold these on.

                        The bugbear is that even very small temperature changes affect the ballast and trim, thus affecting dive performance every time you go out. I can spend ages getting mine to dive..then take it further out into the pond, and in a moments inattention find it has zoomed to the bottom because the water is slightly colder due to increasing pond depth!!

                        Ashley. bUt you no doubt have been told this all before.

                        #53119
                        Len Morris 2
                        Participant
                          @lenmorris2

                          Hi Ashley,

                          Para 1 – agree. Have small magnetic weights. She's made out of tin!

                          Para 2 -agree. The planes are scale size and you can't scale down physics. Still, it will be interesting to see what happens!

                          Para 4 -agree. The metal hull is going to to go all over the place with temperature.

                          At the end of the day that's the fun of the whole job. Could watch Corrie instead!

                          Len

                          #53225
                          Len Morris 2
                          Participant
                            @lenmorris2

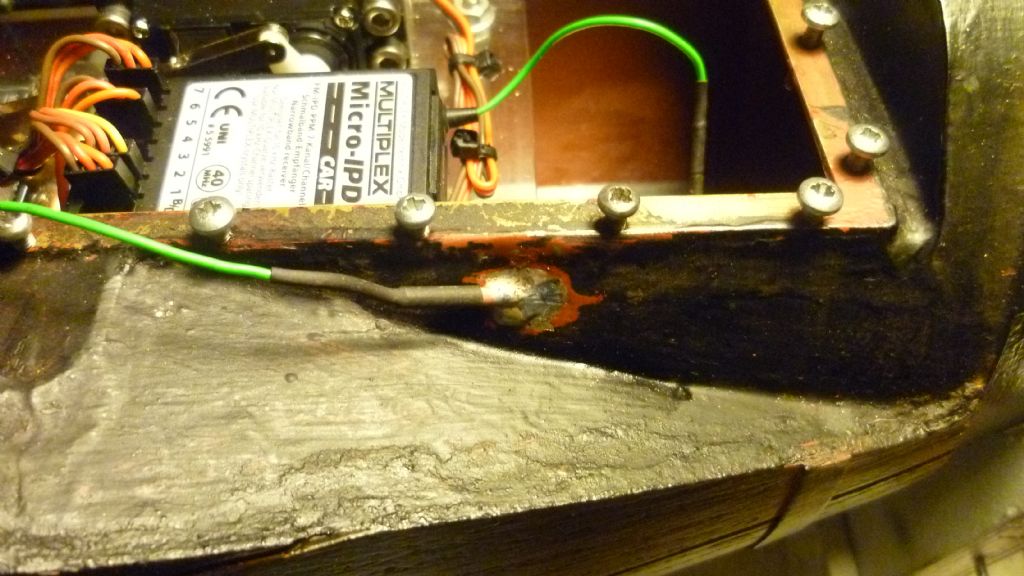
                            Just an update. Have now run the aerial wire through the hull. Small brass tube with heat shrink on either side. Considered a compression fitting but decided it would too bulky and complicated.

                            aerial done 006.jpg

                            Len

                            #53259
                            Geoff Sleath
                            Participant
                              @geoffsleath41411

                              Len, if the aerial is outside the metal hull you shouldn't have any problems with range. Perhaps a bit of silicon sealant would make the outlet adequately waterproof at the depths you're interested in.

                              How near is the test dive? It looks all but complete.

                              Geoff

                              #53275
                              Len Morris 2
                              Participant
                                @lenmorris2

                                Hi Geoff,

                                Thanks for that. The aerial wire is silicon sealed and in truth the heat shrink was just for neatness.

                                I'm only 'interested' in a depth of 6 inches (quarter of a psi pressure) but, when it all goes pear shaped (and I suspect it will for the first few outings) she could be under 6 psi (12 feet down). I'm trying to build her so there's something recoverable when she's salvaged!

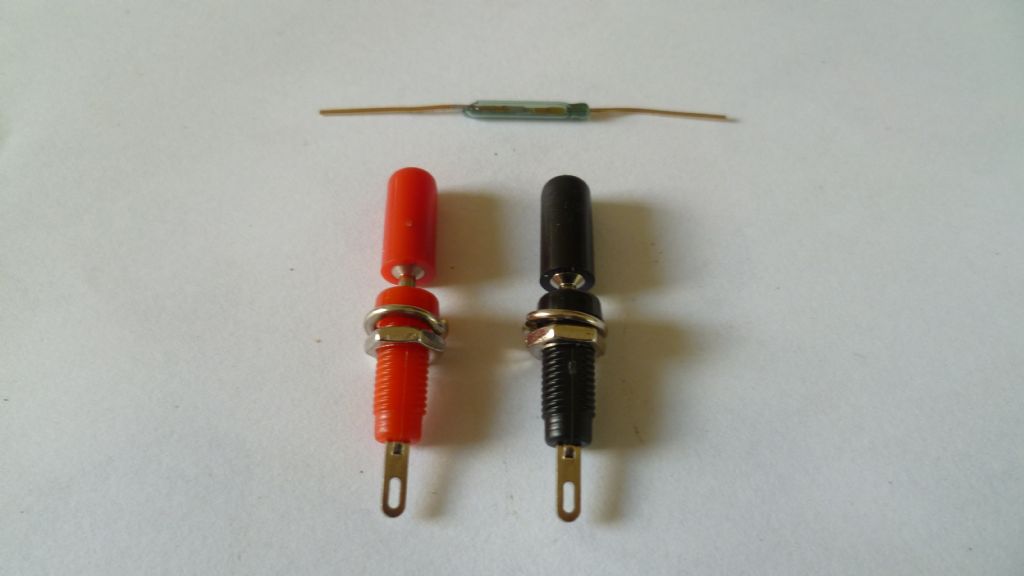
                                The launch is very close but as ever the devil is in the detail and the smallest things seem to take forever. I need to be able to switch her on and off and charge her externally. Here are the bits involved-

                                electrics 001.jpg

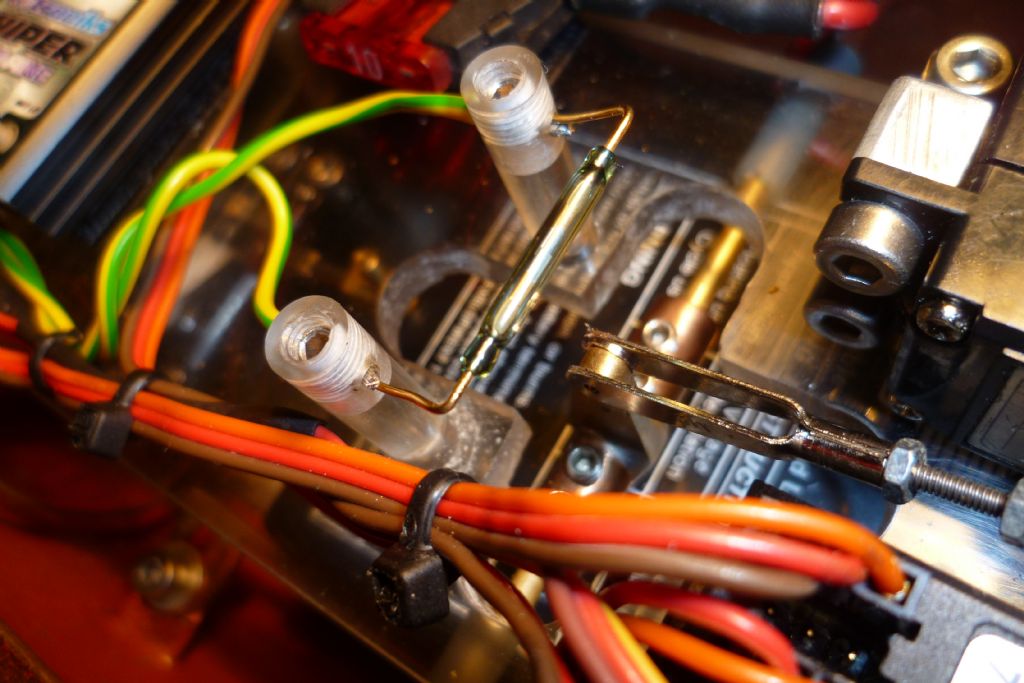
                                The top bit is a magnetic reed switch that fires up the ESC and BEC. It will sit under the hatch cover directly below the conning tower lid and replaces the original ESC slider switch. It gets rid of any problems about sealing switches. Anybody with a keen eye will notice it's broken on the left hand side. Not an issue because I bought a few of them. Delicate care is essential. Learnt a lesson!

                                The 2 mm jack plugs need to be fitted into the hatch cover and sealed for charging. Not sure how I'm going to do it yet but we'll work something out!

                                Len

                                #53435
                                Amy jane September
                                Participant
                                  @amyjaneseptember49770

                                  Magnetic switch, very cunning!

                                  #53448
                                  Geoff Sleath
                                  Participant
                                    @geoffsleath41411

                                    The reed switch is a good idea. The reed switches I've used in the past only stay closed when the magnet is present. Is yours a change-over switch that just needs the magnet to toggle it or are you going to have to keep the magnet in place during operation?

                                    Geoff

                                    #53463
                                    Len Morris 2
                                    Participant
                                      @lenmorris2

                                      Hi Geoff, the switch is just a simple glass tube with normally open contacts. The magnet must be in place to keep the switch closed but it doesn't have to touch the switch, it can be a good 5 mm away (the thickness of mi hatch). I,m using small electronic sized bits but if you've got the room there is no end of magnetic security switches for doors and windows that will work through an advertised 25 mm. Not come across a latching one yet.

                                      Len

                                      #53600
                                      Len Morris 2
                                      Participant
                                        @lenmorris2

                                        Hi Everybody,

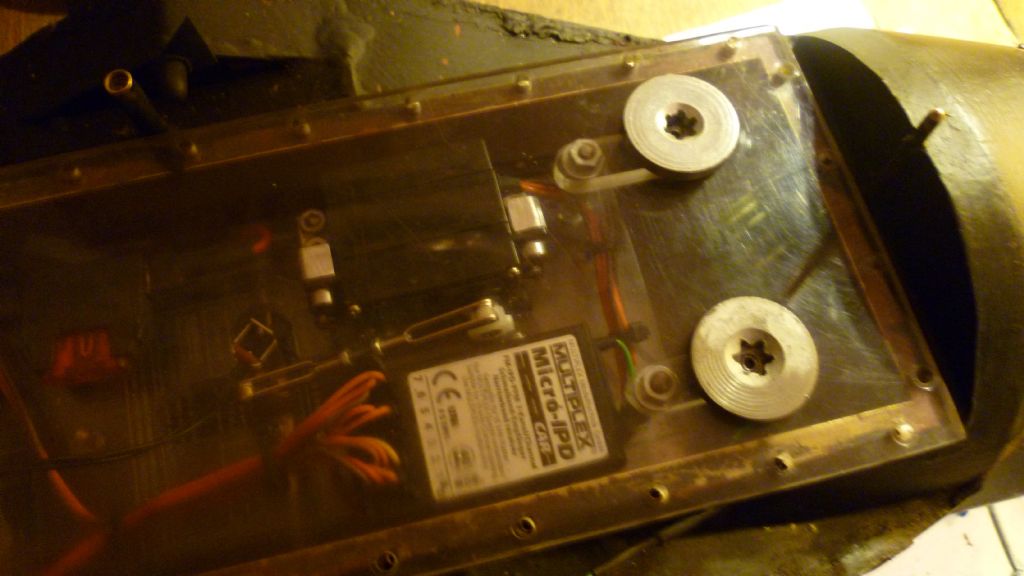
                                        Just an update. The external charging problem has been sorted. Battery connections were made up to lie just below the main hatch:-

                                        batt connection 001.jpg

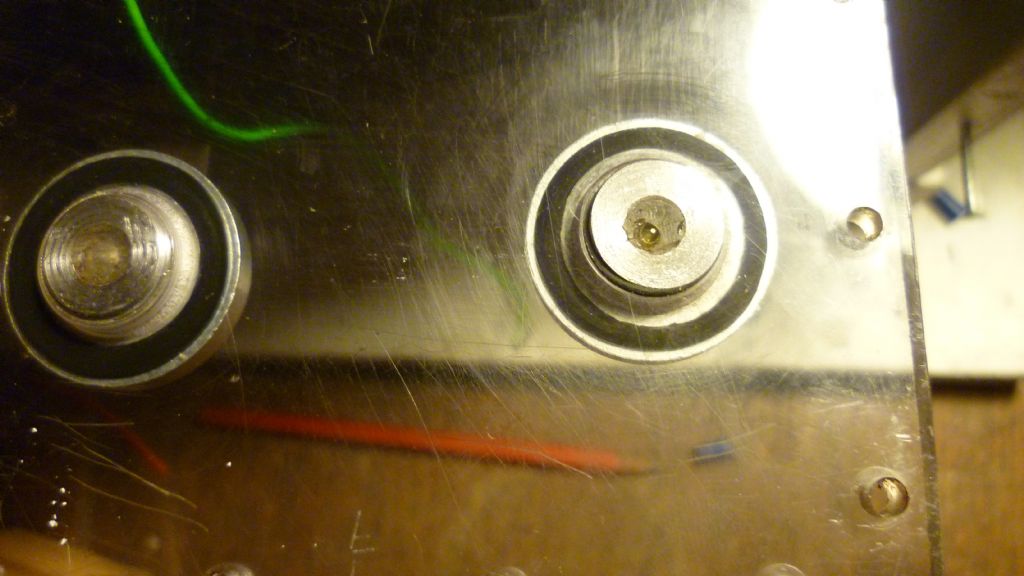
                                        The hatch itself was then drilled and tapped to accept two plugs, one directly above each electrical socket:-

                                        batt connection 006.jpg

                                        A view from the underside shows how the plugs sit down on 'O' ring washers:-

                                        batt connection 008.jpg

                                        The plugs themselves are Vauxhall sump plugs from the local car accessory shop and chosen because they were the only ones that sealed on a rubber O ring. All the others were copper or fibre which was a bit harsh. I had a bit of a surprise when machining them to length as they are hollow inside, so had to plug the centres.

                                        Have decided to retain the ESC slider switch for normal servicing and will wire the reed switch in parallel. Just seems to take forever to get the small details right!

                                        Len

                                        #53602
                                        ashley needham
                                        Participant
                                          @ashleyneedham69188

                                          Len. One thing I need to do on both my submersibles is make an easy-off hatch or some sort of opening to ventilate the interior between divings when at the pond. Both vessels collect condensation like mad, coupled with dribbles from the propshaft and this needs to be ventilated when resting between dives..

                                          Do I take it your sump plugs will be able to fulfill this task??

                                          Magnet trimming for ballast…spiffing idea..must say I didnt think of that, but of course both mine are wood and i could not have used magnets! Hmmm….so saying….the Oberon has a steel keel..

                                          Ashley

                                          #53612
                                          Len Morris 2
                                          Participant
                                            @lenmorris2

                                            Hi Ashley,

                                            The answer to your direct question is 'I don't really know'! I suspect if you fitted two of them as far apart as possible and blew warm air down one of them, it would clear the boat.

                                            Just so you have all the specs, the plugs were bubble packed in the shop by 'Autobar' item 'S01' and simply labelled 'Sump Plug – Vauxhall'. The thread size is M14 x 1.5. This is a non preferred metric size in the fine series so if you decide to have a go, beg, borrow or steal a tap. I bought one from the local tool store for £16 and that was with 50% discount! The tapping drill size is 12.5 mm so that is the effective size of hole you'll get. (Here's a gem that not many people seem to know. For the whole metric series, coarse, fine, whatever, subtract the pitch from the diameter and you have the tapping drill size)! The head diameter on the sump plugs is 25mm. To get the O rings to seal the plug has to be absolutely square so don't try tapping the thread freehand. Do it with a tapping jig or in a drill press (tried it freehand – crashed and burned)!

                                            I don't intend having any leaks on mi boat and that's why I fitted a Raboesch waterproof prop shaft (time will tell). However, condensation is a different matter as it's locked in when the hull is sealed. Hadn't really thought about it before and I suspect you are dead right, particularly in a tin hull. So, the whole extended family, workmates etc are now on alert to keep any silica gel packaging they might find!

                                            Len

                                            #53618
                                            Geoff Sleath
                                            Participant
                                              @geoffsleath41411

                                              Looks a very neat installation, Len. That £16 hiring fee for a tap seems a bit steep, but I guess a 14mm tap is quite big and probably too expensive to buy for very infrequent use.

                                              On the condensation front, could you put a sachet of silica gel crystals inside to absorb the moisture? It might keep things dry for a day's submerging and you could dry them out when back home. Probably impractical but just a thought.

                                              Geoff

                                              #53627
                                              Len Morris 2
                                              Participant
                                                @lenmorris2

                                                Hi Geoff, thanks for that. Think you might have miss-read mi post. I didn't hire the tap, I did buy it. As regards the silica gel I think you are dead right. I envisage one more 'sump plug' in the main hatch with a gauze tube threaded into its underside to carry the silica gel. Easy enough then to have it in and out to reactivate the crystals. At this stage I might be trying to solve a problem that doesn't exist but I suspect Ashley's right and it needs to be addressed. At least I get to use mi tap again bringing the cost per hole down from £8.00 to £5.33 each!

                                                Len

                                                #53659
                                                Len Morris 2
                                                Participant
                                                  @lenmorris2

                                                  Hi Everybody,

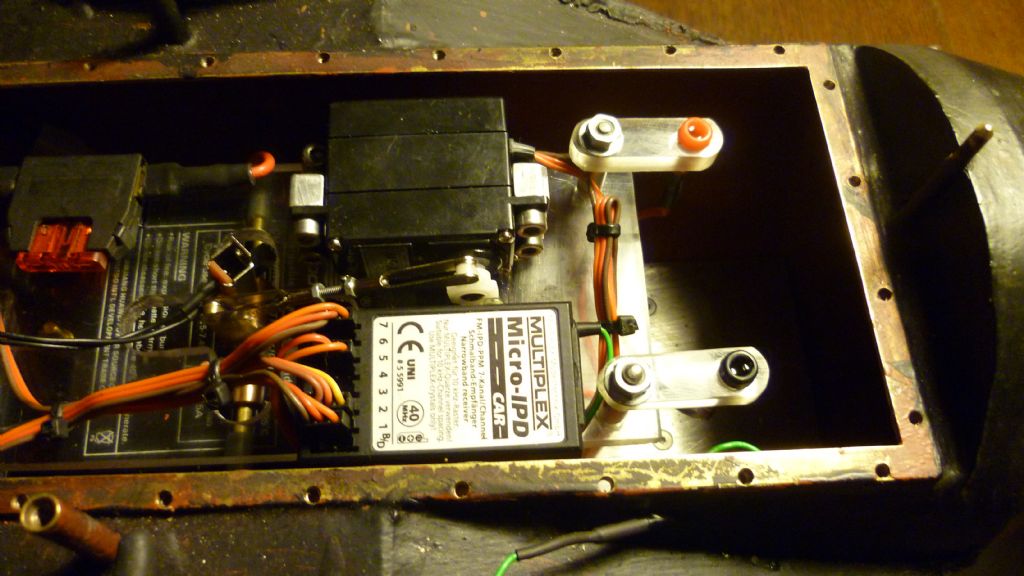
                                                  Here's a pic of the reed switch installation:-

                                                  switch2 003.jpg

                                                  It's held between two pillars that are superglued to the upper deck and wired in parallel with the standard ESC slider switch. It was then bent upwards until the glass tube sat just below the main hatch cover. The next pic shows it working:-

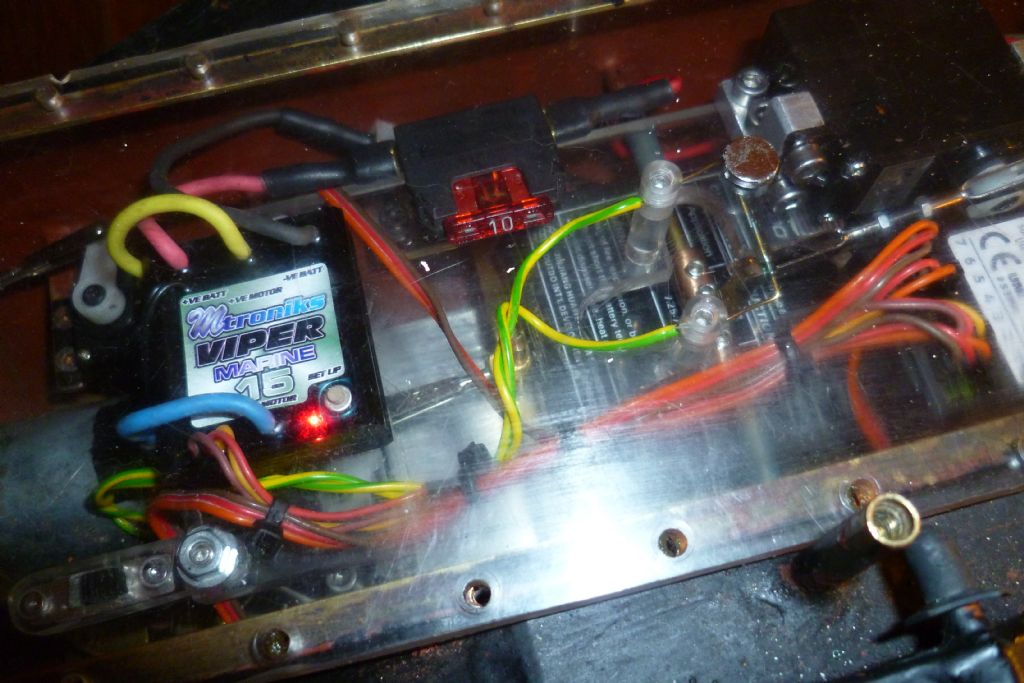
                                                  switch2 006.jpg

                                                  The hatch is in place and in the lower left corner is the slider switch (in the off position). The ESC (BEC etc) has been fired up by the button magnet on top of the hatch just above the reed switch. Now need to sort out a way of controlling the magnet down the conning tower.

                                                  Len

                                                  Edited By Len Morris 1 on 16/11/2014 19:44:22

                                                  #53760
                                                  Len Morris 2
                                                  Participant
                                                    @lenmorris2

                                                    Hi Everybody,

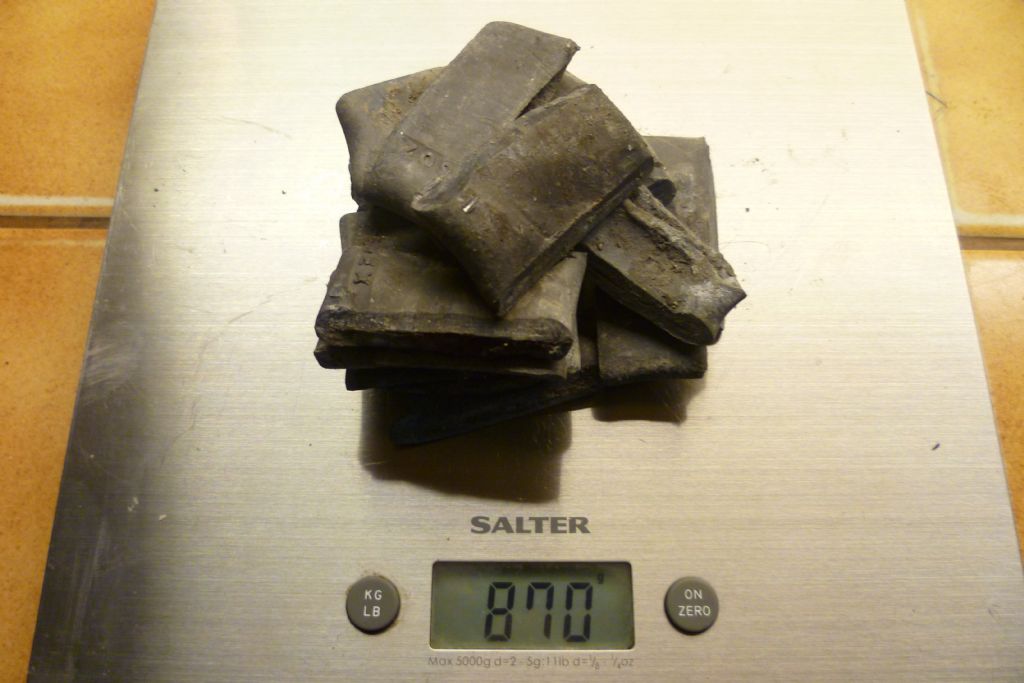
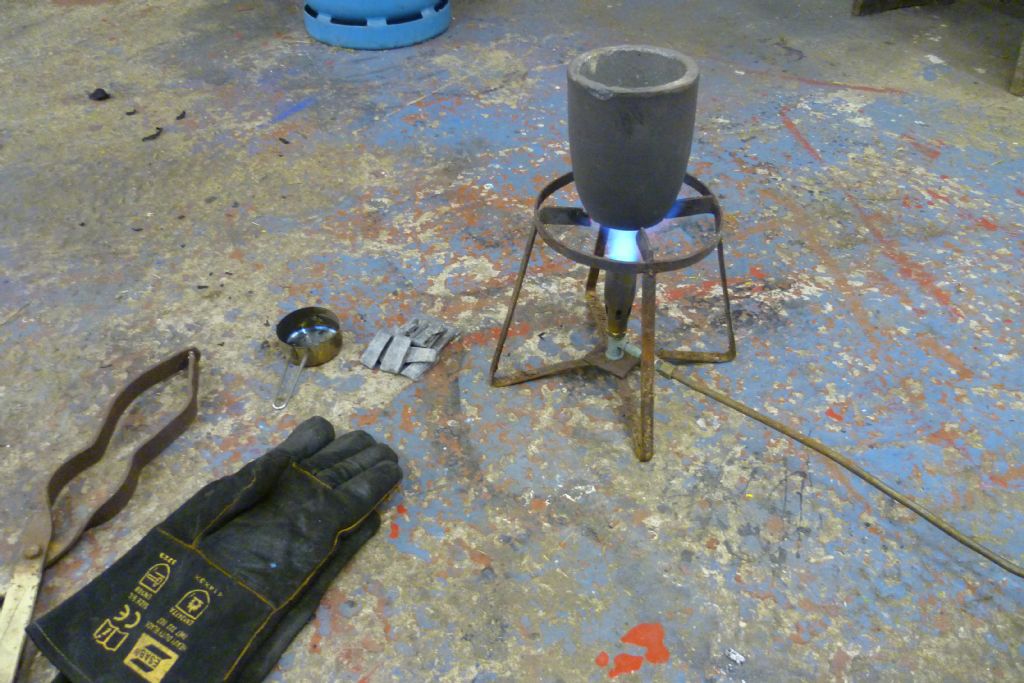
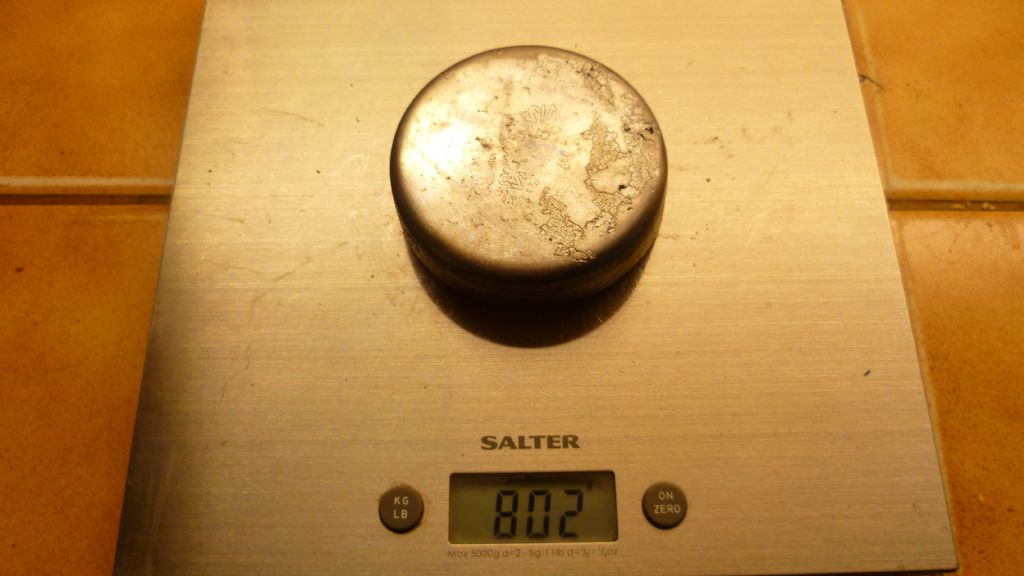
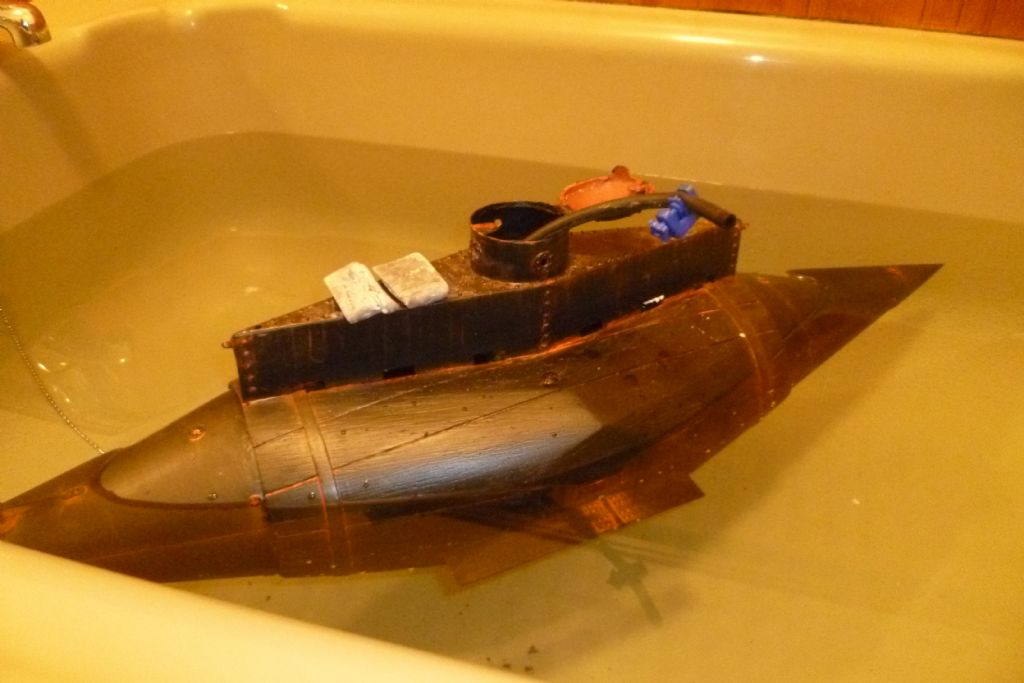
                                                    Had my first shot at getting the static ballast right. She was chucked in the bath and bits of lead added until she achieved an even keel. Turned out to be about 800 grams in the bow. A bit more was added to the melt to account for the casting dross.

                                                    front ballast 005.jpg

                                                    The bits were melted down :-

                                                    front ballast 010.jpg

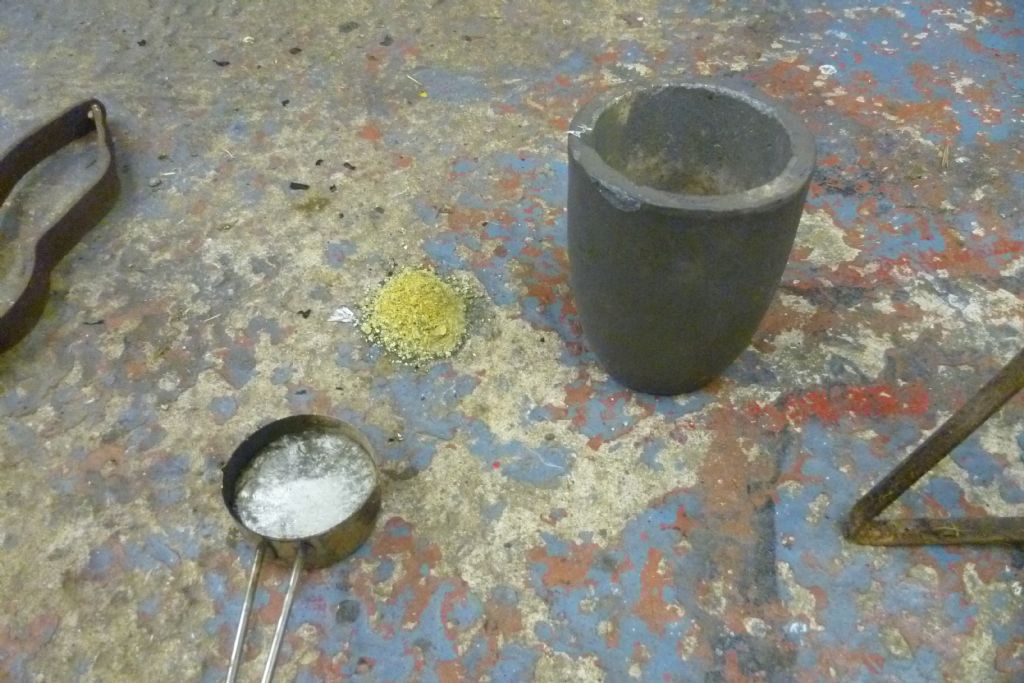
                                                    and cast into a stainless steel cup:-front ballast 012.jpg

                                                    The pile of muck next to the casting pot is the dross from the melting. Here's the finished product:-

                                                    front ballast 015.jpg

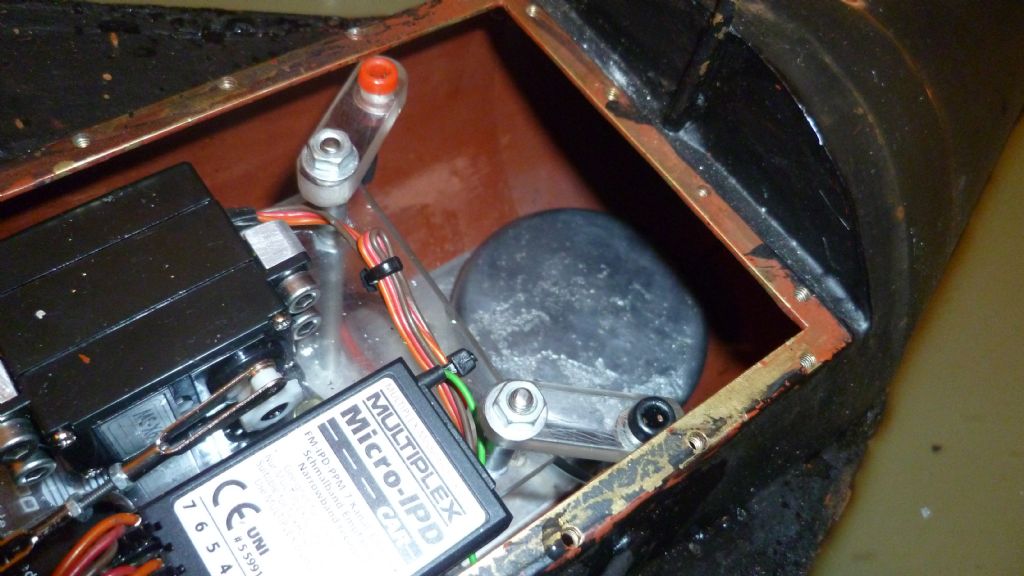
                                                    Here's the lump in place:-front ballast 023.jpg

                                                    and mi boat floating in the bath!:-front ballast 018.jpg

                                                    Number of issues. but have to go now.

                                                    Len

                                                    #53996
                                                    Len Morris 2
                                                    Participant
                                                      @lenmorris2

                                                      Hi Everybody, been doing some extensive bath trials over the past week and here are the results. The motor (545) and prop combination are well on top of the job. At full welly she takes off like a speed boat so I'm happy to have that reserve of power if ever needed. It's hard to assess in a bath but the rudders don't seem that powerful despite having over 45 degrees of movement. The main focus was on getting the static ballast correct. Her ballast tanks were rigged with a simple bleed pipe:-
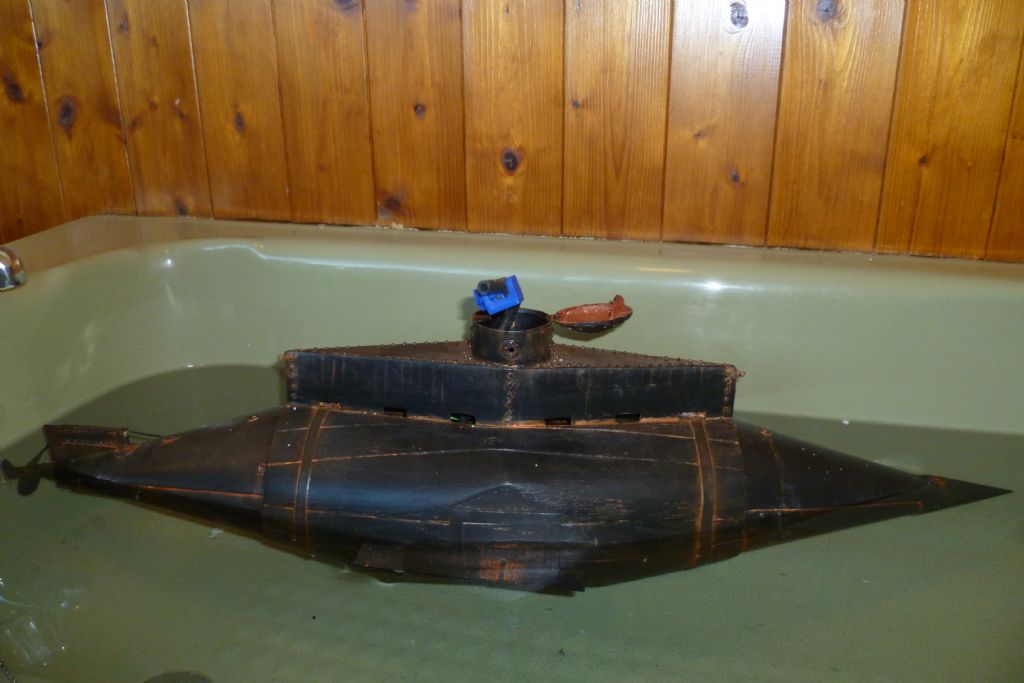
                                                      002.jpg

                                                      At full vent they took her down about an inch so more keel weight was needed. This was found by piling bits of the famous lead pipe on top of the hatch:-007.jpg
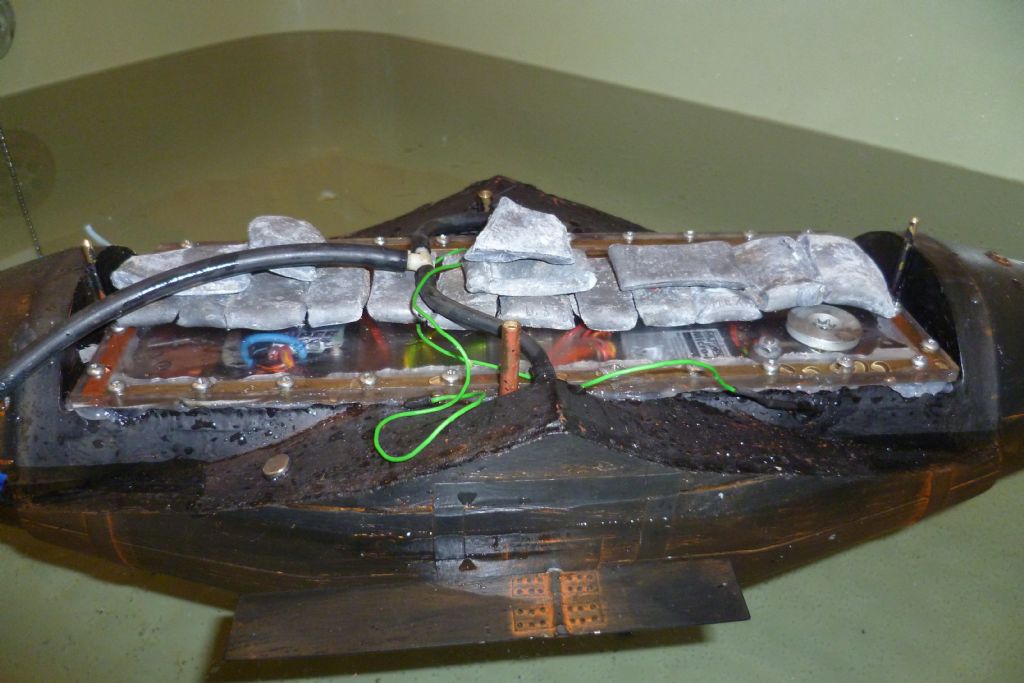
                                                      All the lead bits were then cast into one lump and screwed onto the main keel so it sits inside the ballast tank cavity.:-
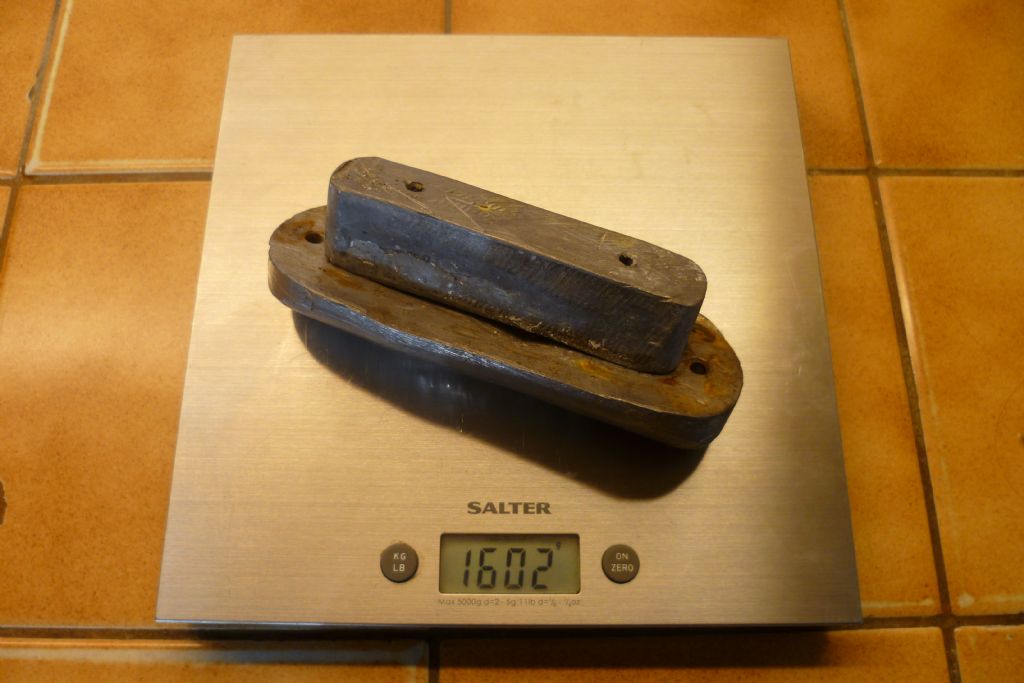
                                                      new keel 006.jpg

                                                      This added about another 500 grams to the keel weight. Some final trimming was needed to get static fore and aft correct:-013.jpg
                                                      and this was added to the internal battery. Being able to shift the battery fore and aft with the RC gave about half an inch of adjustment in fore and aft trim.

                                                      At the end of all this ballast work the ballast tanks themselves would take her down or bring her up so I am very happy about being in a 'control zone'.

                                                      Mi next problem was the issue the issue of neutral buoyancy. Resurgam's water line is at the top of her hull and exactly at the bottom of the breakwater plating protecting her 'conning tower'. The real boat herself would have had no more buoyancy than say a 45 gallon drum (all approximate but about 450 lbs). No wonder the contemporary reports state she was submerged for most of the time!

                                                      On mi boat I needed to get some buoyancy into the superstructure which other wise was dead weight. Two bits of poly foam were added:-poly blocks 003.jpg

                                                      This gave some 80 grams of flotation and kept her rock solid on her water line.

                                                      Given full pelt in the bath she was actually starting to dip under with the hydroplanes down but there's not enough room to make any real judgement.

                                                      When she came out of the bath there was one drop of water inside the hull. Literally no more than a mustard spoons worth. I suspect this came up the prop shaft as the seals had to tolerate no end of abuse during the shortening process.

                                                      Way ahead? New prop seal, consolidation of all her fittings and then chuck her in the pond!

                                                      Len

                                                    Viewing 25 posts - 151 through 175 (of 227 total)
                                                    • Please log in to reply to this topic. Registering is free and easy using the links on the menu at the top of this page.

                                                    Code of conduct | Forum Help/FAQs

                                                    Advert

                                                    Latest Replies

                                                    Home Forums Scratch build Topics

                                                    Viewing 25 topics - 1 through 25 (of 25 total)
                                                    Viewing 25 topics - 1 through 25 (of 25 total)

                                                    View full reply list.

                                                    Advert

                                                    Newsletter Sign-up