Resurgam Submarine

Advert

Resurgam Submarine

Home Forums Scratch build Resurgam Submarine

  • This topic is empty.
Viewing 25 posts - 101 through 125 (of 227 total)
  • Author
    Posts
  • #49894
    Bob Abell 2
    Participant
      @bobabell2

      Len

      If you joined top and bottom rudder posts in the middle using a large diameter tube, the prop shaft could then pass through the tube and out the back……Or have you already thought of that?

      Bob

      Advert
      #49897
      Len Morris 2
      Participant
        @lenmorris2

        Hi Bob,

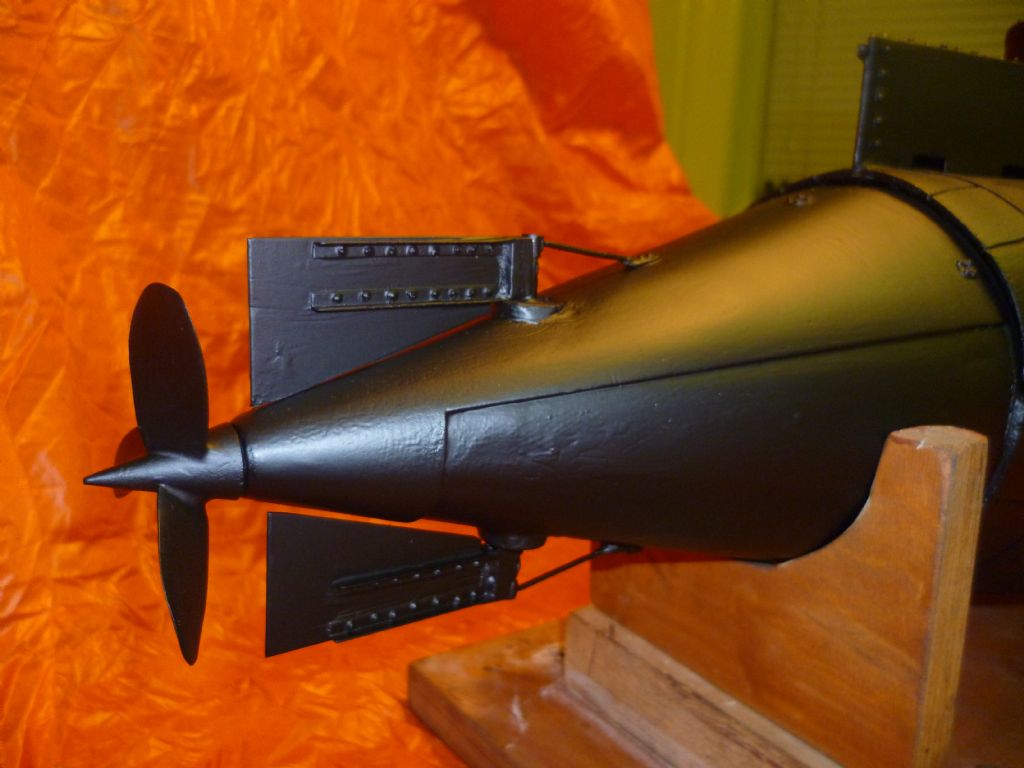
        That's a good idea given a clean sheet of paper . In my head I can see a wide rudder shaft with a hole through it large enough to allow the rudders to move enough. Seal the shaft with 'O' rigs where it passes through the hull. Turn the ends down to scale size and bolt on the rudders. Shaft can't move because there's a rudder top and bottom. Bit of detail required on fittings and threads but definitely workable.

        To answer your direct question, no I didn't think of it! I built the hull, installed the propshaft (the old one) and moved on to the the hatch and all the other problems. Rudders are easy aren't they? Doh! Certainly if I started again the stern would be done very differently. Unfortunately I can't so I have to chew that which I have bitten off!

        This is the whole attraction of scratchbuild.!

        Len

        #49988
        Len Morris 2
        Participant
          @lenmorris2

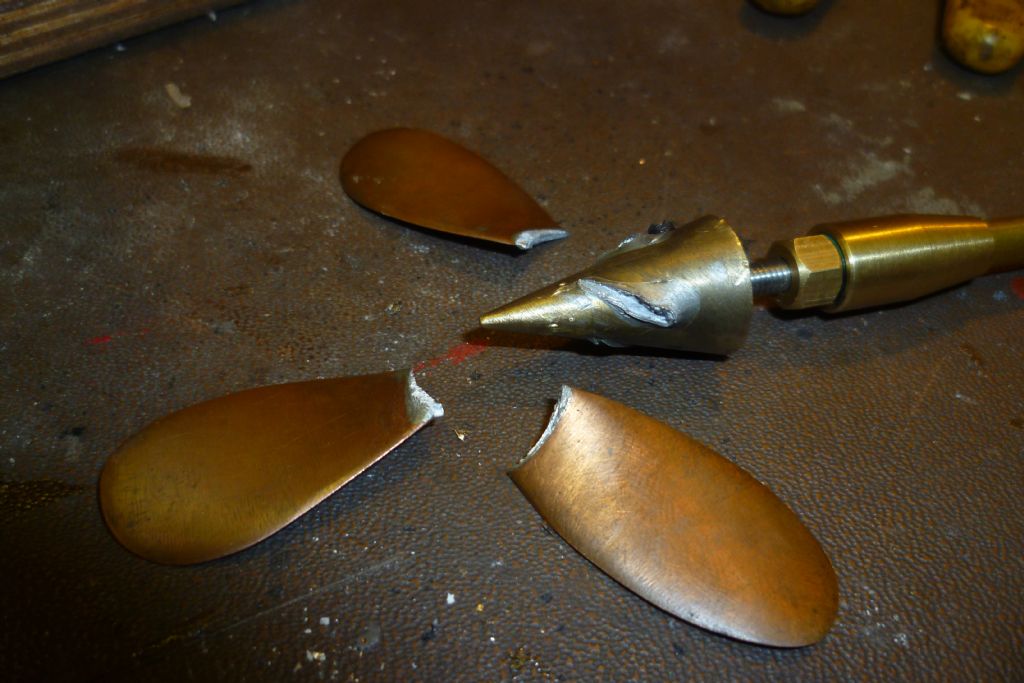
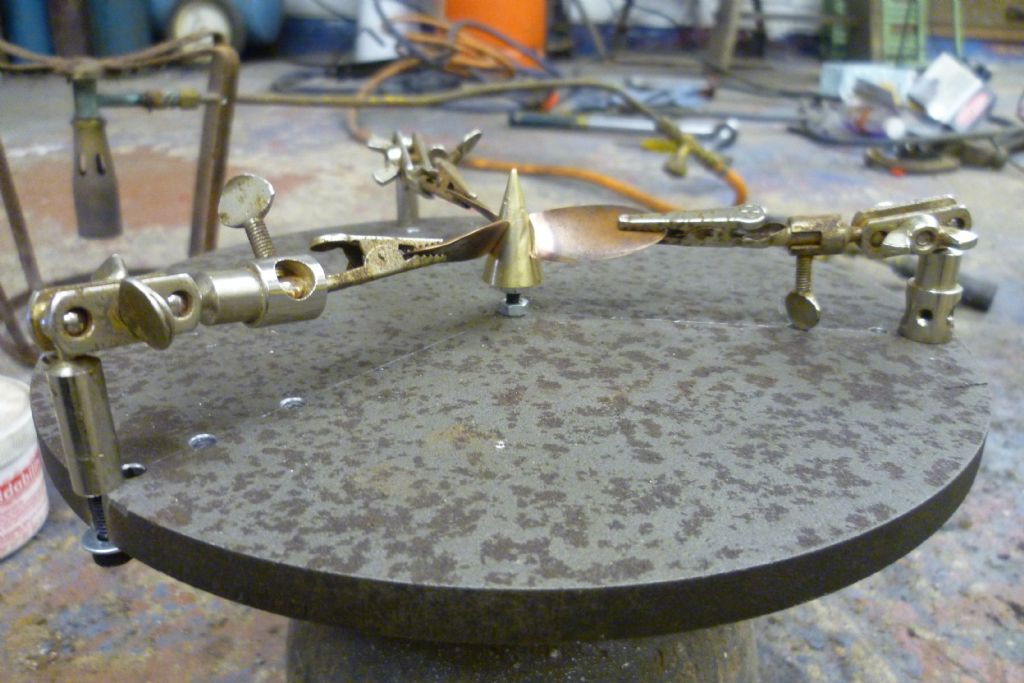
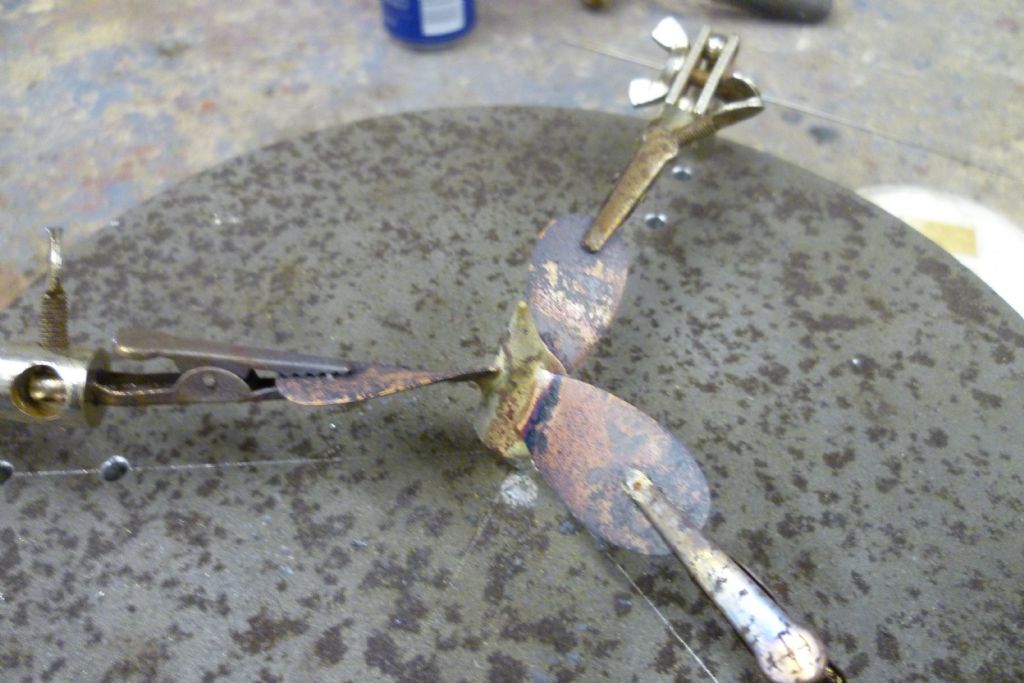
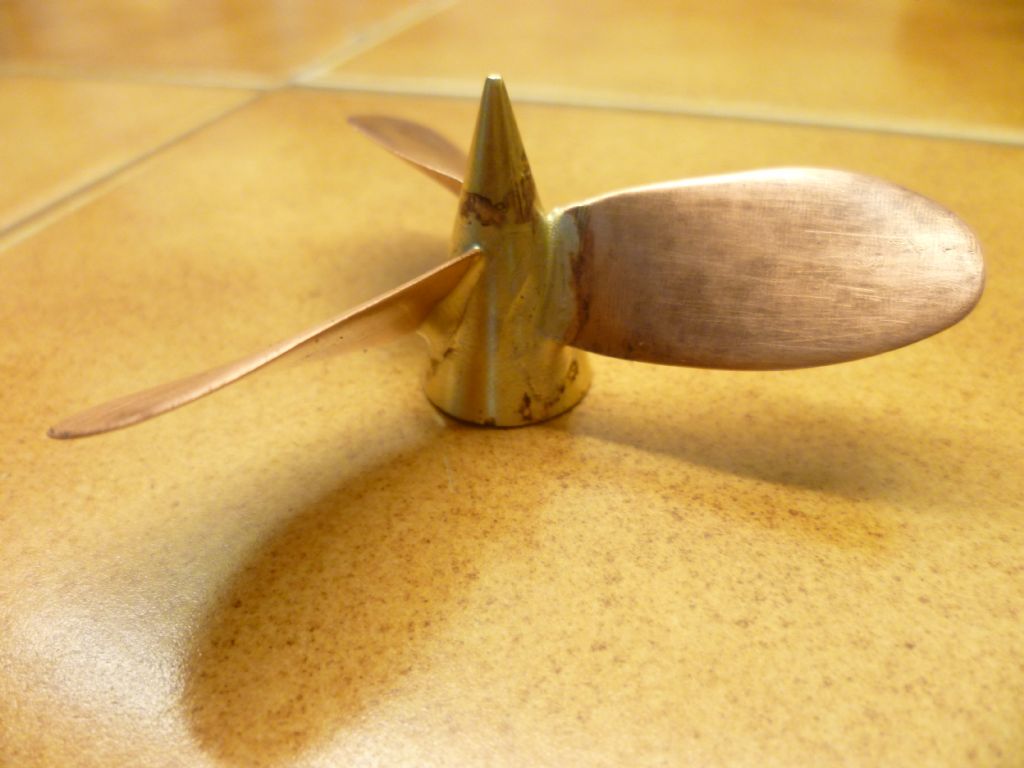
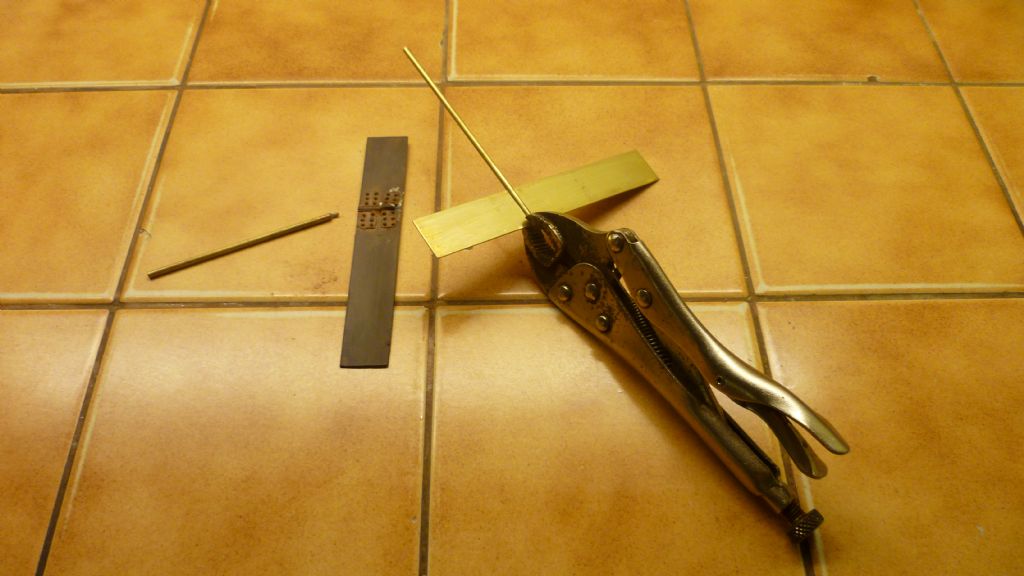
          003.jpgpropeller 006.jpgpropeller 010.jpgHi Everybody,

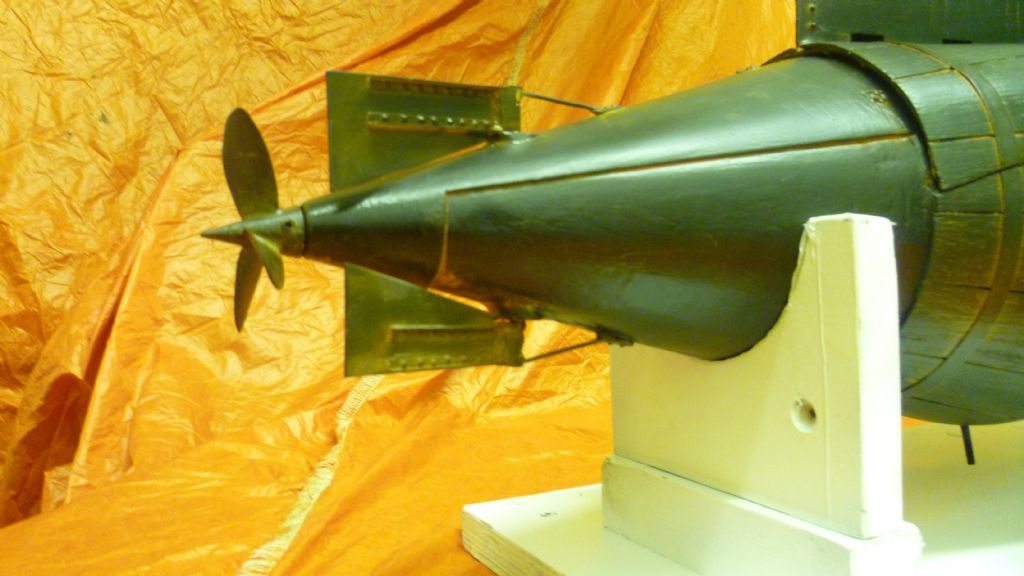
          Just an update. Had a problem with the propeller. When I first made it a long time ago, the blades were soft soldered onto the boss. Quite acceptable unless the blades are put under a lot of stress. In re-tapping the boss M4 for the Raboesch prop shaft they all broke off. Time for a bit of silver solder. The pics show the mess, the repair jig, the prop just after soldering and the finished job. Job done!

          Lenpropeller 013.jpg

          #49990
          Bob Abell 2
          Participant
            @bobabell2

            Good bit of silver soldering there, Len!…..Nice fixture and setup

            I'm surprised it was a success with all that soft solder contamination!

            I once silver soldered a full boiler for a 3 1/2" gauge LBSC's Britannia!

            What a job that was!…As you can imagine?

            Bob

            #50011
            Len Morris 2
            Participant
              @lenmorris2

              Hi Bob A,

              The fixture was a piece of steel plate and two of those assembly thingies that have two clips on an arm and a magnifying glass. They were chopped up and reconfigured. At the temperatures involved I thought the clips would simply let go but amazingly they didn't and the jig is still very reusable. The set up took some time with angle and height gauges but the whole process was very viable. I too was concerned about the soft solder and cleaned as much of it off as I could by simply warming the bits and wiping off the excess. I think at the temperatures involved with silver soldering the lead simply evaporates even before the silver solder flux starts to bite. I like silver soldering. Follow the rules of clean bits, tight clearances, flux in the right place, right temperature and your home. Touch on with rod and job done!

              Out of all this lot is that I fixed my problem and that the prop jig worked extremely well against all expectations. Hope the idea might be of use to others.

              Just so you know, I have a 5" 0-4-0 Ajax boiler to finish (the chassis was finished years ago)! Need to find the courage! I can well understand your efforts.

              Len

              #50186
              Len Morris 2
              Participant
                @lenmorris2

                rudder 034.jpgrudder 017.jpgrudder 012.jpgHi Everybody,

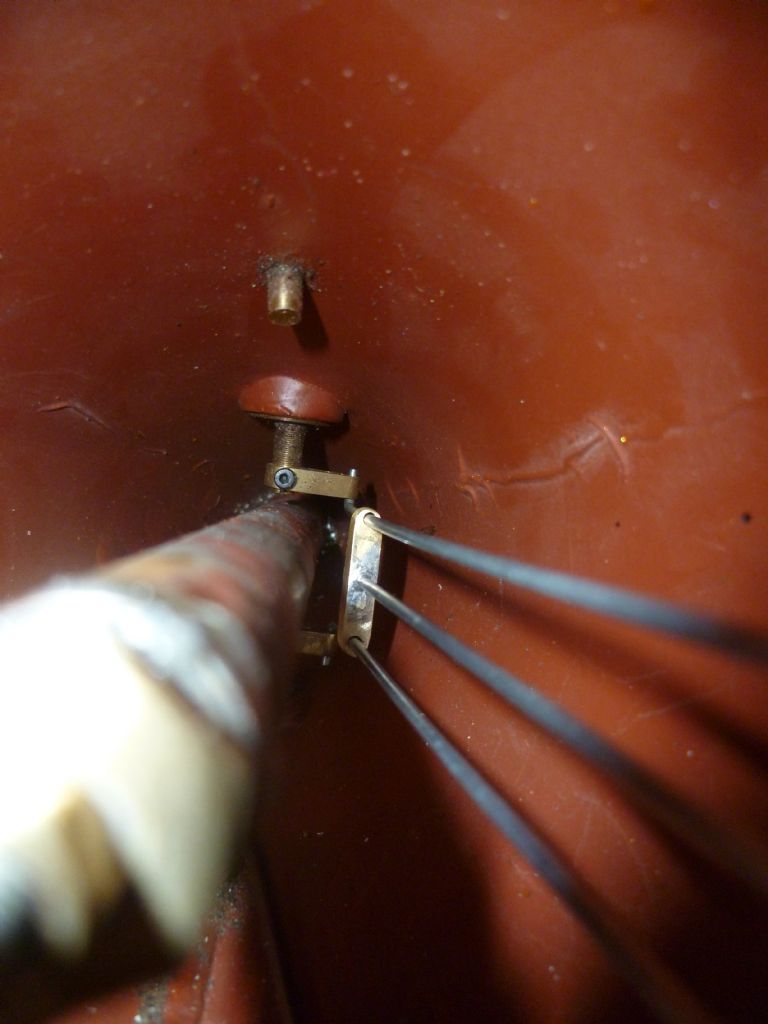
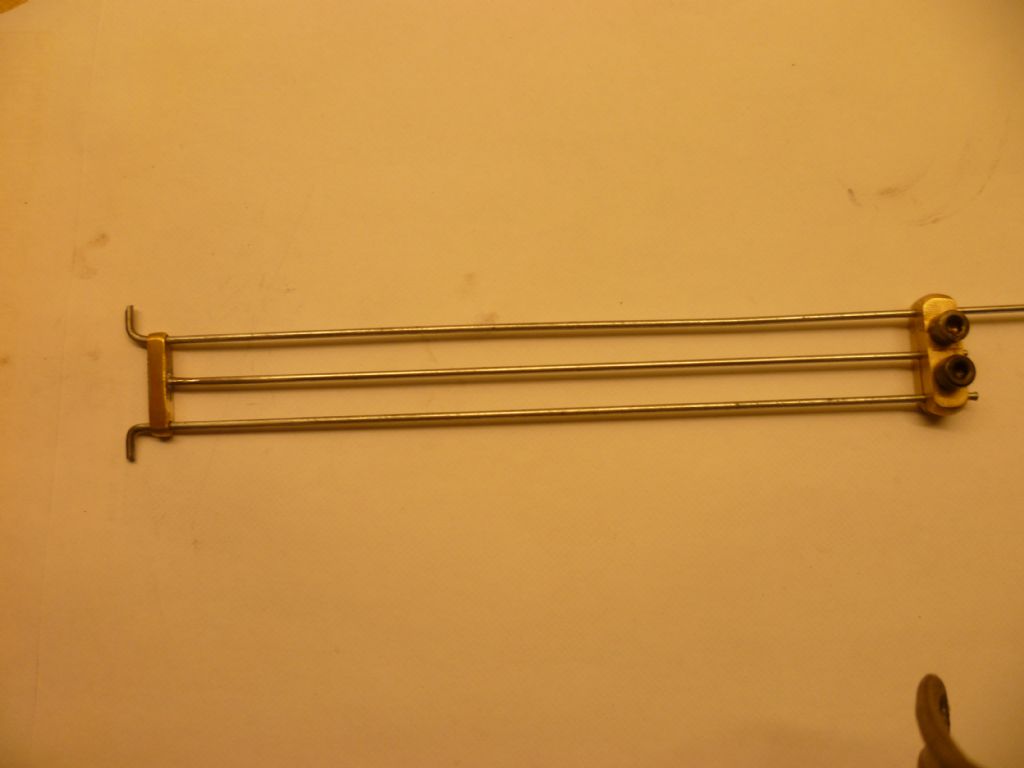
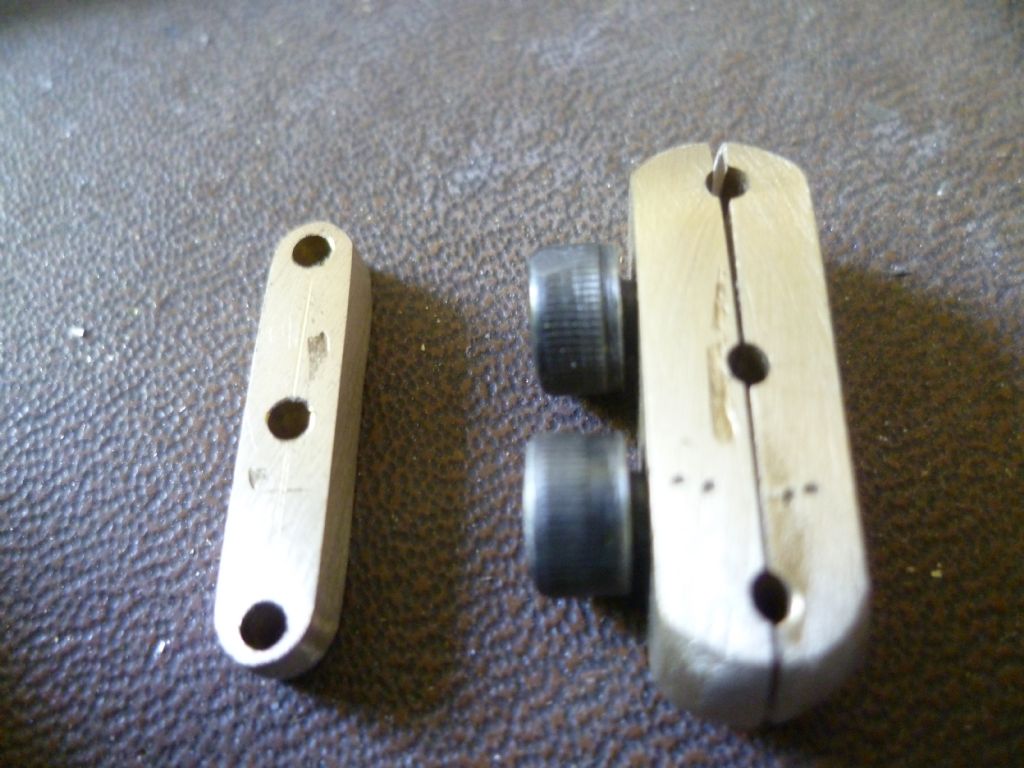
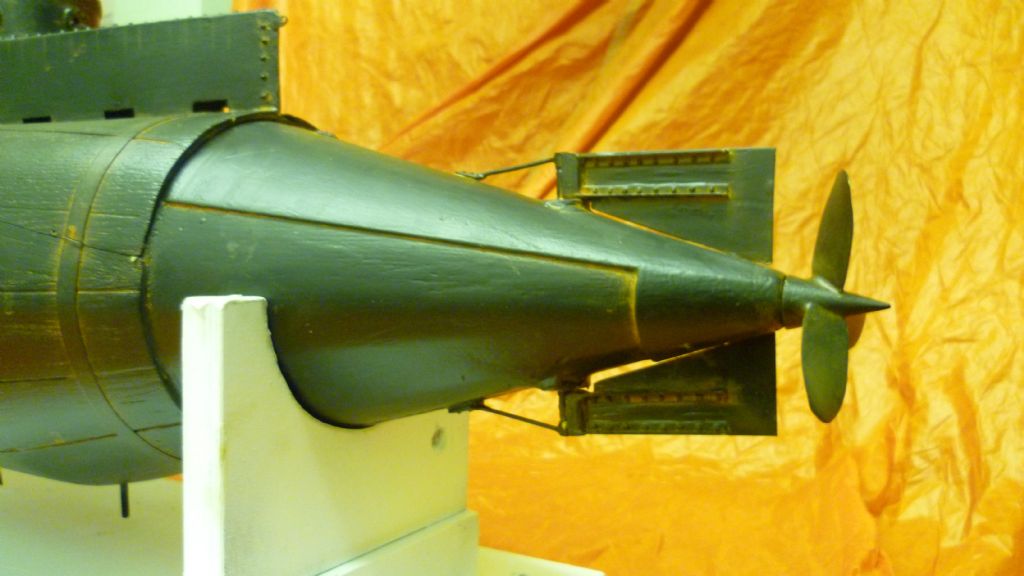
                Here's the last bit of the puzzle, connecting the control rods to the rudder arms so that they are removable but can't fall out. The cranked rods are poked down the stern and hooked into the rudder arms. the 'keeper' rod is then slid over the cranked rods and pushed down to the stern. All three rods are then clamped together with the longest destined for the servo. The rudders now waggle in unison and can manage a good 80 degrees port and starboard. Hope the pictures explain everything better than my text.

                Len

                #50228
                Len Morris 2
                Participant
                  @lenmorris2

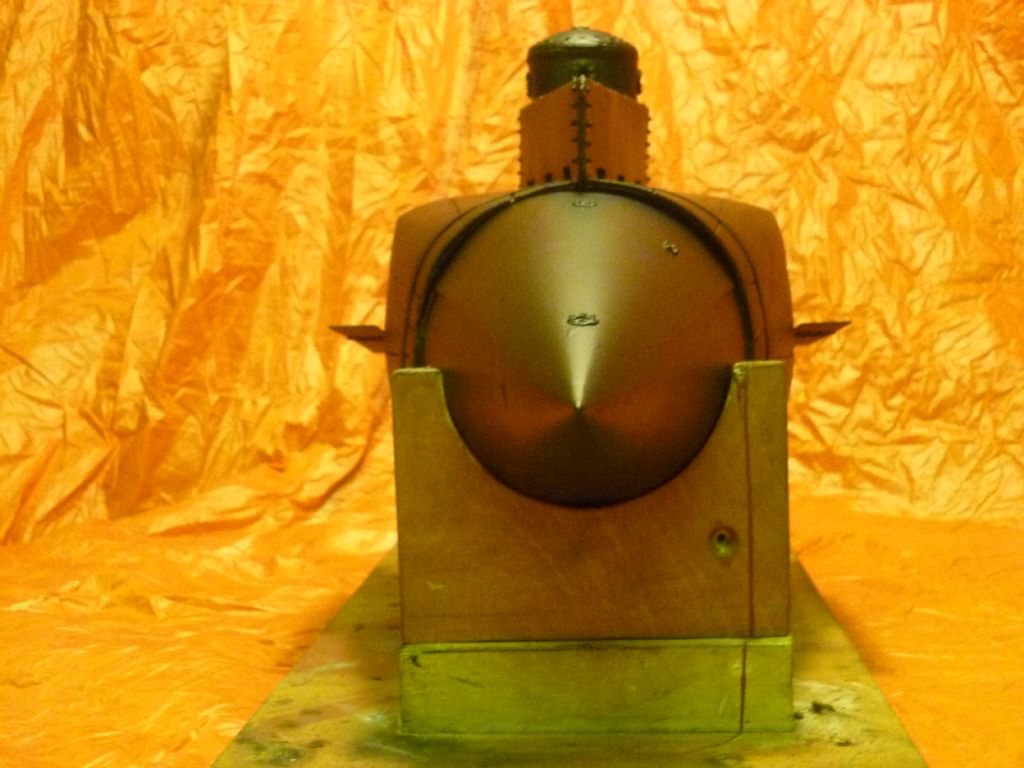
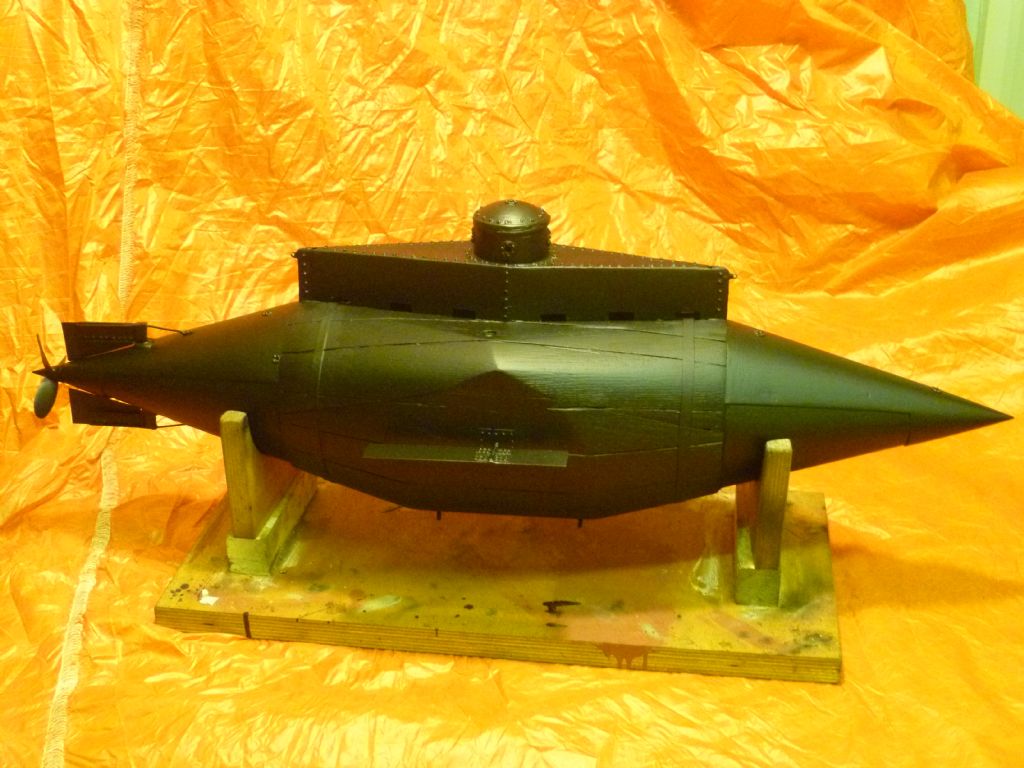
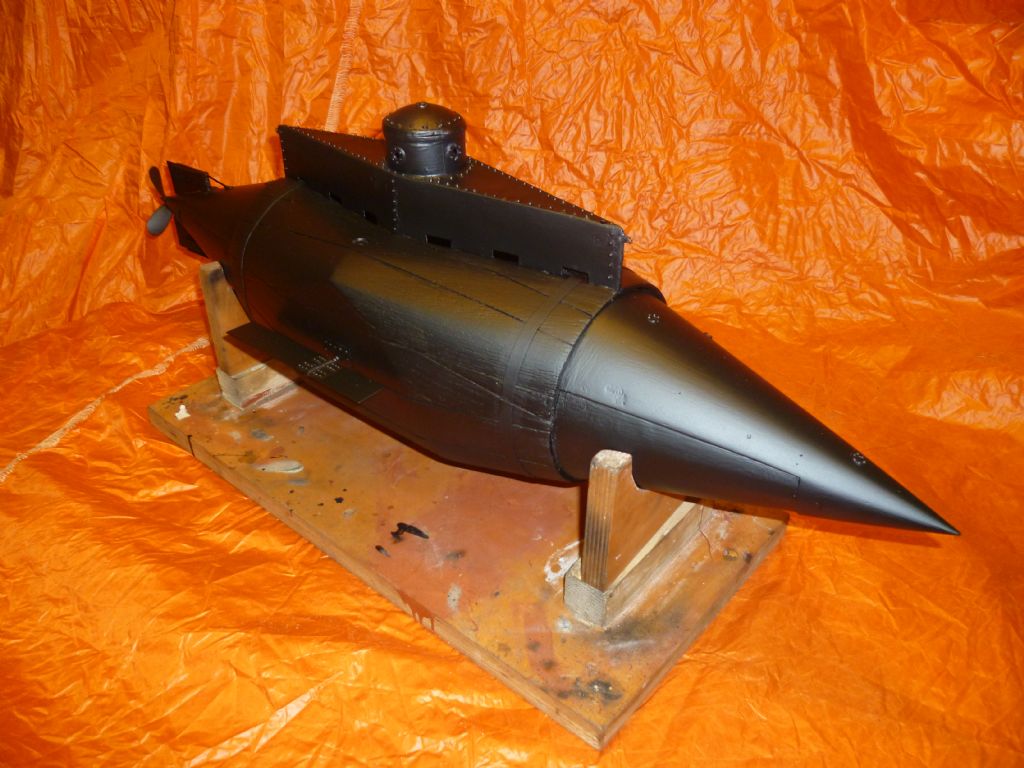
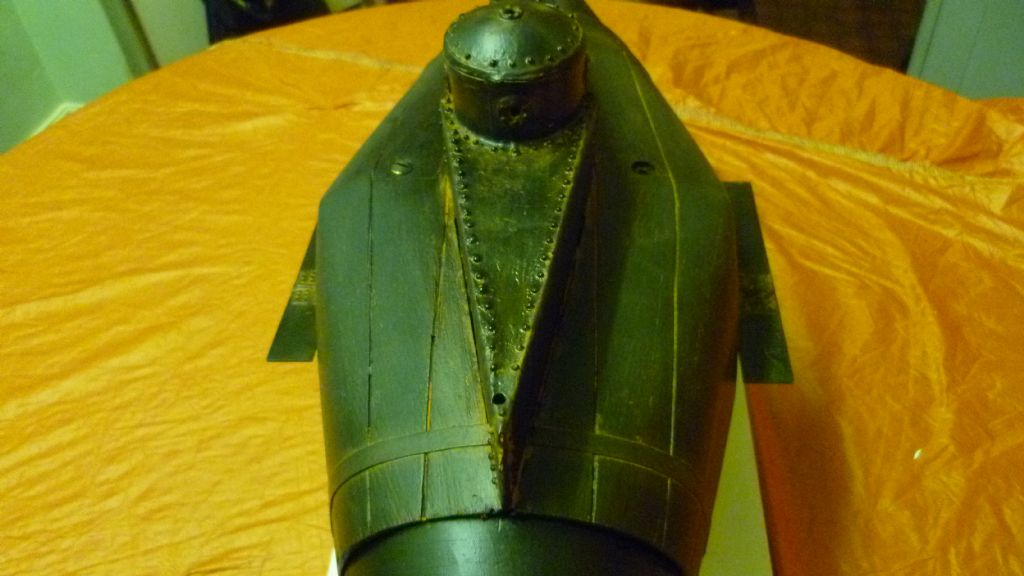
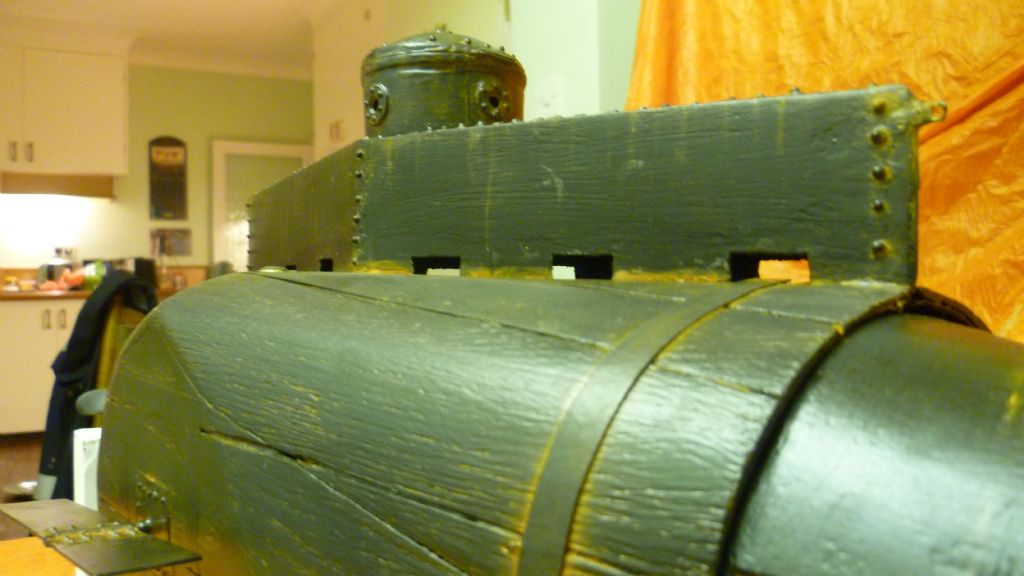
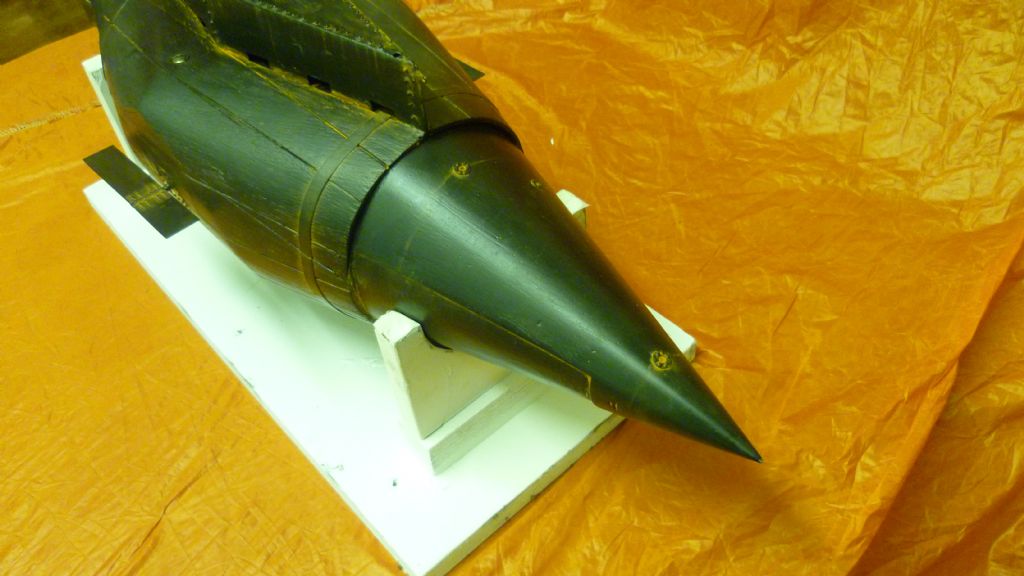
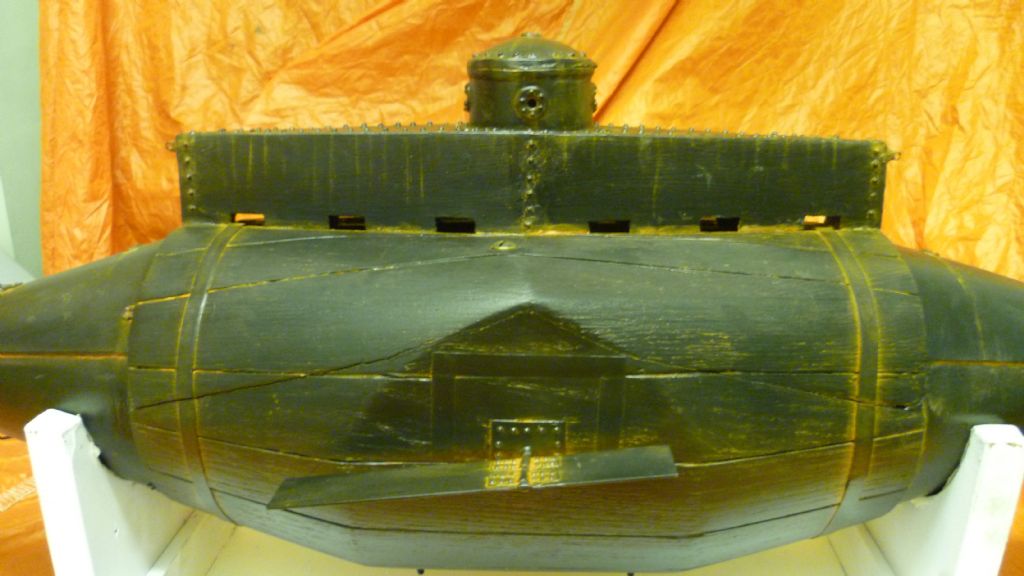
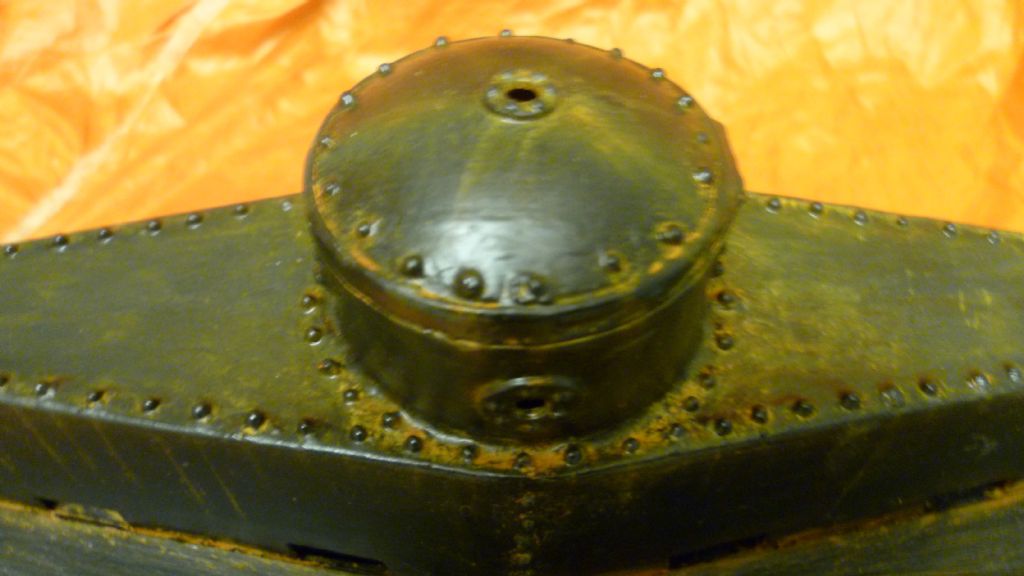
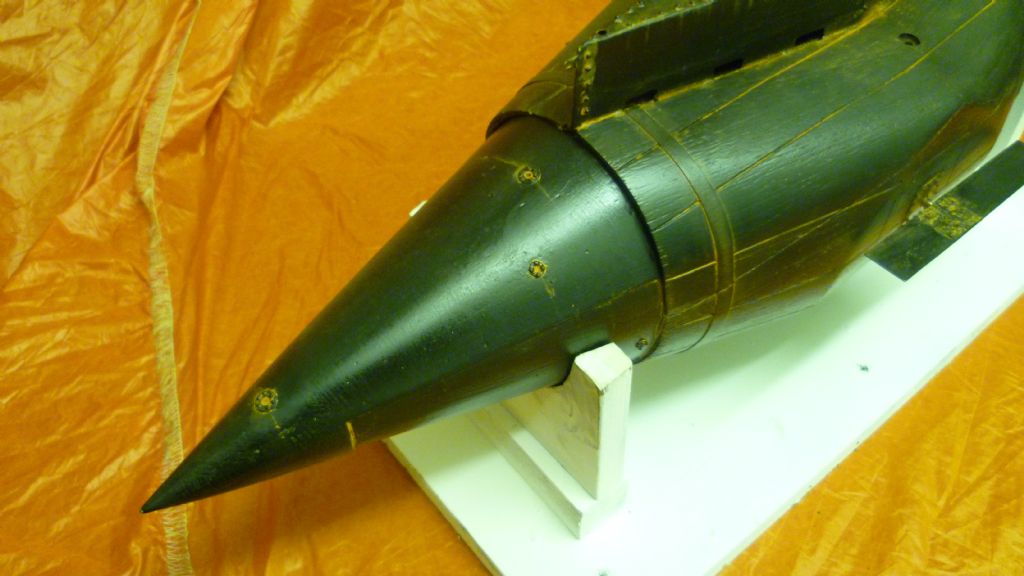
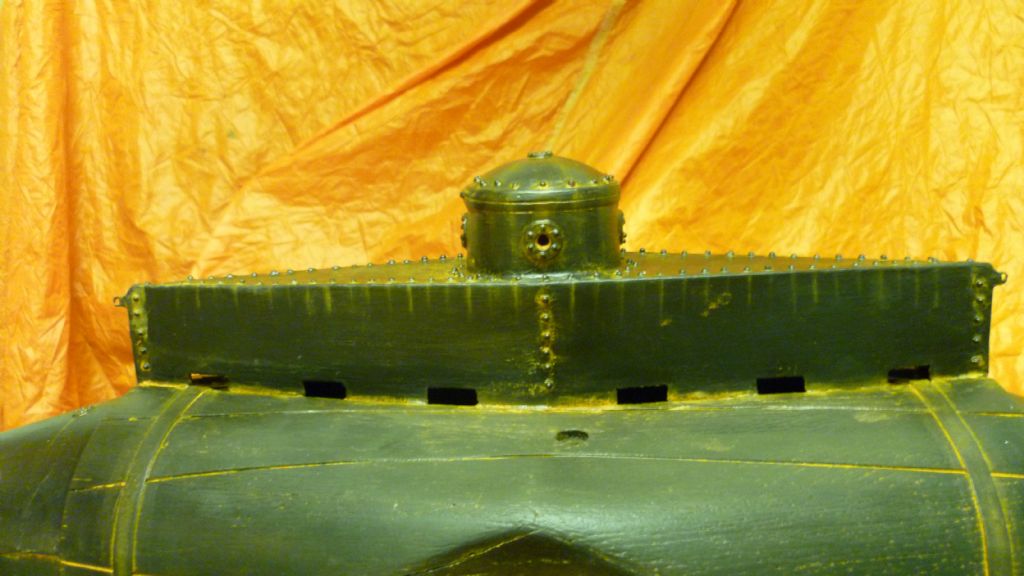
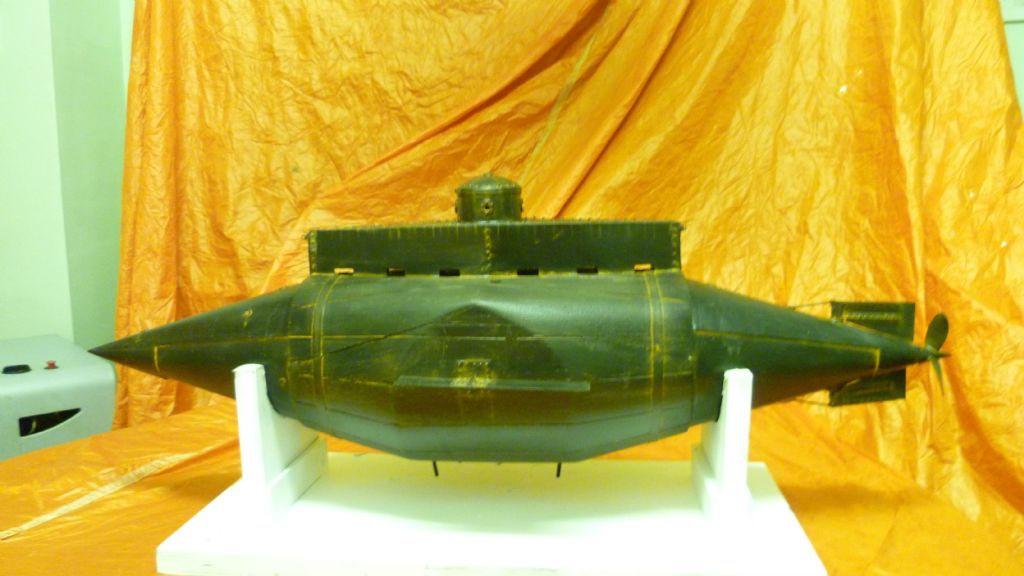
                  done 011.jpgdone 009.jpgdone 003.jpgdone 001.jpgHi Everybody. Just an update. With all the waggly bits installed she was given a fresh coat of matt black and declared done! All that remains is to play with the 'weathering' cosmetics. Seems paradoxical to make a tin plate boat, protect the steel with primers and top coat and paint on rust! Broke my heart to paint the brass prop! Now need to find a motor. The plan is to sit it low in the hull with a toothed belt drive up to the prop shaft. All for now. Len

                  #50243
                  Bob Abell 2
                  Participant
                    @bobabell2

                    Looking lovely, Len

                    A really interesting model deserving more appreciation!

                    If she sails nicely……Then it`s worthy of a nice write up in the Mag

                    Keep up this excellent pioneering project

                    Bob

                    #50270
                    Amy jane September
                    Participant
                      @amyjaneseptember49770

                      Hi Len

                      I agree with Bob!

                      An interesting and unusual model with lots of interesting bits of engineering. Great stuff! (I know how you feel about the prop, I feel the same way about slapping paint on a pretty bit of timber!)

                      Amy jane

                      #50277
                      Bob Wilson
                      Participant
                        @bobwilson59101

                        A very nice build, both inside and out. No real need to have painted your beautiful propeller though! As they spent a lot of time swishing round, it kept them clean and bronze coloured. But, of course, it may have been cast iron, in which case, black is no doubt correct! Do you know what the real one was made of?

                        Bob

                        Edited By Bob Wilson on 11/07/2014 14:17:36

                        #50311
                        Len Morris 2
                        Participant
                          @lenmorris2

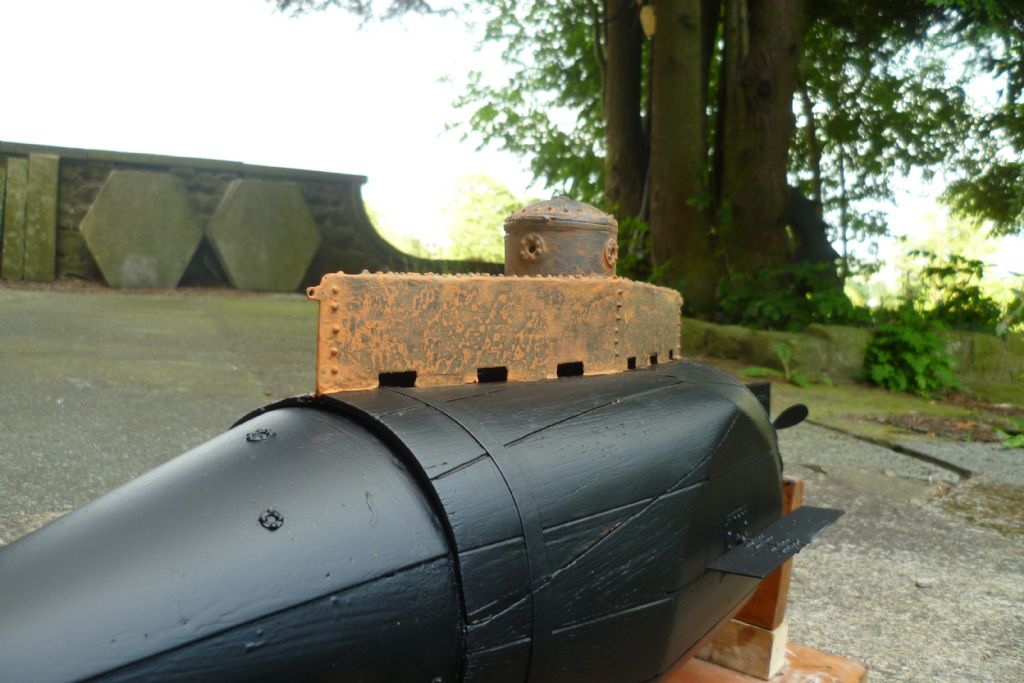
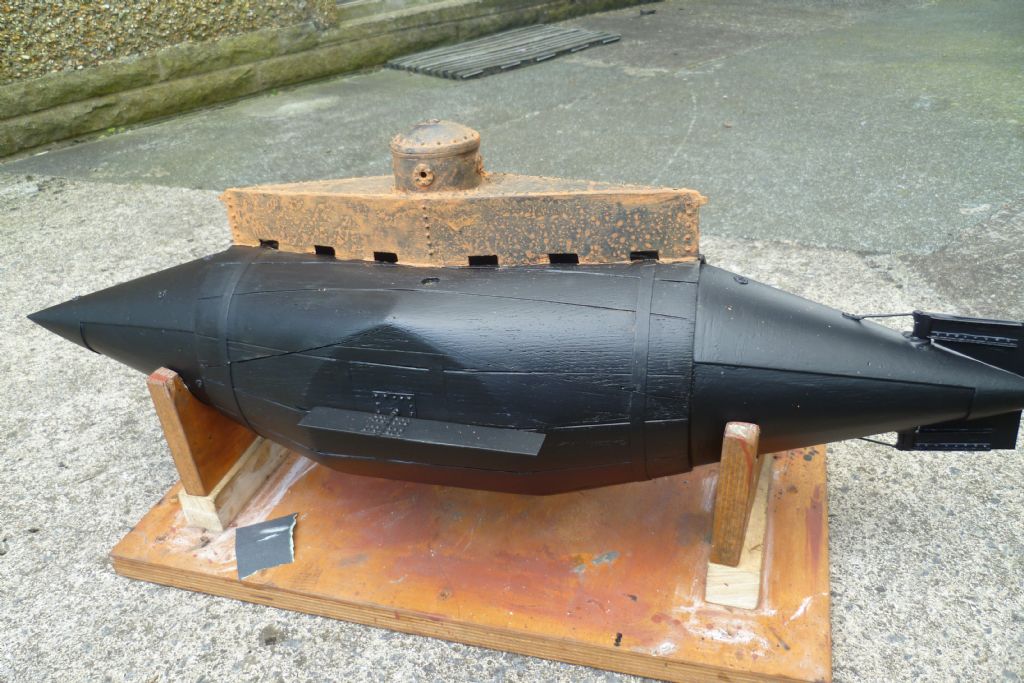
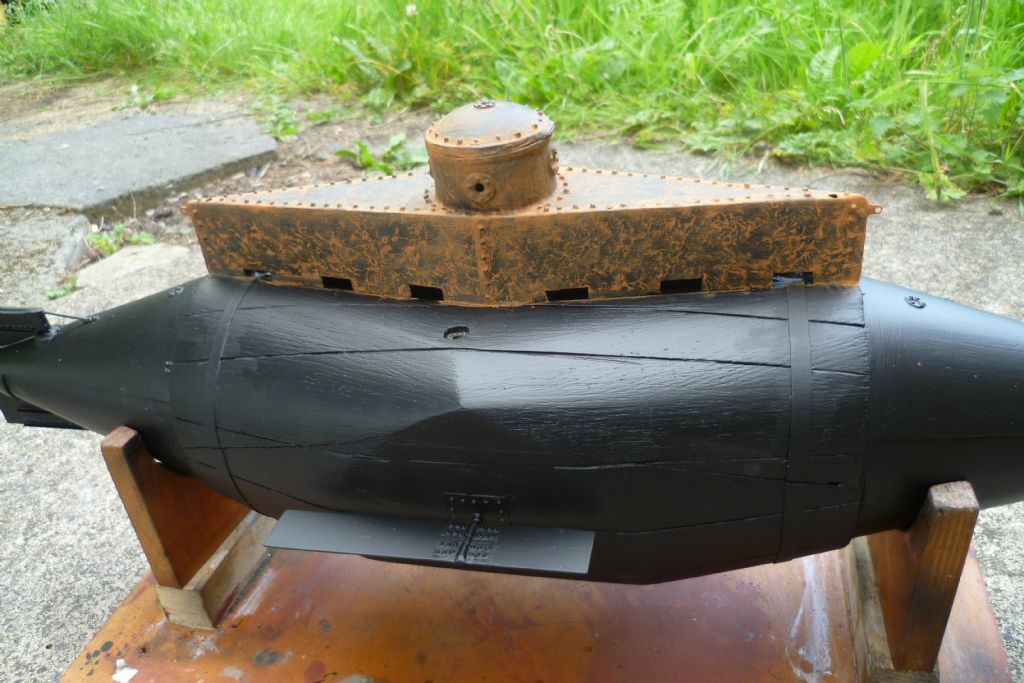
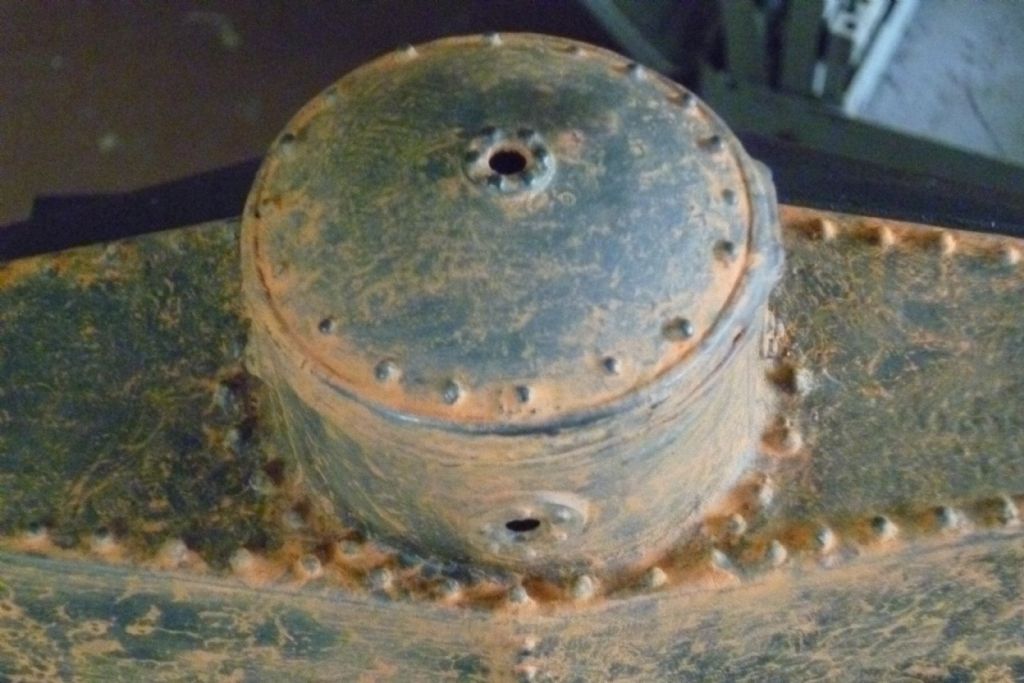
                          rust 011.jpgrust 010.jpgrust 007.jpgrust 005.jpgHi Everybody,

                          Thank you for your kind remarks (BobA, Amy & BobW)rust 001.jpg. Such comments keep you focused when you hit one of those "and it was going so well" moments!
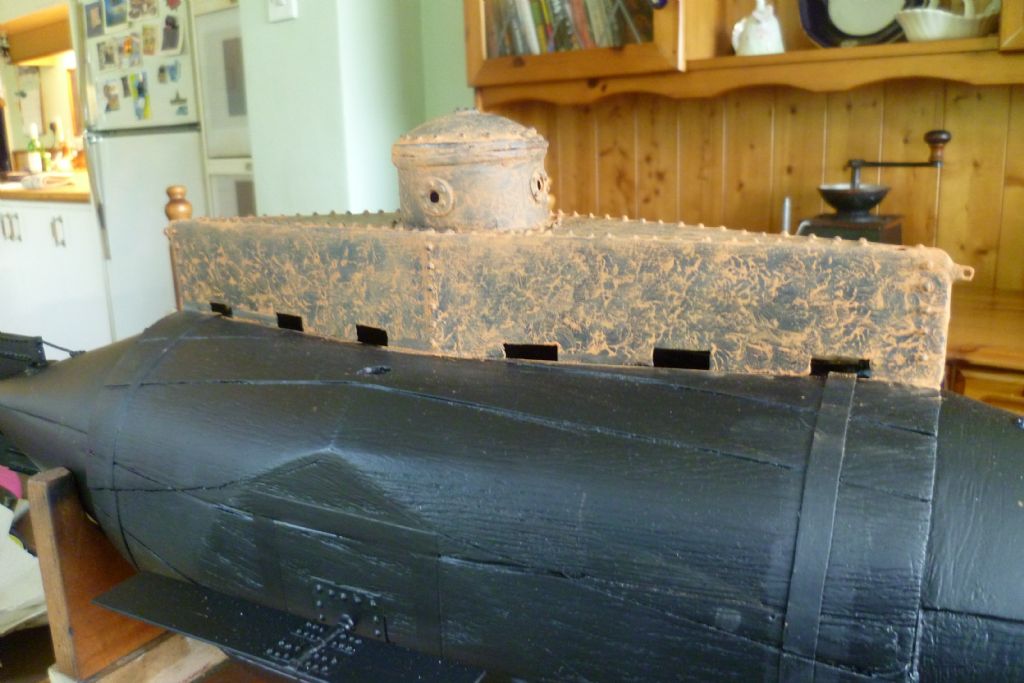
                          Now about rust. How rusty should Resurgam be? I think she was painted by Cochrans before she was launched but there is no evidence of this in the bill of materials. The only reference I can find is on page 61 of Scanlan Murphy's book which refers to a curious incident at Hodgson's house (Cochran's shipwright) :-

                          "During the removal of the submarine from Mr Cochran's yard, a stranger arrived at the yard and asked for a coat, saying that my father had come into contact with the new paint on [the boat] and must have another. Just as we were getting it, my father appeared and the stranger bolted."

                          Whatever all this was about, I believe Hodgson would not have gone for a coat unless he knew Resurgam had been painted. After much pondering I've convinced myself that Resurgam was painted, and was painted black. The point of all this rambling is that I don't think Resurgam would have been that rusty when launched.

                          Now Resurgam had roughly a 3 month life. How much can a boat rust in 3 months? Maybe a lot above the waterline but surely not much below. However, she also spent most of her life beached in Rhyl fully exposed.

                          I've been churning all this about in my head for some time and finally took the plunge the other day. Mi boat will look like the day she left Rhyl. Some pictures follow (or maybe lead). Only a start above the waterline. Nothing is fixed yet so it can all be wiped off. Is it too much? Should it be more vertical? Does it look right?

                          BobA and BobW, I know you will read this and will really appreciate your expert comments. You do not have to be nice! If you think it is rubbish then say so! It's fun doing it and will keep getting done until it meets your approval.

                          Off now to find the engine.

                          Len

                          #50312
                          Bob Abell 2
                          Participant
                            @bobabell2

                            Hello Len

                            I think the rust looks ok, but a bit over done, on close inspection

                            It will look more authentic if you rub off the bulk of it but leave the rust it the hard to clean area's

                            We would have a better idea, if the complete model was rusty

                            I also think the rust should not be the same colour all over?

                            It would be a good idea to study a few rusty boats somewhere local?

                            Bob

                            #50314
                            Bob Wilson
                            Participant
                              @bobwilson59101

                              I agree with Bob (A), a bit too much rust considering the boat only had a short life. When seeing real ships dry-docked after a year in the water, most of the concentrated rust was along the waterline. Further up, you may only have got rust where the paint had been damaged by mooring lines etc. Pretty difficult to decide what amount a submarine would accumulate in such a short time.

                              Bob

                              #50317
                              Len Morris 2
                              Participant
                                @lenmorris2

                                Dear BobA and BobW,

                                Thanks for that chaps. Just the comments I was looking for. Knew I had got carried away and thought it was too much, but it was fun having a go, having never done it before. Will re-do and post again (and again) until official approval is received!

                                Just so you know, the 'weathering powder' used was the dried out muck from my compressor. The Humbrol powder turned out to exactly the same shade. I suppose rust is rust.

                                Right, so we have "nooks and crannies, waterline, shades and completion for the full picture"

                                I'll be back!

                                Len

                                #50397
                                Len Morris 2
                                Participant
                                  @lenmorris2

                                  Hi Everybody,

                                  I think I've got this rust business under control. It's wipe in on and wipe it off till you're happy. With guidance from the Bobs I think she's just about right for the day she left Rhyl. However, in a moment of hamfistedness managed to break off on of the port hydroplane. Not a problem and a new one is under construction as we speak but she's not appearing in public until properly dressed!

                                  On the subject of Resurgam's planes, they are assymetric with most of the length being behind the pivot point. This puts the centre of pressure towards the stern given that the COG is central and the shaft is central. This means that to get the bows down for diving the planes will be 'up' and vica versa. Can't wait to see what she will sail like.

                                  Lenrust2 023.jpg

                                  #50466
                                  Len Morris 2
                                  Participant
                                    @lenmorris2

                                    rust3 012.jpgrust3 011.jpgrust3 010.jpgrust3 009.jpgrust3 008.jpgrust3 006.jpgrust3 005.jpgrust3 004.jpgrust3 002.jpgHi Everybody,

                                    Here are some pics of mi boat after the re-rusting exercise following advice from the Bobs. Not good but it will do for now. Need to get the internals done.

                                    Lenrust3 001.jpg

                                    #50471
                                    Bob Abell 2
                                    Participant
                                      @bobabell2

                                      It's getting there, Len

                                      The smooth black areas need attention…..Make up a mix of your rusty stuff and dab it on with a piece of bent wire at random

                                      I use un diluted acrylic paint on a saucer…..Raw umber, Yellow Ochre and burnt Sienna and a touch of blue

                                      You need a few vertical rundown streaks too…..Have you got any barnacle paint?

                                      Now….Go to town!

                                      Bob

                                      #50488
                                      Len Morris 2
                                      Participant
                                        @lenmorris2

                                        Thanks BobA,

                                        If you think it's getting there then I'm happy. I ran out of my rusty stuff and did the remainder with Humbrol rust weathering powder. There really was no difference. In either case I put the powder on dry and then fixed it with thin clear acrylic air brushed on top. I'm not very steady with a fine paint brush so did the vertical bits that you can see through a stencil of 2 Stanley knife blades with their edges together.

                                        I'll try your mixture and bent wire technique on my matt black Kitty Can tin which is my test piece before going any further. As for now she'll do otherwise she,ll never get in the water.

                                        I love your dry sense of humour Bob. Or in our game should it be a 'wet' sense of humour? Yes, I have gallons of barnacle paint.

                                        Len

                                        #50739
                                        Len Morris 2
                                        Participant
                                          @lenmorris2

                                          Hi Everybody,

                                          This is just an update. Went shopping at weekend to Rossendale models in Rawtenstall (Lancs). Excellent shop and very, very helpful. Their main interest is model cars, planes and trains. Nevertheless, they had bits for mi boat. Came away with 4 servos and a Multiplex 7 channel Cockpit MM system for £130. Thought that was not bad. On holiday at home this week so things should progress a bit quicker.

                                          Len

                                          #50882
                                          Len Morris 2
                                          Participant
                                            @lenmorris2

                                            Hi Everybody,

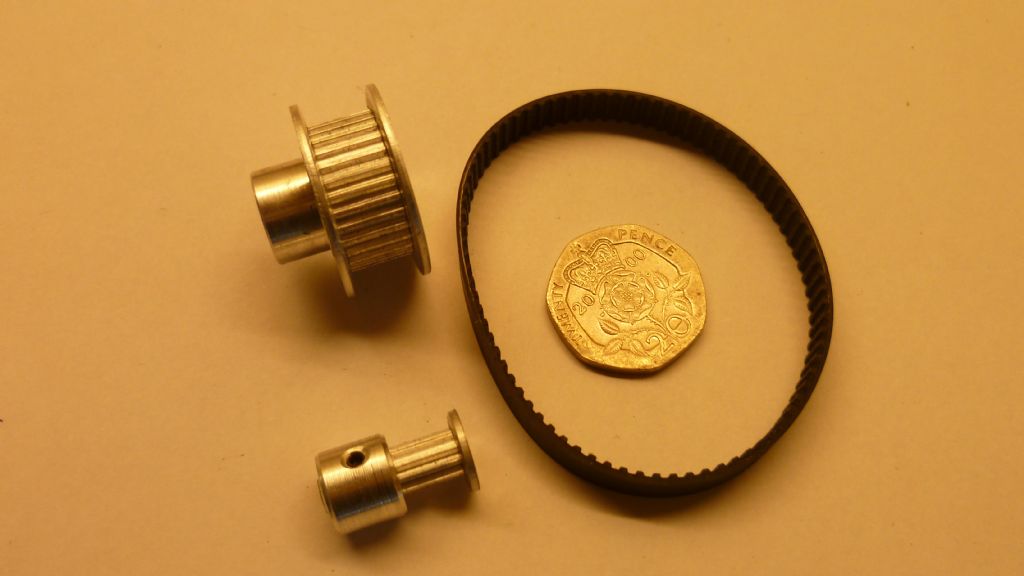
                                            Just another update and some info as well. Decided to start with a 545 motor (thanks to you guys can now talk the talk) and a 3:1 reduction via a timing belt drive. The motor arrived today and I could sit it low in the hull to get the centre line distance up to the propshaft. 40mm in total. Now the headache of working out the pulley sizes and belt length. At the end of the day it turned out to be very simple but it was hard work to get there. Most of the miniature timing belt sites were quoting £30 a pulley and £20 a belt and I was not sure if all my maths would be right to know I was buying the right sizes. Then found "Motionco" somewhere in Oxfordshire. In the sizes we are talking, the pulleys and belts are all about a fiver each so there's nowt much lost if you make a mistake. But, on their site they have a really clever centre line calculator. Type in the pulley sizes selected for the ratio. Type in a belt length and it calculates the centre line distance. Play with the belt length until you get the CL distance you need and the jobs done! Parts ordered, motor installed soon.

                                            TX and RX batteries being charged and conditioned according to all the instructions.

                                            Len

                                            #50924
                                            Amy jane September
                                            Participant
                                              @amyjaneseptember49770

                                              Isn't it nice when suppliers actually go that little bit extra distance, and at a good price too!

                                              Starting to get exciting….

                                              #50952
                                              Len Morris 2
                                              Participant
                                                @lenmorris2

                                                Dear Amy,

                                                Starting to get dangerous! We're getting to the put up or shut up stage!

                                                As regards suppliers it's all internet these days but if you can find a local shop and an owner with a passion you are 'quids in'

                                                Len

                                                #50953
                                                Len Morris 2
                                                Participant
                                                  @lenmorris2

                                                  Hi Everybody,

                                                  I've been to several model shows recently and been very impressed with sound modules. They are absolutely excellent.

                                                  What did Resurgam sound like given that she had a single cylinder closed cycle steam engine?

                                                  Would love your opinions.

                                                  The best I can come with is a Clyde Puffer and I know that's not right, but, it's better than the whir of an electric motor.

                                                  Len

                                                  #51067
                                                  Len Morris 2
                                                  Participant
                                                    @lenmorris2

                                                    balloon 013.jpgHi Everybody,

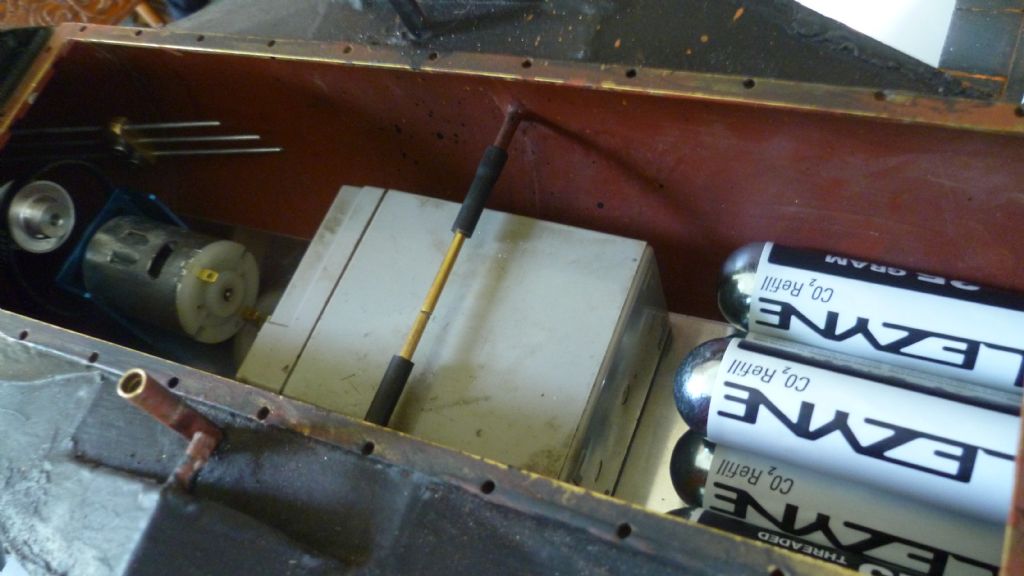
                                                    Just an update and a couple of pictures. The timing belt pulleys arrived and they are excellent . Now I can start installing the lower deck. The picture shows nearly all the main weighty bits placed as low as possible on a 1.5 mill thick aluminium 'orlop' deck. The 545 motor drives upwards via the 3:1 reduction timing belt to the prop. The 6 volt 4Ah battery sits in the middle and the CO2 gas cylinders sit towards the bow. The space either end of the battery is important as this allows the battery to be moved by solenoid for accurate fore and aft trim after the basic lead ballasting has been done. The radio gear I bought is particularly useful for this function as one channel is controlled by a volume control knob. All the ballast blow gear and manifolding goes in the bows.

                                                    On top of all that lot will go a perspex deck carrying the radio control and all the associated gubbins.

                                                    I might have said it before but the master plan, just so I can get mi boat in the water as soon as possible is to close her ballast tanks and replace the blow system with solid ballast. It will be very interesting to see if she will go under as a dynamic diver!

                                                    Lenballoon 012.jpg

                                                    #51080
                                                    Bob Wilson
                                                    Participant
                                                      @bobwilson59101

                                                      You certainly deserve success after all that effort. Despite its simple external appearance, the whole thing is really a complex device of great precision, and beautifully made. Best wishes for the trials.

                                                      Bob

                                                    Viewing 25 posts - 101 through 125 (of 227 total)
                                                    • Please log in to reply to this topic. Registering is free and easy using the links on the menu at the top of this page.

                                                    Code of conduct | Forum Help/FAQs

                                                    Advert

                                                    Latest Replies

                                                    Home Forums Scratch build Topics

                                                    Viewing 25 topics - 1 through 25 (of 25 total)
                                                    Viewing 25 topics - 1 through 25 (of 25 total)

                                                    View full reply list.

                                                    Advert

                                                    Newsletter Sign-up