Resurgam Submarine

Advert

Resurgam Submarine

Home Forums Scratch build Resurgam Submarine

  • This topic is empty.
Viewing 25 posts - 76 through 100 (of 227 total)
  • Author
    Posts
  • #48524
    Len Morris 2
    Participant
      @lenmorris2

      Hi Bob A. Good question! I don't know is the honest answer. The timbering would have provided additional flotation but no more than could have been achieved by simply increasing the iron hull dimensions. Was it done for protection? We are in the era of ironclads. Was it some strange idea based on that concept? Or did Garrett make a mistake with his installed weight and need a cheap solution from Cochrans to fix the problem?

      Actually Bob, that was not a good question, but, a very good question!! I shall find the answer. I just need to think of a cunning plan!

      The water line is defined by the patent drawings where the prop and rudders are just submerged. The only bit above the water is then the vertical deck superstructure. The clearly visible bit of my model when surfaced will then be 12 inches long, 2 inches wide and painted black! When she sails, I can assure you that the First Officer (STMBO) will be glued to her binoculars!

      Best Regaeds, Len

      Advert
      #48645
      Len Morris 2
      Participant
        @lenmorris2

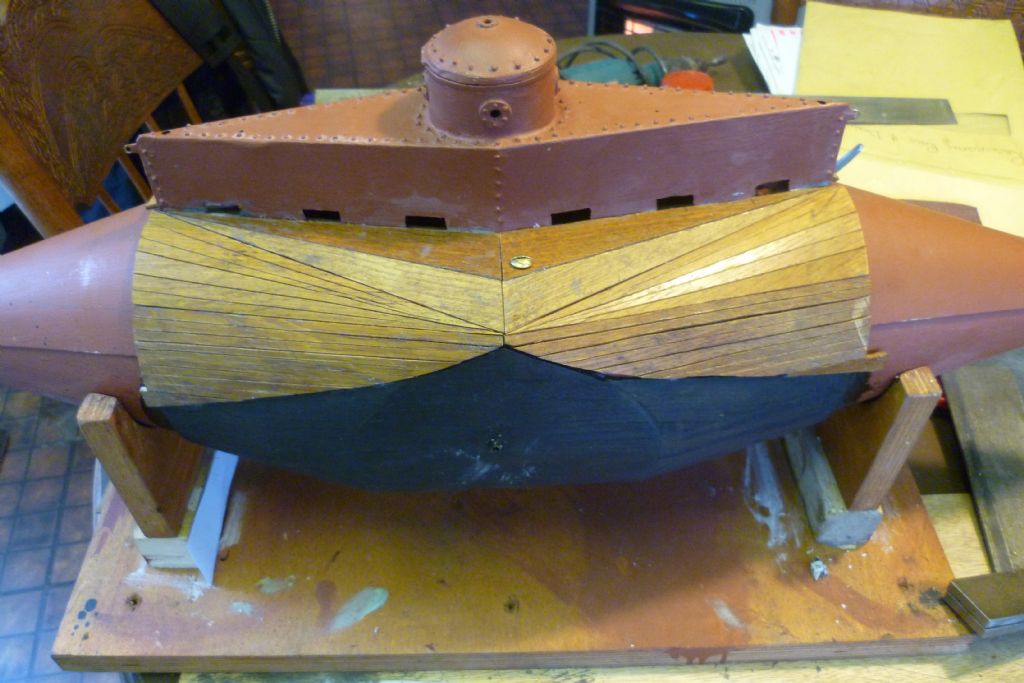
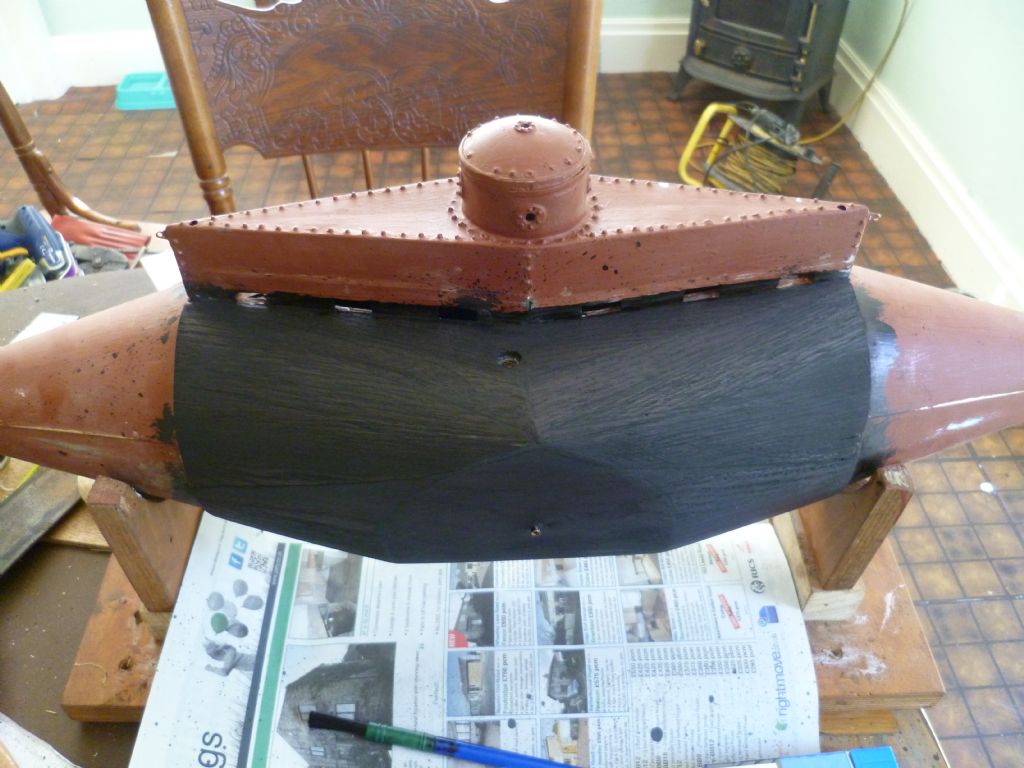
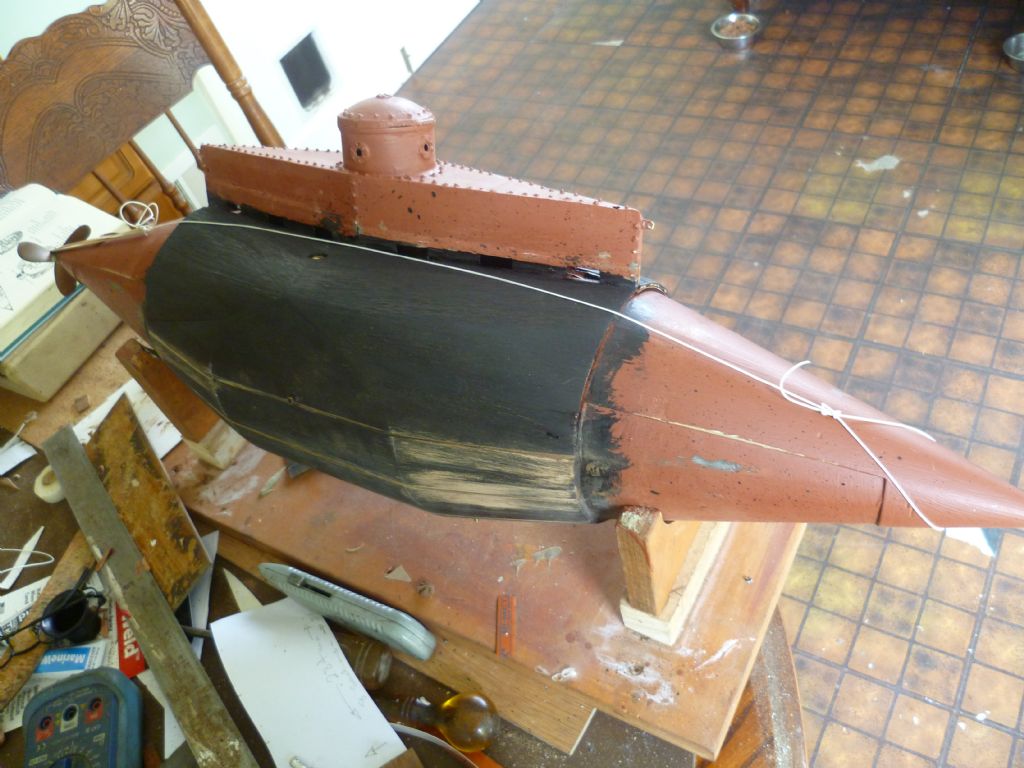
        019.jpg012.jpg007.jpgHi Everybody. Just an update on the cladding. It's done! JB Weld is excellent but it just takes forever to go off! Here are some pictures:-003.jpg

        #48646
        Bob Abell 2
        Participant
          @bobabell2

          Hello Len

          Nice woodwork

          What's this JB stuff you are on about?

          How will you protect the gear from gerrin' wet?

          Bob

          #48648
          Amy jane September
          Participant
            @amyjaneseptember49770

            Hi there Len

            I've been following this thread from the start, so I thought I'd best pop in and say Hello!

            Fun and fascinating work!

            Amy jane

            #48652
            Len Morris 2
            Participant
              @lenmorris2

              Hi Bob A,

              I hate wood and I hate woodwork. It moves all over the shop and sucks up water for England. At least when I make something out of tin brass or steel it has the courtesy to stay the same shape and stay where it was put!

              Cladding mi boat was a necessary evil (like going to the dentist) and it was only going to be done once! Hence the search for a decent glue as I found soldering wood not good. I wanted to use a rapid twin pack epoxy but on reading the small print they were all water 'resistant' but none of them went the distance and said waterproof and suitable for continuous immersion. That's why I used JB Weld's Marine Weld epoxy. The blurb says quite clearly that it is waterproof when cured and retains its strength above or below water. Perhaps the others do, but they don't say it and I wasn't going to take the risk. All the info is at http://WWW.jbweld.com. (Sorry, not clever enough to create a link).

              The problem is that it does take 24 hours to cure and although they quote a set time of 25 minutes it's more like 6 hours (perhaps I need to turn on the central heating). Putting the strips on mi boat just took forever. I hate wood. I hate wood!

              Now to the good bits, nowts going to get wet (bit of the Garrett spirit here). Under the casing is a 3.5 x 10 inch plexy glass hatch. I know it seals from the early bath trials. The bits that only turn through 45 degrees are sealed with silicon tube over the shafts and housings and the propshaft has a spring loaded grease and cotton wool seal. Job sorted. (I know I shall regret those words)!

              As an aside, I have read all 66 pages of your GE thread. Just publish it as an unabridged book. Excellent!

              Best Regards,

              Len

              #48653
              Len Morris 2
              Participant
                @lenmorris2

                Dear Amy,

                Thanks for your comment.. The real fun will start when she has to go up and down and I expect there will be more down than up!

                Len

                #48655
                Bob Abell 2
                Participant
                  @bobabell2

                  Hello Len

                  You deserve a medal!….For reading the entire Great Eastern sails again story!

                  Did you read the link also, describing the actual build in 2007 ?

                  Those two epic episodes were very exciting for me and I felt slightly sad when it was all over!

                  If you like epic stories like that, try………Jeanie Deans ar War

                  Thanks Len……….Bob

                  #48759
                  Len Morris 2
                  Participant
                    @lenmorris2

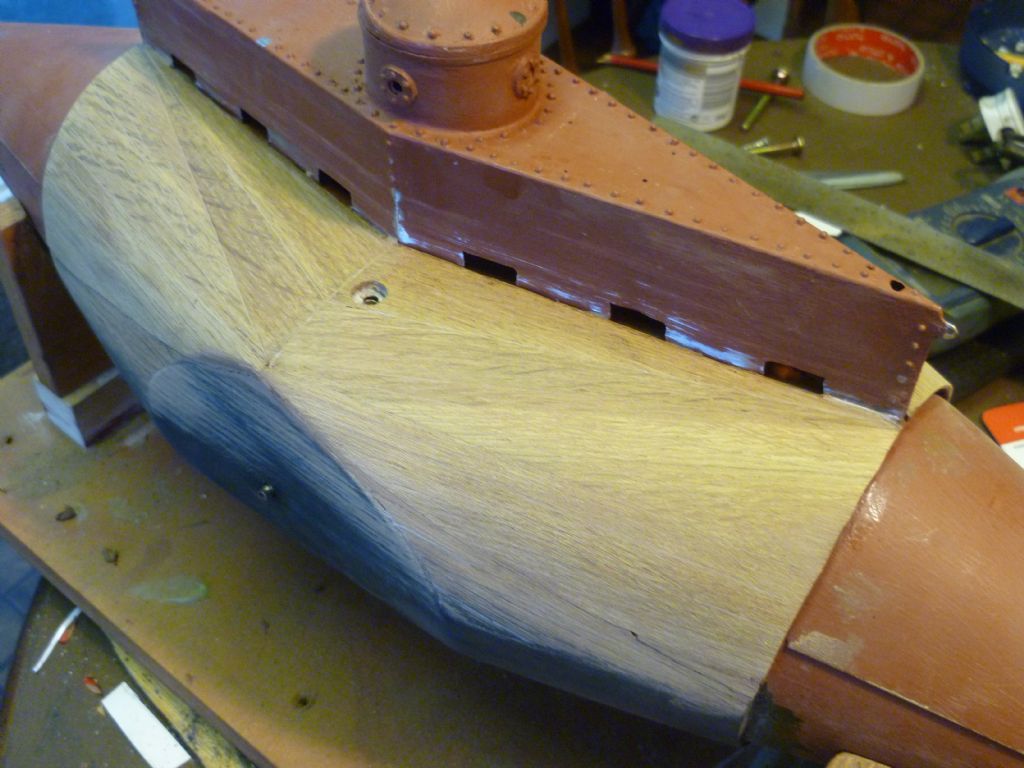
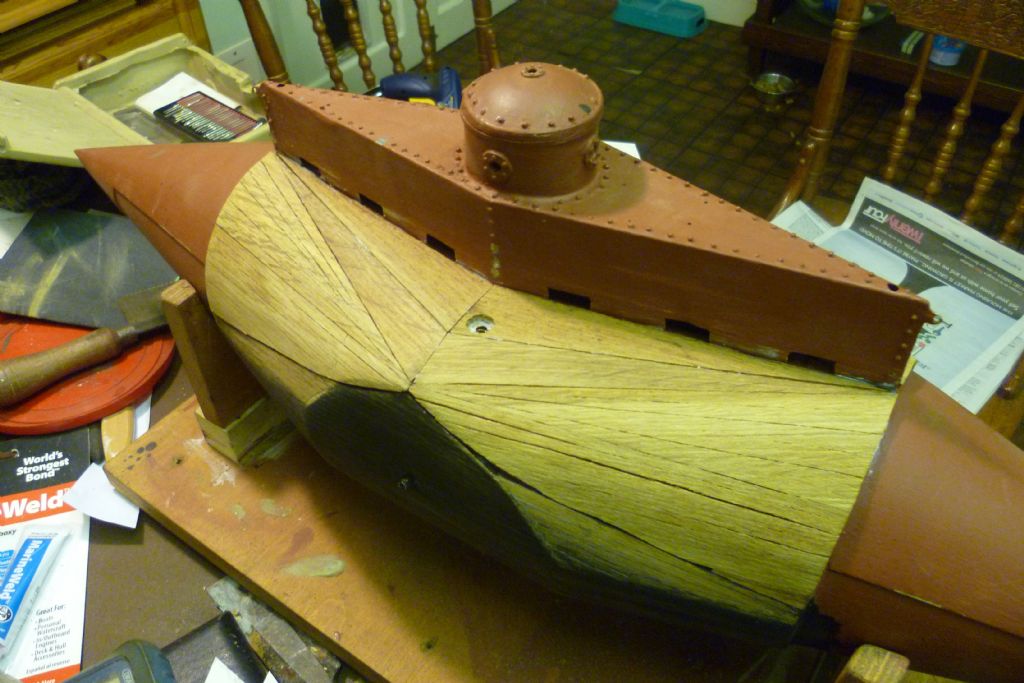
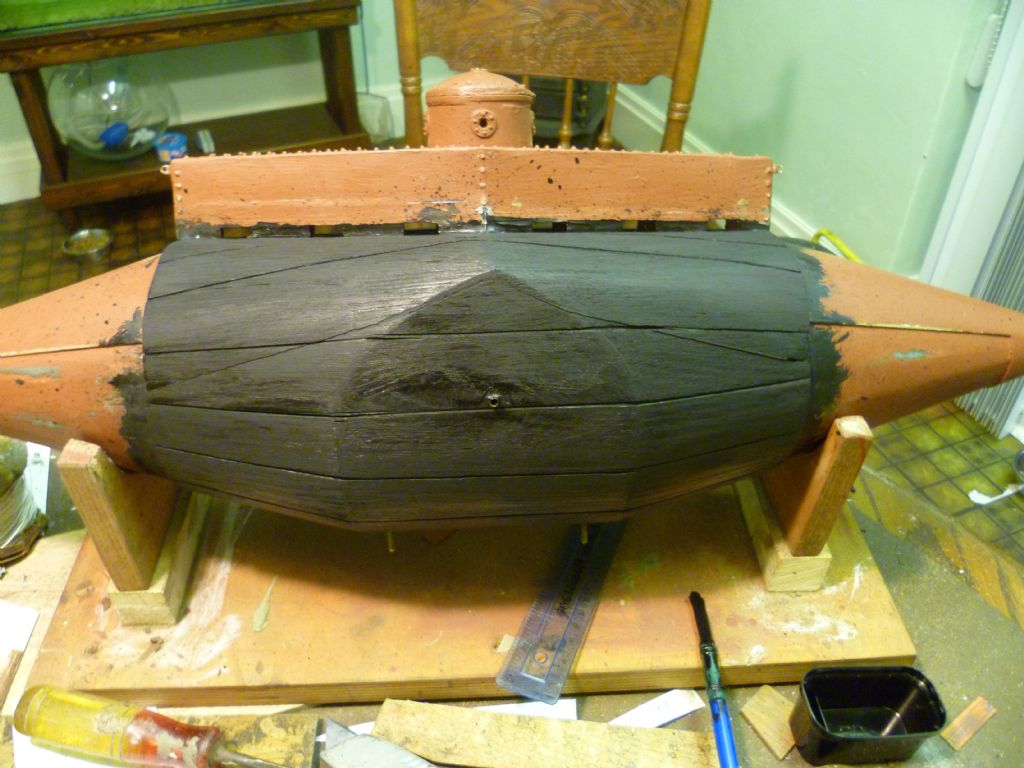
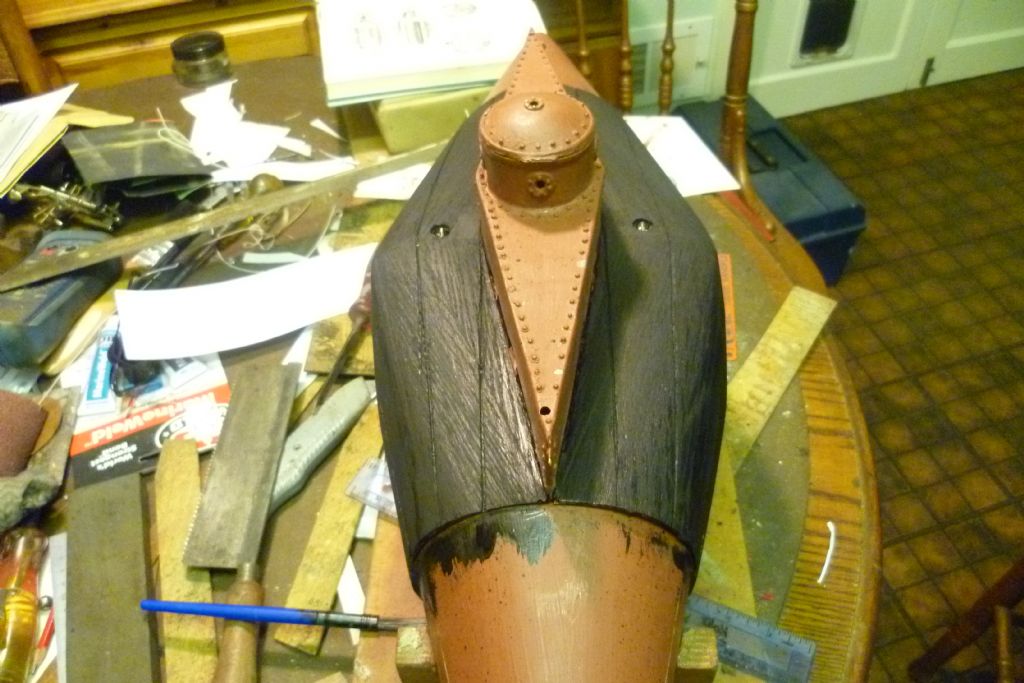
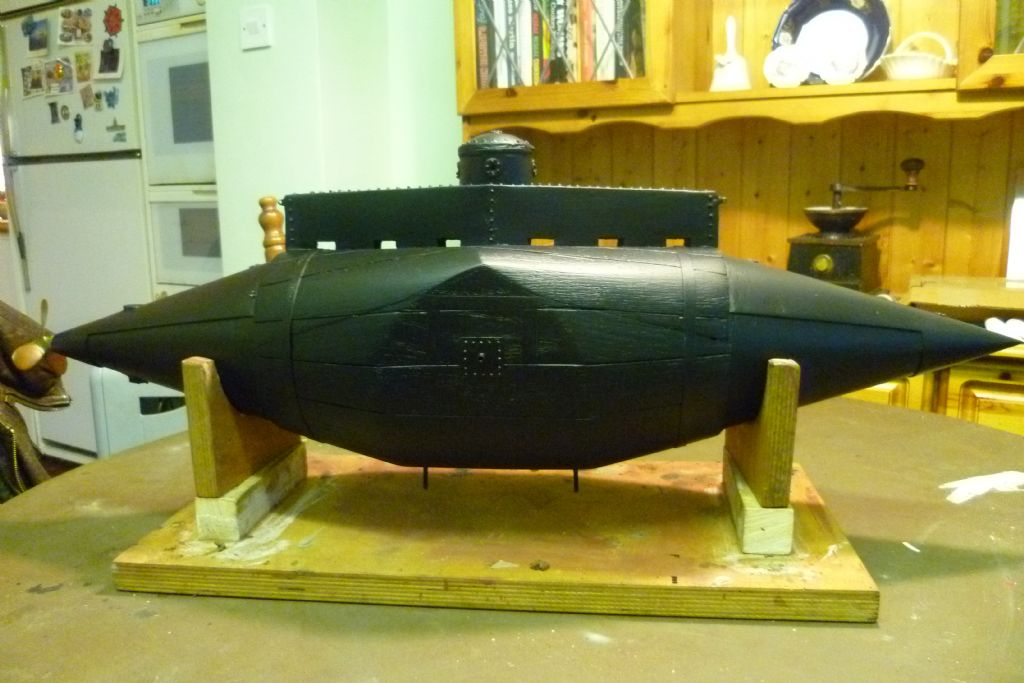
                    wood1.jpgwood5.jpgwood7.jpgHi Everybody, Just a brief progress report. Centre section stained with ebony wood dye. Lines marked off for the timbering according to the patent drawings (14 radial sections), grooved with a tenon saw and then stained again. As the whole job was sanded with P40 it all looks a bit rough now but I'm happy with the result. I doubt Cochran's the builders were that bothered about a Furniture finish! Now need to get the straps on and the plates around the hydroplane shafts. Can any body advise a good matt varnish?

                    I cannot see any rivets on the conical bow and stern sections. They must be there. Is it the photography or did Cochran countersink them?

                    Getting excited now as the cosmetics for what they are are nearly over and I can get on with the internals (which are made of metal!!!).

                    Pictures follow and I hope I can get them in chronological order. If not apologies.

                    Best Regards, Len.wood9.jpg

                    #48762
                    Bob Abell 2
                    Participant
                      @bobabell2

                      Hello Len

                      I like the authentic junk yard!

                      Hope to see some impressive rust?

                      Very interesting subject for a model

                      Bob

                      #48792
                      Len Morris 2
                      Participant
                        @lenmorris2

                        Hi Bob A,

                        Glad you like junk yard because STMBO is getting a bit fed up of a miniature Cochrans' on the kitchen table! Need to tidy up but the pics are for information and I'm sure you'll understand not presentation.

                        Not sure how rusty Resurgam should be. She wasn't that old and not in the water that long. Its hard to tell from the two black and white photographs what colour she was and indeed if she was painted at all. To add to all this the photographs give the impression that they were taken in the snow. For now, just to keep the momentum, I'm going to spray all the metal bits satin black and worry about them later.

                        Having said that, I love 'distressed' model boats. It's hard to do and hard to do right. Mi Dad's model boats always had the perfect P2000 finish. They were brilliant (excuse the pun) but nowt like real life.

                        Having seen your GE you're the expert. What colour is rust and is it an airbrush job to get it right?

                        Best Regards Len

                        #48795
                        Bob Abell 2
                        Participant
                          @bobabell2

                          Hello Len

                          Don't use an air brush…..Very unrealistic

                          I use an assortment of acrylic paint colours…..Straight from the tube

                          Burnt sienna, raw umber, yellow ochre

                          The rust needs to be in all cracks and crannies and along plating lines

                          Lots of vertical rust looks authentic

                          Bob

                          #48796
                          Bob Abell 2
                          Participant
                            @bobabell2

                            Hello Len

                            Don't use an air brush…..Very unrealistic

                            I use an assortment of acrylic paint colours…..Straight from the tube

                            Burnt sienna, raw umber, yellow ochre

                            The rust needs to be in all cracks and crannies and along plating lines

                            Lots of vertical rust looks authentic

                            Bob

                            #48798
                            Bob Wilson
                            Participant
                              @bobwilson59101

                              I always use real rust! It is not difficult to make. Put a piece of fine wire wool in water and leave it for a couple of days and it will all change into rust powder. That can be mixed with clear acrylic and painted on. Then, whilst still wet, sprinkle more dry rust powder over it to get back to the matt finish.

                              Bob

                              #48827
                              Len Morris 2
                              Participant
                                @lenmorris2

                                Dear BobA and BobW,

                                Thanks very much for your rusty advice. It has been well noted.

                                Best Regards, Len

                                #48844
                                Bob Abell 2
                                Participant
                                  @bobabell2

                                  Hello Les

                                  Any chance of a Resurgam in the water picture?

                                  To whet our appetites?

                                  Bob

                                  #48851
                                  Len Morris 2
                                  Participant
                                    @lenmorris2

                                    Hi Bob A.

                                    Now you are just rattling my cage!

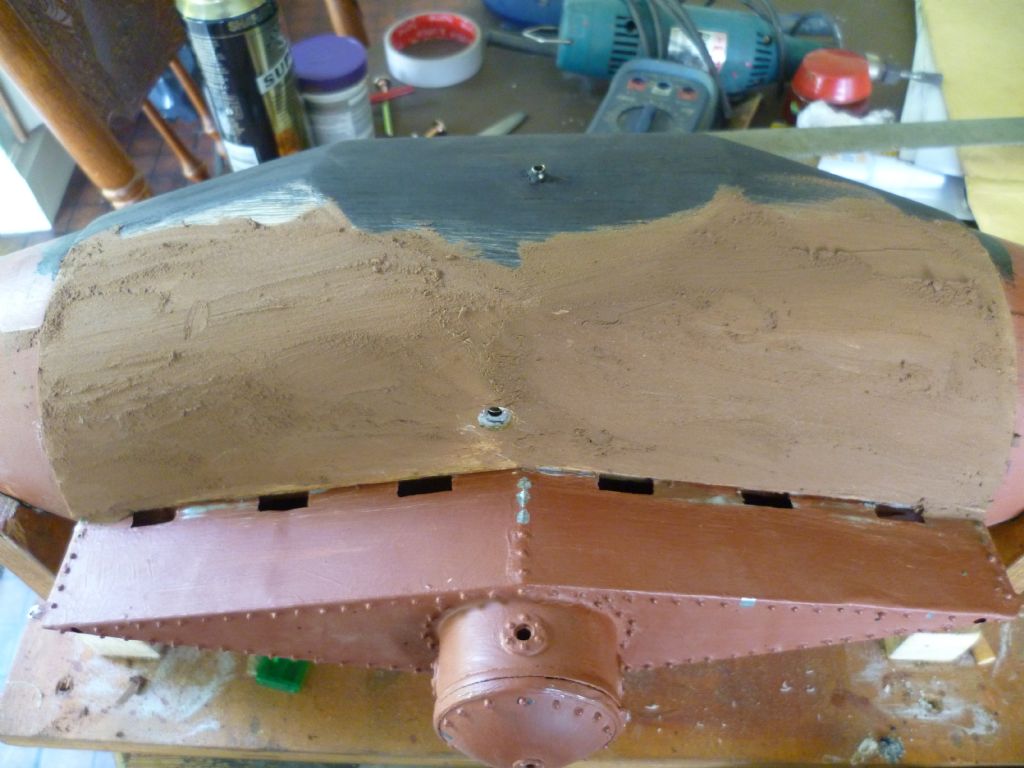
                                    Have had a bit of a disaster, one of those one step forwards and two steps backwards moments. I sealed the woodwork with Blackfriar's clear matt polyurethane varnish a couple of days ago. By last night it was well dry. I masked off the wood and sprayed the whole boat with Hycoat acylic satin black as a starter for ten. Have used it a million times on cars and it's good stuff. Where the varnish had overlapped onto the metal conical section I got a horrible reaction. I'm not even going to post a picture of it!

                                    Last night plan B was being heavily considered but this morning I found some of the Garrett spirit and we'll just clean it up and do it again!

                                    Plan B by the way is that I smite it heavily with a hammer, put it in my daughter's salt water fish tank and find some barnacles.

                                    Finally to answer your direct question Bob. Yes, as soon as, once I've cleaned up all the poop!

                                    Best Regards, Len
                                    #49100
                                    Len Morris 2
                                    Participant
                                      @lenmorris2

                                      Hi Everybody,

                                      Now back on track. Hope to post pics this evening. The whole boat was stripped back including half the rivets and redone. She's now all Acrylic and "polyurethane" has been added to my list of naughty words!

                                      Now back to rust for a moment. I blew down my compressor the other day and when I saw what was coming out of the drain cock had an inspired moment. Collected the reddish gloopy water and allowed it to evaporate. Ended up with perfect fine grained rust powder. Just a different slant on Bob W's technique I suppose but for free !

                                      #49180
                                      Len Morris 2
                                      Participant
                                        @lenmorris2

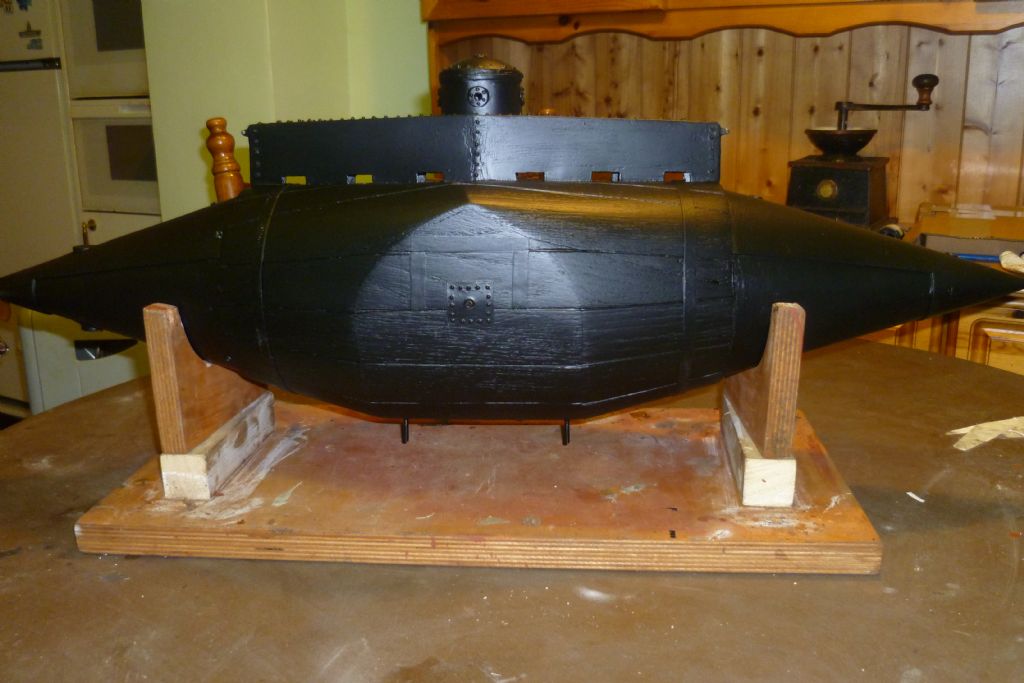
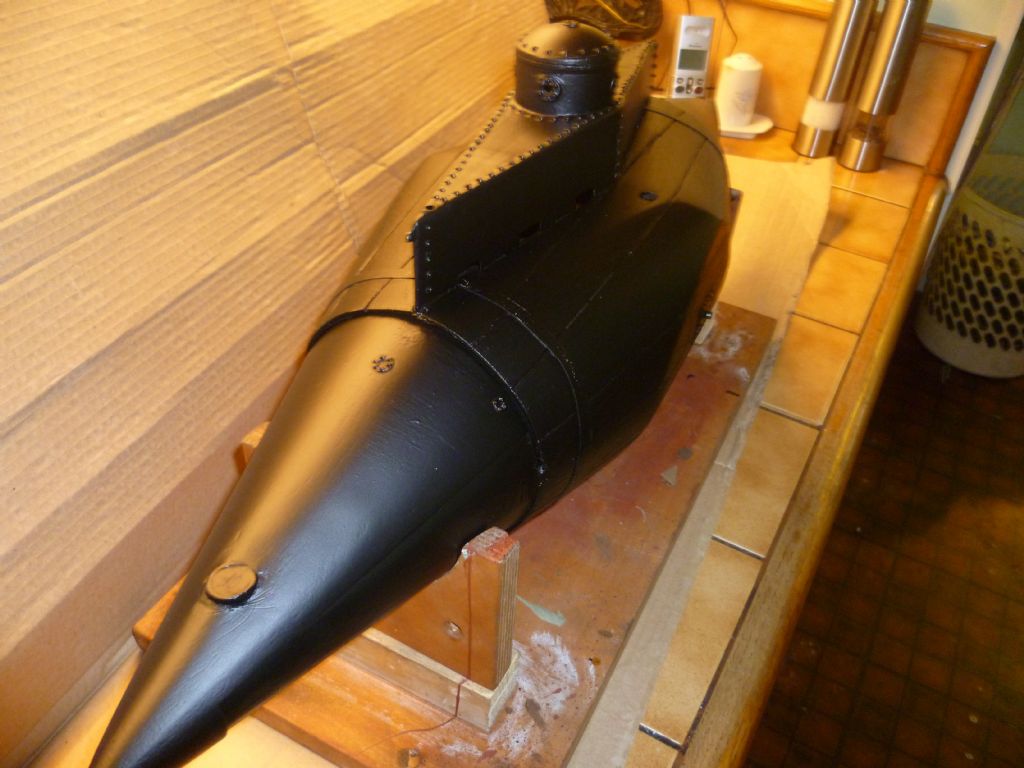
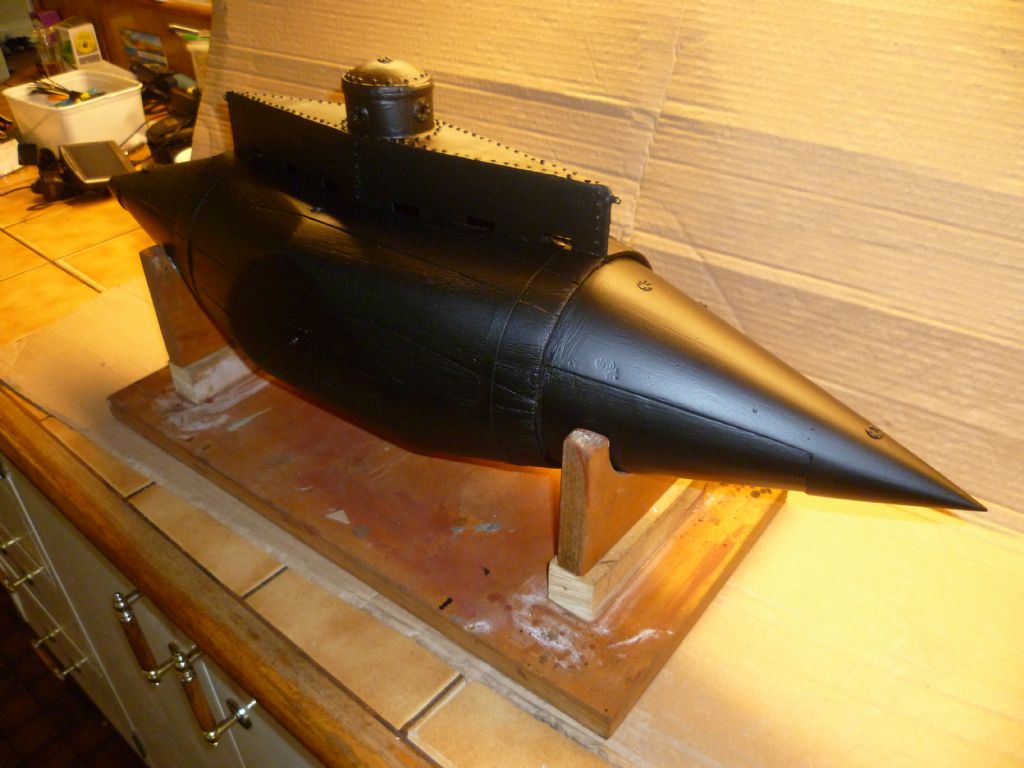
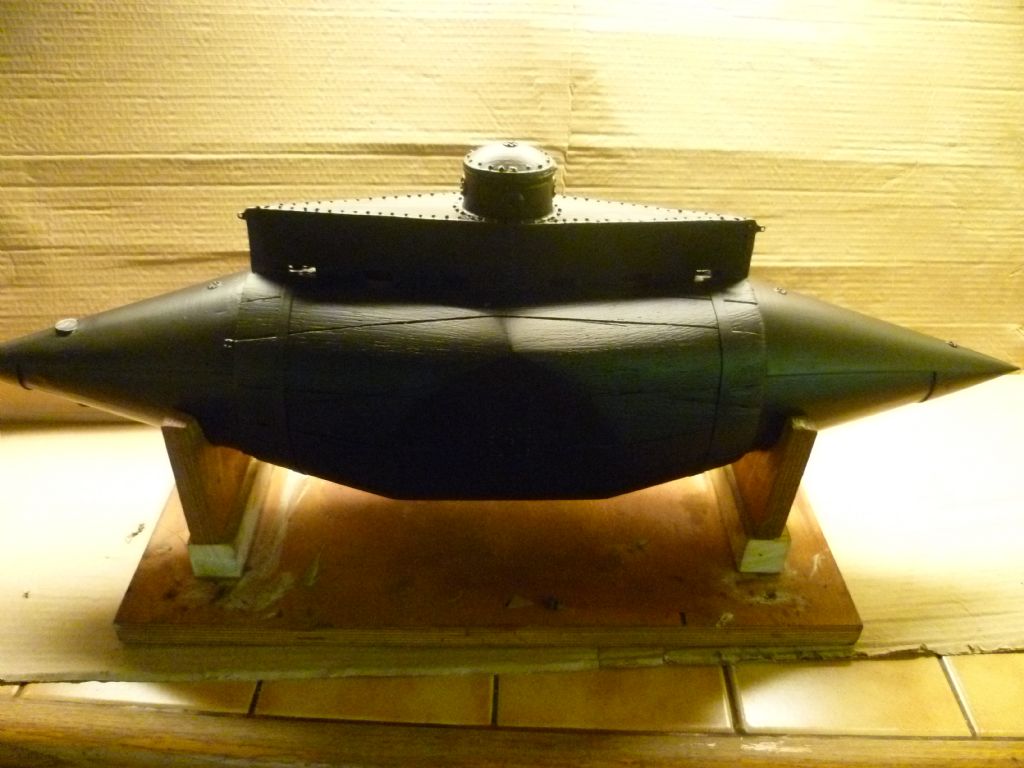
                                        017.jpg006.jpg004.jpg003.jpgHi Everybody,

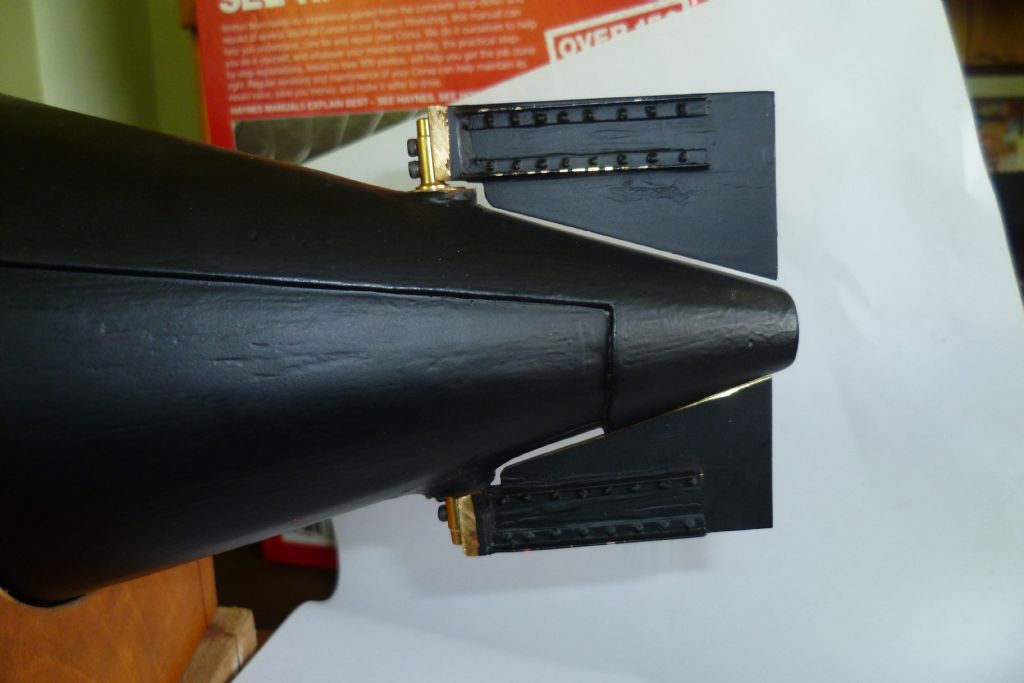
                                        Here are some pics of where we are now. Externals done, internals follow. Big problem is the stern where two rudder shafts and the propshaft all meet at a really difficult to get at location. Not sure how to get the control rods on to the rudder arms but we shall devise a cunning plan!015.jpg

                                        #49389
                                        Len Morris 2
                                        Participant
                                          @lenmorris2

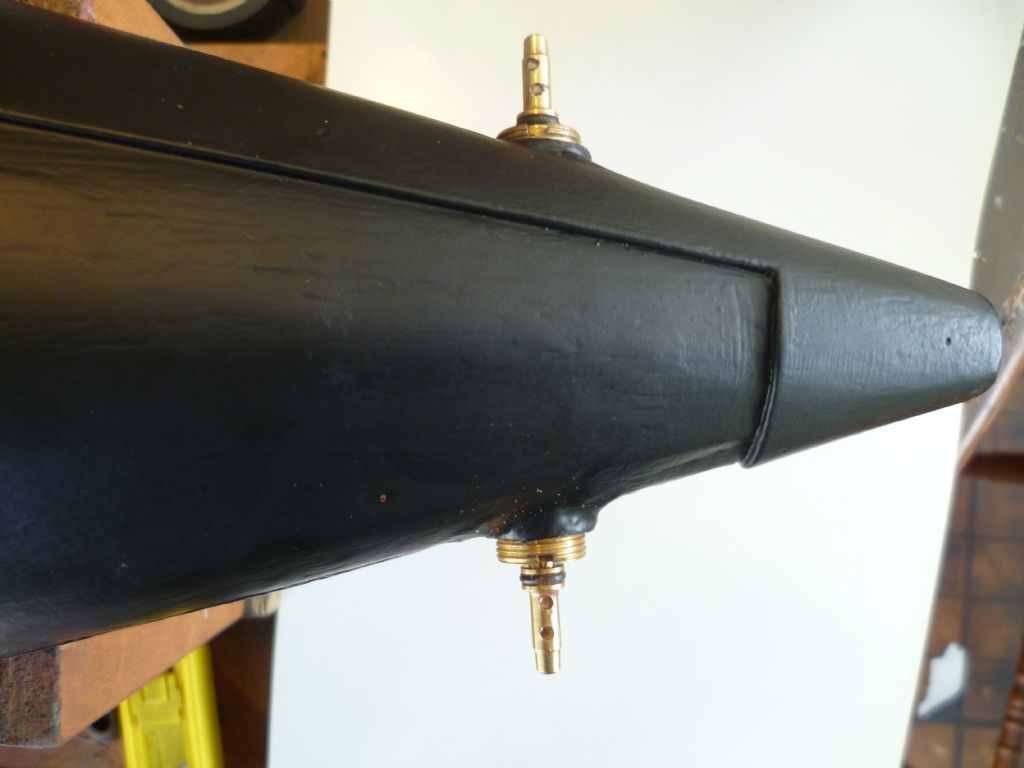
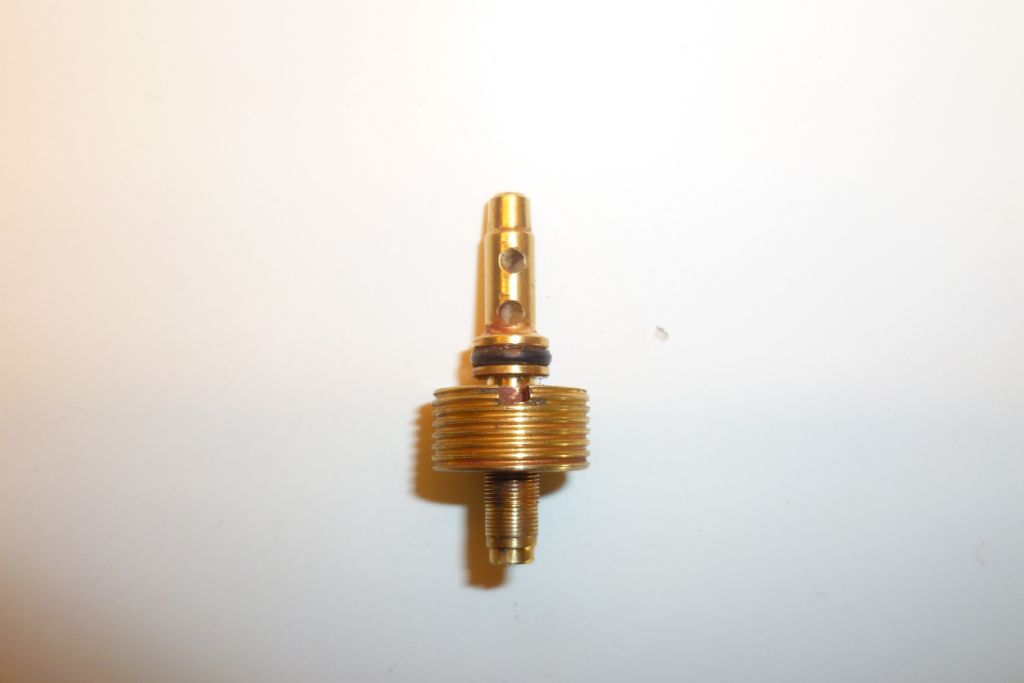
                                          013.jpg010.jpgHi Everybody,

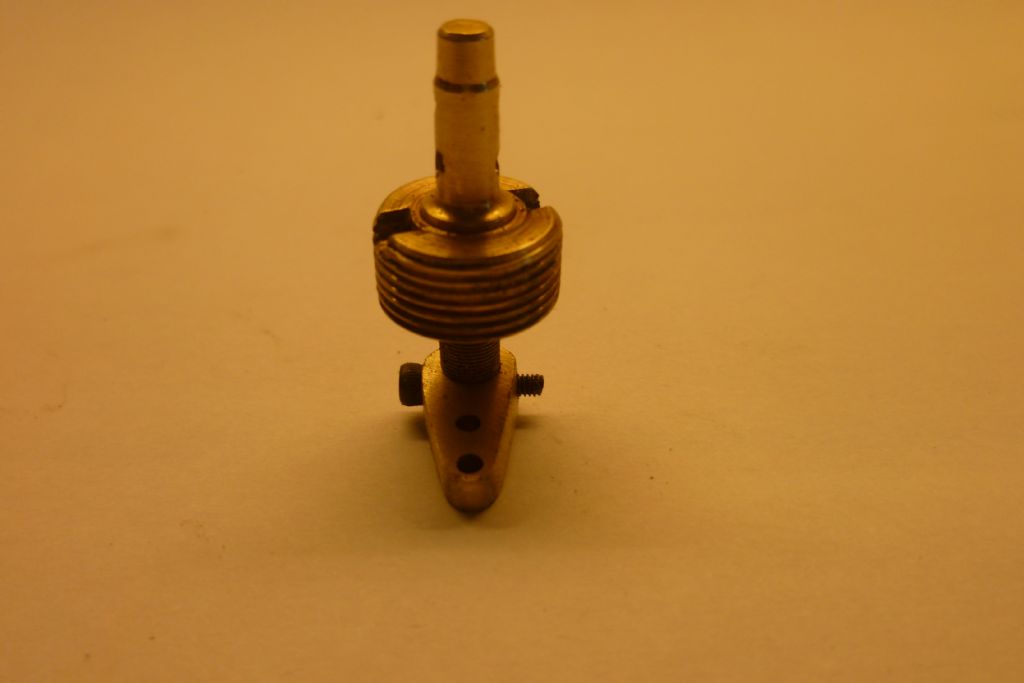
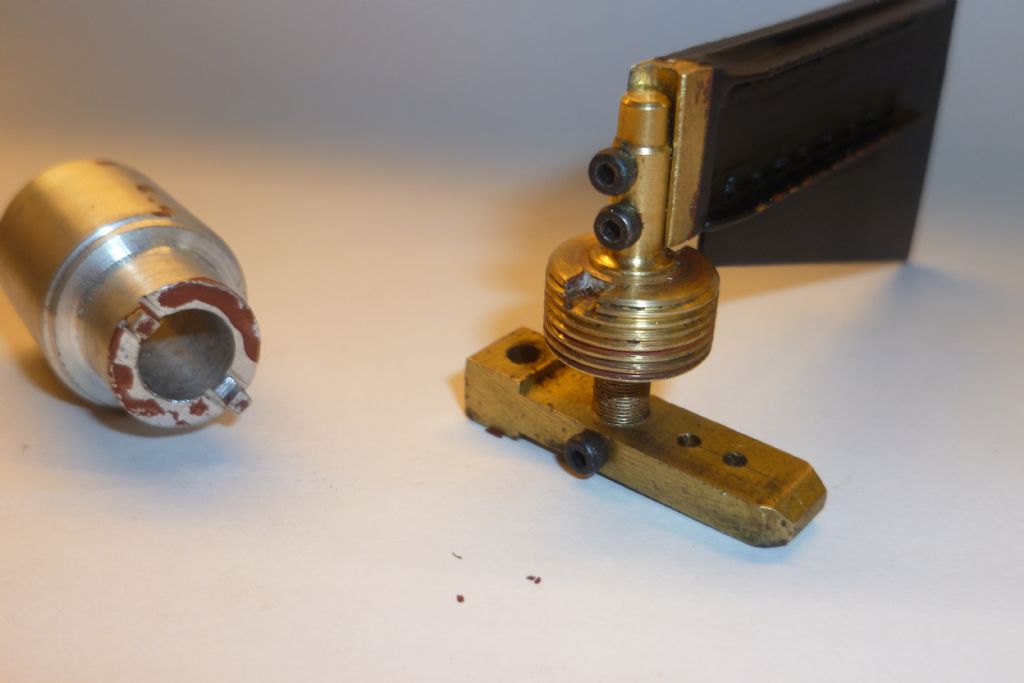
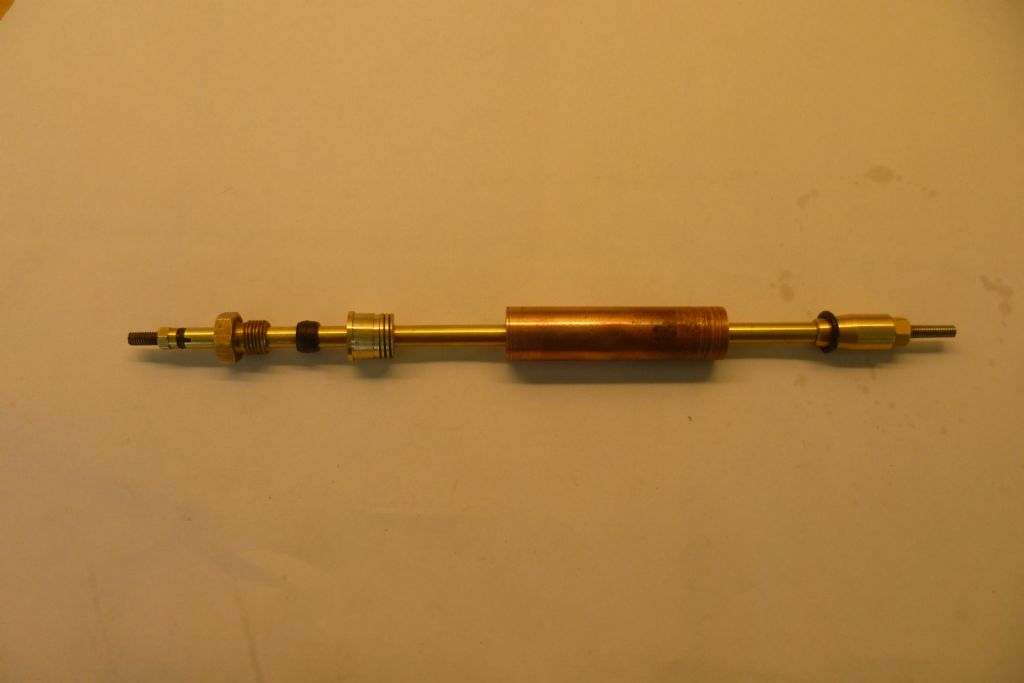
                                          Just some pics for an update. Cleared out the old sealing arrangement for the propshaft leaving a clean stern tube of 15mm domestic copper waterpipe. Have a Raboesch waterproof propshaft to install down the centre of this. Reason for change was simply the reduction in shaft friction. The rudder posts were carved out of some small pneumatic valves. The shafts are very finely screw threaded for axial location and sealed by the O rings when finally set in place.

                                          Best Regards

                                          Len007.jpg

                                          #49390
                                          Bob Wilson
                                          Participant
                                            @bobwilson59101

                                            It is amazing what a bit of paint can do. Looking really good now! I can imagine there will be screams of anguish from some after the rust is applied, but I often think it gives a model a more authentic look and do apply it to my own models from time to time

                                            Bob

                                            #49469
                                            Amy jane September
                                            Participant
                                              @amyjaneseptember49770

                                              Hi Len

                                              Nice progress, and clever use of the valves! Good stuff.

                                              #49549
                                              Len Morris 2
                                              Participant
                                                @lenmorris2

                                                016 (2).jpg007 (2).jpgHi Everybody,

                                                We now have rudders! You can tell what the brass control arms were made of and after a bit of fiddling, they would just pass through the 16mm opening and give a 12mm torque arm. They are screwed solidly onto the shafts as I don't want any slippage from a friction fitting at a really difficult place to get at. All for now.

                                                Len

                                                010 (2).jpg

                                                #49862
                                                Len Morris 2
                                                Participant
                                                  @lenmorris2

                                                  Hi Everybody,

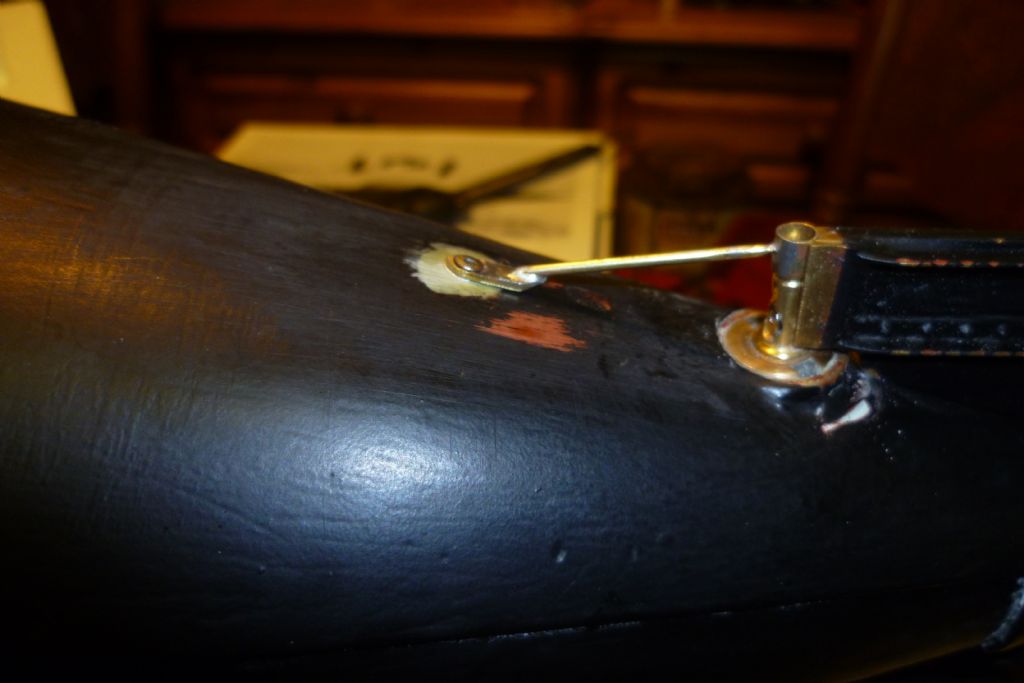
                                                  The rudders are now finally fitted and sealed. The stay bars are done and these are quite functional. The connection to the rudder post was the reason the tip of the rudder post was turned down slightly. The cap screws were replaced with stainless countersunk screws so the whole assembly looks much more shipshape. The new propshaft was fitted down the middle of the old 15mm domestic copper tubing. All done with solder and rubber gromets. The bit of pipe around the propshaft is just to show how everything went together in the sub herself. In truth I made a rod for my own back by insisting that all the stern waggly bits would be sealed and removable/serviceable. However, job done! Len P.S. The pics are are all out of order and I don't know how to get them right.

                                                  Len

                                                  039.jpg 006 (2).jpg

                                                  #49864
                                                  Bob Abell 2
                                                  Participant
                                                    @bobabell2

                                                    The rudder looks the business now, Len!

                                                    How will the prop shaft fit!…..You could use two sets of bevel gears to clear the rudder shaft, but very fiddly?

                                                    Or a flexible cable?

                                                    Bob

                                                    #49885
                                                    Len Morris 2
                                                    Participant
                                                      @lenmorris2

                                                      Hi Bob,

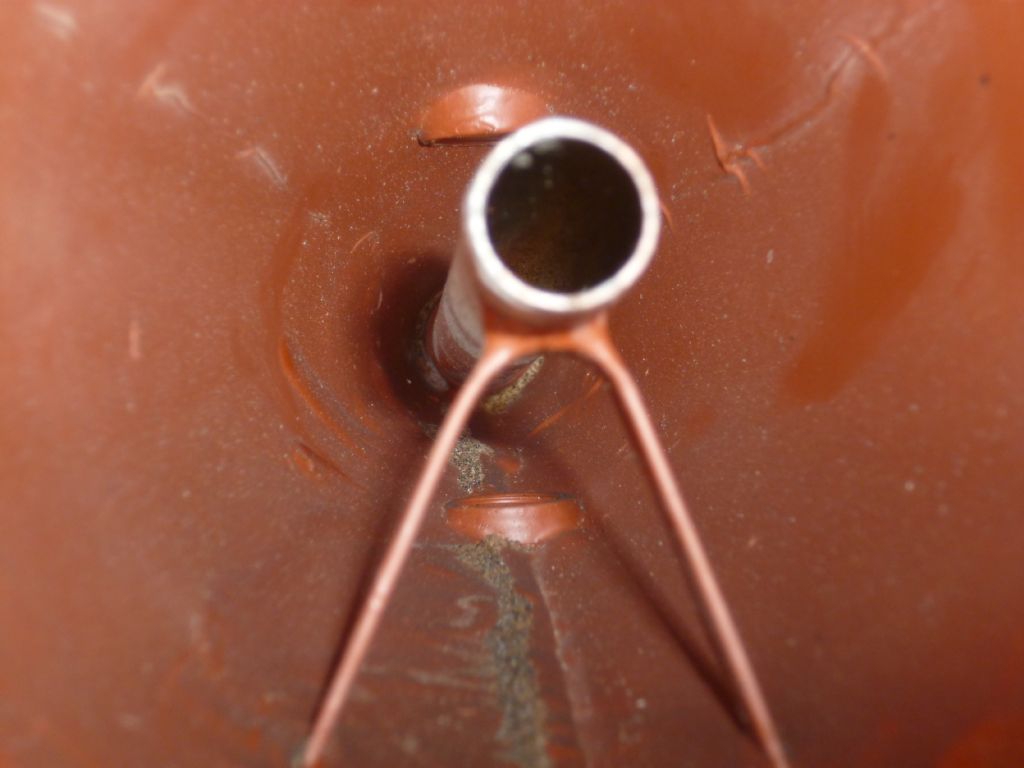
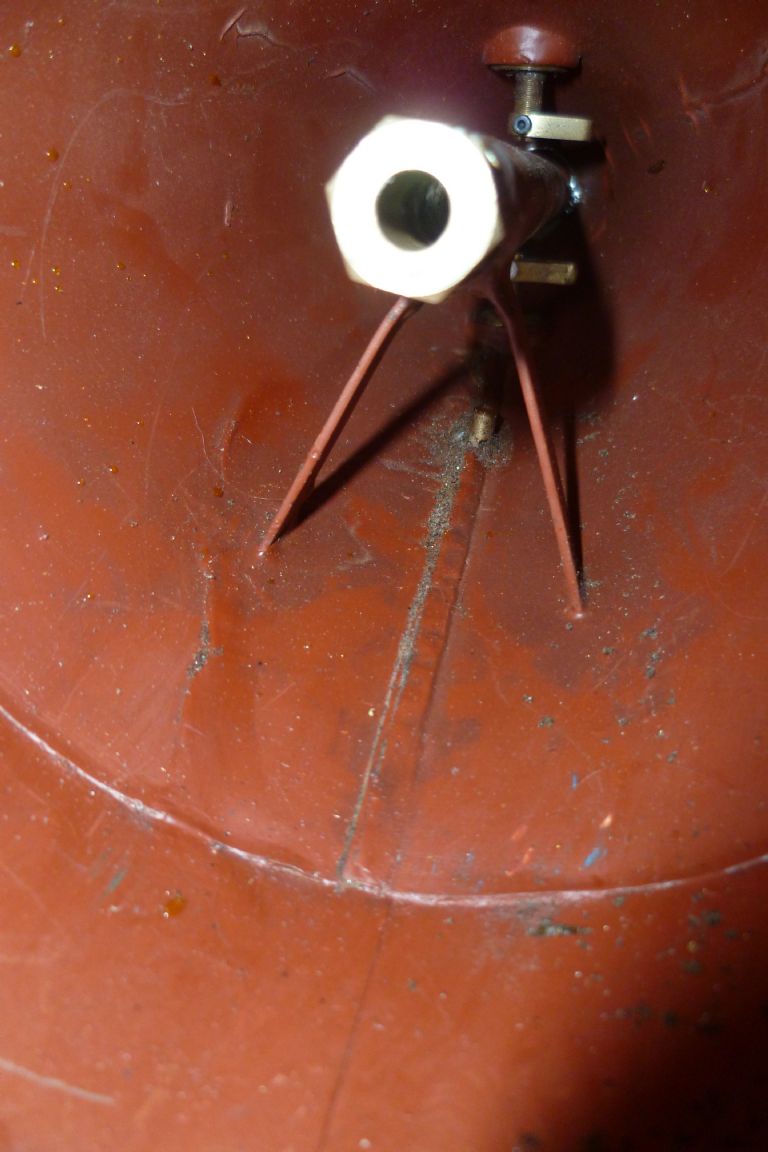
                                                      The stern of Resurgam is difficult. Three shafts meet at a very restricted location. Oresurgam stern 008.jpgn the model the prop shaft runs straight through down the middle of the original 15 mm copper pipe. The rudders, top and bottom, sit in their own posts with the control arms just clear of the prop shaft set up. The control for the rudders is piano wire bent at 90 degrees at the lever end. These are poked down the hull and popped into the lever arms. The problem is to stop them coming out, and getting to them for a normal fixing is almost impossible. However, we have a cunning plan! Because there are two control rods all it needs is for them to be tied together and neither can move. Job done! Hope the picture explains.

                                                      Best Regards, Len
                                                    Viewing 25 posts - 76 through 100 (of 227 total)
                                                    • Please log in to reply to this topic. Registering is free and easy using the links on the menu at the top of this page.

                                                    Code of conduct | Forum Help/FAQs

                                                    Advert

                                                    Latest Replies

                                                    Home Forums Scratch build Topics

                                                    Viewing 25 topics - 1 through 25 (of 25 total)
                                                    Viewing 25 topics - 1 through 25 (of 25 total)

                                                    View full reply list.

                                                    Advert

                                                    Newsletter Sign-up