The world's leading magazine for all model boating interests
Eilean Mor
Eilean Mor
Home › Forums › Building Kits › Eilean Mor
- This topic is empty.
-
AuthorPosts
-
31 July 2015 at 21:30 #59503
Banjoman
Participant@banjomanThank you very much indeed, Ian, for your kind words!
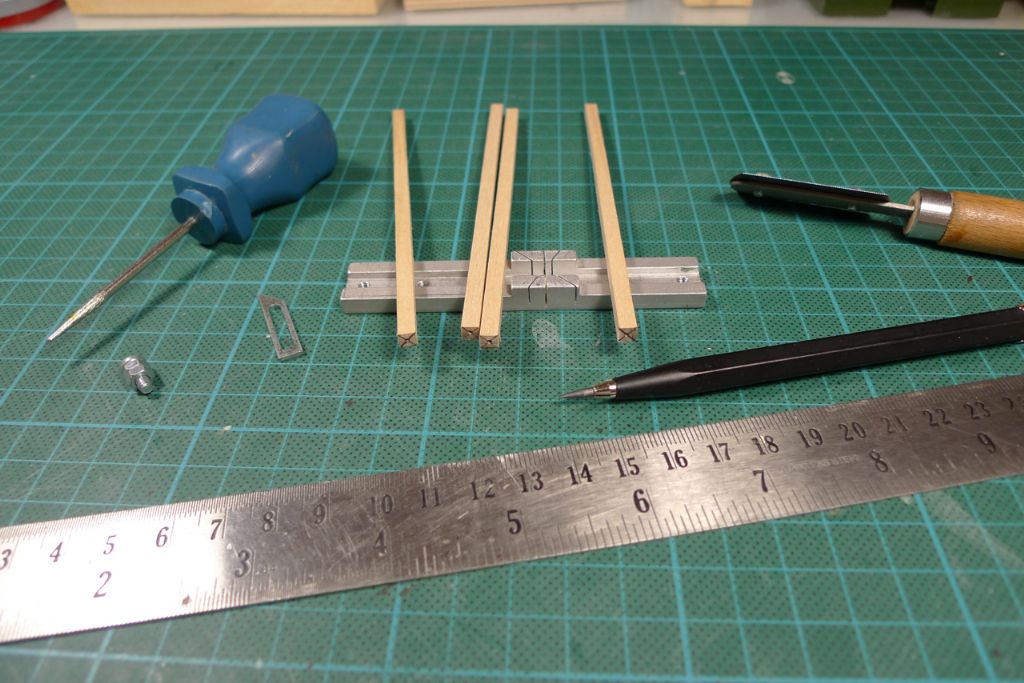
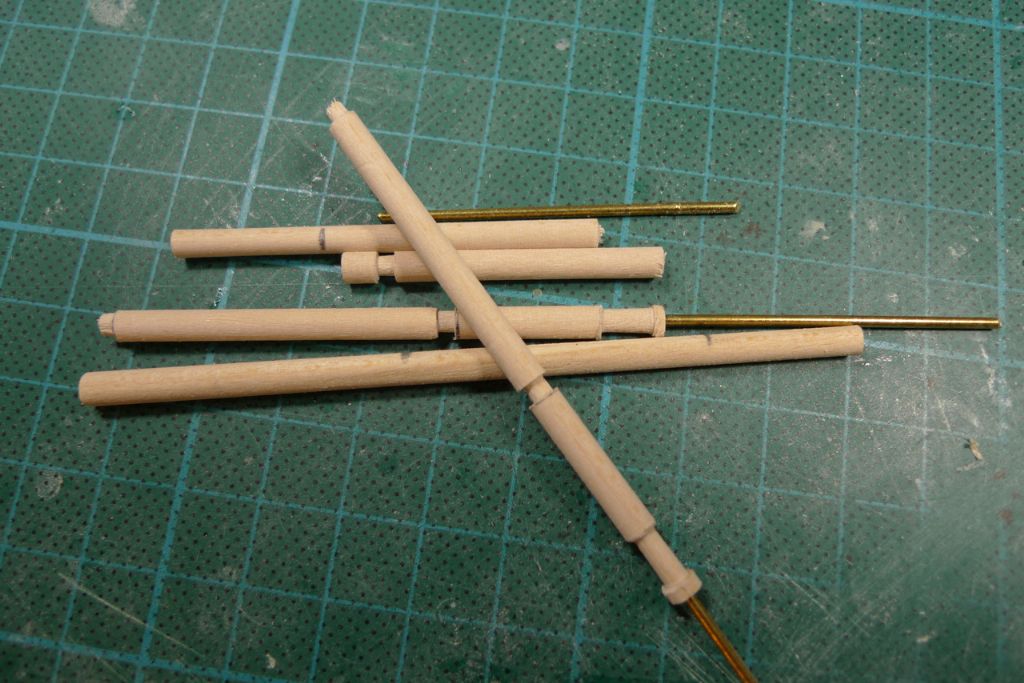
Today I began my attempt at making four oars for the dinghy, by cutting up a half mere length of 4×4 mm lime into four equal parts. Each length was then marked for the centers at both ends, and thopse centre points pricked out with an awl.
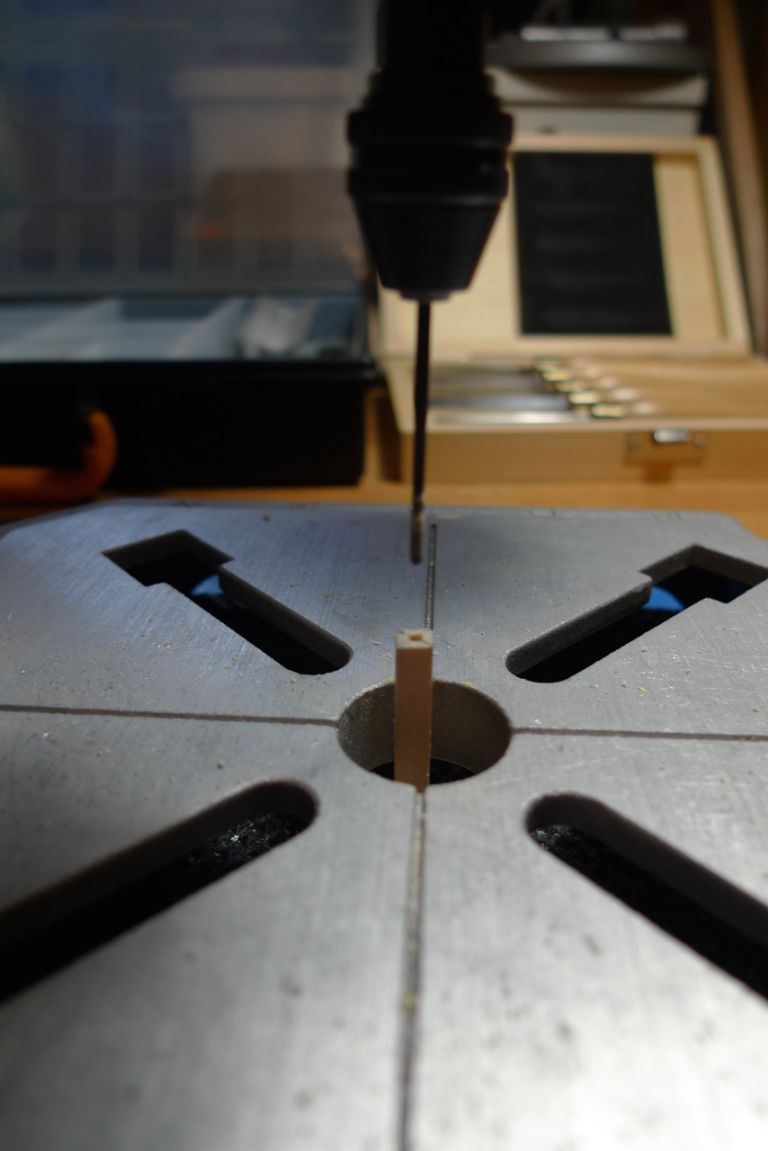
One end of each length was then drilled some 10 mm into with a 1.5 mm drill …
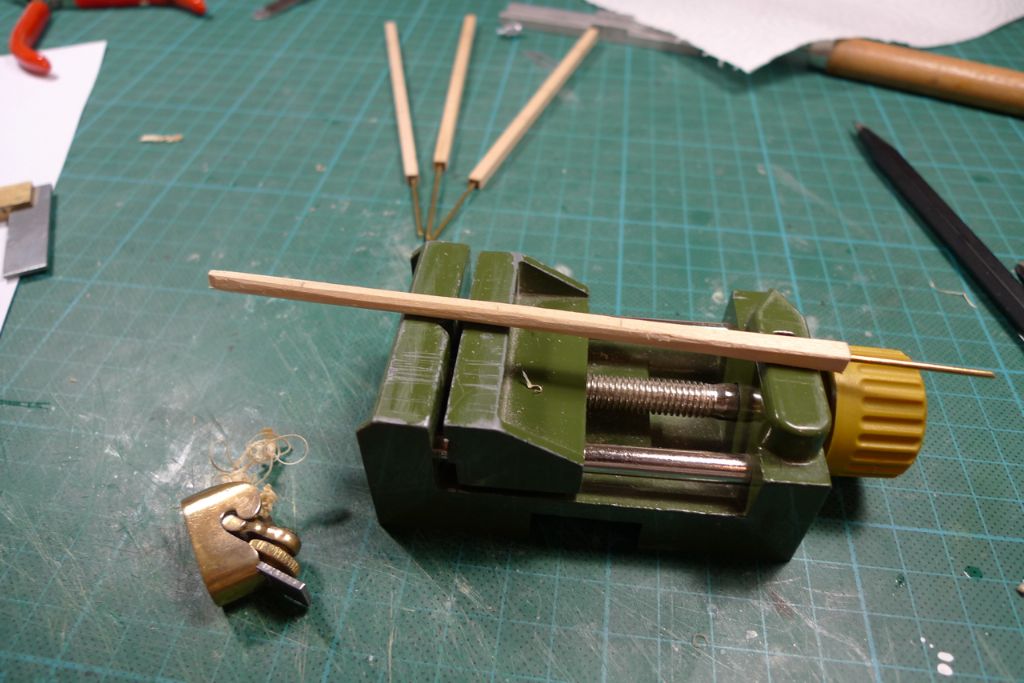
… and short lengths of 1.5 mm brass wire CA-glued into those holes.
The wood was then shaved roughly octagonal with a luthier's plane …
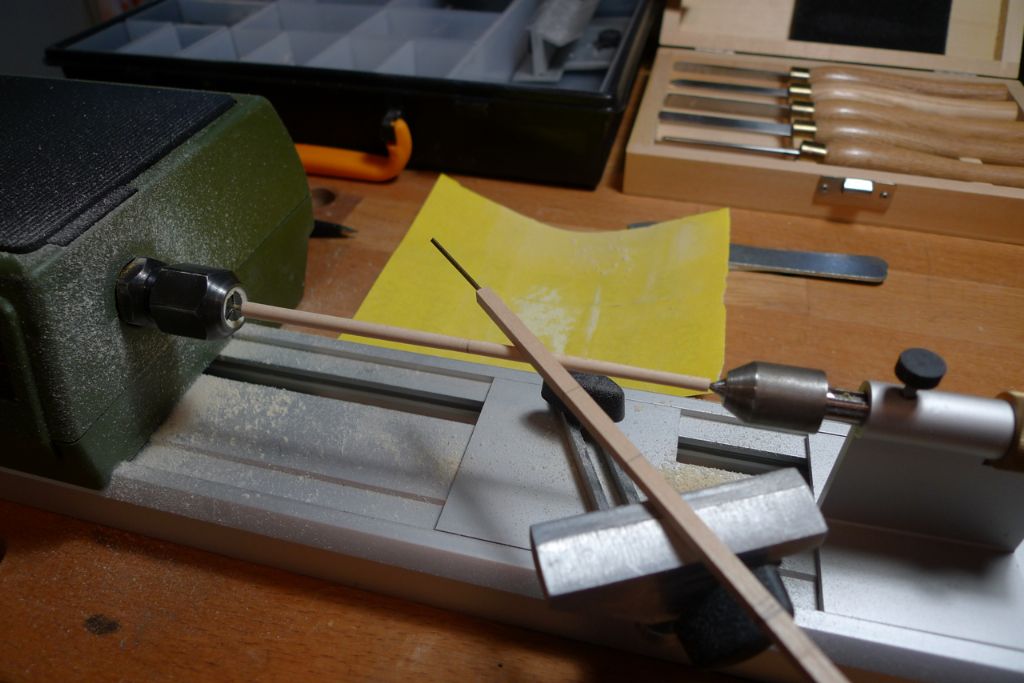
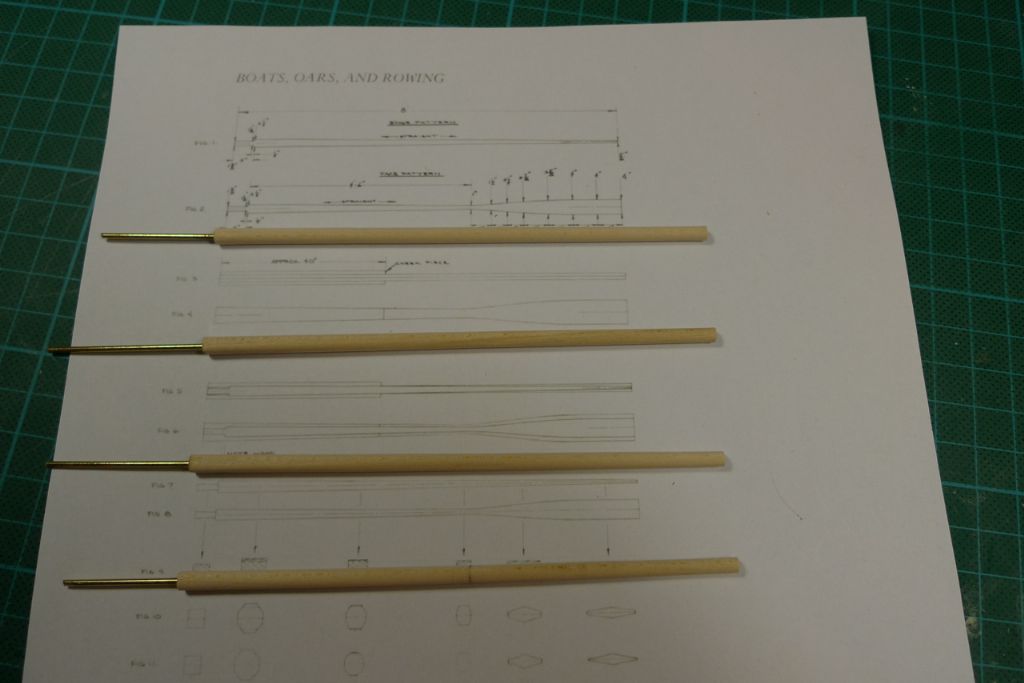
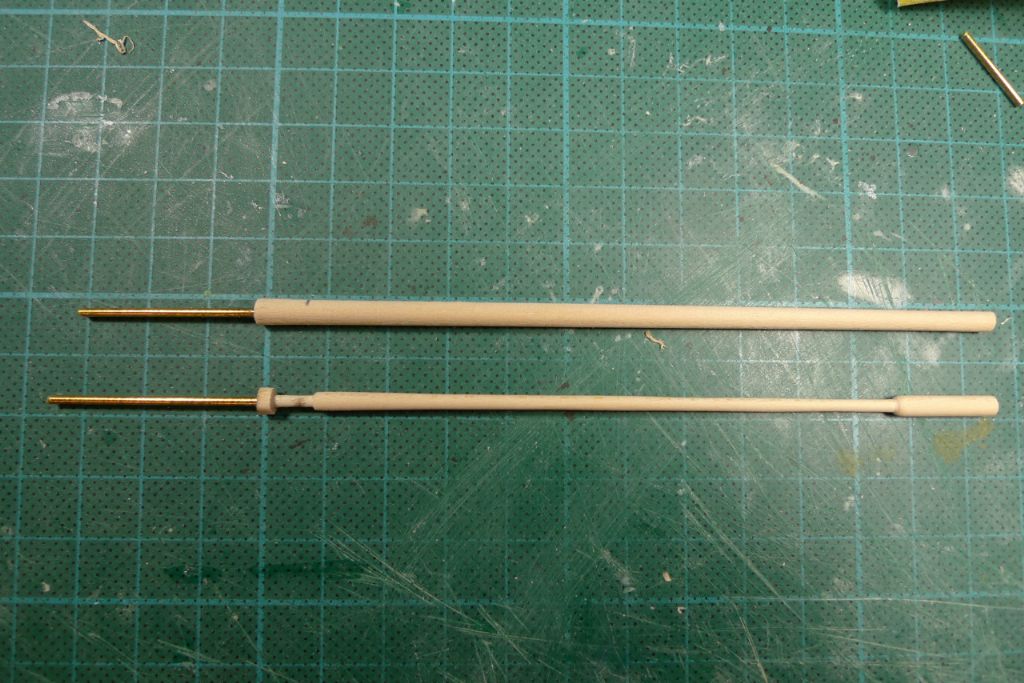
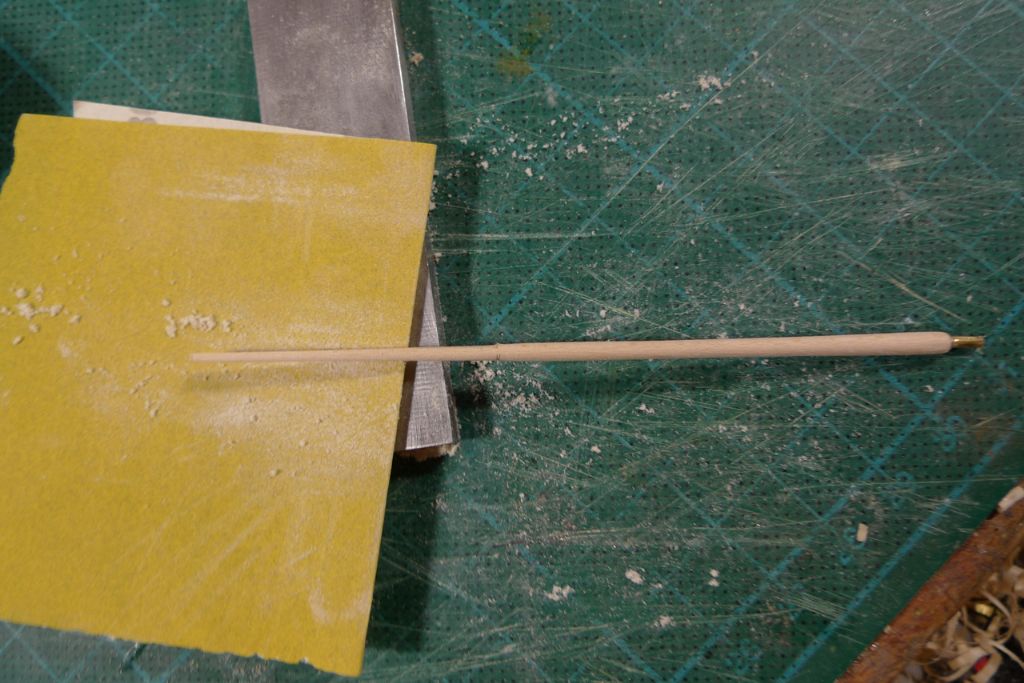
… and each spar in turn set up in the micro lathe and turned round, with a light taper, using sandpaper rather than a turning tool. The point of the glued-in bit of brass wire is of course to allow a proper, sufficiently strong and sufficiently well-centered set-up in the lathe.
Turning tools should come into play at the next stage, though, when I shall attempt to turn these blanks down to the correct dimensions to fit the oar construction plan seen here, which I managed to find after some googling.
I intend the finished oars to be slightly shorter than the blanks – 102 mm in total, which corresponds to 8' oars in real life, while the blanks are currently 125 mm long.
To be continued …
/Mattias
Edited By Banjoman on 31/07/2015 21:31:42
Edited By Banjoman on 31/07/2015 21:33:15
2 August 2015 at 07:55 #59520Amy jane September
Participant@amyjaneseptember49770Always inspiring, good sir!
3 August 2015 at 08:58 #59537Banjoman
Participant@banjomanThank'ee, ma'am, for your kind words

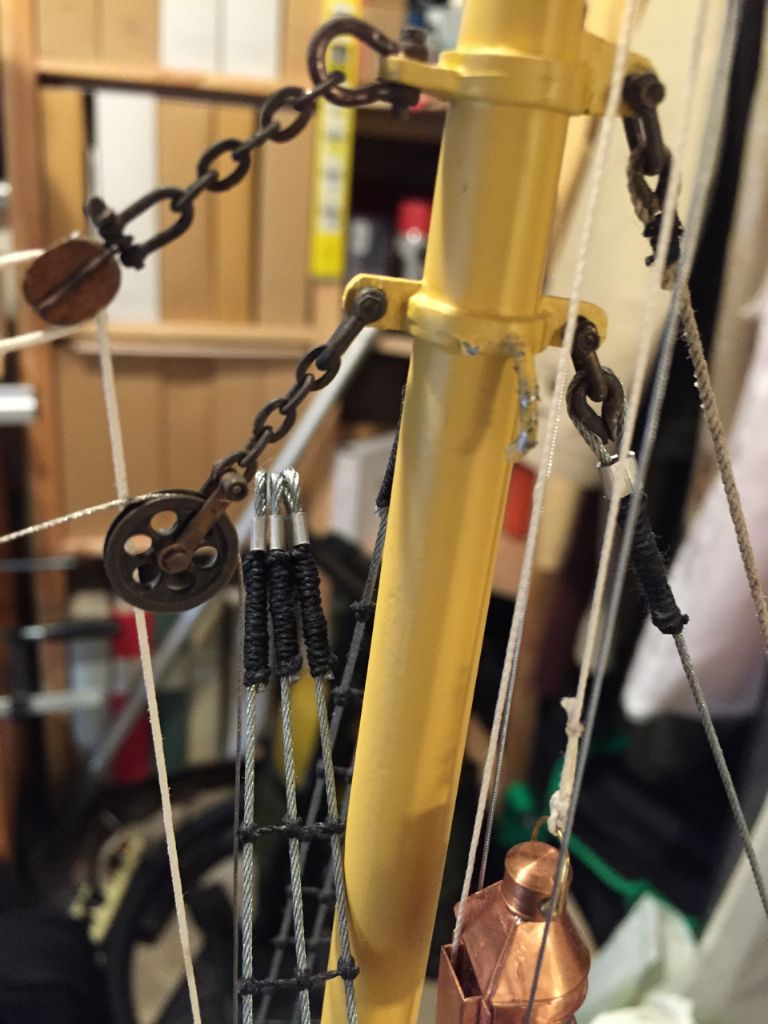
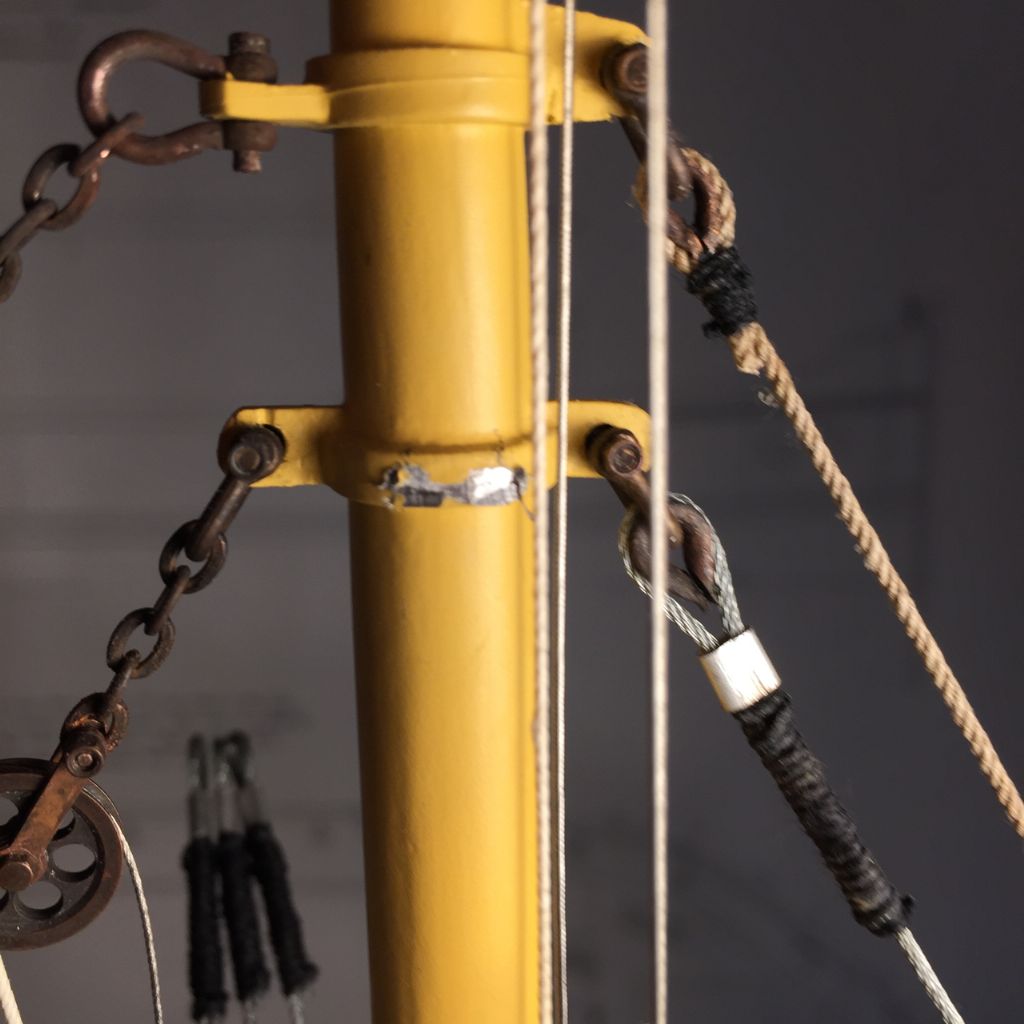
I'm sad to report that Eilean Mòr suffered some minor damage as I took her out to the pond for a sail yesterday afternoon — I think the mast top may have snagged briefly when I put her into the back of the car, but in any case the port shroud spiderband eye snapped, and the tops of the port shrouds thus came loose.
More fool me for putting my trust in a white metal fitting — I really ought to have known better, and to have modified the spiderband already while making up the mast. At that point, it would of course have been so much easier, with the mast out of the ship and all, but I dare say it'll still be fixable. If absolutely necessary, I could still take the mast out of the ship — all the rigging is actually working, and attached with shackles or similar means that can be opened or dissassembled; nothing is permanently fixed.
I would, however, prefer not to have to go to all that trouble, so shall try to carry out the repairs with mast and rigging in situ.
3 August 2015 at 21:33 #59549Banjoman
Participant@banjomanFirst off, a wee correction to my posting of this morning: it was of course the starboard shroud eye that snapped off from the spiderband, and not the port one. Apologies for the confusion! Not that it matters, one way or the other, but still …
Any road, tonight I worked out a solution to the problem!
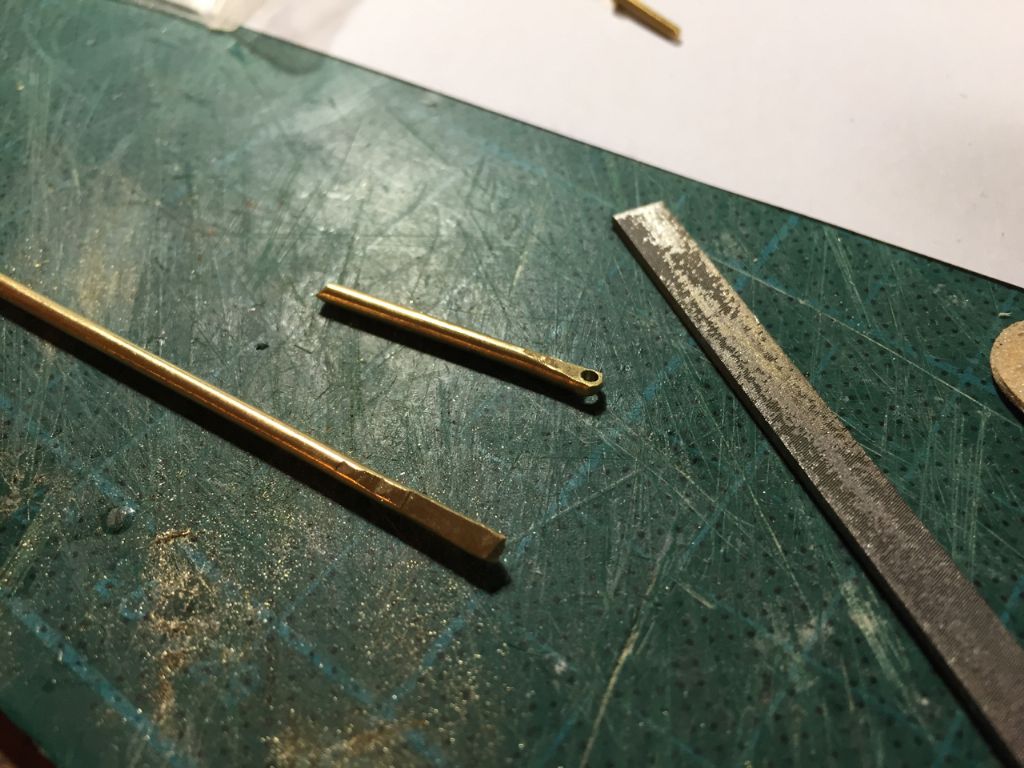
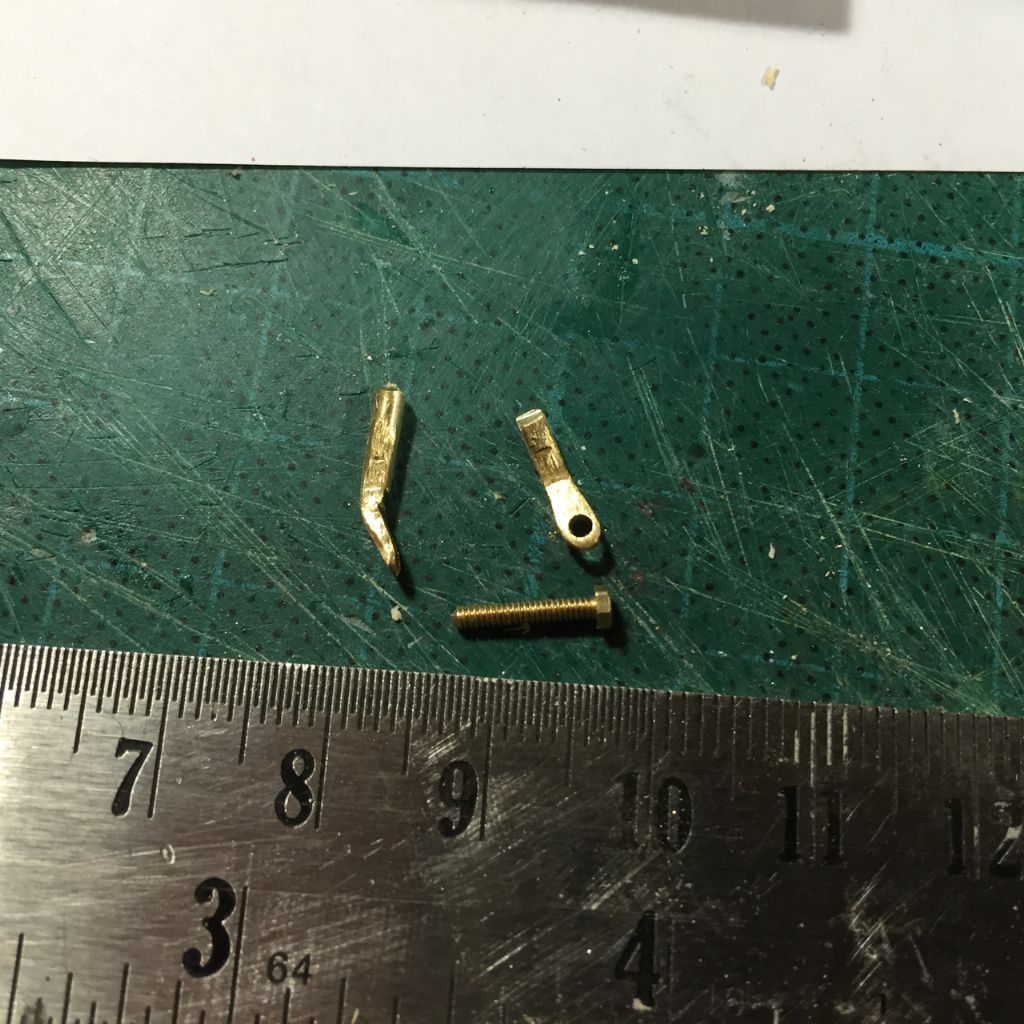
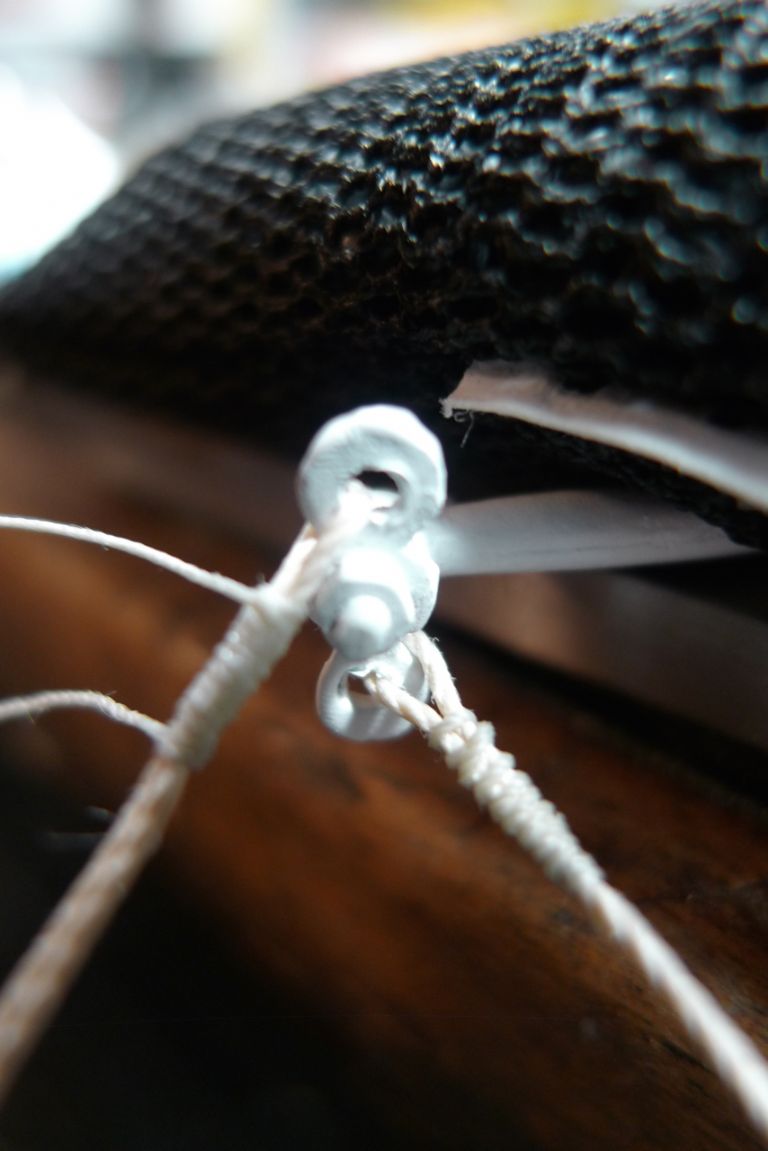
First off, I flattened the end (mildly annealed) of some 2 mm brass wire, drilled a 1.6 mm hole into the flat bit, and then trimmed away the excess material …
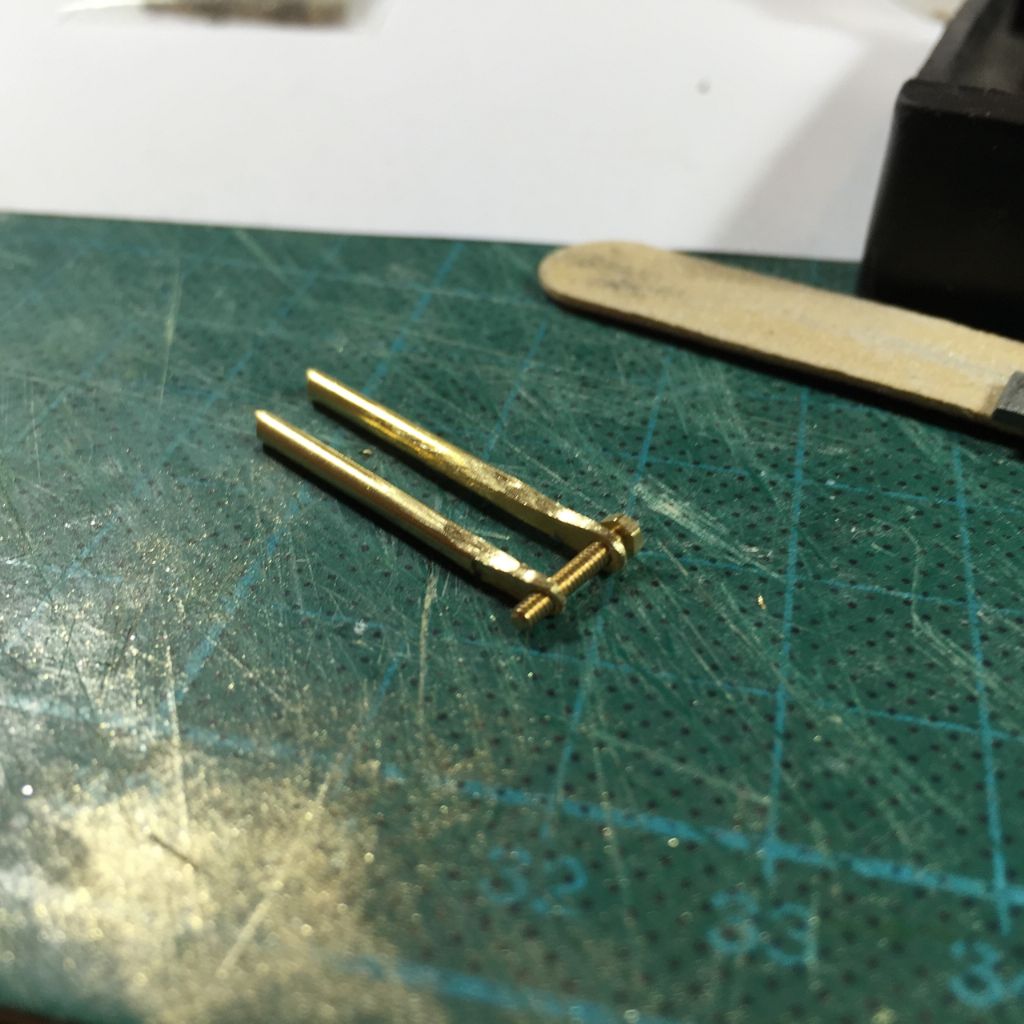
… so that I had two ears with eyes through them, suitable for taking a 10 mm long RB Model M1.6 micro bolt.
Next, I cleared away the damaged white metal, and drilled two guiding holes into the mast at the appropriate places. Rather than trying to drill the holes parallell with each other, I set them both at +/- 90 degrees to the mast, as this was rather easier and also (more importantly) allowed me to go deeper into the mast.
The two holes were then gradually enlarged to 2 mm, and their depths plumbed using the two pieces of brass wire …
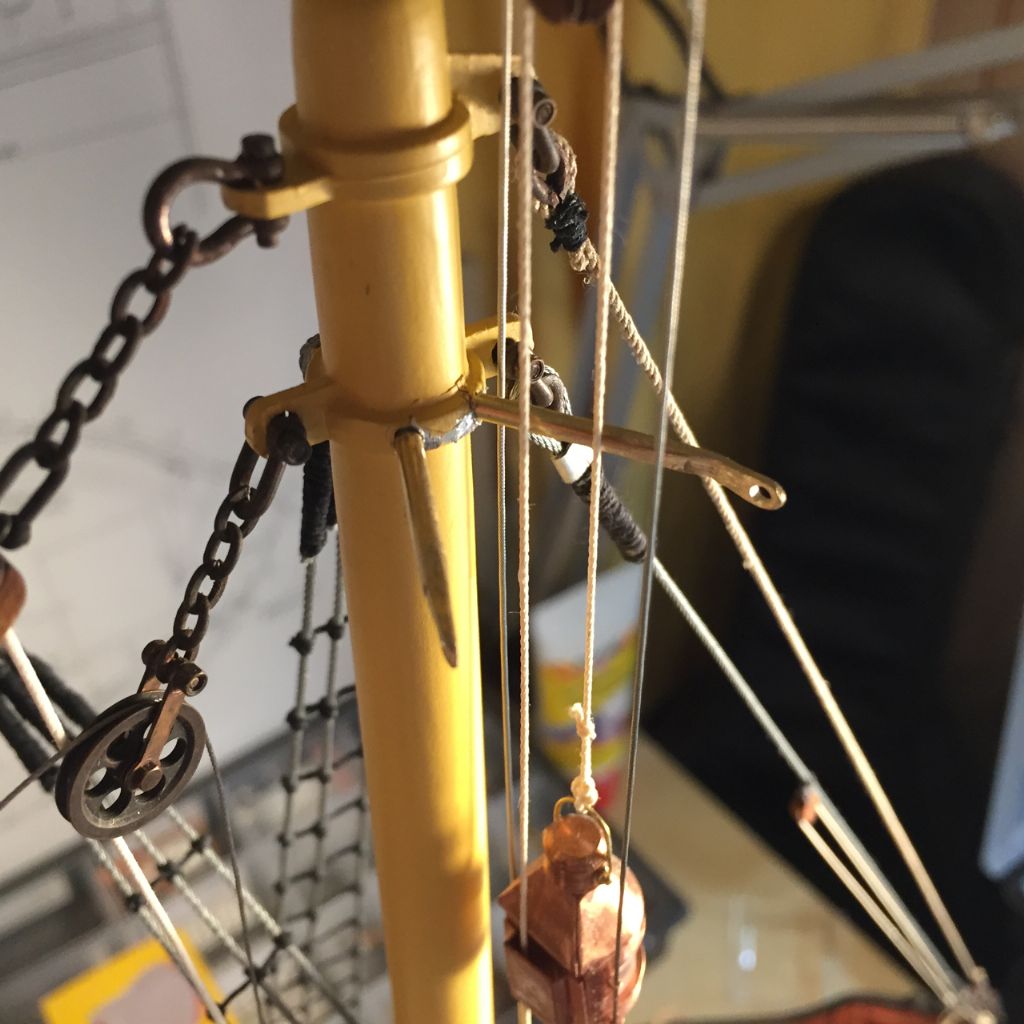
… the ends of which were trimmed away, and the ears set at suitable angles …
to extend, parallell to each other, from the mast. They were then fixed in the their holes using 24 hour epoxy, with the bolt set in place to ensure a proper and stable set-up while the epoxy goes off.
Tomorrow, I will hide the joints between the ears and the spider band with some Milliput, to give it that integral look. Once that has set too, the ears will of course be painted to match the mast and the spiderband, while the nut-and-bolt will be chemically blackened.
The operation shall of course have to be repeated on the port side, but that can wait a little; the important thing is that the starboard shrouds can go back in place ASAP.
I'm still kicking myself, though, for not thinking of this while I was making the mast in the first place, given that I was rather unhappy back then about not having the tops of the shrouds detachable from the mast, as I will have now. Oh well – just goes to prove that yesterday's accident probably was all for the best in this, the best of all possible worlds

To be continued …
/Mattias
Edited By Banjoman on 03/08/2015 21:33:39
Edited By Banjoman on 03/08/2015 21:34:15
Edited By Banjoman on 03/08/2015 21:34:47
Edited By Banjoman on 03/08/2015 21:35:21
Edited By Banjoman on 03/08/2015 21:36:06
5 August 2015 at 19:27 #59608Banjoman
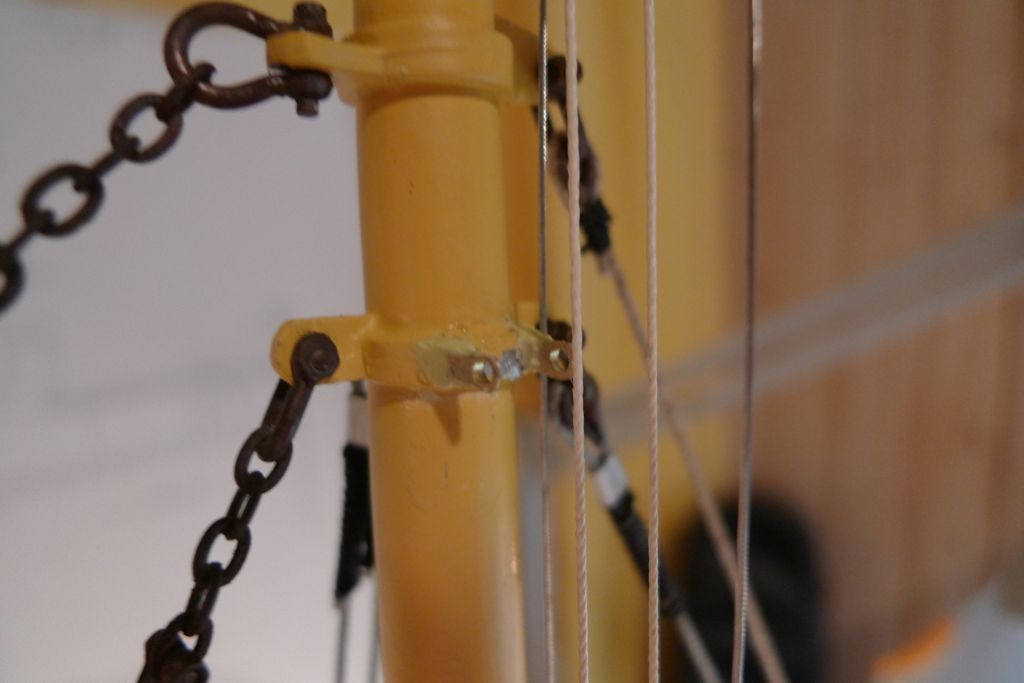
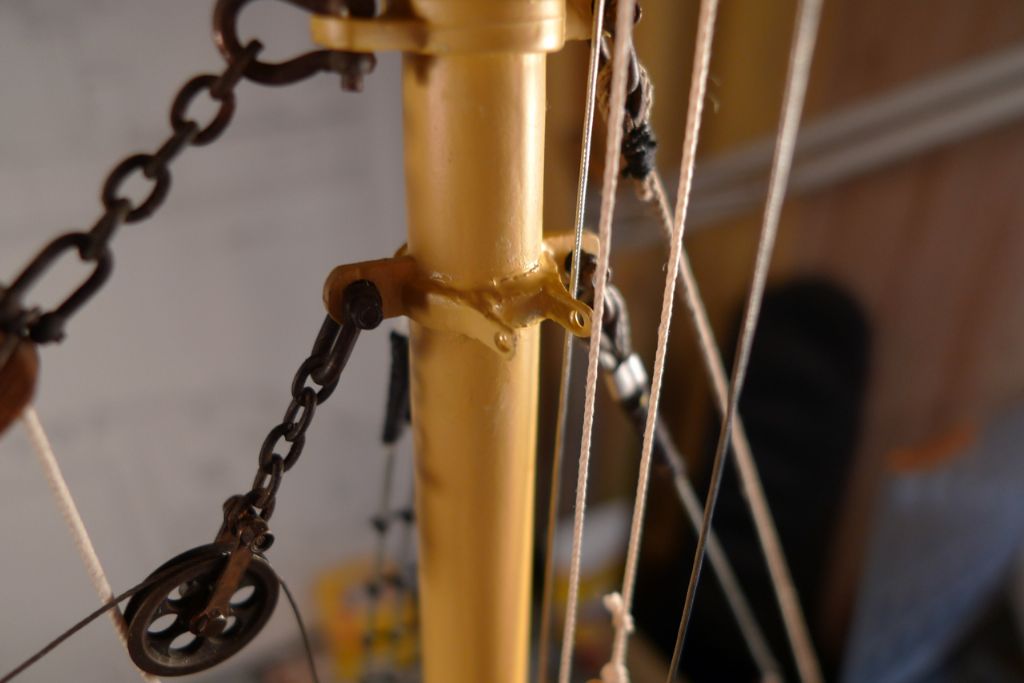
Participant@banjomanWell, once the epoxy had gone off completely, I added Milliput shoulders to the lugs …
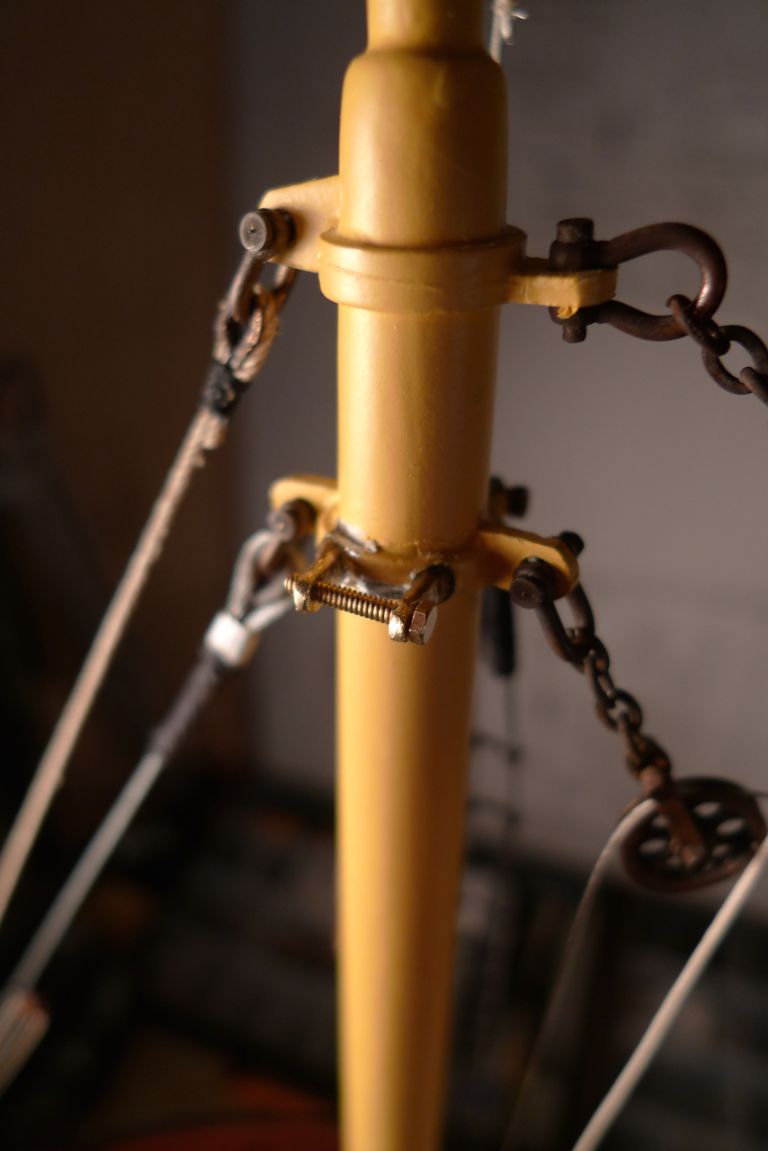
… left that to go off in its turn, after which the whole thing was painted mast yellow …
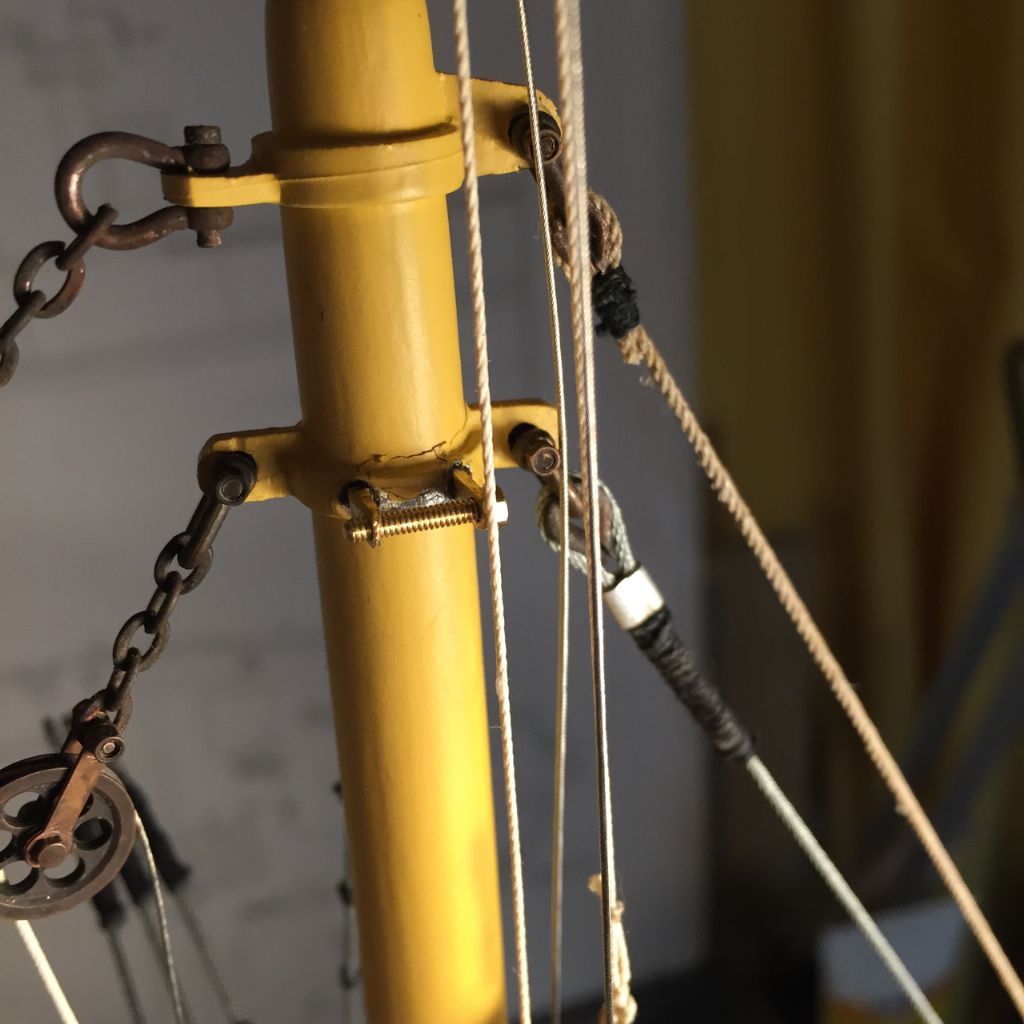
… the bottle screws slackened off a bit, the shrouds reattached with a M1.6 nut-and-bolt …
… and the bottle screws tightened anew! Repair completed, and, I would even say, not to "as good as new" but to "rather better than new"! Yay

The operation shall of course be repeated on the port side, but at a slightly later date …
To be continued …
/Mattias
Edited By Banjoman on 05/08/2015 19:28:43
Edited By Banjoman on 05/08/2015 19:29:42
5 August 2015 at 19:51 #59609Banjoman
Participant@banjomanBefore tackling the retackling of the port shrouds, though, I have other fish to fry, namely the dinghy oars, for which I'd managed to make up rough blanks before the shroud incident occurred.
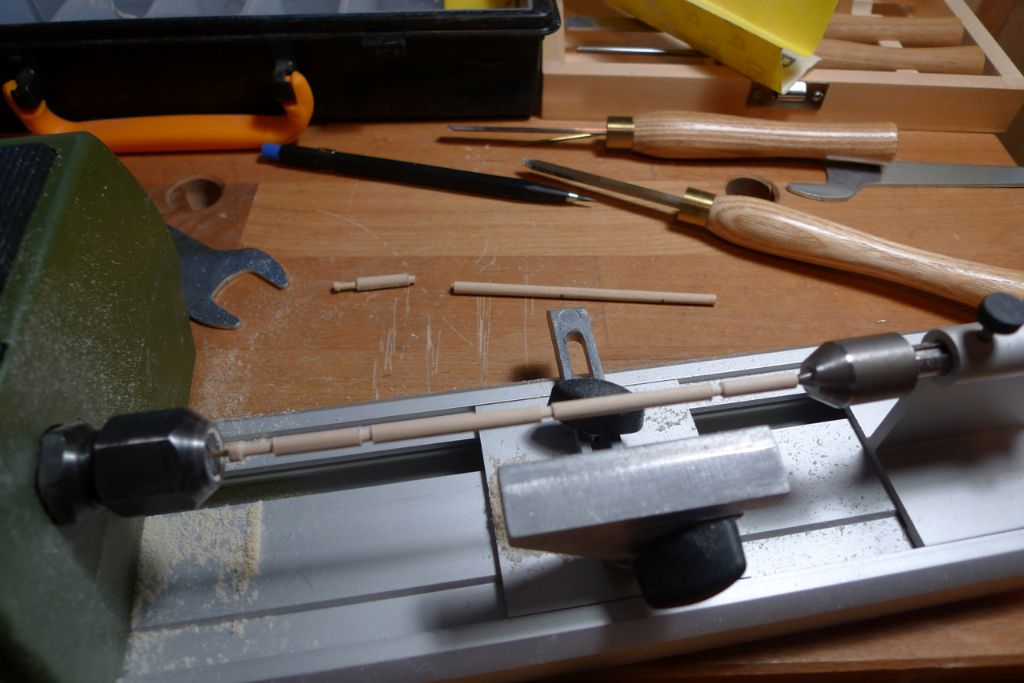
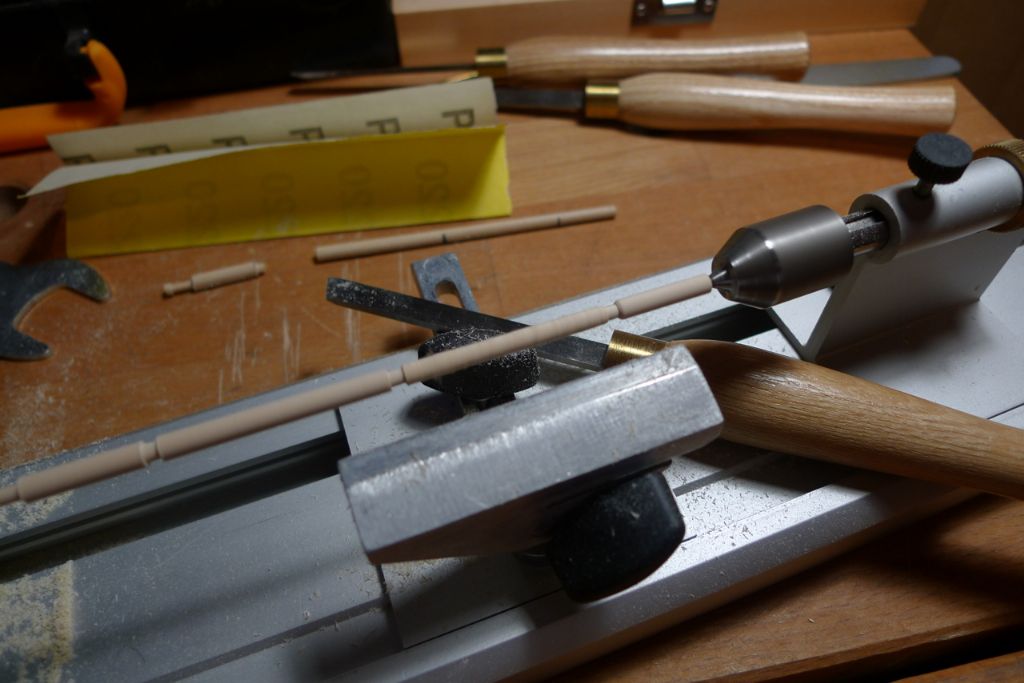
Turning these rough loom blanks down to proper dimensions is a fairly touchy job, given the required diameters in relation to the length of the blank being turned – witness the broken one just behind the lathe! A tad too much pressure with the tool, and snap!
Anyway, to make sure that I get all four looms to the same dimensions within a few tenths of a millimeter, I begin the turning job by cutting a couple of strategically placed grooves straight down until the required thickness is acheived.
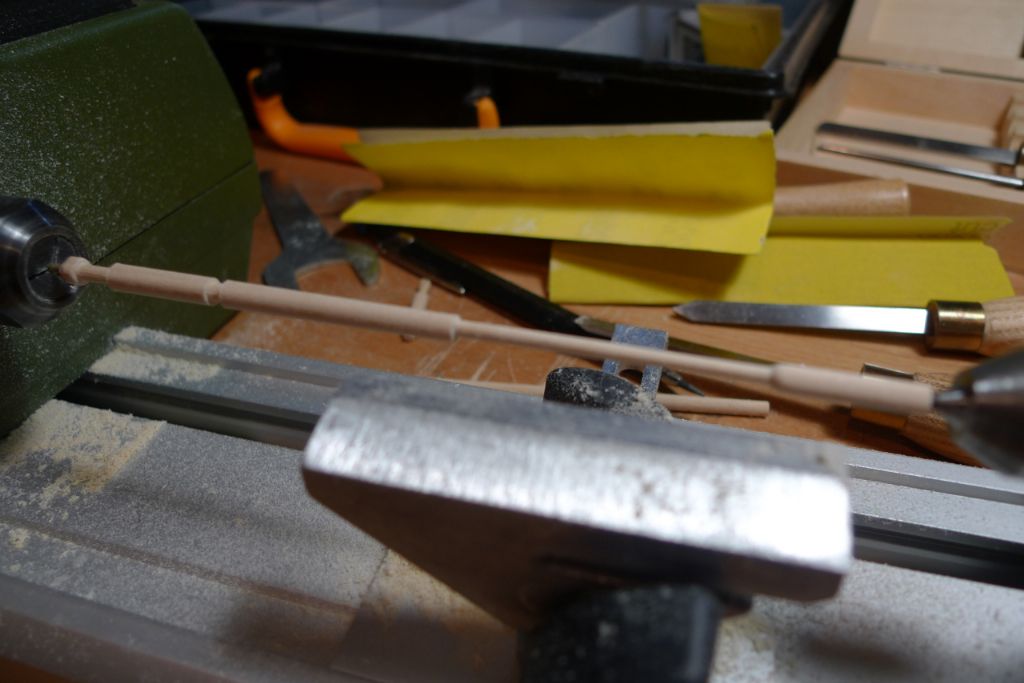
Using these grooves as reference points, I then work on one section at a time, starting from what will be the narrowest end (where the blade will go on), and slowly, slowly, slowly (a couple of hundredths of a millimieter at a time) bring that section down to size, alternating between the tool and different grades of sandpaper.
It is then on to the next section …
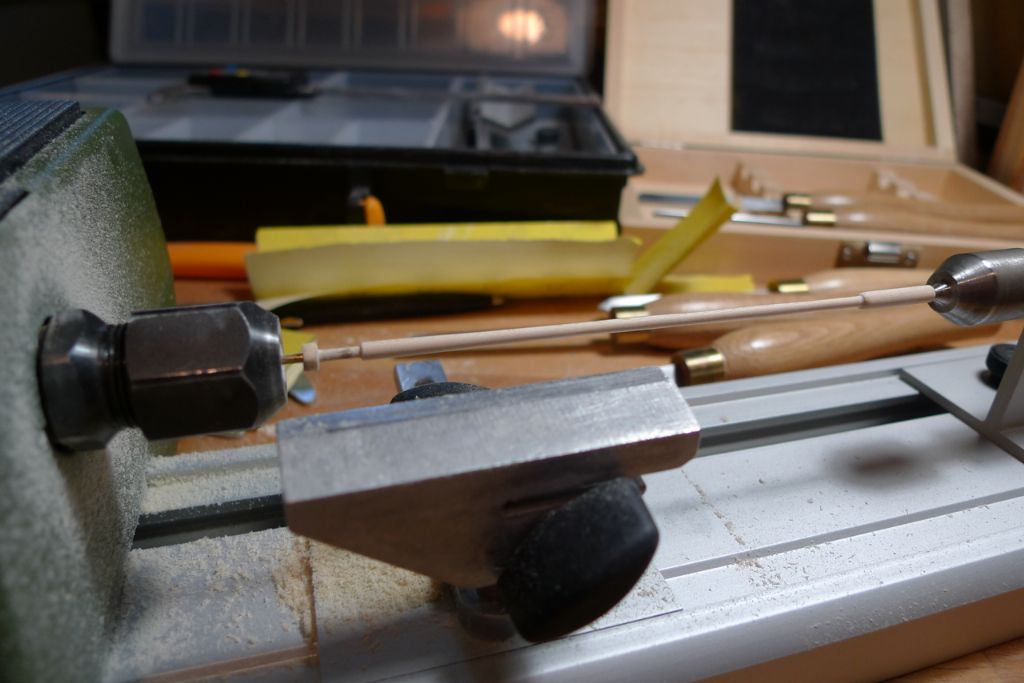
and the next, after which the whole length is very carefully smoothed down, and any remaining lumps and bumps evened out. The final job is taking off all but the last tenth of a millimeter around the brass wire, from which the handle will be formed …
… and the finished loom blank can be removed from the lathe after well over an hour of continous turning.
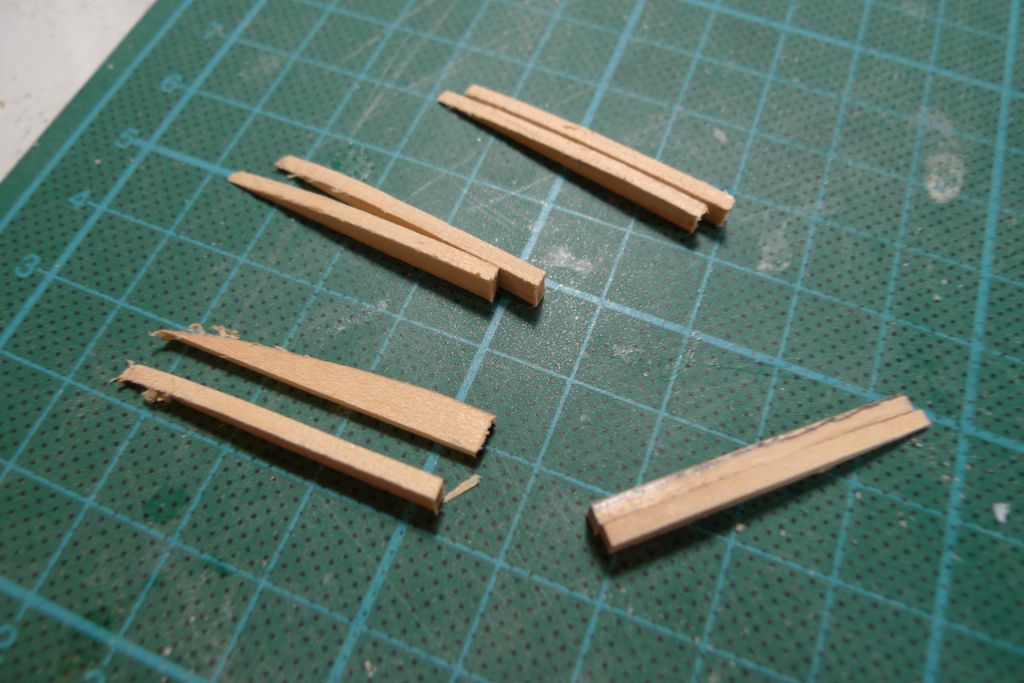
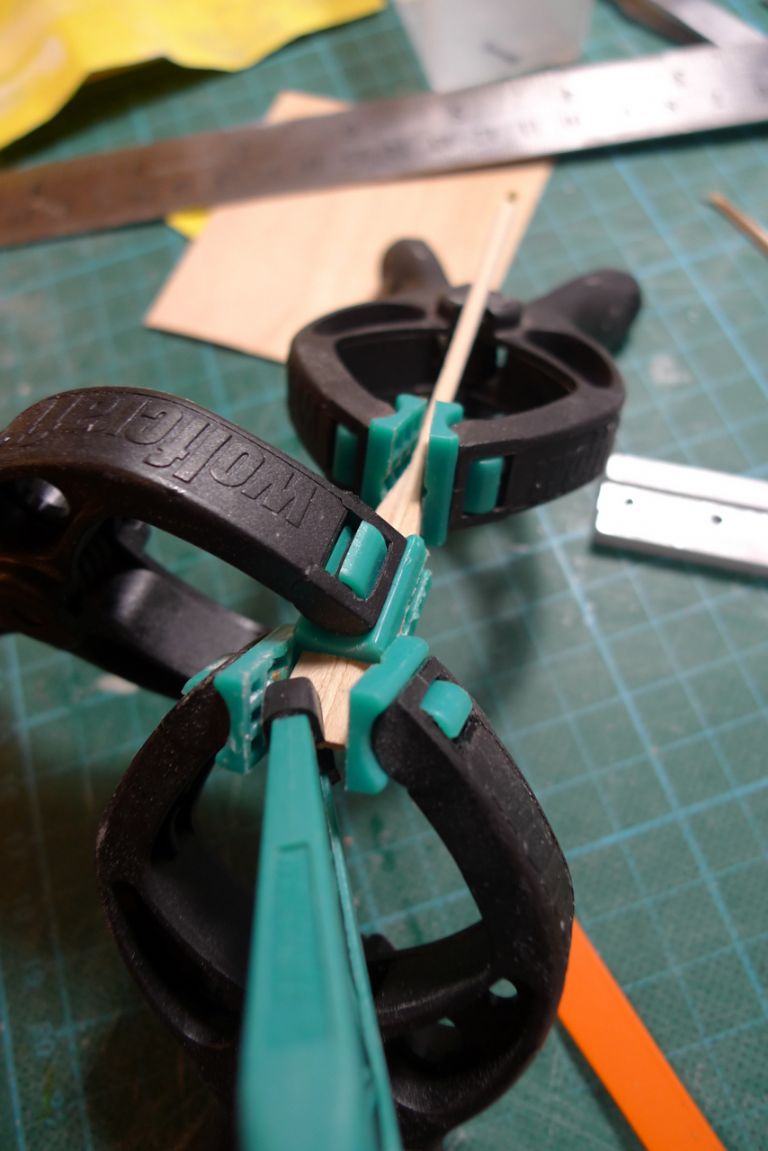
Together with the rough loom blanks, I also cut out four pairs of blade blanks from some 2 mm maple sheet …
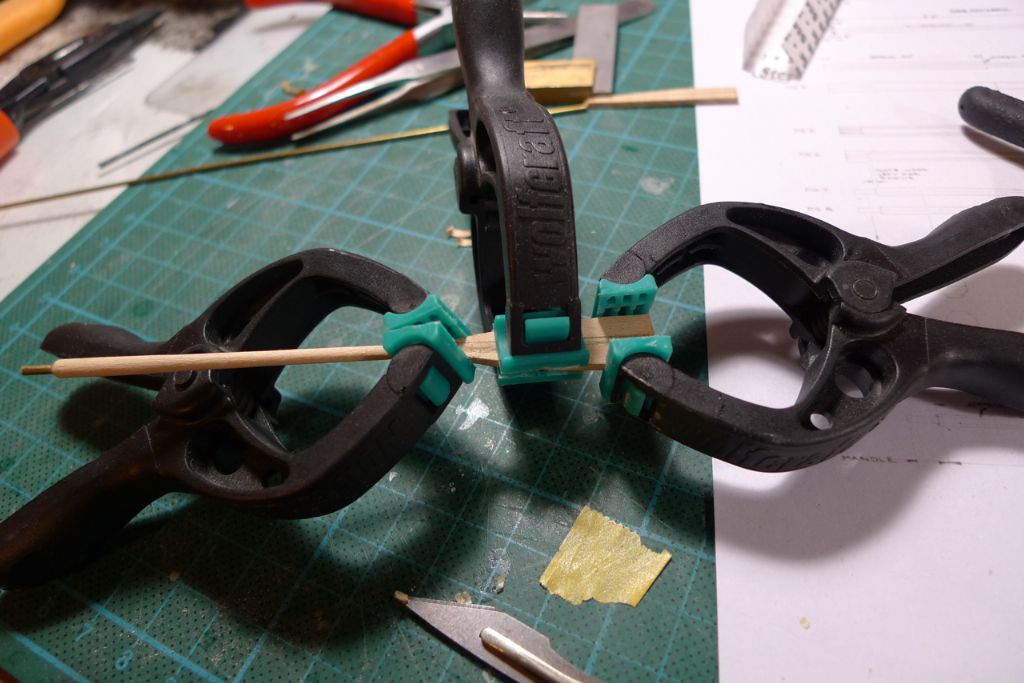
… and then glued two of these to a finished loom blank.
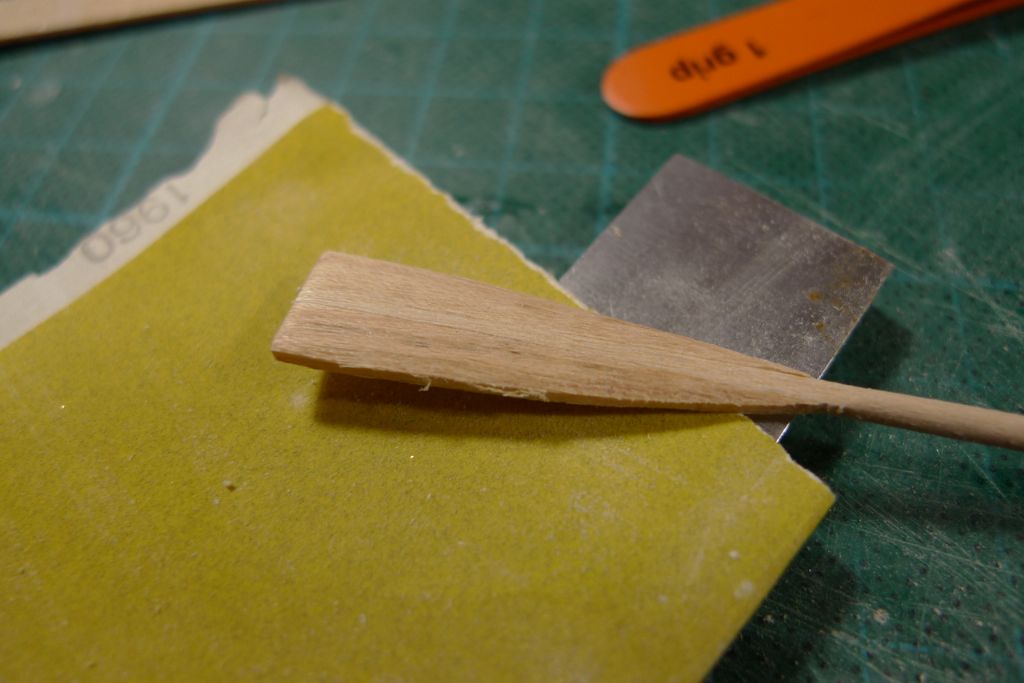
Once the glue had set properly, the blade was gradually sanded down to a rough, final profile. I will leave the last bit of sanding down until I have all four ours available, so that I can try to make them as like one another as I'm able.
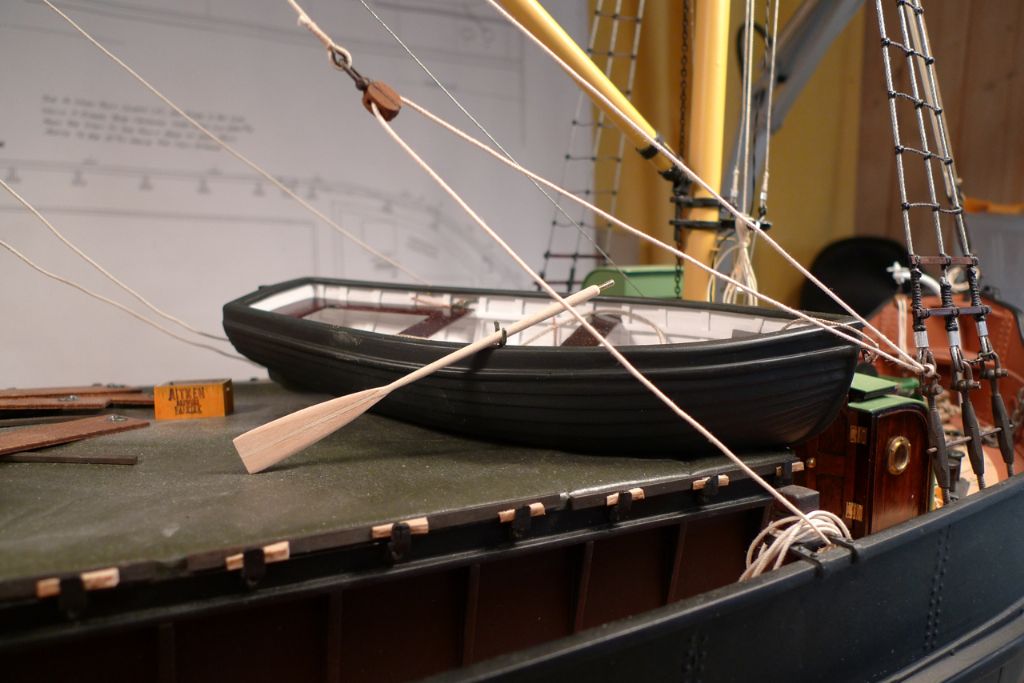
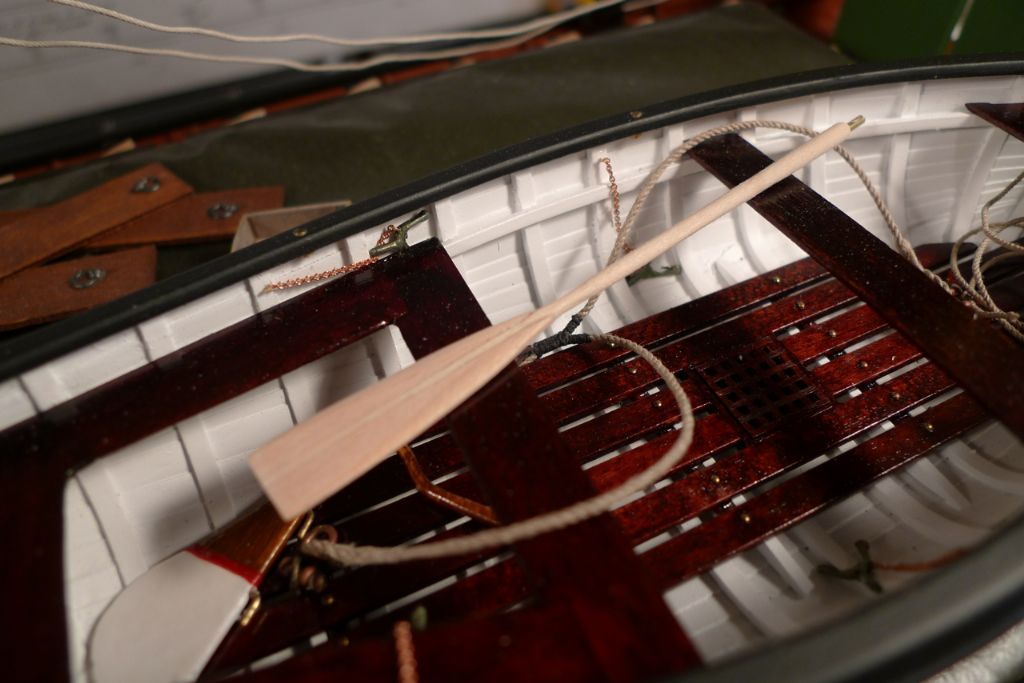
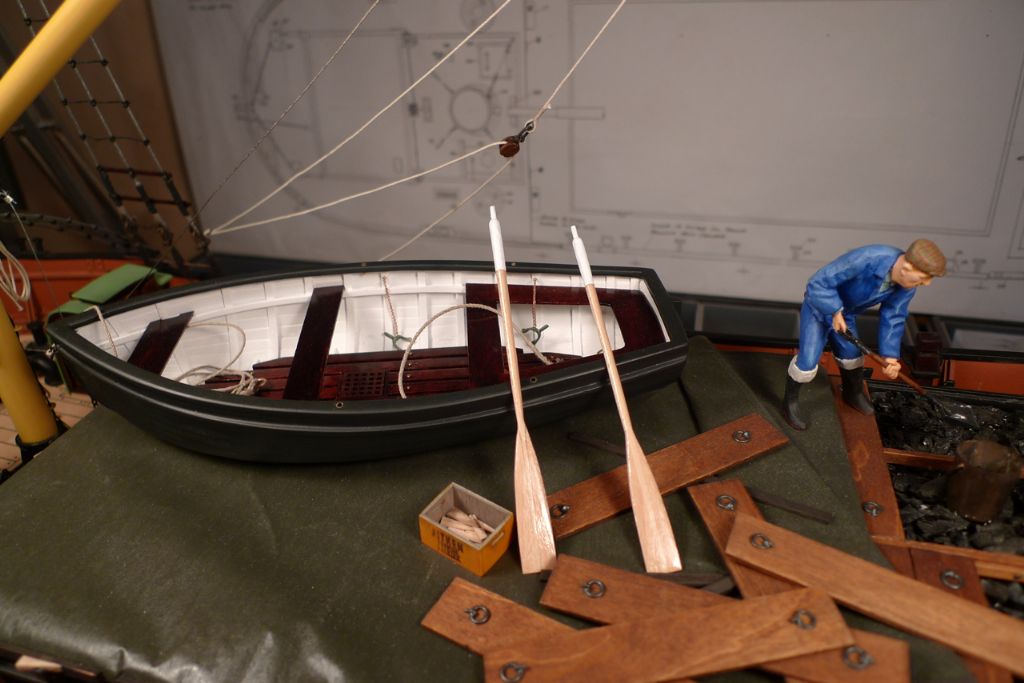
In the meanwhile, though, it is at least beginning to look like an oar; here resting in a rowlock …
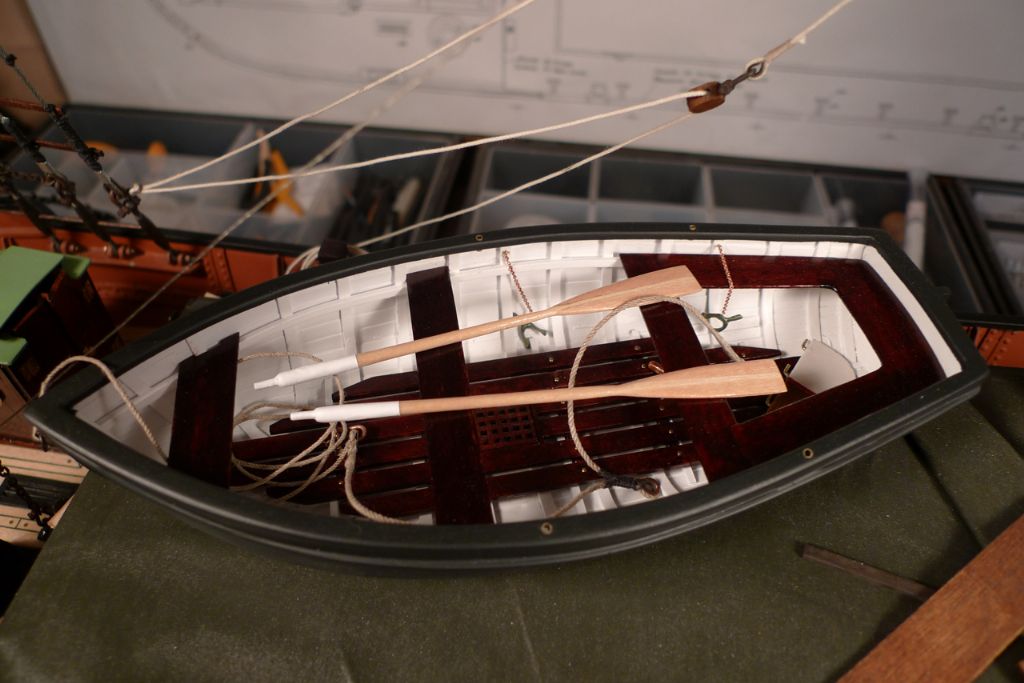
… and here stowed across the thwarts.
As can be seen, the handle is made up from brass wire rather than wood, as this ensures that all four handles will have exactly the same diameter. Although I plan to just simply clear varnish (well, perhaps with a slight, yellowish tinge to it) the oar, I shall therefore paint the handle and maybe the handle end of the loom, too.
To be continued …
/Mattias
6 August 2015 at 17:56 #59623IAN_I
Participant@ian_iHi Banjo…
Out standing work, a treat to look at.
Best regards,
Ian
7 August 2015 at 21:37 #59645Banjoman
Participant@banjomanThank you ever so much, Ian, for your kind words!

Today's trick at the lathe ended in one broken blank after the other – from the finger tip response, I 'd say my tools are getting a tad dull, so I will have them reset before I make any further attempts to produce oars # 3 and 4.
In the meanwhile, I have a succesfully turned blank from the other day for producing oar # 2 – and of course, unless one were building a gondola or a boat propulsed by sculling, two oars sort of is the minimum minimorum …
Anyway, the second blank was sanded flat on two faces at the blade end …
… and the blade blanks secured.
Once the glue had set, the blade was first roughly shaped on a sanding drum in the Dremel …
… and then gradually sanded down and shaped, using some 600 grit sandpaper.
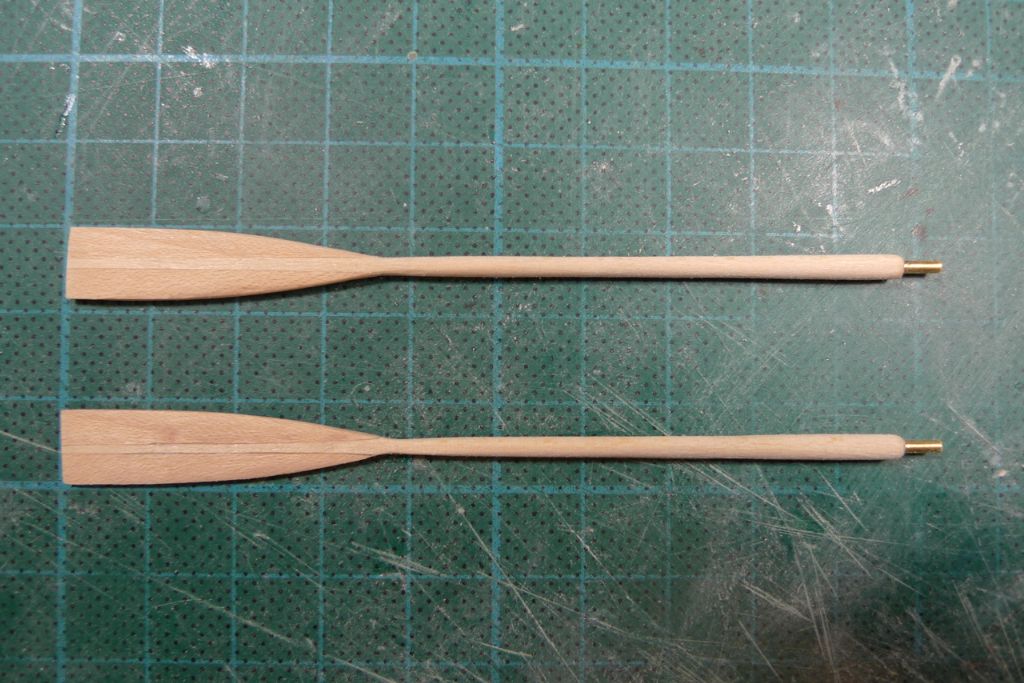
The two oars were then given several coats of clear varnish …
… and the handle ends picked out in white.
It remains to add the (imitation) leather bands around where the oars go inte the rowlocks … I'm thinking about painting a couple of small pieaces of Tamiya masking tape, but we'll see …
To be continued …
/Mattias
Edited By Banjoman on 07/08/2015 21:38:27
Edited By Banjoman on 07/08/2015 21:39:05
10 August 2015 at 15:52 #59673Banjoman
Participant@banjomanWhile waiting for something or other in the oar making process to set or dry or whatever, I took in hand a small job that I've been planning to get sorted, namely to add a cleat to the quartederdeck bulkhead, so that the tie-down rope for the whip can be made fast there rather than to the stormrail on engine room fore bulkhead; this way, I won't have to slacken off the whip each time I want to remove the engine room to get at the on/off switches for the motor and the r/c …
With the oars finished, I went on to cut down the port shrouds, i.e. to cut away the white metal eye to which their top ends were made fast …
… after which I made up and glued in two lugs, similar to those I'd already done on the starboard side.
When the epoxy had gone off, the lugs were given proper shoulders from Milliput, and when this had set the whole thing was painted.
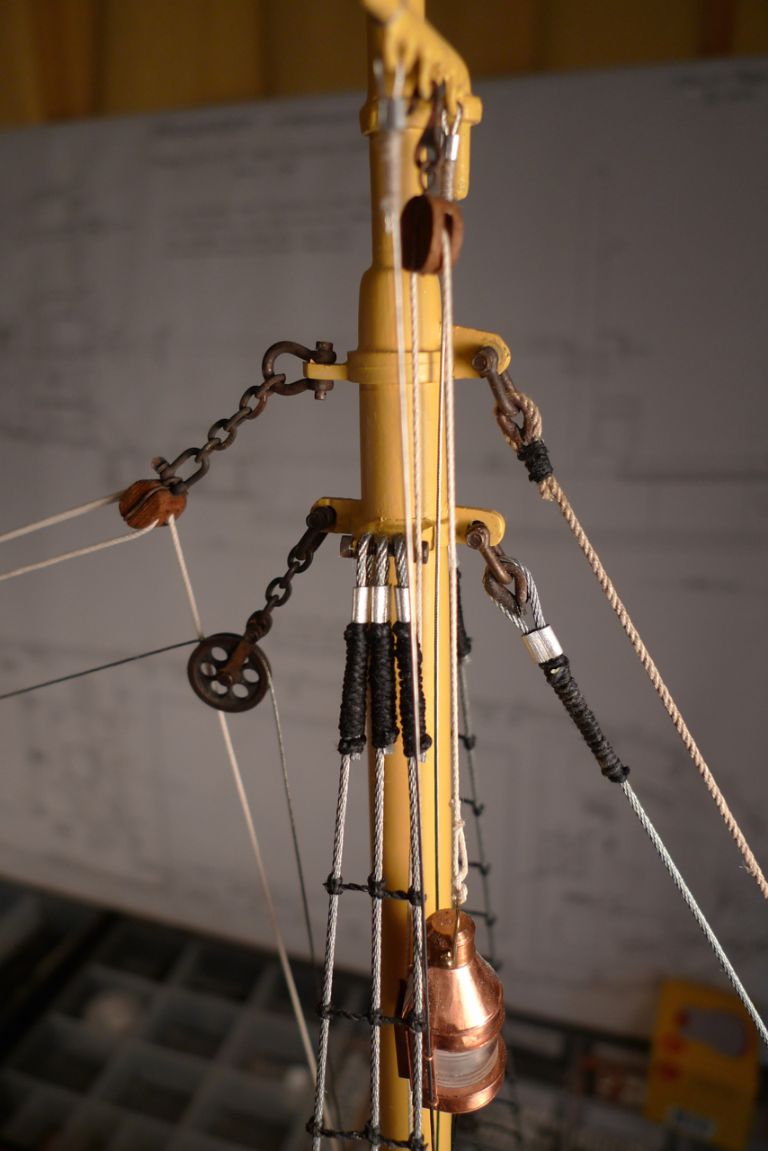
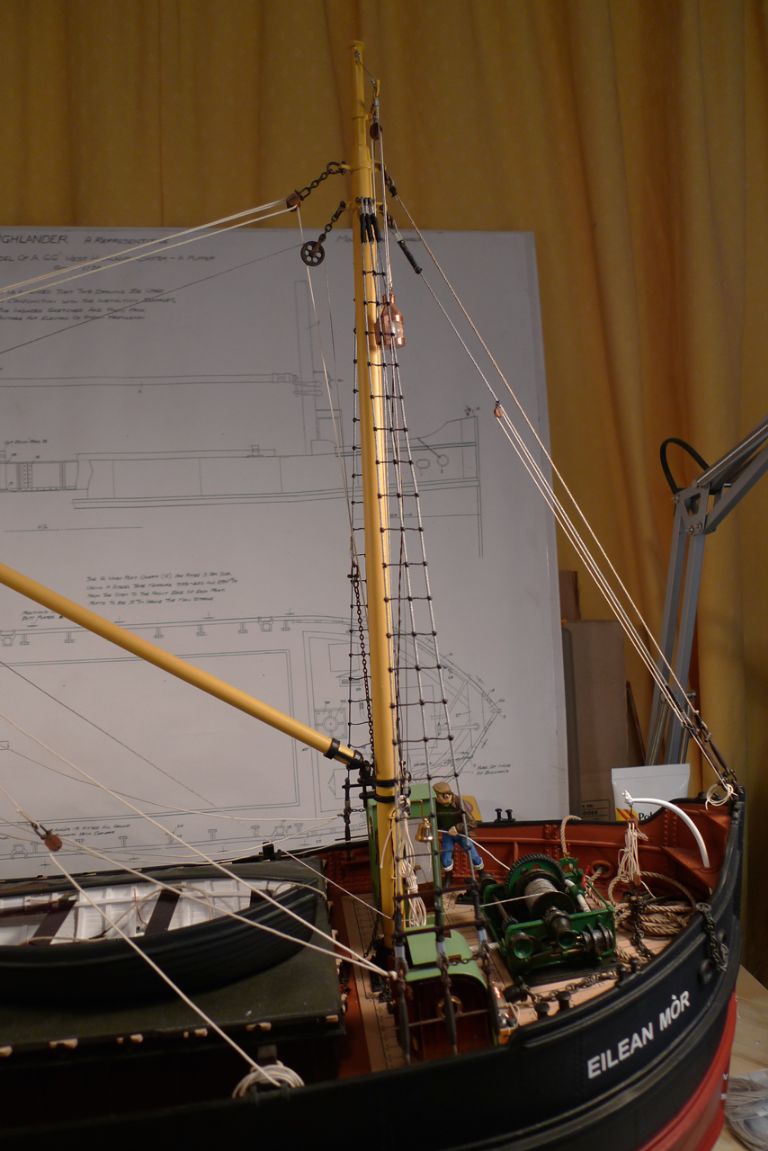
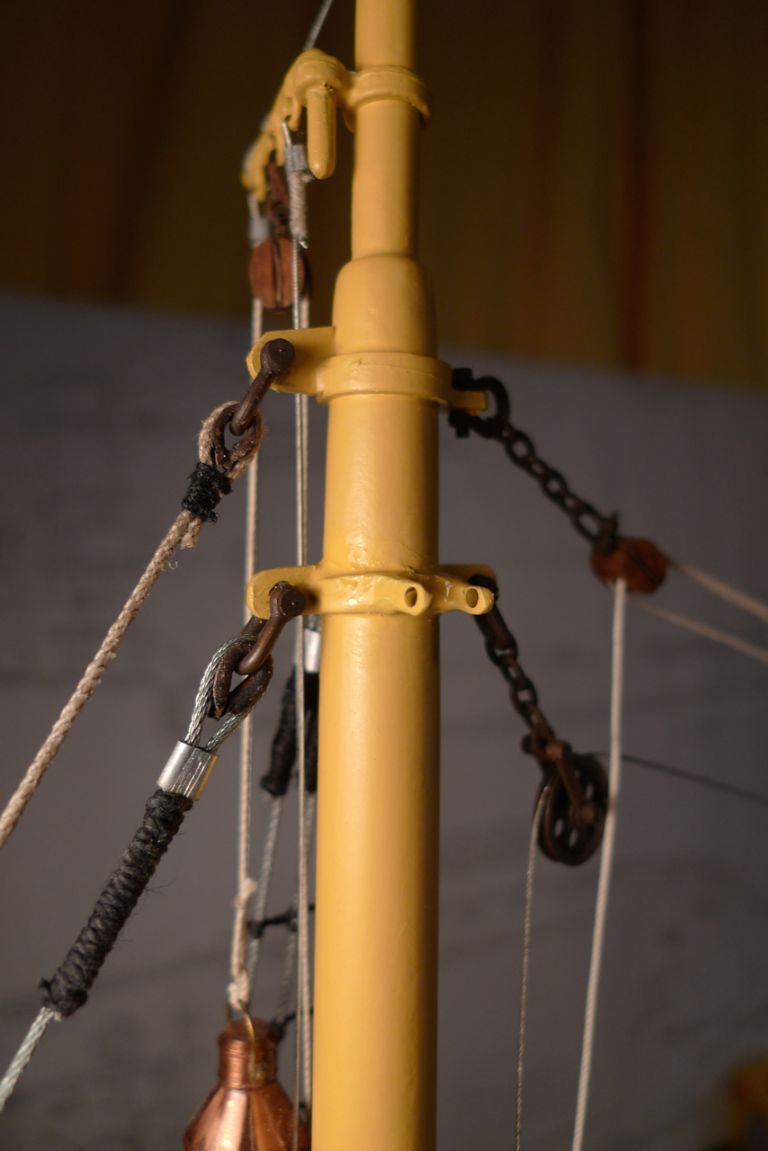
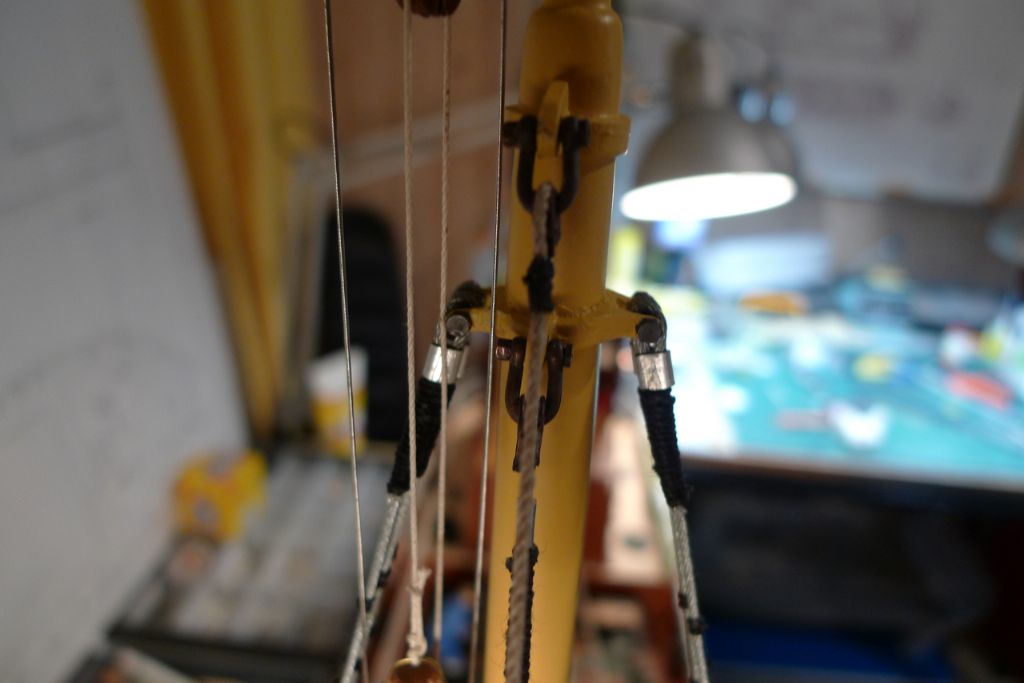
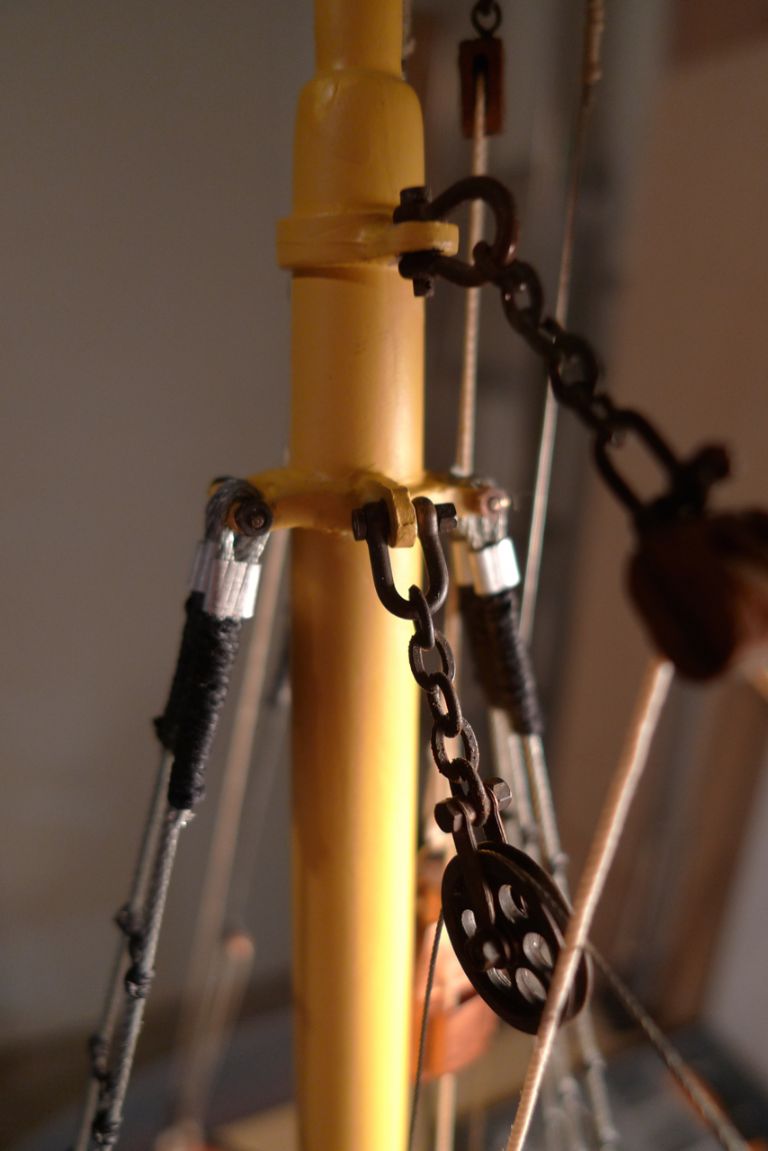
With the paint dry, the port shrouds could again be set up; here the contraption is seen from before the mast …
… here from aft …
… and here from over the port bows.
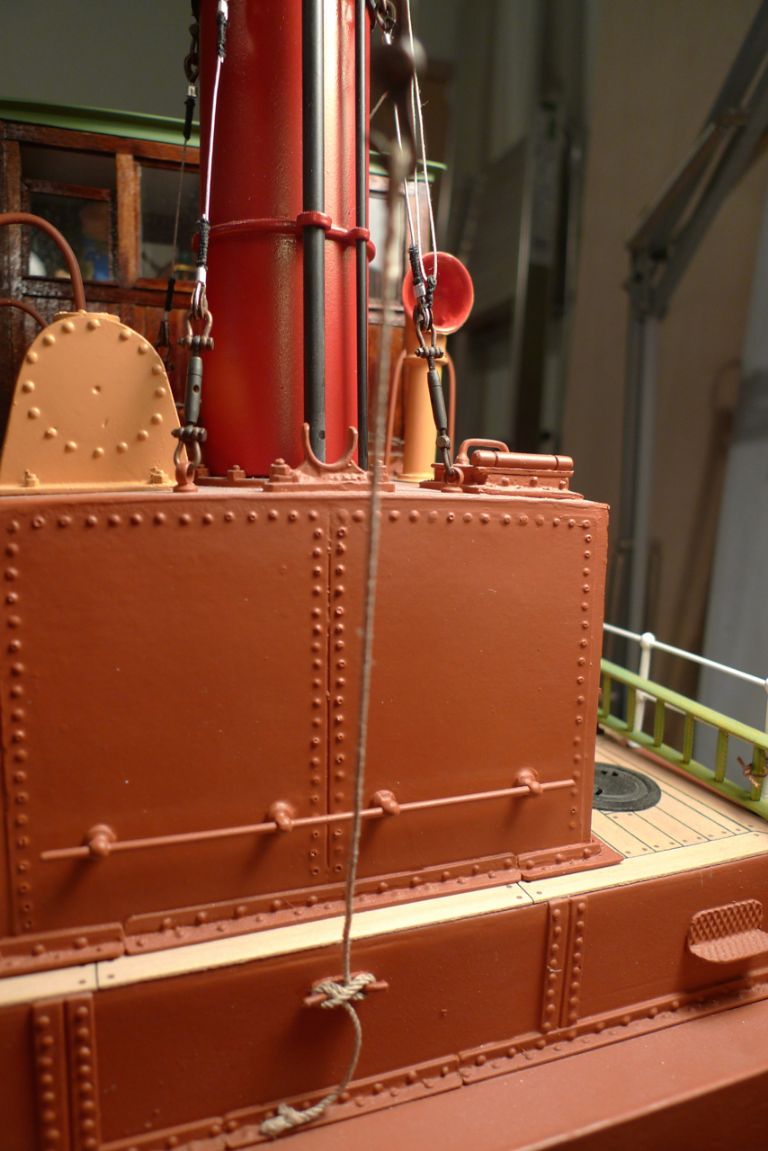
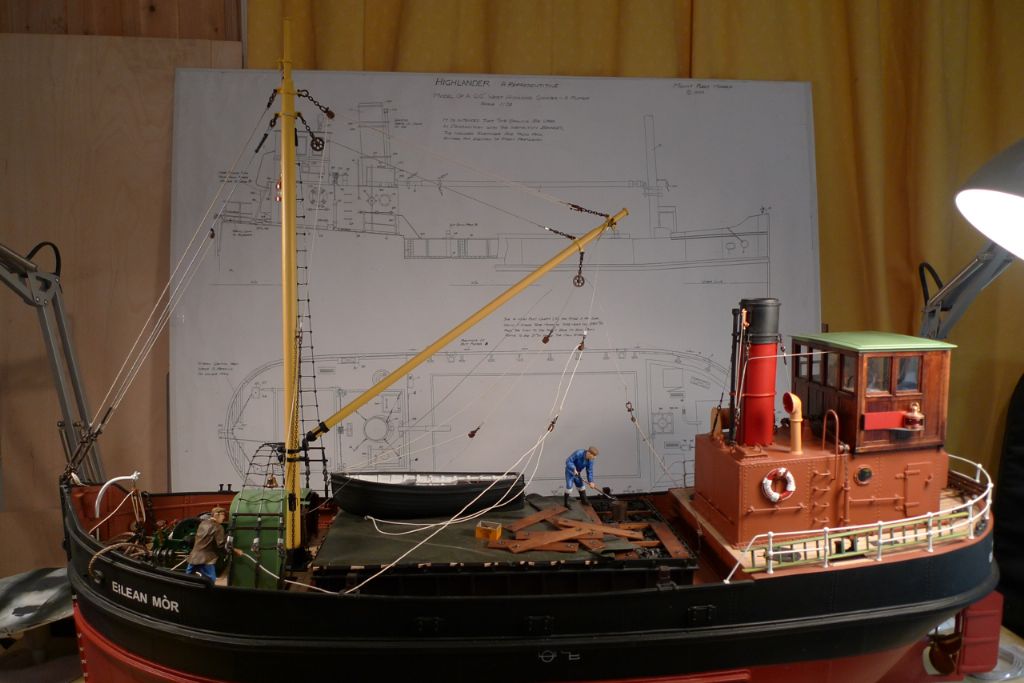
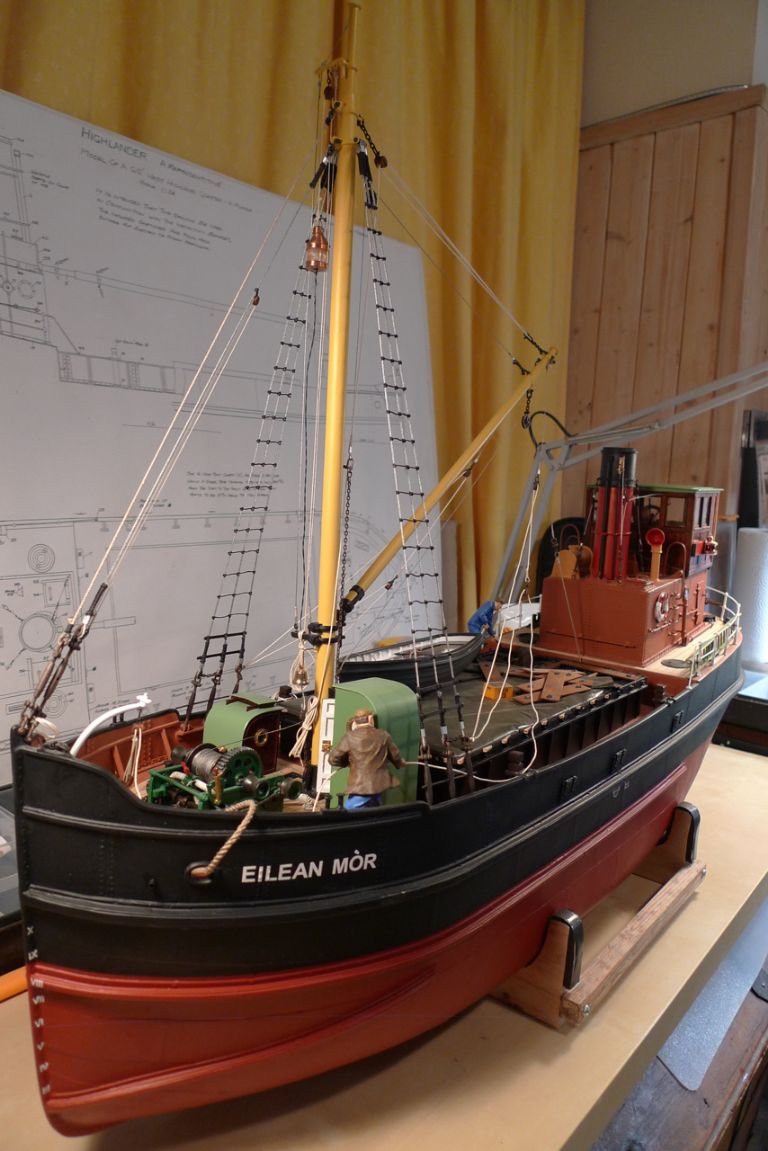
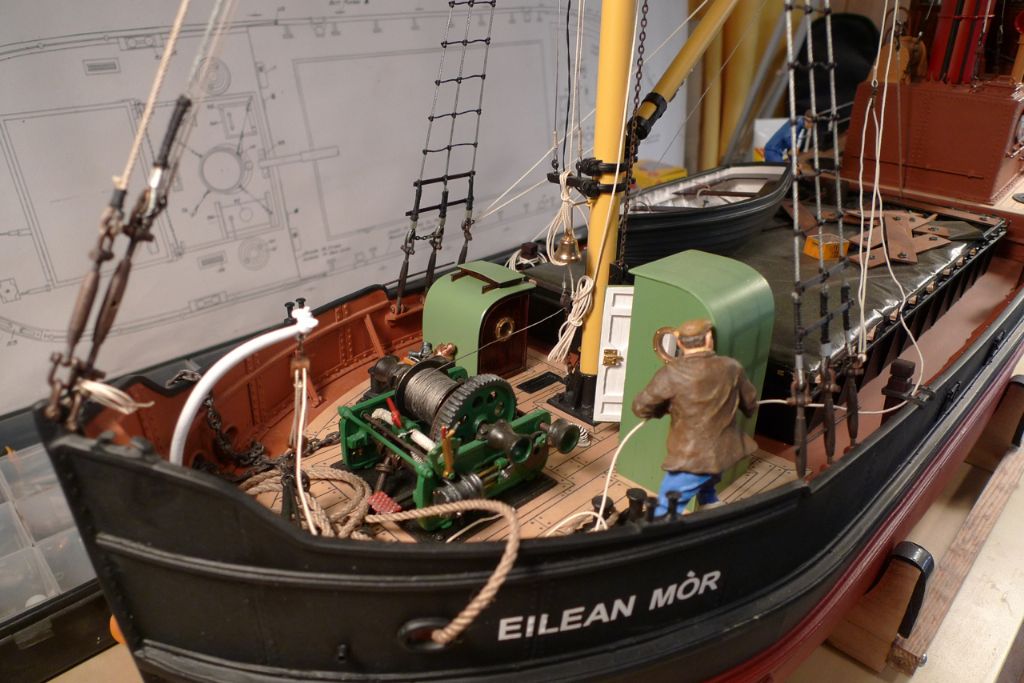
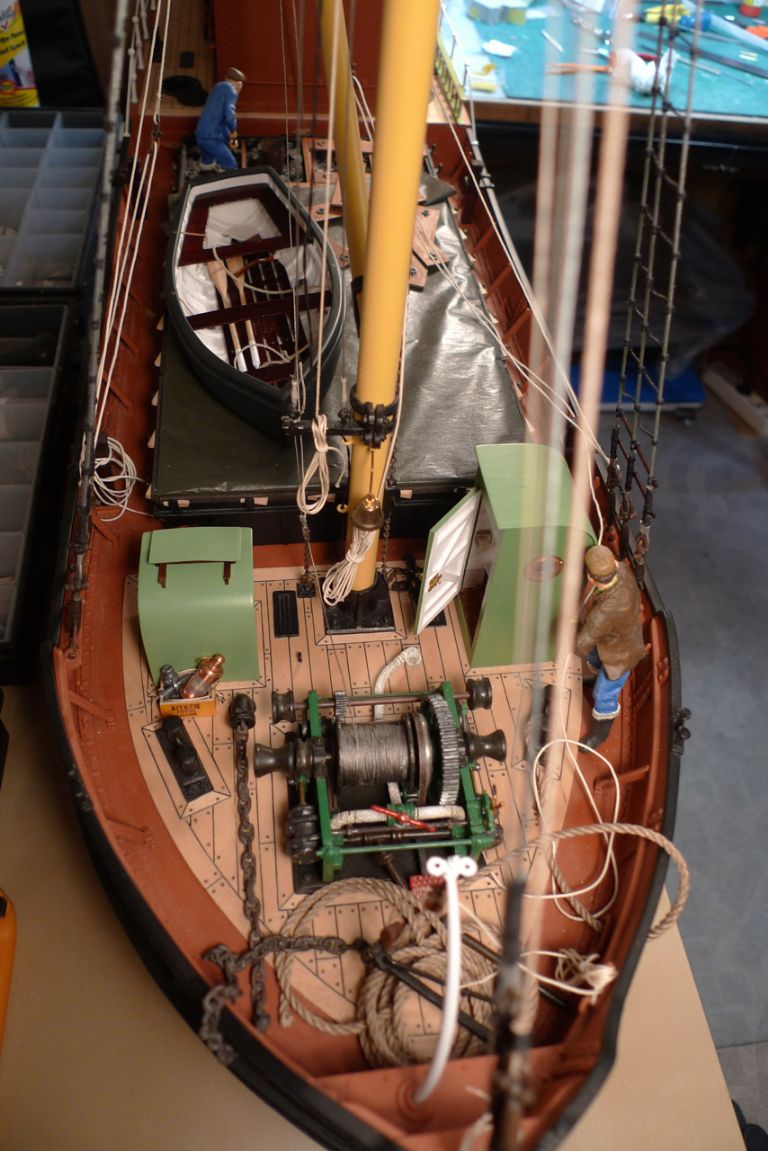
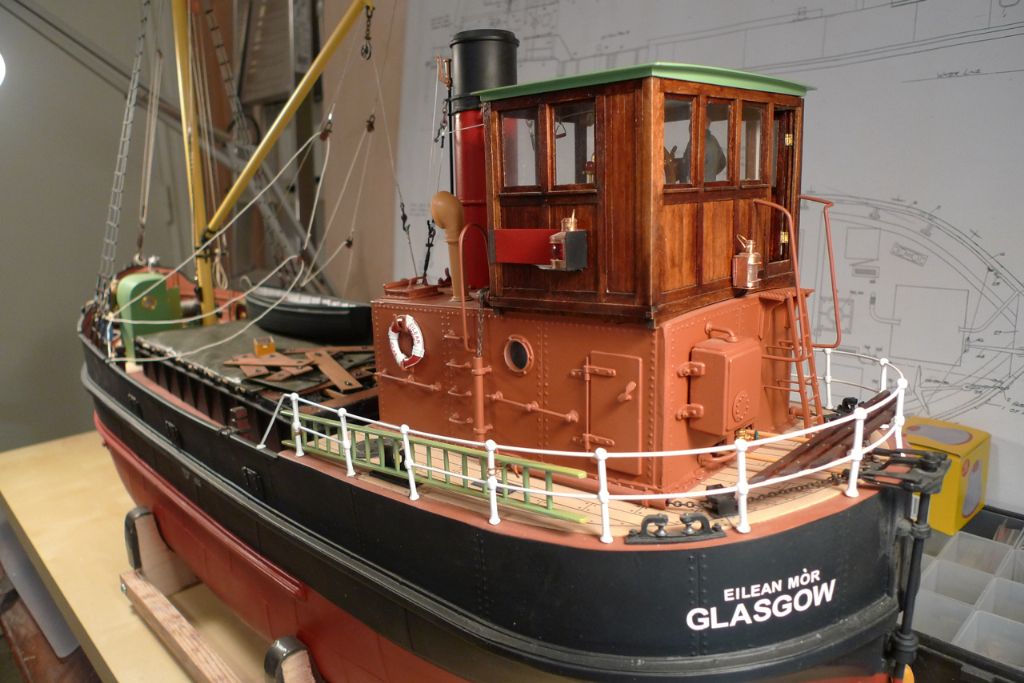
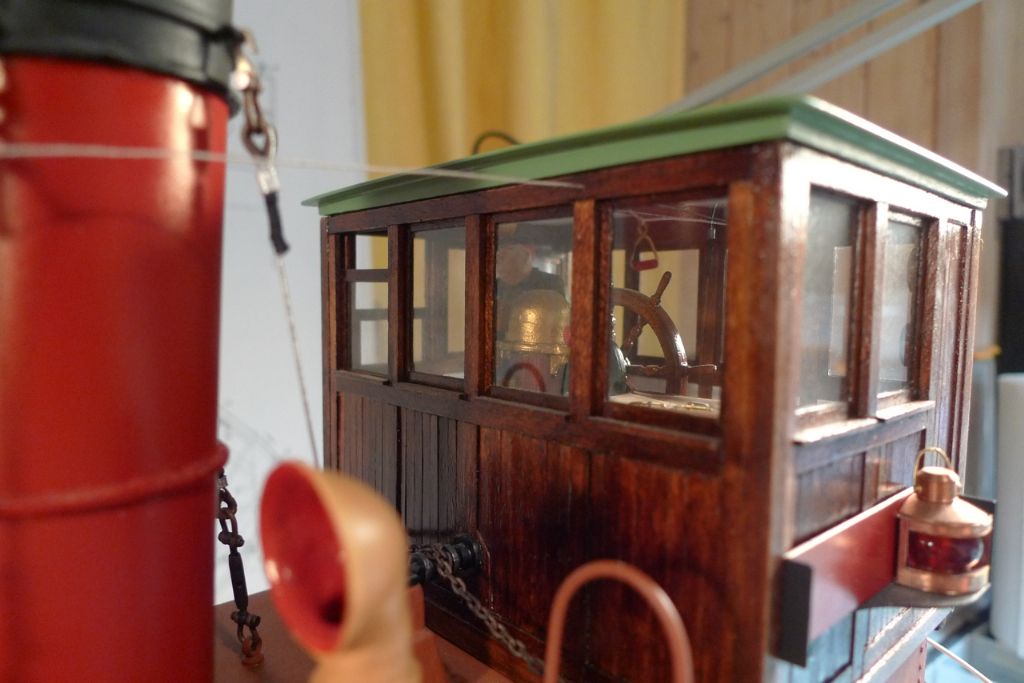
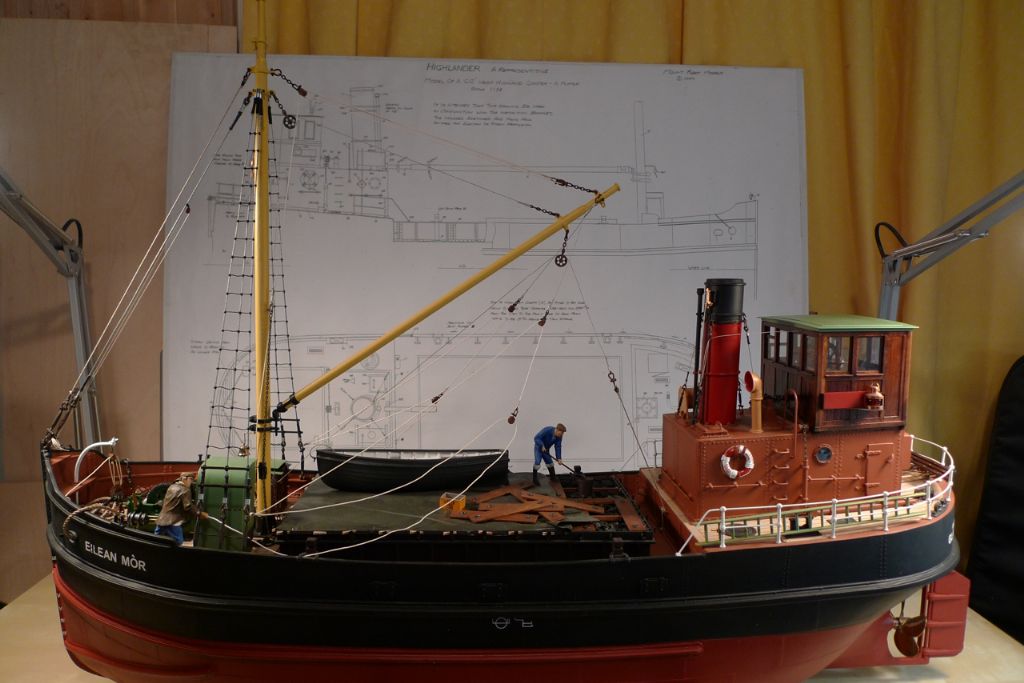
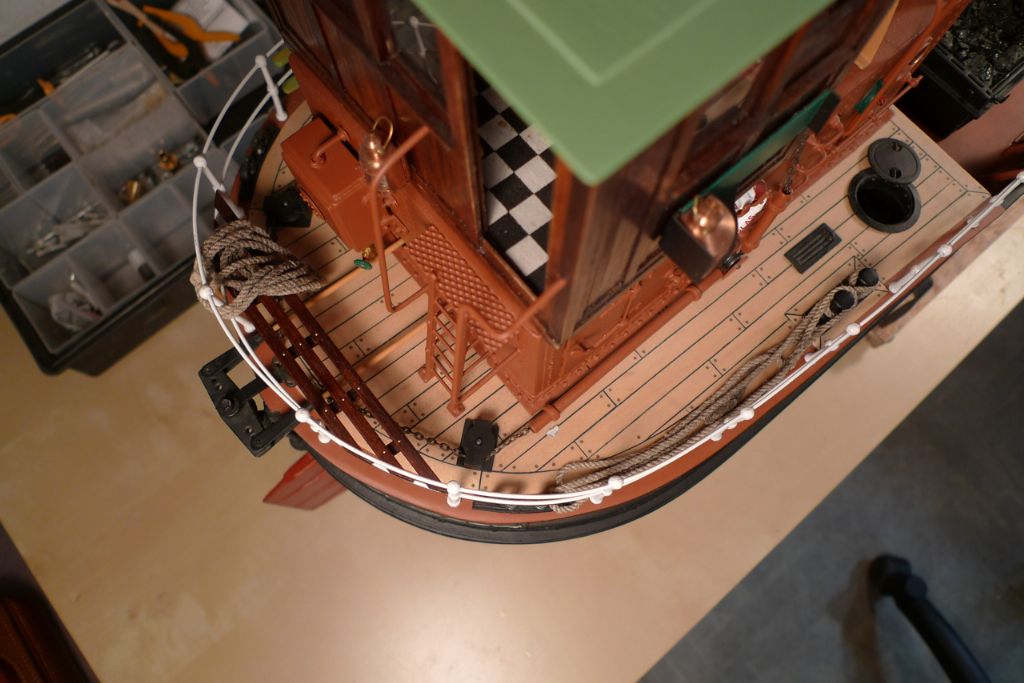
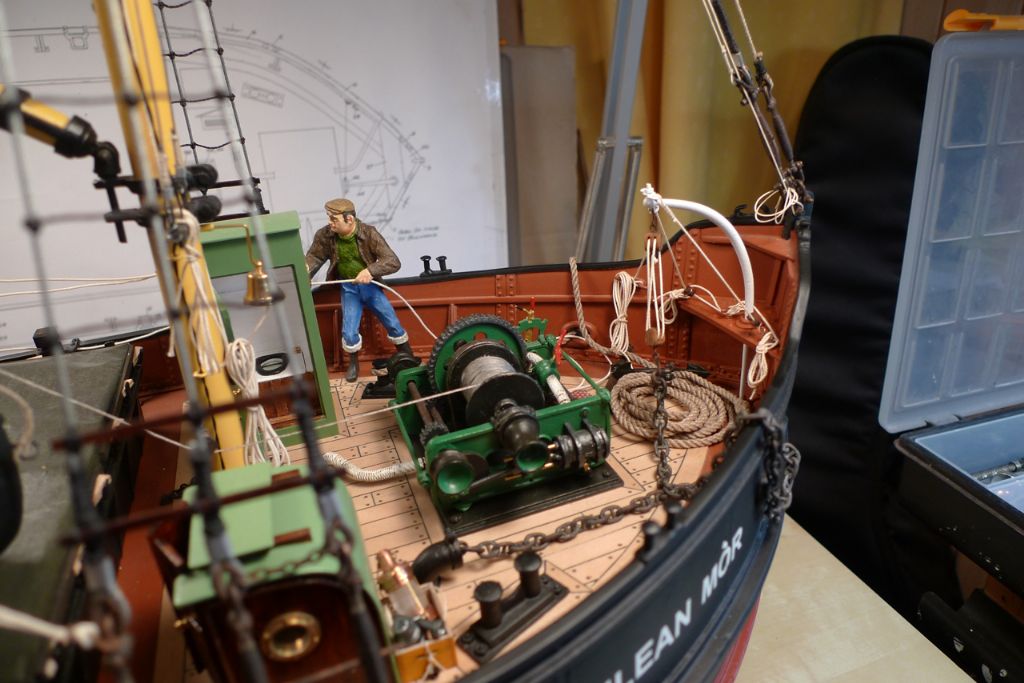
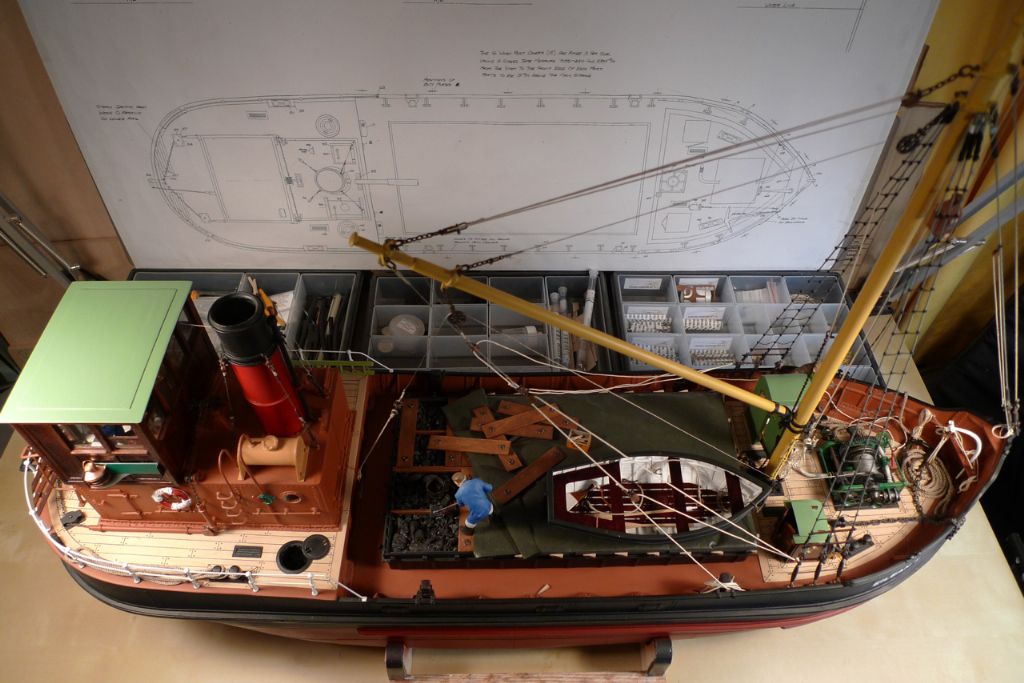
Here are also a few photos of the ship as she is at the moment; there are still one or two minor jobs to take in hand, but otherwise she's more or less done. Here thus the foredeck from over the bows …
… and here as seen by a passing seagull …

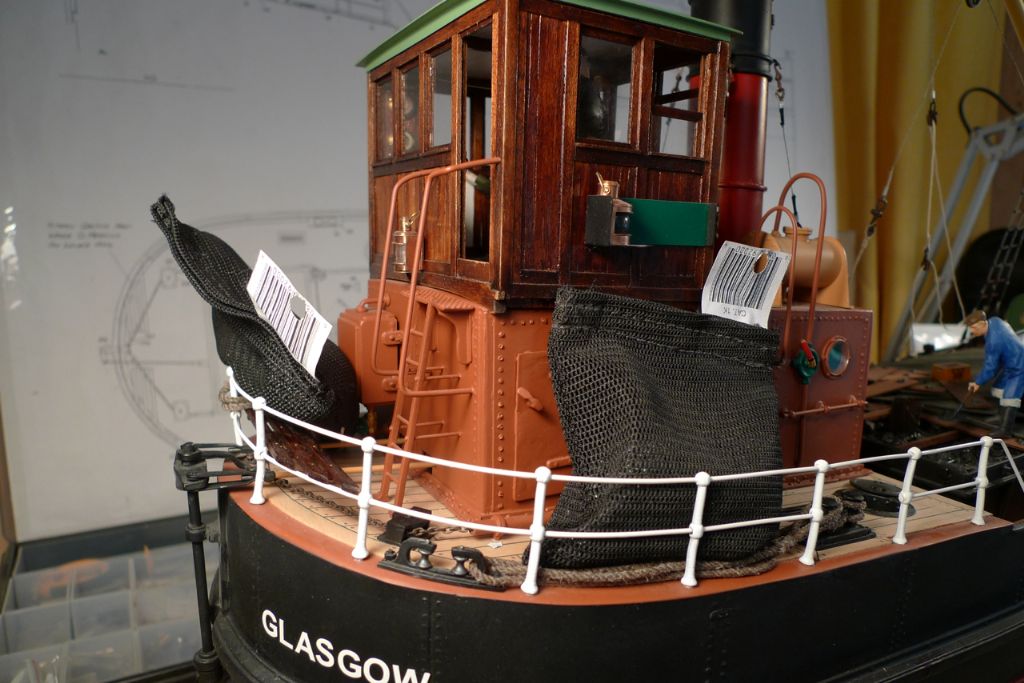
Here the port quarter …
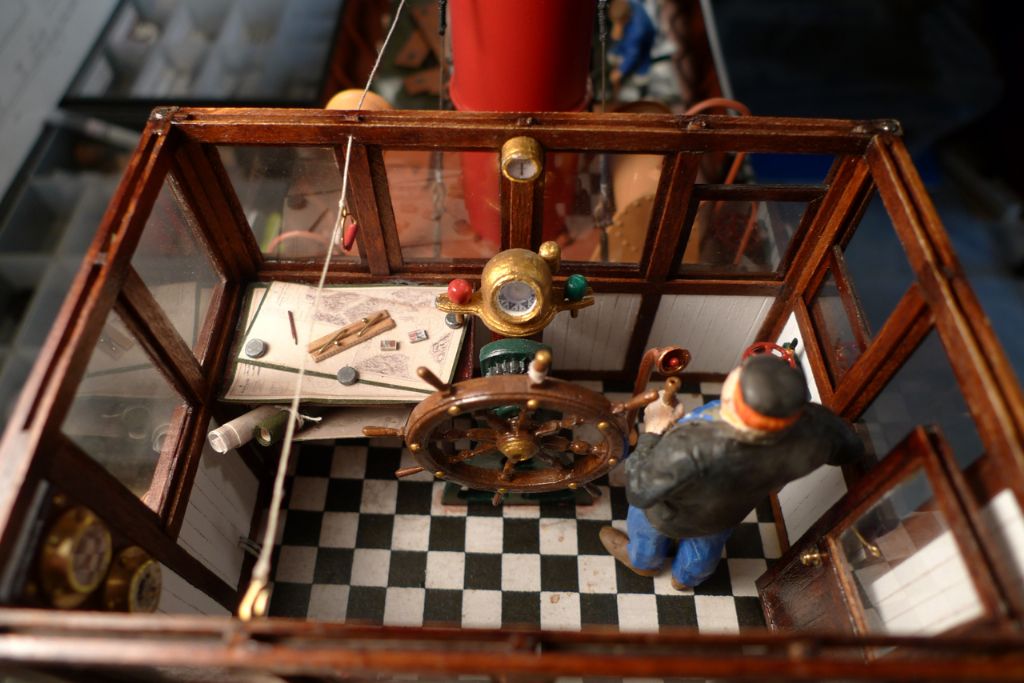
… here the wheelhouse …
… and finally here an overview from midships on the port side.
To be continued …
/Mattias
Edited By Banjoman on 10/08/2015 15:53:59
Edited By Banjoman on 10/08/2015 15:54:15
10 August 2015 at 20:31 #59677Ralph Pinch
Participant@ralphpinch41762Hi Mattias,
told you about my mate in work making same, I showed him your build on the site in work this morning,
He turned a little green and mumbled something about a Viking chieftains funeral, Valhalla and a part finished Clyde puffer Lol.
Your build is truly inspiring unless you have the misfortune to be making one as well.
Keep it up.
Ralph.
11 August 2015 at 08:37 #59680Banjoman
Participant@banjomanHi Ralph,
Many thanks again for your much too kind appreciation!
I really don't think it should be seen as a "misfortune" to be building what is after all a hugely interesting (and suitably challenging) kit like the Mountfleet "Highlander"!
I also don't think that it is a great idea to set oneself up too much in competition with other builders (entering a real, judged competition is of course a different kettle of fish, should said kettle of fish be what floats one's boat). There are so many great builders out there that you can always find plenty that'll knock your confidence for six, if you approch it that way. For my part, I love seeing other builds of all sorts and at all levels of skill and quality, and will always first and foremost look for their strong points. I will also happily pinch ideas, techniques and solutions to problems, if I can figure out how from looking at what others have done. But the only person with whom I ever compete is myself, and my only criterion for success in a build is that the result'll do in my own eyes. If others like it too, I am of course as chuffed as the next person (and then some!
 ), but it is not that against which I measure myself as a model builder.
Anyway, I wish your work mate much continued pleasure and heaps of fun with his Highlander!

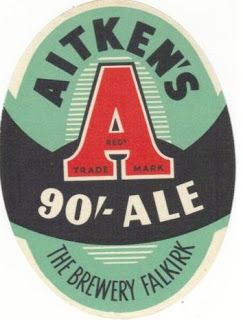
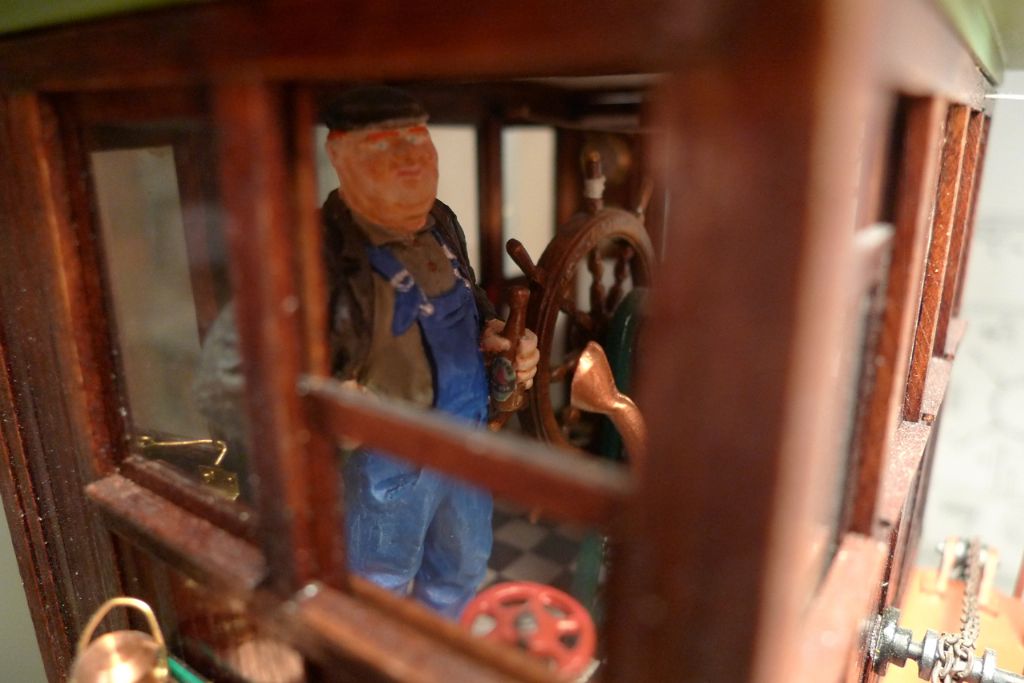
As for the Eilean Mòr, I got one of the remaining minor jobs sorted yesterday, namely the application of a suitable beer bottle label to the bottle out of which the skipper is drinking.
As already made clear by the occurence on deck of several old beer crates from the Aitken brewery in Falkirk, our friend the skipper is partial to their products, which were very popular and well distributed in Scotland in the middle of the last century (the brewery went out of business in, I think, the late 1960s). Some gooigling turned up the following label for their 90/ ale, which I quite liked both because of the period feel and because it has a sufficiently bold and simple design that I felt there was at least a chance it could be reduced to scale and stay recognisable (if not necessarily readable):
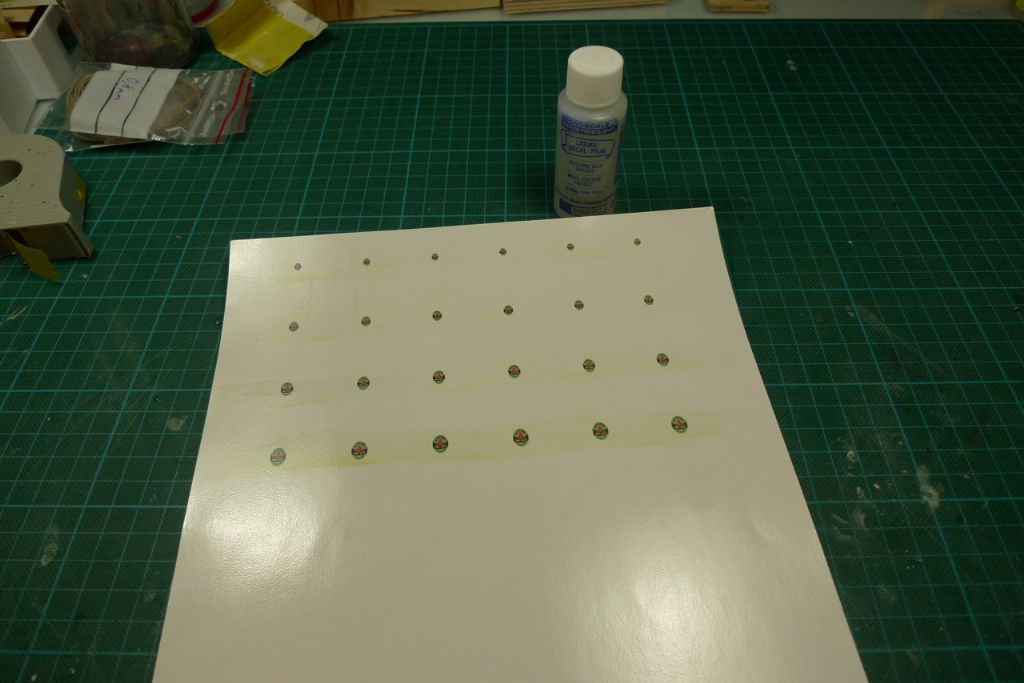
I thus printed a number of such labels in varying sizes (from 3 to 6 mm tall) out on print-your-own-decals sheet, and then sealed the print with some liquid decal film.
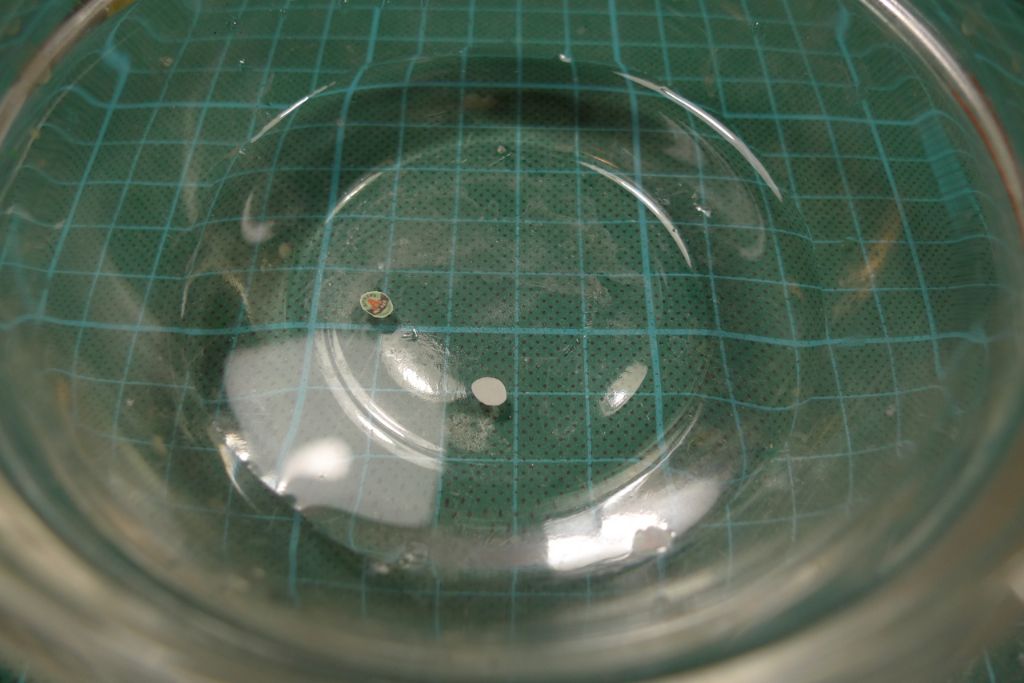
After some carfeul deliberation, I decided to use a 4 mm tall label, which I duly cout out and soaked in water. As I haven't done transfer decals since my Airfix days, many, many moons ago, I actually had to make three attempts at this operation …
… before I managed to produce a decal that would fit the available surface, didn't curl up at the dges and stuck to the bottle.
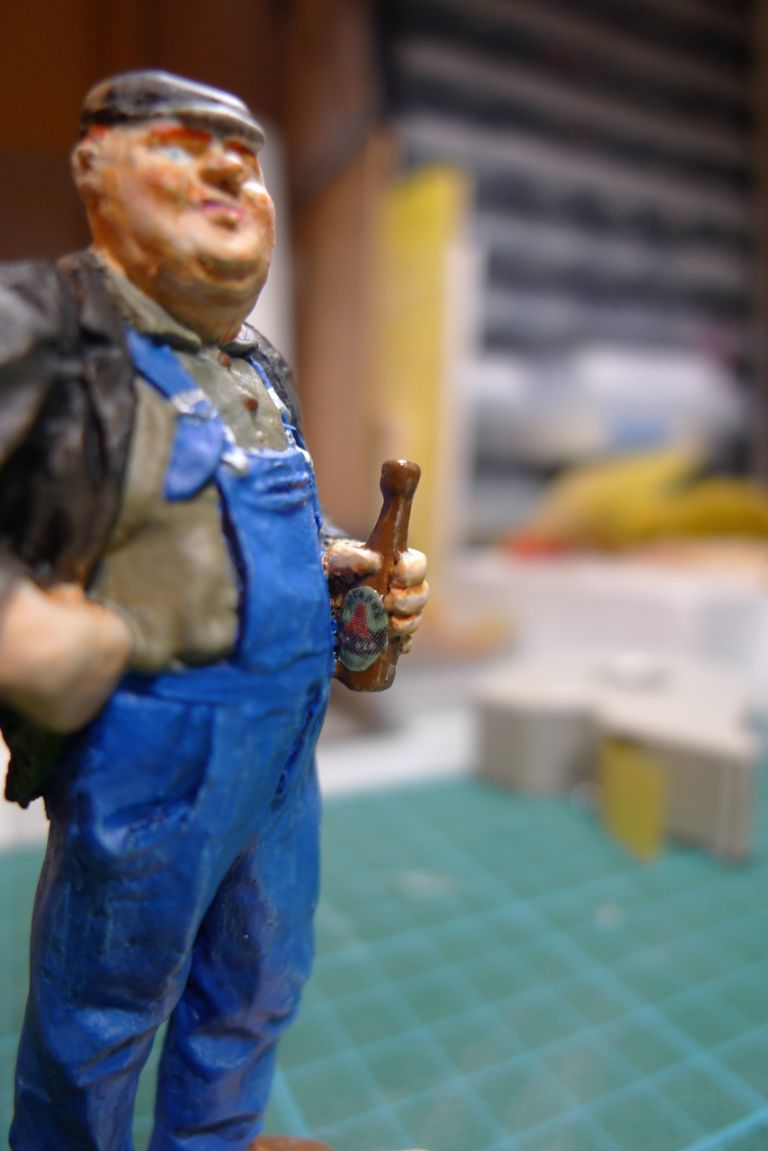
I should perhaps add that I found the PYO decal sheet very easy to work with! The only hinder to complete success lay with the level of resolution that my colour laser printer is able to produce, but at least the label looks like a label, and, thanks to the large, red "A" should be identifiable by a beer label buff as an Aitken's label (I hope) …
And here is the skipper back inthe wheelhouse, ready to take another pull at his bottle of Aitken's 90/ ale

To be continued …
/Mattias
Edited By Banjoman on 11/08/2015 08:41:15
11 August 2015 at 08:51 #59681Bob Abell 2
Participant@bobabell2How about a few old Beer Mats, Banjo?
And a bottle of suitably labelled whiskey?
And a packet of Woodbines?
Bob
11 August 2015 at 16:35 #59683Banjoman
Participant@banjomanHello Bob,
I dare say a matching beer mat (or two) could eventually be arranged; I have seen an image when googling of one in a quality similar to that of the bottle label, so it shouldn't be too difficult to manage.
The whisky bottle I think I'll leave out, though; I'm sure there's at least one on board somewhere, but even though I have the skipper supping 90/ ale (which of course is not the weakest of beers) I'm quite sure both he and I would draw the line at drinking whisky while under way. The bottle would therefore not be kept standing around in the wheelhouse, or on deck, where it might meet with a calamity, but be safely stowed away below deck where it thus cannot be seen.
A packet of Woodbines on the other hand seems like a nice idea. I just need to turn up a good enough picture of a packet as they looked in 1951. I've done some image googling, but so far nothing with a confirmed date has turned up.
Would you by any chance be able to recall what such a packet would have looked like then, Bob? Or maybe someone else? If you (or someone) could point out an image on the net somewhere (the image quality wouldn't matter as long as I knew what packet type and design would be right), I'd be very grateful indeed!
Would someone also happen to know wheter there's a difference between "Wild Woodbine Cigarettes" and "Wills's Woodbine Cigarettes"? Just simply different labeling during dfifferent eras? Or two varieties? They were both from the same makers, that much is already clear …
Any road, let us for now leave all thoughts of practices detrimental to the crew's health, and instead turn our eyes to todays progress! Nothing very much, I hasten to add, but what it is is two mooring ropes for the quarterdeck.
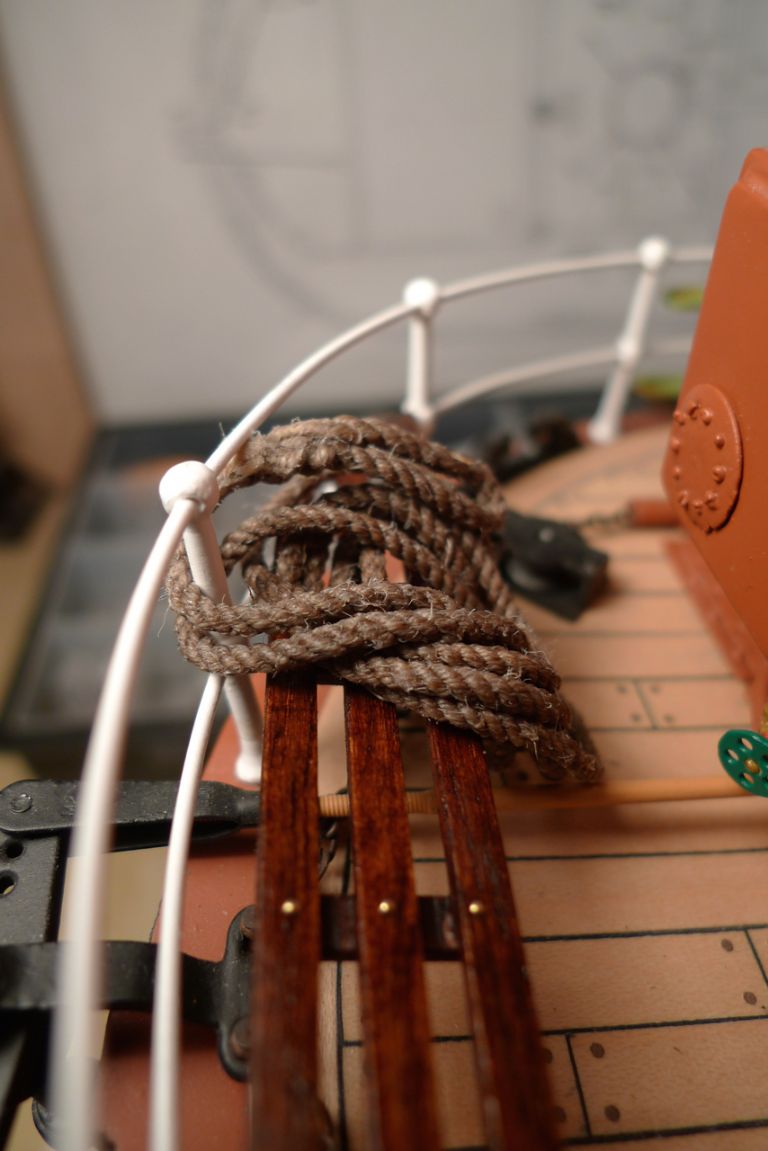
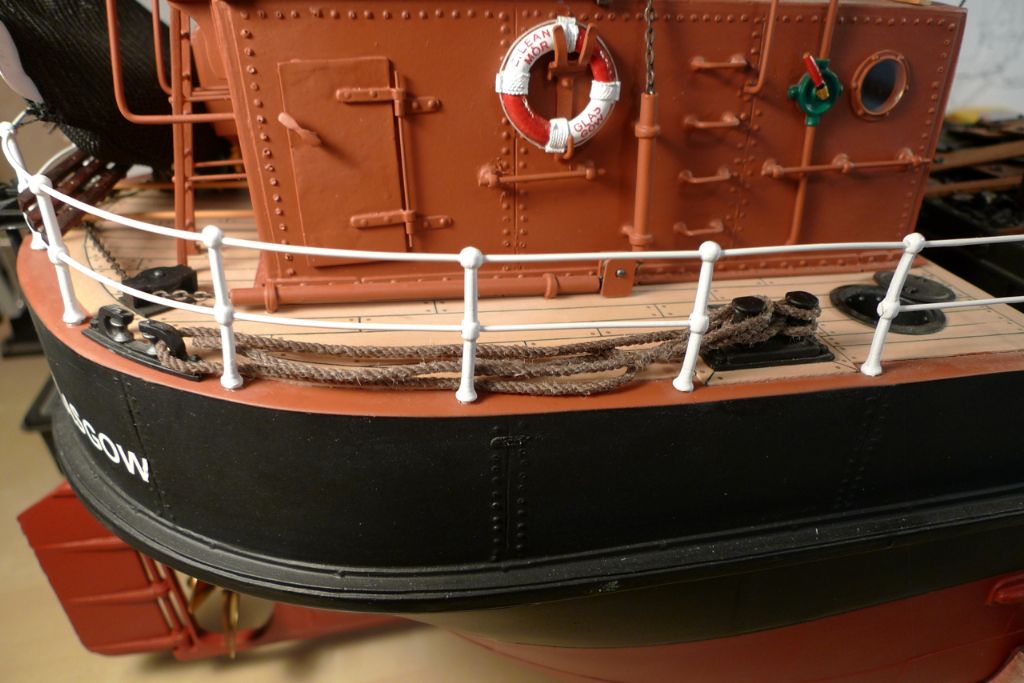
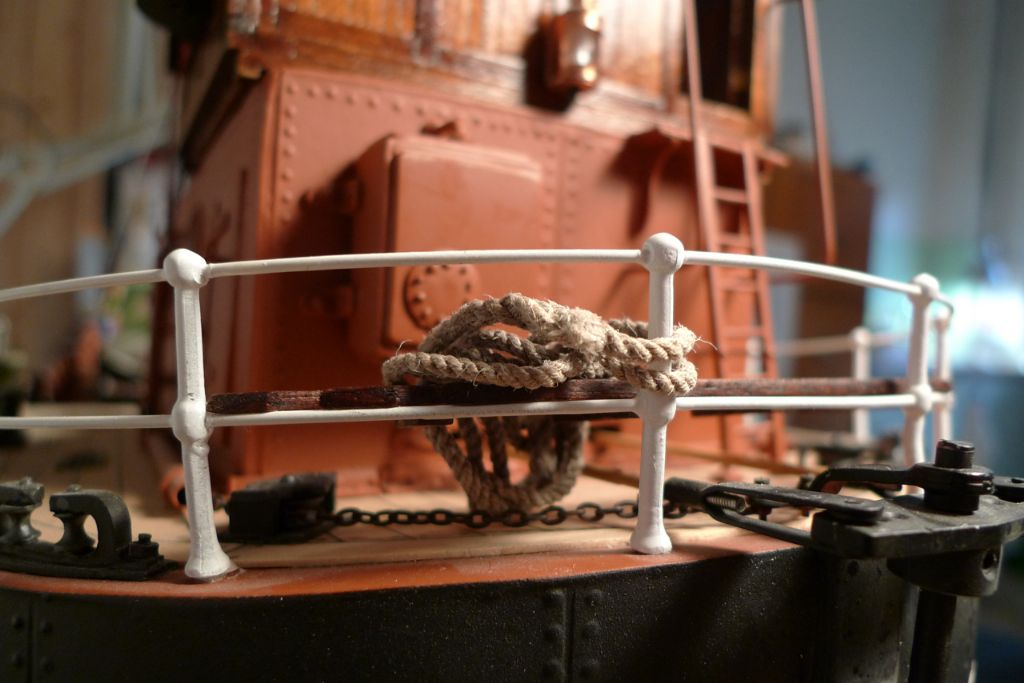
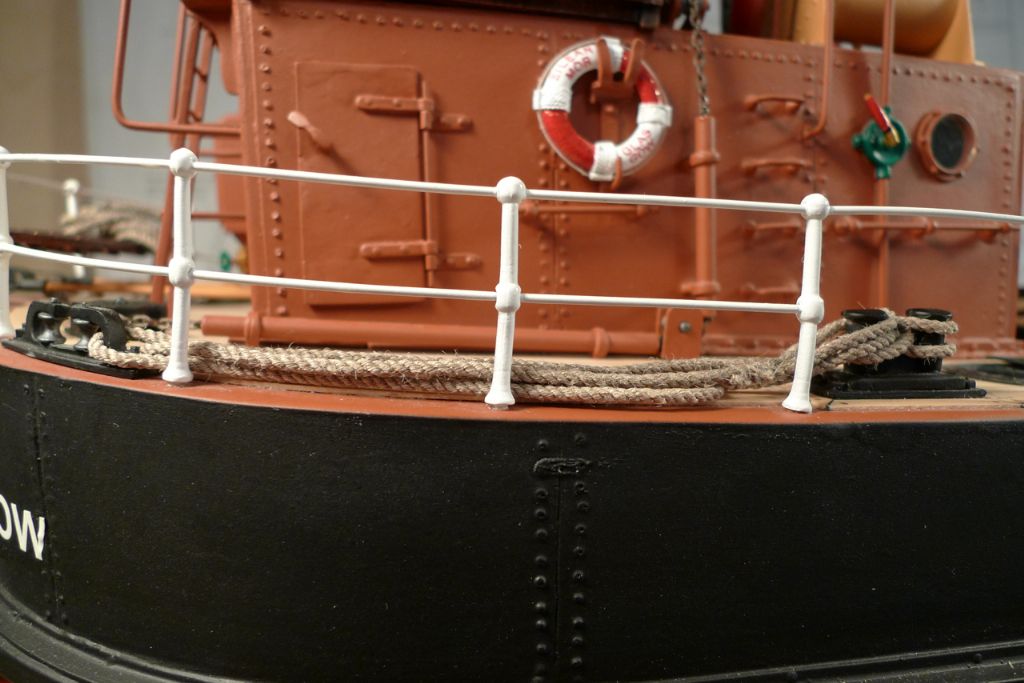
They have both been given an eye-splice to one end, and a back-splice to the other, and were then briefly soaked in water. This allowed me to shape them and drape them to (hopefully) look as though they actually had some real weight to them.
One was rolled up and draped over the rope bench at the stern …
… while the other was made fast to the starboard bollards, led through the fairlead, and then "pushed up" against the starboard railings.
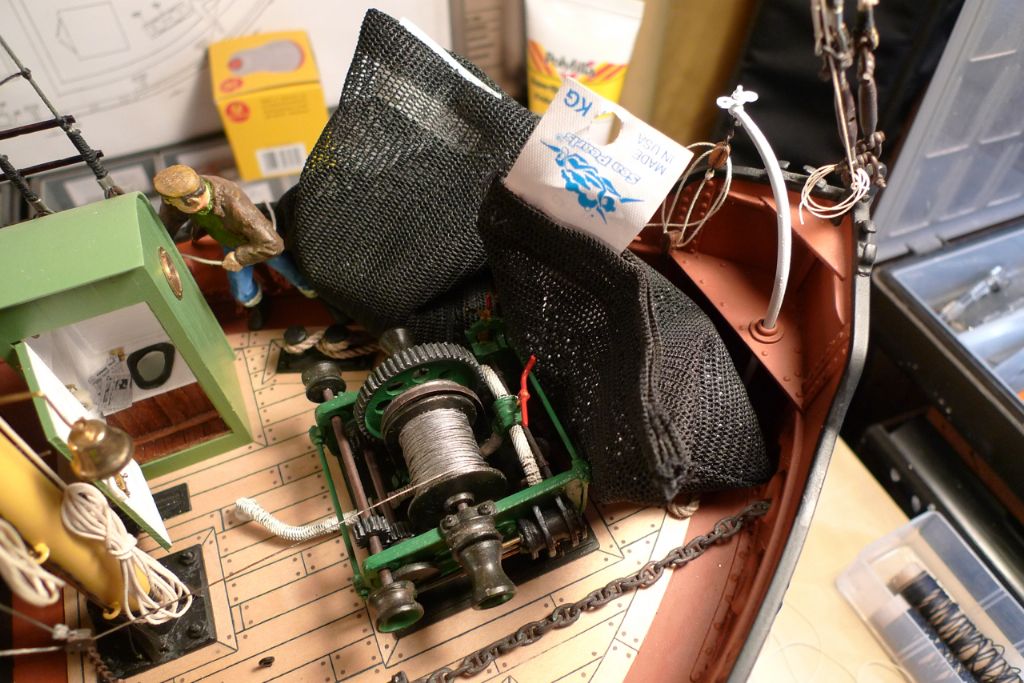
They were then weighted down with half-kilo bags of lead shot …
.. until dry, at which point their shapes were set in the positions I wanted without having had to, as it were, permanently ruin this rather beautiful miniature rope by brushing it with watered-down glue.
The rope on the bench has also been given a couple of strategic turns around a railing support, to ensure against it falling off while under way, in which case there would be a serious risk that it'd end up in the propeller.
The other rope has also been placed in such a way that there shouldn't be any risk of an end going overboard.
To be continued …
/Mattias
Edited By Banjoman on 11/08/2015 16:36:15
Edited By Banjoman on 11/08/2015 16:38:34
11 August 2015 at 17:41 #5968411 August 2015 at 20:21 #59685Banjoman
Participant@banjomanThank you, Bob! I take it that thart is the packet that was used in the early 1950s … and that "Wild Woodbine" (in quotation marks!) was the brand name used at the time?! On what is obviously more modern packets I note that they're just called Woodbine Cigarettes.
By the way, would you also happen to know how many cigarettes there would be in a pack like the one in the picture you posted? Looks like there might have been 10?! And what was the packet made from? Cardboard? Paper? Fairly solid (lika a modern fag packet) or more crumply? I assume there would have been no cellophane or similar wrapping in the early 1950s?
Oh, dear – what a mass of questions! Please don't feel that you need to come up with any answers; I am sure that the trusty ol' Internet would throw up plenty of information if asked properly, but I hope you don't mind me trying for the easy (for me!) route to information first?!
In other words, if you just happen to know summat about what I'm asking above, I'd be delighted for any answers you woul dlike to give, but please don't put yourself out for my sake on this'un!
Many thanks in advance, nevertheless, and cheers

/Mattias
11 August 2015 at 20:54 #59686Banjoman
Participant@banjomanHello again, Bob!
Just to say that I found a fair amount of information already, including these very useful, high definition photos of all sides of a packet of Wild Woodbines on eBay: **LINK**
In other words, I know now how the entire packet would have been put together and what all faces of the sleeve and the internal box looked like … remains to be seen if I can manage to reproduce that at 1:24 … ?!?
/Mattias
11 August 2015 at 20:54 #59687Bob Abell 2
Participant@bobabell2Hello Banjo
About 1950, I would probably have been a schoolboy "Fag Packet" collector
In those days, a Woodbine packet would have been the lowest of the low!
The desirable names would have been……..Passing Cloud……..Daphne du Maurier……….Peerage
Run of the mill stuff……..Gold Flake…….Senior Service……..Players/Medium/Weights……….Capstan Full Strength
The really unwanted stuff would be…….Turf…….Lucky Cat……..Pasha……….Camel
The Woodbine packet was made of thin card and held 10 cigs………They also produced a thin paper open topped packet that held only five cigs
I don`t suppose many of the old packets have survived these days?
Looking forward to your choice of cigarette packet?
Bob
11 August 2015 at 21:29 #59688Banjoman
Participant@banjomanThank you very, very much indeed, Bob, for all that very helpful information!
Judging from eBay, quite a number of packets are still around – I dare say they were produced in such huge numbers!
From what I've been reading over the last hour or so, Woodbines were indeed very much a cheap cigarette – gaspers aimed squarely at the working man, and as such they would be, I think, a good choice for on board a Puffer in the 1950s.
We'll have to see if I can manage the scale of the thing, though: from what measurements I've been able to find on the 'net: the IWA has a packet of five in their collection, which measures 71 x 40 x 9 mm, so if we assume that a packet of ten would have been roughly twice as thick, at 1:24 that would give me a packet measuring 2.95 x 1.67 x 0.75 mm! Even if factored up slightly to 3.9 x 2.2 x 1 mm, it is purty dang small – I don't think that my printer would be able to reproduce it in a recognizable way … but I'll see what I can come up with!
/Mattias
12 August 2015 at 19:47 #59701Banjoman
Participant@banjomanWell, the Great Wild Woodbine Story continueth!
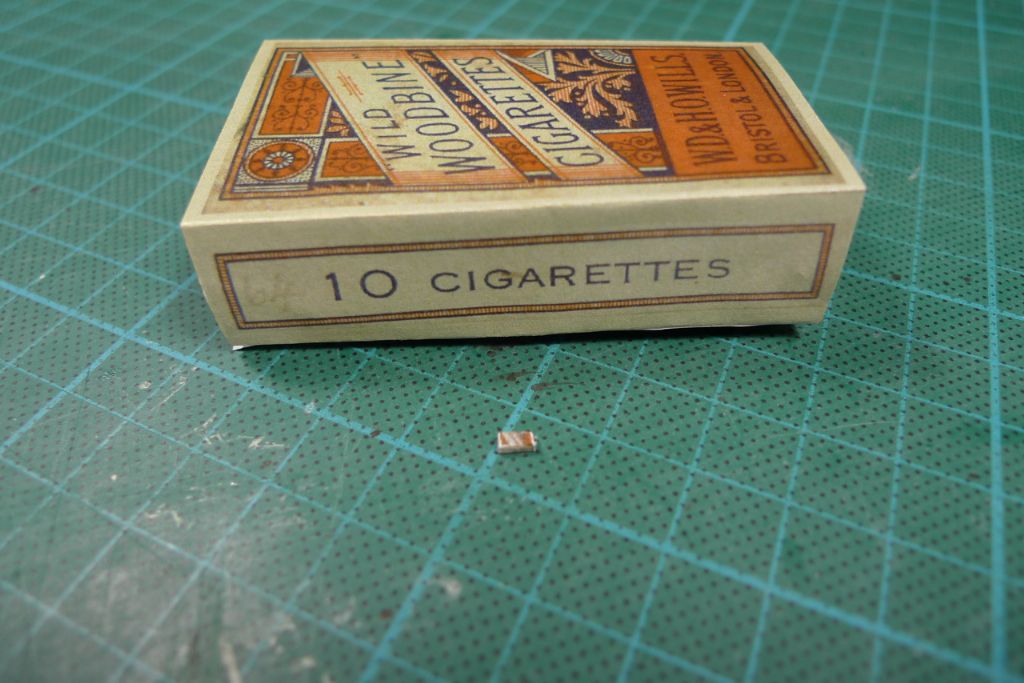
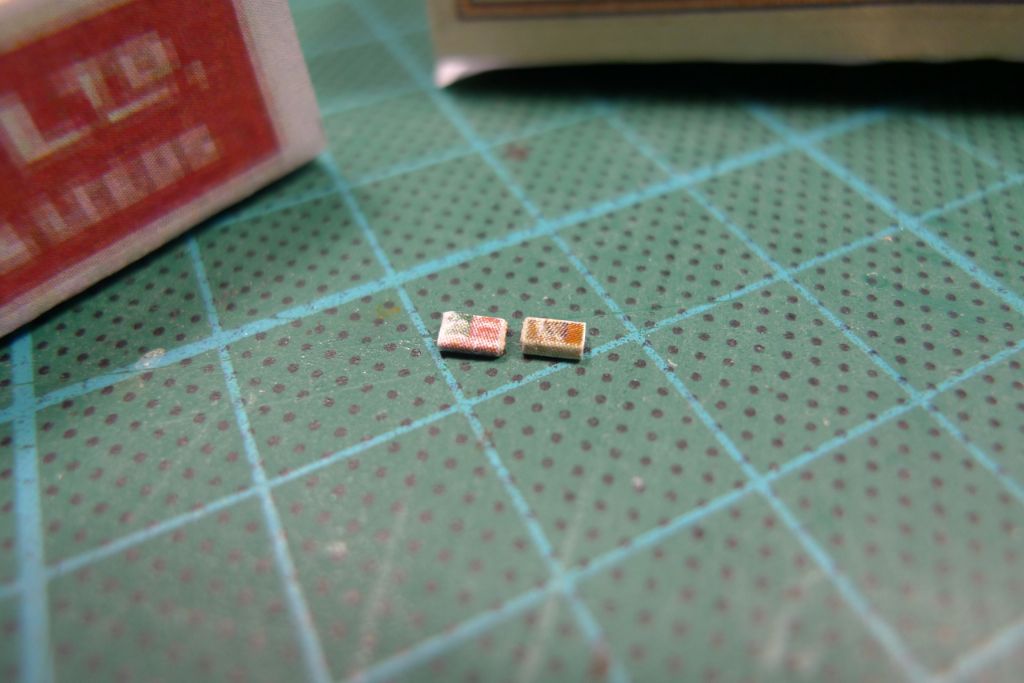
Today, I used the photo's I'd found on the net to create a full size and almost-to-scale mock-up version of a reproduction Wild Woodbine packet; the one in the back of the picture is thus the same size as I believe a real packet would have been (i.e. 71 x 40 x 18 mm), while the small, multicoloured dot in front of it, at approx. 1:18 scale, is the model version and measures 3.9 x 2.2 x 1 mm. Although a giant in comparison, actually even the full size packet feels quite small – no King Size cigarettes, these …
As expected, my printer was not really up to reproducing any kind of detail on the model packet, but I do have what I hope might turn out to be a cunning plan: photo printing!
Given the fact that you can get your digital photos professionally printed, that such photo printing tends to be quite high resolution, and that the thickness of the finished printout matters much less for this subject than it did for e.g. the newspaper I did before, I'm tempted to 'ave a go! My only big worry is that the print-out will be to glossy … ?!
Anyway, as can be seen from the full-size packet above, the photos I found has more than sufficient resolution in themselves, and I'm hoping that I might be able to give the end result an even better appearance if I manage to separate the printed layer of paper from the underlaying stratas. It all remains to be tested and seen, but its worth following up on, I'd say!
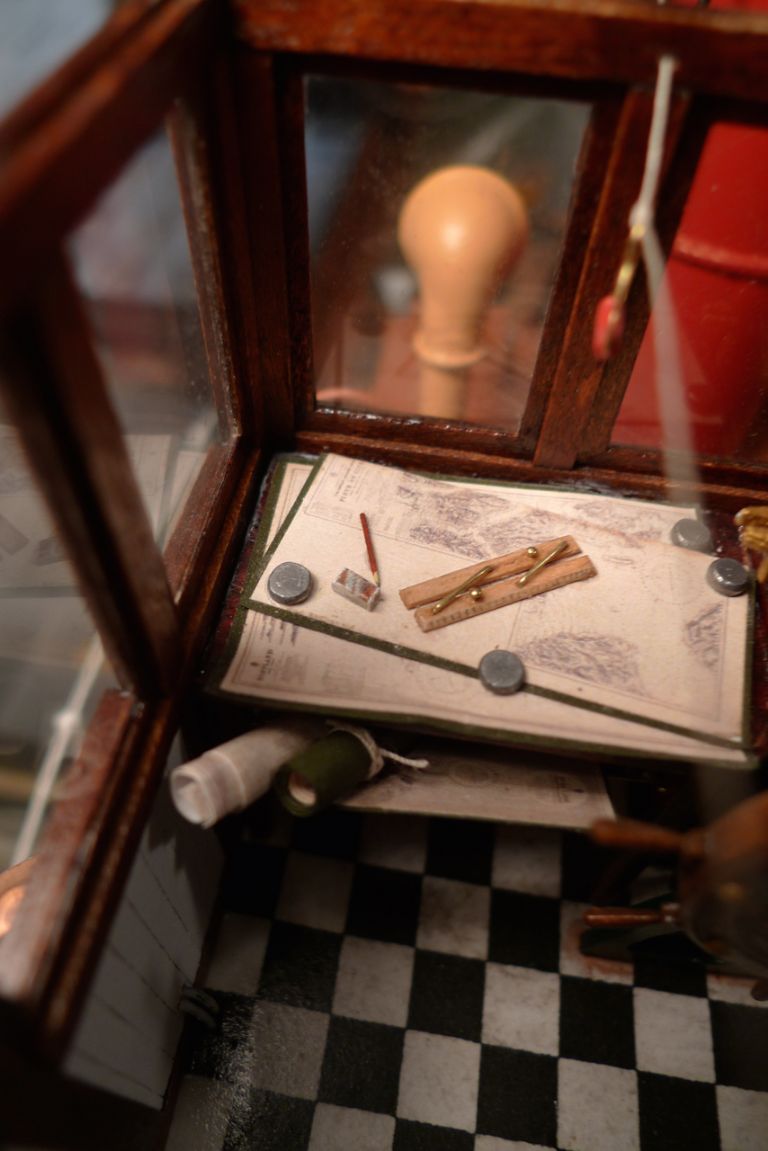
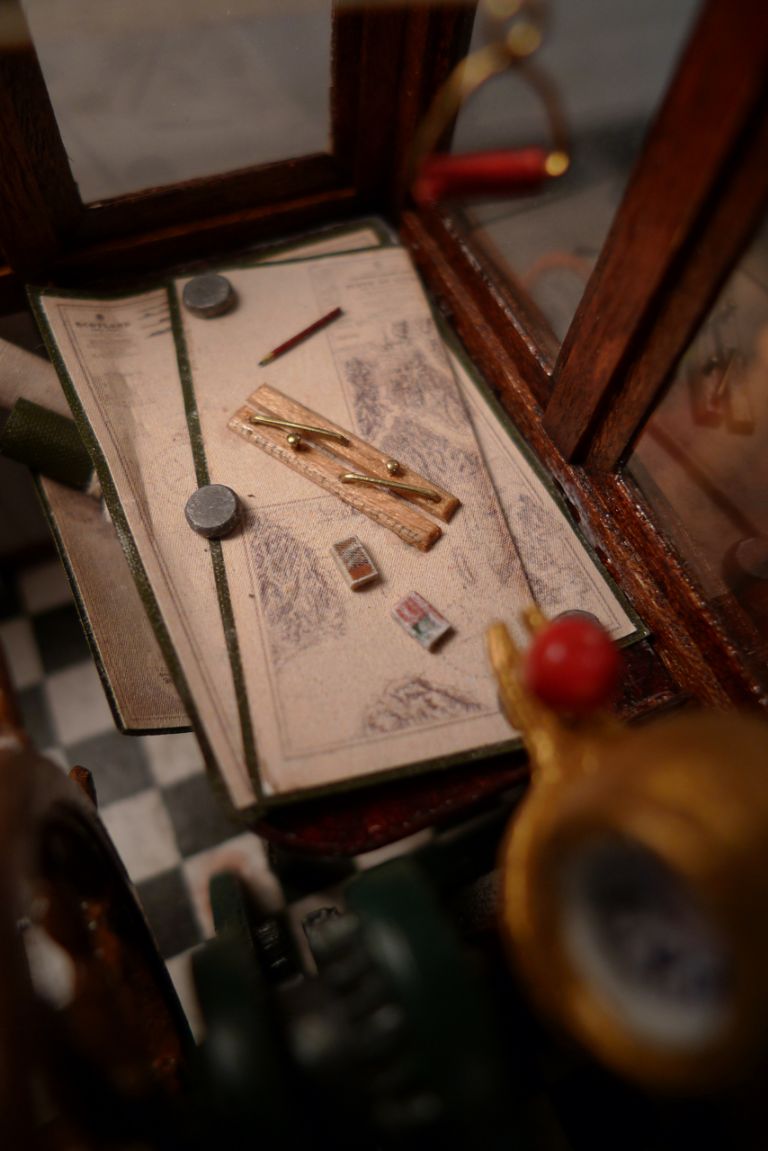
In the meantime, here is how todays scale mock-up looks where the skipper has casually thrown it on top his charts …
To be continued …
/Mattias
12 August 2015 at 20:13 #59702Bob Abell 2
Participant@bobabell2That's a nice touch, Banjo……Well done
Just had another idea……..A box of matches!
You can't have a packet of Woodbines without a box of SwanVestas!
Bob!
13 August 2015 at 15:04 #59719Banjoman
Participant@banjomanIndeed, Bob – no smoke without fire, eh, wot?!
The thought had already struck me, and although I could have gotten out from under by claiming that of course the skipper lights his fags with a Zippo that he bought off of a Yank serviceman during the war, and that he alsways keeps said Zippo in his pocket, well, I thought it'd be worthwhile to see if I could find enough information and a good enough (set of) photo(s) to make up a box of Swan Vestas, too.
Some research on the 'net turned up the information that the most likely look for a box of Swan Vestas in the early 1950s would have been the older, red-green-and-white box (the current yellow background came in much later), with the swan facing left (these days, it faces right), and with The Smoker's Match in the upper right and British Made in the lower left corner.
Well, lo and behold! Someone once sold an unused, complete wraparound Swan Vestas label (i.e. all the sides of the box printed on a single, flat piece of paper) with just this design, and was kind enough to not only leave an image of that to be found via Google but also to give the measurements of the label, which allowed me to figure out the size of the real thing (approx. 75 x 38 x 15 mm) with enough precision.OK, the photo is not as high res as the ones I found for the Woodbines, but at 1:24 it'll do, I think …

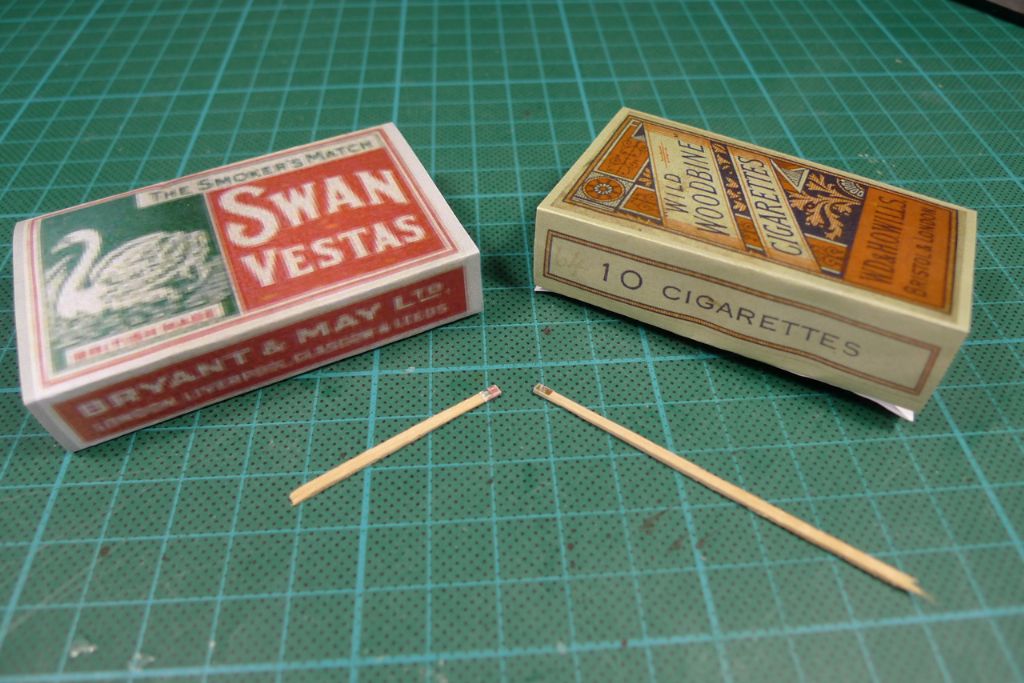
Actually, the matchbox is slightly larger than the cigarette packet, as can be seen from this photo of the two full-size mock-ups and the two 1:24 versions, here just glued to some slivers of wood (so no, the long wooden objects in the photo are not fake matches).
The fag packet that I made yesterday was at approx. 1:18 scale, and although slightly more recognizable at that size (almost 1 mm longer and 0.25 mm thicker), in the end I decided that I should try to be true to scale, particularly now that there wuld be a second box, so a new one in 1:24 was made up.
And here they are, within the skipper's reach …
… on the wheelhouse chart table. As already mentioned, I shall attempt to source better printouts, though, where at least the largest letters might become (almost) legible …
To be continued …
/Mattias
Edited By Banjoman on 13/08/2015 15:06:42
Edited By Banjoman on 13/08/2015 15:07:34
Edited By Banjoman on 13/08/2015 15:07:49
13 August 2015 at 16:52 #59722Bob Abell 2
Participant@bobabell2Well done, Banjo
Good enough for me!
Bob
13 August 2015 at 17:26 #59723Bob Abell 2
Participant@bobabell2Er………..One more thing, Banjo
What about the ship's cat?…..You can't leave out……..Sooty!
Bob
13 August 2015 at 18:58 #59725Banjoman
Participant@banjomanThankee kindly, Bob! I have to say it is more sort of could do-ishish for me, but not really good enough; you know: room for improvement; could do better; that sort of thing …
Cat? Mmm … possibly. Or a dog. If I stumble across one that is clsoe enough, both to scale and to the general crew member figure quality and level of detail (neither too good, nor too bad), so that it'll blend in properly.
I'll keep my eyes open, but don't hold yer breath …

/Mattias
Edited By Banjoman on 13/08/2015 18:59:00
14 August 2015 at 08:42 #59729Banjoman
Participant@banjomanWhile working on the Woodbines-and-Swan-Vestas diversion, I've also kept my hand in with the main finishing work.
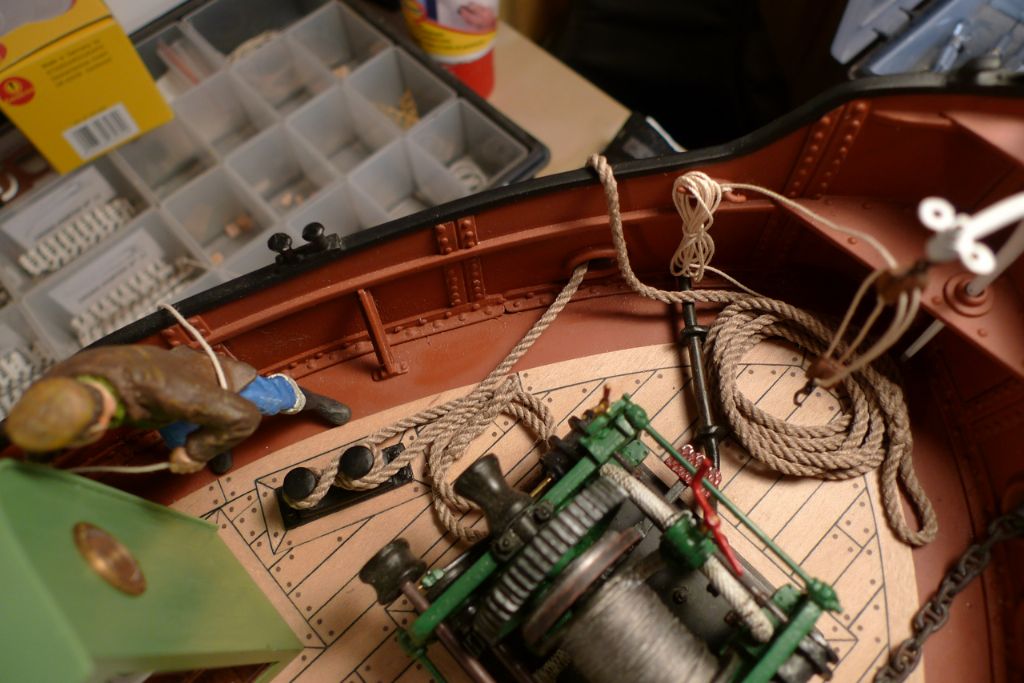
Just as I did with the mooring ropes at the stern, the bow one was given a back splice at the previously unworked end, soaked in water, attached to the port bollard, run through the port hawse hole and over the top of the bulwarks, and then coiled up and weighted down with a couple of bags of lead shot to dry …
… to this effect:
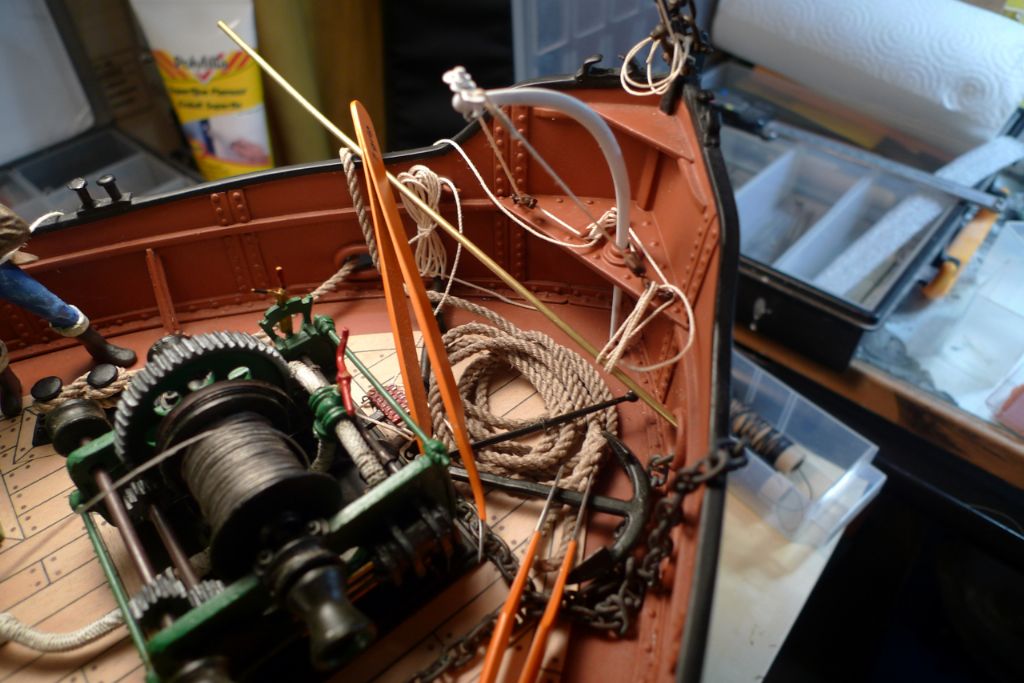
Next I got on with finalising the rigging of the anchor davit.
In the Mountfleet prototype model photos, the davit has been secured by simply tying some rigging thread to the eyes at the top of the davit, and then running them stright to the small bollards on top of the bow bulwarks.
I was not overly keen on this solution, in part because it would mean ropes stretching across the foredeck in a, to my mind, rather unsightly manner, and because the bollards sit an an awkard angle to take such lines in a sightly fashion, but mainly because I wanted something that would represent a proper purchase that would both be able to work the davit and to secure it in any desired position along its arc of movement.
And lo: while I was lying sleepless with a bout of bad coughing the other night, my mind's eye turned (as it often does) to build problems, and finally came up with a solution, namely this:
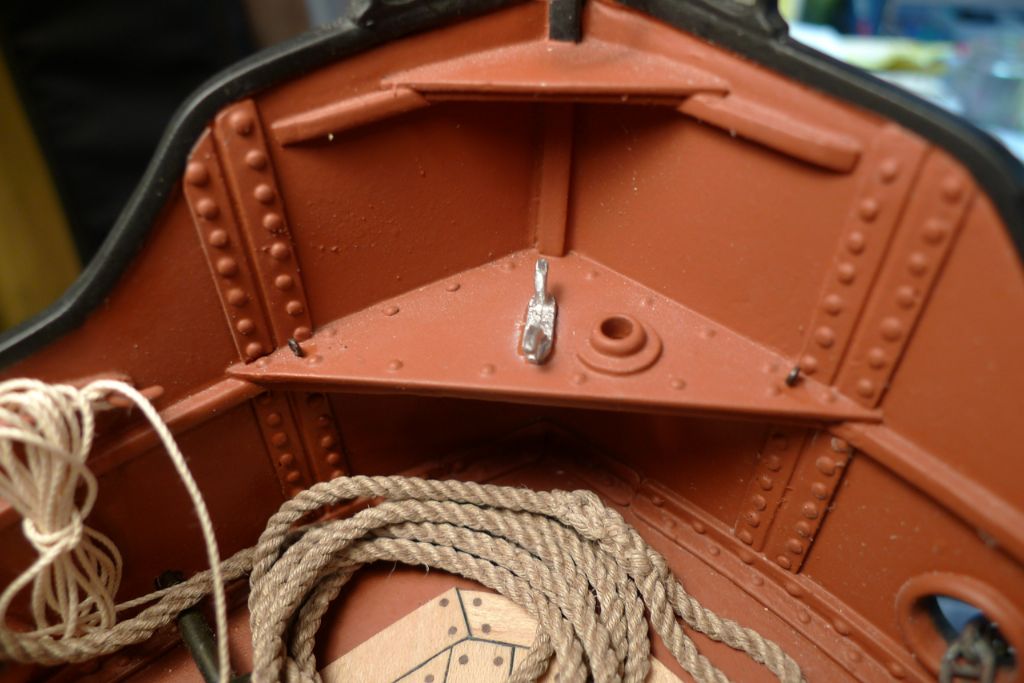
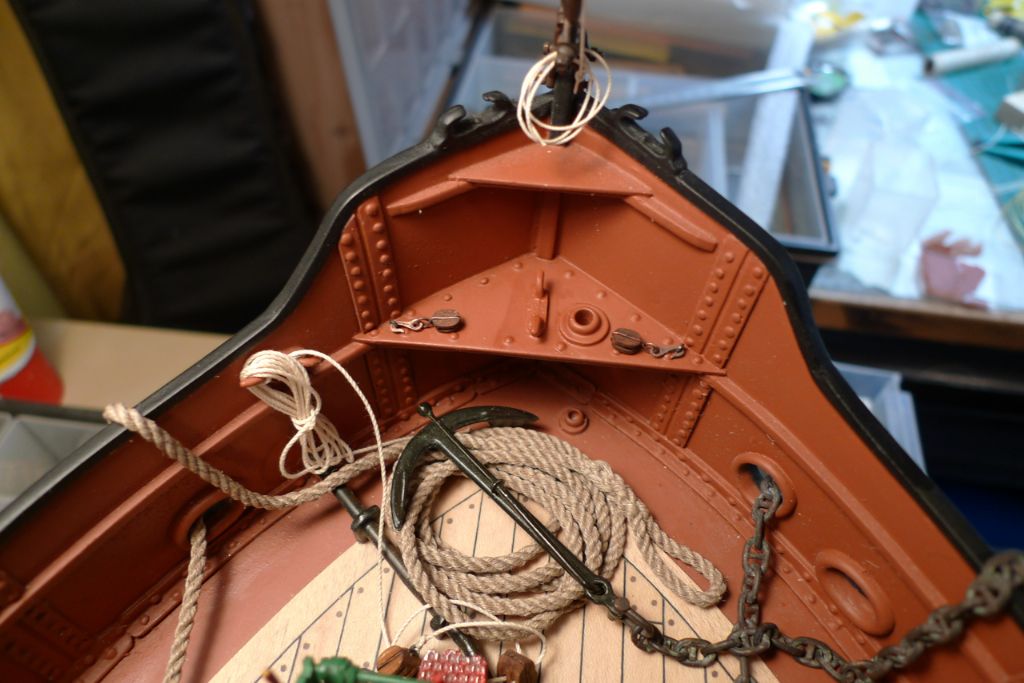
First up, I set a cleat in the middle of the lower bow plate , and two small eyebolts in the corners.
I next painted the cleat (the slight difference in nuance visible here disappeared when the paint was fully dried) and prepared and hooked two small blocks to the eyebolts.
Two lengths of 0.6 mm rigging thread were seized to the top of the davit.
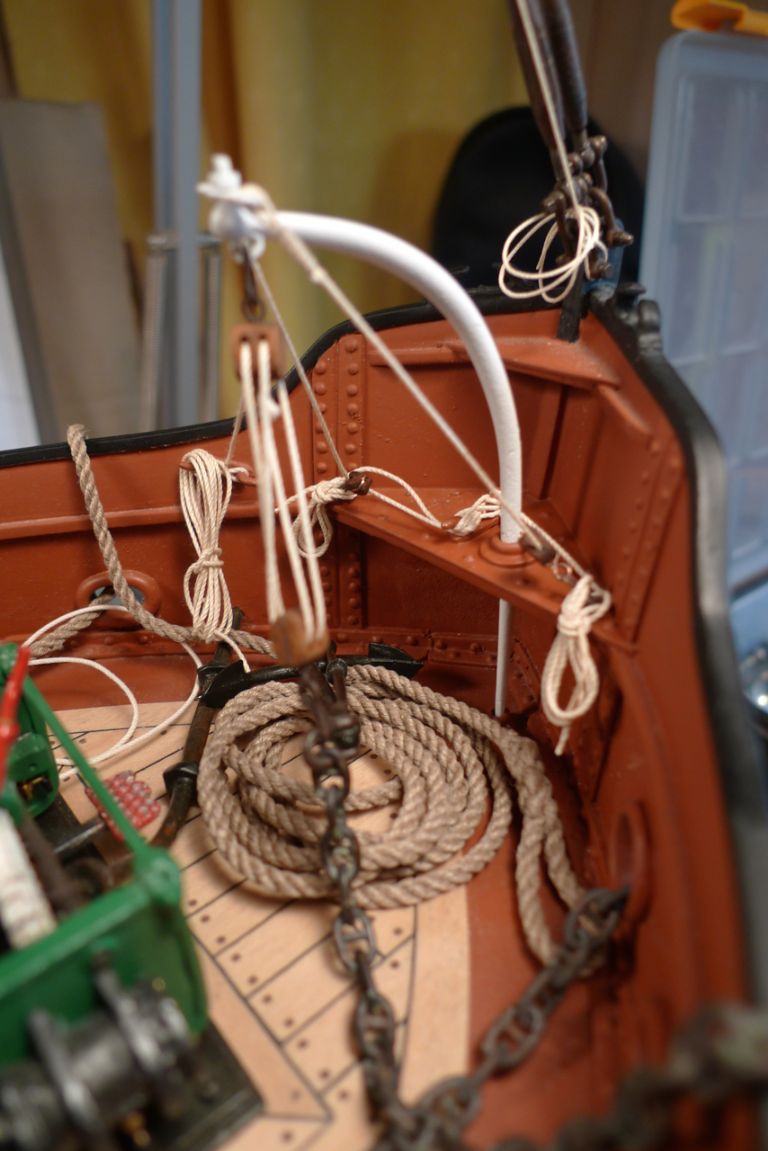
These lines were then rove through the blocks, belayed on the cleat and their running ends and flaked up around the eyebolts …
… with this as a final result, once the anchor raising tackle had been re-hooked.
This solution was not based on any specific prototype or photo that I'd seen, but is rather my own invention; however, it does the job! By pulling on the lines, the davit can be moved through an arc of +/- 180°, and when made fast it keeps the davit firmly in place. It does not encumber or clutter up the rest of the foredeck, and, as the blooks have been hooked into place, the point of purchase could be easily moved, should the crew so wish, or the whole thing taken down in a jiffy if needed, so it'll do.

With this job done, the foredeck is, I think , actually completely finished!

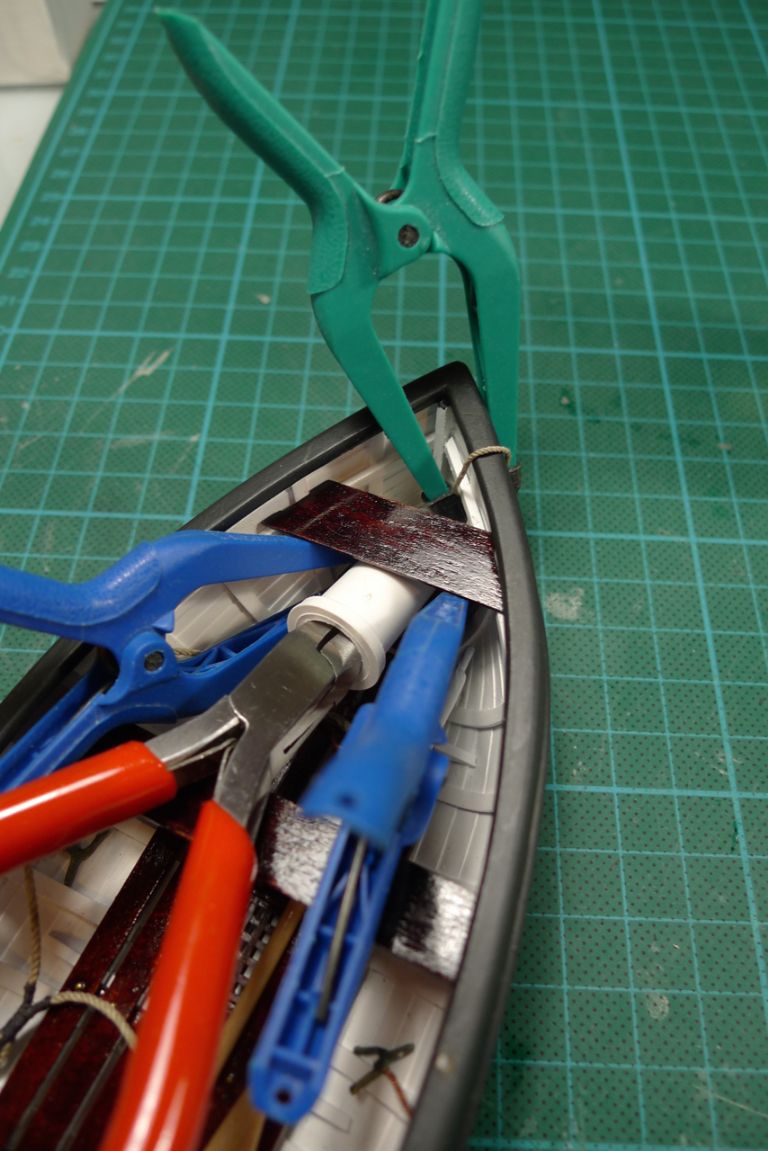
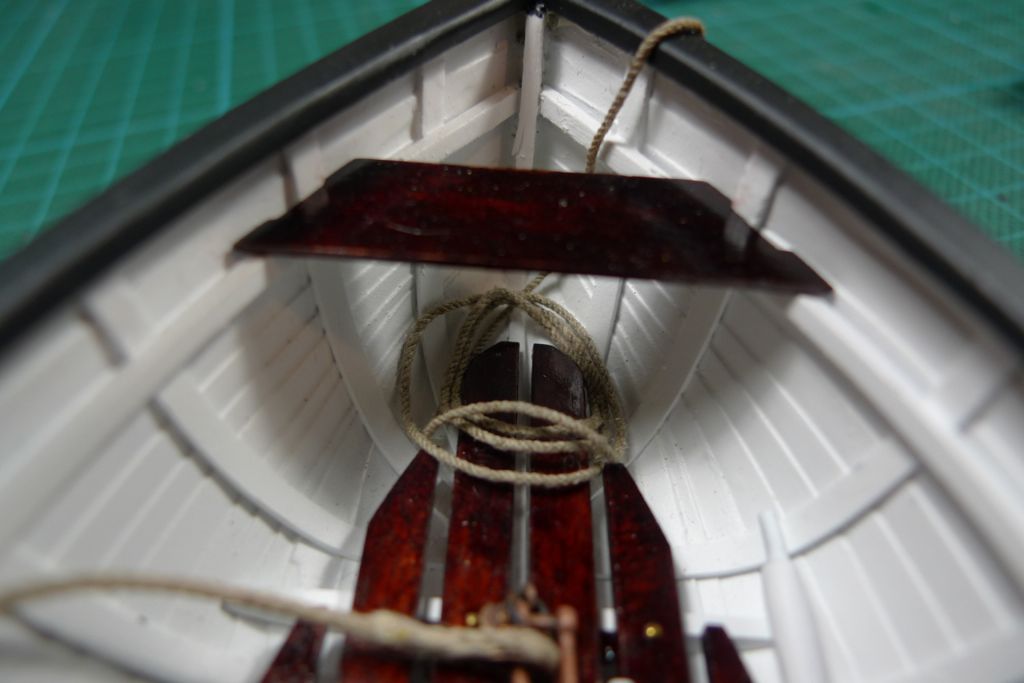
Another small detail was the lay of the painter in the forepeak of the dinghy: it, too,was soaked, and set to dry under pressure …
… with this as a result. Perhaps not 100% perfect, but much better – at least it now looks as though the rope has some weight!
This is thus the current state of affairs, and unless I (or Bob Abell!
 ) come up with yet more irresistible ideas for extra detailing, all that remains to do now is the leather facings on the oars and the (if achievable) better versions of the cigarette packet and matchbox on the chart table in the wheel house.
In other words, I think I can see the finish line!

To be continued (but not for that much longer) …
/Mattias
Edited By Banjoman on 14/08/2015 08:47:52
-
AuthorPosts
- Please log in to reply to this topic. Registering is free and easy using the links on the menu at the top of this page.
Code of conduct | Forum Help/FAQs
Latest Replies
Home › Forums › Building Kits › Topics
-
- Topic
- Voices
- Posts
- Last Post
-
-
Antique model lifeboat
Started by:
douglarse in: Gallery
- 3
- 7
-
1 hour, 56 minutes ago
douglarse
-
Antique lifeboat in auction
Started by:
douglarse in: Buy/Sell or Trade
- 1
- 1
-
1 hour, 59 minutes ago
douglarse
-
Vic Smeed’s Silver Mist
1
2
…
33
34
Started by:
Bob Abell 2 in: Scratch build
- 5
- 830
-
4 hours, 44 minutes ago
 Tony Hadley
-
Lead Zinc boat parts Clean up, and Type of Glue to attach them
Started by:
bruce dixon in: Building Kits
- 2
- 2
-
7 hours, 13 minutes ago
 Colin Bishop
-
Aeronaut Mahogany Sheet issue
Started by:
floatmeboat2025 in: Beginners
- 3
- 4
-
15 hours, 13 minutes ago
 Colin Bishop
-
Melton & District Model Club 60th Anniversary Model Show
Started by:
Michael Campbell 2 in: Shows and Events
- 1
- 1
-
1 day, 9 hours ago
Michael Campbell 2
-
Fairey Huntsman 28
1
2
…
7
8
Started by:
 Chris Fellows
in: Build Blogs
- 2
- 197
-
2 days, 7 hours ago
 Colin Bishop
-
Building a hull.
Started by:
 mick east
in: Scratch build
- 7
- 16
-
3 days, 15 hours ago
 mick east
-
Fairey Faun
1
2
3
Started by:
 Chris Fellows
in: Build Blogs
- 7
- 60
-
4 days, 8 hours ago
 Ray Wood 3
-
superglue allergy
Started by:
 Alasdair Allan
in: All things floating
- 5
- 12
-
5 days, 9 hours ago
Tim Cooper
-
Model Yacht Racing – The future ??
Started by:
 Ray Wood 3
in: Sailing Models
- 4
- 4
-
6 days, 3 hours ago
 Richard Simpson
-
Vic Smeed’s Legacy
Started by:
 Colin Bishop
in: All things floating
- 6
- 15
-
6 days, 6 hours ago
 Colin Bishop
-
Eezebilt RAF Fire Boat
Started by:
Tim Cooper in: Build Blogs
- 4
- 9
-
6 days, 7 hours ago
 Colin Bishop
-
Feathered Friends
Started by:
 Chris Fellows
in: Soapbox
- 3
- 9
-
1 week ago
 Richard Simpson
-
4D Modelshop
Started by:
Keith Long in: Scratch build
- 6
- 9
-
1 week, 1 day ago
 Colin Bishop
-
Fairey Huntsman 31
1
2
…
5
6
Started by:
 Chris Fellows
in: Build Blogs
- 14
- 139
-
1 week, 2 days ago
 Chris Fellows
-
John Cobb’s Crusader
1
2
…
7
8
Started by:
 Paul T
in: Scratch build
- 1
- 192
-
1 week, 3 days ago
 John W E
-
Complex Automata
Started by:
 Colin Bishop
in: Soapbox
- 1
- 1
-
1 week, 4 days ago
 Colin Bishop
-
RAF Fireboat ID
Started by:
 Dave Reed
in: Collectors’ corner
- 8
- 24
-
1 week, 5 days ago
Tim Cooper
-
TID steam tug 42″ – PN Thomas drawing enlarged
1
2
Started by:
 Ray Wood 3
in: Scratch build
- 8
- 33
-
1 week, 6 days ago
 Richard Simpson
-
Lady of Skye (puffer)
1
2
Started by:
 mick east
in: Build Blogs
- 9
- 43
-
1 week, 6 days ago
 Richard Simpson
-
Todays Boating
1
2
…
210
211
Started by:
 ashley needham
in: All things floating
- 84
- 5,252
-
2 weeks, 2 days ago
 Colin Bishop
-
Sea Rover Restoration
Started by:
harry smith 1 in: Collectors’ corner
- 4
- 10
-
2 weeks, 2 days ago
 Richard Simpson
-
WORKSHOP LIGHTING
Started by:
 John W E
in: All things floating
- 9
- 18
-
2 weeks, 3 days ago
 Colin Bishop
-
Mayhem Website Down
Started by:
 Colin Bishop
in: All things floating
- 4
- 10
-
2 weeks, 6 days ago
 Colin Bishop
-
Antique model lifeboat
-
Latest Issue
Newsletter Sign-up
Latest Replies


