TEV Wahine 1/35 Build

Advert

TEV Wahine 1/35 Build

Home Forums Scratch build TEV Wahine 1/35 Build

Viewing 25 posts - 126 through 150 (of 411 total)
  • Author
    Posts
  • #63587
    Richard H Dunn
    Participant
      @richardhdunn

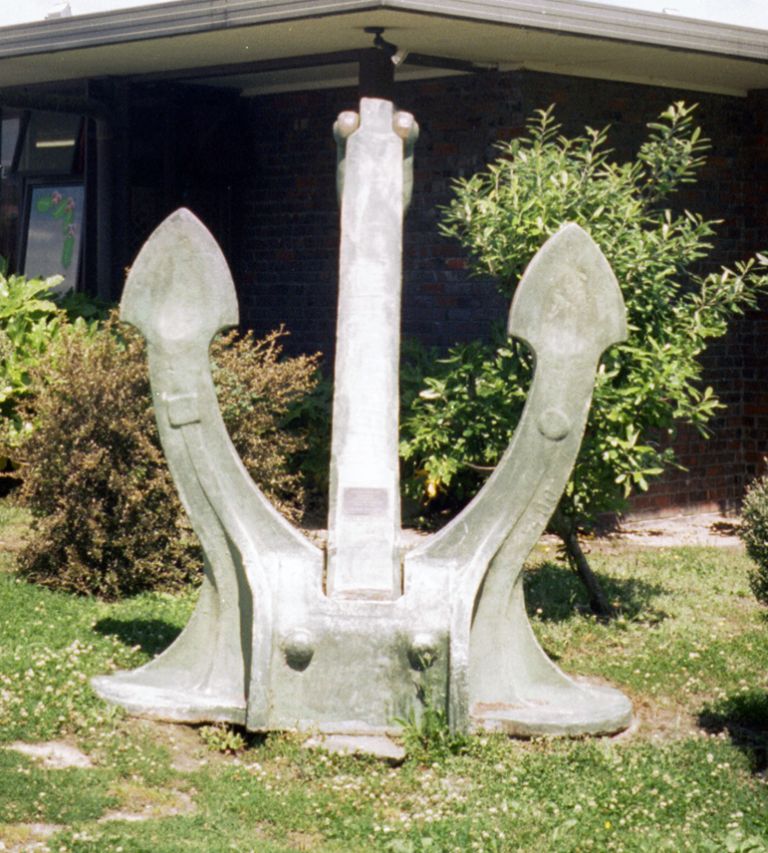
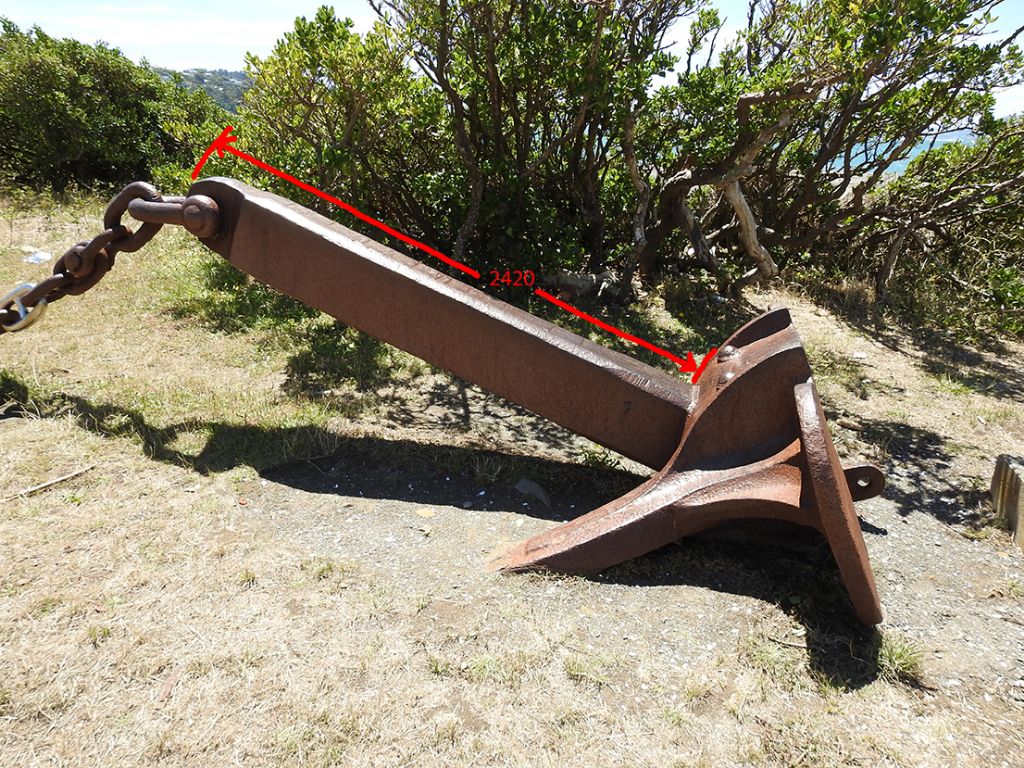
      Ok so here is a bit more info on the anchor test print.

      Actual Anchors

      anchor at pub.jpg

      shank size.jpg

      Some images of the assembly of the anchor with pivoting shanks.

      I need this to make sure my Hawse pipes are correct..what better way than to fit the anchor in it…..

      dscn0846[1].jpg

      dscn0847[1].jpg

      dscn0848[1].jpg

      dscn0849[1].jpg

      dscn0850[1].jpg

      I will turn up some brass retaining bolts to hold the shank pin in place later.

      I have left the corners square because the rounding on the real anchors is very rough I want to attack the casting with a file to make it look more rustic, internal corners will be filled with filler and sanded before casting final resin anchors.

      Enjoy

      Advert
      #63591
      Bob Abell 2
      Participant
        @bobabell2

        An excellent addition to your workshop

        The anchor test seems to have proved the suitability of the Printer

        Could have made your own scale anchors?

        Bob

        #63905
        Richard H Dunn
        Participant
          @richardhdunn

          Just about ready to get back into it , after finally getting my workshop sorted and building a shade house for growing orchids.

          Have now got my motors from Motion Dynamics, and will be buying the speed controllers from them as well when the new design comes out.

          https://www.motiondynamics.com.au/xyd-6d-450w-24v-2600-rpm-with-chain-sprocket-en.html

          https://www.motiondynamics.com.au/12v-36v-dc-speed-control-bi-directional-50a-pcb-model.html

          Batteries are going to be here in about 5 weeks.

          The Props are being done now and will be ready in 2- 3 weeks…exciting.

          Building superstructure bases this month.

          I need to buy 600 LED bulbs!!! that's if I build the 50 fluro lights the way Gareth did his but with 5-6 bulbs in each, will use a more opaque cover to diffuse the light more and make it harder to see the bulbs..

          How do these LED bulbs last?

          I have also sourced a pump for the ballast.

          http://www.pumpwarehouse.com.au/lfp122-202-flojet-automatic-12v-dc-duplex-pump-santoprene-epdm-3-8-l-min-max/

          #64306
          Richard H Dunn
          Participant
            @richardhdunn

            Some overdue pics

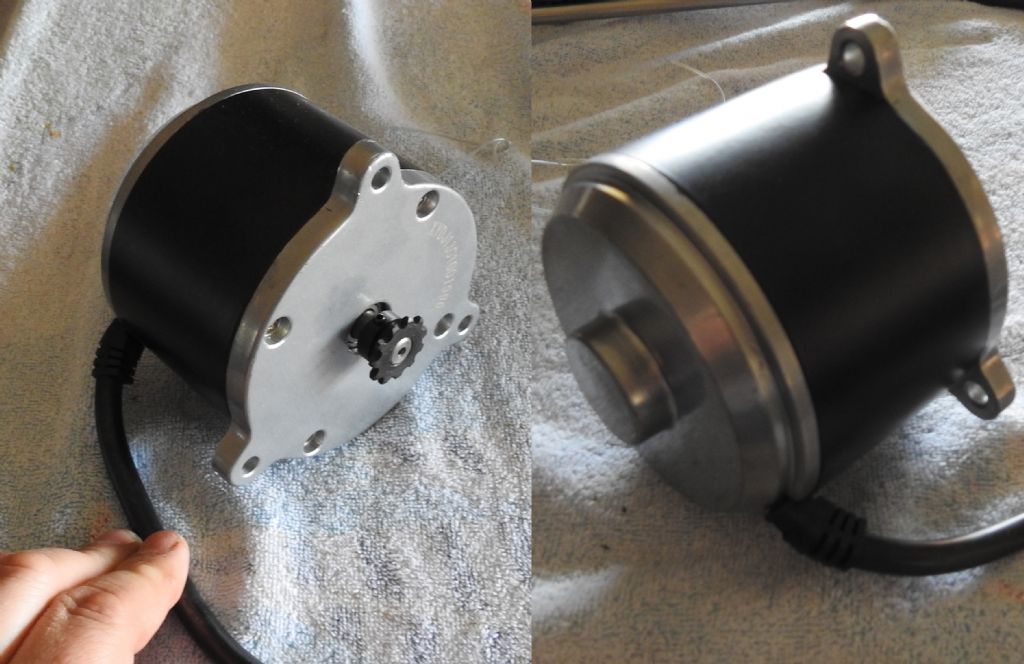
            The motors

            motors.jpg

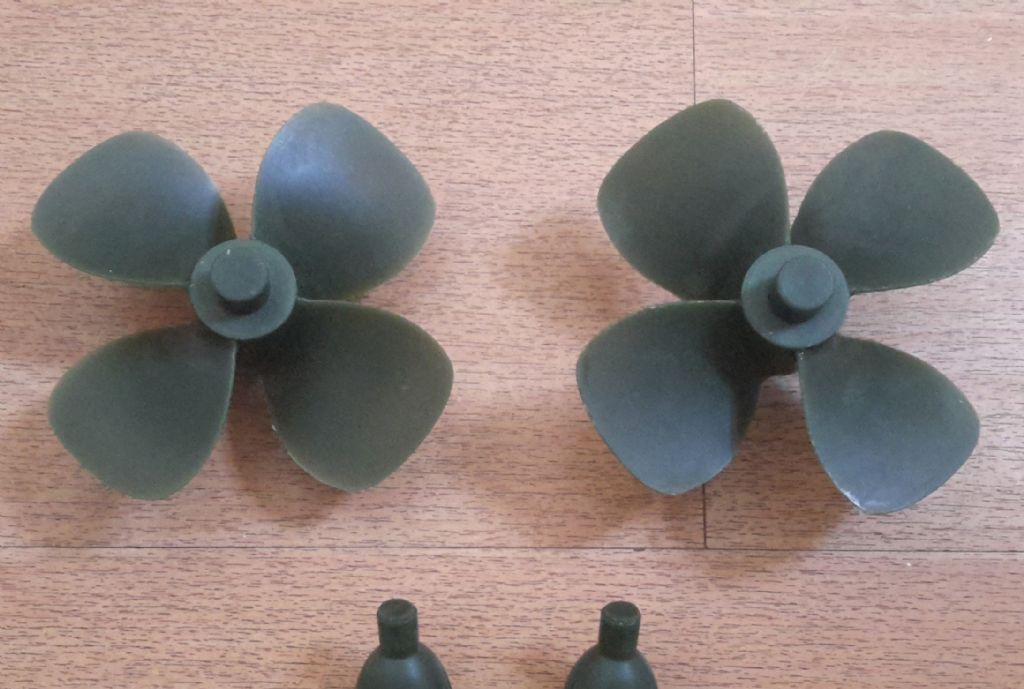
            I also got a pic from Simon Higgins of the props at wax master stage.

            wax models.jpg

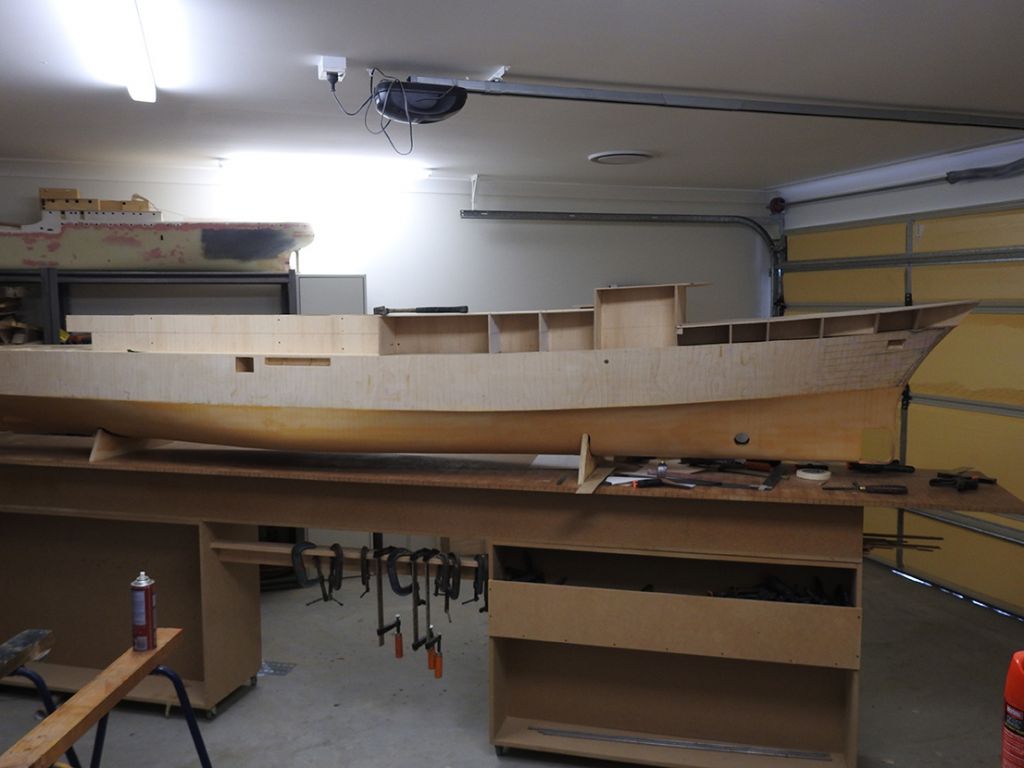
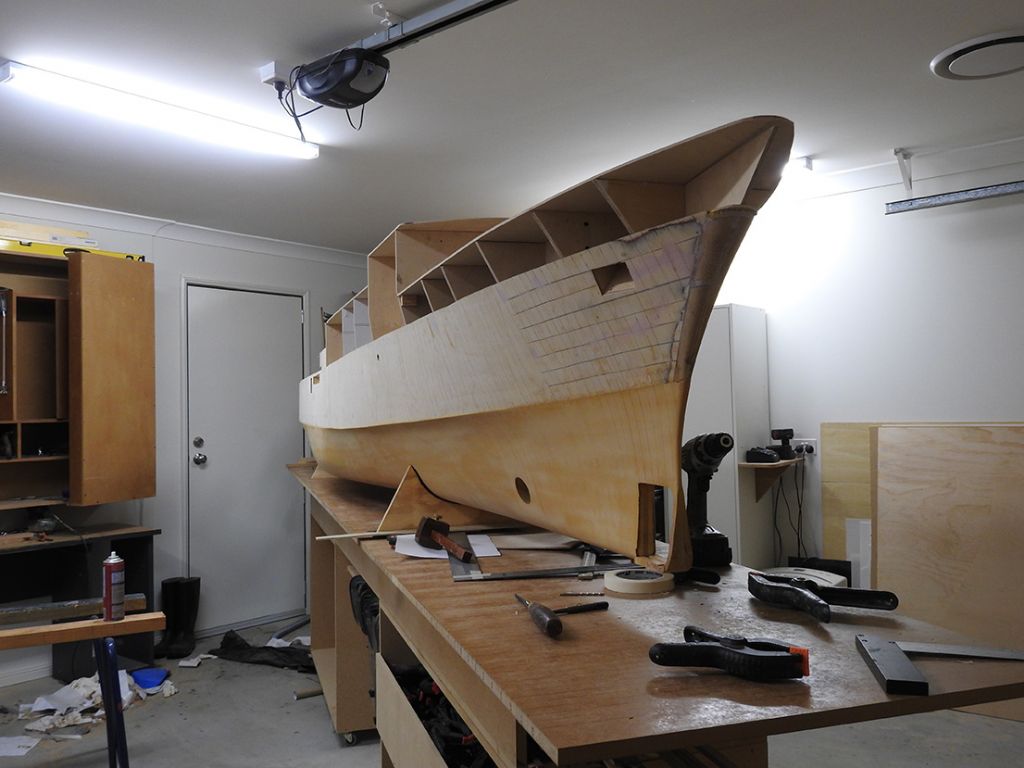
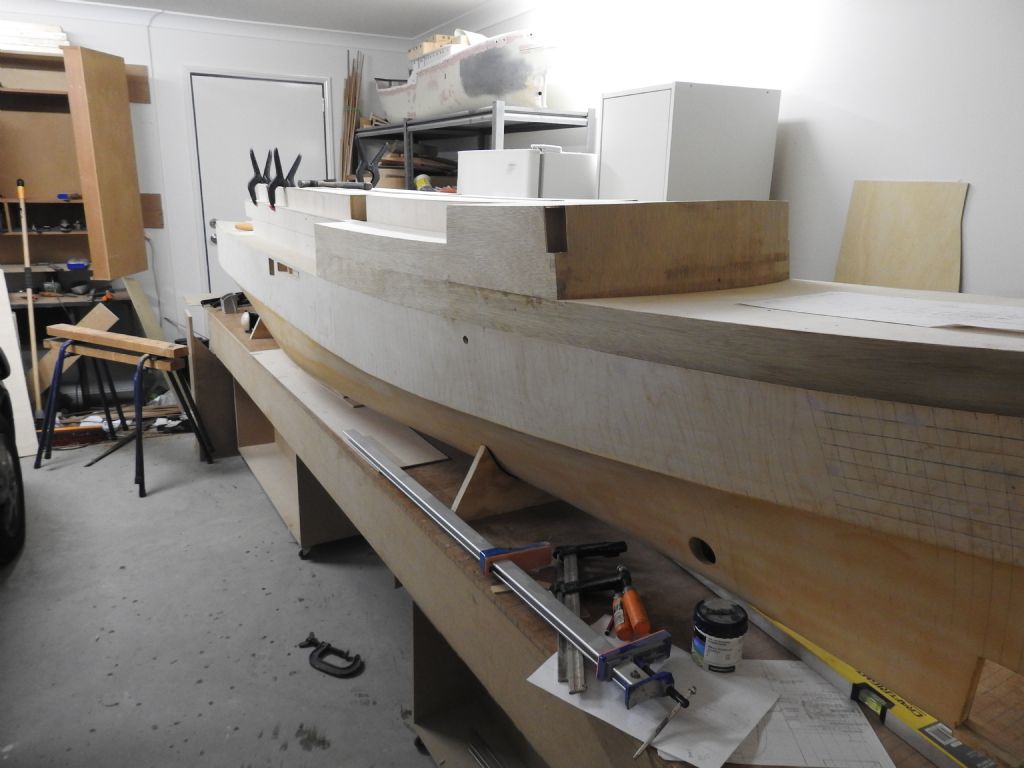
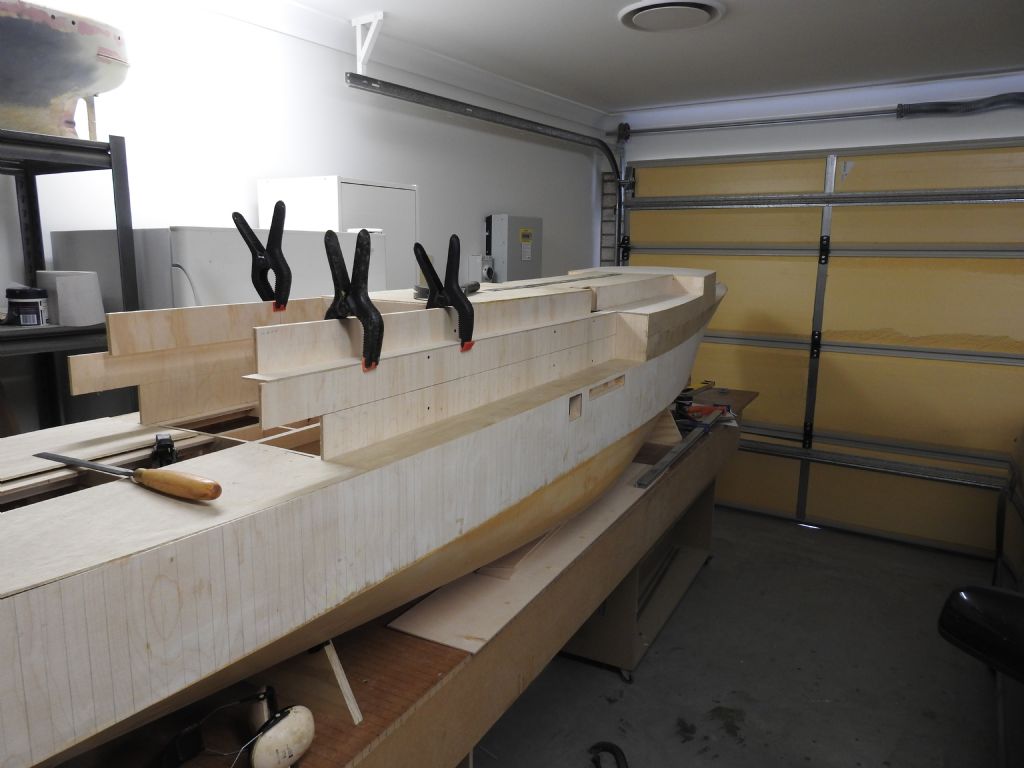
            And lastly just building the lightweight superstructure base structure which is almost ready to cover in with ply.

            I am leaving the aft end until last as it is the most difficult part to build.

            dscn0917.jpg

            dscn0916.jpg

            dscn0914.jpg

            dscn0915.jpg

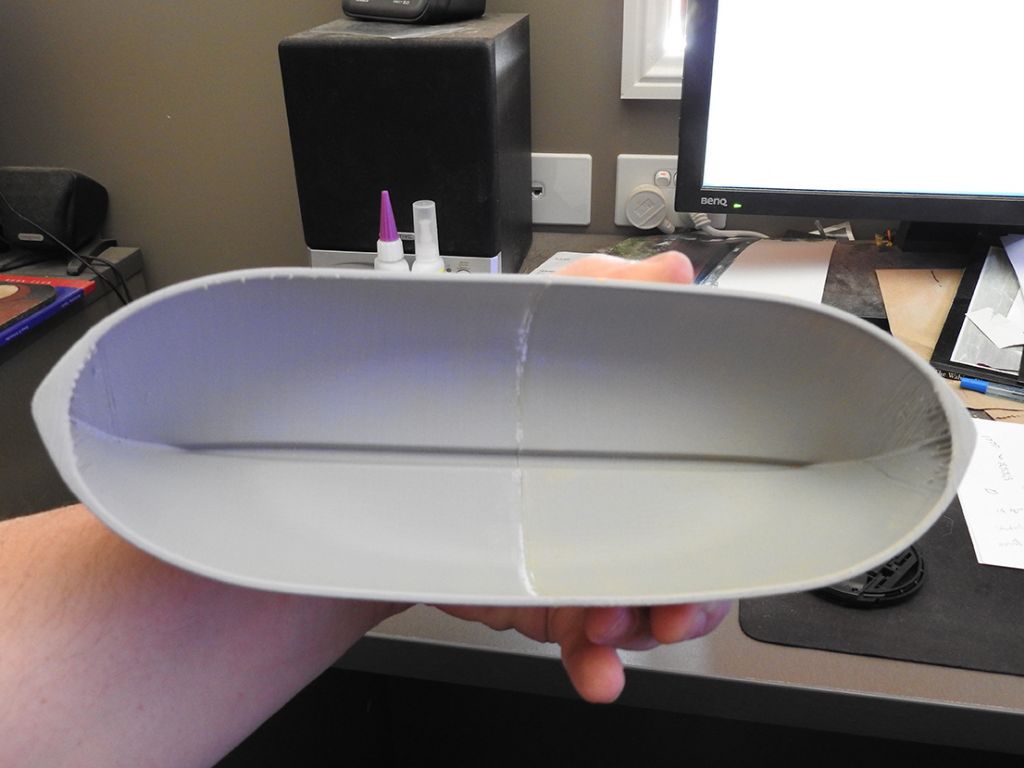
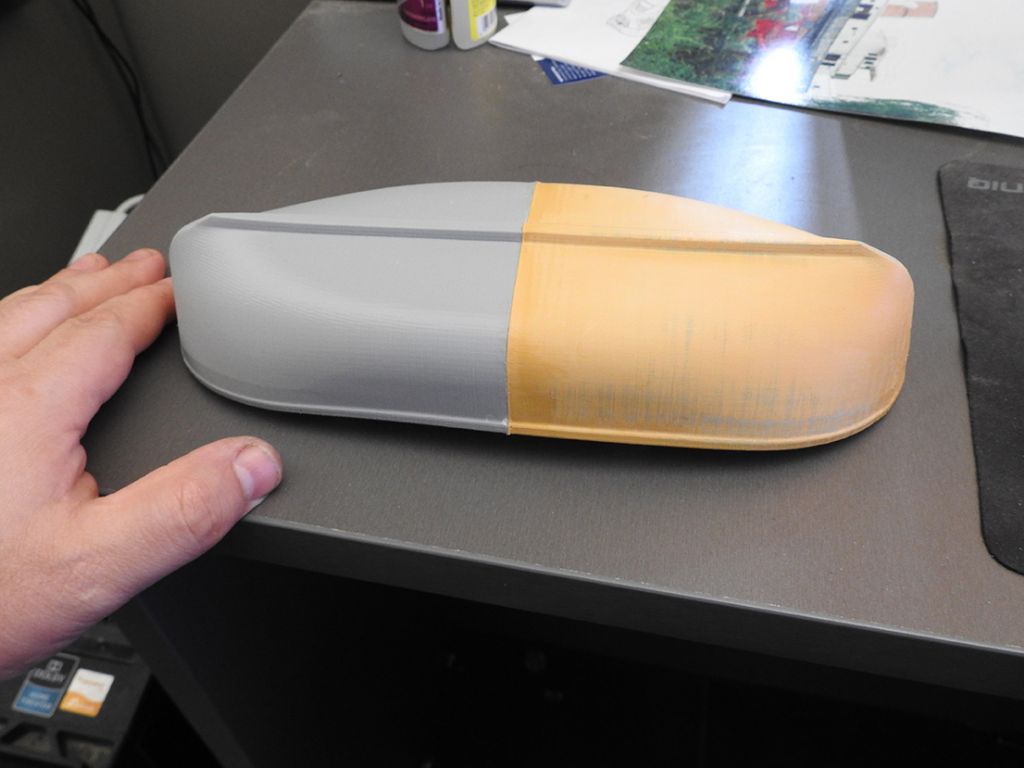
            I have also experimented with printing the lifeboats in 2 parts, once the inside terracing is made these can be cast in resin.

            31ft lifeboat inner.jpg

            31ft lifeboat outer.jpg

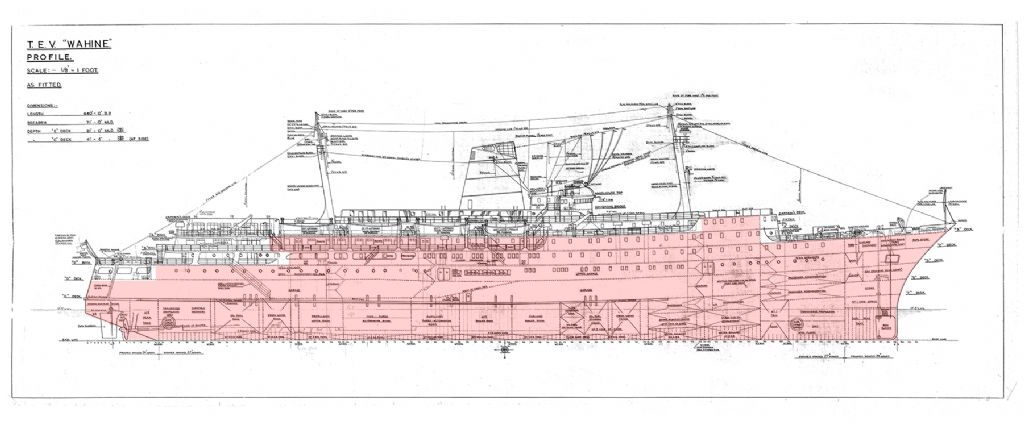
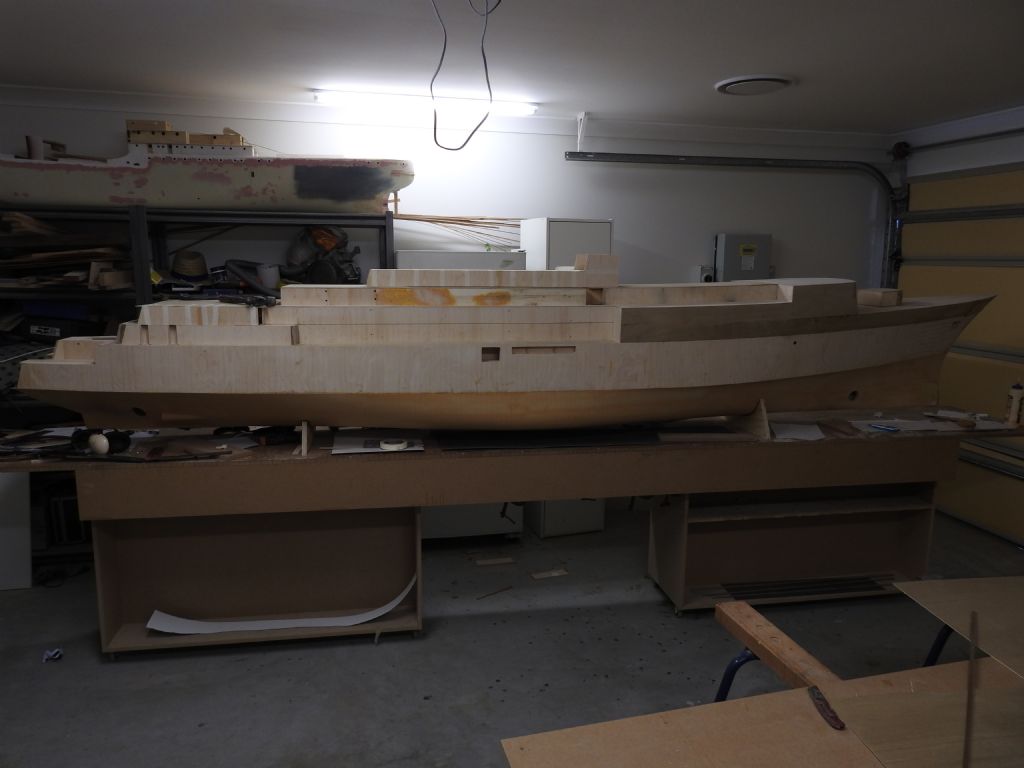
            And finally a progress update on structure.

            tev wahine progress.jpg

            #64310
            Banjoman
            Participant
              @banjoman

              Richard,

              I haven't commented much on your build, mainly out of fear that the well of superlatives would run dry long before the model was finished, but also because an endless string of "wonderful build and great progress"-posts would soon get repetitive and tiresome; however, please believe that I'm in complete and total awe of what you are doing here!

              This is without a doubt one of the most fascinating model boat projects I've ever heard of, while the distance by which your level of acheivement is beyond praise has to be measured in parsecs!

              It is pure joy to be allowed to watch your work progress! It is all simply marvelous!

              /Mattias

              Edited By Banjoman on 05/04/2016 09:27:17

              #64311
              Bob Abell 2
              Participant
                @bobabell2

                Richard

                I second Banjo`s comments entirely…………Simply awesome!

                The 3D idea is a wonderful modern approach to your build

                Bob

                #64870
                Richard H Dunn
                Participant
                  @richardhdunn

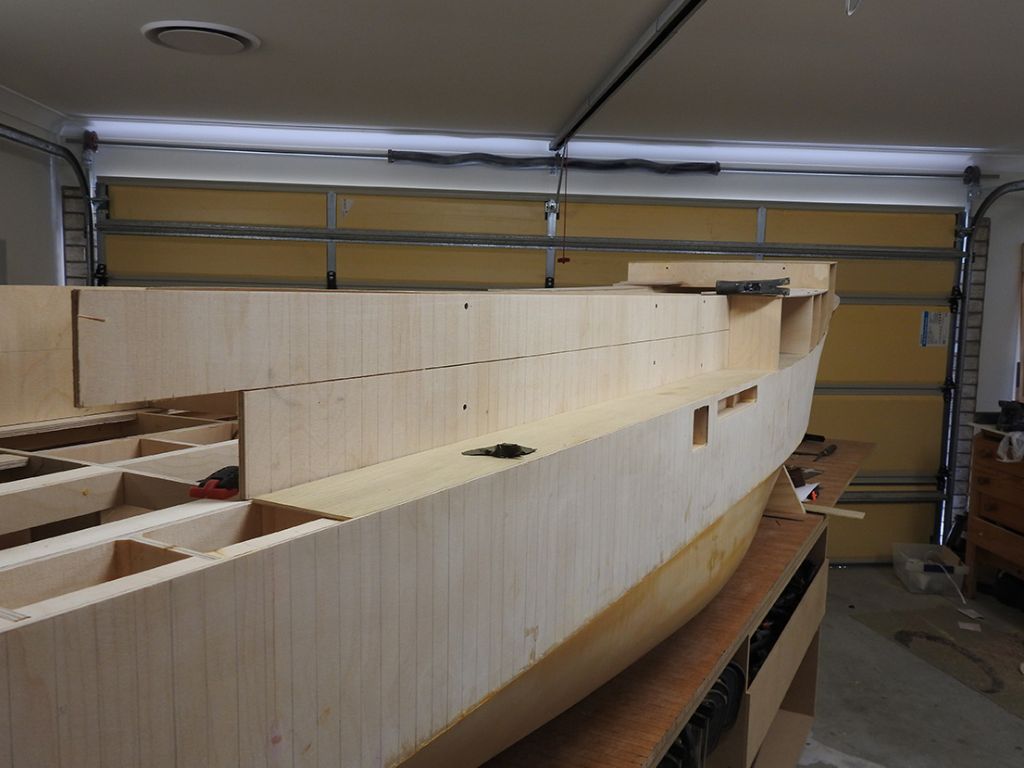
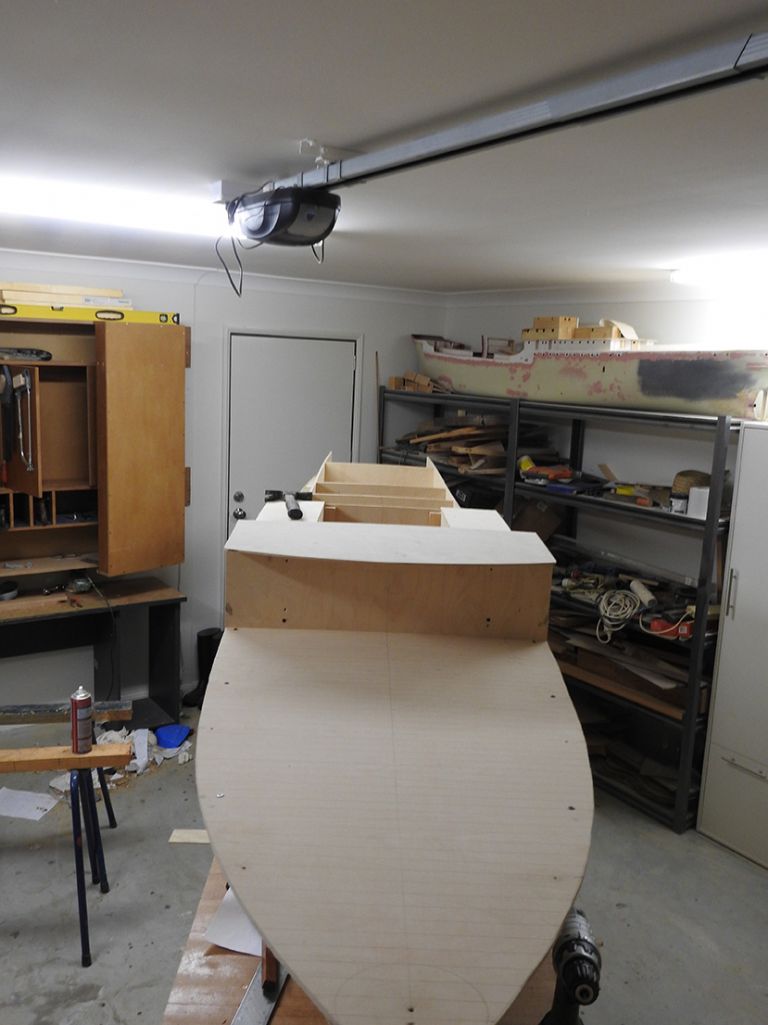
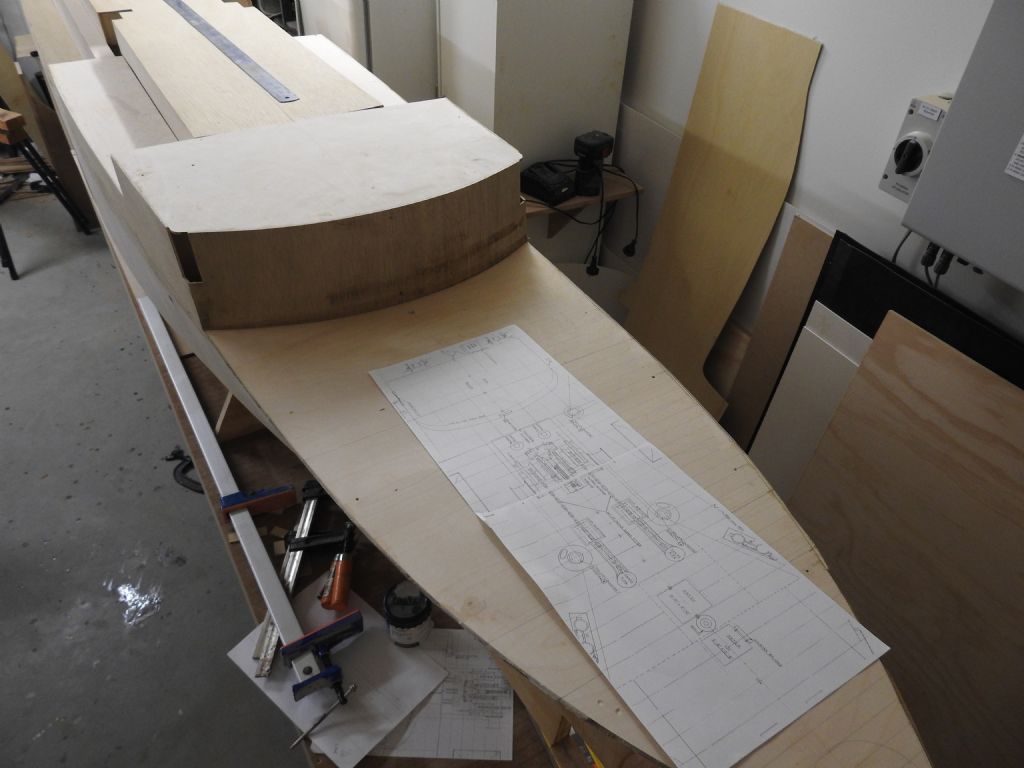
                  Some updates on the superstructure.

                  Just the after structure to make and the fan rooms and bridge on top now.

                  I ten have the job of marking out all ports/windows and cutting out ply behind them so I can start cladding in styrene sheet.

                  The top most layer in these shots is the removable lid for hull access

                  dscn0959.jpg

                  dscn0957.jpg

                  dscn0960.jpg

                  #64871
                  Richard H Dunn
                  Participant
                    @richardhdunn

                    No need to comment on These works of art..Thanks Simon!!.

                    finished props.jpg

                    #65436
                    Simon Estall
                    Participant
                      @simonestall44634

                      Hi Richard. I have an absolute interest with this model. Why? in 1968 in Wellington Mum was an air traffic controller at Wellington airport. Dad was an aircraft engineer over the other side. After the Disaster "NAC" put on a 'booze up" if you will to thank the staff that helped out. My parents met there. mum was sent out in one of the rescue craft and dad was tying the planes down at the airport. In later years I did get to meet the people involved… I was born in 1971

                      #65692
                      Richard H Dunn
                      Participant
                        @richardhdunn

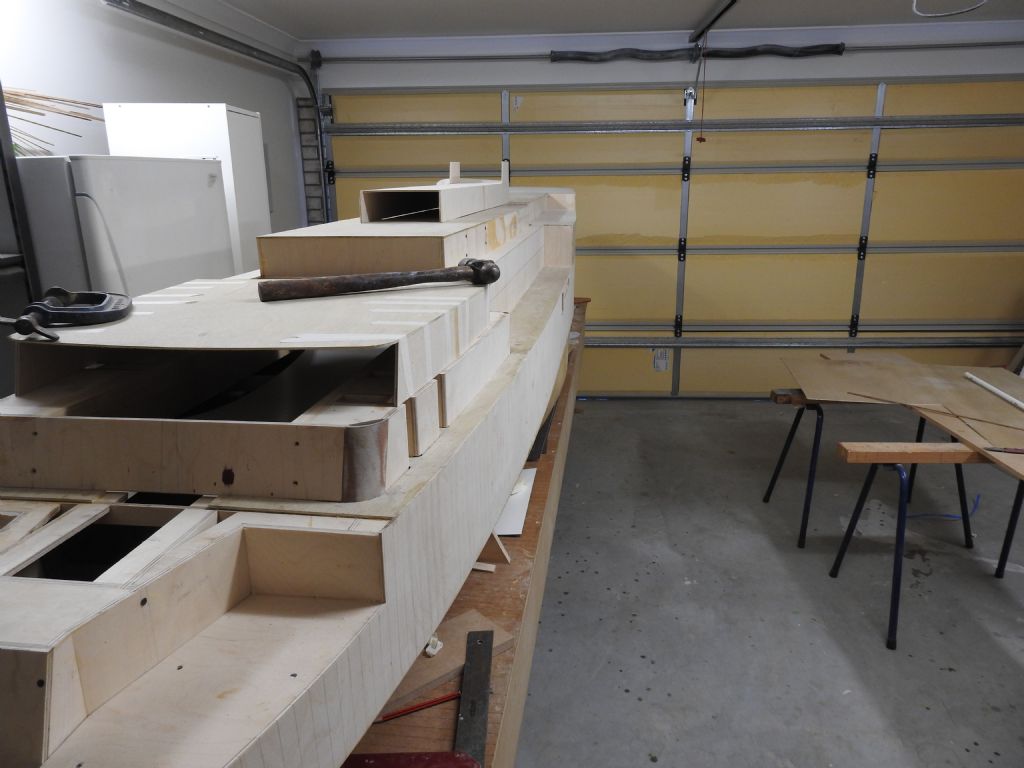
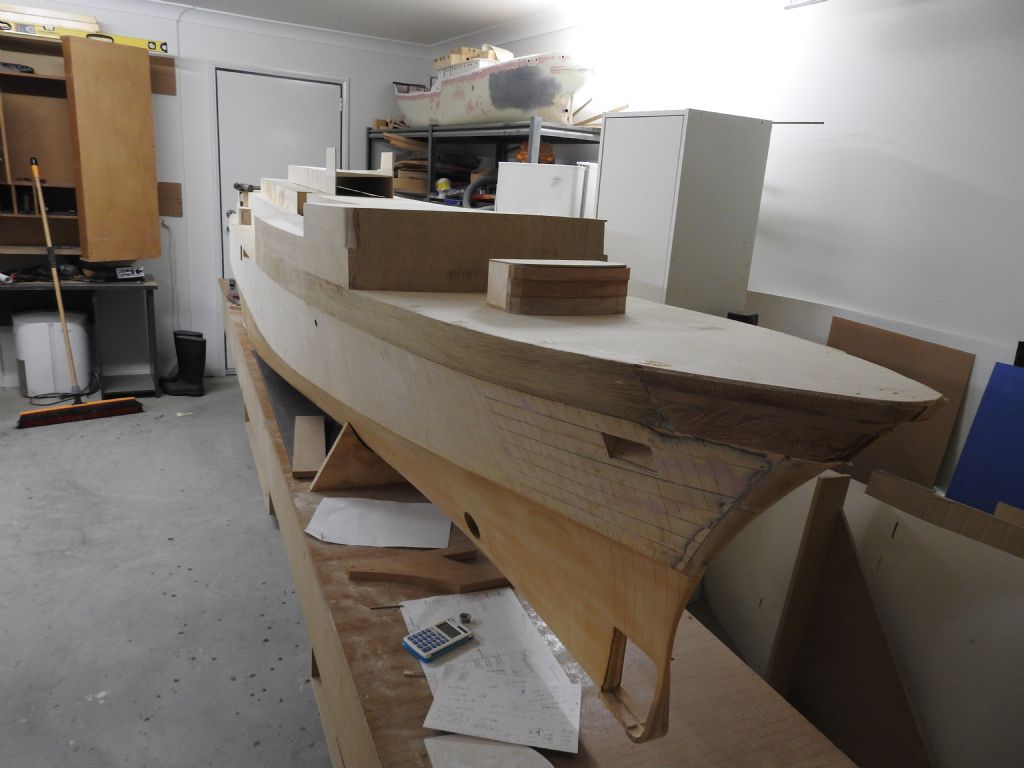
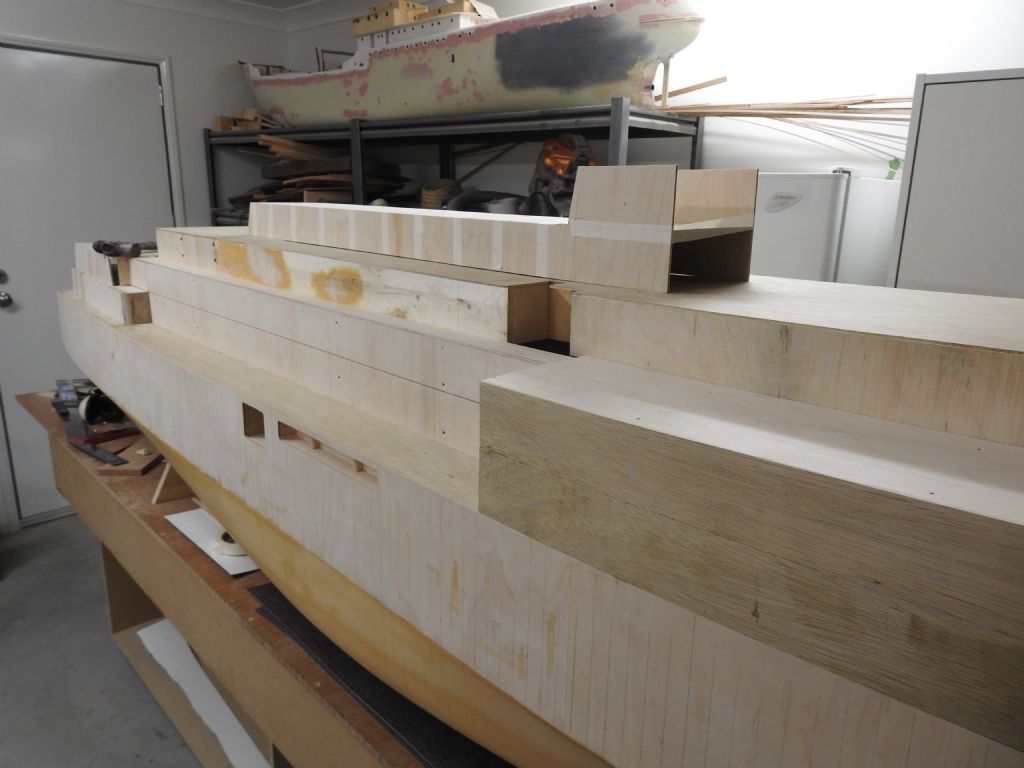
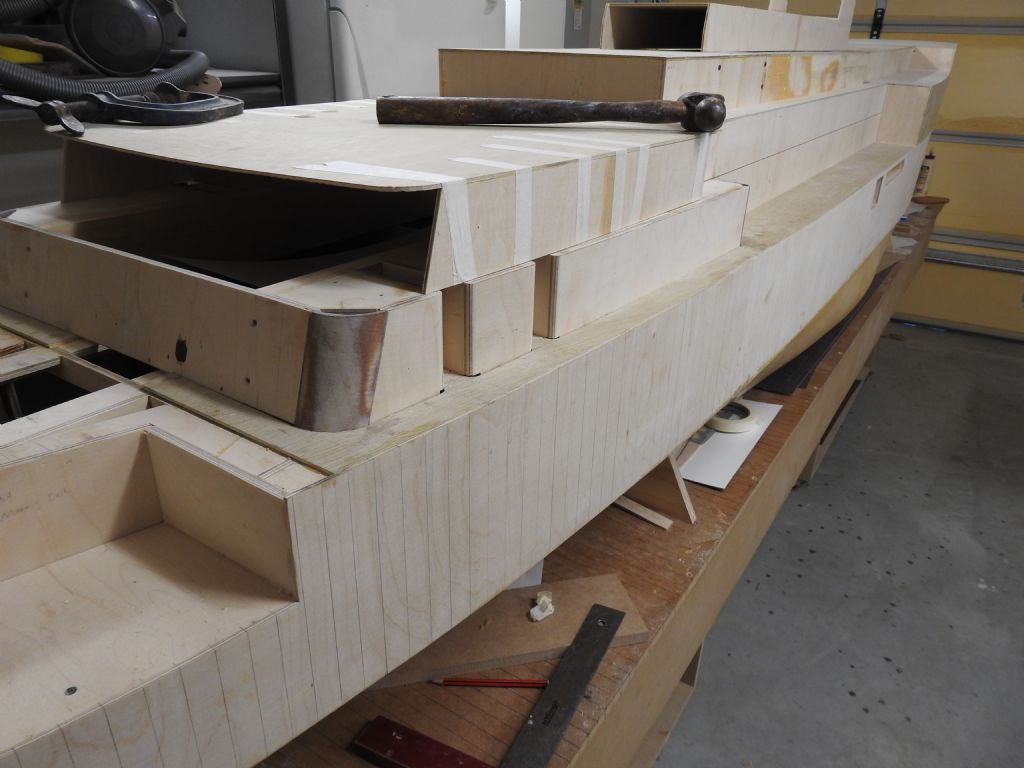
                        Just a few pictures of the superstructure boxes nearing completion.

                        Only the aft lounge and bridge now and then its time to install all the radio gear and moving parts.

                        That will be a first for me, so a little daunting.

                        I had to knock the building board apart and re build it as it was too high to work on Superstructure, I am 6ft 1 and could not reach the top deck easily.

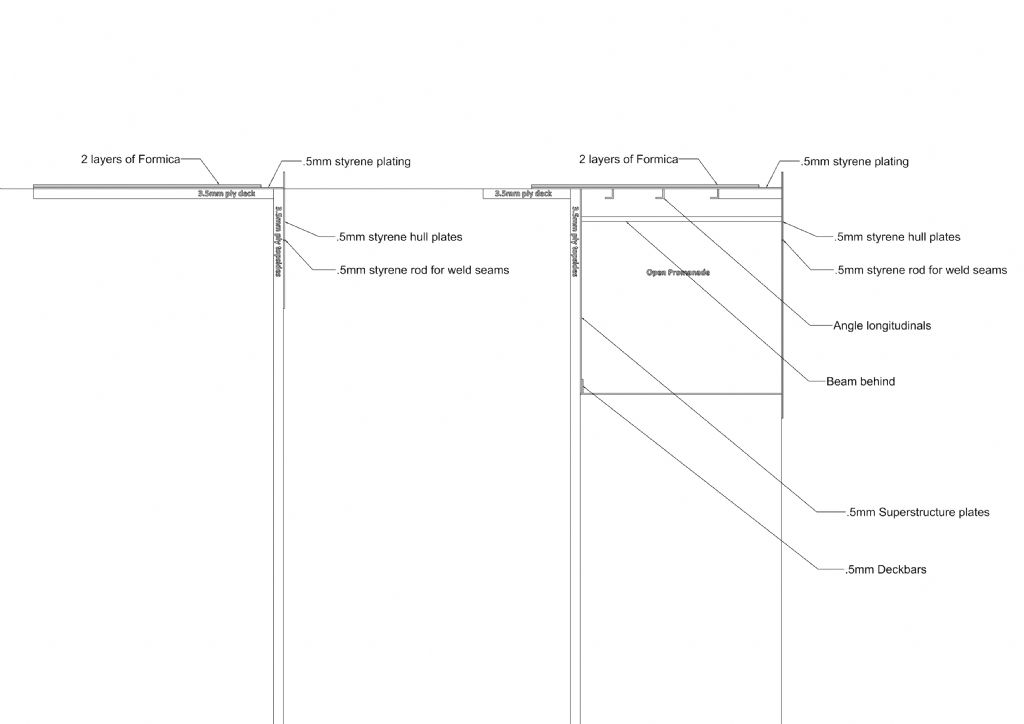
                        I have decided to use laminate(formica) for the deck surfaces and it has been cut, the deck had the steel plate made from .5mm Styrene and the 1.5inch Semdek(Semprene) decking on top of this but stopped short 12 inchs to form gutter.

                        So I will do a 3 layer sandwhich for overhanging decks, the .5 styrene and the 2 layers of Formica on top that way I have tough hard surface for deck and styrene underneath to bond all the framing to.

                        dscn1009.jpg

                        dscn1010.jpg

                        dscn1011.jpg

                        Fan room laminations before shaping.

                        dscn1012.jpg

                        The fan room, the bridge sits at the front of this box where it is open and the funnel sits on here behind the radio room (the heighest part in this shot)

                        dscn1013.jpg

                        The Galley layer with the laminated corners from 0.4mm ply and recessed door wells, The cafetaria is being assembled above and will need fitting out internally as it has large windows.

                        Weight so far as weighed 59.5kgs.

                        #65694
                        Richard H Dunn
                        Participant
                          @richardhdunn

                          Here is a plan of the structure of the decks in the model.

                          deck construction.jpg

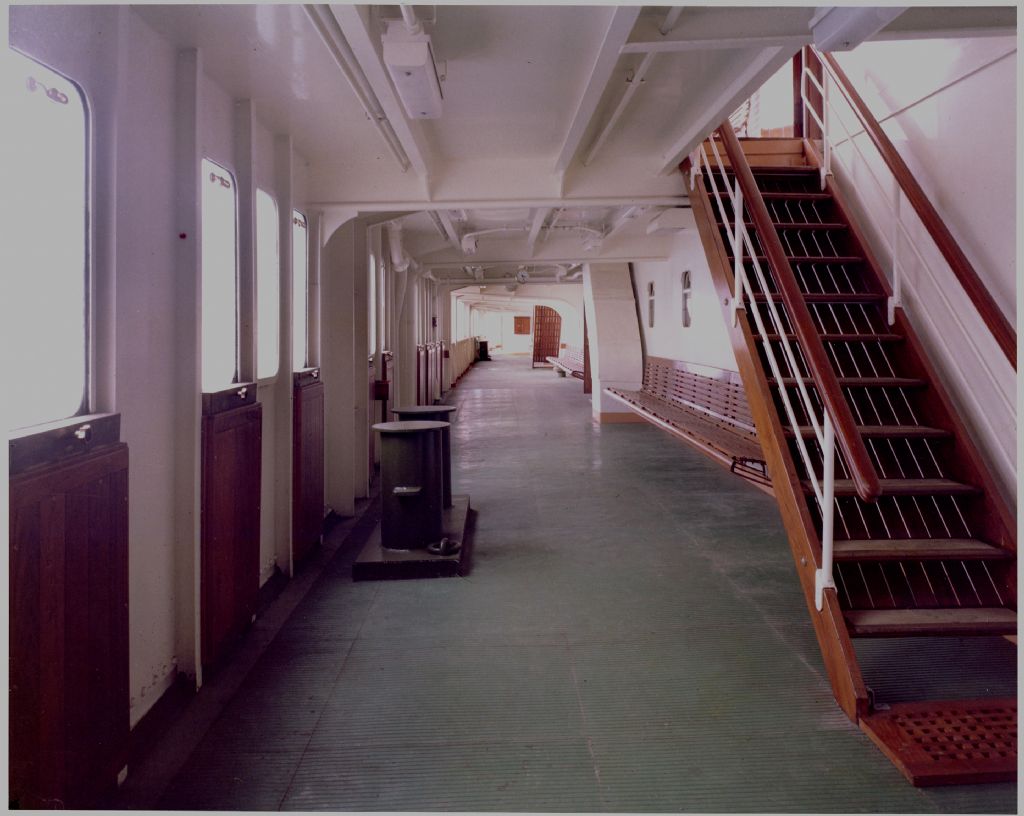
                          This will enable me to build this sort of under deck structure while using styrene, nice and safe.

                          promanade deck looking aft.jpg

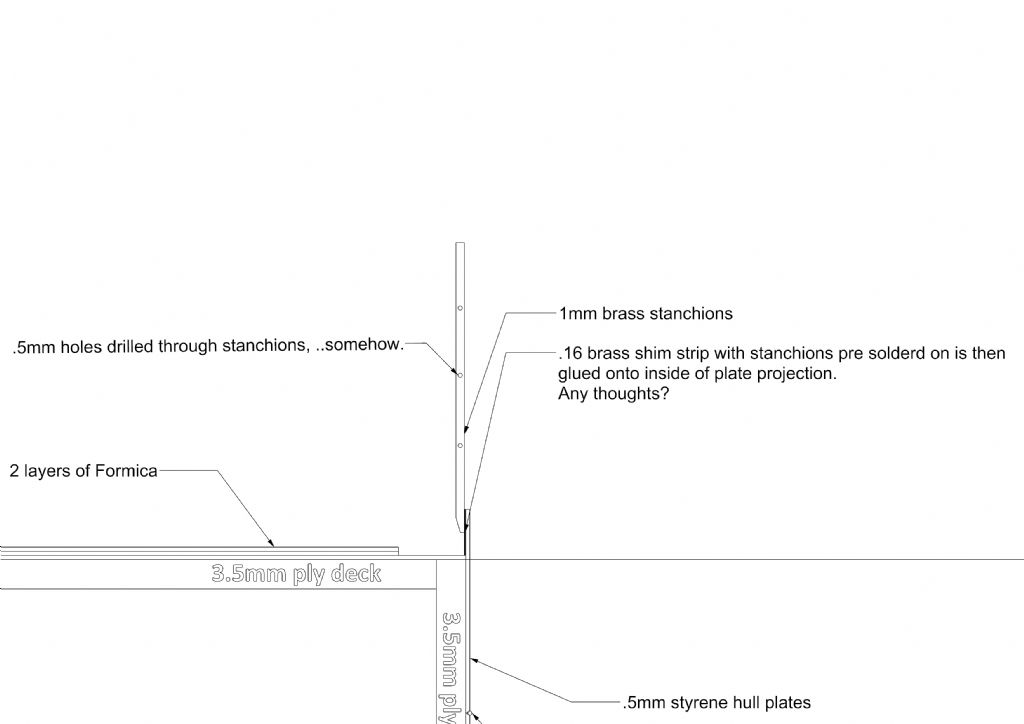
                          I would also like some feedback on this system of railing, as the stanchions do not always go into deck I had to devise a strong system, I think this will work as he shim is glued over it full 6mm high strip to the styrene

                          railing system.jpg

                          #65695
                          Richard H Dunn
                          Participant
                            @richardhdunn

                            And props are here now to.

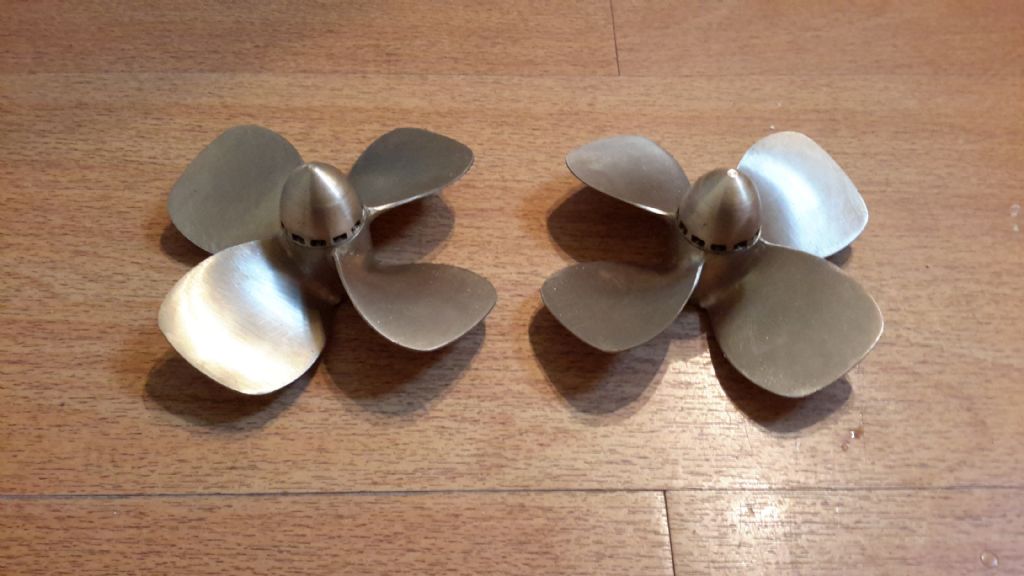
                            Get a load of these, including screw on nose cones to conceal split pin through shaft

                            dscn1014[1].jpg

                            Thank you to Simon Higgins from Protean Design for the amazing work and FYI he is now working freelance, I have his new details now if anyone needs them.

                            Edited By Richard Dunn 3 on 29/05/2016 07:45:25

                            Edited By Richard Dunn 3 on 29/05/2016 07:46:04

                            #65699
                            Dave Milbourn
                            Participant
                              @davemilbourn48782

                              Richard

                              Have you considered having the stanchions etched in brass? A half-etch would provide a crease line to fold the 90° bends as well as the shim; they would all be identical and deadly accurate, and those 0.5mm holes would be done with no further effort from you than the click of a mouse. I saw some amazing brass etching this weekend in the Linkspan ferry kit (which also includes some beautiful 3D printed parts).

                              Your build continues to amaze!

                              Dave M

                              #65700
                              Richard H Dunn
                              Participant
                                @richardhdunn

                                Hi Dave
                                I did consider it as I have set myself up for etching now, not a cheap process but really glad I have, just waiting on the photo resist paper and UV lamp to arrive.
                                The problem is the stanchions are oval in section 1mm x .6mm.
                                I also thought about using plastic but I think its too flimsy, really not sure on this as nothing is worse than out of scale railing.


                                Although……I could fold them into a diamond shape and use hi build primer to make them rounder?


                                Tried it and the spacing of the creases is too close, .2 of a mm.

                                However I am thinking of cutting slots for the rails from one side and then filling with solder to replace sawn out part when the railing is being soldered together, that way no holes need drilling

                                Edited By Richard Dunn 3 on 29/05/2016 09:07:59

                                Edited By Richard Dunn 3 on 29/05/2016 09:32:04

                                Edited By Richard Dunn 3 on 29/05/2016 09:32:35

                                #65701
                                Richard H Dunn
                                Participant
                                  @richardhdunn

                                  Like this

                                  slot type.jpg

                                  #65702
                                  Dave Milbourn
                                  Participant
                                    @davemilbourn48782

                                    Richard

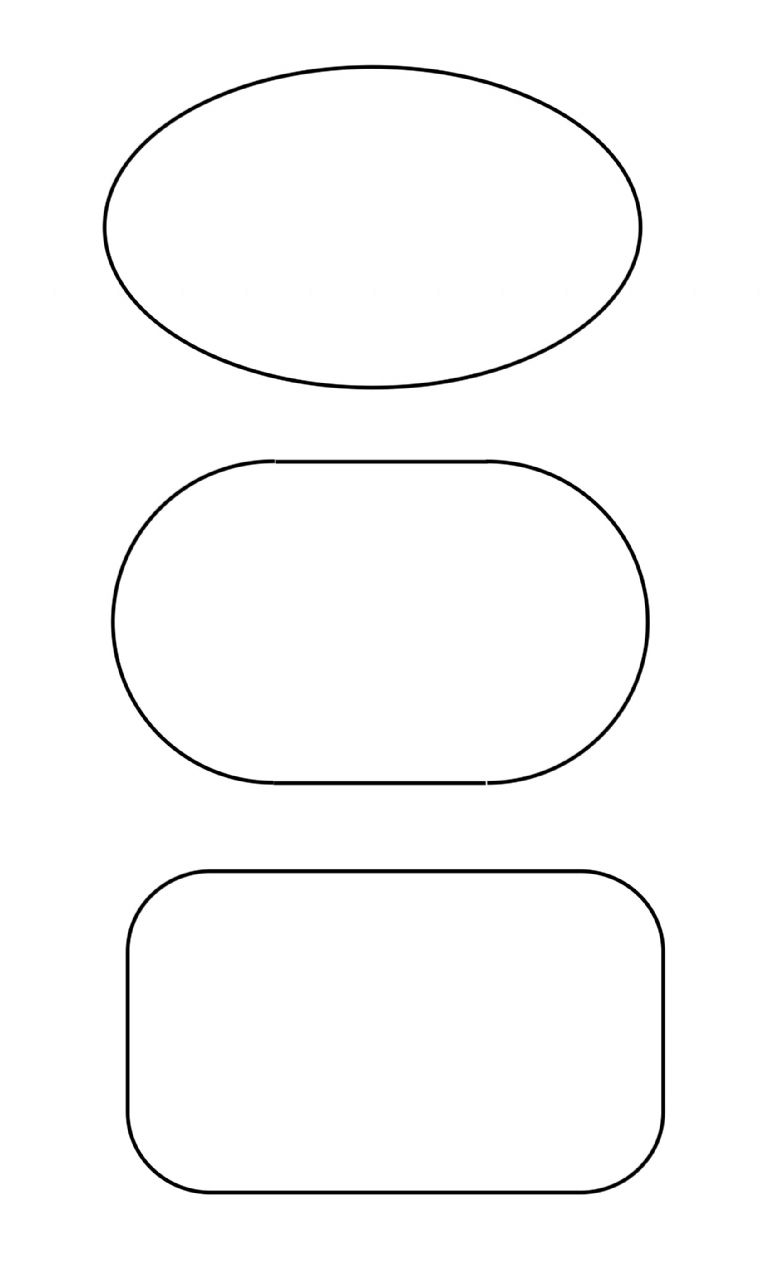
                                    Why not use 0.6mm brass sheet for the etch and make the stanchions 1.0mm wide? When completed, dress the edges with a fine linisher and I very much doubt if anyone else would ever spot the difference. One man's oval is as good as another man's ellipse – which I think is what we're talking about here. We're also talking about a tiny fraction of a millimetre on a model which is several metres long. Here is a drawing showing, from top to bottom, elliptical, oval and rounded – note that each section is just one millimetre long:

                                    richard d stanchions.jpg

                                    Some things really are just too small to worry that much about. Suit yourself.

                                    Dave M

                                    #65703
                                    Richard H Dunn
                                    Participant
                                      @richardhdunn

                                      Hmmm.

                                      True, I guess I'm getting caught up in details too much, which is a good thing but sometimes can't see the obvious.
                                      That's why I started this Blog.

                                      Cheers I will do that, I will get myself some thicker shim

                                      #65704
                                      Richard H Dunn
                                      Participant
                                        @richardhdunn

                                        Does anyone know if you can get smoke machines for models that do darker smoke?.

                                        #65705
                                        Dave Milbourn
                                        Participant
                                          @davemilbourn48782

                                          I've not heard of a successful one. In model boating terms it's almost the Holy Grail.

                                          DM

                                          #65706
                                          Colin Bishop
                                          Moderator
                                            @colinbishop34627

                                            I would agree with Dave, make them flat first which will facilitate drilling the holes using a jig and then round off the sides. The important thing with railings is to ensure that they are neat and even. Visually, an onlooker's attention will be drawn to the horizontal bars and the timber capping rail (where fitted). If the edges of the vertical stanchions are rounded off they will look right even if technically they are not precisely accurate. With this method you will have a fighting chance of retaining your eyesight!

                                            Dave is also right about dark 'smoke'. Adding oil to a heating element seems to be the only feasible method and this then produces a nasty residue over the model's upperworks.

                                            Anyway a properly set up full size power plant shouldn't generate much smoke at service speed.

                                            Colin

                                            #65870
                                            Richard H Dunn
                                            Participant
                                              @richardhdunn

                                              HELP NEEDED

                                              Ok everyone I really need some advice as I have hit a small hurdel

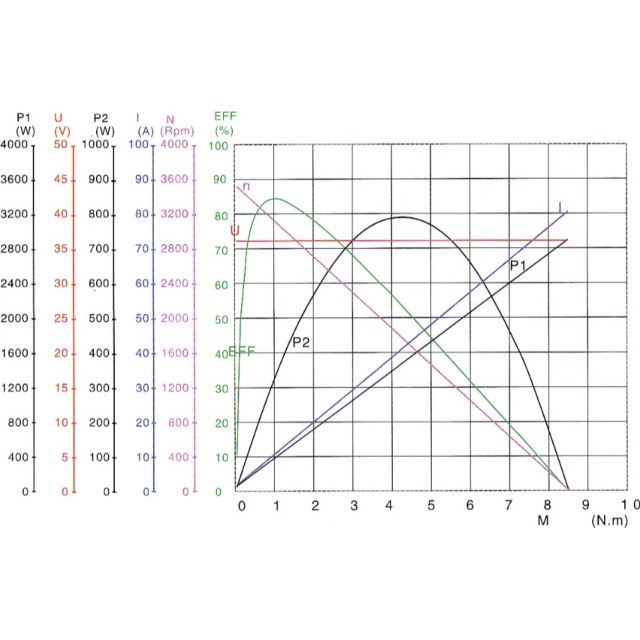
                                              The motors I am using are these.

                                              https://www.motiondynamics.com.au/xyd-6d-450w-24v-2600-rpm-with-chain-sprocket-en.html

                                              Specs

                                              Rated Power: 450W
                                              Rated Current: 28A
                                              Style : Brushed Motor
                                              Reversible: Yes
                                              Current Draw: See Chart
                                              Rated Speed: 2600 RPM
                                              Efficiency: Greater than 75%
                                              Number of teeth: 11, Pitch 6.35
                                              Weight: 2.45kg

                                              xyd-6d_e.jpg

                                              The problem is I have had some varying advice on batteries for this model and I am unsure what I really need.

                                              What I know is weight is not a factor currently model is 60kg, target weight is 200 kg so not an issue.

                                              However I have compartments with a certain access size(due to previous info that may now be wrong).

                                              Can someone help me figure out the best batteries for this, AmpHour etc vs running time, I know the unknown factors are hard to assess but how do you all work out type batteries needed for your motors in Model ships?.

                                              Should I look at SLA, Gel, LiPoly?

                                              Really need some help here

                                              Thanks

                                              #65873
                                              Gareth Jones
                                              Participant
                                                @garethjones79649

                                                Richard,

                                                The graph supplied with your motors seems a bit confusing as it seems to have been plotted for 36 volts, rather than the 24 volts that the motor is rated at, and what I believe you plan to run them at. I would guess that for the majority of time when you are cruising around you are unlikely to be drawing more than 10 amps per motor if you are reasonably close to the max efficiency rating. However you will need to go up to maybe 30 amps for occasional short periods. There is a group who have built a large grey model, possibly a type 42 destroyer if I remember rightly. I will try and find a link to their website as I think they sailed it down the length of the Thames a couple of years ago. It would be of comparable weight and size to your model so might give you a clue.

                                                Sealed, gel type lead acid batteries tend to be poor at delivering high currents so I would not really recommend them for your model.

                                                Low maintenance lead acid car batteries (wet/flooded type) would be OK and relatively low risk of spillage. You would probably need to use a couple of 12 volt units wired in series and they might be more manageable to fit in that form. A typical car rating at around 40 amp hours would give you a reasonable sailing time.

                                                NiMh batteries would give you the current capability and are readily available in 12 volt packs. However you can't get much bigger than 5 amp hours so your duration would be limited.

                                                LiPo batteries would give you the current delivery but the high power/capacity units used in model aircraft and the like tend to have a limited number of charge/discharge cycles, maybe only in the range 100 or so, perhaps 200 if you are careful, so they might be expensive in both the short and long term.

                                                Overall I think a couple of 12 volt car batteries wired in series looks the best bet, or two pairs if you want to have a separate power supply for each motor.

                                                PS

                                                I have not found all the info on the 'grey model' but here is a link to their website, there should be some other data available about it on the web if you follow it up, or even get in touch with them.

                                                http://www.ateamboatyard.co.uk/

                                                Gareth


                                                Edited By Gareth Jones on 06/06/2016 08:34:24

                                                Edited By Gareth Jones on 06/06/2016 08:35:28

                                                #65876
                                                Dave Milbourn
                                                Participant
                                                  @davemilbourn48782

                                                  You can actually obtain NiMH batteries of more than 5000maH – here's one example of a 13AH cell **LINK**

                                                  The maximum discharge current is 39A and a pack of 20 cells would cost over £200 in the UK. You might be able to get a better price direct from the Chinese Internet retailers but beware of cheap cells because many are much less capable than the figures quoted from them claim.You also would need a charger which could deliver around 10A unless you want to wait a very long time while they charge up. I would split the cells into two packs of 10 for ease of installation and charging.

                                                  I've never been a fan of SLA batteries so you can take what information you need about them from Gareth's posting above.

                                                  I also would suggest you research the ability of a modern car battery to deliver a continuous current of the order of 10-20A. A pair of those for my Verso would be almost on a par pricewise with the F-size NiMH cells.

                                                  Dave M

                                                  #65878
                                                  Richard H Dunn
                                                  Participant
                                                    @richardhdunn

                                                    Wow
                                                    Thanks a heap guys, yeah its a problem, I am being pulled towards the standard car battery option, because I need the weight and also because I can get the Amps I need, the biggest drawback is I have hatchs that I had built of 160mm x 200 mm that would fit scooter batteries, car ones will not fit, ones that have a high enough amp hour rating anyhow.
                                                    Looks like I am going to have to remove some beams and move some longitudinal bulkheads,….really not happy about that but better done now I guess.
                                                    I will contact those guys thanks Gareth and see what they found.
                                                    Gareth, I had no idea about the limited lifetime of Lipos, So thank you for bring that to my attention, I have a guy designing a pack now for me as an option and it will cost me $1300 to get about 70 amp hour.

                                                    I have asked for other options to.

                                                    I will look at NiMH as well David and see what I can find out.

                                                    The Car batteries will cost me $280 each x 4, and yes they are in parallel and split 2 per motor.

                                                    #65879
                                                    Dave Milbourn
                                                    Participant
                                                      @davemilbourn48782

                                                      There is a type of sealed lead-acid battery which is designed for heavy-duty cyclic applications in such things as mobility scooters and golf trolleys. These can deliver high continuous currents, as opposed to a standard car battery which delivers a massive current to the starter and is then recharged by the alternator. They are also sometimes known as "deep discharge" or "leisure" batteries and might be worth considering as an alternative to more expensive options. Don't forget that you don't have to use heavy batteries just because you need lots of weight; lead scrap or flashing sheet could also be used as ballast.

                                                      The Type 42 destroyer seems to have been fitted with large brushless motors but there's no clue as to what type of battery it used.

                                                      DM


                                                      Edited By Dave Milbourn on 06/06/2016 09:35:36

                                                    Viewing 25 posts - 126 through 150 (of 411 total)
                                                    • Please log in to reply to this topic. Registering is free and easy using the links on the menu at the top of this page.

                                                    Code of conduct | Forum Help/FAQs

                                                    Advert

                                                    Latest Replies

                                                    Home Forums Scratch build Topics

                                                    Viewing 25 topics - 1 through 25 (of 25 total)
                                                    Viewing 25 topics - 1 through 25 (of 25 total)

                                                    View full reply list.

                                                    Advert

                                                    Newsletter Sign-up