Second ever build – airboat

Advert

Second ever build – airboat

Home Forums Build Blogs Second ever build – airboat

  • This topic is empty.
Viewing 25 posts - 26 through 50 (of 102 total)
  • Author
    Posts
  • #100875
    ashley needham
    Participant
      @ashleyneedham69188

      Chris. Slippery slope…I don’t know what you mean….

      In the grand scheme of things I have only recently bought Permagrit and yes, an essential if ever there was one. Expensive, but as they last forever, not really.

      Ray, that’s a nice plan. Only useful for the outline and idea in general as fitting not only electric but r/c as well would require some or a lot of redesign, but it’s a nice shape.

      Ashley

      Advert
      #100904
      Simon Anderson 1
      Participant
        @simonanderson1

        Thanks all – appreciate the advice – it will be a 'slow burn' to get all the right equipment I think, depending on how many of these I start working on over time.

        Good news for now is that the basic shape is coming together – glueing the thinner 1.5mm ply base with a couple of heavy toolboxes seemed to do the trick and I held it down right at the end of the curve as well. I used titebond glue.
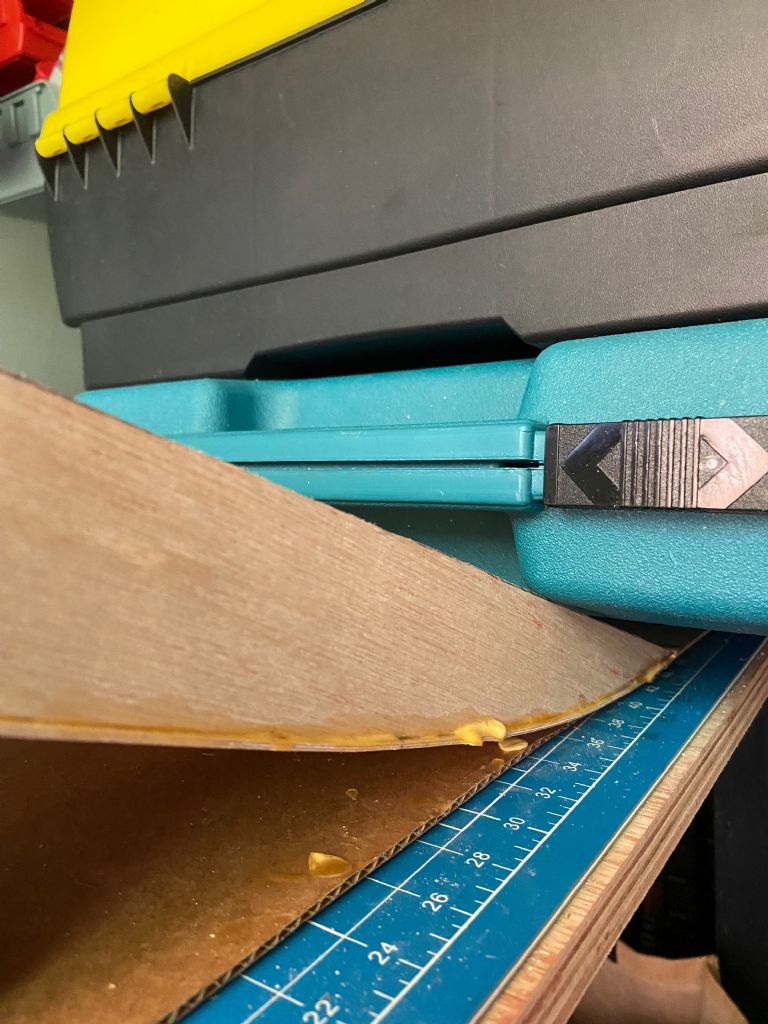
        Airboat step 10

        The body shape I widened slightly as the first one looked a bit long and thin proportionally. I also added 4 spines to this one.

        I also found I could cut the 1.5mm ply with a ruler and a Stanley knife which saved time for the length and width of the base.
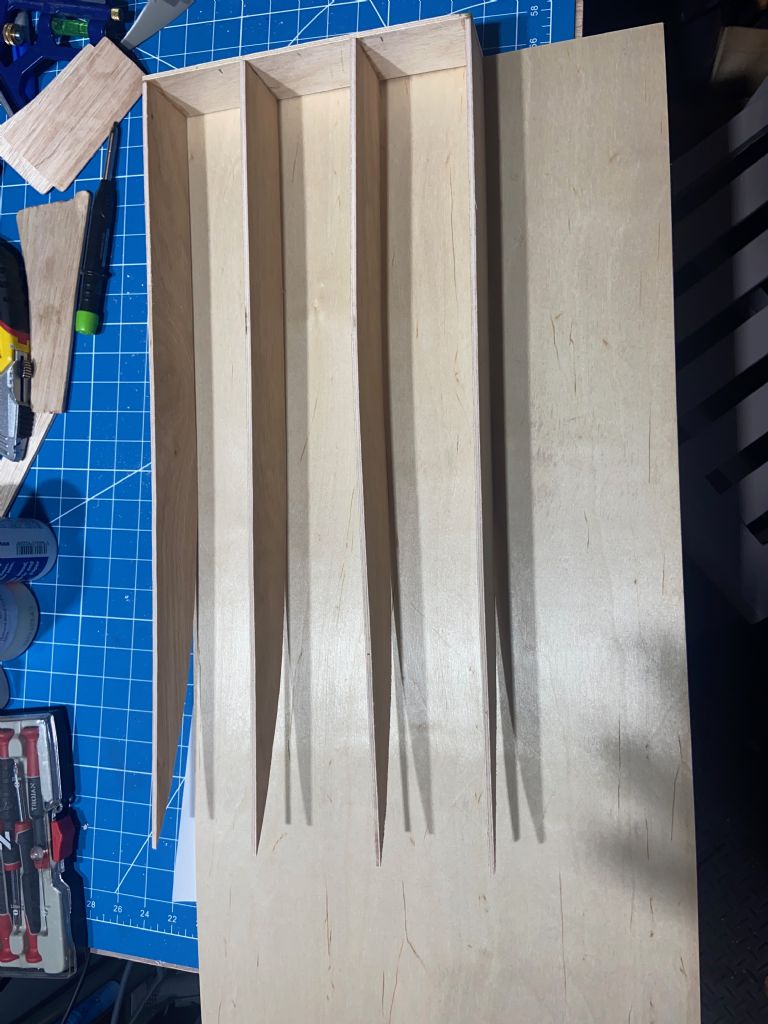
        Airboat step 9

        My next challenge is how best to design the air rudders (or whatever they are called!). I guessed 2 because most of the boats I've seen have 2 in place.

        I cut some out of 3.6mm ply and 1.5mm ply – the 1.5 is much lighter but seems like it might be too flimsy … I tried glueing 2 halves of a brass tube to the the thicker one but then they seem a bit on the heavy side ..

        Any suggestions / advice about how best to design and attach the rudders to the boat? I was thinking originally a metal rod could go up the brass tube as something for it to rotate around but not sure if there are known ways of doing this as this seems quite heavy. Another idea I had is to put some very small hinges and attach to the wooden rudders directly (from a wooden post that I will attach to the back of the main hull).
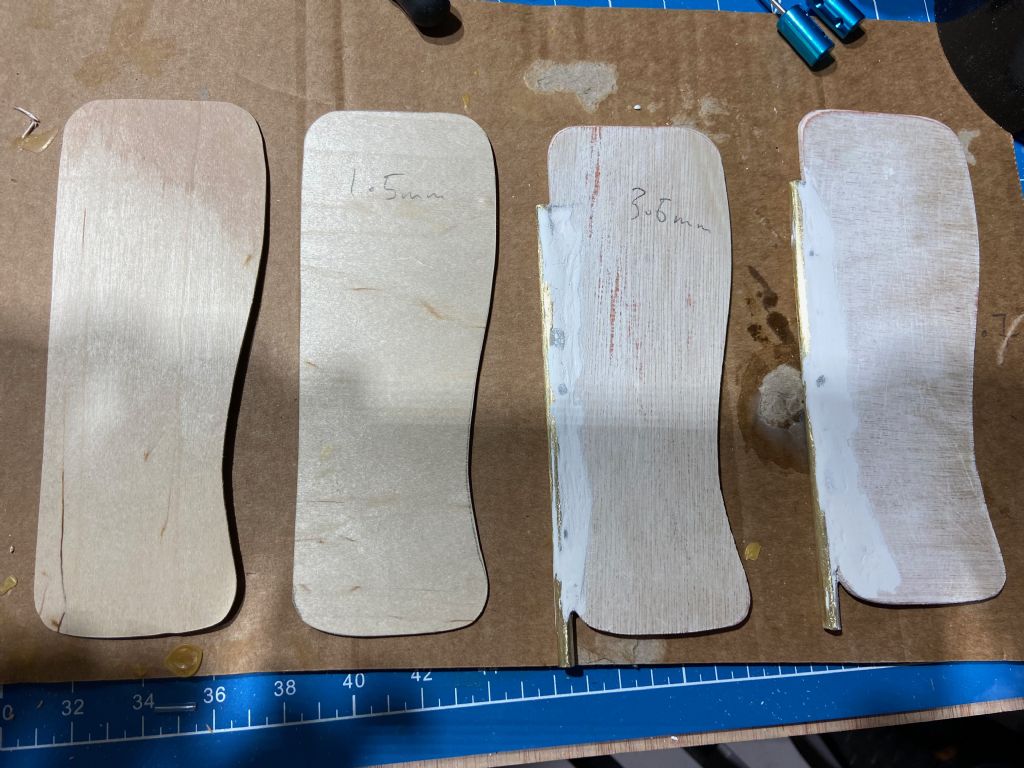
        Airboat step 11


        Edited By Simon Anderson 1 on 20/06/2022 19:00:52

        #100905
        Simon Anderson 1
        Participant
          @simonanderson1

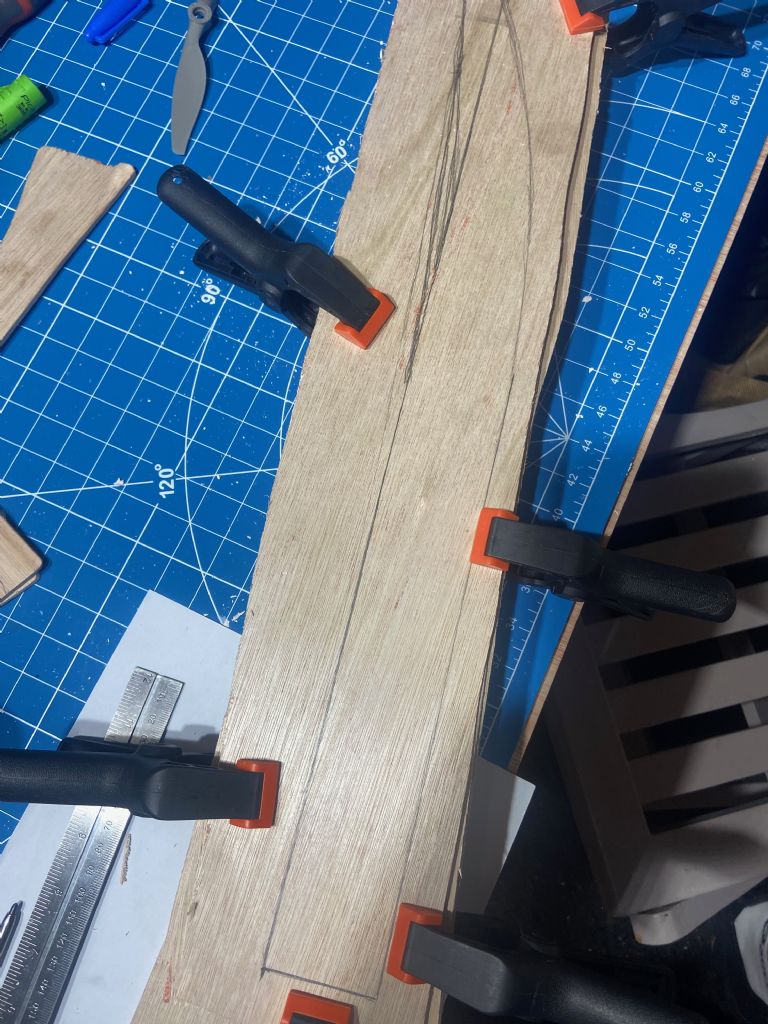
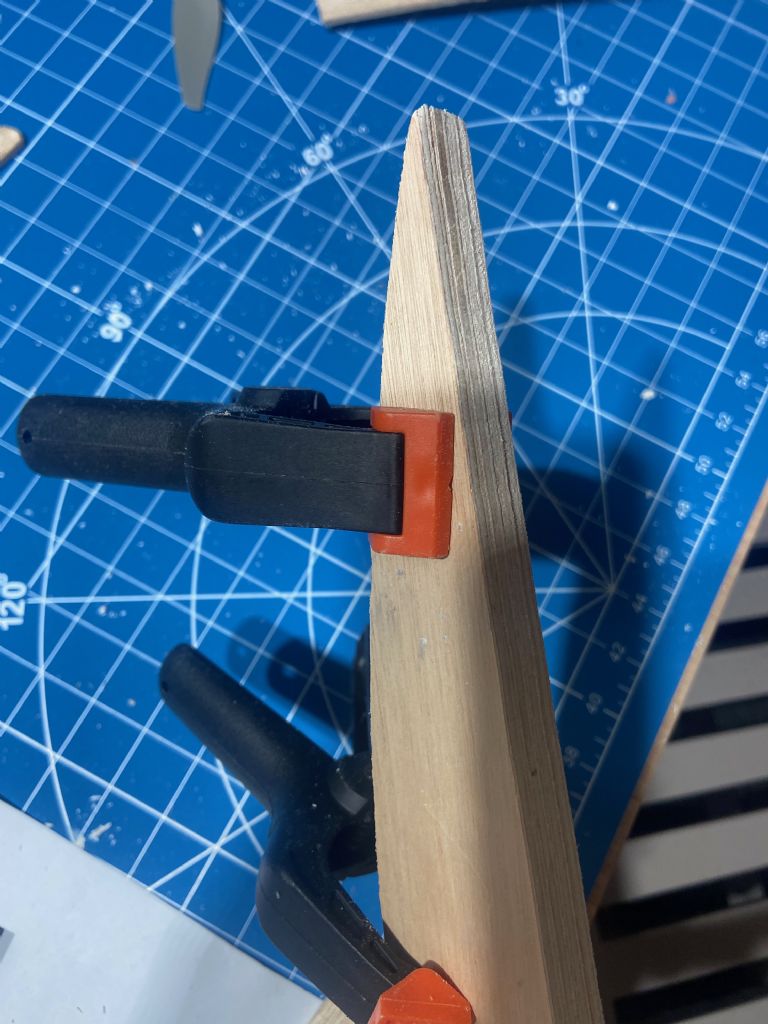
          … and a couple of pictures for the "in-progress" step putting together 4 pieces in one go with clamps and then cutting together – this made a huge difference to the accuracy and consistency of the 4 parts.

          Airboat step 7

          Airboat step 8

          #100954
          Simon Anderson 1
          Participant
            @simonanderson1

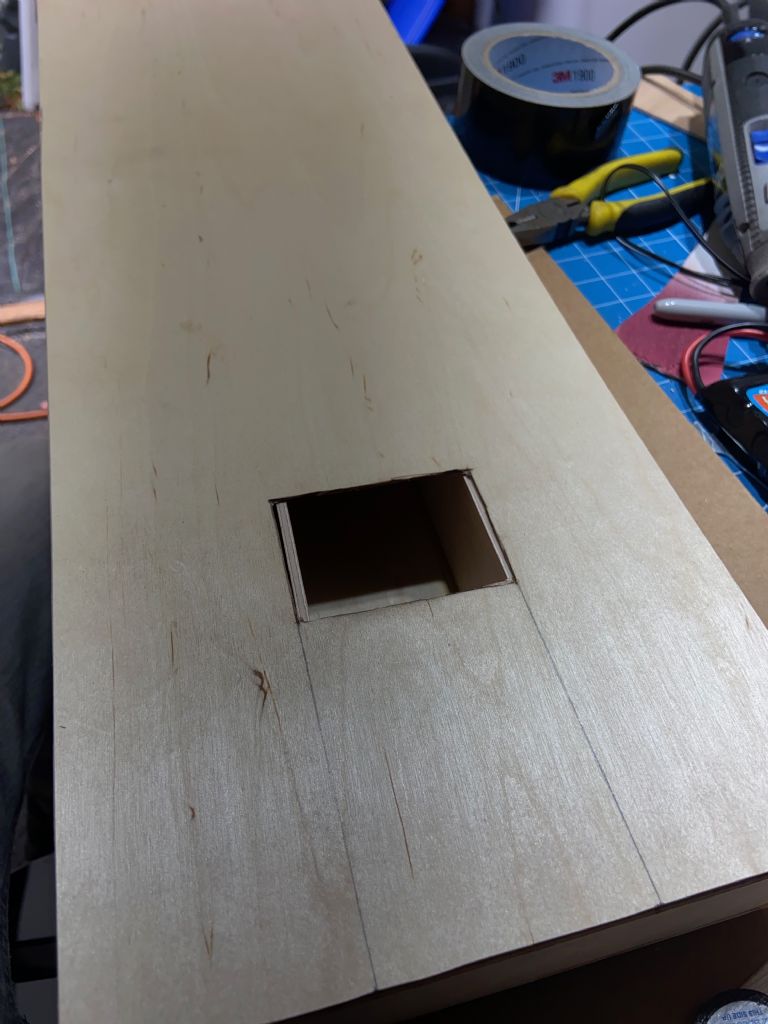
            Once the base had fully dried, I cut out a piece of 1.5mm ply for the top(deck) of the boat. I cut out a section where the motor mount would go and so that the mount could be extended right down into the boat to keep it secure rather than attach on top of the deck which was a bit thin.

            img_8615.jpeg

            #100955
            Simon Anderson 1
            Participant
              @simonanderson1

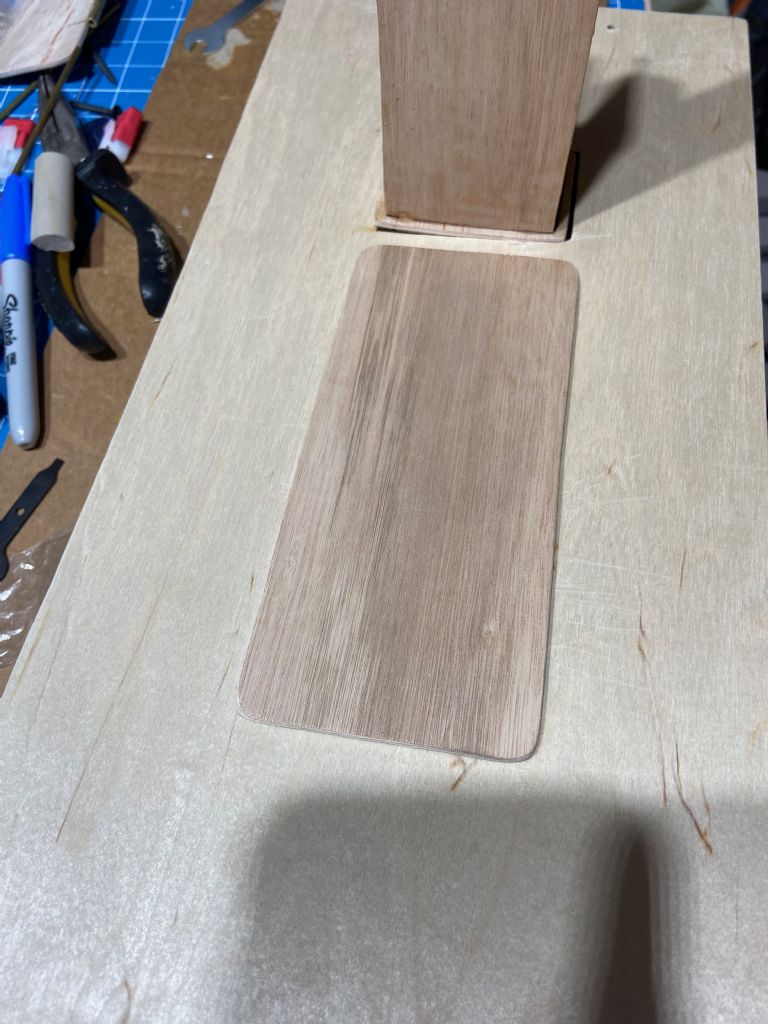
              I then cut a piece of 3.6mm ply to act as the cover for the section cut out for the motor mount.

              img_8618.jpeg

              #100956
              Simon Anderson 1
              Participant
                @simonanderson1

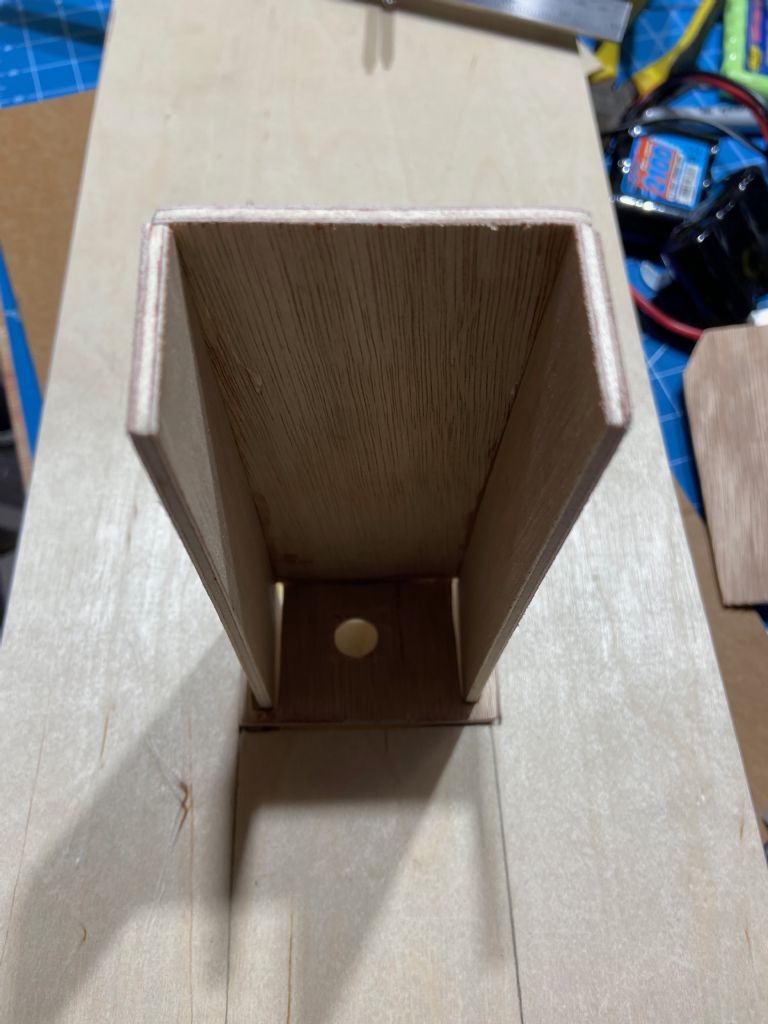
                I then cut the 2 long pieces which would be the start of the motor mount and checked how they would fit into the boat and how they would attach to the spines running the length of the boat.

                img_8620.jpeg

                #100957
                Simon Anderson 1
                Participant
                  @simonanderson1

                  I then cut holes in the ply base to slot the vertical motor mounts into and checked for a good fit.

                  img_8621.jpeg

                  #100958
                  Simon Anderson 1
                  Participant
                    @simonanderson1

                    I then drilled a hole in the ply cover to allow for the motor/esc wires to feed down into the boat.

                    img_8622.jpeg

                    #100959
                    Simon Anderson 1
                    Participant
                      @simonanderson1

                      Next I built the vertical back piece of the motor mount which I will screw the motor onto. I later added a second thickness to it because otherwise the mount screws would come through the back of the plywood.

                      img_8623.jpeg

                      #100960
                      Simon Anderson 1
                      Participant
                        @simonanderson1

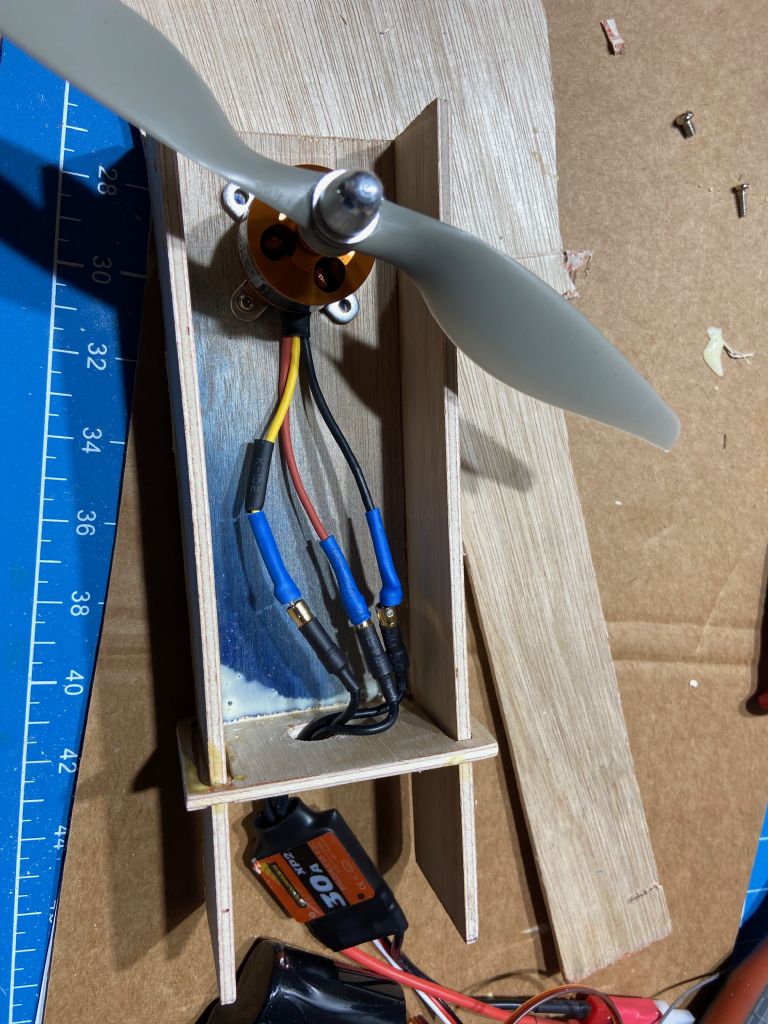
                        … and here is the test with the motor screwed on, prop attached and esc wires connected to make sure everything fitted ok.

                        img_8625.jpeg

                        #100961
                        Simon Anderson 1
                        Participant
                          @simonanderson1

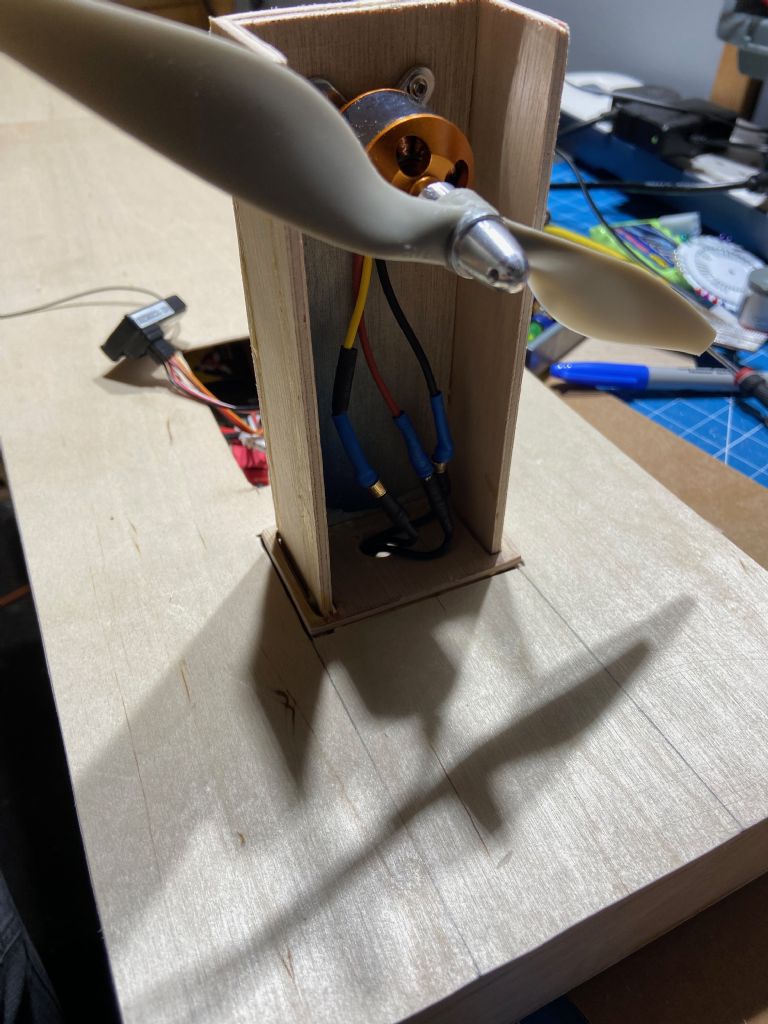
                          … and then dry fitting the whole motor mount section into the boat to check it will all fit, and that I can access the battery, receiver and servo.

                          img_8627.jpeg

                          #100962
                          Simon Anderson 1
                          Participant
                            @simonanderson1

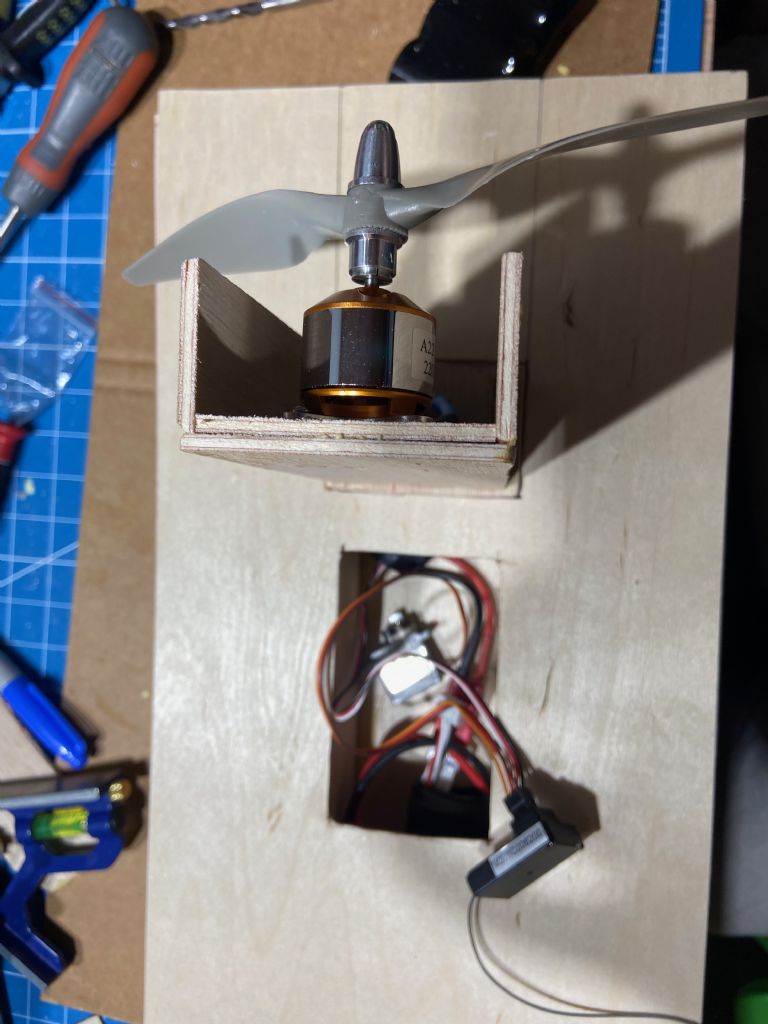
                            .. and the overhead view of that (you can see the doubled up ply for screwing the motor onto). Maybe I should invest in some 5m or thicker ply at some point for things like this.

                            You can also see the space much better that I have cut out to get access to the battery and electronics.

                            img_8629.jpeg

                            #100963
                            Simon Anderson 1
                            Participant
                              @simonanderson1

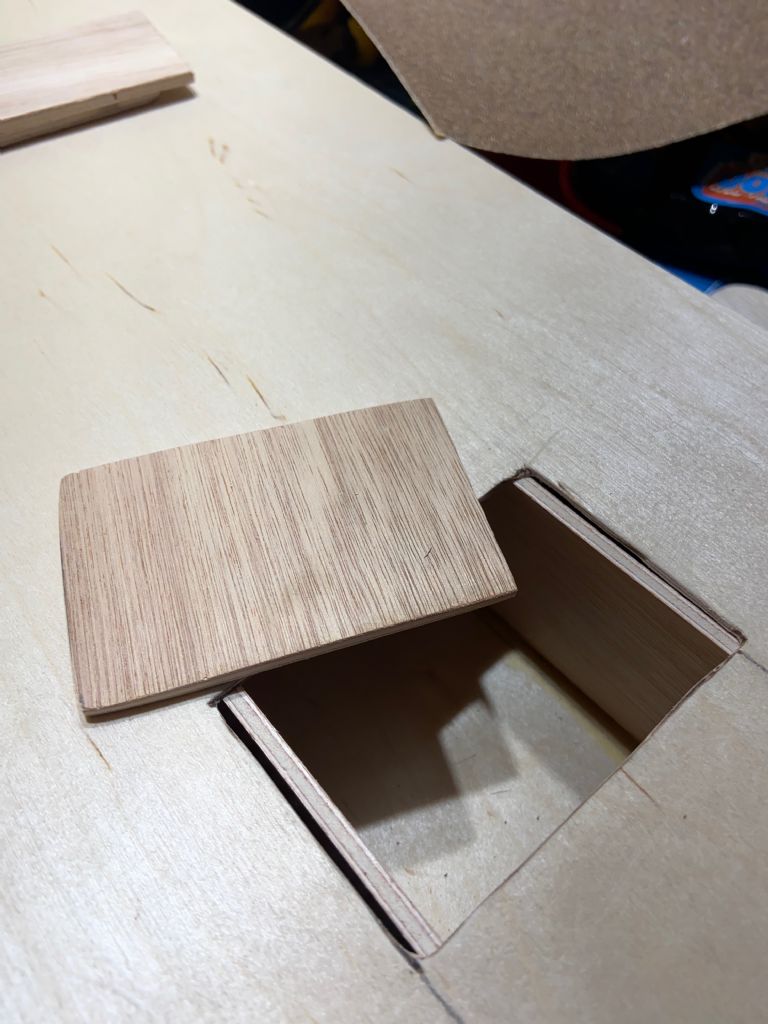
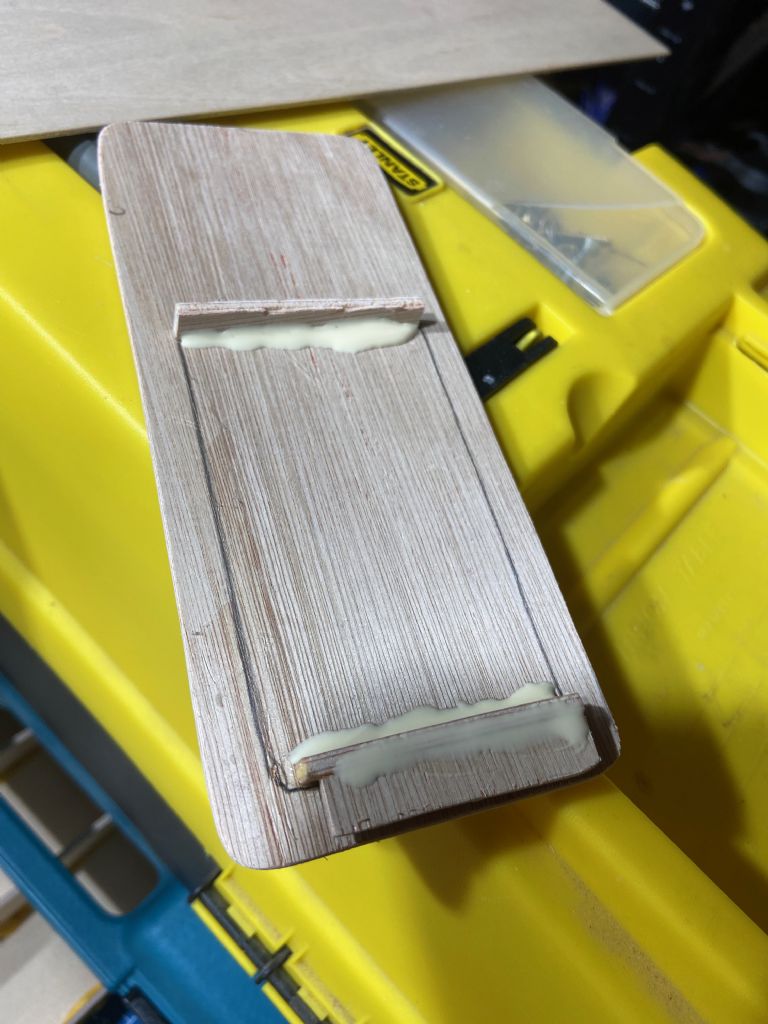
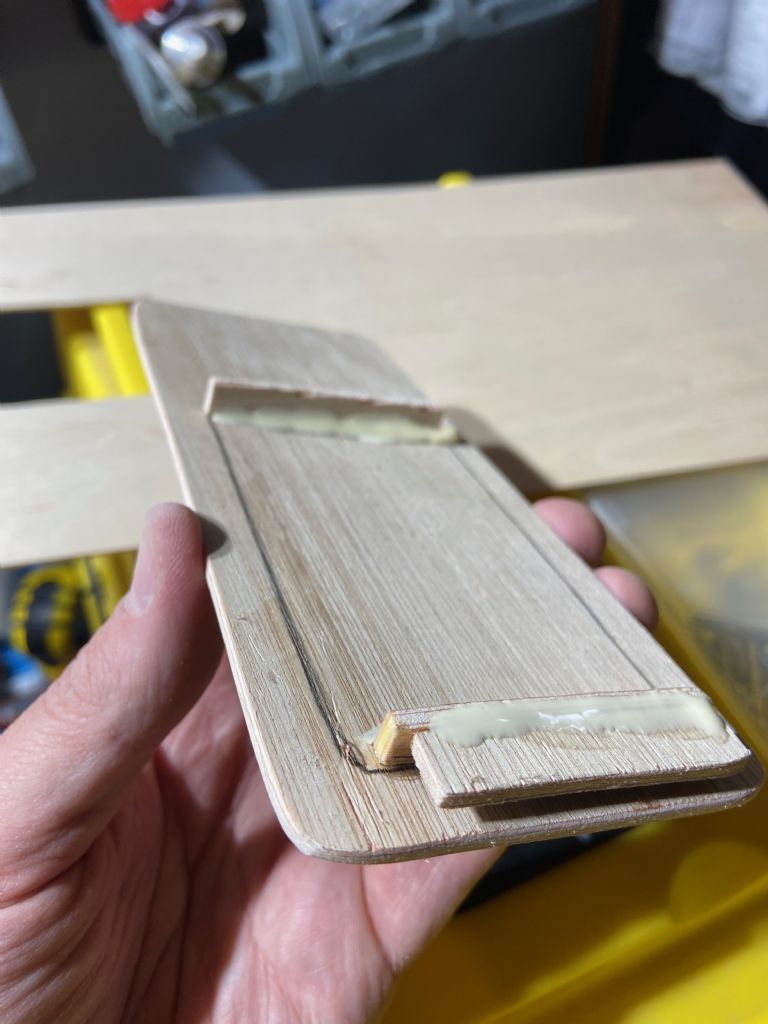
                              In order to cover the electronics (and also make a base for the driver at some point), I made a hatch cover with a small lip inside to help keep it attached to the boat – some 3.6mm ply cut with 3 small pieces glued as shown to make a snug fit.

                              img_8638.jpeg

                              img_8642.jpeg

                              Once fitted it looks like this:

                              img_8635.jpeg

                              Edited By Simon Anderson 1 on 24/06/2022 22:24:13

                              #100964
                              Simon Anderson 1
                              Participant
                                @simonanderson1

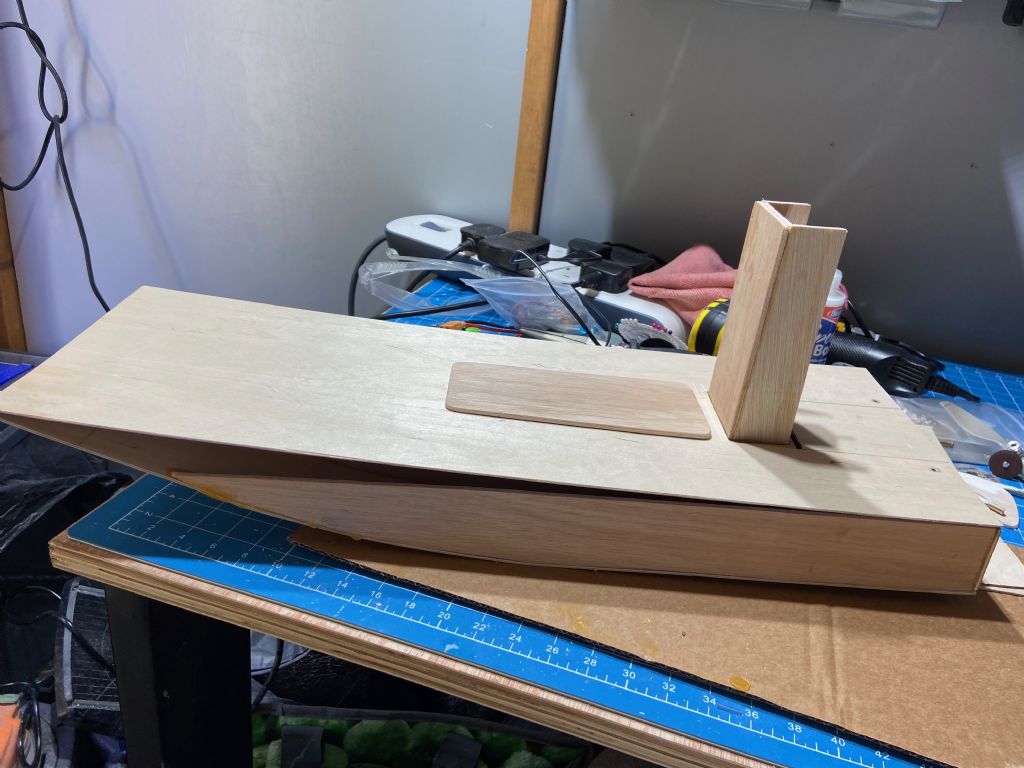
                                Now looking at the whole progress (minus the prop), it looks like this – you can see I haven't yet glued down the deck until I've done the work to create and test the rudders – once that's all done I plan to glue the deck down permanently.

                                I like the side profile, but perhaps the motor mount looks a bit crude (boxy shape). Maybe there are some tweaks I can make later to make it look a bit more appealing.

                                But overall I'm pretty happy with how it is taking shape so far, all things considered.

                                img_8650.jpeg

                                #100965
                                Simon Anderson 1
                                Participant
                                  @simonanderson1

                                  First attempt at creating the air rudders involved glueing 2 halves of a metal tube to the rudders and sitting them on a piece of wire to rotate around. I think these are way too heavy so I'm going to try another approach with tiny hinges.

                                  img_8651.jpeg

                                  #100966
                                  Simon Anderson 1
                                  Participant
                                    @simonanderson1

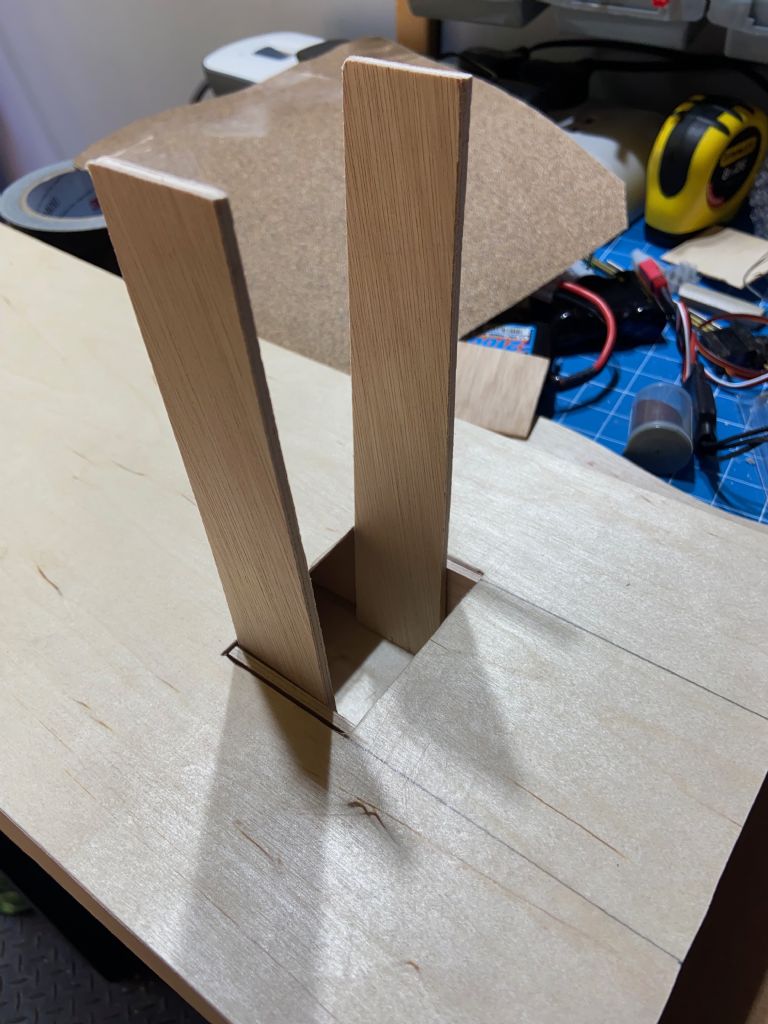
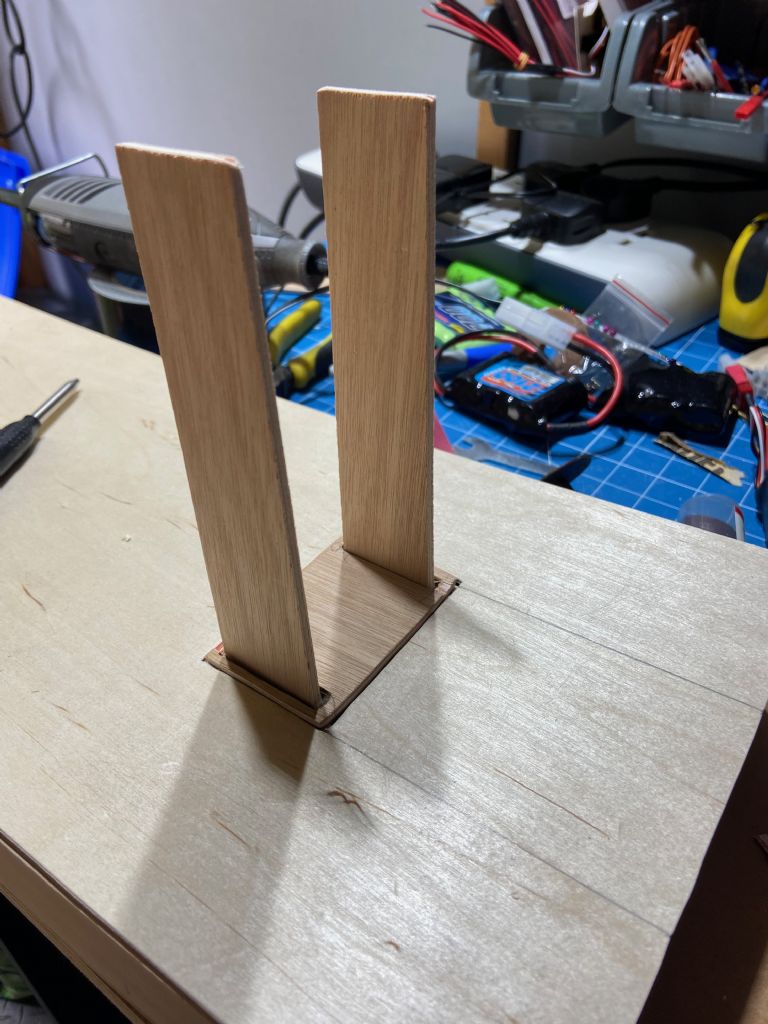
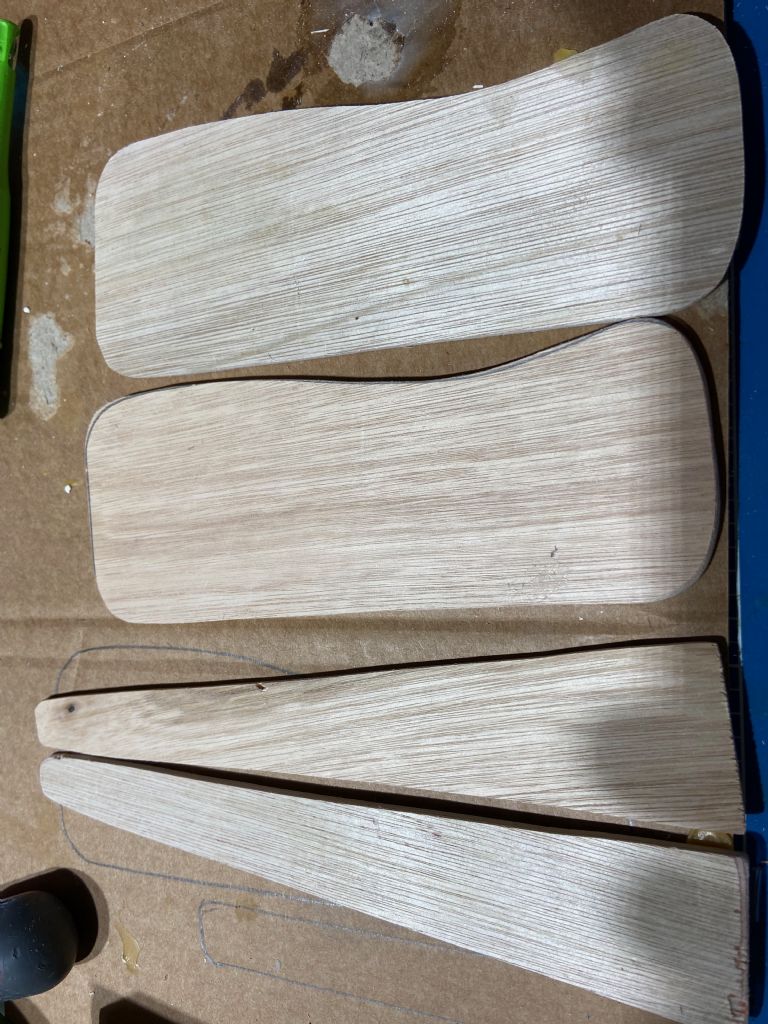
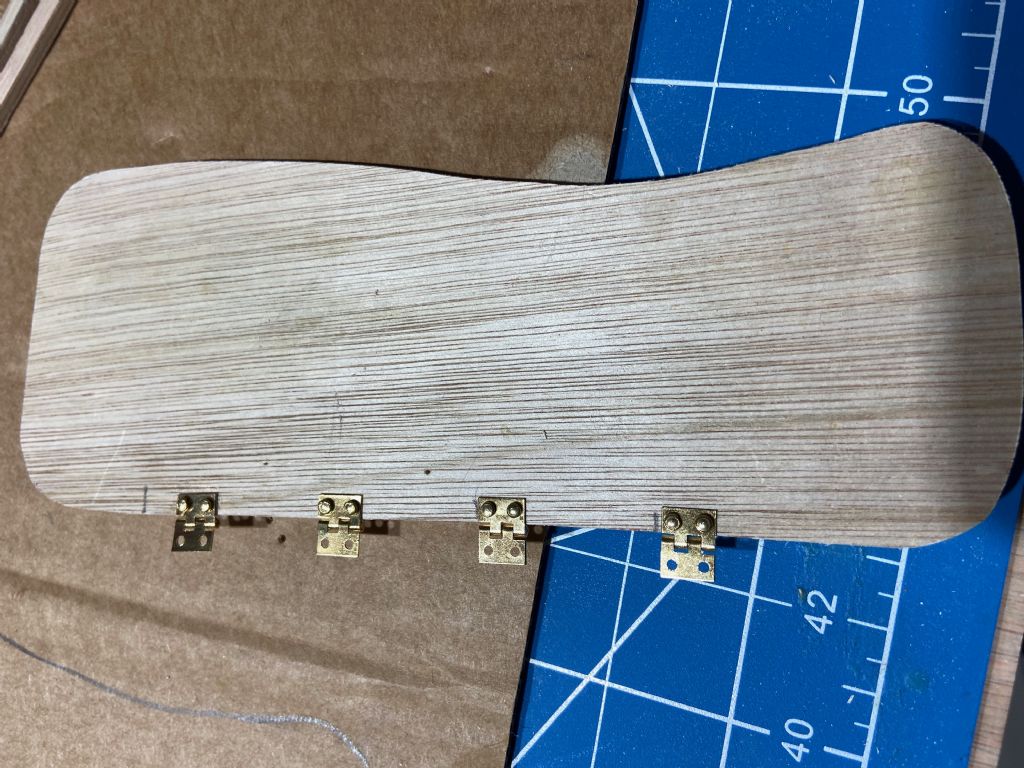
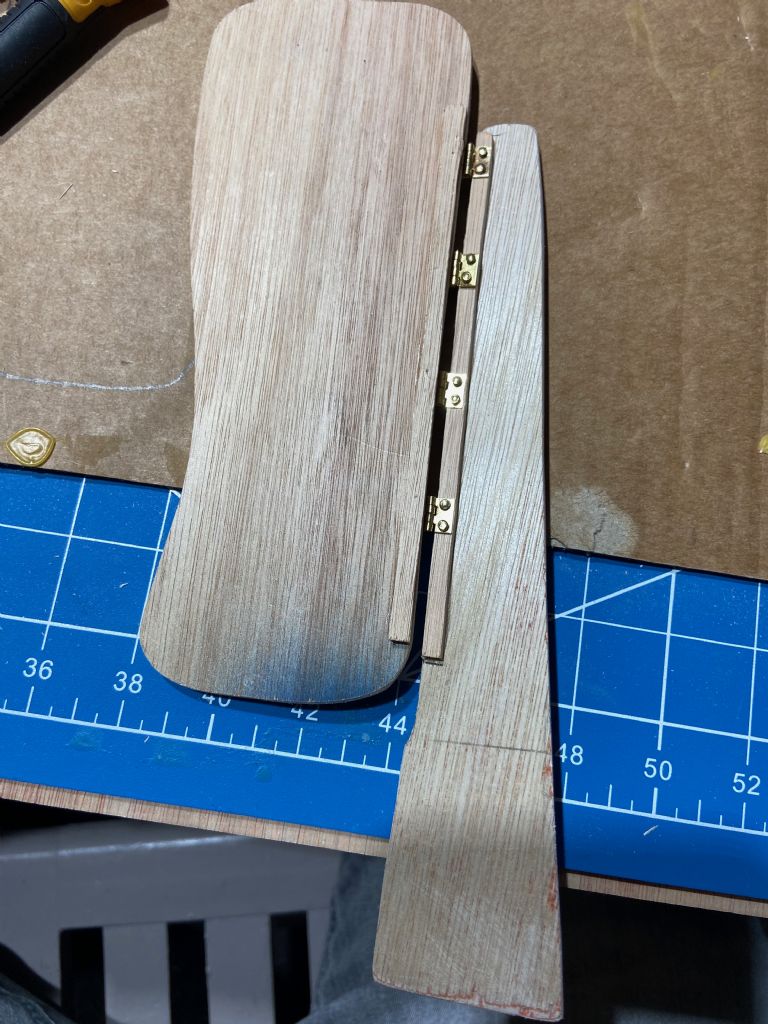
                                    After abandoning the original rudders, I cut some new ones and also some posts to attach them to with the hinges:

                                    img_8657.jpeg

                                    #100967
                                    Simon Anderson 1
                                    Participant
                                      @simonanderson1

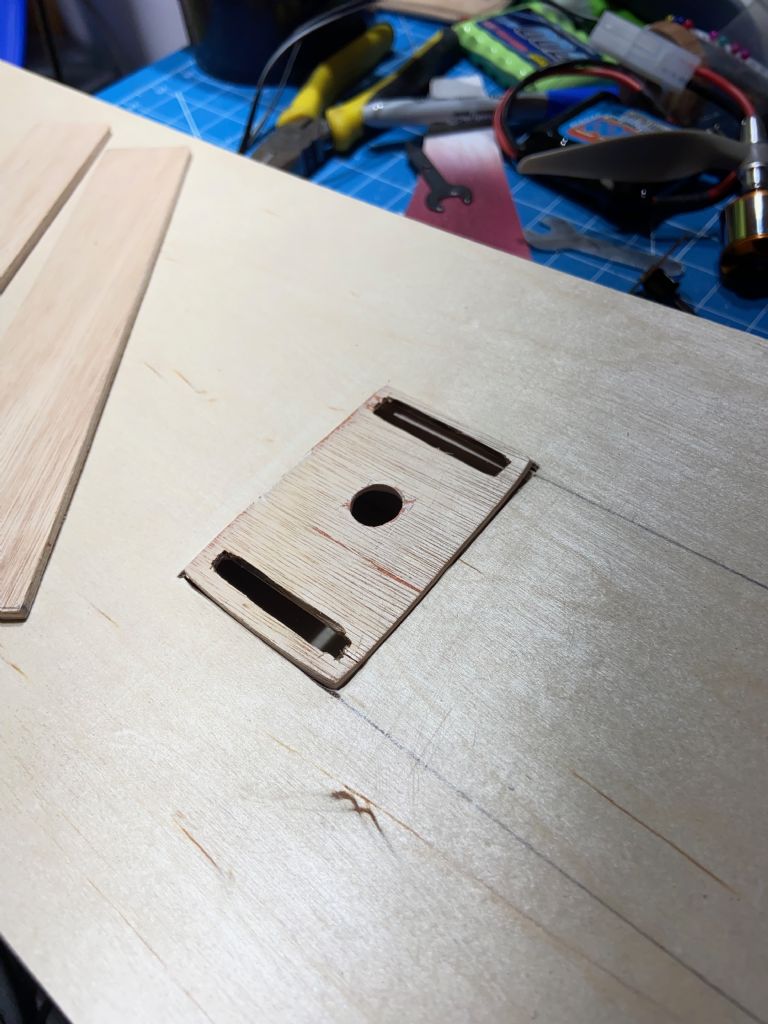
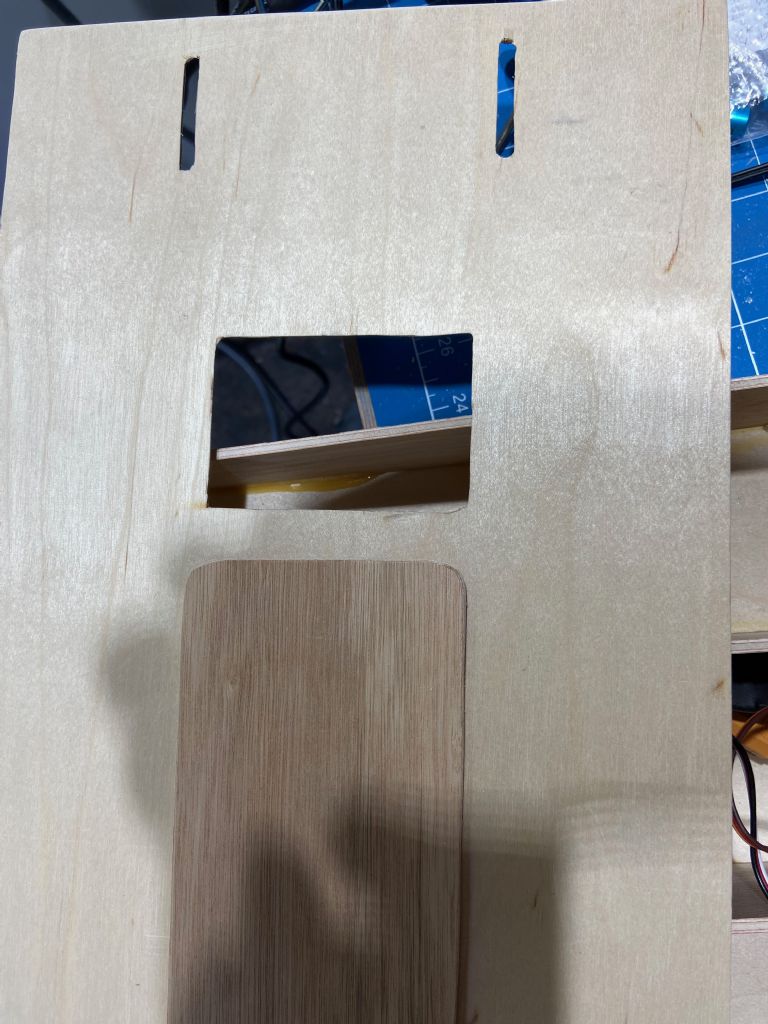
                                      And in order to fit the vertical posts in, I cut 2 slices in the deck so they could also feed down into the boat for more stability rather than attaching to the top of the deck (which is very thin 1.5mm ply)

                                      img_8659.jpeg

                                      #100968
                                      Simon Anderson 1
                                      Participant
                                        @simonanderson1

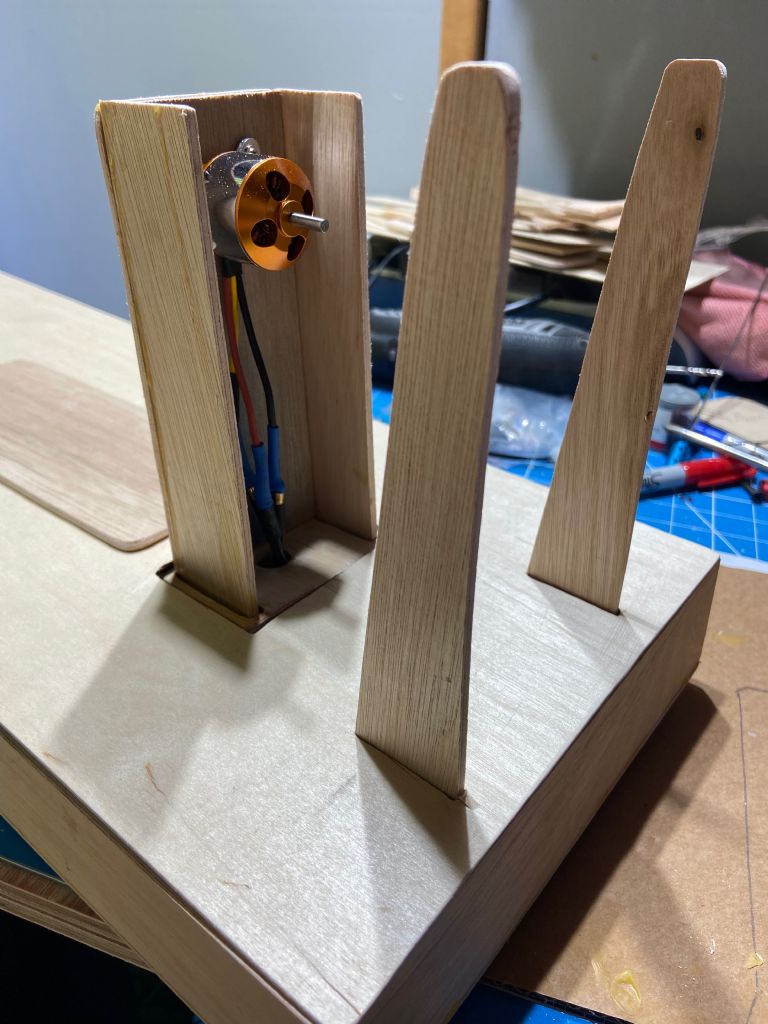
                                        and this is dry fitting the vertical posts:

                                        img_8660.jpeg

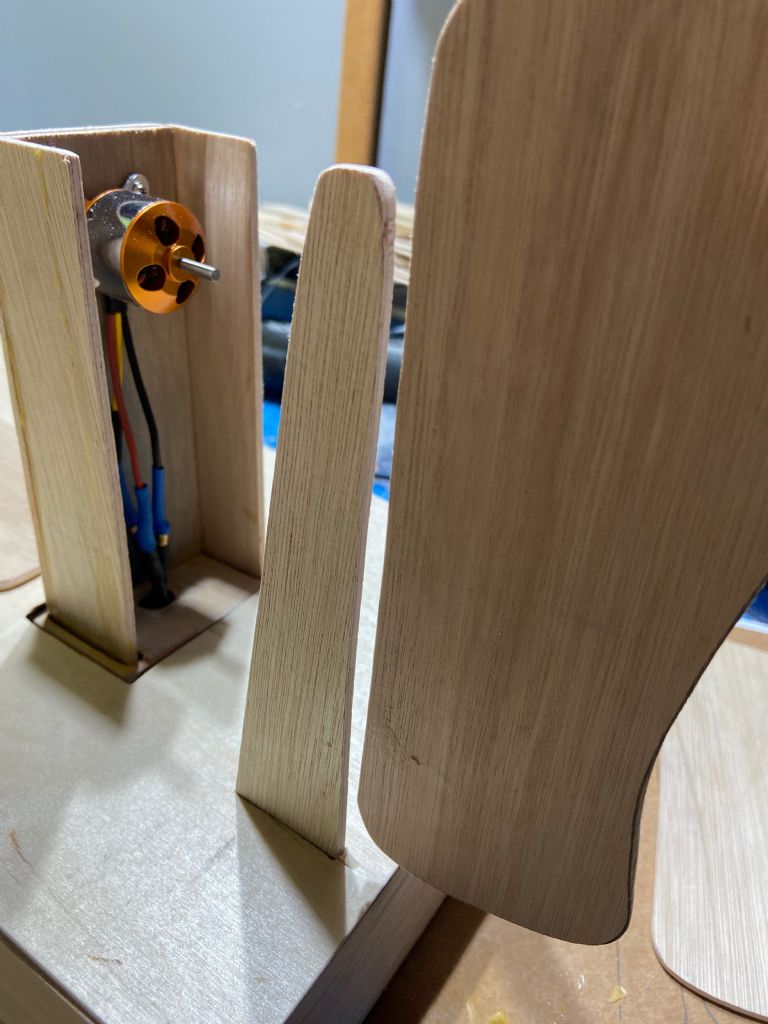
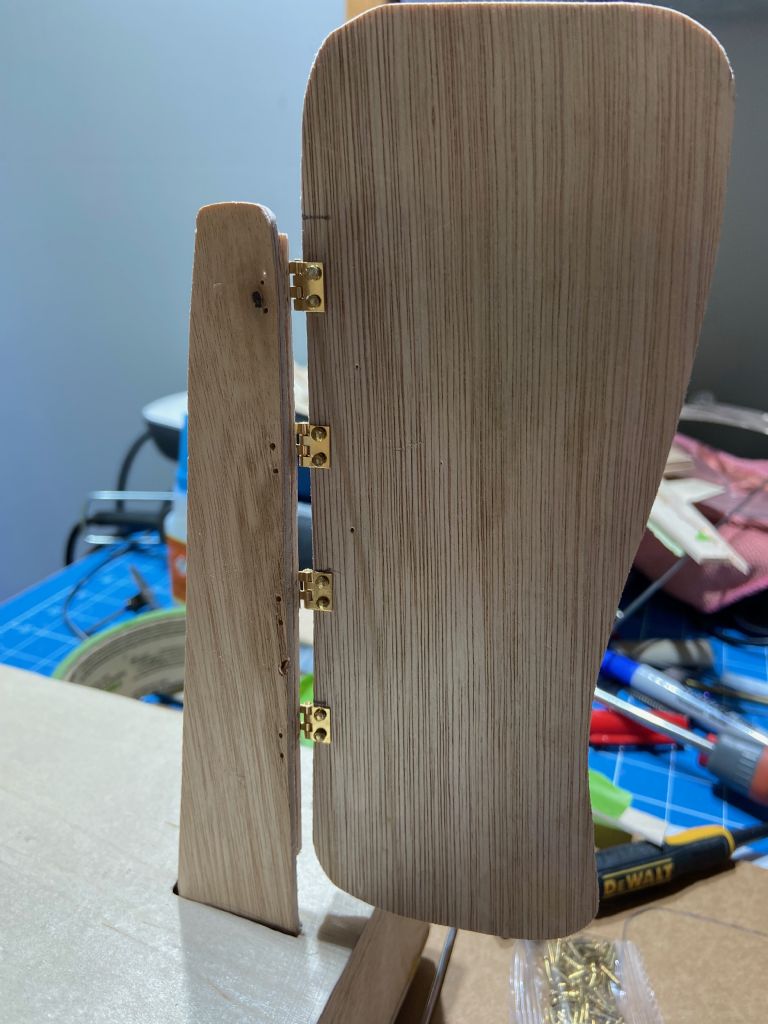
                                        and then holding the rudder to see how it will look/fit next to the posts:

                                        img_8663.jpeg

                                        #100969
                                        Simon Anderson 1
                                        Participant
                                          @simonanderson1

                                          I found a packet 100 tiny hinges on amazon for a few quid & I tried attaching these to the rudder, but the nails went straight through and I needed to add a piece of reinforcement wood to take the nails.

                                          img_8666.jpeg

                                          You can see the fitted rudder below (it needed a reinforcement piece of wood on both the rudder and the post)

                                          img_8669.jpeg

                                          #100970
                                          Simon Anderson 1
                                          Participant
                                            @simonanderson1

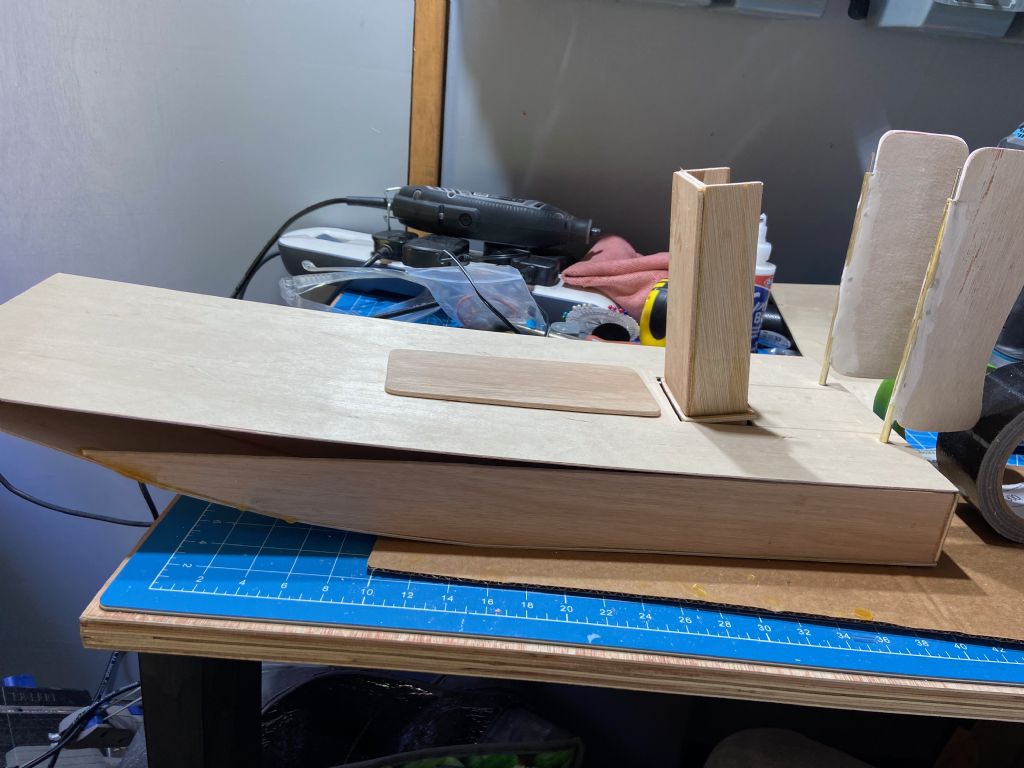
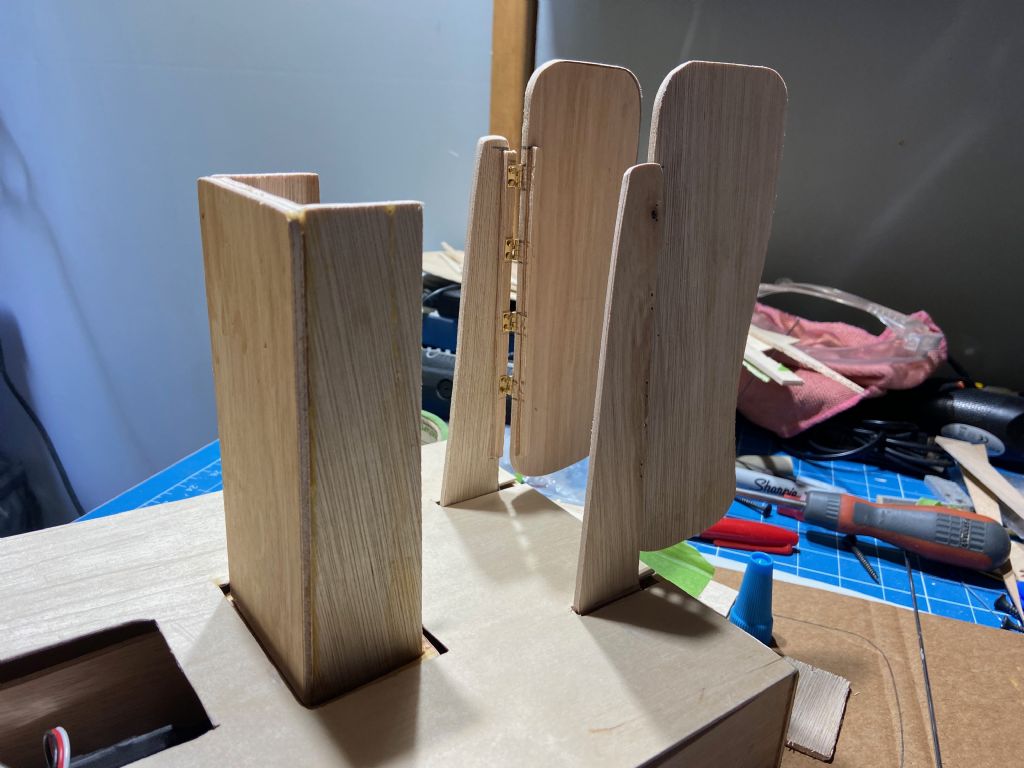
                                            and once dry-fitted this is what the first rudder looks like:

                                            img_8670.jpeg

                                            and with both added it is now starting to take shape. I'm not sure how well these rudders will work but it's the best I can come up with for now.

                                            img_8675.jpeg

                                            #100972
                                            Simon Anderson 1
                                            Participant
                                              @simonanderson1

                                              So – making reasonable progress now – I need to figure out where it would be best to put the servo and how best to attach it to the rudders, but once that's done, I can glue down the deck, maybe run some basic tests and then start painting I think.

                                              Thanks for reading – hopefully it's useful/interesting – any comments or suggestions welcome.

                                              #100977
                                              ashley needham
                                              Participant
                                                @ashleyneedham69188

                                                Simon. Well done so far, and I like your thinking.

                                                I use 3mm bolts and nyloc nuts to hold the motor mount to the actual wooden mount bit. This means you do not have to have such a thick bit of ply backing the motor simply to provide screw-in depth. Your double ply back will be enough to hold the motor in place without the sides as long as it is secured properly to the base.

                                                Alternatively, using the alloy mount as a template drill mounting holes in the ply to suit the holes in the static part of the motor, also drilling a hole to let the rear of the motor shaft poke through, then use the supplied countersunk set screws to secure. These screws would have to be checked for loosening now and then, and this is why I use nuts and bolts.

                                                Rudders do not need to be quite so sturdy. A good and “invisible” way of securing the hinges is to sandwich them in between two layers of ply, using 1.5mm or 0.8mm sheet. Use epoxy glue, but ensure the hinges line up properly. The supports on the boat can then similarly be made from two bits of ply, perhaps 1.5mm to capture the other side of the hinge.

                                                Ashley

                                                #100978
                                                ashley needham
                                                Participant
                                                  @ashleyneedham69188

                                                  Where’s one I built earlier! Motor upright is a single piece of 4mm ply flanked by two bits of wood strip also about 4mm sq. snaps show the hinges embedded in the fins. These are plastic hinges and the hinge pin has been pushed out to allow a singe bit of brass wire to hinge the lot. It lines up all the hinges in one go and allows me to de-mount the rudders. The mount looks a bit thicker in the photo due to the fake radial engine glued to it!

                                                  Also notice the small servo horn at the bottom. All our Tups had separate aircraft plastic snake controls to the fins to be operated by a servo. I had to have two servos but the others managed with one. On yours, you could gang the fins together by a linkage and use one servo to actuate just one rudder.

                                                  Ashley

                                                  b944853e-f342-45f1-91cf-43b7a23e16b6.jpeg

                                                  750c1ff0-a822-4866-aae8-ae76343c78ae.jpeg

                                                  Edited By ashley needham on 25/06/2022 08:14:04

                                                  #101027
                                                  Simon Anderson 1
                                                  Participant
                                                    @simonanderson1

                                                    Thanks Ashley – that's given me some good ideas to think about – I like the curved sides of your one – very cool. At the moment the motor mount at the back doesn't have a strong base at the bottom (the 2 sides are bolted down below the deck), but I'll think whether to change that – shouldn't be a huge amount of work, and maybe make it look nicer at the same time. I like the idea of bolting on the motor as well rather than just with screws.

                                                    I've been doing a bit of testing with the servo – I'll try first of all with one servo and see if I can get it to move both rudders/fins in one go. Seeing where you have attached the servo horn is helpful – has saved me some time guessing where is best to put it (I think if I put it further away from the hinge, there is less movement of the rudder/fin).

                                                    Good idea about glueing the hinges between thin ply – let me take a look at the ones I have and see if I can do something like that – gives a much neater finish as well because most of the hinge is hidden away. I had started trying to glue them down before but they are so tiny that the glue was getting into the centre moving pin – I will try again …

                                                    #101028
                                                    ashley needham
                                                    Participant
                                                      @ashleyneedham69188

                                                      Simon. I have a “working drawing” if you want to build a Tup……

                                                      Join the crowd!,

                                                      Ashley

                                                    Viewing 25 posts - 26 through 50 (of 102 total)
                                                    • Please log in to reply to this topic. Registering is free and easy using the links on the menu at the top of this page.

                                                    Code of conduct | Forum Help/FAQs

                                                    Advert

                                                    Latest Replies

                                                    Home Forums Build Blogs Topics

                                                    Viewing 25 topics - 1 through 25 (of 25 total)
                                                    Viewing 25 topics - 1 through 25 (of 25 total)

                                                    View full reply list.

                                                    Advert