Prototype build of ELLIE

Advert

Prototype build of ELLIE

Home Forums Scratch build Prototype build of ELLIE

  • This topic is empty.
Viewing 25 posts - 76 through 100 (of 1,441 total)
  • Author
    Posts
  • #42480
    Peter Fitness
    Participant
      @peterfitness34857

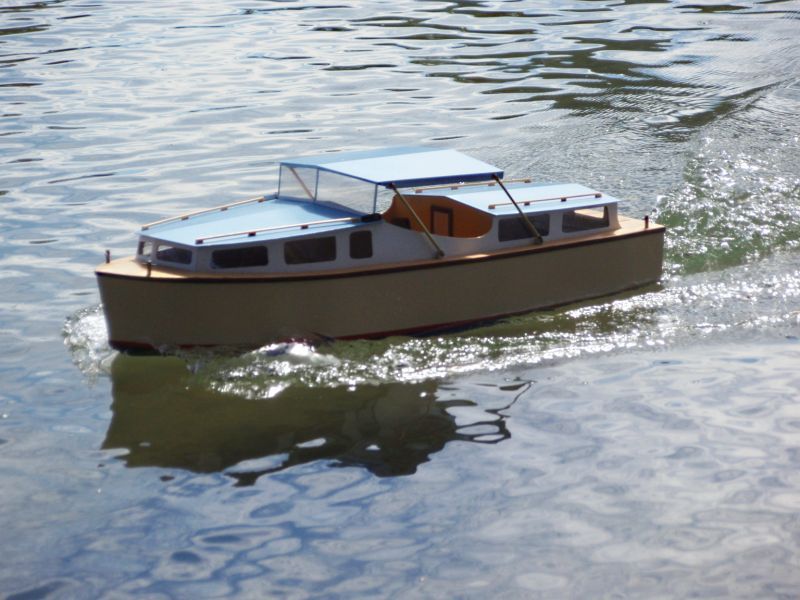
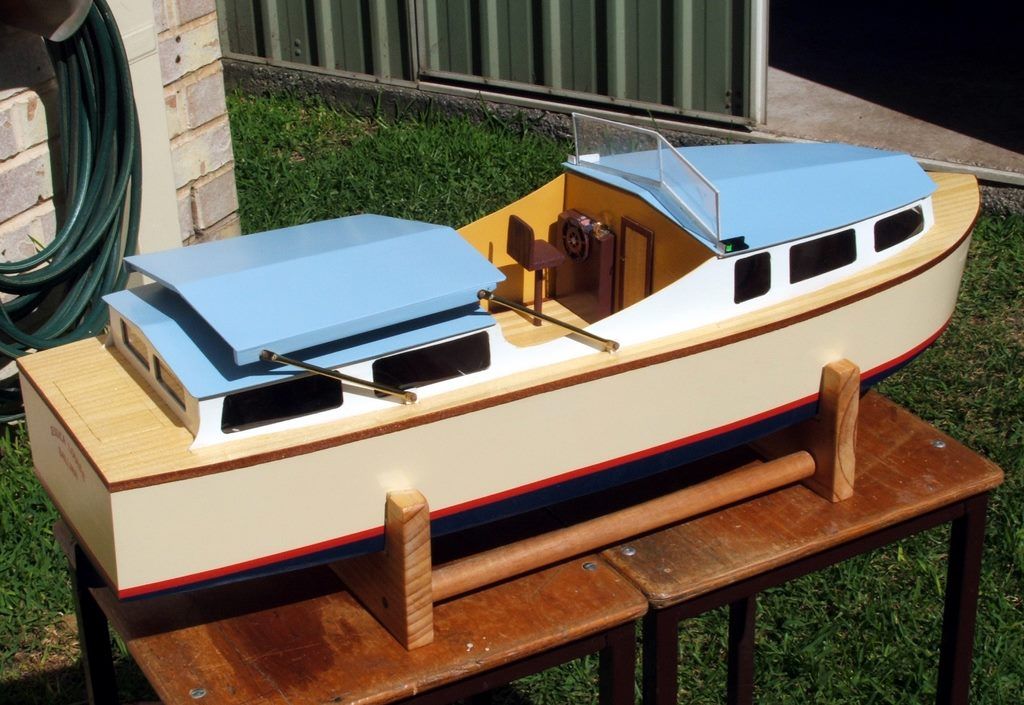
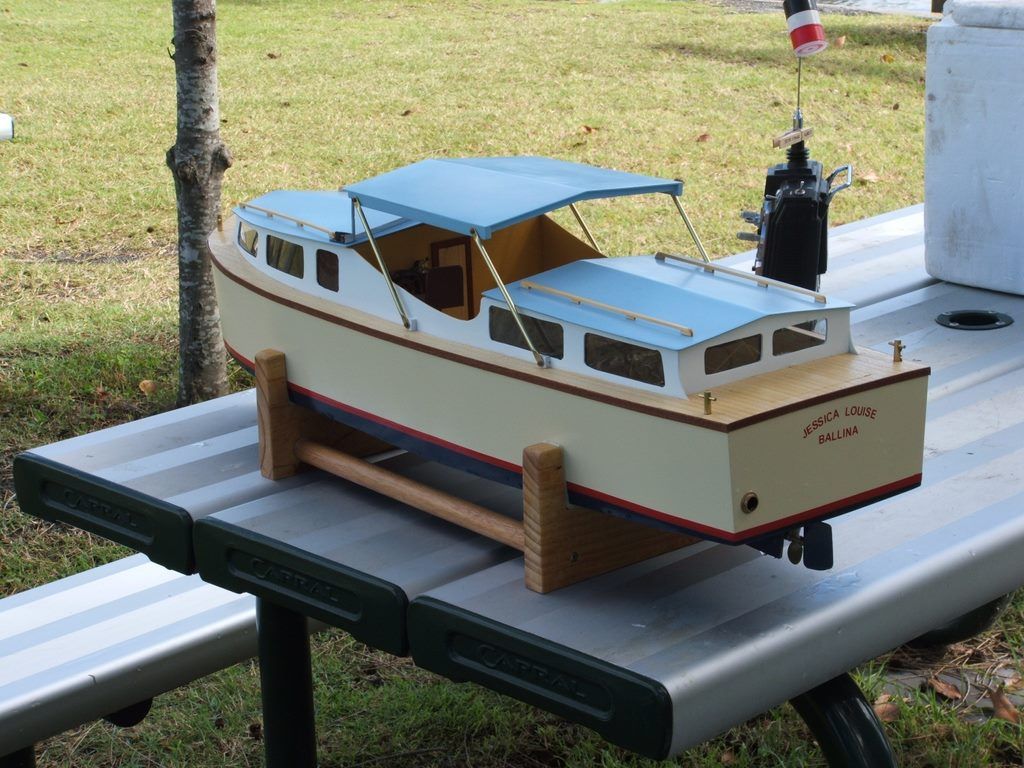
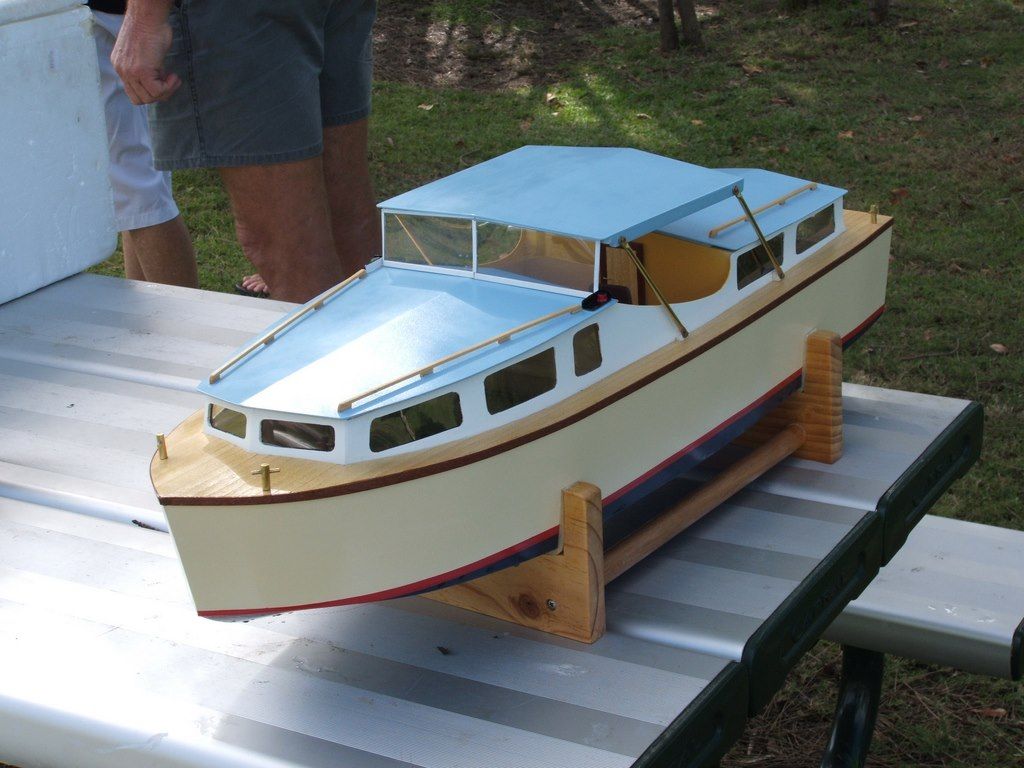
      It's looking very good, Paul and Bob. I particularly like the middle version which would nicely complement the boat I built several years ago from Ray Wood plans, enlarged. I would be interested in purchasing your plan when it is ready.

      Peter.

      Jessica Louise

      Advert
      #42481
      Bob Abell 2
      Participant
        @bobabell2

        Thank you, Peter…..For your kind words and photo of your very nice model, nice colour scheme too

        Your cruiser looks almost the same as ours……Is it based on any particular full sized boat?

        Thank you for your purchase option…..You could be our first customer?

        Bob

        #42488
        Paul T
        Participant
          @pault84577

          Dear All

          To explain the principal behind the drawing delivery system.

          Normally when someone wants a set of plans they order them from a supplier and after a couple of days the drawings will arrive by post. Usually the drawings are in large sheets such as A0 or A1 size.

          With the download process all of the information is sent through the internet via an email attachment, the drawings and instructions are all contained within the attachment in a format called PDF, most modern computers have PDF software pre loaded before being sold, this software is called Adobe Reader and enables the computer to open the PDF documents. Sending the drawings this way means that the end user doesn't need any special computer skills or fancy CAD software.

          In fact all that you need is a computer connected to the internet and an A4 printer and the beauty of PDF is that there is no degradation of image or change of scale.

          After opening the email all the user has to do is press the print button and their own printer will print the drawings in A4 pieces the user then 'cuts and sticks' these A4 pieces together to produce the drawings. However most pieces such as frames are small enough to be contained within one page so the cutting and sticking is kept to a minimum.

          The user can print as many copies as they like which makes the production of cutting templates very easy.

          I hope this explains the system but if anyone has any questions please ask

          Paul

          #42499
          mike farrell
          Participant
            @mikefarrell21522

            Well now Bob and Paul T, I woulld like to purchase your scale model production of this interesting plans .Having little real knowledge of laying out plans you are teaching many of us where to start.,thanks for that. A nice big cabin criuser appeals to me .Best of luck with the continueing build wink

            #42500
            Bob Abell 2
            Participant
              @bobabell2

              Thank you, Mike

              We are pleased you like it!……It`s nice to get some encouragement at this early stage

              The model is 36" long……Is that big enough?

              Now doubt, Paul can produce a larger size at the touch of his CAD button?

              Bob

              #42508
              Peter Fitness
              Participant
                @peterfitness34857

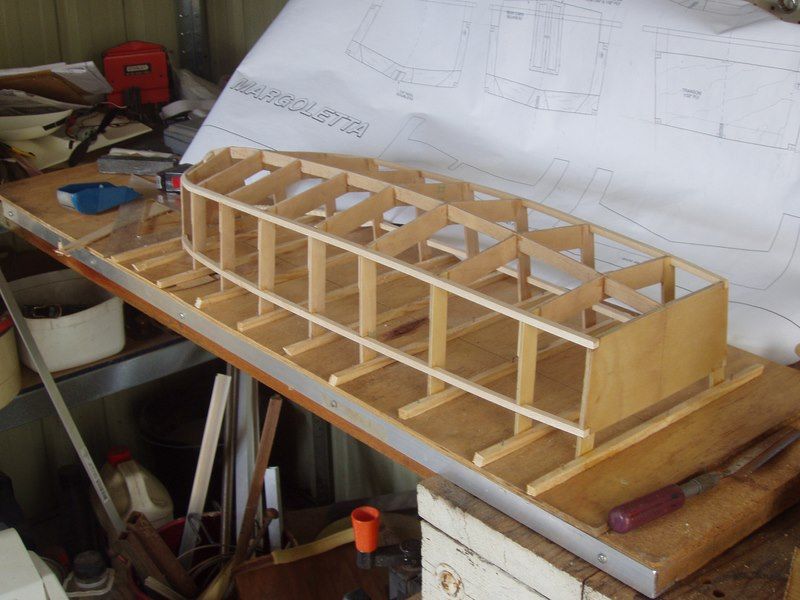
                Bob, as I said it was built from plans by Ray Wood, which were free with, I think, a Marine Modelling International magazine of a few years ago. I don't know if it is based on any particular boat, but I think it is a generalisation of the type. Ray called his plan Margoletta.

                Just let me know when your plans are ready, and I will certainly be a customer.

                Some more photos below.

                Peter.

                Jessica Louise 01.jpg

                Jessica Louise 02.jpg

                Jessica Louise 03.jpg

                #42509
                Bob Abell 2
                Participant
                  @bobabell2

                  Thank you, Peter I like your model, very much

                  The hinged canopy is a nice feature too

                  Have you a photo of the skeletal build, please?

                  Bob

                  #42514
                  Paul T
                  Participant
                    @pault84577

                    ellie frame.jpg

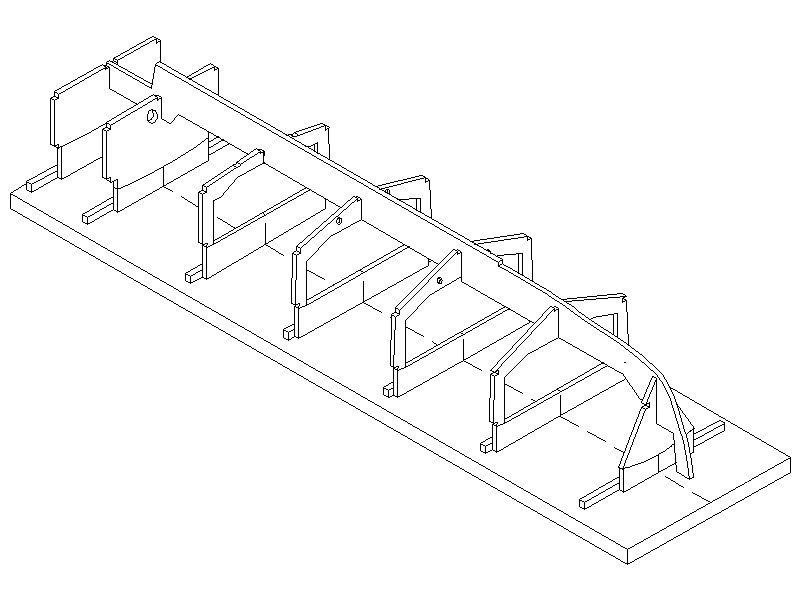
                    Following Bobs suggestion of a building board the plans and templates have been changed to reflect this.

                    The top surface of the building board becomes the datum from which everything can be checked, the other reference point is the bottom edge of the keel which is exactly 160mm from the building board.

                    Paul

                    Edited By Paul T on 31/07/2013 07:08:13

                    #42515
                    Bob Abell 2
                    Participant
                      @bobabell2

                      Hello Paul

                      No wonder you've been quiet lately!……Burning the midnight oil, hey?

                      An excellent assembly drawing, Paul and it certainly looks a labour of love?

                      It explains the assembly process, nicely

                      I should finish the formers today, having corrected the earlier formers to the latest issue.

                      Looking at the above isometric layout…..The space between Former 1 and the front edge looks very severe?…….Don't think the ply will get round that?……Only thinking out loud at the moment!

                      Bob

                      #42520
                      Ian Gardner
                      Participant
                        @iangardner62867

                        I enjoyed the photos of Margoletta, Peter- and I was particularly impressed with the finish on your boat- brush or spray? I remember the plan ( I have a copy) and there were photos of the prototype sailing in the basin of one of the big hire boat yards in the Broads if I remember correctly.

                        All of this is making me nostalgic for the Norfolk Broads-haven't visited for two or three years now. I also think Margoletta was the name of the 'evil' motor cruiser in one of Arthur Ransome's books about the Broads- possibly Coot Club- but I may just be having a senior moment! Perhaps someone will correct me if I'm wrong.

                        Following with interest, Bob and Paul.

                        Ian

                        #42522
                        Paul T
                        Participant
                          @pault84577

                          Bob

                          The isometric view is a little misleading and presents something of an optical illusion around the bow / frame 1 area. If you look closely you will see that the bow piece of the keel doesn't have a sacrificial piece connecting it to the building board, it is this that is creating the illusion of being a very tight curve.

                          When I built the first prototype I managed to bend 4mm ply skin around this curve to complete the hull covering (I have to admit to using rachet straps though)

                          Having specified 4mm ply for the skin I am now persuaded to change this to a more easily manageable 1.5 > 2mm in liteply (or similar) this change should help beginners with the build.

                          Paul

                          #42524
                          Dave Milbourn
                          Participant
                            @davemilbourn48782

                            Paul/Bob
                            Having used both materials I can say that 1.5mm marine ply is more difficult to handle as it may need steaming to fit the curves, but it is easier to obtain a decent finish and is stronger than the 2mm liteply. If I were using liteply for skinning this size of model then I'd be tempted to add glass-cloth and resin to the inside of the hull in each compartment for reinforcement. For those without local suppliers I can recommend SLEC for either material; there is a link to their website to the right of this column.
                            I had to draw an isometric exploded assembly of a white-metal cast Waterfall winch for the Aziz instructions…….jolly fun!
                            Dave M

                            #42526
                            Bob Abell 2
                            Participant
                              @bobabell2

                              Thanks for the advice, Dave

                              Don't fancy the FG option really……..It's nasty stuff, we'll make that an option….Make a note, Miss Jones!……Yes, Sir

                              Will be glueing the skeleton together shortly, then we'll see!

                              Bob

                              #42528
                              Paul T
                              Participant
                                @pault84577

                                Bob / Dave

                                My usual practise is to fit 4mm skins but, as you already, know my models tend to be on the large side and as such need the hull wall to be thicker.

                                At 3ft this model is the smallest that I have ever skinned in 4mm and whilst it was something of a challenge to pull around the curves it has made for a very strong boat…..I tested this by dropping the prototype hull from a 1st floor window onto concrete and I am happy to say that apart from a couple of scratches it survived intact.

                                Having seen the above comments from Dave and Bob I will stick with the 1.5mm marine ply option, for those following the thread this wont effect Bobs build as all of the frames remain the same.

                                Paul

                                #42538
                                Bob Abell 2
                                Participant
                                  @bobabell2

                                  Shop floor Progress report……

                                  Spent the day, tinkering with the formers and trial assembly……..My tip of the day would be…..Don`t make the fits too tight!…..As they confict with each other

                                  It`s my job to make sure that the formers are correct as drawn, without the need to adjust them on the build.

                                  Unfortuneately, Paul has also been tinkering and some formers needed bringing up to date!

                                  If they are not right, I`ll get the DCM…..(Don`t come Monday)…..or even "The four o`clock walk"!

                                  Those were the days…lol

                                  Bob

                                  #42542
                                  Peter Fitness
                                  Participant
                                    @peterfitness34857

                                    Ian, the paint is from a spray can of household enamel. I used car body spray filler first, vigorously rubbed down, followed by an undercoat then several top coats. The finish has proved to be very durable and is still looking good after over 7 years of constant use.

                                    Bob, when I built Jessica Louise I was not in the habit of taking build progress photos, as I do now, however, I did take one of the bare skeleton, which is shown below. Incidentally, she is named after our first and, at the time, only granddaughter (now 20 years old). We now have 2 more granddaughters, the last only 2 weeks old.

                                    Peter

                                    Jessica Louise frame.jpg

                                    #42543
                                    Bob Abell 2
                                    Participant
                                      @bobabell2

                                      Thank you, Peter

                                      Just what we wanted. It's nice to see that we are doing similar in all respects….Upside down etc

                                      What did you cover the frame with….Is our next question?

                                      I've had a trial run with 3mm soft ply and it had no chance of getting round the bows area!

                                      0.5mm looked feasible though

                                      What are you building at the moment?

                                      Your destroyer model, a few years back was lovely!

                                      All the best….Bob

                                      #42544
                                      Bob Abell 2
                                      Participant
                                        @bobabell2

                                        Message from, Gladys, shopfloor liaison co-ordinator

                                        Looking at your very excellent isometric layout, Big Boy……

                                        It would be a good idea if we had a sacrificial extension on the keel with a foot base similar to the formers.?

                                        There is likely to be a lot of pressure in that area when the fireworks start!….lol

                                        Good idea, Gladys!……Now why didn't I think of that?

                                        I'm too busy getting these formers right!

                                        Bob

                                        #42546
                                        Paul T
                                        Participant
                                          @pault84577

                                          frame and deck.jpg

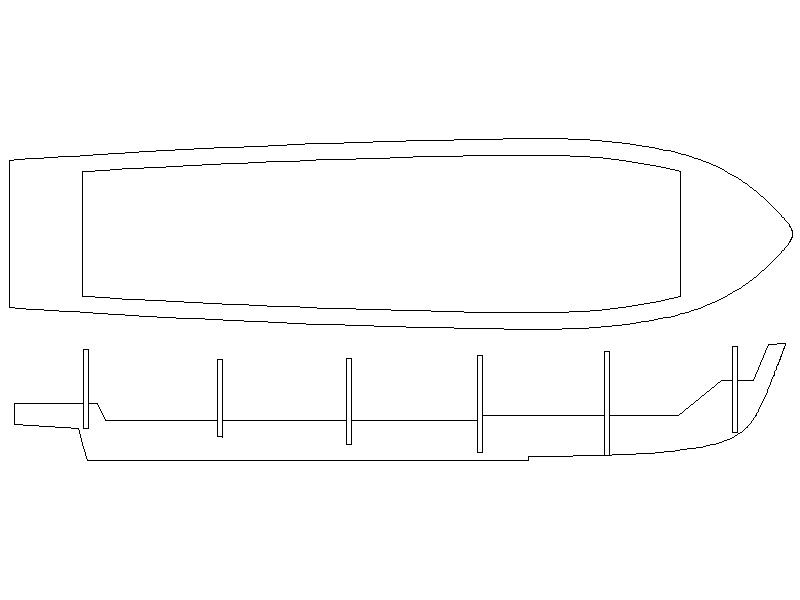
                                          I thought it might help the followers of this thread to see the positions of the formers in a non isometric layout so that they can better understand why there is so much discussion about bending plywood to form the hull.

                                          The upper image shows the deck and the readers can see how the hull forms around the bow, this is the the ply bending that we have been discussing and whilst I have already made a prototype hull using 4mm ply Bob has quite rightly pointed out the difficulty that beginners would have in making 4mm ply bend so tightly, this is the reason why the specification has changed to 1.5mm thick marine ply.

                                          In this way the original design shape remains unchanged.

                                          I hope this help to explain what has been happening and show how designs can be improved through practical application.

                                          Paul

                                          #42552
                                          Bob Abell 2
                                          Participant
                                            @bobabell2

                                            Paul

                                            Apart from the Former 6 to the prow section, there probably would be no problem with the 4mm skinning……Which I like really as it's nice and strong and has scope for sanding to shape

                                            How about making that section from blocks of balsa? This would be attractive to the Newbies?

                                            I know you are out for most of the day, so we'll wait with baited breath

                                            Bob

                                            #42557
                                            Paul T
                                            Participant
                                              @pault84577

                                              Memo to the Chief Engineer

                                              Perhaps it would be beneficial to include solid wood an optional method for constructing the bow section, by adding this as a variation I would be catering for all skill levels without diluting the main design.

                                              Paul

                                              #42572
                                              Bob Abell 2
                                              Participant
                                                @bobabell2

                                                Work in progress…….

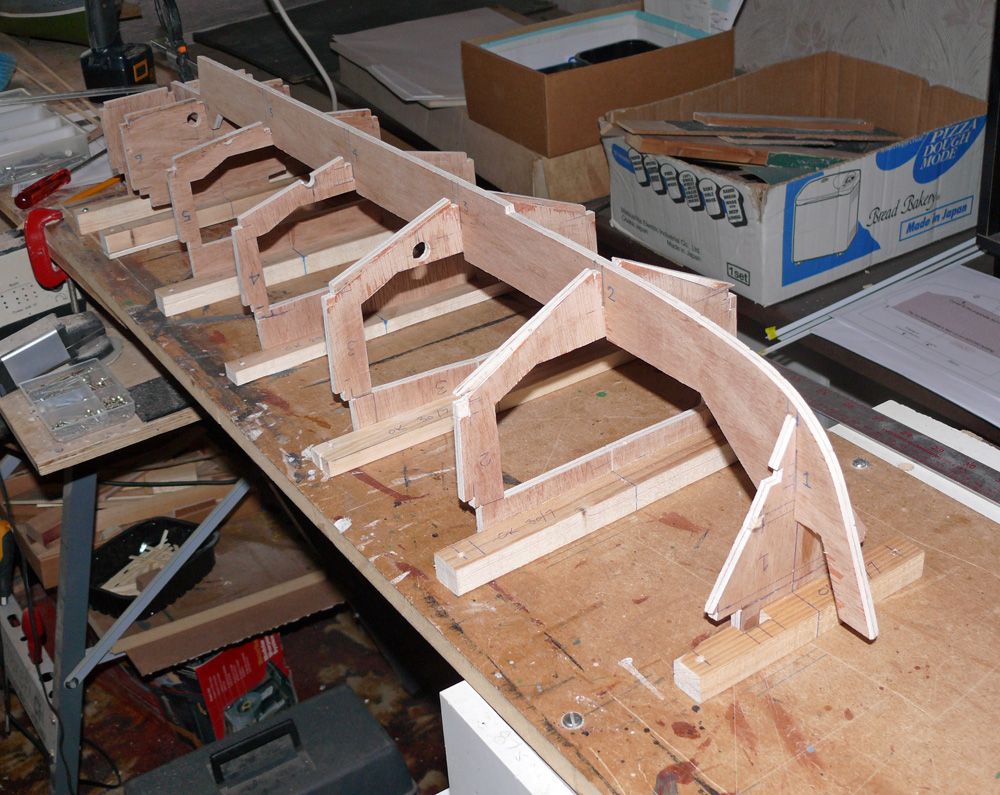
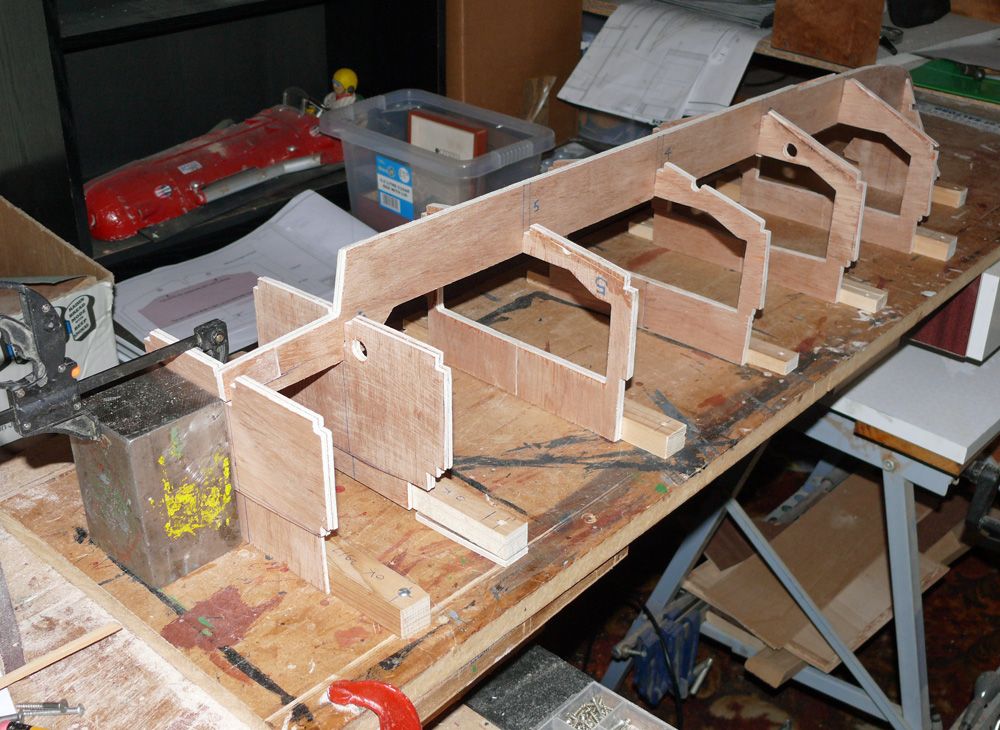
                                                Finished the formers and keel and have dry assembled them

                                                Next job is to screw the formers down, very accurately and then stand back and study the structure

                                                Checking the formers and stringer notches for accuracy and true form

                                                Even though the formers are accurately made, I`m still expecting a few adjustments here and there. A rough check has not shown any problems

                                                front view.jpg

                                                rear view.jpg

                                                The Transom is squared and screwed in place

                                                Not having any 6mm plywood in stock….I've used two  pieces of 3mm and glued them together, crossing the grain, which has made a very strong format, especially with the long wibbly wobbly keel!

                                                Taking shape a last…………Bob

                                                Edited By Bob Abell on 01/08/2013 20:51:40

                                                #42580
                                                Peter Fitness
                                                Participant
                                                  @peterfitness34857

                                                  Bob, I used 1.5mm ply, not marine grade, just normal ply, probably pine. It took a bit of coaxing around the bow, but dampening the wood softened it enough to make it bend. Reinforcing the chine with fibreglass matting strengthened that area, and a coat of resin inside and out waterproofed the whole hull. Wetting non-marine ply is not usually a good idea, but because of the low humidity at the time I was building the boat it dried before any damage was done, and it was just damp, not dripping wet.

                                                  I am not building anything at present. We moved back to our farm about 18 months ago, and my time has been occupied doing some much needed renovations to the house. My wife keeps finding jobs for me to do, and said she needs to make a list. I told her I would buy her a roll of wallpaper for the list, as anything else would not be big enoughteeth 2 We are going away for about 6 weeks on Tuesday, and when we get back I will hopefully get building. The big jobs are done so I should find time for modelling. I live in hopesmiley

                                                  I am following this thread with great interest.

                                                  Peter.

                                                  #42583
                                                  Paul T
                                                  Participant
                                                    @pault84577

                                                    Bob

                                                    The photos are great and the frame is looking perfect.

                                                    Paul

                                                    #42595
                                                    Bob Abell 2
                                                    Participant
                                                      @bobabell2

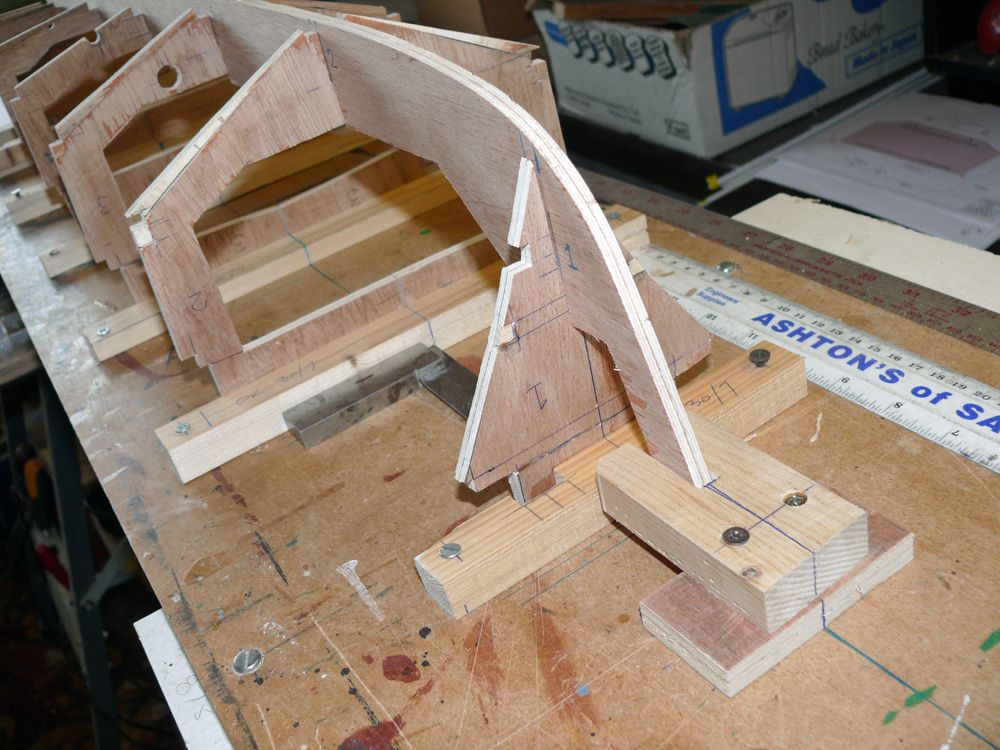
                                                      Shop floor to management……….This is the keel nose suggestion in action!

                                                      The formers are all screwed down and lined up with the centre line

                                                      Note the strong block securing the prow……..If we decide to use 4mm ply, this area will be under considerable strain

                                                      nose clamp.jpg

                                                      Action Man

                                                    Viewing 25 posts - 76 through 100 (of 1,441 total)
                                                    • Please log in to reply to this topic. Registering is free and easy using the links on the menu at the top of this page.

                                                    Code of conduct | Forum Help/FAQs

                                                    Advert

                                                    Latest Replies

                                                    Home Forums Scratch build Topics

                                                    Viewing 25 topics - 1 through 25 (of 25 total)
                                                    Viewing 25 topics - 1 through 25 (of 25 total)

                                                    View full reply list.

                                                    Advert

                                                    Newsletter Sign-up