Prototype build of ELLIE

Advert

Prototype build of ELLIE

Home Forums Scratch build Prototype build of ELLIE

  • This topic is empty.
Viewing 25 posts - 251 through 275 (of 1,441 total)
  • Author
    Posts
  • #43022
    Bob Abell 2
    Participant
      @bobabell2

      Here we go, boyz!……..Another giant step for mankind!………..Not done this for yonks!

      Lights……..Cameras!…..Drum roll!…….Fanfare of trumpets……….Action!

      Gerron with it!

      sheet fitting-2.jpg

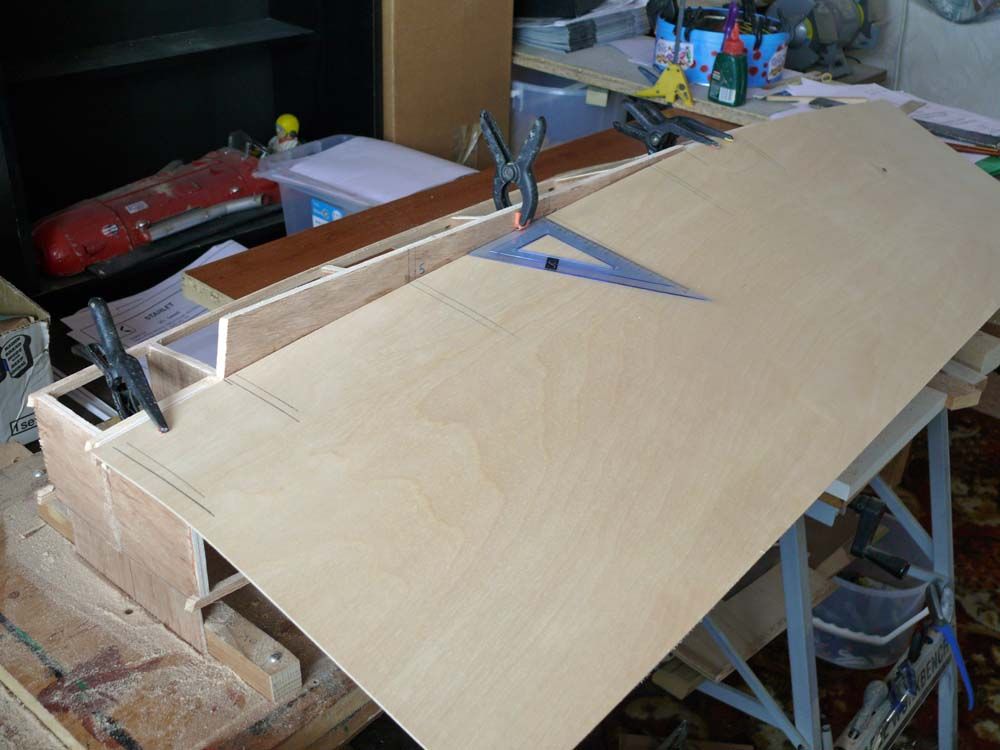
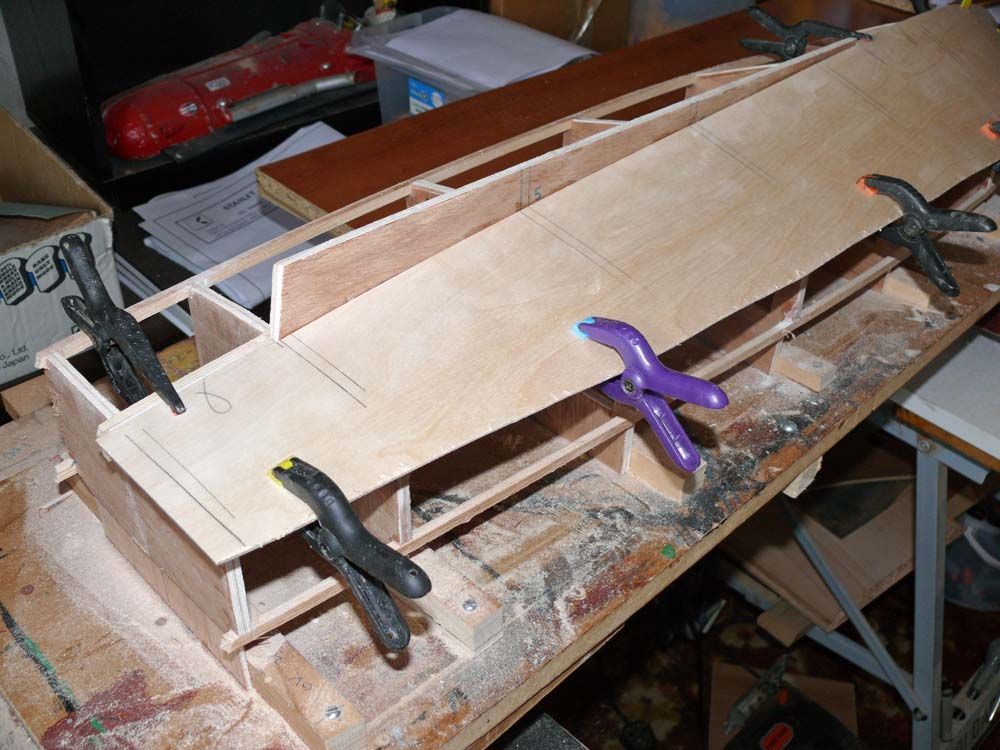
      Lay the ply sheet along the framework, with the sheet edge against the keel face and hold in position with clamps

      Mark the various positions of the Sponson and all the formers……Just in case we need them

      Mark the start and finish of the keel

      sheet fitting-1.jpg

      With a pencil. draw round the Stringer M over the full length of the hull

      I`ll just do that, right now…….Back shortly!

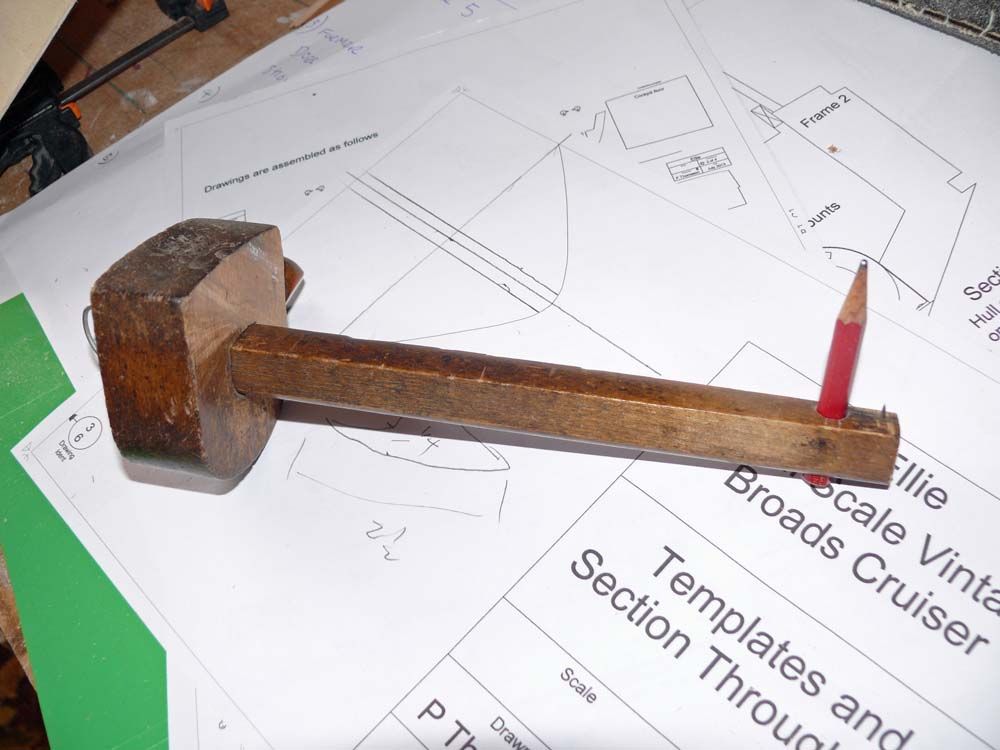
      Ha! Ha!…..I soon realised I needed one of these!….It`s my trusty old marking gauge with a short pencil…….Because access is very limited

      marking gauge.jpg

      Anyway, job done

      Bob on our live, outside broadcast!

      Advert
      #43023
      Dave Milbourn
      Participant
        @davemilbourn48782

        Cut outside the lines, Bob…………..wink

        Dave

        #43024
        Bob Abell 2
        Participant
          @bobabell2

          Cut out the skin on the bandsaw……..What`s that?…..Got no band saw?…………Oooooooooo?

          Cut clear of the pencil line by about an inch or 25mm

          skin cutout.jpg

          Turn the skin over and cut out a 3mm recess to clear the protruding keel

          I`ll just do in right now……..This is live action you know!……..Back in a coupla shakes!

          skin aft.jpg

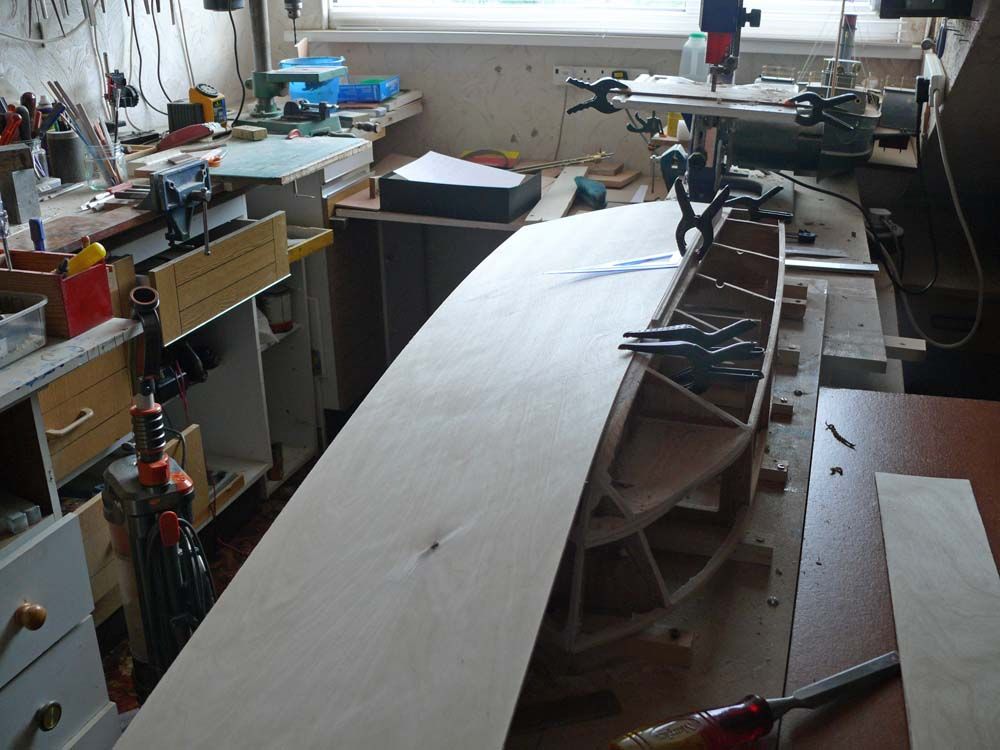
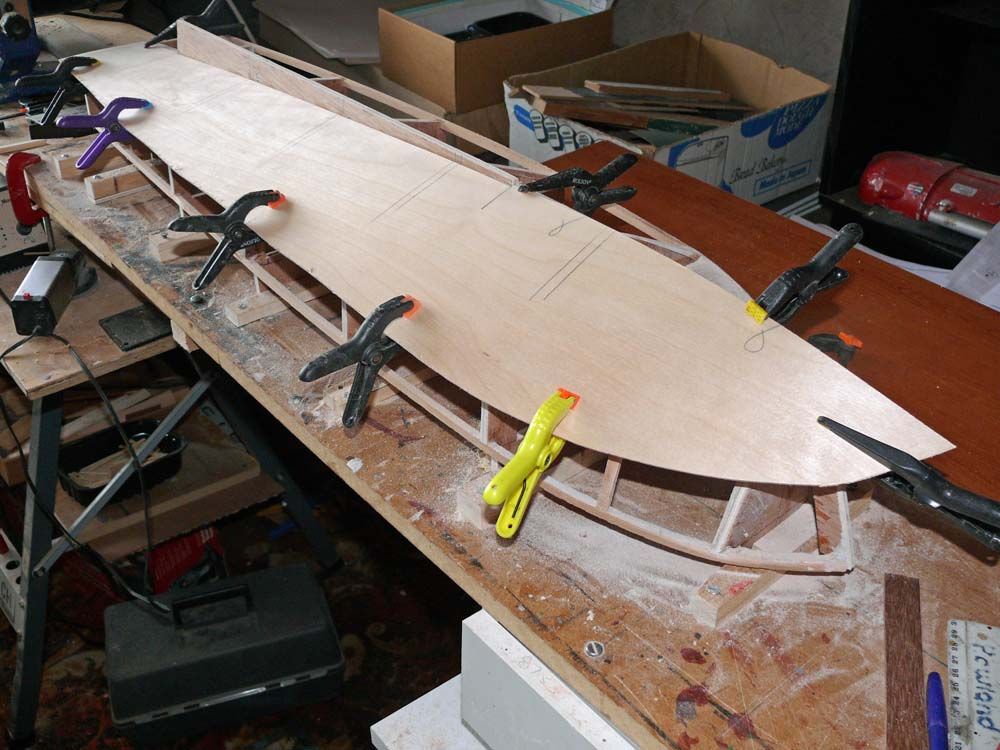
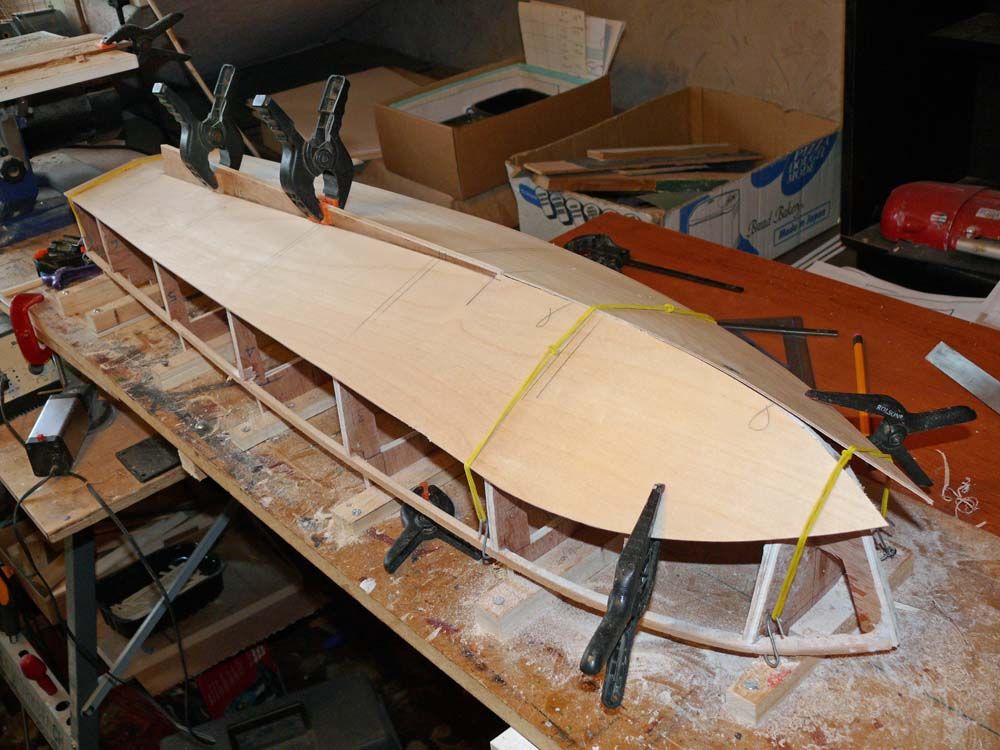
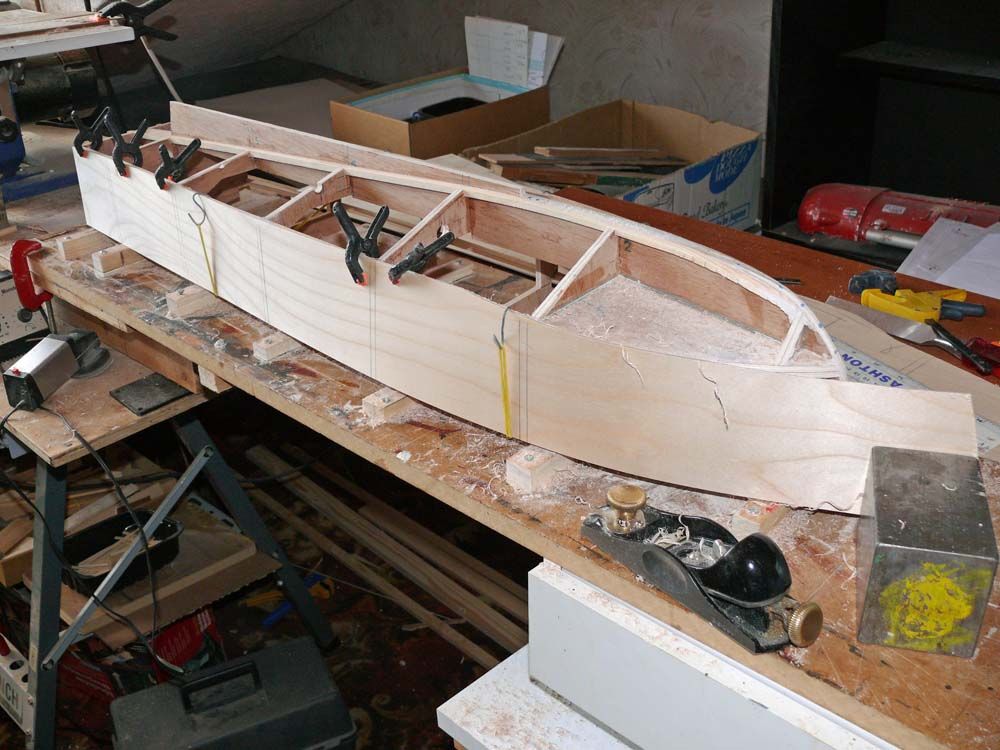
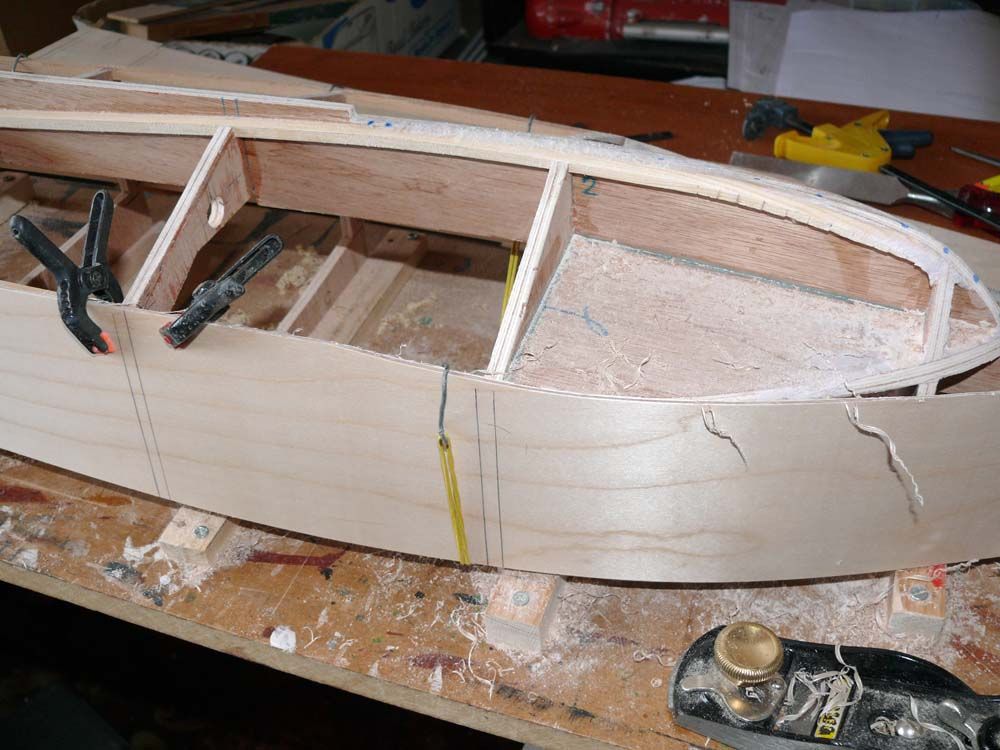
          Skin in position and clamped again to weigh up the situation

          skin general.jpg

          General view

          nose curl.jpg

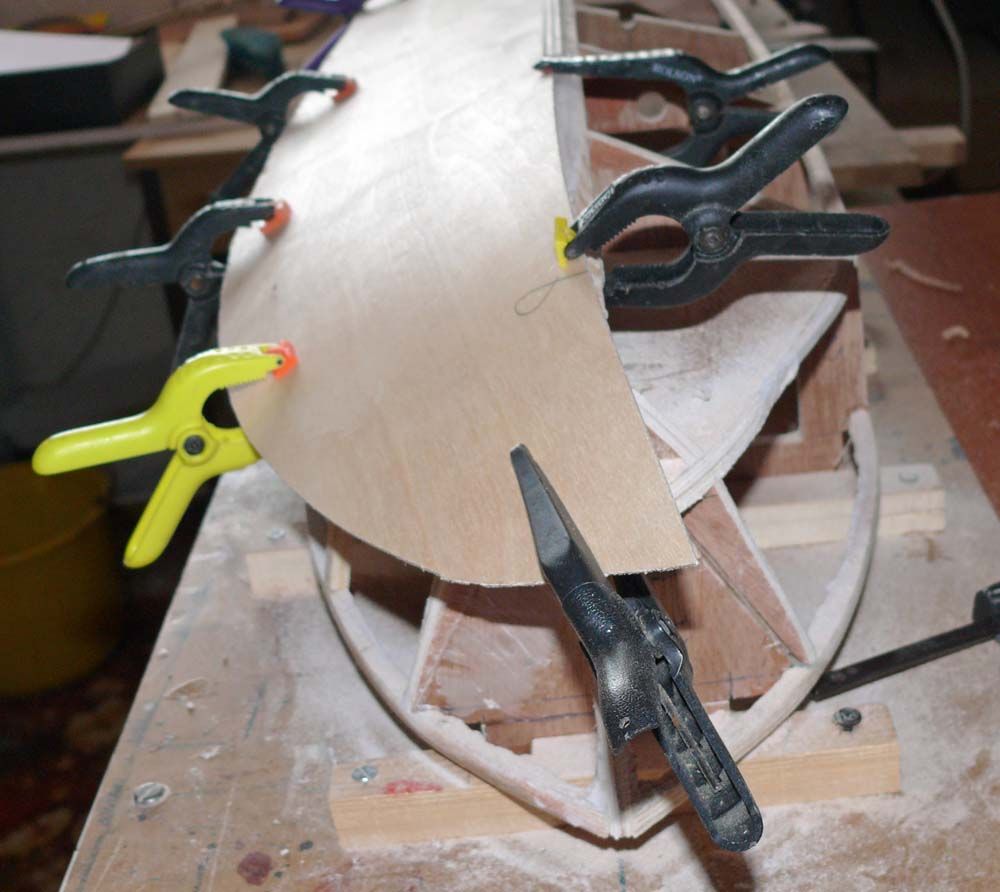
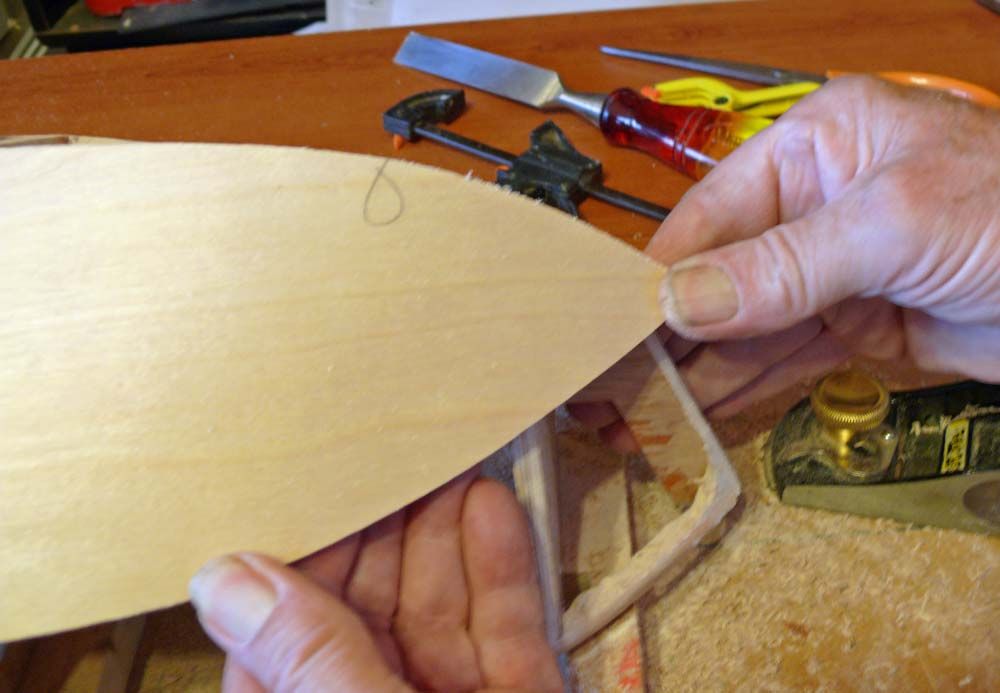
          Now then…..This is the reason for allowing the 1" surplus material to be left on!

          The joint line is now well over the hull centre line……..So much for my Face edge sign!

          The pencil line can be drawn with more accuracy around the top stringer, especially the straight section.

          The curvy section, forrad needs careful attention and will be cut in gradual steps….Always erring on the safe side

          The keel joint line needs to be cut but well clear of the line to be on the safe side

          We`ve got this crazy unscientific process because we haven`t got a skin pattern!

          Back after tea…….Bob

          #43025
          Bob Abell 2
          Participant
            @bobabell2

            Trimmed off a lot of surplus and is back in positon

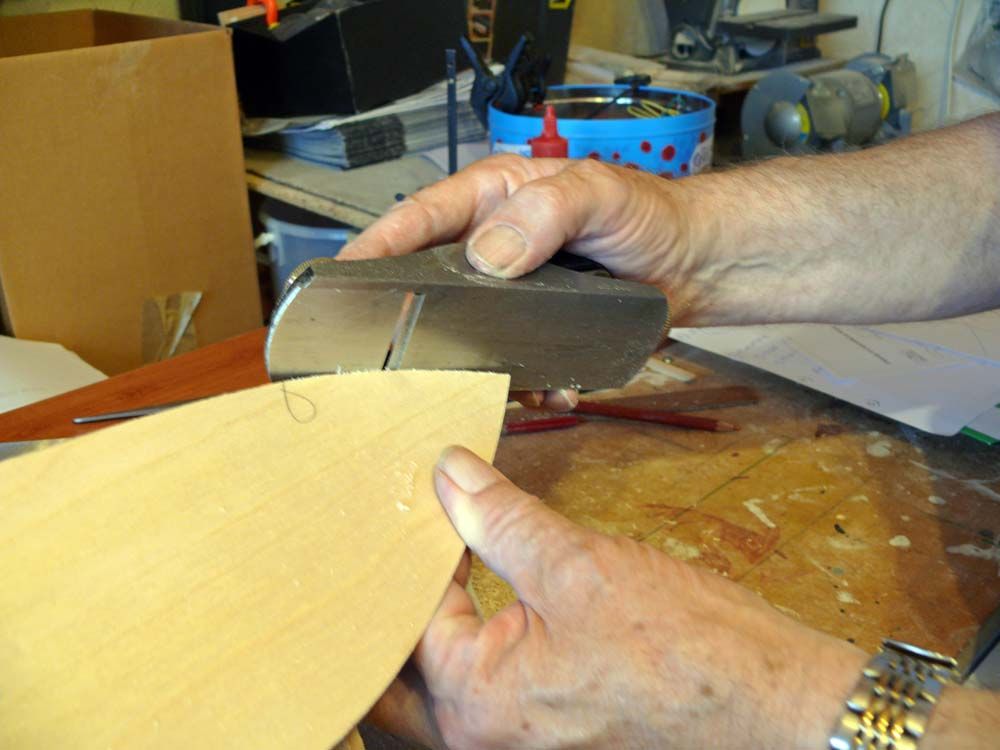
            The keel joint edge is being planed to match the keel centre line and is quite easy to do

            edge trim.jpg


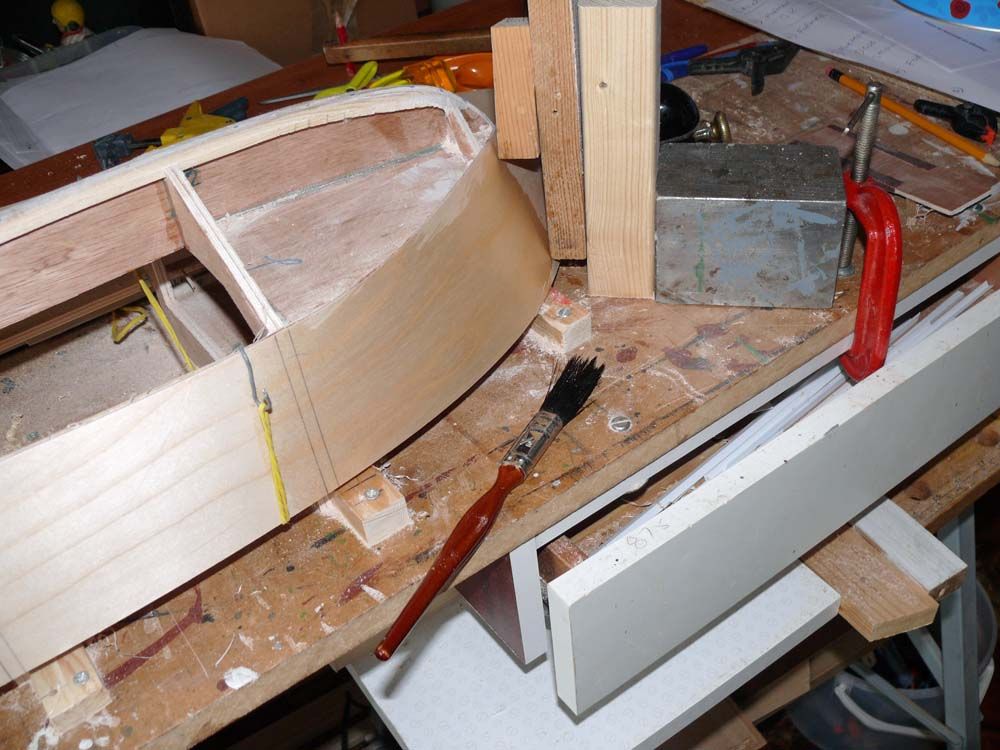
            As the shape becomes thinner, the material became more flexible and is practically touching the structure. With a bit of steam treatment we should be done

            flexing.jpg

            The skin joint needs to be very neat and will take some time to do it properly!

            Now then….What do we do next?……….We make a copy for the other side!

            Hey! Paul………How are we doin`?

            Bob ………In the Skin dept

            Edited By Bob Abell on 15/08/2013 18:59:24

            #43026
            Paul T
            Participant
              @pault84577

              Hello Bob

              Looking good but being less confident than you I would have made a card template first and then transferred the outline to the ply.

              For the others who, like me are not so confident in fitting skins the final instructions will include a paragraph on how to make a card template.

              Before making a copy of the skin I would test fit the first piece on both sides just to make sure that everything is correct.

              I am in for a very busy and difficult day tomorrow so I will be off line for most of the day, if there are any questions I will try and answer them before I leave at 8am.

              Paul

              #43027
              Bob Abell 2
              Participant
                @bobabell2

                OK, Paul

                I won`t be troubling you tomorrow

                You get your day over with a clear mind

                We wish you all the best

                Bob and friends

                #43037
                Bob Abell 2
                Participant
                  @bobabell2

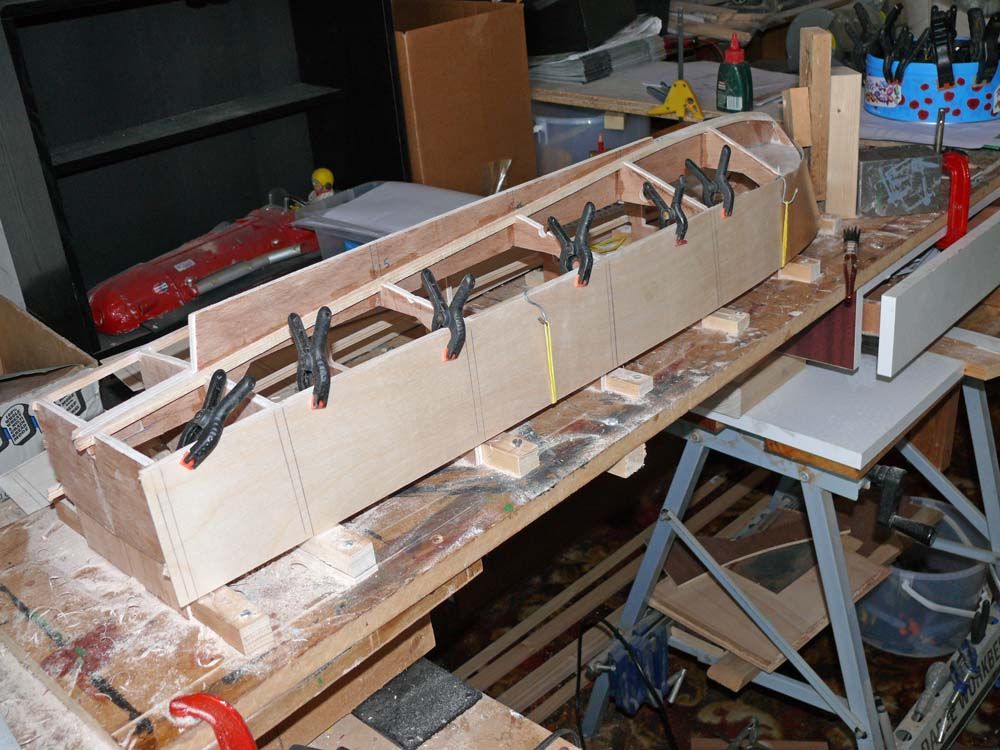
                  Here we go , Boys!

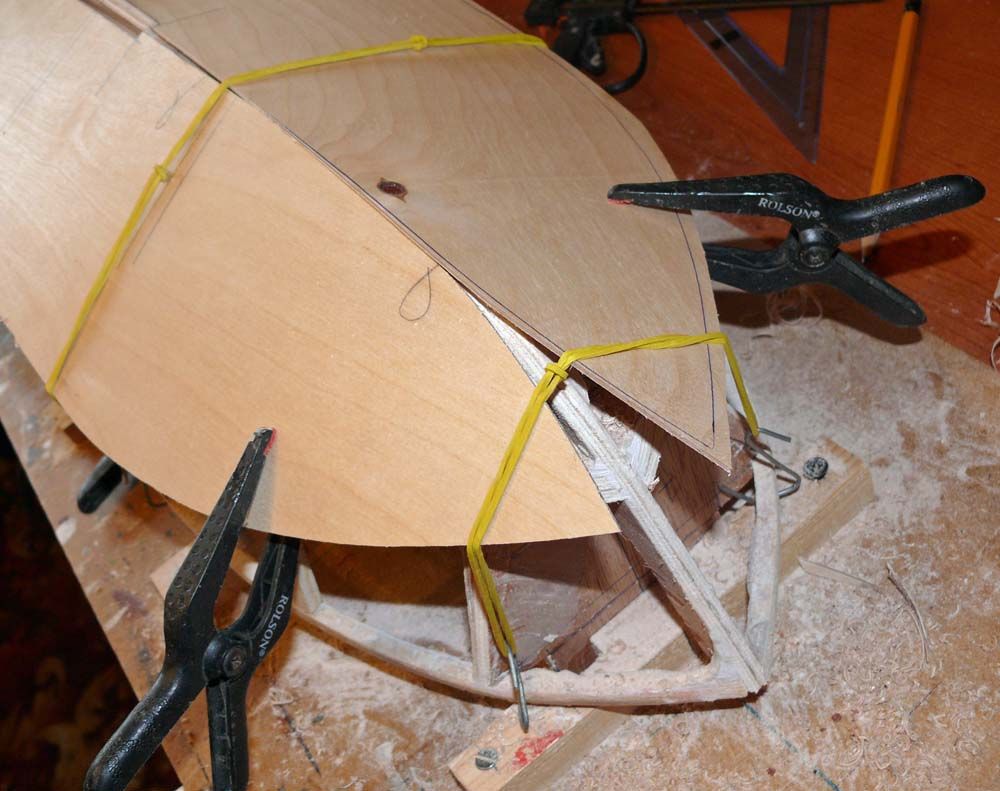
                  General view of the top skins….

                  twins.jpg


                  The skin joint…..

                  skin joint.jpg

                  This is a tricky joint to get right!

                  On the other hand, it`s not that important, as P38 filler will put it right in minutes!

                  The trick is to get the first skin following the keel centreline, then the second skin to match the first. it`s not a job to be rushed

                  The bottom edge needs extra care, as it needs to follow stringer M, and leave room for the lower skin

                  As an after thought, it`s probably a good idea to make the keel from two pieces of 3mm ply, as it gives the keel added strength and the centreline is more visible?

                  Bob

                  Edited By Bob Abell on 16/08/2013 08:43:12

                  #43038
                  Bob Abell 2
                  Participant
                    @bobabell2

                    One hour later…..ish

                    The joint face is finished and the lower edge is in sight

                    I think the hull would look nicer with crisp corners? So the curvy joint will need great care, to get the required effect

                    The bend won`t need steaming now, as the skin is in position. Steaming may have caused a few cockles!…..Muscles are ok….but not cockles!

                    Time to start the lower skin now …….To make sure we don`t get any nasty surprises?

                    nearly there.jpg

                    Bob

                    #43039
                    Dave Milbourn
                    Participant
                      @davemilbourn48782

                      Bob

                      Convention would be to fit one of the bottom skins up to the centre line (or slightly over it); allow the glue to set and then chamfer both it and the keel to fit the other one i.e. one skin overlaps the other at the keel centre-line . It saves having to make such a precise butt-joint, increases glueing area and thus makes it less likely to leak later.
                      As regards laminating the keel well, that might be a good idea if the ply wasn't already laminated and spotting the join line you want wasn't disguised by the others! Seriously I remember a company who came up with a tinted glue so that you could see such joins more easily. i don't think they sold over-much of it.
                      For shaping stringers and skins I have found that a Permagrit block is ideal as it has a coarse side for roughing out and a smoother side for finish-shaping. Not cheap but no good tools are. See if you can find one next week at Haydock and see what I mean.

                      ellie skins.jpg

                      Dave M

                      #43041
                      Bob Abell 2
                      Participant
                        @bobabell2

                        Thanks Dave

                        I will be using that method on the straight forward joints, but the keel joint is rather vague in reality, but I`ll bear it in mind shortly

                        I`ll look out for the Permagrit blocks next week

                        The lower skin is prooving not wanting to flex at the moment………Needs a bit of muscle!

                        Bob

                        Edited By Bob Abell on 16/08/2013 13:46:52

                        #43042
                        Dave Milbourn
                        Participant
                          @davemilbourn48782

                          Steam it, Bob. Works a treat for me.

                          #43045
                          John Shire
                          Participant
                            @johnshire55937

                            Paul , Bob

                            I am a little confused as why there are no plans for the skins is this usual.

                            John

                            #43047
                            Bob Abell 2
                            Participant
                              @bobabell2

                              Hello John

                              No two hulls are alike, because the formers and keel are hand made, so it would be very difficult to predict the correct shape

                              Like Paul says…..Make a card template first, then draw round that, but still leave about 1/8" on….For final adjustment!

                              Bob

                              #43054
                              Bob Abell 2
                              Participant
                                @bobabell2

                                Would you believe it?…….I`ve spotted an error!

                                lower skin.jpg

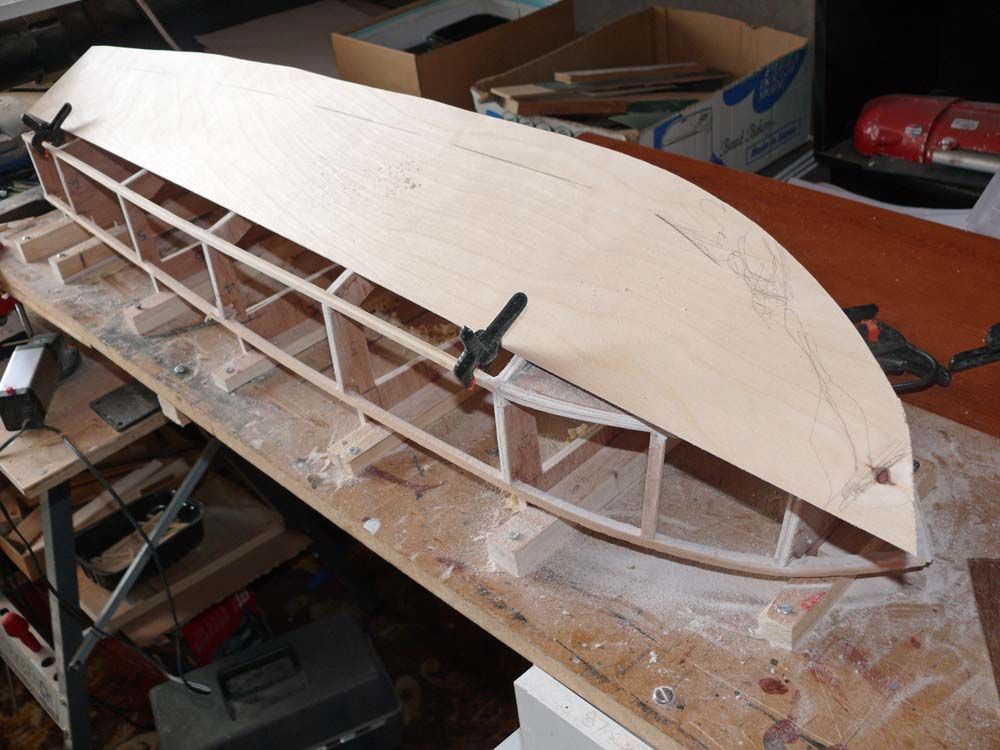
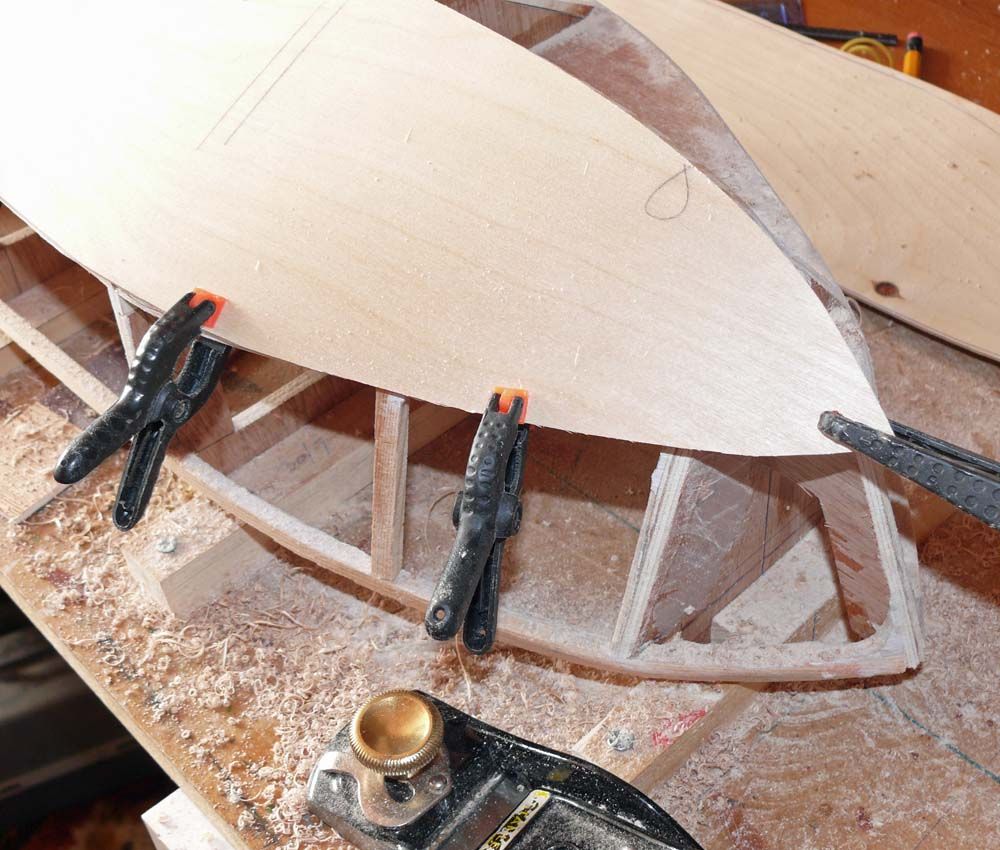
                                Here`s the lower skin, with the sheet resting on the former feet and clamped to the frame

                                Just crying out to have the surplus planed off the top edge…..As Dave M recco`d

                                error in sight.jpg

                                Got to the curvy section and the error was spotted!……….Blimey Charlie!

                                It`s not serious, but will bring a rye smile to the Chief Designers face!

                                Let`s see if anyone can spot it?

                                The basis of the error was mentioned the other day and will call for further structural work!…And the drawings ammended!

                                Bob

                                #43055
                                Dave Milbourn
                                Participant
                                  @davemilbourn48782

                                  Nope. Give us a clue, Bob.

                                  Edited By Dave Milbourn on 16/08/2013 18:40:41

                                  #43056
                                  Bob Abell 2
                                  Participant
                                    @bobabell2

                                    You've soon given up, Dave?

                                    First clue…..Study the structure

                                    Bob….Quiz Master

                                    #43057
                                    Bob Abell 2
                                    Participant
                                      @bobabell2

                                      Dave

                                      Look no further!

                                      it's not drawn wrong….It's made wrong!………Paul will be pleased!

                                      I was busy planing the top edge down to the stringer, but the top of the stringer is the same height as the breast hook!…..ie….Nothing to glue the top skin to!…..That was the alleged error!

                                      Looking closer…..The stringer needs to be planed down!

                                      That means, the lower skin has only got…..3mm to cling to and not 6mm as mentioned earlier

                                      Send for the P38!

                                      Bob standing in the corner!

                                      #43064
                                      Dave_P
                                      Participant
                                        @dave_p

                                        Due to that dirty four letter word, WORK, I have fallen behind with the antics on this thread. However, I have just spent a very pleasant 3/4 hr catching up. The banter has me chuckling to myself, I think my wife is getting a little concerned. I loved the operating scene Bob hope no digits were harmed during the filming.smile p

                                        Keep up the good work chaps, I am really looking forward to making a start on this project when all is ready for us.

                                        Cheers

                                        Dave

                                        #43067
                                        Bob Abell 2
                                        Participant
                                          @bobabell2

                                          Hello Dave

                                          Very pleased you enjoyed the Emergency Ward 10 scene!

                                          It was great fun thinking up the nonsense!

                                          What will happen next!…..I ask myself?

                                          Bob

                                          #43070
                                          Bob Abell 2
                                          Participant
                                            @bobabell2

                                            Had the skin under pressure all night, just out of interest and with a good wash, the skin fits quite nicely

                                            That`s sorted!

                                            wet skin.jpg

                                            General view for reference….

                                            lower skin.jpg

                                            Paul will be pleased?

                                            Bob

                                            #43074
                                            Paul T
                                            Participant
                                              @pault84577

                                              Hello Bob

                                              Yes I am very pleased with how the build is going.

                                              My current concern is how well the horizontal and vertical skins will interact when they both change direction forward of Frame 2 but I am sure that this will all be resolved later today.

                                              Paul

                                              #43075
                                              Dave_P
                                              Participant
                                                @dave_p

                                                Like the interesting clamping arrangment at the bows Bob.

                                                #43077
                                                Bob Abell 2
                                                Participant
                                                  @bobabell2

                                                  Hello Paul

                                                  Pleased that you are back in circulation and hope all went well yesterday………..Take it easy, today, my Mate!

                                                  The curvy skin joint line does look tricky, but we`ll overcome, no doubt

                                                  Stringer M is a tricky shape……Level at the Transome and angled along the hull and is not easy to plane, with the formers in position. It wouldn`t be easy, planing before glueing either, being so slender?

                                                  That was an eye opener…..The angled stringer meeting the breast hook chamfer! Thought I`d got yer!

                                                  The 1.5mm ply seems to be ok now, for bending at the front end, using water brushed on and holding in position

                                                  Bob

                                                  #43079
                                                  Paul T
                                                  Participant
                                                    @pault84577

                                                    John

                                                    The reason for not including skin templates is to allow the builder to overcome any problem that might have been 'built in' by error.

                                                    You have seen from this build how even experienced builders / designers can make small mistakes and it is these small errors that can add up to a serious problem when fitting a pre-designed skin.

                                                    Making the builder take templates and producing their own skins will allow any discrepancy in the frame to be covered without having to resort to masses of filler.

                                                    I hope this explanation is clear enough as my mind is elsewhere at the moment.

                                                    Bob

                                                    When I worked on the stringers on prototype 1 I used a spokeshave rather than a small block plane as it was easier to change the direction of the cut.

                                                    Paul


                                                    Edited By Paul T on 17/08/2013 10:08:09

                                                    #43080
                                                    Bob Abell 2
                                                    Participant
                                                      @bobabell2

                                                      Paul

                                                      Had an idea!

                                                      Since the Keel is settled now…..How about offering the Keel only, to the readers…..FOC…..To get the ball rolling and for us to test the water?

                                                      I would recco` making the keel from two piece of 3mm ply as it will be stronger and straighter

                                                      Or am I jumping the gun, as always?

                                                      Bob

                                                    Viewing 25 posts - 251 through 275 (of 1,441 total)
                                                    • Please log in to reply to this topic. Registering is free and easy using the links on the menu at the top of this page.

                                                    Code of conduct | Forum Help/FAQs

                                                    Advert

                                                    Latest Replies

                                                    Home Forums Scratch build Topics

                                                    Viewing 25 topics - 1 through 25 (of 25 total)
                                                    Viewing 25 topics - 1 through 25 (of 25 total)

                                                    View full reply list.

                                                    Advert

                                                    Newsletter Sign-up