M.V. Sea Nass

Advert

M.V. Sea Nass

Home Forums Scratch build M.V. Sea Nass

  • This topic is empty.
Viewing 25 posts - 26 through 50 (of 50 total)
  • Author
    Posts
  • #93338
    ashley needham
    Participant
      @ashleyneedham69188

      Component shop lists a mabuchi 555….12-30v

      Ashley

      Advert
      #93339
      Ray Wood 3
      Participant
        @raywood3

        Hi Dave,

        Can't see any reason to use 12 volts, 6 volt SLA battery for ballast and slogging power will be fine, you don't want your props sitting in the water creating froth/cavitating ? Still you have a way to go before that's an issue

        Regards Ray

        #93416
        Dave Harrison
        Participant
          @daveharrison24862

          Not a lot to report this week.

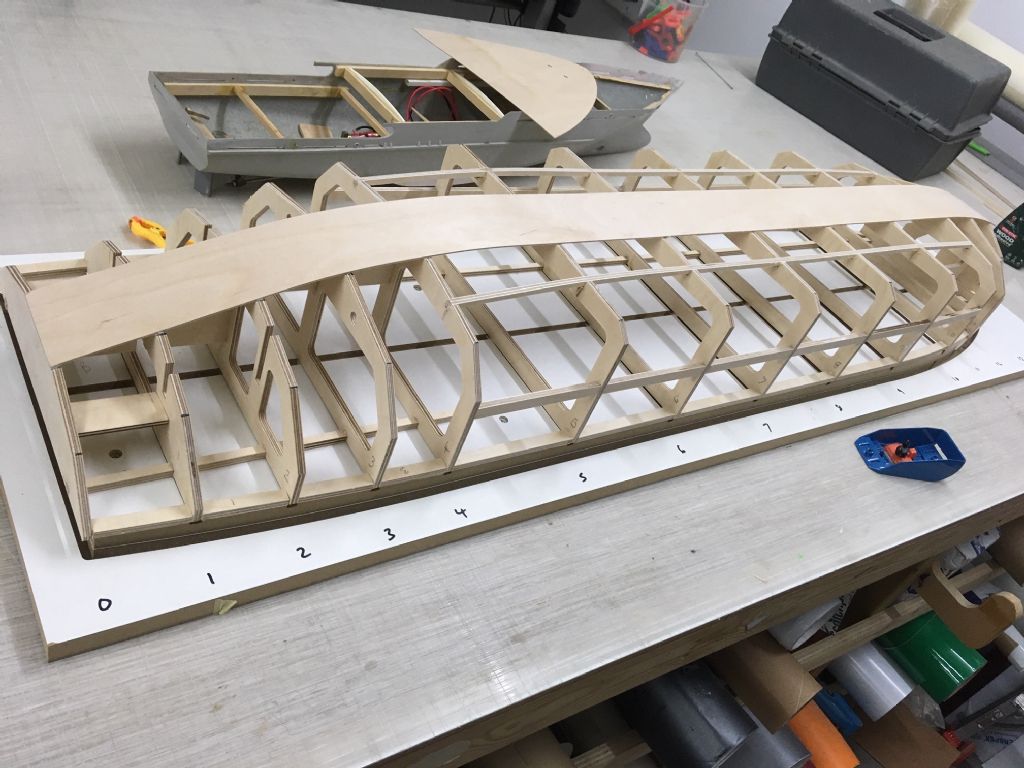
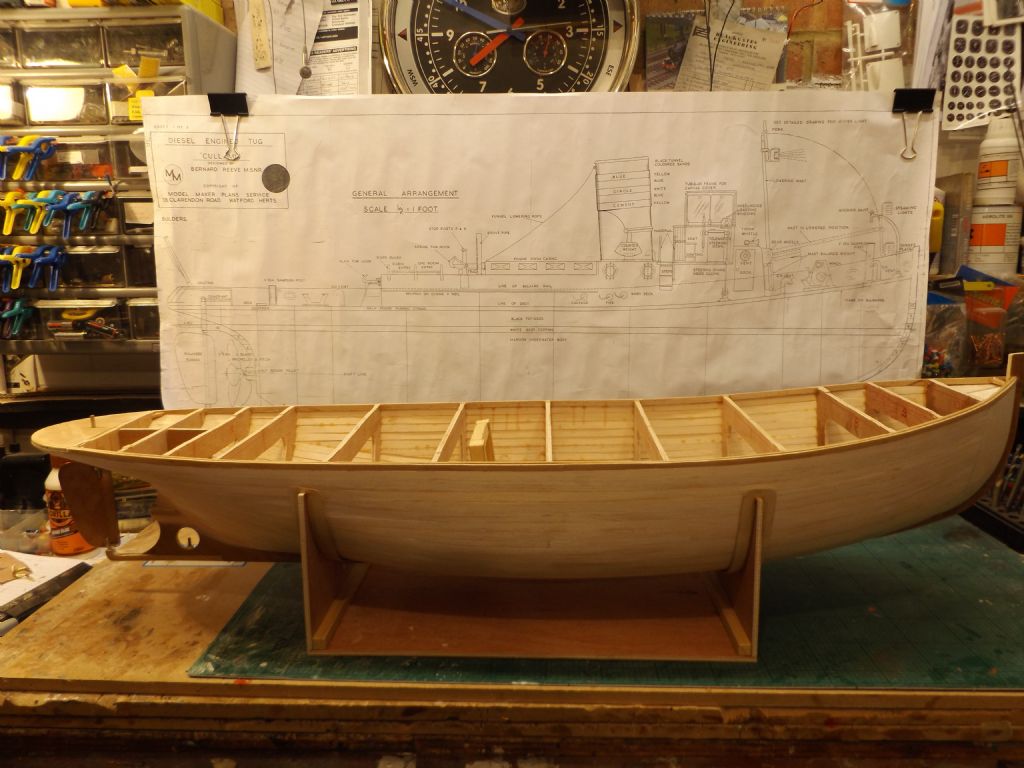
          Following on from Rays wise words I have cut notches into the bottom bulkheads and added stringers, I have also added support on the sides between the wider spaced bulkheads to give the ply skin a little more support as i soon realised this was quite a big area to span with 1mm ply. Then also more support at deck level.

          So now need to spend some time profiling and shaping the edges of the bulkheads before the prop shafts arrive, once I have the shafts I can work on the skegs and rudders !

          She's looking quite big and bulky next to my 1:72 river class hull.

          img_9877.jpg

          #93466
          Richard Simpson
          Participant
            @richardsimpson88330

            Dave just going back to the original conversation regarding ballasting. The "Free Surface Effect" as already mentioned is a stability killer and has a significant effect on the model. Added to that you have a significant sized crane on the deck, which will also have a very detrimental effect on stability on its own. It will be critical to make that as light as you possibly can.

            What would be an interesting way to achieve the effect you are after would be to simply fit a submarine ballast tank. These use either a piston or a bladder to remove the free surface and give you a much more stable mass. One of the best ones around are the Engle units, which have a piston driven by a motor that drives the piston rod via a rack and pinion on the piston rod. This is all built into a beautifully engineered unit that can then be completely controlled from empty to full. Sophisticated and expensive but would do the job for you.

            Failing that either a piston in a cylinder or simply a bladder in a tank would get rid of the free surface effect.

            Just an interesting side here, free surface effect is a huge problem for road tankers, which is why your average 20 ton tanker will be split into five separate tanks and each of them are fitted with a number of transverse and longitudinal frames with only lightening holes in them for the fluid to flow through.

            #93548
            Dave Harrison
            Participant
              @daveharrison24862

              Thanks for the information Richard, I've just spent an enjoyable hour on the engel website and then looking at home built versions of the same idea. It could be a possible solution to the ballast problem, my only concern would be could i make a big enough piston ?

              My plan will be to finish the hull with running gear, get the superstructure built and then weigh what i have, add a token amount for fittings etc, do a bath test, play around with some heavy batteries and see where i'm at before the decks get glued down.

              I have just had a delivery of essentials from Cornwall model boats, including my motors. After speaking with the guys at the prop-shop I went for a pair of geared 2.5 to 1 385s.

              A good few years ago i donated all of my modelmaking tools, stocks of materials and RC gear to my father-in-law who is an avid aeromodeller. I really took for granted having a fully stocked model making workshop full of all the bits and bobs one acquires over time. It is only now when starting from scratch again I realise what a gave away. It is such a pain to have to buy every servo horn, every pushrod ! ! As soon as we are allowed to visit relatives I'm off to raid his shed ! laugh

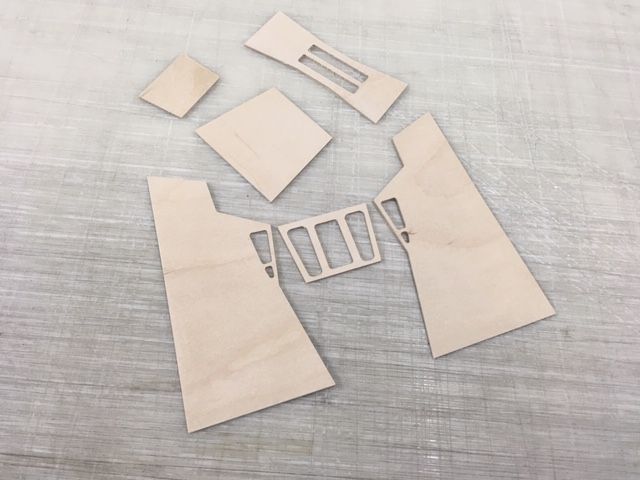
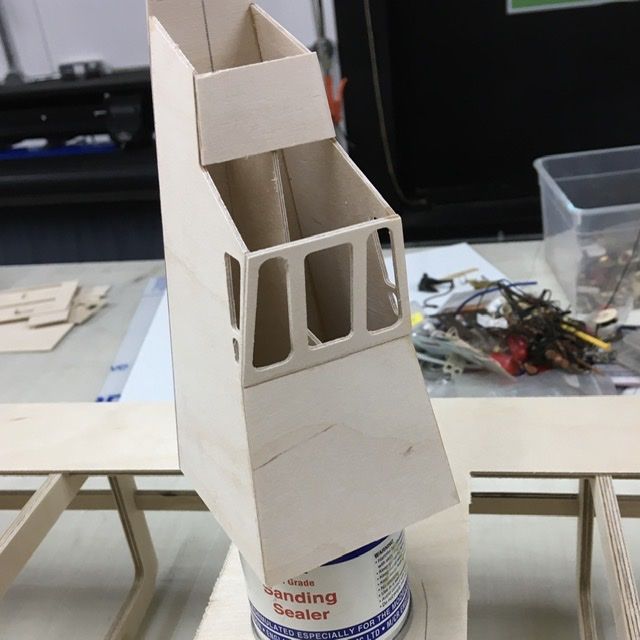
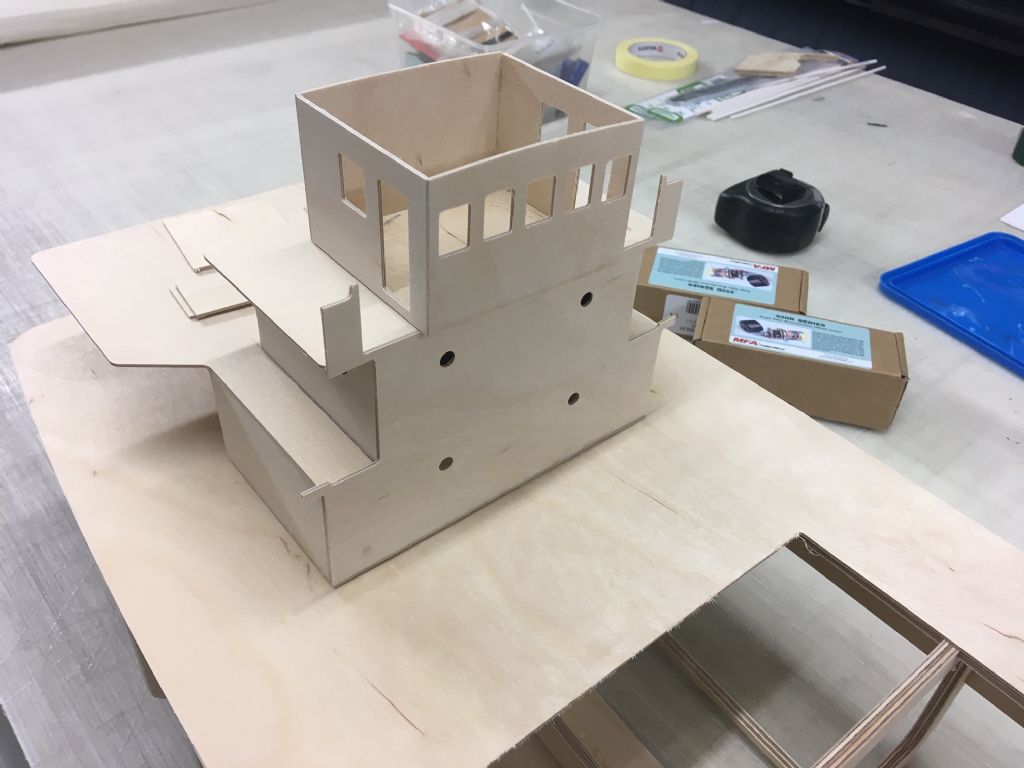
              Over the last few days I have managed to spend a few hours making a start of the superstructure. I had planned to construct this out of plasticard but had a 4×4 sheet of 1.5mm birch ply in the off cut rack so decided to use this and save some money. I will use plasticard for the detailing. Just out of interest are 8×4 sheets of plasticard available is it the same as HIPs ?

              I have noticed a few differences from the plan to the photos of the full size ship with regards to the superstructure, this maybe because the full size has been modified over the years. While i have many photos of the stern of other vessels in the mini series. I don't have any of the Sea Nass so I am going to use a little modellers / artistic license therefore she will not be a true scale model. ( unless i can convince the crew in Bahrain to walk around with a camera ! )

              Thanks everyone Stay Safe.
              img_9879.jpg

              img_9882.jpg

              #93553
              Dave Harrison
              Participant
                @daveharrison24862

                Another couple of hours tonight cutting out the last of the crane cab parts. I have also found some sanding sealer.. I wonder what the shelf life is of this stuff, the price on the tin is £2.99 so it must be quite old ? It still smells like cellulose. I might have to test a bit ! img_9881.jpg

                #93557
                Ray Wood 3
                Participant
                  @raywood3

                  Hi Dave,

                  I'm impressed with your superstructure and crane works, but desperate to see how your going to the sheet the hull that bluff bow would lend it's self to Styrofoam or balsa blocks carved to shape and glass clothed ?

                  Regards Ray

                  #93576
                  Dave Harrison
                  Participant
                    @daveharrison24862

                    Thanks Ray, I’m a few weeks away from sheeting the hull. I know it’s probably a bit back to front but I decided to get all the prop shafts motors, rudder posts in first as it will be easier to get everything straight.

                    As the hull is hard chine I had planned on sheeting the hull in a mixture of 1-1.5mm birch ply. I’m sure there will be a bit of steaming involved to achieve the curves around the bow. The bow really is the only difficult bit, and I can break the panels down into smaller sections (plates) if need be ( in fact this would better replicate the full size ). A back up plan is to insert polystyrene between each bulkhead at the bow and us a hot wire to shape. Then sand and full as required.
                    I plan to glass the hull in light cloth and epoxy. 🤞

                    #93577
                    Tim Rowe
                    Participant
                      @timrowe83142

                      Hello Dave

                      In the full sized ships the plates would have been rolled. You can even roll a cone to approximate double curvature.

                      If you try replicating plates with ply I think you will find you will end up with a series of facets with won't look to good.

                      Ray and other's block method is tried and tested. If you want to go the sheeting route i would drop down to 0.8mm ply using two layers. In a curve. 0.8mm is amazingly strong.

                      Tim R

                      #93610
                      Dave Harrison
                      Participant
                        @daveharrison24862

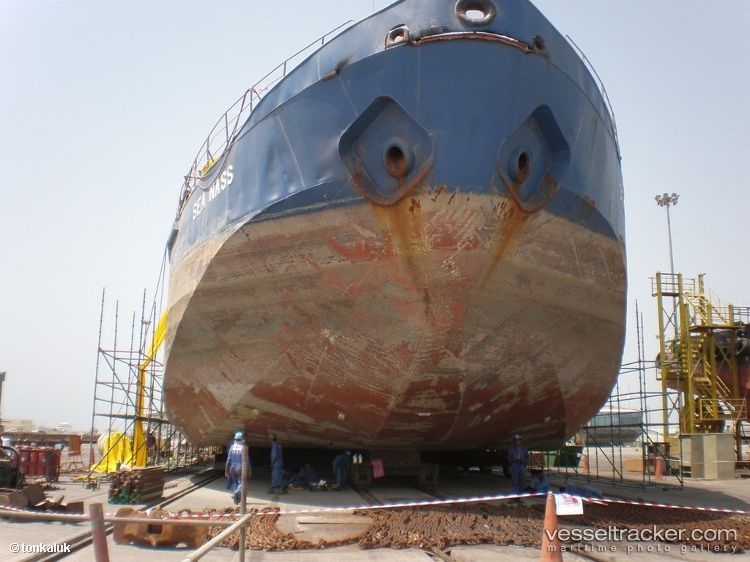
                        663959.jpgHere is a good shot of the bow, The bottom plate / chine is sharper than the one shown in the plan. I am thinking if I were to go down the foam route I would be able to easily add some hull damage / battle scars as per full size.

                        #93624
                        Dave Harrison
                        Participant
                          @daveharrison24862

                          Hi Tim.

                          Thanks for the advice, I have found some 0.8mm ply and am surprised at how more flexible it is. Tonight’s efforts included giving the wheelhouse and superstructure a couple of coats of vintage sanding sealer and making a start on the crane body. I need to think about what I can use for crane pulleys over the weekend !

                          #93625
                          Dave Harrison
                          Participant
                            @daveharrison24862

                            Crane body.jpeg

                            #93629
                            gecon
                            Participant
                              @gecon

                              MV Sea Nass is progressing niceley Dave.

                              I thought of your project yesterday when I saw a well loaded freighter vessel 'pushing' it's way up the fjord near Stavanger. There was little freeboard left! More freeboard showing than Sea Nass when fully loaded, but never-the-less the same 'look' on the water. I can understand your interest to produce a 'well loaded vessel'. A vessel with 'purpose and presence'.

                              Looking forward to seeing the next stages.

                              George

                              #93630
                              gecon
                              Participant
                                @gecon

                                Regarding pulleys: there are probably many sources but if you logg in to CMB and write 'pulleys' in their 'quick search' you'll find a few pulleys and brass sheaves to consider.

                                George

                                #93634
                                Dave Harrison
                                Participant
                                  @daveharrison24862

                                  Hi George.

                                  Thanks, I had been admiring the mast and rigging on your fisher 34. I was wondering how well the full size fishers go under sail ? They are such pretty little boats.

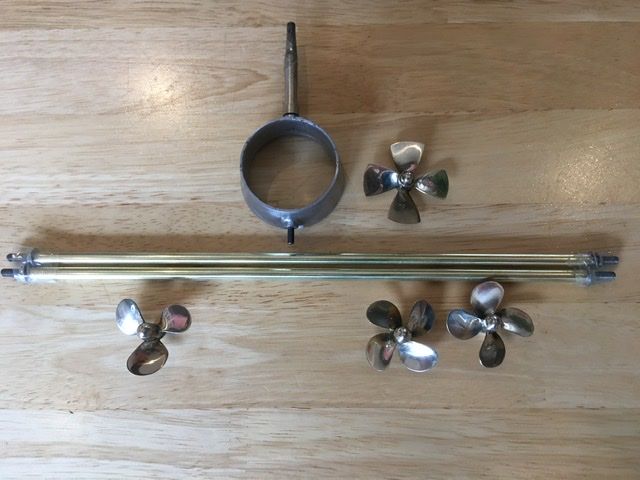
                                  These little gems came through my letterbox this morning. Thanks to the prop-shop, they are beautiful !
                                  The kort nozzle and 3 blade prop are for my next projects.. mv Miranda Guinness and the s.s Earl Sigurd.

                                  #93635
                                  Dave Harrison
                                  Participant
                                    @daveharrison24862

                                    castprops.jpeg

                                    #93655
                                    gecon
                                    Participant
                                      @gecon

                                      Hi Dave, we are lucky that so much miniature scale gear is available to us.

                                      Regarding Fisher sailing qualities I'll be polite: you don't buy a Fisher if you want to 'go sailing'. But you do if you want to enjoy life on the sea, cacooned in teak, protected from the UK weather and accompanied by a happy Admiralty/crew.

                                      The full size 34' is said to sail best of all the Fishers. The 37' has a cutter rigged option which sails well and better in heavy-ish weather but is hard work if single handed. Generally though it's not smart to be single-handed on any sea-going vessel. My 34 and a 37 are pictured together at Bosham Harbour, Chichester -in my Album.

                                      I don't expect my F34 to sail well at all -it'll be too heavy. I rather suspect that it will resemble MV Sea Nass with respect to available freeboard!

                                      George

                                      #93709
                                      Dave Harrison
                                      Participant
                                        @daveharrison24862

                                        Hi George, your full size fisher looks beautiful. Bosham is a very pretty part of the world. One of my favourite walks is on the other side of the water, from Dell Quay along the banks to the Witterings.

                                        I love the idea of furling sails on a model so you can motor bare poles or sail in the right conditions.


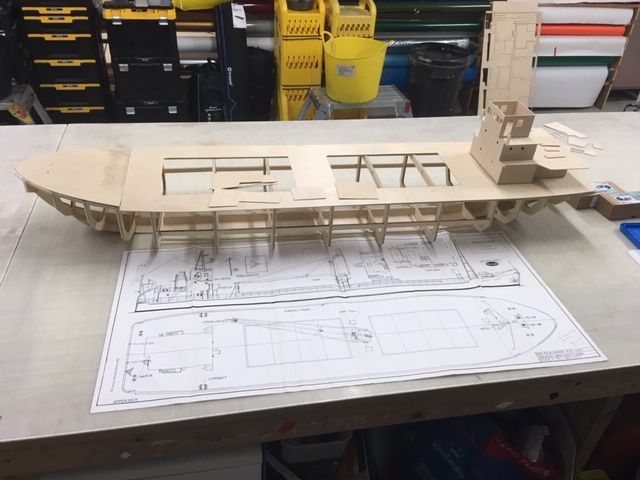
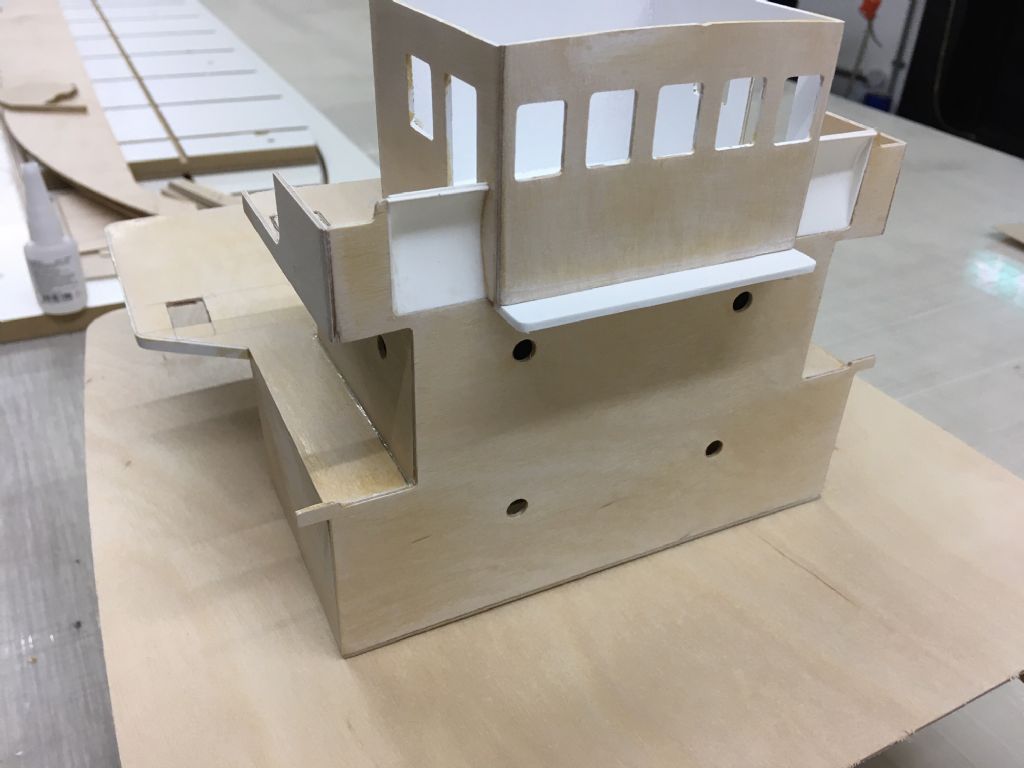
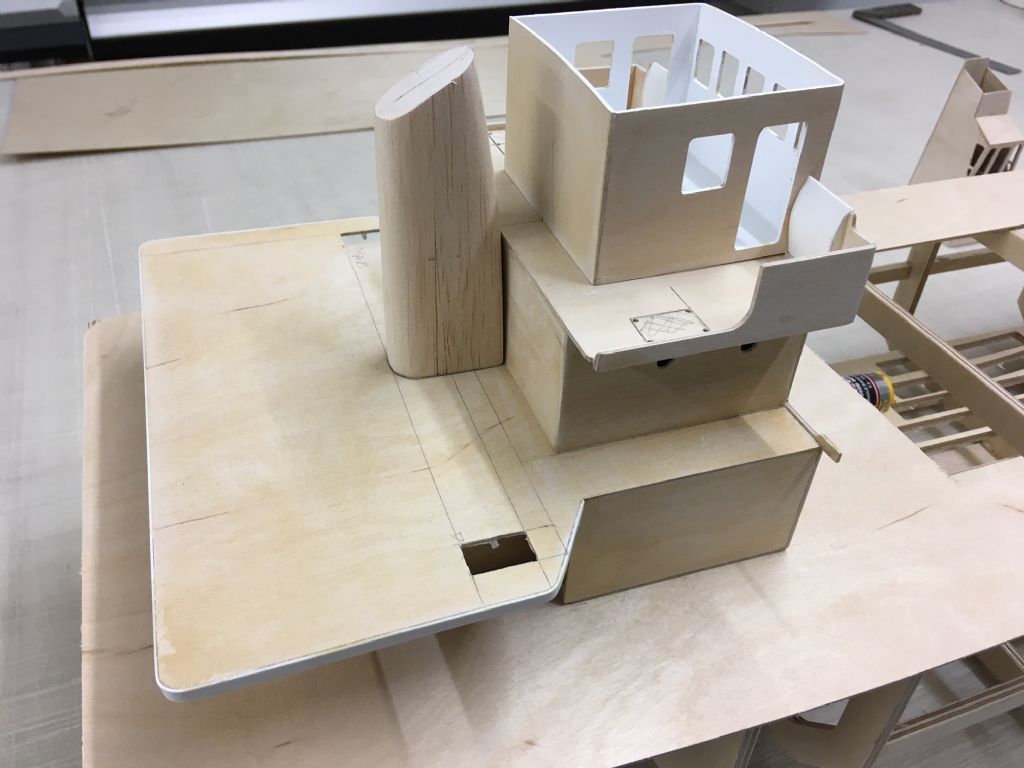
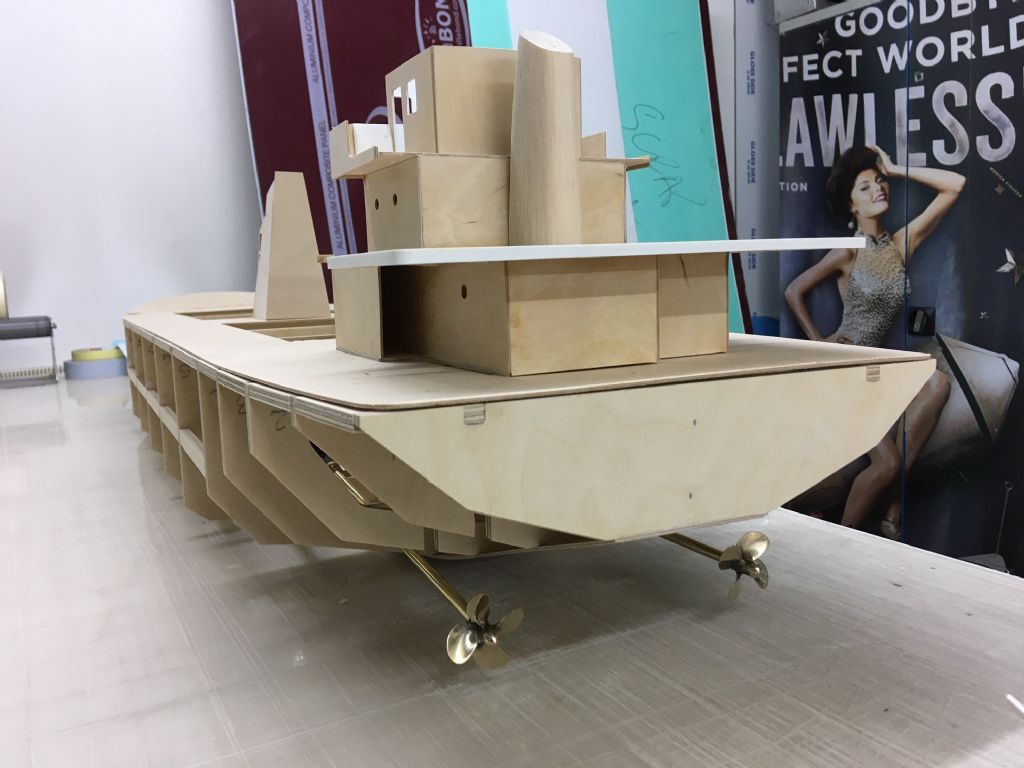
                                        A quick update from the tinkering over the weekend. I carved a funnel from scrap balsa and added a bit more to the bridge. I also realised in my haste to cut parts that i have forgotten to cut the holes for the stairs / ladders up to the bridge. This has added a couple of hours of drilling, cutting, sanding and filling. I'm quite annoyed with myself ! Oh well, its a learning project. I'm happy with my progress so far. She's starting to look like a merchant ship from the stern.

                                        This week I will start to work on the twin skegs and mounting prop shafts and motors. I also need to ask a few questions about rudders. Comments and suggestions most welcome.

                                        Cheers Dave. img_9901.jpgimg_9902.jpg

                                        Edited By Dave Harrison on 09/02/2021 13:33:19

                                        Edited By Dave Harrison on 09/02/2021 13:33:36

                                        #93710
                                        Dave Harrison
                                        Participant
                                          @daveharrison24862

                                          img_9908.jpg

                                          #93856
                                          gecon
                                          Participant
                                            @gecon

                                            Hull is looking very impressive Dave. Not as curvy as the subject on the wall though.

                                            Can't help much with rudders but as you already know they will need to be big-ish to turn that hull. I bought a standard Robbe rudder for the Fisher and enlarged it…but it's not much bigger than scale size.

                                            I'd consider a bow thruster if I were you. Plenty to choose from and easy to install -if you do it SOON.  Two speed controllers will of course help to turn the beastie.

                                            George

                                            Edited By gecon on 19/02/2021 05:54:24

                                            #93912
                                            Dave Harrison
                                            Participant
                                              @daveharrison24862

                                              Hi George, yes I'm going for independent motor control but the sea nass doesn't have a bow thruster. I have looked at stock rudders but my problem is these need to be bottom hinged ( if that's the right terminology )

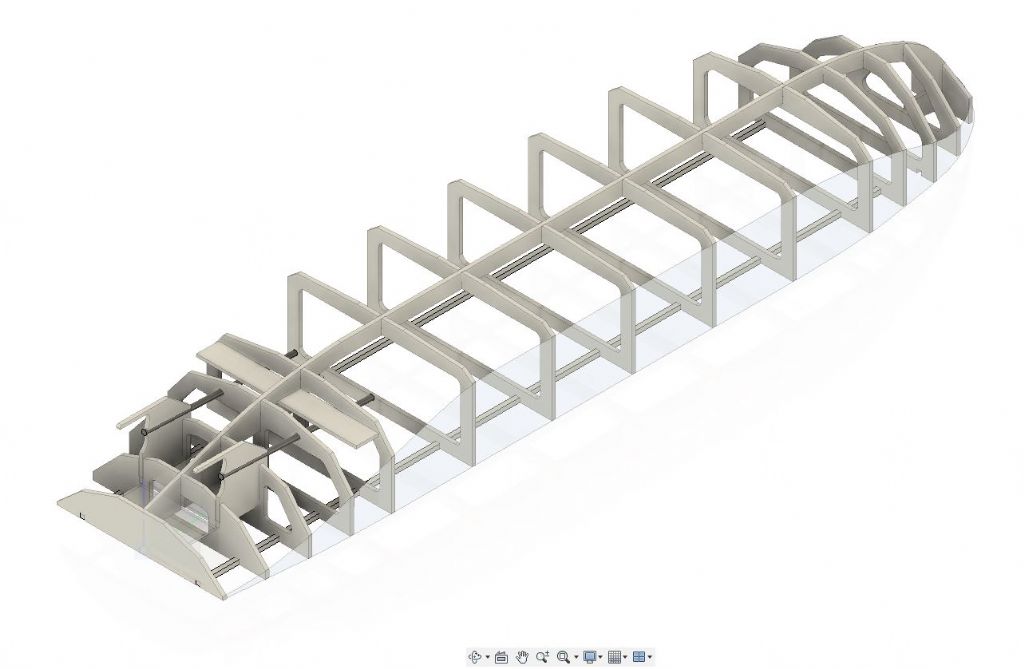
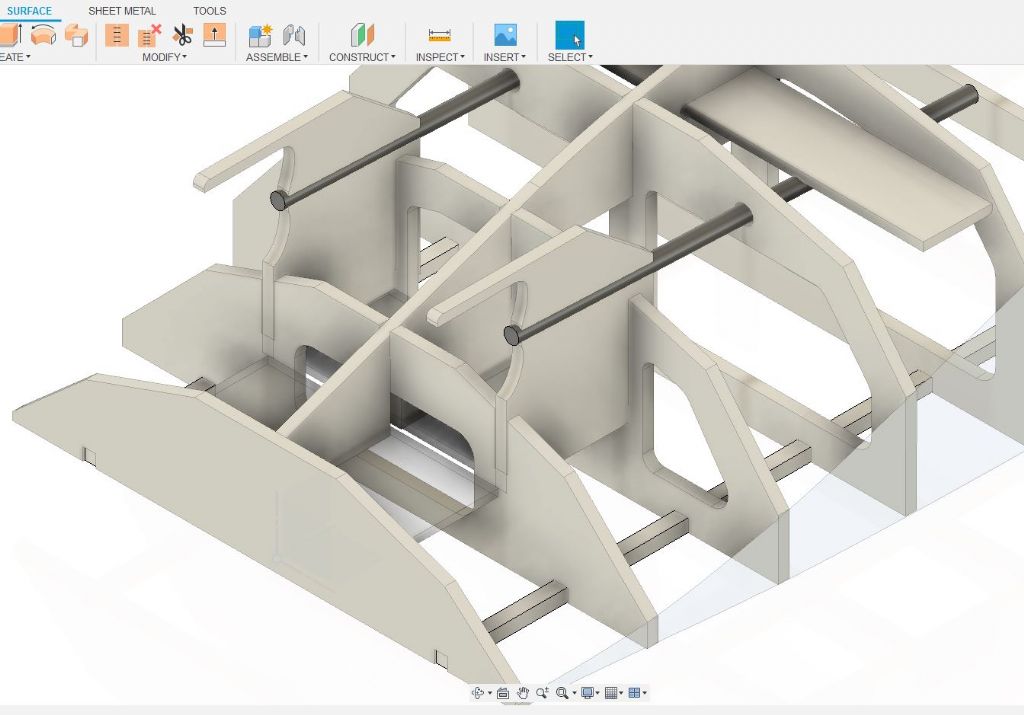
                                              For the past two weeks I have been attempting to learn fusion360 (a free to use 3d cad software ) so all of my model work has been on a screen rather than in the workshop. I decided to do this after making a few silly mistakes with the build. I also want to use CAD to work out the chine hull panels so I can machine them. First they are modelled in 3d at full size then the software will flatten them and give me the correct shapes to cut in 2d

                                              Below are a couple of images of my first efforts at 3d modelling.

                                              3d-ness.jpg3d-ness2.jpg

                                              #93914
                                              Ray Wood 3
                                              Participant
                                                @raywood3

                                                Hi Dave,

                                                I wish I'd learned some computer drafting ! but to late now I have a pencil

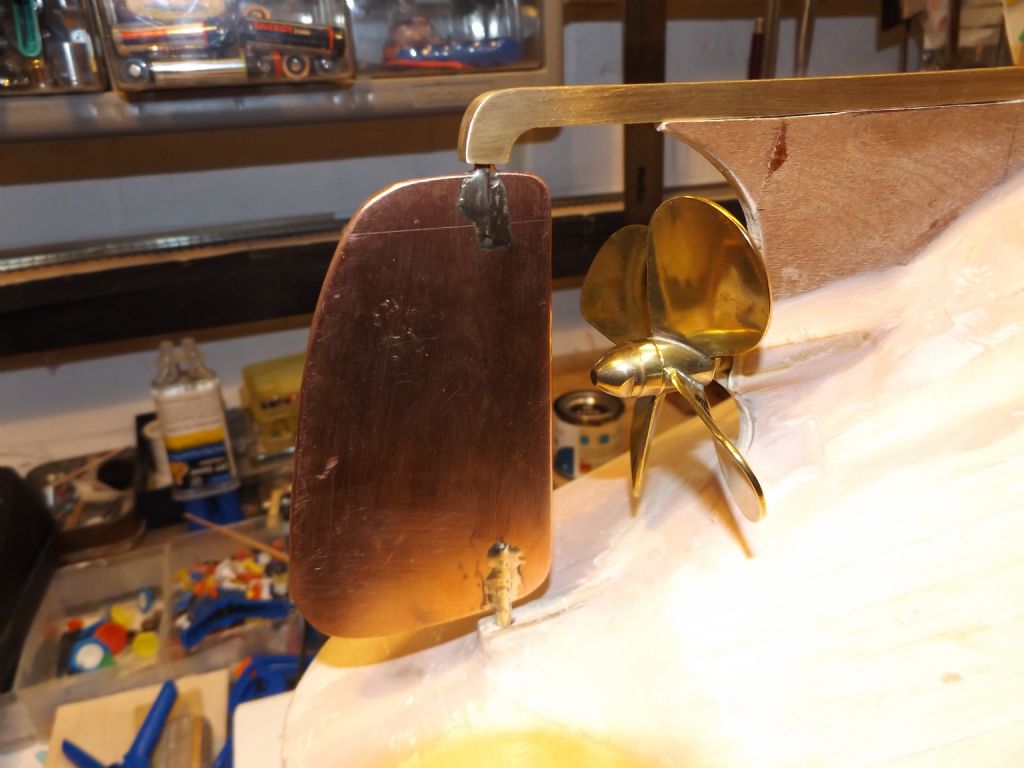
                                                One good tip I've learned the hard way and yet still get wrong, is make the bottom shoe on your rudder skeg's removable, rather than the way you have drawn so you can still take the rudder off. my Cullamix tug build had a nice 1/4" brass shoe and gives you a maintenance free bottom bearing. I didn't do this on my Eventide build and now regret it !!

                                                Regards Raycullamix 5 12 005.jpg

                                                #93924
                                                Dave Harrison
                                                Participant
                                                  @daveharrison24862

                                                  Hi Ray

                                                  Yes indeed, I have been thinking about how the rudders can be mounted in a removable fashion. Did you screw the brass shoes down to the hull ? I have seen a build somewhere online where the brass was cut from a door hinge ?

                                                  As for drawings, while I find the computer helps me identify potential problems fitting components together and makes everything very easy to produce with the aid of a CNC router ( which I am lucky to have use of ). I still think for a one off model its hard to beat a 2b pencil and hand drawing. I was working in Southampton before Christmas, for lunch we went to a Cafe in a boat yard and there were the most beautiful hand drawn yacht plans decorating the walls.

                                                  #93927
                                                  Ray Wood 3
                                                  Participant
                                                    @raywood3

                                                    Hi Dave,

                                                    I didn't want to try putting brass screws in the keel whish was only 1/4" ply so I cut a hole through the keel with my Starrett hole cutter and used a 6ba brass bolt and captive nut and a brass pin for alignment, then put the ply disk back in with filler etc.

                                                    Just visible in this picture. yes brass hinges or some 13amps plug pins are a good source of material.cullamix hull & drwg.jpg

                                                    Regards Ray

                                                    #93929
                                                    Tim Rowe
                                                    Participant
                                                      @timrowe83142

                                                      Hi Dave

                                                      + 1 for everything removable. Ray has his removable keels and so do I. Maybe its a hangover from full sized stuff but wherever possible (and it usually is) I like to be able to swap out anything mechanical even after the model is fully complete. I also echo Ray's feelings about computer drafting. I keep on saying that I will get onto it one day but the analog paper and pencil is usually compete way before I have read the manual, let alone understood it! I may have to though mainly due to getting accurate weight / buoyancy distribution useful to de a rule compliant IOM.

                                                      A few observations:
                                                      Your shafts a well spaced apart and this should give you good manoeuvrability without resorting to a bow thruster. the handling will more closely represent the real thing.
                                                      Your propellers look like they are inward turning. The common convention is to have outward turning where looking from behind, the tips of the props at the top position move outwards.
                                                      I would probably try scale or near scale rudders to start with as they will be working in the propwash.

                                                      Tim R

                                                    Viewing 25 posts - 26 through 50 (of 50 total)
                                                    • Please log in to reply to this topic. Registering is free and easy using the links on the menu at the top of this page.

                                                    Code of conduct | Forum Help/FAQs

                                                    Advert

                                                    Latest Replies

                                                    Home Forums Scratch build Topics

                                                    Viewing 25 topics - 1 through 25 (of 25 total)
                                                    Viewing 25 topics - 1 through 25 (of 25 total)

                                                    View full reply list.

                                                    Advert