Colin Archer 1:15 scale

Advert

Colin Archer 1:15 scale

Home Forums Building Kits Colin Archer 1:15 scale

  • This topic has 292 replies, 2 voices, and was last updated 5 months ago by Johannes Jones.
Viewing 25 posts - 126 through 150 (of 293 total)
  • Author
    Posts
  • #99207
    neil hp
    Participant
      @neilhp

      magnificent incredible bult, George…………and glad to hear that it won't be hidden from view.

      i do hope you bring it to the blackpool show when finished in the future…….

      a model not to be hidden awy or missed.

      Advert
      #99208
      Richard Simpson
      Participant
        @richardsimpson88330

        Before the deck goes on George you should take a number of walk through movies with one of these very small cameras to get you down to eye level. It will look stunning.

        One thing I learned when reading up about early 20th century coastal steamers was that the crew lived in the fo'c'sle and had a head, usually on the starboard side. This was nothing more than a plank with a hole in it, like yours, but coupled to a pipe that simply went overboard. On the end of the pipe was a flap valve that prevented sea water from going back up the pipe. Apparently it was not uncommon for the pivot of the flap valve to erode away and fail, causing the flap to fall off, and so every time the bow dug into a wave sea water, and anyone sitting on the plank at the time, would be ejected into the head.

        Edited By Richard Simpson on 21/01/2022 09:19:27

        #99213
        gecon
        Participant
          @gecon

          Hi Neil,

          The Blackpool show with a Colin Archer under my arm all the way from Norway will be a logistics problem. Otherwise thank you for the kind comments.smiley

          Hi Richard,

          Too close a view will show up all the dust, scratches and shoddy paintwork a bit, but it'll be a good excuse for me to buy a microcamera. I'll suggest it to the Admiralty after the visit to the "Bristol" and "Burgundy" this evening!yes

          The newest 'home loos' also have a similar cleansing system but the wash spray is done with a bit less force and NOT with ice cold salt water! Cost about the same as new yacht though!

          Have a good weekend!

          George

          #99267
          gecon
          Participant
            @gecon

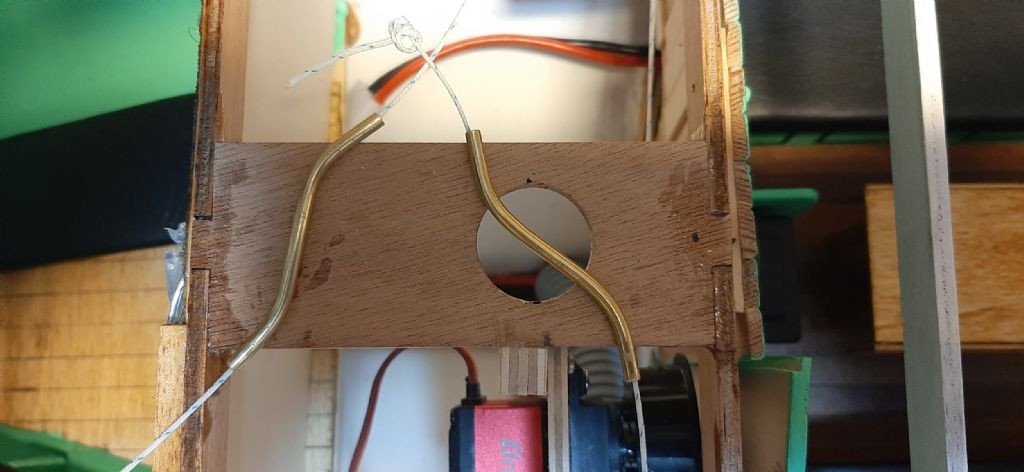
            20220126_091804.jpgSpent a disproportionate amount of time adjusting the foresail winch and sheets yesterday. A bit dificult to get at the winch drum for removal and adjustment of the wound on sheets. Anyway, adjusted now (I think) and two shaped, brass guide tubes made up to get the sheets through P&S edges of the deck. Also a guide tube for the mainsail sheet has been bent and twisted. Hopefully this will produce a controlable main boom.20220126_091757.jpg

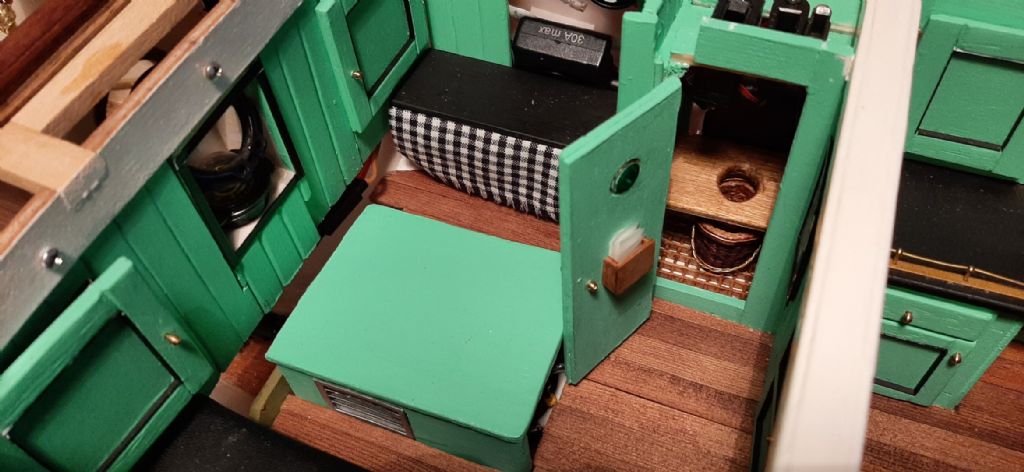
            The heads compartment has received -even further- refinement in the guise of loo paper and dispenser. The paper at the time resembled greaseproof paper,so that's whats in the dispenser! None of your soft Andrex here boys!20220126_165346.jpg

            Need to hinge the rudder and make up connections for the rudder servo. Due to the interior detail, and wish obscure the R/C installation, a lot of extra work has to be done before the ply deck plate can be glued on. Hope to be ready for deck-planking by next week.

            George

            #99273
            Chris Fellows
            Participant
              @chrisfellows72943

              Nice bit of detailing George, you're obviously enjoying it.

              Chris

              #99278
              gecon
              Participant
                @gecon

                I suppose I am enjoying it. Admiralty suggests it's becoming an obsession. It's been suggested that cutting rectangles of vintage style loo-paper is just one step from the looney-bin.

                On another matter…

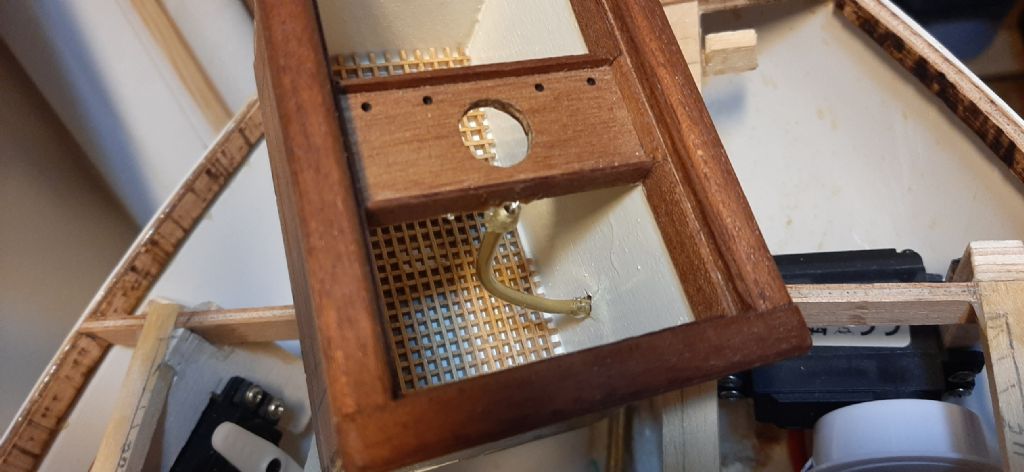
                This morning, the grey cell realised that the side-mounted rudder servo produces a slight vertical movement during operation. Also the rudder horn moves slightly horizontally during ops. This means I need a HOLE for the pushrod -as apposed to a narrow slot- in the aft hull in order to acommodate all this action. So instead of buying a Neil H-P style bilge pump, I bought a snake! The local 'zoo' only had red ones, so I'll paint it white where needed. It's not the perfect mechcanical solution but it'll have to do.

                George20220127_154915.jpg

                #99284
                Richard Simpson
                Participant
                  @richardsimpson88330

                  Admiralty probably correct, so you are on the right track then.

                  #99294
                  gecon
                  Participant
                    @gecon

                    laughyes

                    #99296
                    neil hp
                    Participant
                      @neilhp
                      Posted by gecon on 21/01/2022 15:58:51:

                      Hi Neil,

                      The Blackpool show with a Colin Archer under my arm all the way from Norway will be a logistics problem. Otherwise thank you for the kind comments.smiley

                      George

                      yes, George i could certainly see a massive problem there……actually didn't realise that was where you are based, but, you wouls always be welcome.

                      #99300
                      gecon
                      Participant
                        @gecon

                        20220129_144955.jpgWith regards to the rudder hinging issue posted on Soapbox:

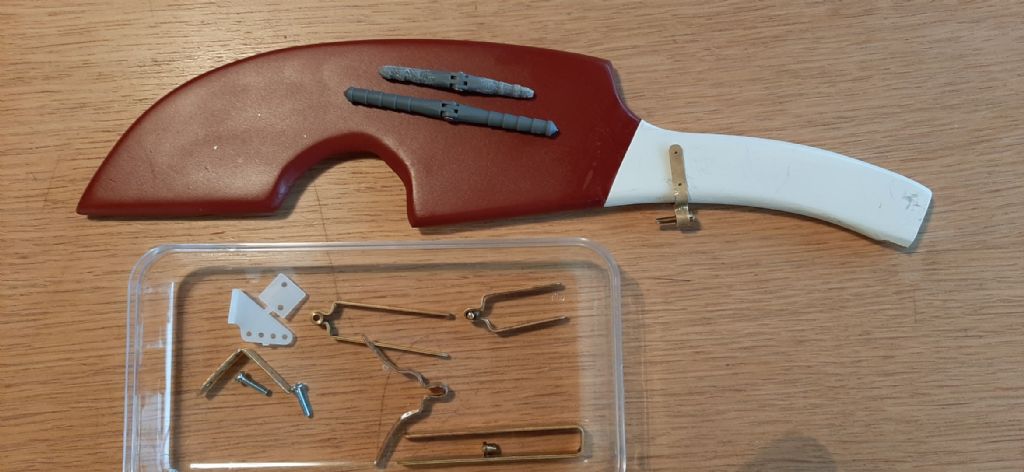
                        The home made brass plate hinges, which I have 'bent-up' as close to the diagrams as best I could, will be supported by two Robart hinge-pins as shown in the photo. These are large size 5mm. The local shop did not have the more suitable 'medium' size in stock. I've started trimming them down to nearer 3.5-4mm on the pin which goes into the rudder blade which is 2x4mm ply thick. I hope the mechanics/hinge-lines of the kit hinging are not such that they only work if they're sloppy!

                        I simply do not see how I can bend up a hingewhich will be precise enough in operation. I'll paint the visible part of the grey pin, gold or brass to try to hide it a bit.

                        Viewing CA models on you tube show that other builders either have a large gap between rudder blade and stern post or they have disgarded the bent-brass and resorted to other hinge solutions.

                        I'll sign off the forum for a few days and stop hogging the postings list. Maybe I'll get some work done instead of whingeing

                        George

                        Edited By gecon on 29/01/2022 14:27:46

                        #99336
                        gecon
                        Participant
                          @gecon

                          20220131_124027.jpg20220131_212406.jpgJust a quick 'look-in' with a short story and a quiz……

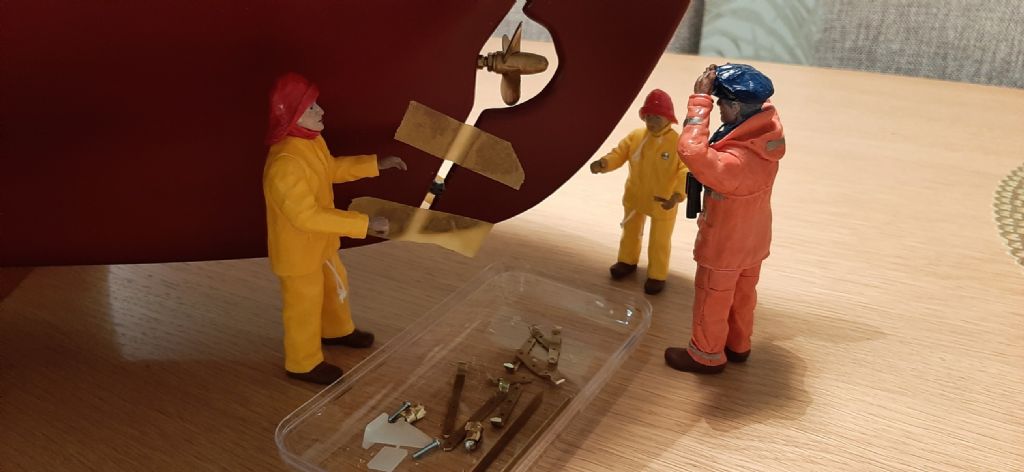
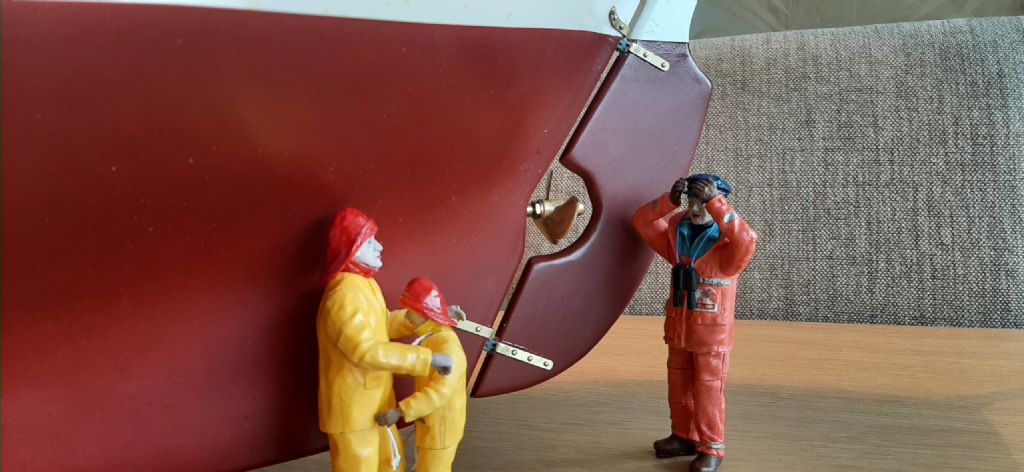
                          Oh dear, I've made a king size blunder. My apologies to Ray, and all other lovers of barges, pintles and gudgeons.

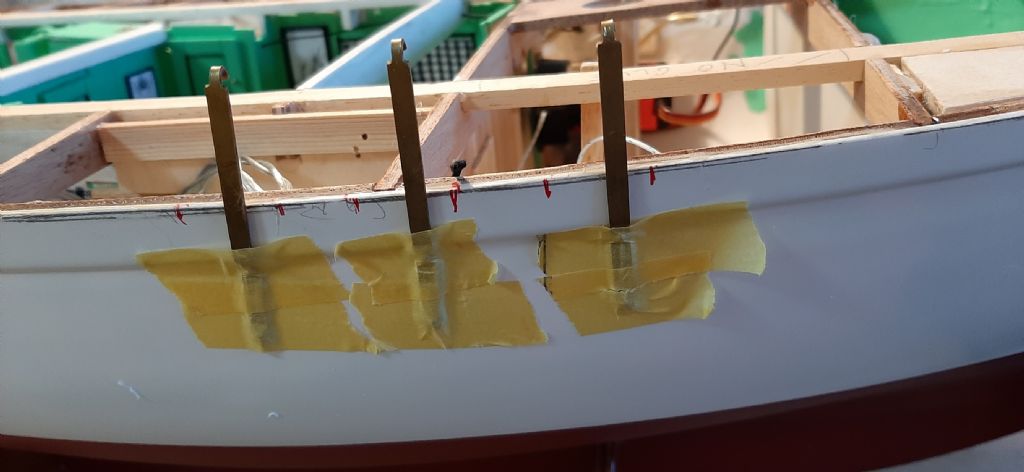
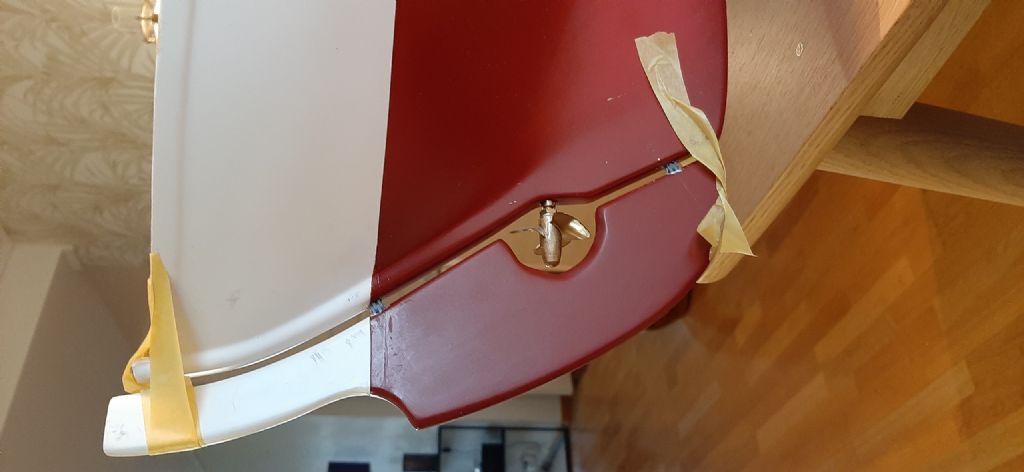
                          My home-produce pintles were simply not good enough, and I could not see how starting all over again would give a better result. I cut away the gudgeon pin sections and installed the Robart 'hinge-point' units. Then the grey cell kicked in and I decided to use the brass 'arms' of the pintles to simulate….yes, pintles.

                          When the crew heard about the plan, they arrived in no-time-flat with a surveyor from Lloyds to have a look at the plan. The next day they came back to see the result and all were dismayed at what they saw. Chopper had to comfort his son, Lambchop, The surveyor had a migraine attack.

                          I did not see the blunder before I looked at my own photos of the end product. I can hardly bare looking at them. All the parts are pinned and epoxied in place sad so it's too late to change anything.

                          There is one thing I could do to which might help to hide the blunder, but I'll wait a while before taking any action.

                          I suspect that the experts will see the blunder immediately. Any suggestions how to disguise it? Paint?20220201_152545.jpg Maybe I'll just look the other way. It will hardly be visible when the yacht is afloat.
                          George


                          Edited By gecon on 01/02/2022 18:06:32

                          #99337
                          Richard Simpson
                          Participant
                            @richardsimpson88330

                            I take it you are talking about the fact that the rudder pintles should go into the top of the pintle bearings, not the bottom? The whole idea of the arrangement is that the rudder is supported by the bearings and the weight of the rudder ensures that it cannot fall off. In real life there will be some sort of "Bump Stop" in the arrangement to prevent the rudder jumping up in the case of grounding or heavy seas. With your arrangement there is always the potential for the rudder to fall off.

                            Have a look at Neil's lifeboat build, he has just fitted his rudder pintle bearings and, exactly as I mentioned earlier, the bearings should be perfectly in line. Assembling them with a straight rod through them is the best way to get them right.

                            #99338
                            Ray Wood 3
                            Participant
                              @raywood3

                              Hi George,

                              With Robart hinge points your rudder isn't going to fall off any time soon, as the strapping is only for show, once they are painted who's going to know, worse things happen at sea !! Ooops

                              Regards Ray

                              #99339
                              gecon
                              Participant
                                @gecon

                                Good morning, and many thanks to the RRT (rapid response team) for inputs.

                                Re-designing the scale-shape rudder is of course not feasable, and trying to get a straight rod through all that lot AND make it operate, is beyond my abilities I fear.

                                So in time, when the diappointment of the blunder subsides, I will probably attempt to disguise the mistake. Most likeley by adding both brass and paint. smiley. The rudder is very firmly in place, and it moves nicely from side-to-side.

                                I could always proclaim that I wanted a rudder system which could withstand the forces of inverted sailing!

                                Logging off for 2-3 days so I can get some work doneyes

                                Thanks again,

                                George

                                #99349
                                Chris Fellows
                                Participant
                                  @chrisfellows72943

                                  We all do it George. Only the other day I increased the dia. of a hole on one side of a piece of ply to recess a bolt head, trouble was it was on the wrong side!

                                  Is the extra brass strip going to be above each pivot as that would look Ok?

                                  Chris

                                  #99372
                                  gecon
                                  Participant
                                    @gecon

                                    Hi Chris, yes I did at first think that I could attatch a brass strip above but that would also look wrong. I will either leave it as is, or attatch a strip below each hull strip. This will then look like the pivot pins (pintles?) are sucured above and below by extra straps on the hull. I won't do anything until the deck plate is on and I've moved on with the build. There'll be plenty of oportunities to fiddle with this later -while waiting for something to dry or cure!

                                    George

                                    #99375
                                    gecon
                                    Participant
                                      @gecon

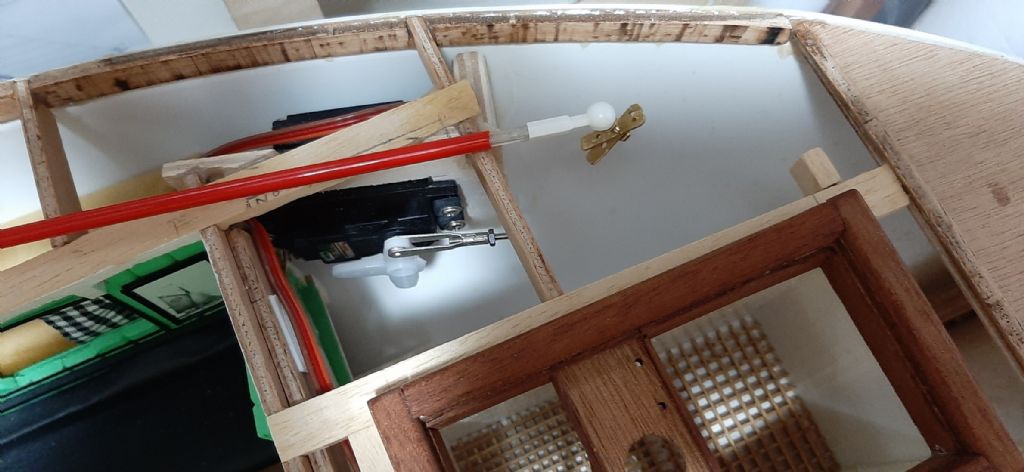
                                      The rudder servo has now been linked to the rudder via a 'snake'. Ball-links are used to accomodate the strange arc that the top of the rudder blade moves through. It all works to my liking.

                                      I'm getting closer to the dreaded deck-glueing procedure which might actually take place this weekend.

                                      A set of battery operated LED Xmas lights has been strategically strung throughout the accomodation. I hope it will give the desired effect and spice up the interior details- which will hardly ever be seen by man or beast. I will try to route a wire up the rigging to the nav-light boxes.

                                      Took some photos but they look just like previous ones…..green & black here & there, and lots of cables! Back when the deck is on.

                                      George

                                      #99419
                                      gecon
                                      Participant
                                        @gecon

                                        20220206_165355.jpg20220206_161824.jpgI lied….back before the deck is on!.

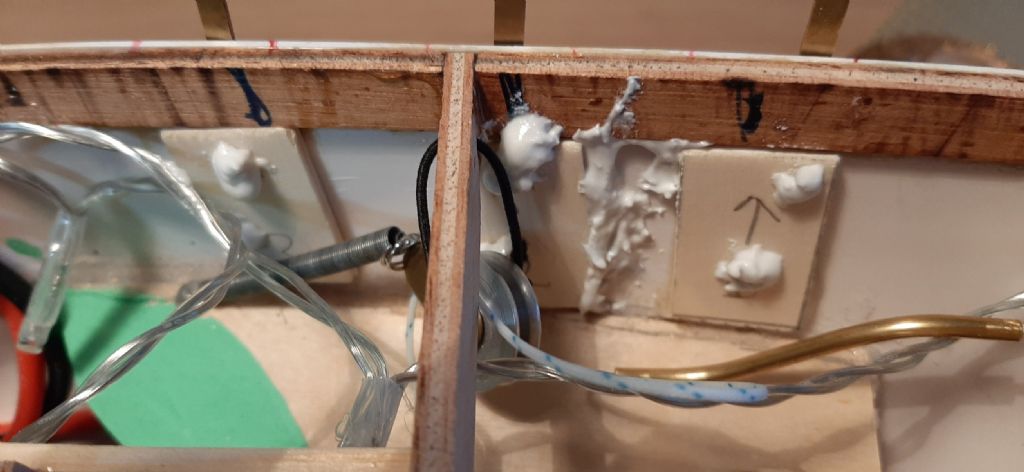
                                        As usual, a few other jobs came up before the deck can be fitted. The chain plates are simply pinned throught the hull (ABS). This is probably OK if the model is to be on static display. Not OK for a model which is to be sailed.

                                        I have epoxied 3mm ply doublers to the inside of the hull in way of the chainplate pins. The pins have been dolloped with epoxy filler on the inside of the doublers to secure them. If that's not good enough I'll drill the chainplates 2.2mm and screw in self tappers. Due to the interior fit-out all the above work needs to be done before the deck is glued on. The innner sides of the hull are rather inacessible once the deck goes on.

                                        George

                                        Edited By gecon on 06/02/2022 20:01:26

                                        #99437
                                        gecon
                                        Participant
                                          @gecon

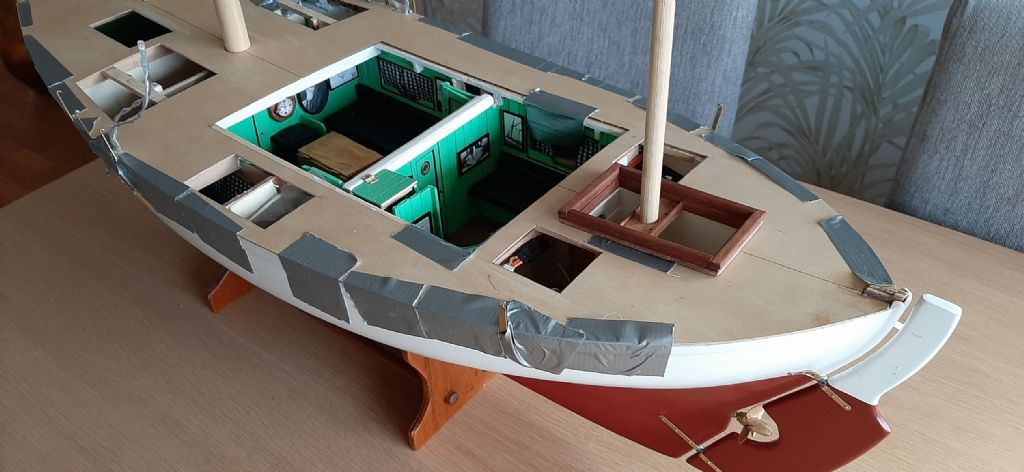
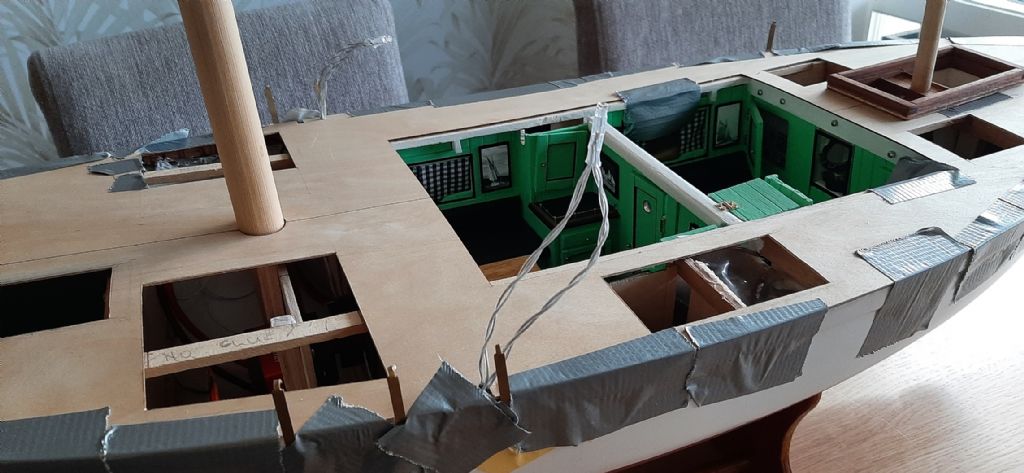
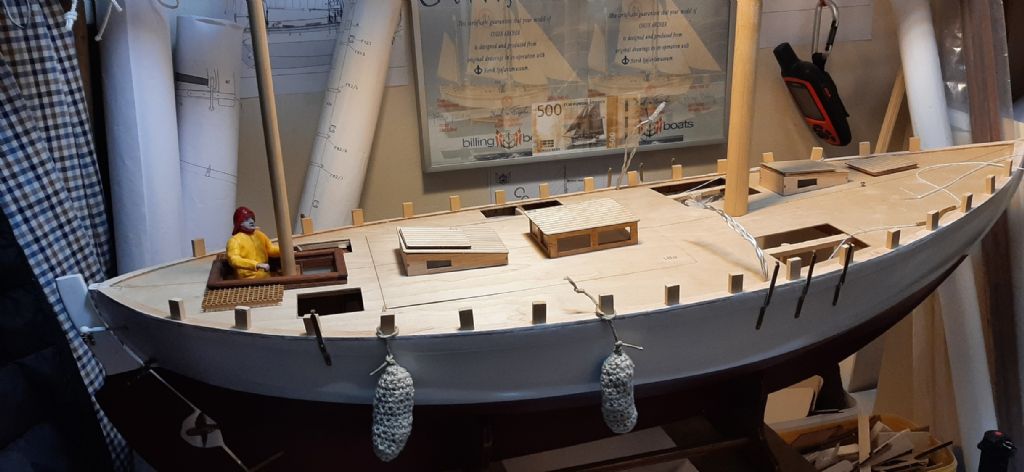
                                          20220208_154910.jpg20220208_154929.jpgI hope I have remembered everything of importance! The main deck plate is now glued onto the hull and framework. So some of the goodies are not easy to get at….without a scalpel.20220208_155039.jpg

                                          Two cables exit P & S which I hope will illuminate the nav lights. I'll paint the cables black and try to hide them in rope and rigging.

                                          George

                                          #99509
                                          gecon
                                          Participant
                                            @gecon

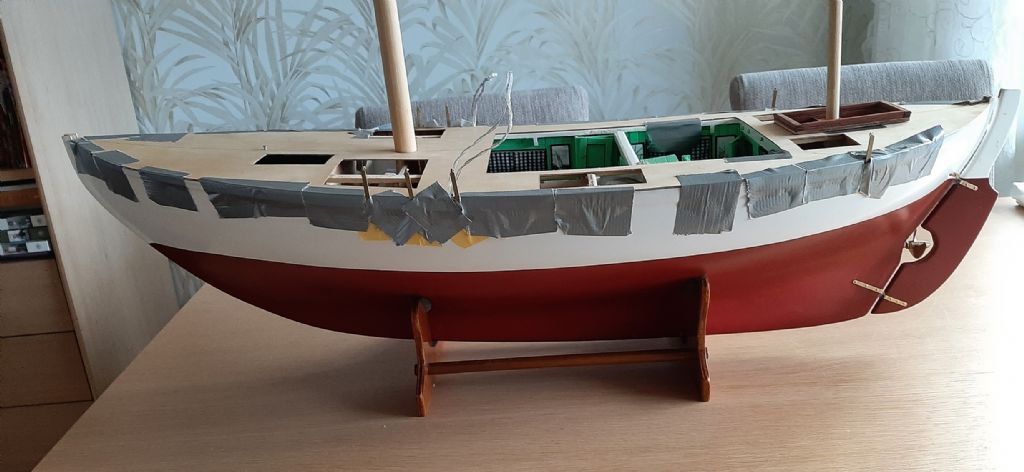
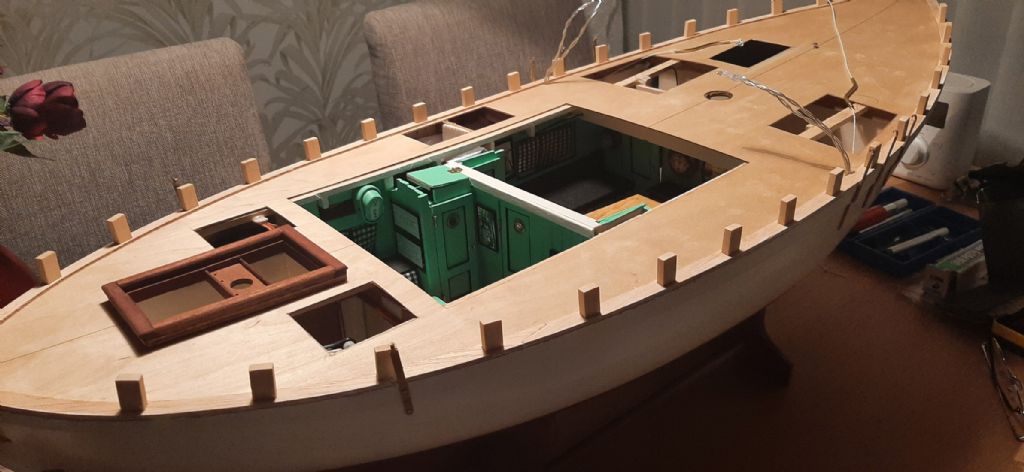
                                            Gunnel parts have been adjusted a bit and then glued to the edge of the deck. Tamiya white putty has been applied to the deck/hull joint and is ready for sanding.

                                            Main hatch has been spot-glued (two spots of glue!) to the removeable the frame beneath. The hatch will be liftet off when cured, and then glued properly to the rest of the frame. Some of the frame and hatch will be cut away for the skylight and the main companionway.

                                            George20220213_214812.jpg20220214_150915.jpg

                                            #99510
                                            Chris Fellows
                                            Participant
                                              @chrisfellows72943

                                              Coming along nicely George. I hate gluing decks down as well!

                                              Chris

                                              #99511
                                              neil hp
                                              Participant
                                                @neilhp

                                                looking like a ship now with the deck on……great work George.

                                                #99520
                                                gecon
                                                Participant
                                                  @gecon

                                                  Couldn't hold Chopper back this evening. He simply had to try out the steering well for size. He also got a dry run of the relative positions of the companionways and deck skylight. And so did I.

                                                  George20220215_210229.jpg

                                                  #99592
                                                  gecon
                                                  Participant
                                                    @gecon

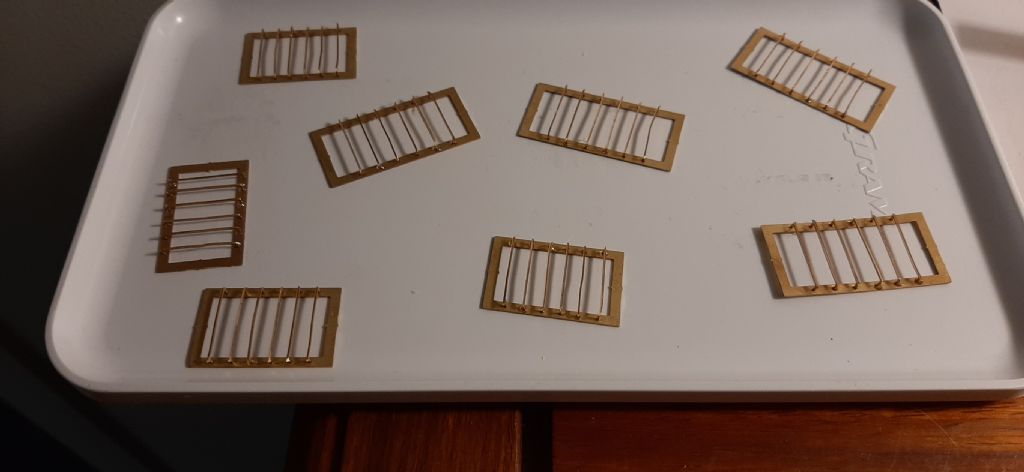
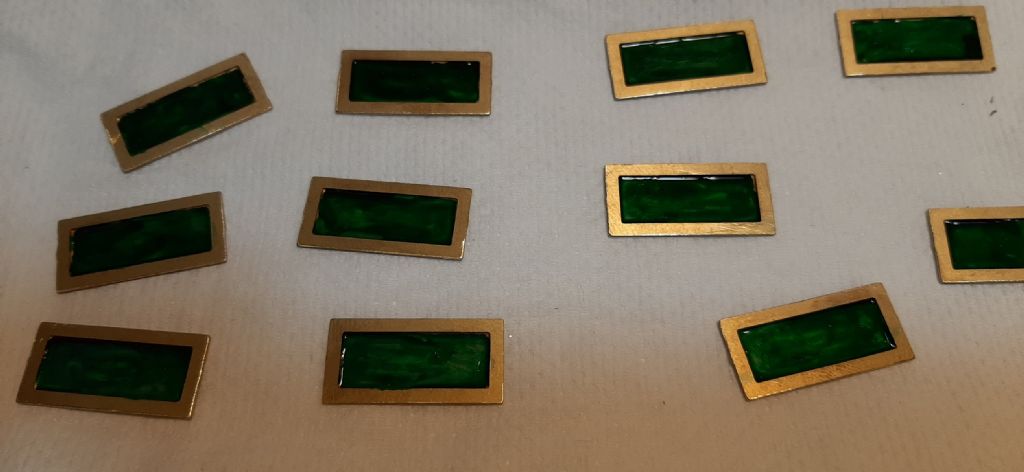
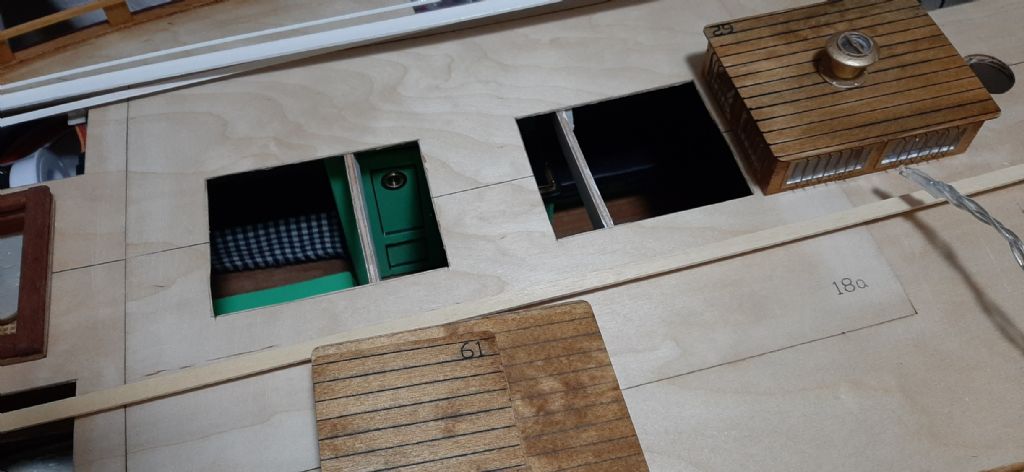
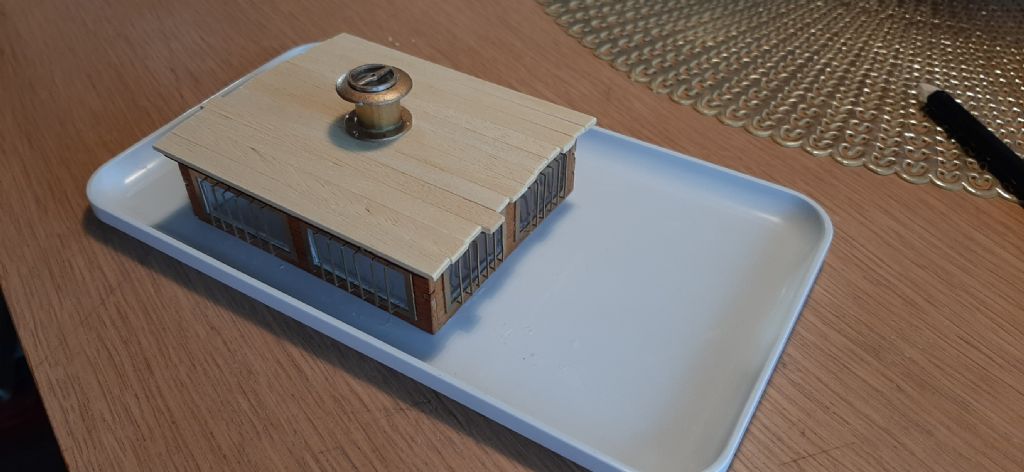
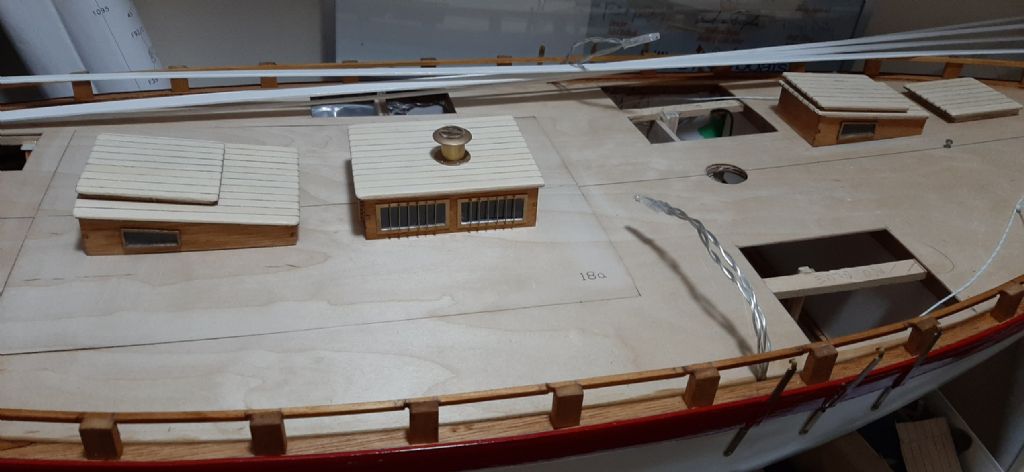
                                                    20220221_181900.jpg20220221_181906.jpgBeen doing some fiddly jobs recently. Getting 48 tiny brass bars onto the skylight window frames took half a day and a lot of patience. The deck has glass 'lights' let into the planking. Trouble is they are made of brass, not glass. Tried to paint them to resemle thick glass showing the green-ish interior below decks.

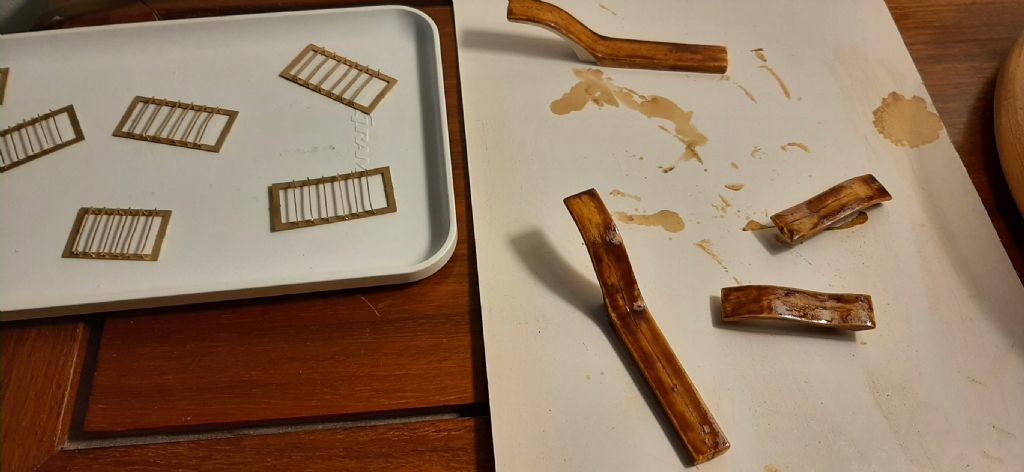
                                                    Some white plastic parts were sanded and stained in an attempt to resemble the wood of the capping rails. Not a super sucess yet, but I think it will be OK eventually.20220221_201604.jpg

                                                    George

                                                    #99750
                                                    gecon
                                                    Participant
                                                      @gecon

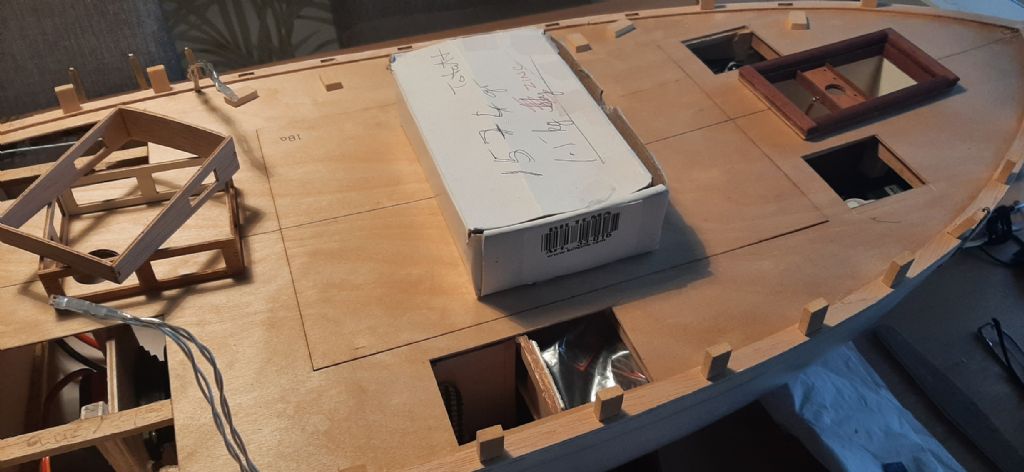
                                                      20220307_180653.jpg20220310_084103.jpgPlodding along slowly as usual. Partly due to non-Covid coughing and spluttering for over two weeks. Some of the deck structures are being prepared. Not sure if I'll stain the planking on structures and deck or just oil and varnish. Some of the wood suplied for the stuctures is slightly redish-brown (sapeli?) That has previously been given a coat of teak stain. The plan at the time was to stain the deck planking in teak. Not sure if that's still the plan. May just keep it natural, oil + varnish. The beams across the openings in the deck hatch have been cut away and repositioned!

                                                      George20220310_180042.jpg

                                                      Edited By gecon on 10/03/2022 21:04:59

                                                      Edited By gecon on 10/03/2022 21:05:59

                                                    Viewing 25 posts - 126 through 150 (of 293 total)
                                                    • Please log in to reply to this topic. Registering is free and easy using the links on the menu at the top of this page.

                                                    Code of conduct | Forum Help/FAQs

                                                    Advert

                                                    Latest Replies

                                                    Home Forums Building Kits Topics

                                                    Viewing 25 topics - 1 through 25 (of 25 total)
                                                    Viewing 25 topics - 1 through 25 (of 25 total)

                                                    View full reply list.

                                                    Advert

                                                    Newsletter Sign-up