Billing Boats Smit Nederland

Advert

Billing Boats Smit Nederland

Home Forums Building Kits Billing Boats Smit Nederland

Viewing 25 posts - 76 through 100 (of 205 total)
  • Author
    Posts
  • #121703
    gecon
    Participant
      @gecon

      Many thanks gents for the detailed info on railings. As mentioned earlier, my original plan was to not paint the brass at all, therefore would not solder the rails together but use epoxy. Soldering would dictate painting afterwords.

      Since then I have been a little worried that too much shiny brass on a tug would look rather ‘wrong’.

      I have also done some of the multiple-bends rail work as Richard says “threading on stanchions and bending to shape”. There was no other way I could work out how to get it all done. My glaucoma hampers the detail work to some extent.

      I read that painting brass requires priming with etching primer.Not sure if that is really necessary for such tiny surfaces. A little fine sanding in here and there may suffice?

      Have not decided on the final finish yet,  though I think the top ‘hand rail’ will have to be painted black. May make a small test-railing and paint that first. I expect railing work on the bridge deck and deck ladders to take all week to complete. The the ‘illuminated’ bridge unit can be glued onto the deck.

      Thanks again to both for your help,

      George

      Advert
      #121704
      Colin Bishop
      Moderator
        @colinbishop34627

        It’s a lot to do with finding out what options are available and then literally sticking with the one you are most comfortable with. There is no absolute right or wrong way to do things – just what works for you.

        With regard to painting, brass rails are not really authentic. Tug rails would be steel. The default colour is usually white. It can be useful to do a bit of searching online for full size vessels of a similar type to see what looks right.

        Colin

        #121705
        James Hill 5
        Participant
          @jameshill5

          For what it’s worth, when I made the hand rails for my Pilot boat, they were brass, and soldered together, but before that I tinned the brass wire ,gently rubbed down afterwards and then painted them, If you leave enough tinning on the brass, the paint sticks to that.

          Just a suggestion.

          Jim.

          #121709
          Richard Simpson
          Participant
            @richardsimpson88330

            Just a point to chew over George, when I soft solder my brass handrails you can hardly see any solder, just the spot where you touch with the end of the fine solder.  If you go for painting I would recommend a coat of Etch primer.  If you paint straight on with enamels any slight flexing when fitting can lead to the paint flaking loose.

            You might also find a very thin cyano glue a lot more convenient.  Using epoxy is almost certainly going to leave a very slight bead of glue to be removed, which could be a bit of a pain with so many joints.  Just a spot of very thin cyano will immediately be drawn into the joint by capillary action and, even if you get a drop hanging, just a touch with a piece of kitchen paper will soak it off.

            #121710
            Colin Bishop
            Moderator
              @colinbishop34627

              I would agree with Richard. If you are using glue then cyano is the way to go. If you want a bit of extra working time then use the odourless variety which gives you a bit of wriggle room. When you are happy just put a drop of ‘kicker’ on the joint to give an instant set.

              Colin

              #121711
              gecon
              Participant
                @gecon

                Thanks again gents, did in fact use some thin cyano today. The top of the bottle started leaking and it dripped several times where it wasn’t needed before I noticed it. I’ll try to get some odourless tomorrow. I don’t like using the smelly stuff – though I use a double face mask.

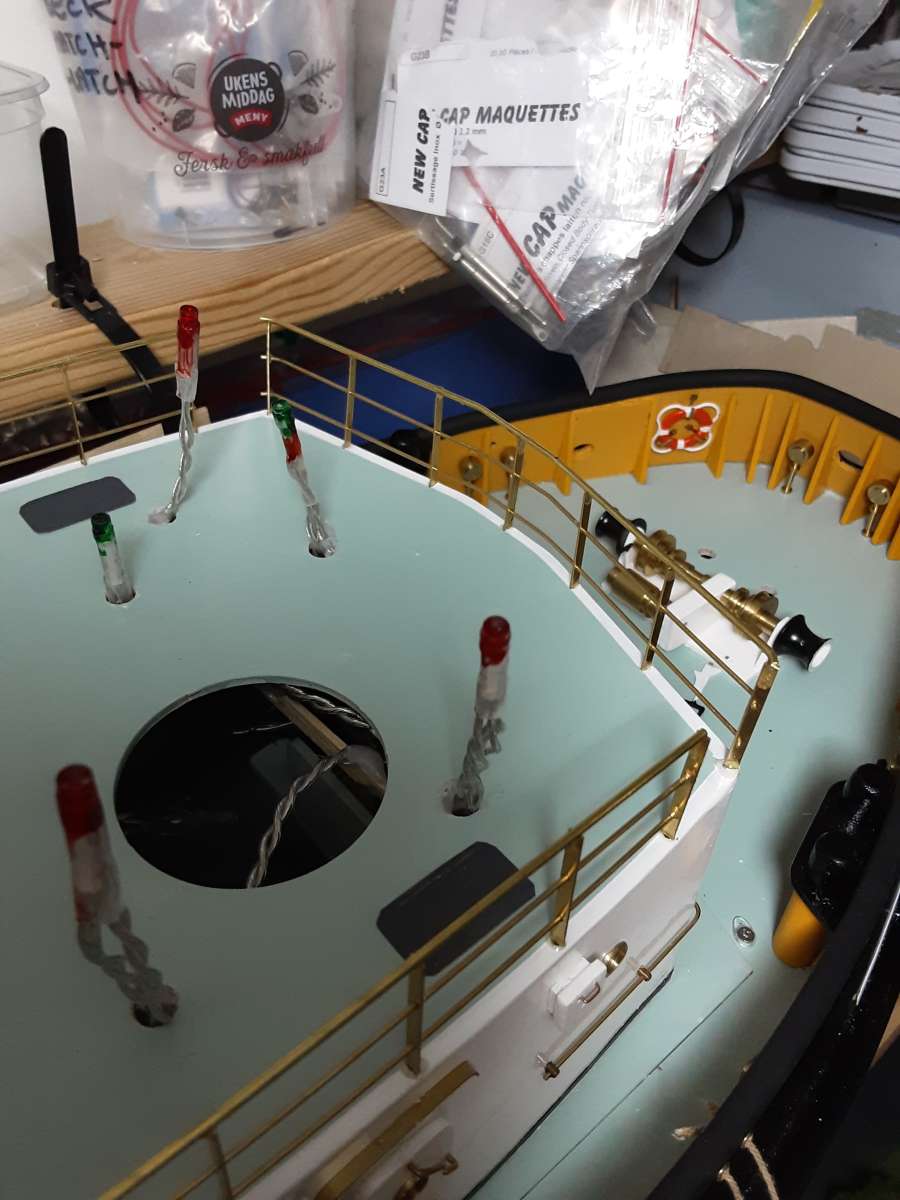
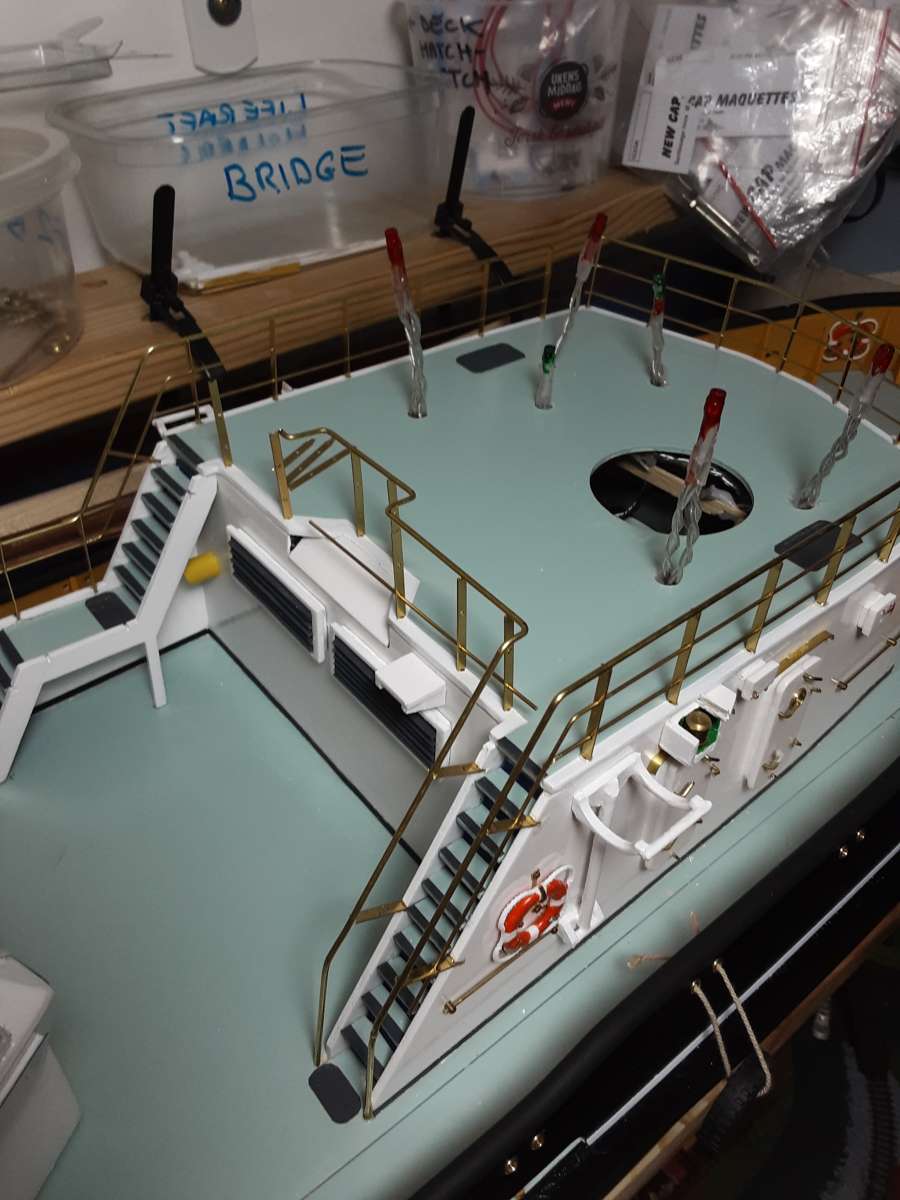
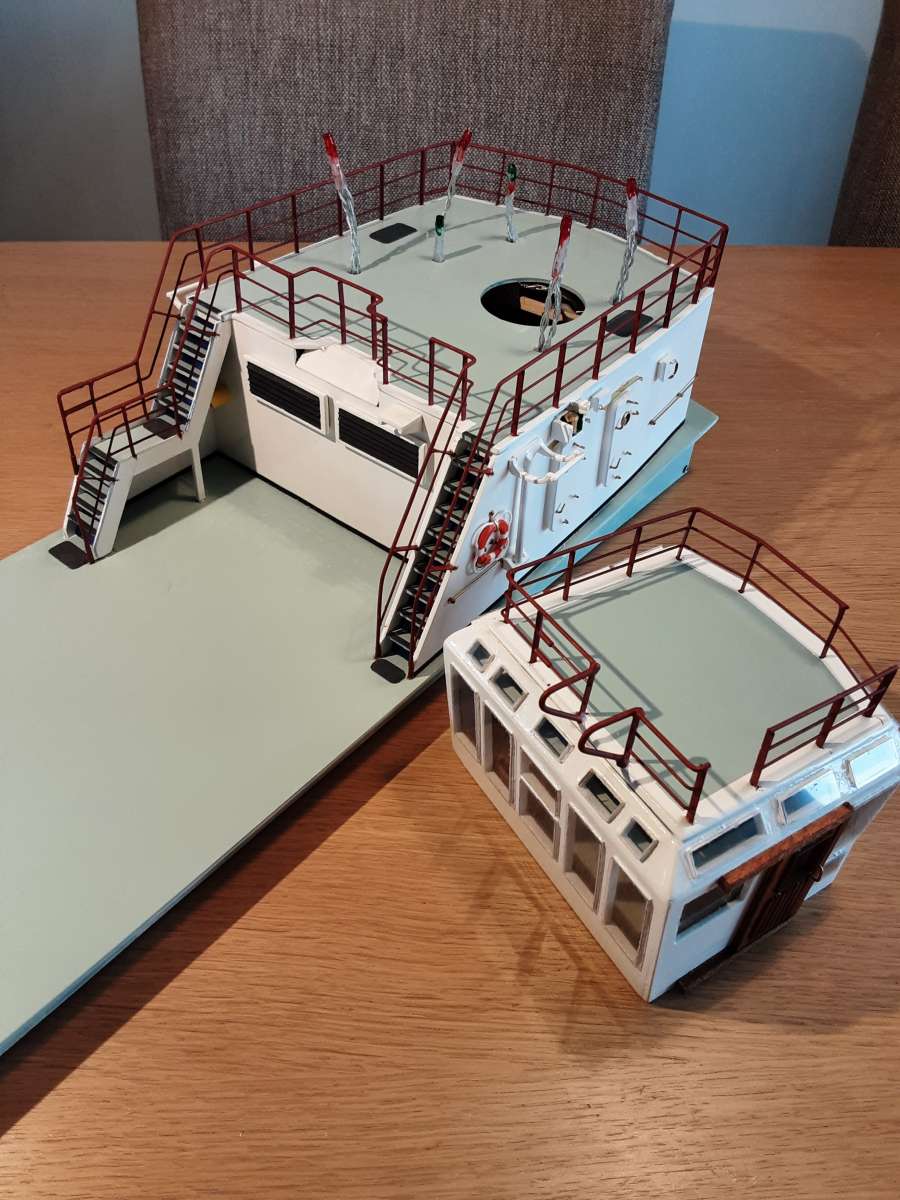
                Managed to get in a couple of hours of wire-bending today though, with epoxy blobs. Not perfect, but I’m satisfied with results so far. Better than I feared when I first started. Should have the bridge deck railings done during the week. Post a pic from todays efforts -and another later in the week. Not all of the wires shown are glued in place, some are just bent-to-shape.    George

                20240811_191658I20240811_191706


                #121857
                gecon
                Participant
                  @gecon

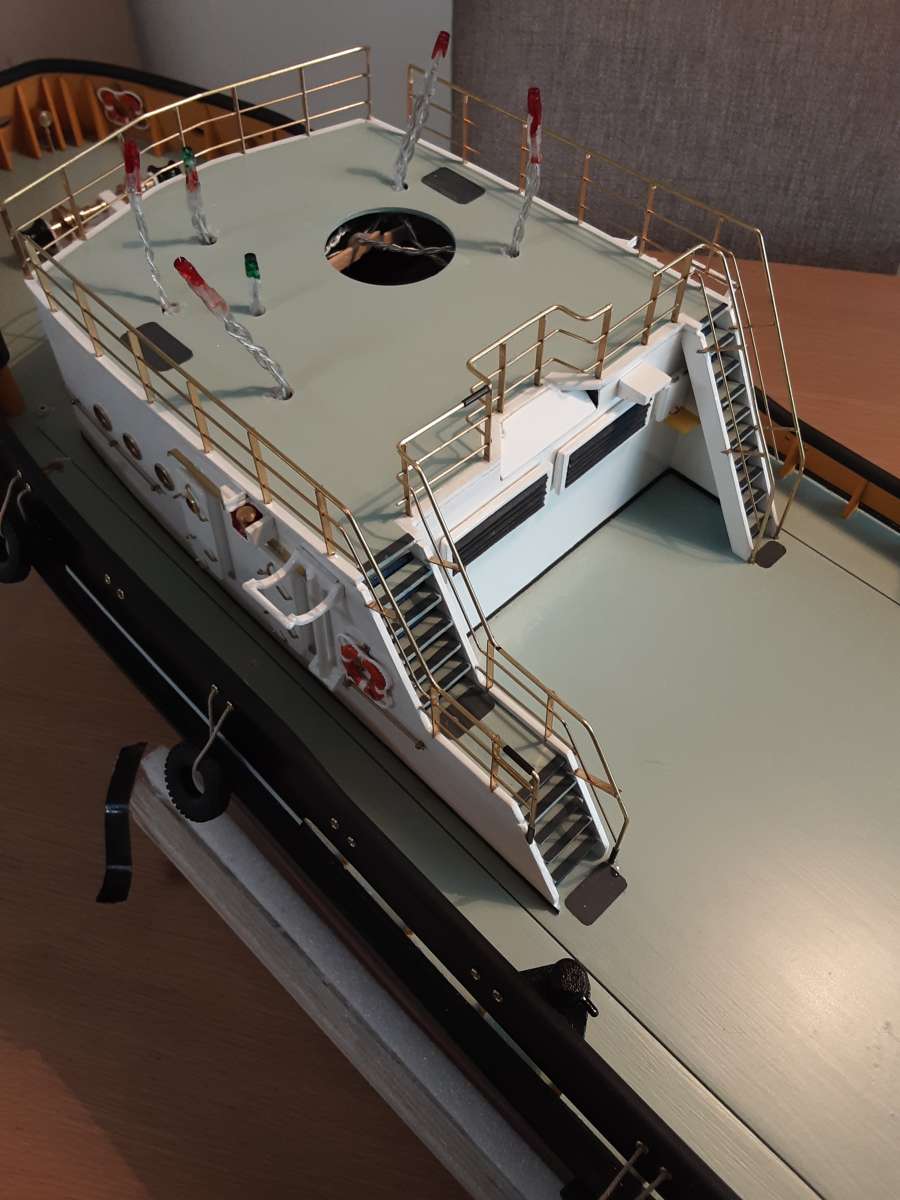
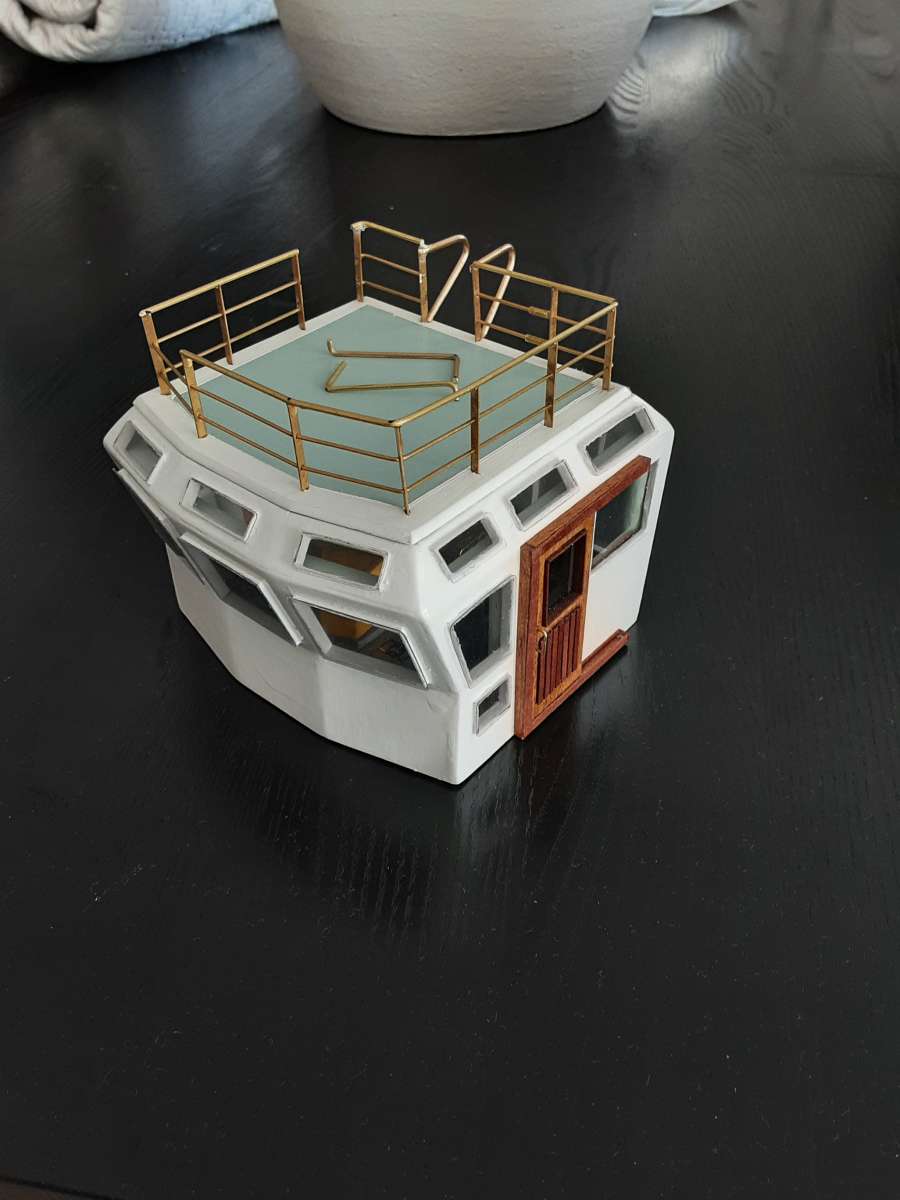
                  A few delaying distractions this last week, but the guardrails are now done. There’s still two ‘garden gates’ to produce at the fwd end of the guardrails but don’t have any more 1.5mm brass rod left. Nor does the local model shop. The result looks OK to me from half a metre away, but not from very close up with my glasses on🤓. Did not manage to use cyano sucessfully, so there are a few visible epoxy blobs to ‘operate’ on before priming.

                  20240817_175901

                  #121915
                  Ray Wood 3
                  Participant
                    @raywood3

                    Hello George,

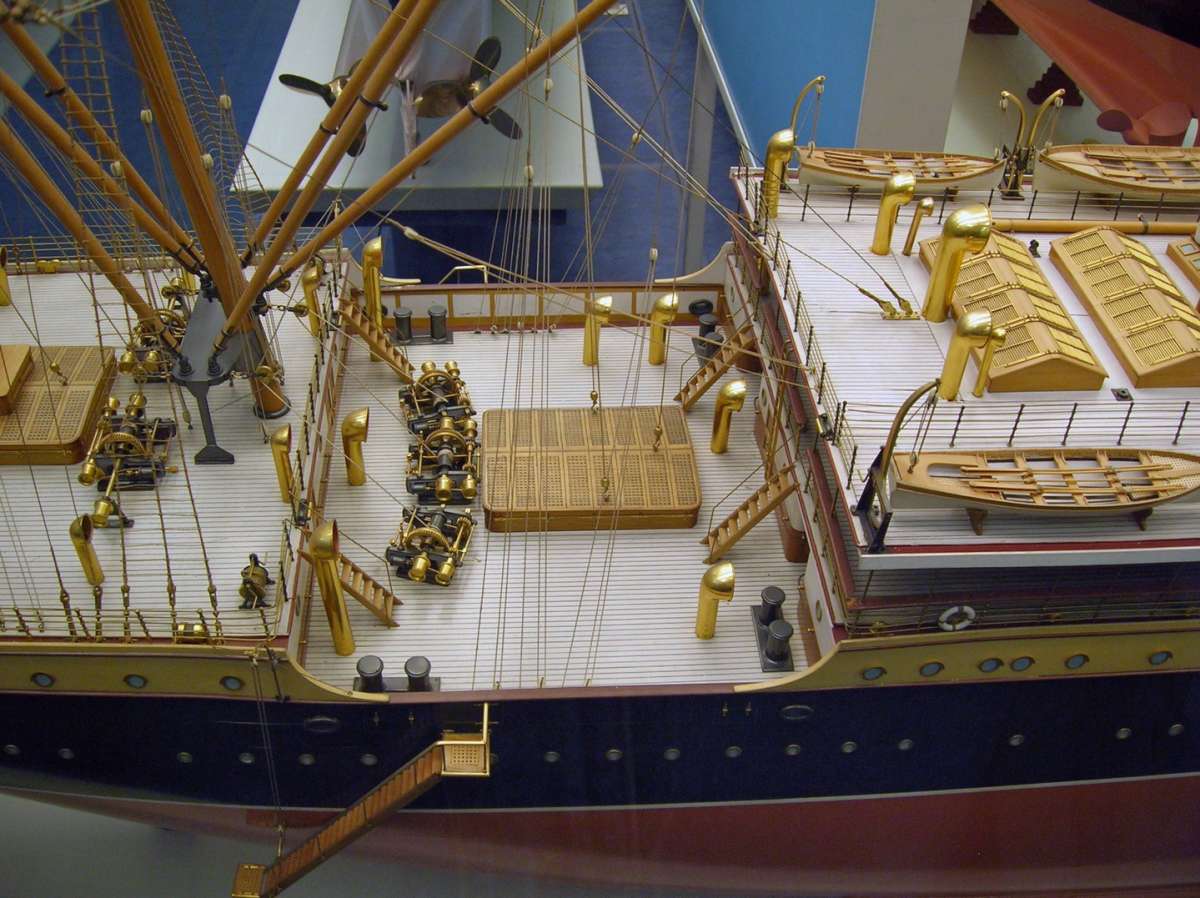
                    The railings and stanchions look very sharp, I often wonder how the museum modellers got away without painting them ?

                    Still with all those lights you won’t need the Christmas tree this year 🙂

                    Regards  Ray

                    #121924
                    Colin Bishop
                    Moderator
                      @colinbishop34627

                      The railings and stanchions look very sharp, I often wonder how the museum modellers got away without painting them ?

                      Many museum models are builder’s models and the convention was to show the detail but leave much of it unpainted. I do wonder how they made those brass cowl vents though.

                      In my case I tend to paint over everything to conceal the bodged detail.

                      Colin

                      SP3


                      #121928
                      Richard Simpson
                      Participant
                        @richardsimpson88330

                        The 1/50 th scale model of the Bismarck, housed in a room at the Blohm & Voss yard in Hamburg, has many of the details, including handrails and vents made in bare brass.

                        #121949
                        gecon
                        Participant
                          @gecon

                          Ray, an R/C boat would never be allowed anywhere near the Christmas tree in this flat. Anyway, the tug lights would be far too ‘ambient’ to serve as festive season lighting🎄.

                          Colin, then I too will have to paint over everthing to conceal etc…etc.😬

                          Richard, that info -together with Colin’s photo- puts me back to the original plan of not painting any brass. I have in fact painted two brass anchor-winch drums, before I bought Hammerite primer. I haven’t yet  tested for adhesion though.

                          A decision will be taken soon. The inboard edges of the bridgedeck railings will be quite dificult to paint once the bridge unit is ‘threaded over’ the protruding light wires -and the bridge is soon ready for installation.

                          I’m not supposed to waffel on Wednesdays….I’m off,

                          George


                          #121950
                          Richard Simpson
                          Participant
                            @richardsimpson88330

                            I think you have to decide what you want as a finished item George.  If you want the most accurate scale representation of the real thing then you should paint the handrails.  If you want the model to be a display of the model maker’s art and show a degree of the work that has gone into creating it, then leaving the handrails bare brass is also an option.  I have seen a tug model in the past that was plank on frame construction and the entire tug was simply varnished, not a drop of paint on it.  Not an accurate scale model but nevertheless a beautiful display.

                            Remember though that bare brass will tarnish with age and pond water so you either need to varnish them or frequently polish them.

                            I actually think there is also a degree of not wanting to cover something up that you are, quite rightly, very proud of.  I remember the same feelings when I finished the handrails above.  My aim though is always the best scale representation of the real thing that I can create so, inevitably I go for painting them and then adding a light weathering wash as well.

                            The final consideration was pointed out by Colin above, handrails on tugs were never brass so to some people brass handrails on a model tug looks a little odd.

                            One thing I would suggest, for something that is going to be such a significant aspect of the model, is to stop and take a breather.  Don’t rush into anything.  You have to be totally sure in your mind that whatever you decide is what you want and you are not going to regret it in years to come.  Maybe even make up a small sample length of railings and paint them so you can compare the two together side by side.

                            Waffle any day you want, we do!

                            #121970
                            gecon
                            Participant
                              @gecon

                              Many thanks Richard for your very helpfull suggestions and advice. I was going to reply on Sunday by posting a photo of a mile of primed brass. However I felt it would be impolite  not to reply more promptly and thank you.

                              There are just a few more sessions of wire shaping to complete before I will start priming the rails -so hopefully some painting will take place during the weekend.

                              I see that I have wrongly cut away part of the caprailon the bridge deckhead. It should have been the rail below 😬 (to not impair light from a deck-mounted searchlight)…ooops.

                              Thanks again, much appreciated.

                              George20240821_091438÷

                              #121994
                              gecon
                              Participant
                                @gecon

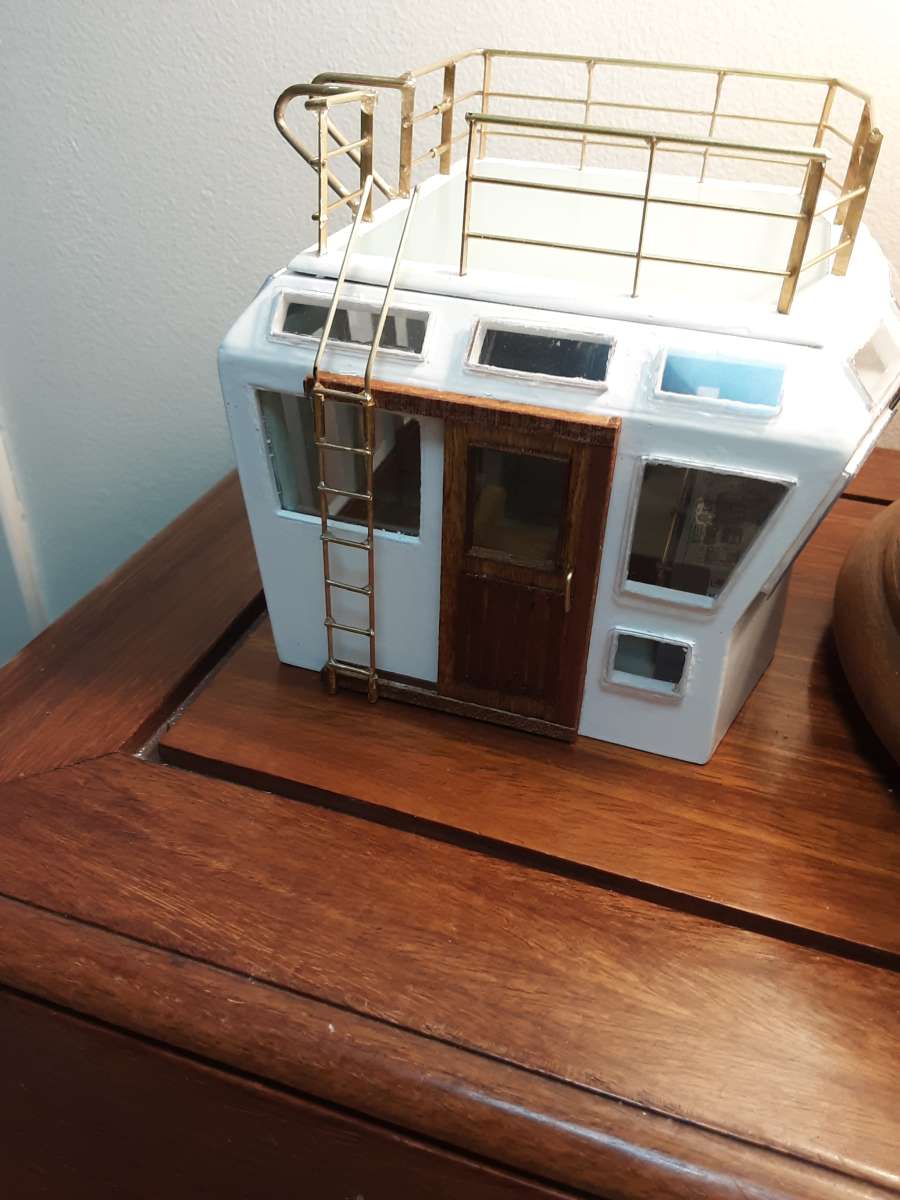
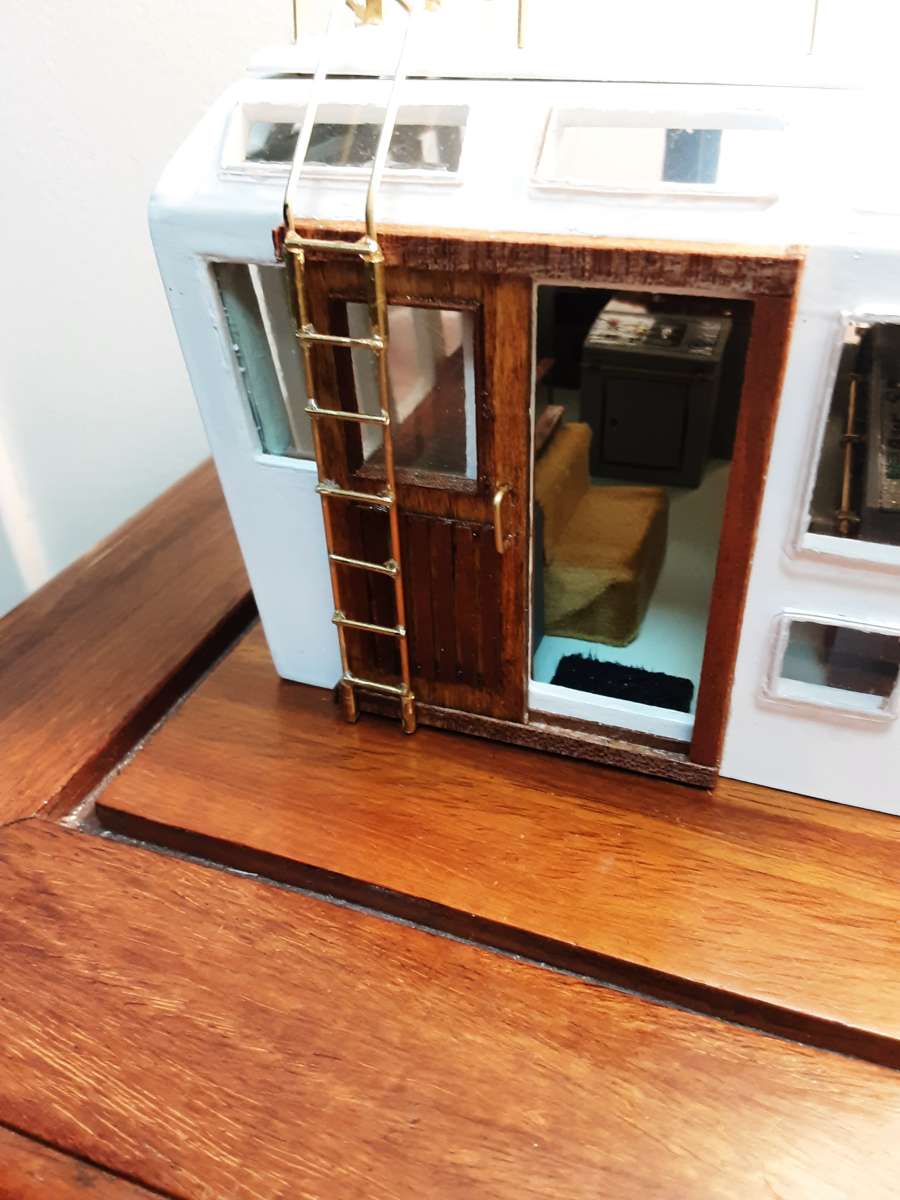
                                While filing off ‘blobs’ I droped the bridge deckhead onto the floor🫣 This served as a crash test😬 and a couple of poorly glued  (cyano) wires took flight. Glued again…Zap 15 minute this time. Had to stand it on it’s nose while it set.20240823_17253920240823_22181120240823_221915

                                Took me hours to produce this rather substandard wire ladder. Very fiddly work. Stiil need a couple more bends in it and two more rungs….tomorrow.

                                Definately a subject for primer and several coats of dark… err…(cover-up) paint.

                                I hope to get something primed this weekend.

                                George

                                #122055
                                gecon
                                Participant
                                  @gecon

                                  …and it came to pass  -at last-  that act of priming brass wire has taken place.

                                  Then I did a topcoat test with Billing Boat’s white acrylic. It is so thin that it would take >3coats to conceal the red-brown primer. I knew Billing paint was low on pigmentation but the white was rediculous. Tamiya was a bit better but also the wrong stuff for painting thin wire.

                                  Back to my garage door metal alkyd (enamel?) paint. Have both black and white in store. It’s a pretty thick stuff, a bit too heavy for modelling but it’s good quality paint. Have to paint out on the balcony as it’s very ‘niffy’ for the first 2 hours.20240824_155356

                                  #122083
                                  gecon
                                  Participant
                                    @gecon

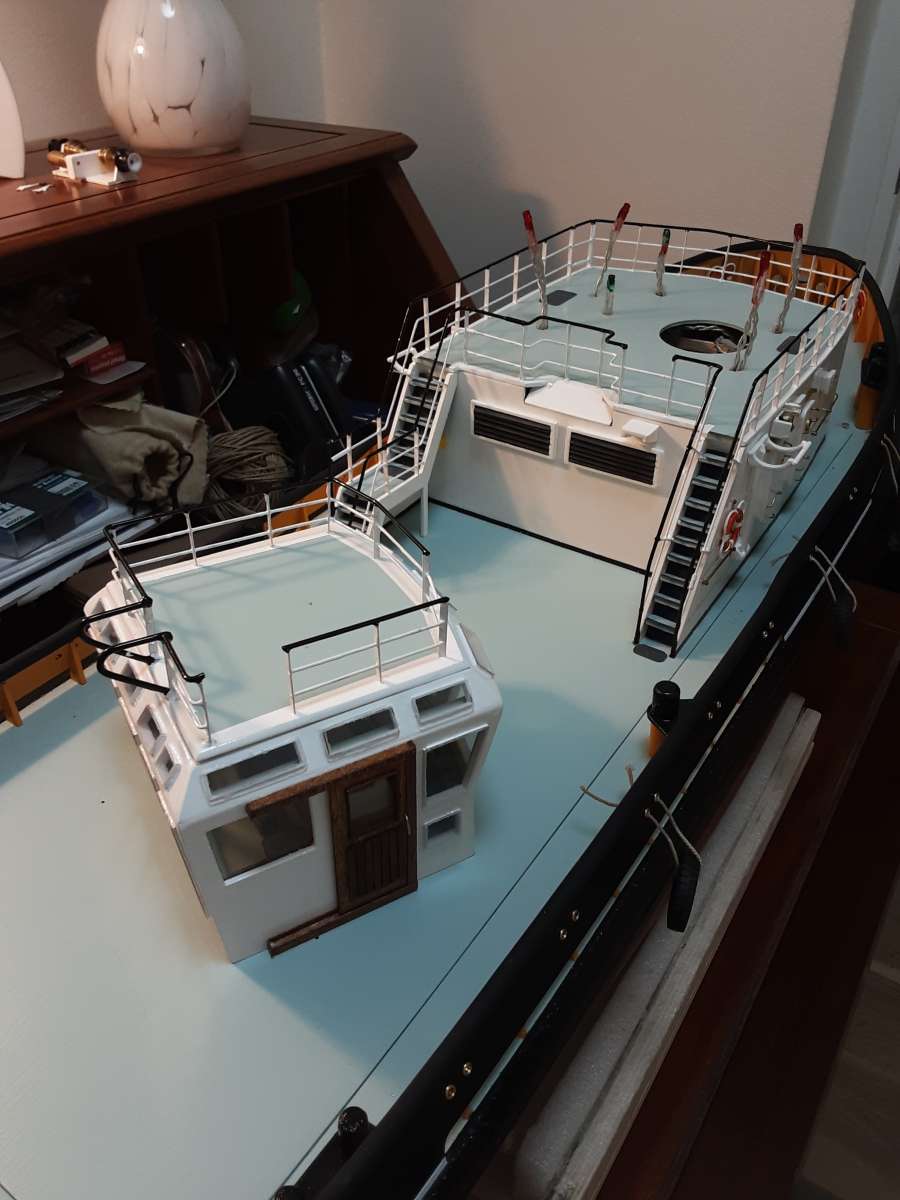
                                    Getting a bit fed-up with brass railings, have at last got a coat of paint on them.

                                    Looks OK a meter away, but not if you zoom in too much 🫣20240825_213550

                                    #122088
                                    gecon
                                    Participant
                                      @gecon

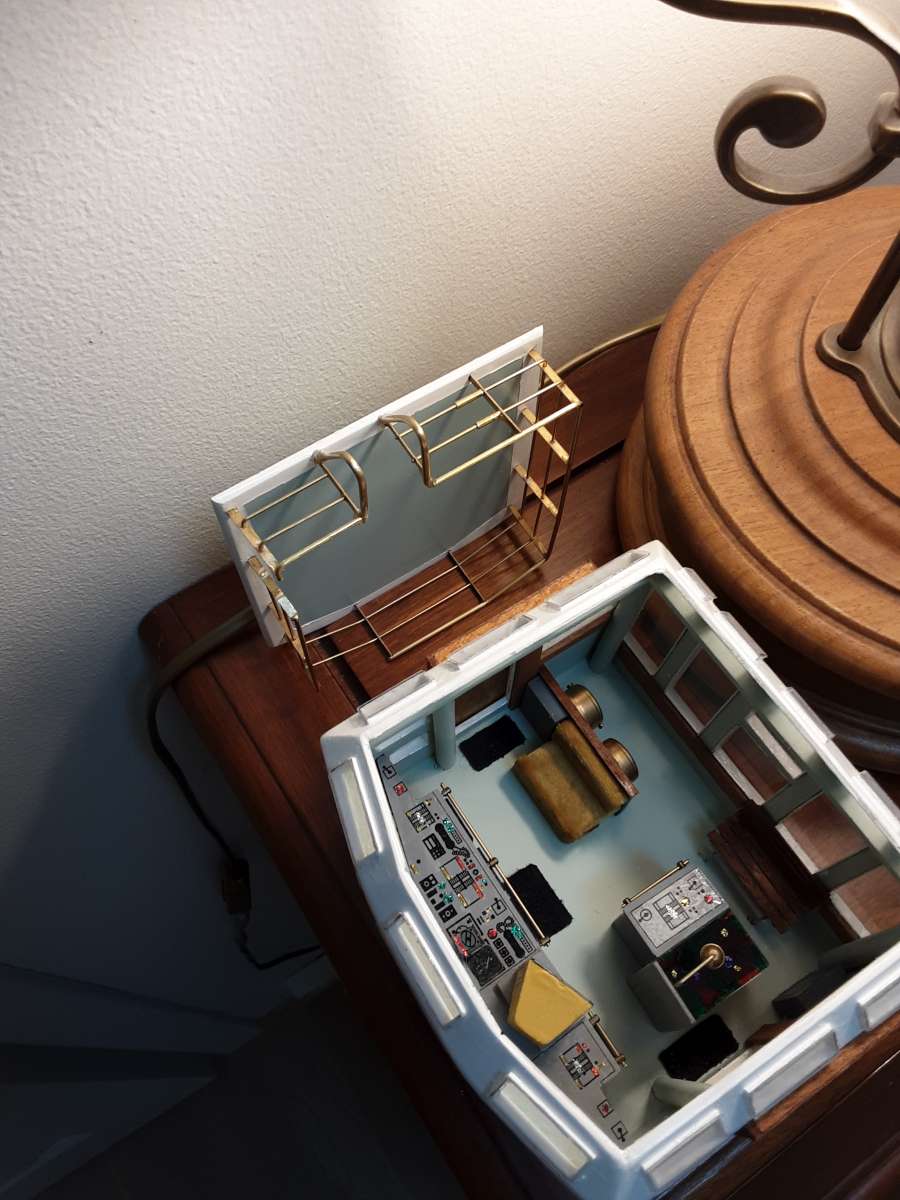
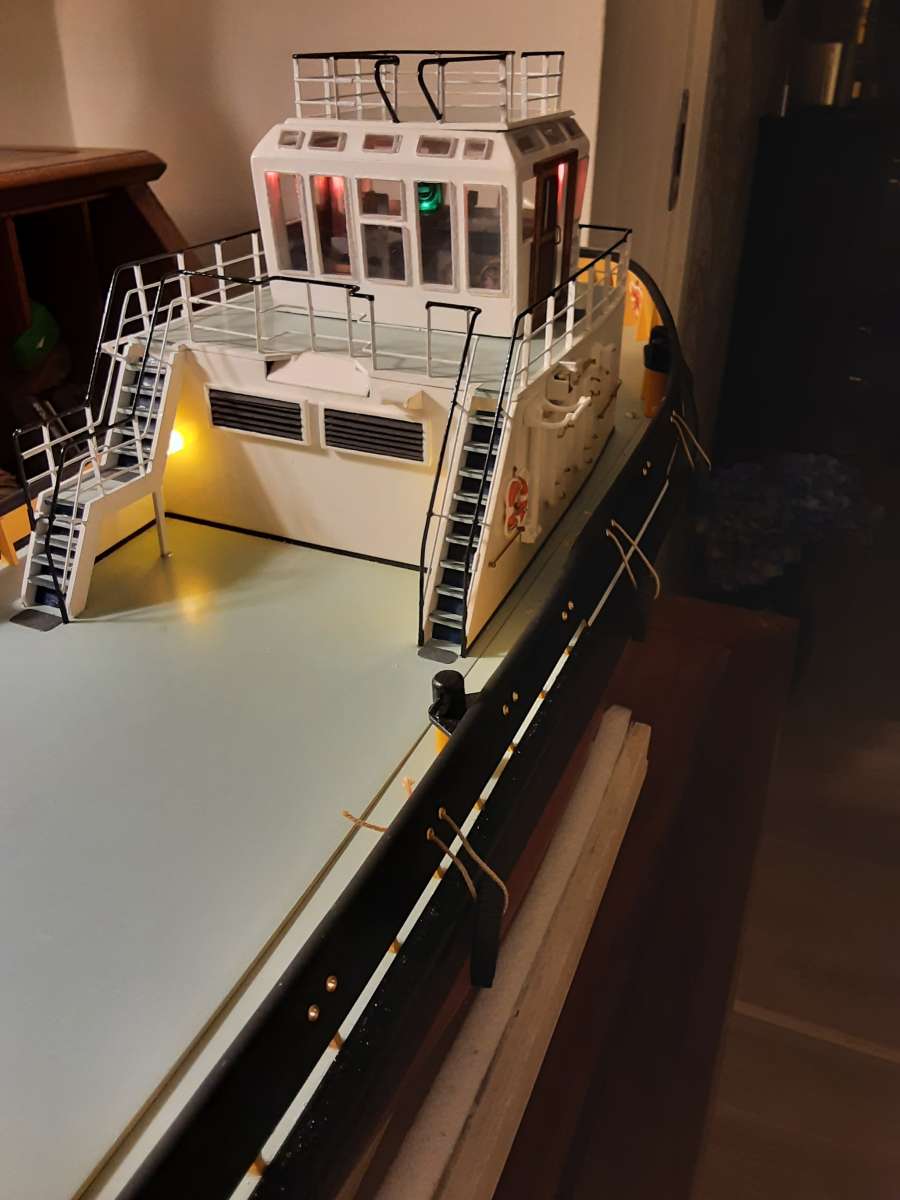
                                      Test assembly with lights connected. Will have to subdue the LEDs a bit. 20240825_21452620240825_214554

                                      #122089
                                      Colin Bishop
                                      Moderator
                                        @colinbishop34627

                                        Yes, LEDs can be too bright. On some of my models I have used grain of wheat/rice bulbs on half the rated voltage.They last longer that way too!

                                        Colin

                                        #122096
                                        gecon
                                        Participant
                                          @gecon

                                          The LEDs are just Xmas lights from Ikea. Not at all to scale and used them because I had them -more to impress the grandchildren I suppose. I can withdraw them from the guide tubes ( plastic straws) very easily but leave the radar and chart plotter LEDs in place. I’ve added more paint to the straws but not tested it yet.

                                          I have also installed, but not connected up yet a 6v. navlight set which are grain of wheat and much less glitzy😎

                                          George

                                          #122112
                                          gecon
                                          Participant
                                            @gecon

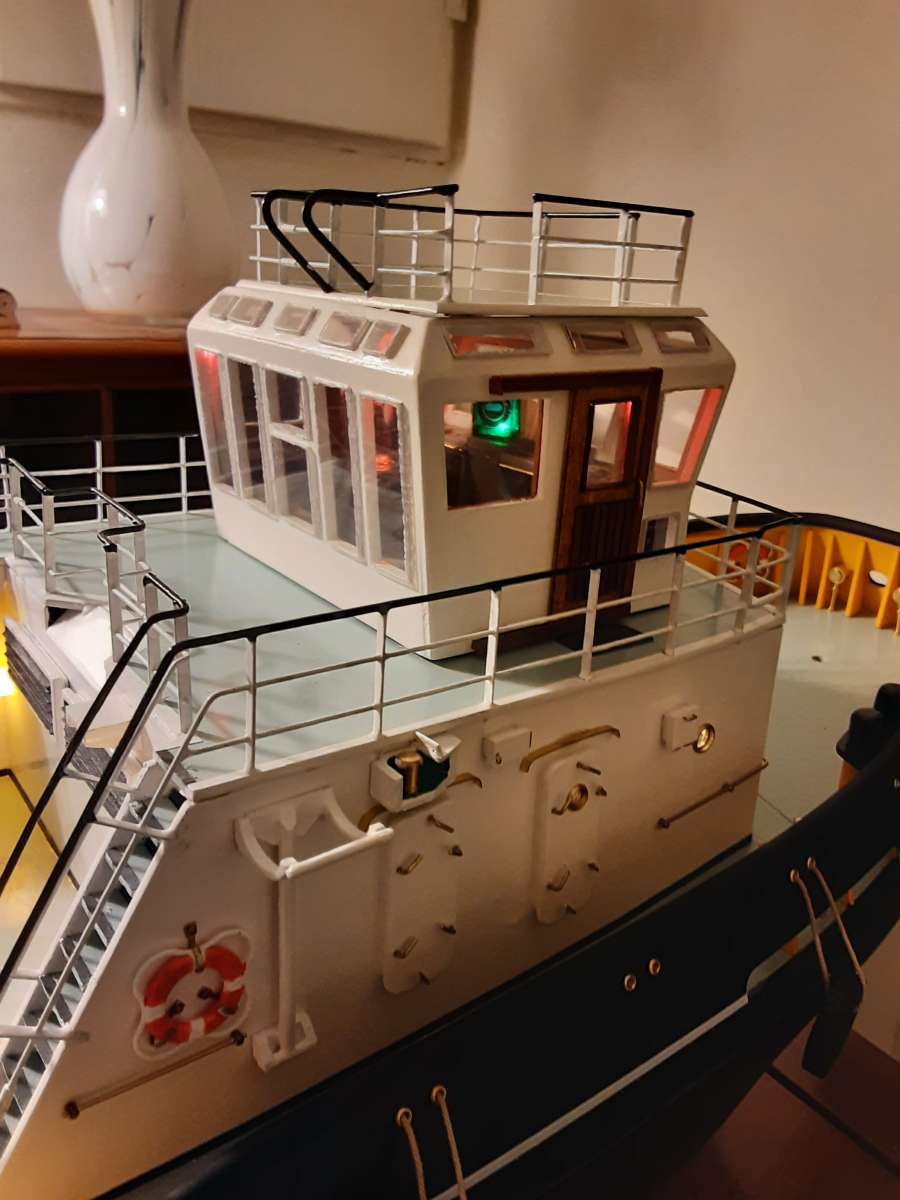
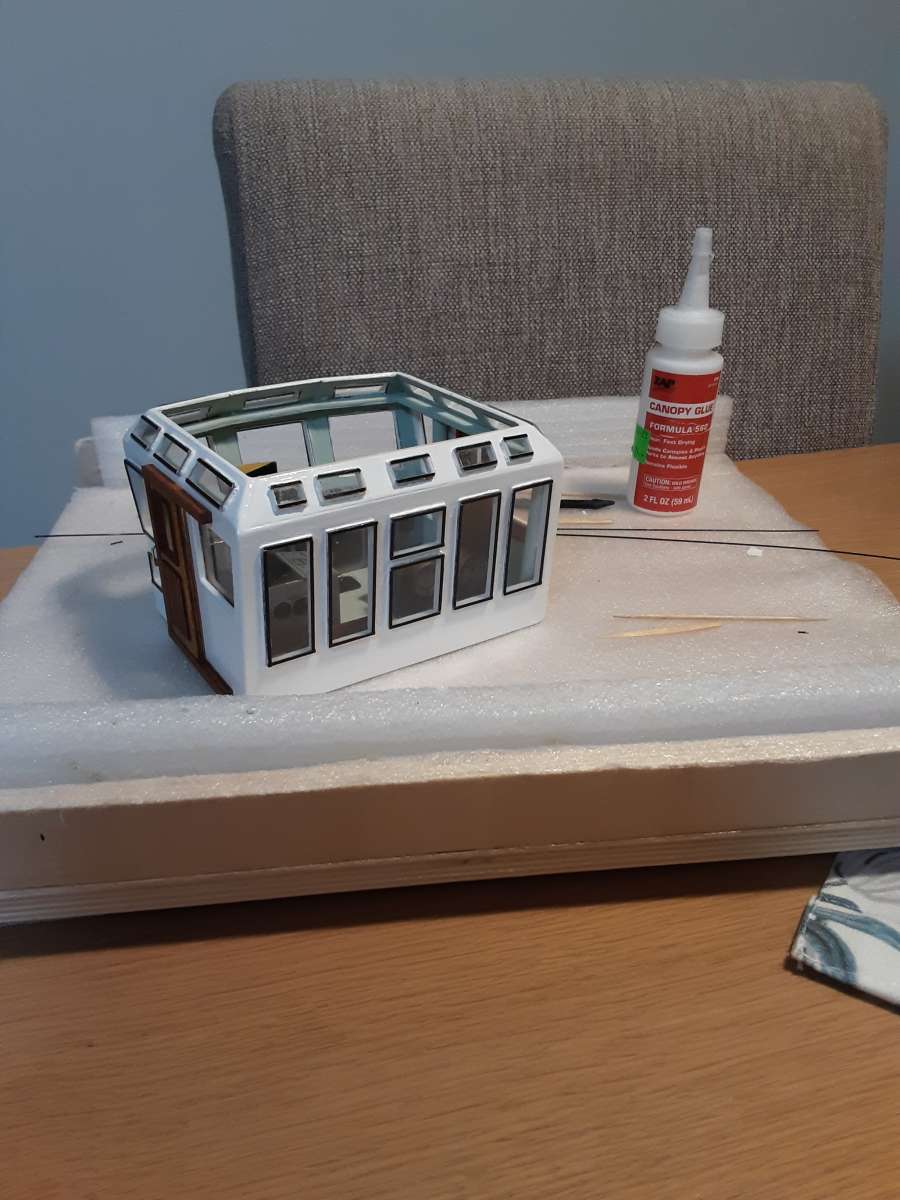
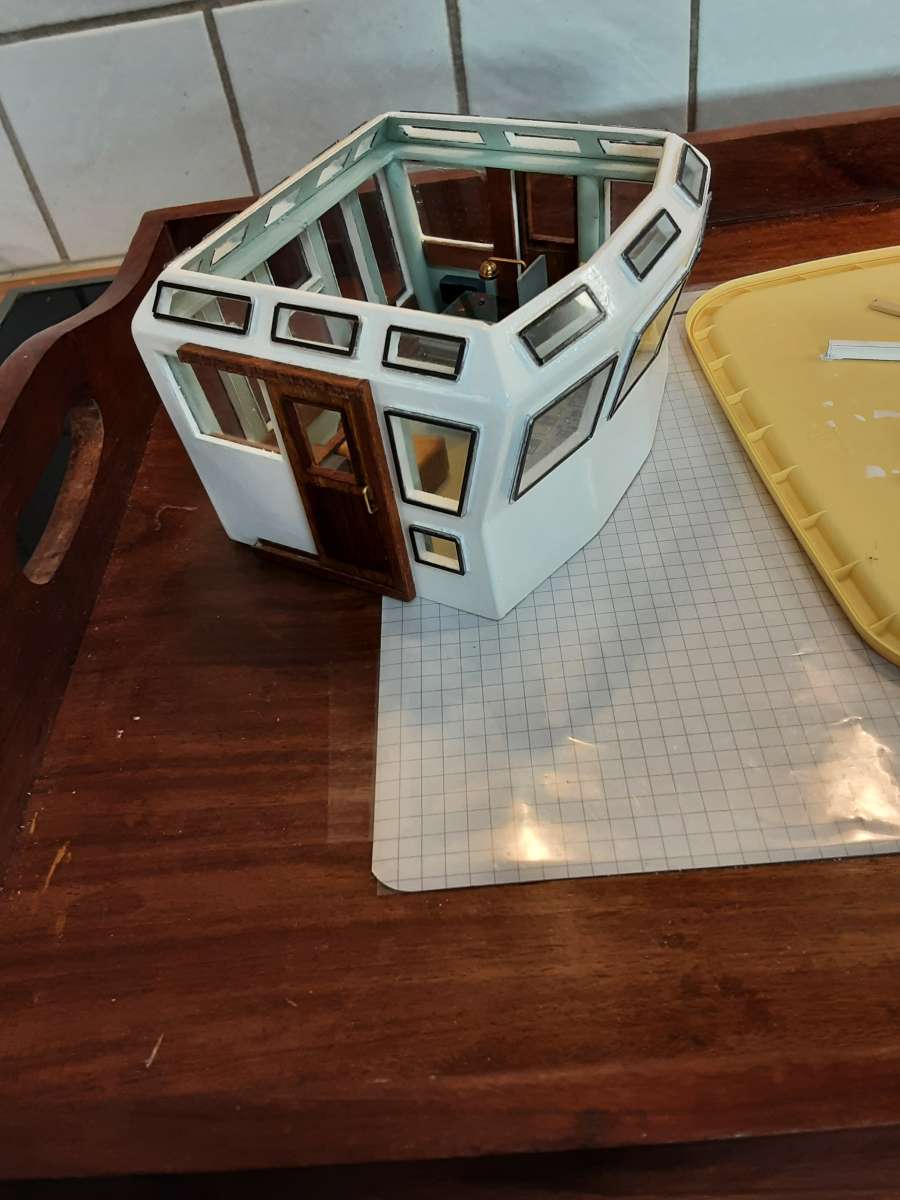
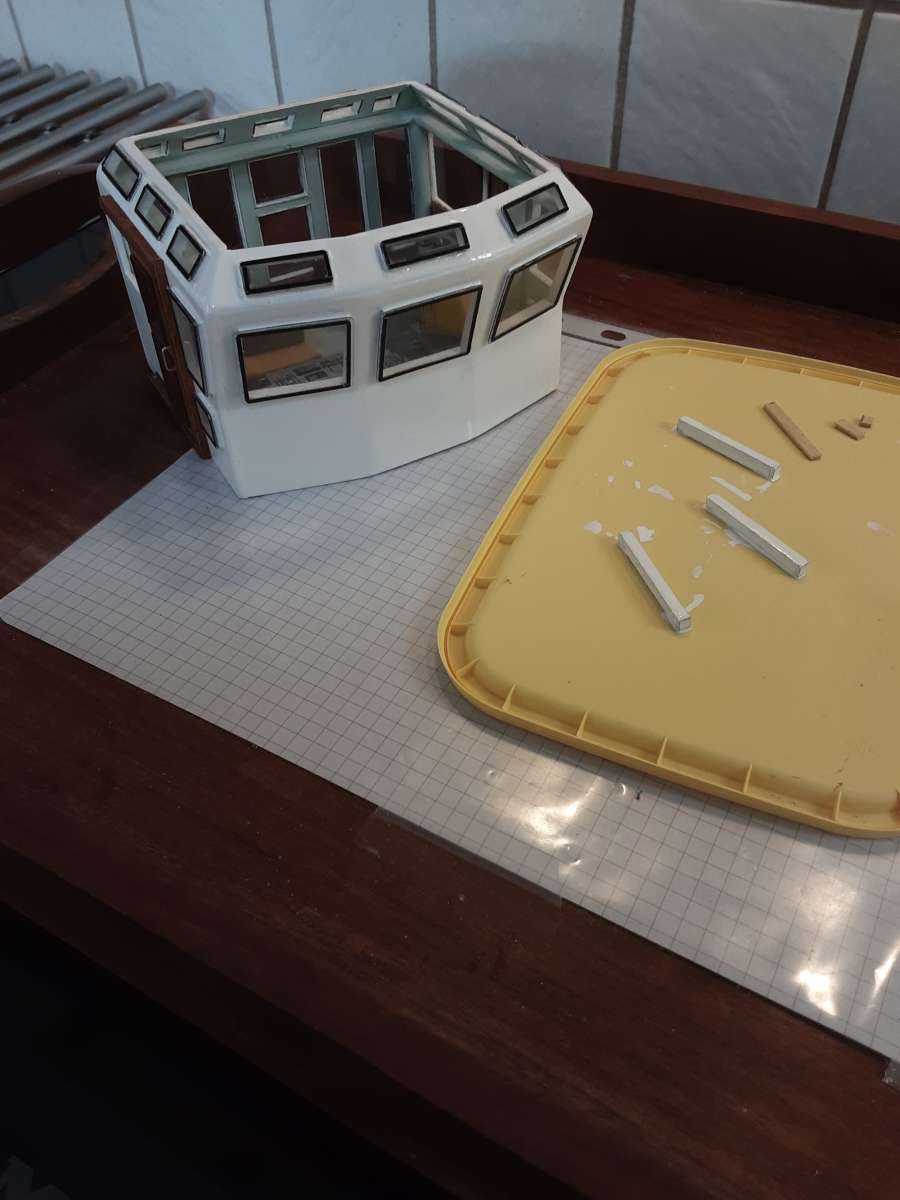
                                            There are quite a few monotonous jobs in this tugboat lark. Being doing a new one over the past 2 days -adding black lines around 27 window panes. I suppose the black is supposed to resemble Sikaflex or some kind of rubber seal around the windows. Not sure though, the boxtop photo shows clearly that the black is on the outer surface of the window panes. Anyway, I’ve glued on 108 pieces of black-painted styrene strip. It’s looks OK if viewed from 0.5 metres. I was going to omit this, as I note that some others on You Tube have done so. But then I could imagine Mr.R.S. frowning disapprovingly, and The Cannon readying a shot across the bows etc etc. So, now it’s done. But I’m still not sure what the black lines represent apart from a monotonous job😀

                                            20240828_21514720240829_194235I

                                            #122113
                                            Colin Bishop
                                            Moderator
                                              @colinbishop34627

                                              The black lines look right as they add ‘texture’ to the model so well worth doing. I have similar issues with my Miltiades liner. The basic aim is to bring the model to life which can require a degree of artistry.

                                              Colin

                                              #122115
                                              Richard Simpson
                                              Participant
                                                @richardsimpson88330

                                                Many different ways of sealing bridge windows, as you say with either rubber profiles or sealant.  Frequently held in place from the rear by brass screwed plates, sometimes painted white and sometimes polished up.  Depends if you have cadets or not!

                                                Interesting story.

                                                I once sailed on a passenger ship that had large diameter port holes fitted to passenger cabins in the hull.  The glass was 1200 mm armoured glass discs with a rubber profile around the edge, sat in a recess and held in place by a large brass ring on the inboard side.  I got a call in the middle of the night to go and attend a serious hull breach in a passenger cabin.  I went down to the cabin to find a big wave had slammed against the hull and blown the glass out.  The glass had flown diagonally across the cabin, gone edgeways through the bulkhead to the adjoining cabin leaving a nice neat slot across the bulkhead, and was sat in the middle of next doors cabin floor.  It had gone over a child asleep in a bunk.  First job get the emergency team out and make a wooden blank to fill the hole and shore it up with beams and wedges.  Second job look at why the glass had blown out.

                                                The internal brass ring was held in place by a large number of brass countersunk set screws.  These screwed through into the steel port hole mounting welded to the hull.  All the screws had been cut short with a hack saw and were held in place by a blob of silicone.  Just enough to hold everything in place under normal circumstances.  This was on deck 2 so very unusual to get a wave slam against the hull that high.  Every single port hole mounting screw had to be removed and checked and a number of others were found to be mounted in the same way.

                                                #122116
                                                gecon
                                                Participant
                                                  @gecon

                                                  Both interesting and frightening! Unbelievable too, that those assembling the portholes would choose such a method.

                                                  I found a few photos of full size Smit Ned’s and could not see any sign of external framing surrounding the glass, but they may have had new bridge windows fitted!   Not going to loose any sleep over this, although it’s 0400hrs right now.

                                                  The three front windows need window wipers and I see that I have used the supplied brass parts to hang up lifebelts on the bulwarks in the bows…oops.

                                                  20240829_194250


                                                  #122117
                                                  Richard Simpson
                                                  Participant
                                                    @richardsimpson88330

                                                    Sorry if I misled George, the securing frame is frequently on the inside but, arrangements vary quite significantly. Often the securing arrangement is boxed in so you can’t even see it.

                                                    As you say there are so many variations who is to say what is right or wrong and, at the end of the day, the most important aspect is whether they ‘look’ right.  Yours look spot on.

                                                    #122118
                                                    Colin Bishop
                                                    Moderator
                                                      @colinbishop34627

                                                      I’m sure you will be able to fabricate replacement wipers George but don’t get superglue anywhere near plastic glazing as it will attack and fog it, the slightest drop is enough, but you probably already know that. I have found canopy glue to be very useful for working with glazing and in other situations too. I don’t think it is truly waterproof but it is certainly water resistant.

                                                      Both interesting and frightening! Unbelievable too, that those assembling the portholes would choose such a method.

                                                      They are probably working for Boeing now….

                                                      Colin


                                                    Viewing 25 posts - 76 through 100 (of 205 total)
                                                    • Please log in to reply to this topic. Registering is free and easy using the links on the menu at the top of this page.

                                                    Code of conduct | Forum Help/FAQs

                                                    Advert

                                                    Latest Replies

                                                    Home Forums Building Kits Topics

                                                    Viewing 25 topics - 1 through 25 (of 25 total)
                                                    Viewing 25 topics - 1 through 25 (of 25 total)

                                                    View full reply list.

                                                    Advert

                                                    Newsletter Sign-up