Billing Boats Smit Nederland

Advert

Billing Boats Smit Nederland

Home Forums Building Kits Billing Boats Smit Nederland

Viewing 25 posts - 151 through 175 (of 205 total)
  • Author
    Posts
  • #123955
    Richard Simpson
    Participant
      @richardsimpson88330

      The windlass looks superb.

      Just one suggestion that you may be interested in or may think it is over the top.  Just about all ship’s anchor chain is studded, this is to help prevent it becoming snagged up when its all piled up in the chain locker,  and you can get scale studded chain from model boat materials suppliers or even on Ebay.  It does look more authentic when fitted to a model boat.

      Advert
      #123969
      gecon
      Participant
        @gecon

        Thanks gents, almost added all of the small parts in the kit now. As regards anchor chain, I did not quite like the look of the chain in the kit, but used it instead of spending Santa-money on a new, tiny 1/33 scale chain.

        The windlass gypsy(s) as supplied are machined smooth -without ‘notches’- to engage in the chain links when operating the anchors. So, smooth gypsies and studless chain are OK by me at this scale.

        I did take a little extra effort with the windlass though. I drilled through the base plate and made a small chain locker beneath it. There is just enough chain stowed there to allow the anchors to be dropped below the waterline. To prevent the anchors from dropping out of the hawse pipes, I have stuffed some grey sponge into the top of the hawse pipes to jam the chain. This sponge should also prevent water from being forced up onto the bow deck.  There is also some foam stuffed into the openings for the chain lockers which also prevent the anchorchain from running out. I hope😬

        The windlass/anchor installation became a bit like the navigation lights ordeal: a lot of agro for something which no-one will ever notice.

        I expect that the final exterior detail will be done by the weekend. Will post some pics. Then there will be a pause until after Xmas before starting the RC installation.

        George😁


        #123975
        gecon
        Participant
          @gecon

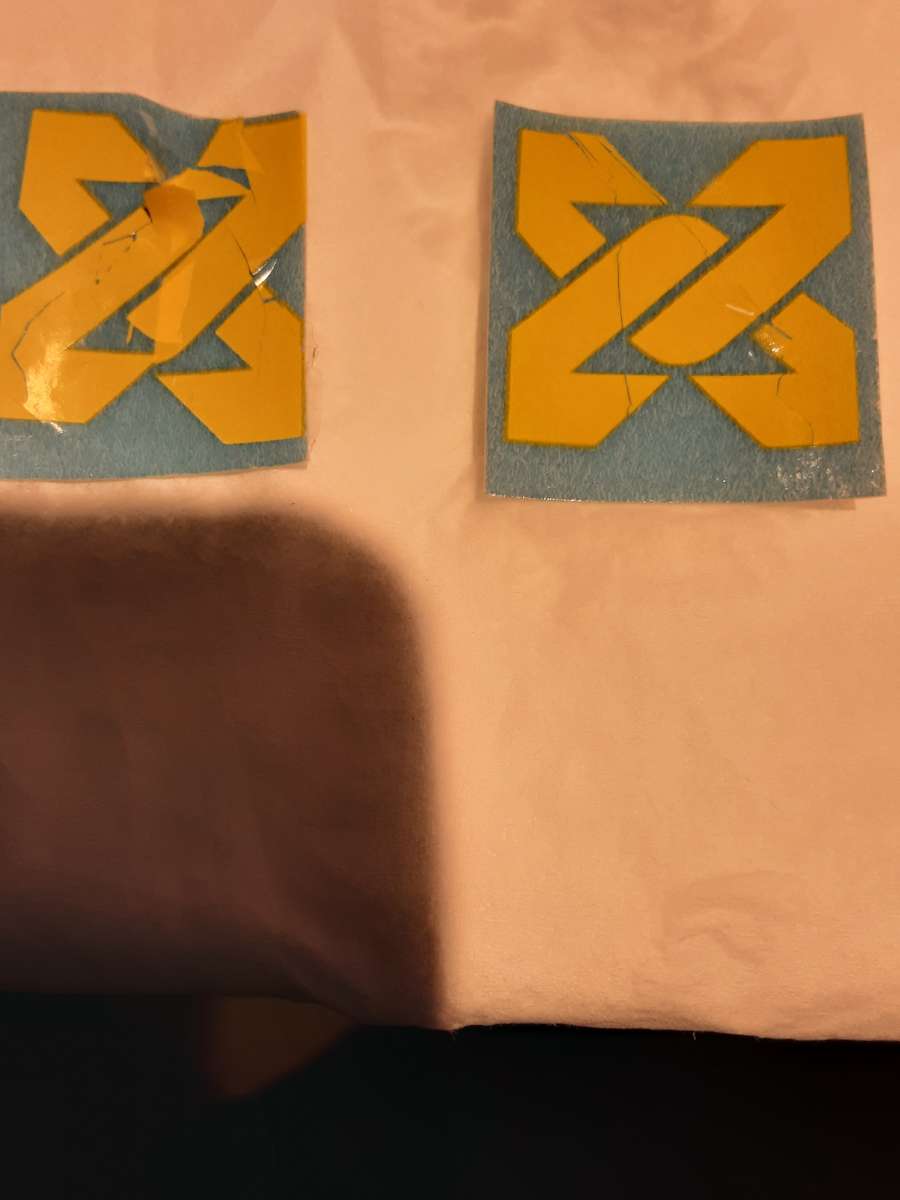
          Thought I would add some transfers today. After a soak in a weak mix of ‘fairy-water’ the transfers cracked like crazy-paving. Sent an e- mail to Billings and they apologised and confirmed an hour later that new ones would be sent asap.👍

          Same thing happened to the Colin Archer transfers but they were 10 years old.

          George

          20241218_114504

          20241218_114033

          #123977
          Chris Fellows
          Participant
            @chrisfellows72943

            As per other’s comments this is another first class build and whilst not my area of interest (mine being very narrow!) I can appreciate the workmanship and attention to detail.

            Glad that you’re getting replacement transfers without any pain.

            Chris

            #124027
            gecon
            Participant
              @gecon

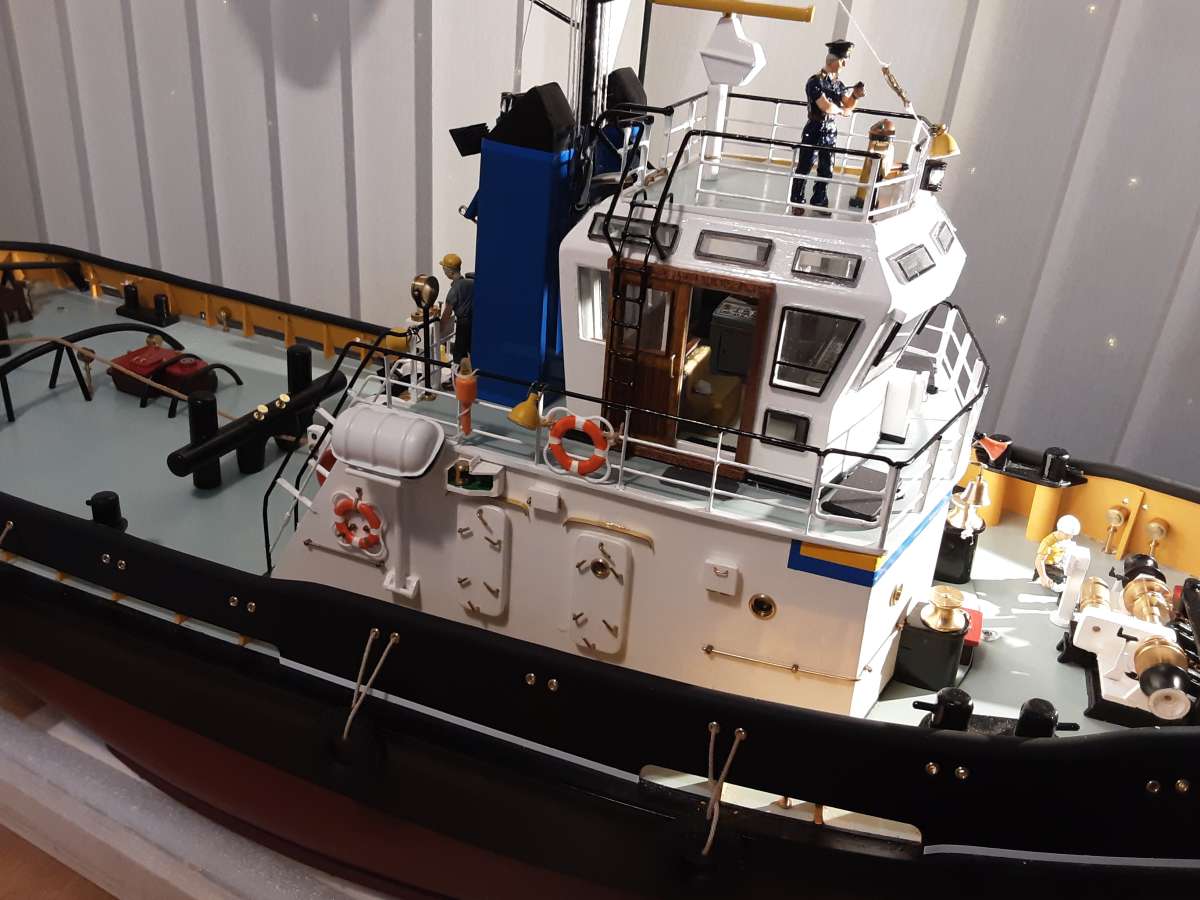
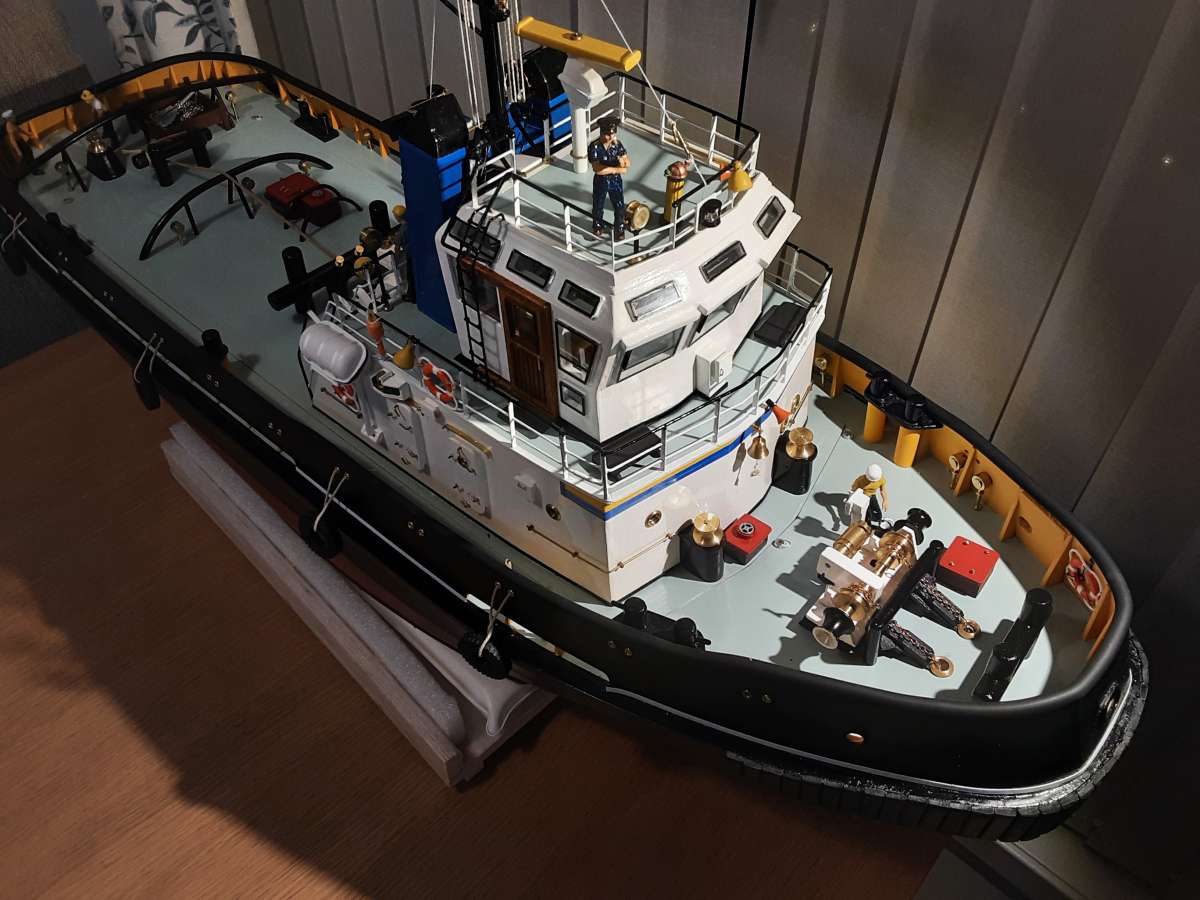
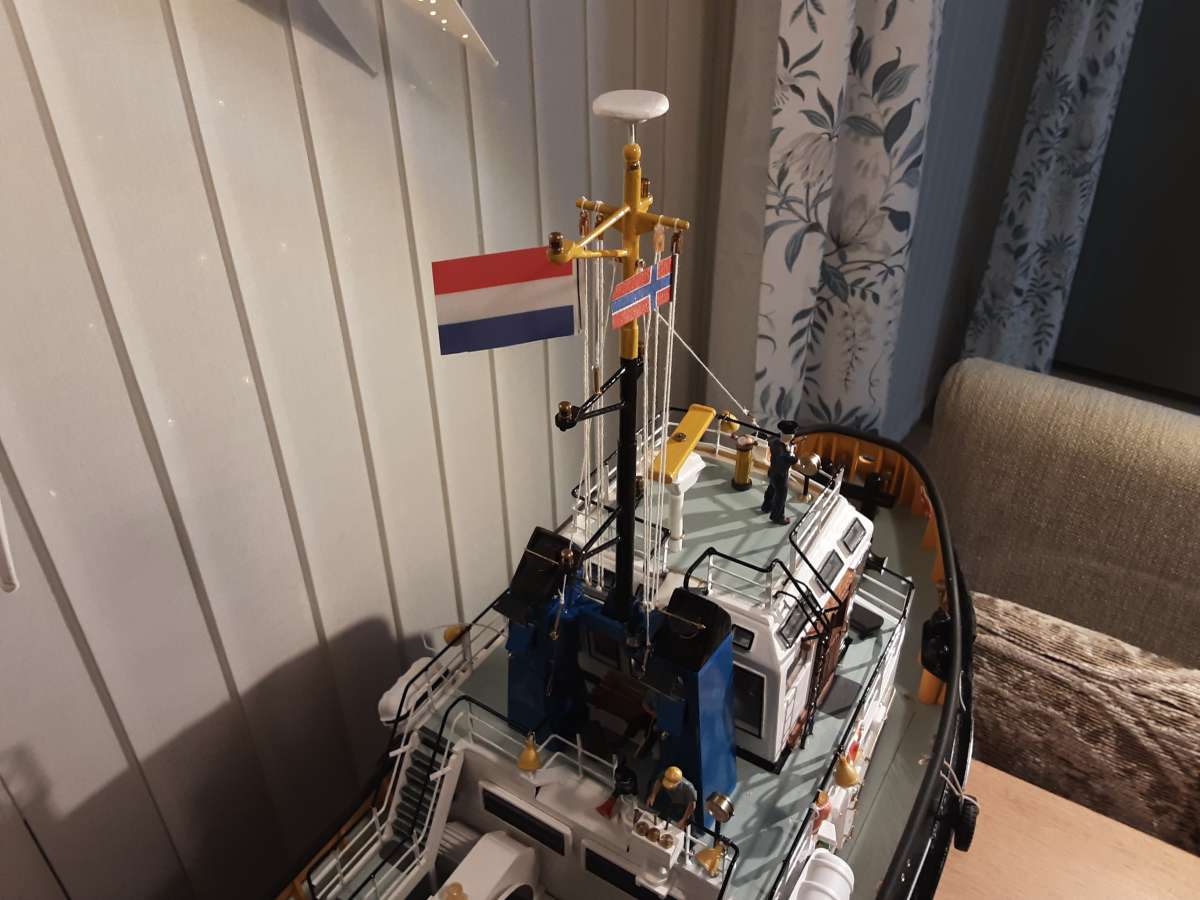
              Took all day Sunday to coordinate my fingers and eyes sufficiently to rig the mast. Three stays for the mast and four flag/pennant lines threaded through tiny plastic blocks was a real test of patience. Compass binacle glued to the top deck and tannoys etc attached to vatious rails.

              The shipyard is now closed for the Xmas break.

              Merry Xmas to all, George🎅

              20241222_21111520241222_21101520241222_210919

              #124031
              Chris Fellows
              Participant
                @chrisfellows72943

                Merry Christmas to you as well George.

                #124033
                bku
                Participant
                  @bku

                  Hallo George,

                  Your boat is really looking great, I still have a long way to go.
                  As you have been through some processed and you seems to be much more experienced in building then I am, I would like to ask some advice on painting.

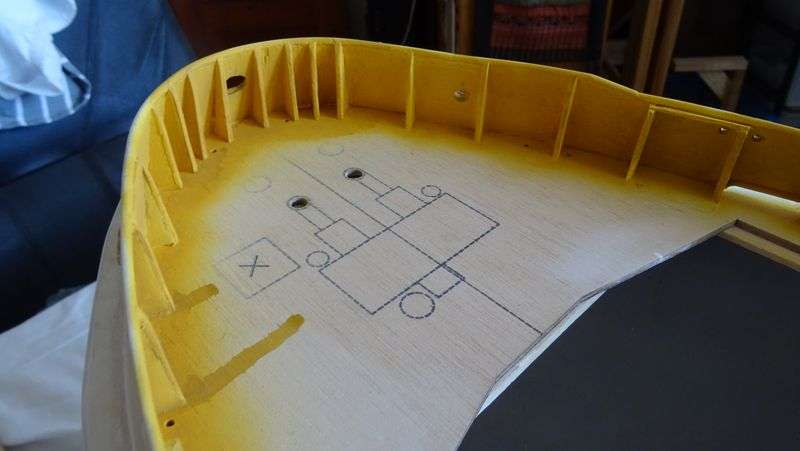
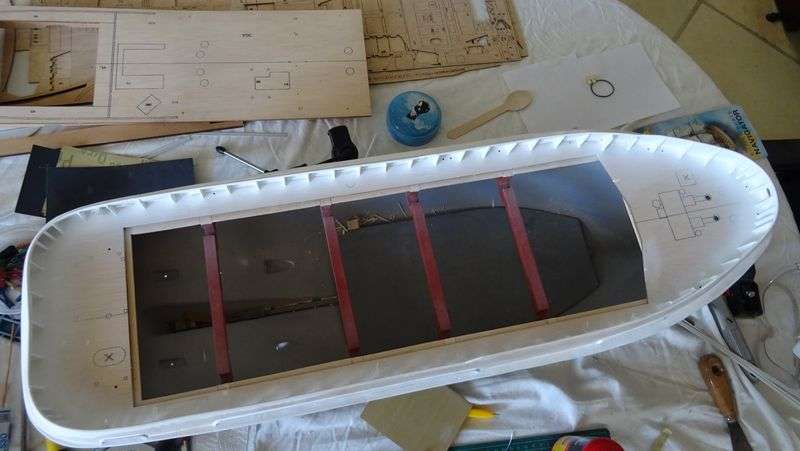
                  I have reached the point where the inside of the bulwark has to be painted. I have done a first underlayer with white acrylic paint in a combination with a paintbrush and a normal brush.
                  Before painting I tried to sand the inside of the bulwark as good as possible to get rid of the oneveness of the cheep plywood, but after the paintbrush spray I was not satisfied with it. So with thicker acrylic paint I did it again, now most of the uneveness is gone.

                  Now the yellow color has to be sprayed on it, which I don’t thing will be a problem to do.
                  Now the question:
                  I see in your pictures that you did a very good painting job between the bulwark supports and the deck. I don’t see any yellow on the deck, and I don’t se any grey/blue on the bulwark supports.

                  Can you explain me how you did this so nicely?

                  Next question:
                  What kind of wood treatment did you do to the wood of the wheelhouse and the deck to get rid of all the uneveness in the plywood.
                  My approach is first to put wood filler on the plywood and then to send it as smooth as possible, which I did to the outside of the bullwark. But maybe you have a smarter idea.

                  Some pictures how it looks at the moment
                  DSC01923_small

                  DSC01921_small

                  For the rest, Happy Christmas and a healthy new year from South Africa,
                  Best regards,
                  Bert

                  #124213
                  gecon
                  Participant
                    @gecon

                    Hello Bert, sorry for the late reply. As I wrote on 22 dec, the yard was closed for Xmas. I have not looked in on the forum since then.

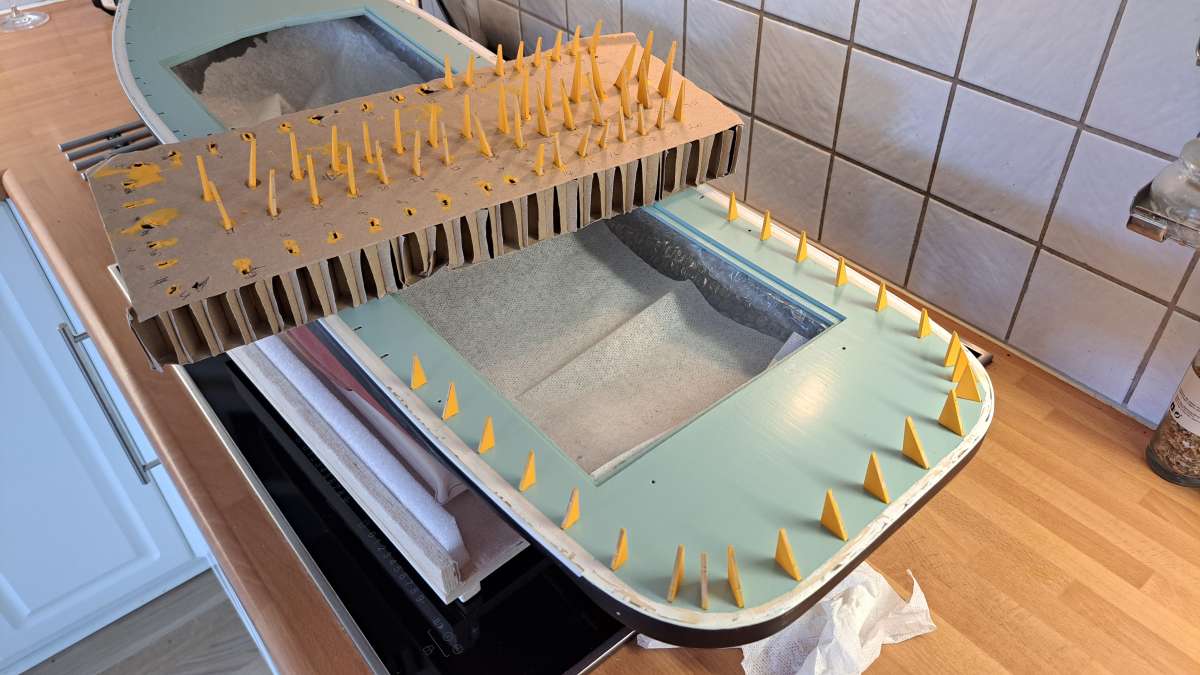
                    The bulwark supports were a ‘headache’ for me the work out. I sanded, undercoated and top coated all 69 supports BEFORE gluing them onto the deck! It was a pain in the — to do it, but was the only way I could work out how avoid getting paint on the deck. Trying to mask off everthing after gluing in place seemed impossible. There is a photo somewhere in my build log which shows all the painted supports but that won’t help you much now, sorry.

                    As for my decks, they are not completely smooth. I did not use fliller, just sanded well before undercoating i white about 2-three coats with a good quality brush – not airbrush.. Then brushed on 2 coats of silk-matt topcoat. The wood grain is still slightly visible but not from 1 meter away!

                    Your bulwark supports look very well made. You could mask off the deck inboard of the bulwarks and just accept that the deck has a yellow strip all the way round the deck. I don’t think that would look ‘wrong’ and at least better than having ‘stray yellow paint’ showing where you don’t want it. You have probably already thought about that alternative.

                    Regards from Norway,

                    George.

                    #124215
                    bku
                    Participant
                      @bku

                      Hallo George,

                      Happy New Year!

                      I spraypainted the inside of the bullwark yellow a couple of days ago. Still to do one or two layers more for an even coverage.
                      As you can see in the below picture, the deck is yellow in between the supports. My idea is to hand paint this area green, which will be an anyoing job to do. When done and the deck is ready after filling and sanding to cover the bullwark with paper and tape and then to spraypaint the deck.
                      I have experienced to do the anoying jobs in parts and to do someting funny in the mean time. So I have started to build the winch on the rear deck as detailled as possible. Also here a few challanges.

                      Regards,
                      Bert

                      DSC01936_small

                      #124216
                      gecon
                      Participant
                        @gecon

                        Looks good Bert. I’m sure the deck would look fine if you painted the green (duck-egg?) Only to the edge of the supports and leave the area between each support painted yellow. My supports are painted Humbrol ‘yellow facings’ and the inside surface of bulwarks is Revell ‘Lufthansa Yellow’. In practice, there’s hardly any difference. I did this because I did not have enough of each colour to do the whole job!

                        I note that the photo of the supports’ painting was here on my phone and not posted in the blog

                        Have fun, George

                        20240607_134116

                        #124261
                        gecon
                        Participant
                          @gecon

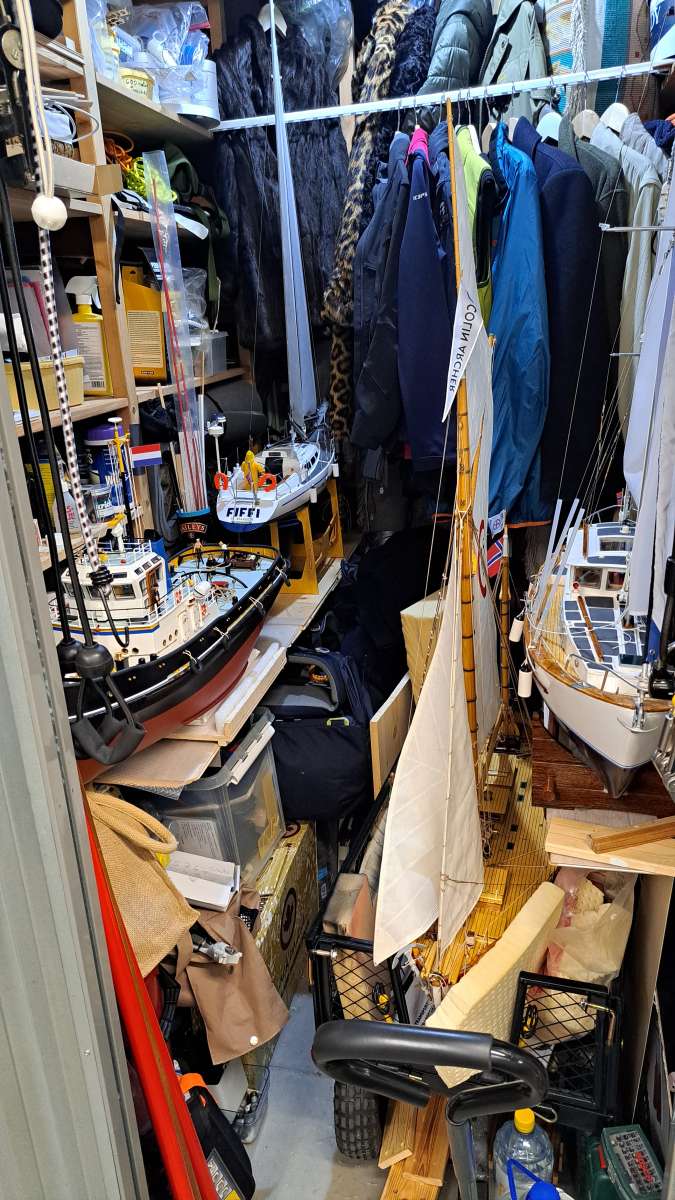
                          My 4-ship ‘navy’ is now in dry dock in the cellar store room.

                          Radio control and electrics will be installed in the Smit-Ned’ in due course. Enthusiasm on a low ebb for the moment but will no doubt manifest itself in the fullness of time😃

                          20241229_150204


                          #124263
                          Richard Simpson
                          Participant
                            @richardsimpson88330

                            Bert, I would use a fairly small, flat ended brush that you can simply push up to the bulwark to get a neat line there, then simply drag it back along the edge of the bulwark stay to get a nice neat line there.  I would use a paint density that ensures you do not need to do a second coat!  I think you will find it easier than you imagine if you use the right brush and paint consistency.

                            Once you have done between the bulwark stays you can then do the majority of the deck with a much wider brush.  Over painting into the areas between the stays will help to prevent any demarcation showing between the two stages of the process.

                            Don’t forget, most parts of a ship are painted by deck crew with 3″ dog leg brushes around the edges and rollers for the main areas so there is no such thing as a perfect straight edge between colours!

                            #124265
                            bku
                            Participant
                              @bku

                              @George:
                              I should have done it that way, but you know how it goes, you want to glue something together, instead of first thinking what is better: painting or glueing. Painting the deck will be time consuming now, fortunately I have time enough.
                              I am building the rear winch currently, and here I try to do it more smart; first painting when necessary, then glueing.

                              @Richard:
                              Thanks for the tip what kind of brush to use, currently I am only using round brushes in different sizes. You are right about how perfect to paint the ship, I have got hundreds of pictures of the real ship, and there you can see also that the cleanliness of painting isn’t always great.

                              Regards,
                              Bert

                              #124271
                              Richard Simpson
                              Participant
                                @richardsimpson88330

                                You should have seen some of the early engine rooms I worked in!

                                #124282
                                gecon
                                Participant
                                  @gecon

                                  Hi Bert, Richard’s suggested painting method would definately make a tidier job. As you say, you have the time to do it.

                                  I also painted nearly all the parts for accessories (winch, windlass, deck hatches etc) before gluing. Just scraped away some paint where surfaces were to be glued.

                                  By the way, no need to zoom in too much on my paintwork!  It only looks good from about 1m distance😀


                                  #124584
                                  gecon
                                  Participant
                                    @gecon

                                    New tranfers arrived from Billing Boats in Denmark 2 weeks ago. They were put applied to thd tug two days ago.

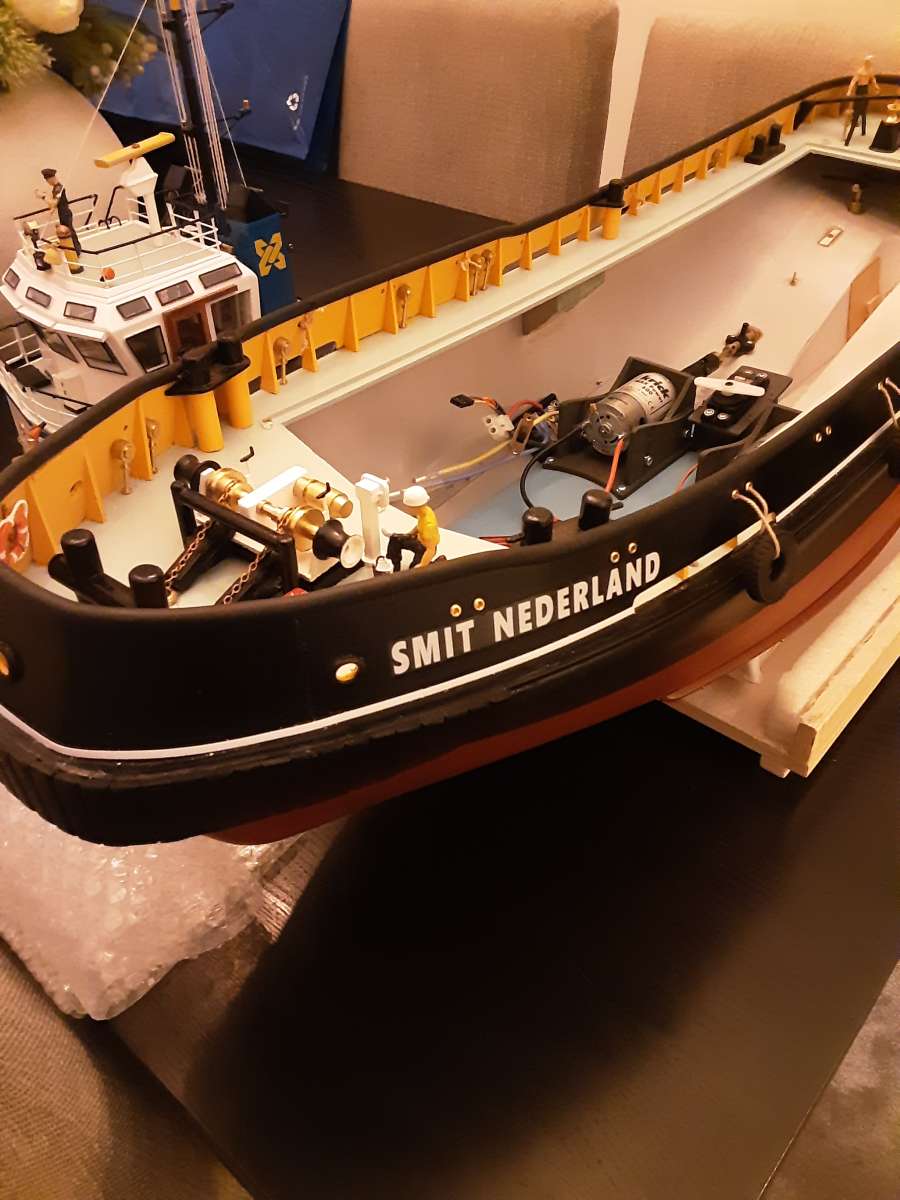
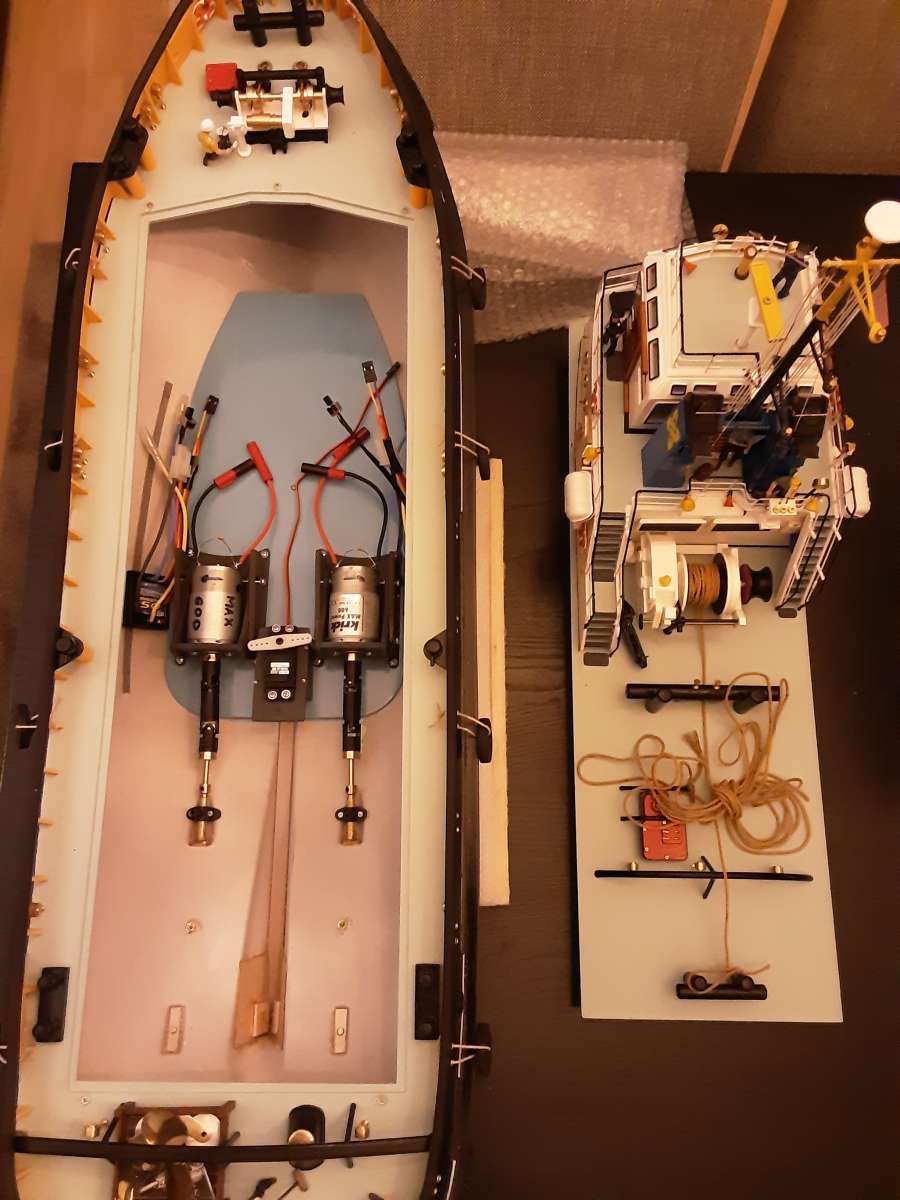
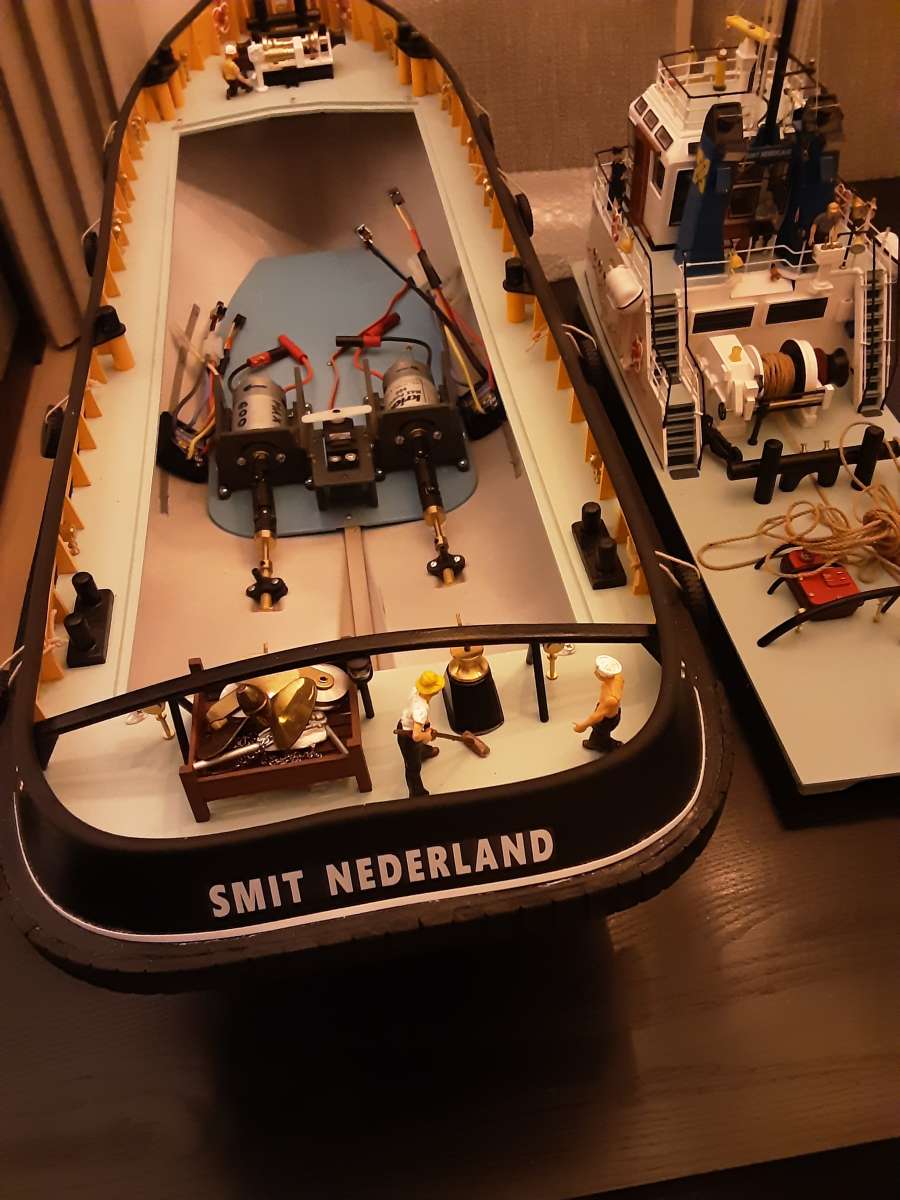
                                    Planning for R/C and power supply is now in progress. Slow process due to a lot of wires and plugs to be routed, placed and secured..

                                    George

                                    20250130_215244

                                    20250130_215223

                                    20250130_215216

                                    #124586
                                    Chris Fellows
                                    Participant
                                      @chrisfellows72943

                                      I enjoy that stage George, even though I haven’t reached that point many times yet!

                                      Lovely neat work as always.

                                      Chris

                                      #124592
                                      gecon
                                      Participant
                                        @gecon

                                        Thanks Chris, but only ‘neat’ at a distance! Somehow the Stbd motor mounted was screwed down slightly out of alignment. The double u/j’s should accept that, but I’ll probably try to give it a ‘tweek’ anyway. The base of the servomount is touching the motormount so that also needs a shove.

                                        First I have to route all the wiring….it won’t look so ‘neat’ after that I expect.😁

                                        George

                                        #124640
                                        gecon
                                        Participant
                                          @gecon

                                          And it came to pass….that I started deliberating. At least, I think that’s what I was doing. It may have been internal waffling.

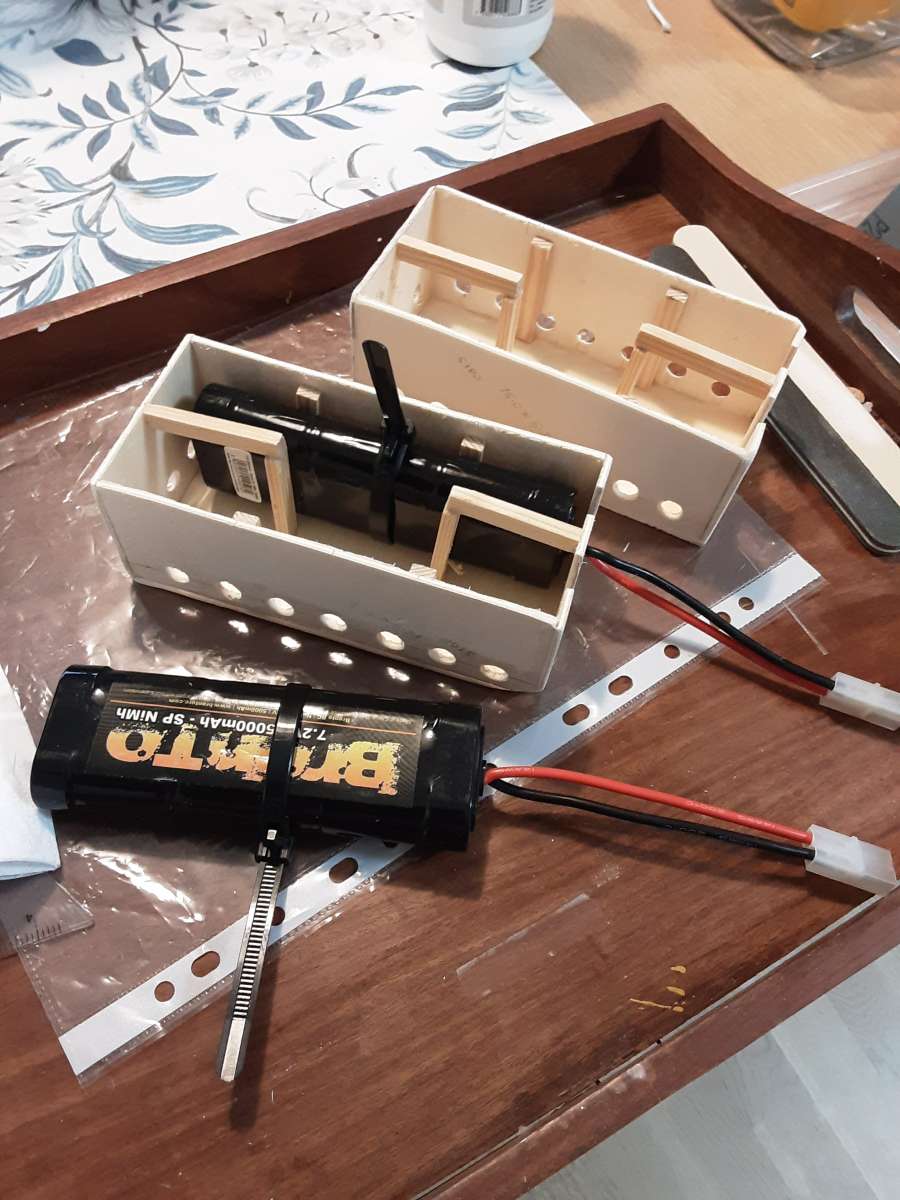
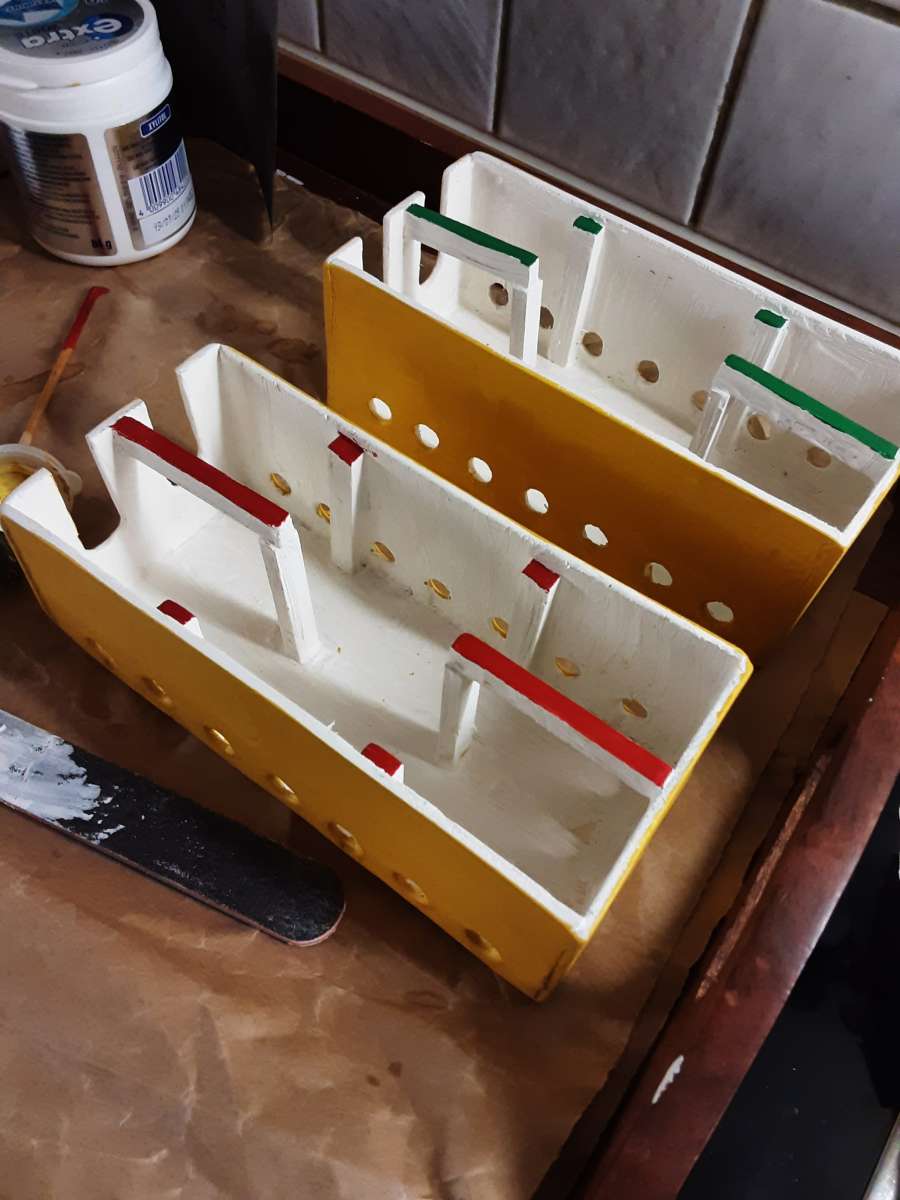
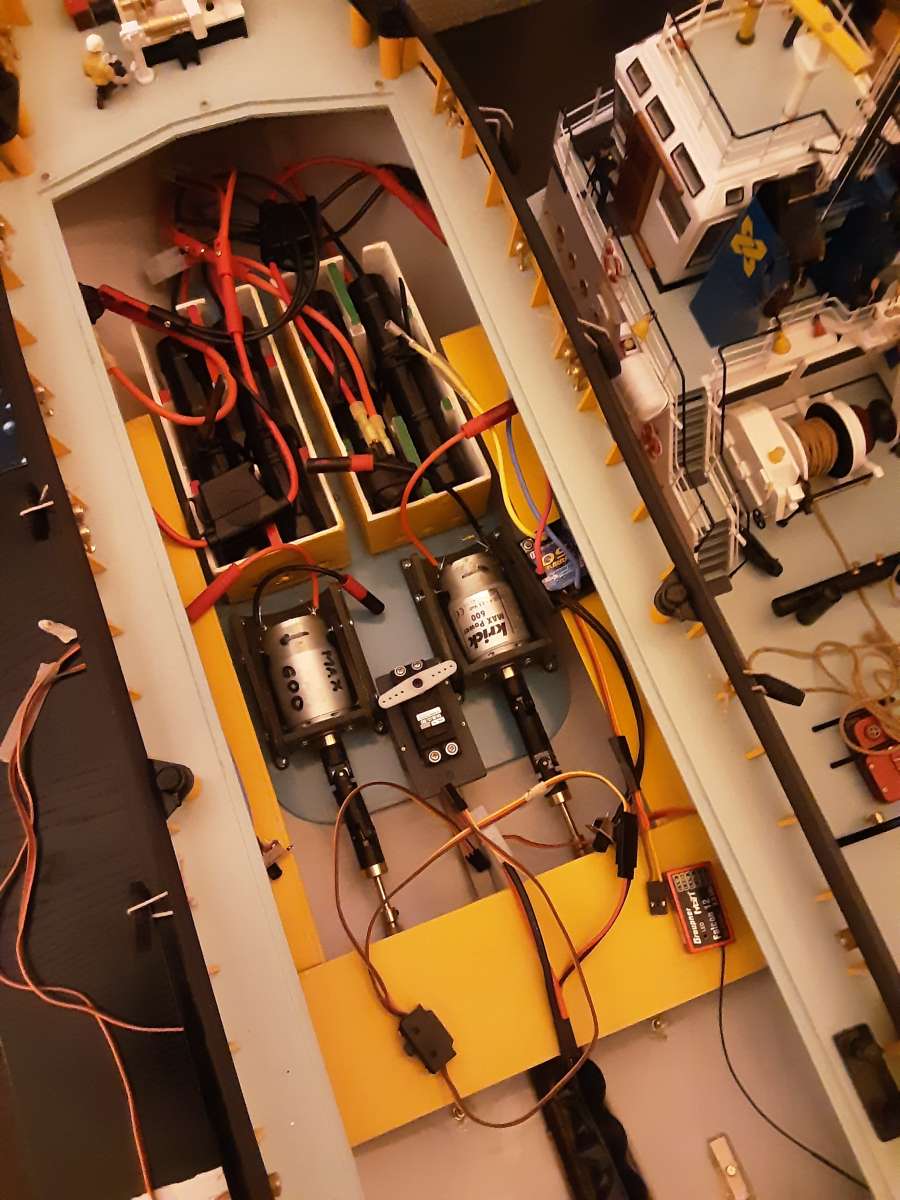
                                          I tried to think of a way to contain the 4 drive batteries and also have them moveable -fore and aft. I made containers! -to contain them! QED

                                          They’ll be painted sometime soon and be (initially) held in place by velcro tape. There will be less available fore-aft adjustment than I hoped for so I hope the tug doesn’t become a ‘sub’ and do a nose-dive on the first trials. I will of course find a suitable bath tub for the balance checks. Have plenty of stick-on wheel balance weights on hand.

                                          George20250202_150407

                                          #124680
                                          gecon
                                          Participant
                                            @gecon

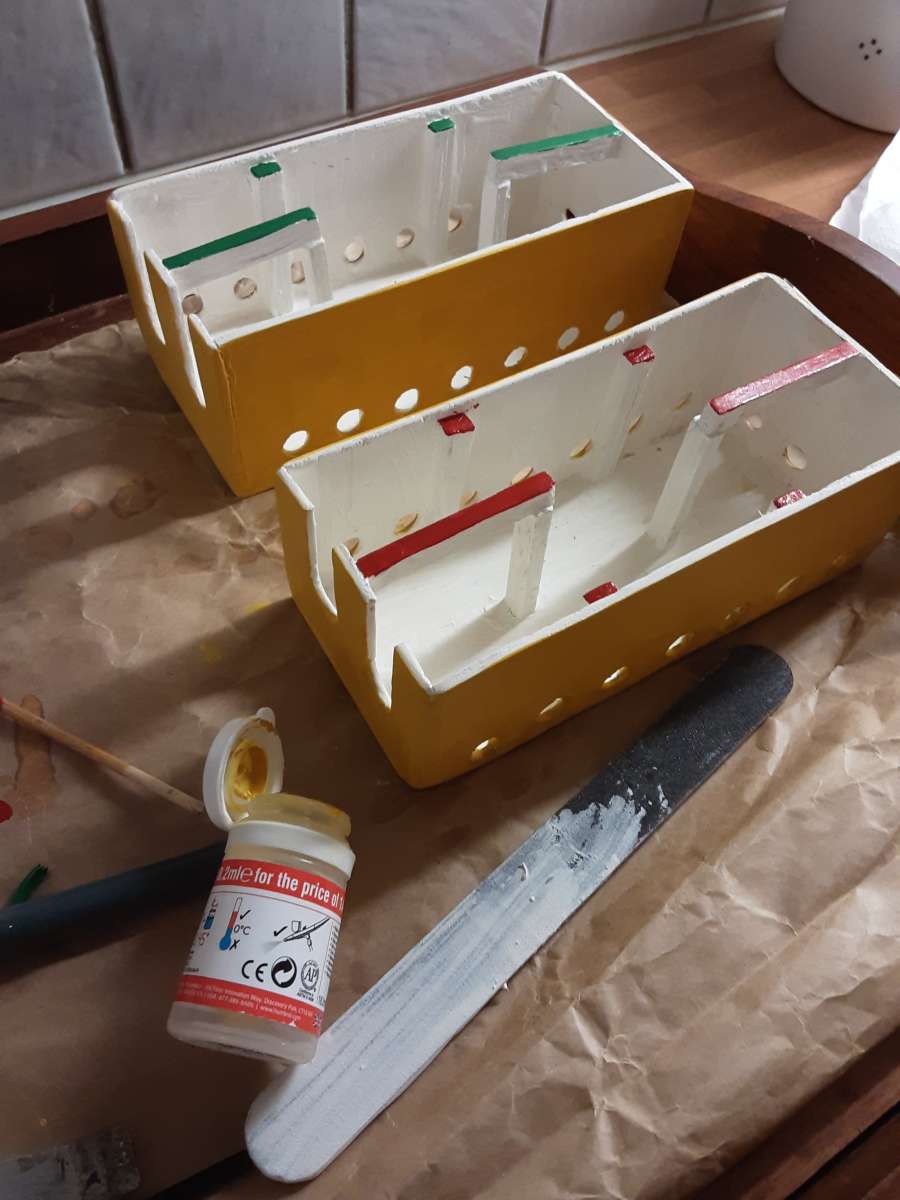
                                            The battery containers have taken on a yellowish ‘hue’. I had a20250203_194639 lot of ‘bulwark yellow left over you see”.
                                            20250203_194622

                                            George.

                                            #125104
                                            gecon
                                            Participant
                                              @gecon

                                              The cable looms, battery boxes, fuses, switches, ESC’s, Rx and Rx battery have all been chucked into the the hull. Won’t know if the longitudinal balance is right until I find a neighbour with a bath tub. Positioning and securing work will then be done.

                                              George

                                              20250301_182644

                                              #125108
                                              bku
                                              Participant
                                                @bku

                                                Looks great George, what kind of batteries are you using, as these are not the standard lead batteries I always see.

                                                In the mean time, I am busy with painting the deck and bullwards.
                                                Best regards,
                                                Bert

                                                DSC01993_small

                                                #125136
                                                gecon
                                                Participant
                                                  @gecon

                                                  Hi Bert, you can see one of the batteries 4 pictures up from here.  The batts are NiMh. 7.2volts/5000mA/hr. I use the same type of drive battery in my other boats (only have 3 boats). Thus I only have one type of battery to charge. And any battery can be used in any boat.

                                                  I am using 4 of these paralleled in pairs so should give 7.2v and 10,000 mA/hrs to each motor. I don’t know exactly how long they will power the tug but should be OK if operated at a scale-ish speed.

                                                  Receiver has it’s own battery. 4.8v 3300mA/hr.

                                                  George


                                                  #125138
                                                  Ray Wood 3
                                                  Participant
                                                    @raywood3

                                                    Hi George,

                                                    That is a brilliant idea for those boxes for the batteries, they are my favourite type for general use 🙂

                                                    Looking at your boat store you may need to build smaller boats ??

                                                    Best Regards from the UK

                                                    Ray

                                                    #125194
                                                    gecon
                                                    Participant
                                                      @gecon

                                                      Hi Ray,

                                                      before taking that photo I removed two small aluminium stepladders from the space between the Colin Archer trolly and the Smit Ned’ tug. Not only is there NO more space available, but the person who previously considered requests for more build space has installed soundproof walls and doors in the office. SHE has also given away the negotiating table to charity. She was going to send it to Donald Trump but recent events have shown that he does not do “negotiate” either.🤐

                                                      Smit Ned is the very last project. In future I will focus on charging batteries and taking an occasonal trip to the lakeside.

                                                      Launch day for the tug wiil be near Easter.

                                                      All the best,🫡

                                                      George.

                                                    Viewing 25 posts - 151 through 175 (of 205 total)
                                                    • Please log in to reply to this topic. Registering is free and easy using the links on the menu at the top of this page.

                                                    Code of conduct | Forum Help/FAQs

                                                    Advert

                                                    Latest Replies

                                                    Home Forums Building Kits Topics

                                                    Viewing 25 topics - 1 through 25 (of 25 total)
                                                    Viewing 25 topics - 1 through 25 (of 25 total)

                                                    View full reply list.

                                                    Advert

                                                    Newsletter Sign-up