Transferring from plans

Advert

Transferring from plans

Home Forums Scratch build Transferring from plans

  • This topic is empty.
Viewing 5 posts - 26 through 30 (of 30 total)
  • Author
    Posts
  • #78528
    Ray Wood 3
    Participant
      @raywood3

      Hi All,

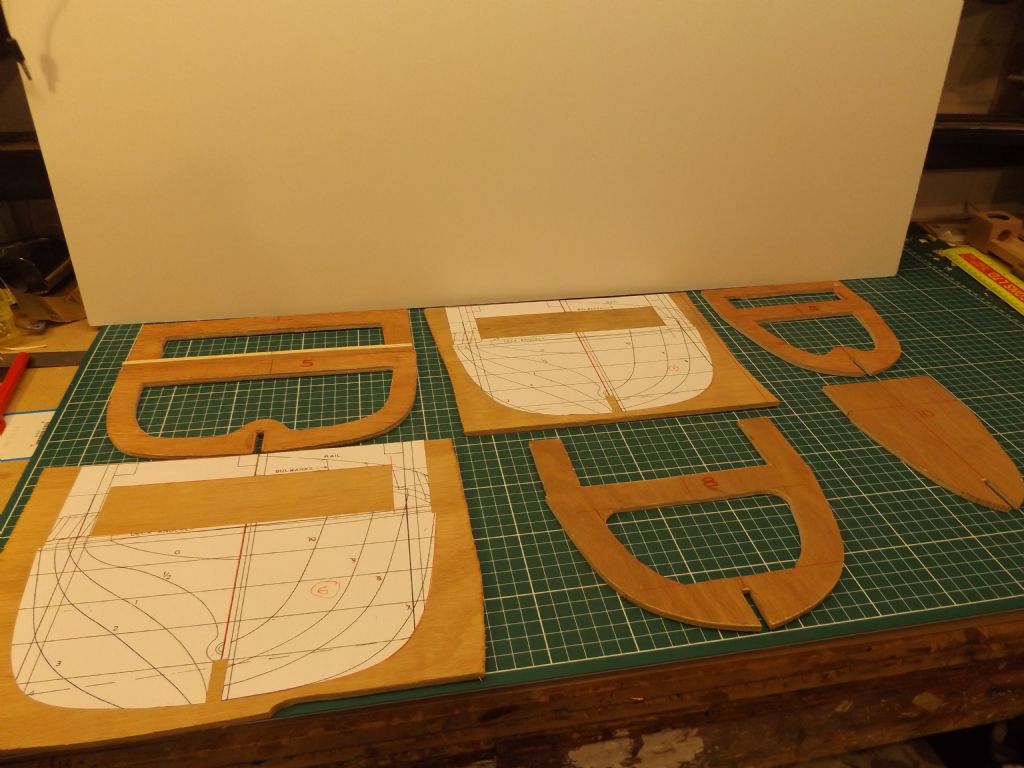
      I used to spray mount my photo copies of the bulkheads onto the ply as shown here on my Cullamix build, using 3m photo mount, but it's a devil to peel off maybe the repositionable would be better ? but @ £20 a can !!! I now mount the copies on cereal packet card and cut out a template to draw round it works for me.

      Regards Raycullamix 1.jpg

      Advert
      #78585
      Diede van Abs
      Participant
        @diedevanabs87670

        What you can do if you copy your plan using a laser printer or copier is to lay the plan down inverted on the wood and then go over it with a hot iron. If you press firmly and apply enough heat, part of the print is transferred to the wood and you end up having an accurate (if mirrored, big deal, just flip the wood after cutting) image "printed" on the wood for you to cut along. Works best with thick black lines and set the print quality to heavy / darkest to get the most toner on the paper.

        #79170
        Ian Dowlman 1
        Participant
          @iandowlman1

          Hi Diede
          Tried the hot iron as suggested when making a small glider for my grandson, but ended up with some seriously warped 2mm balsa.
          Tracing or using stuck on templtes works for me.
          Ian

          #79190
          Byron Rees…(Ron)
          Participant
            @byronrees-ron

            Hi Ian and Diede.

            The method you both suggest works very well but only really where the photocopy has been produced by a printer/copier that uses powder toner, inkjets are not as good.

            One foolproof method is to use old glossy paper from magazines to iron your photocopied pattern onto, this works extremely well. I cut these out and stick them onto artists card, which are then cut into templates for drawing around.

            I design my own models and draw plans for them for others to build from which sometimes can be found in the Model Boats magazine. When building the prototype I cut the actual wood/plastic etc till its fits then draw round the parts onto thick artists card. These templates are used to draw the plans and also can be passed on to someone else.

            There are lots of methods for transferring shapes like this but I don't stick the copied plan bits onto the wood anymore as its difficult to remove and ironing the plan part onto the actual wood can, as you say warp thin pieces of ply and balsa, and certainly will not work with depron foam etc.

            Cheers….Ron.

            PS…the glossy paper trick is especially good for producing circuit boards and can be stuck onto blank PC board. This will transfer the ink if wiped over with Nail Varnish remover (Acetone). This can then be etched using Ferric Chloride as the toner ink is a resist. Works well. RR.

            #79195
            Diede van Abs
            Participant
              @diedevanabs87670

              Hi Ron and Ian,

              I only really tried the iron transfer method on ply and there it works sort-of okay (I used it to label my transport cases), I can see where it doesn't work on balsa and especially on thin balsa. My guess would be that it is too soft for this method anyways, and the heat being applied on one side doesn't help either.

              Truth be told, my method to date for build plans, has been to print out the plans (or copy them) and use spray adhesive to stick it to the balsa. Then cut out with a knife, and remove the paper ASAP again. (if you wait too long, the paper sticks too badly to the wood and you end up having to sand which is a pain with the glue and all). Most spray adhesives have two ways of applying: spray both sides, wait 10 minutes for a pernanent bond, or only spray one side (the paper!), wait 20 minutes and then stick, which gives you a sticky notes-like bond – if you remove it within a couple of days…

              That, or stick the (copies of…) plans to a thick piece of cardboard and use that as a cutting template.


              P.S. to create nice labels/texts/pictures on transport cases I found a way that works somewhat better than the heat transfer method: Use water-based Polyurethane clear coat to stick the image (printed side down) to the case, let it dry and then gently rub the paper away with plenty water and a sponge and discarded toothbrush. Then apply second coat to seal.

              Edited By Diede van Abs on 03/10/2018 15:18:20

            Viewing 5 posts - 26 through 30 (of 30 total)
            • Please log in to reply to this topic. Registering is free and easy using the links on the menu at the top of this page.

            Code of conduct | Forum Help/FAQs

            Advert

            Latest Replies

            Home Forums Scratch build Topics

            Viewing 25 topics - 1 through 25 (of 25 total)
            Viewing 25 topics - 1 through 25 (of 25 total)

            View full reply list.

            Advert

            Newsletter Sign-up