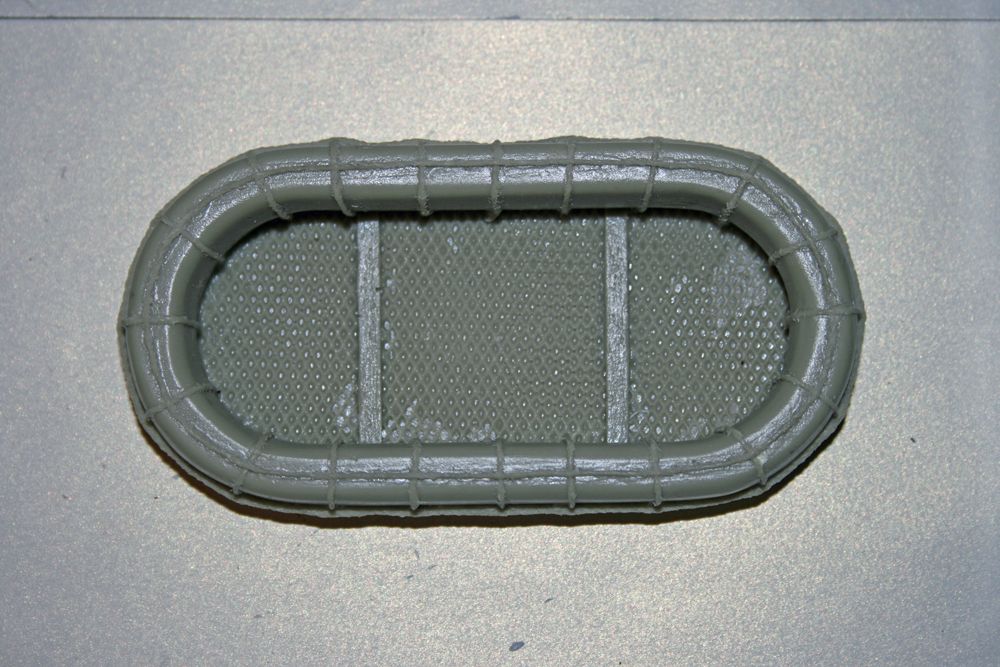
The lighting for the lower superstructure & main deck escape scuttles / companionways has now been completed. The 12v grain of wheat bulbs attached to the underside of the lower superstructure were seen in previous photos, and were fairly straightforward. However, I had made things difficult for myself with regards to the main deck lighting by not installing the wiring at an earlier stage!
I made a wiring loom consisting of 1) a connector to join to the electronics tray, 2) a single bulb for the rear deck, and 3) three bulbs for the front section of the main deck. The bulb and its wiring at the rear was easy to fit due to its proximity to the main opening in the deck, but the front three needed some head scratching!. I ended up using a strip of 1/4 inch square section hardwood to which I attached the front part of the wiring loom (with black electrical tape), with the three separate bulbs correctly spaced to line up with the three holes I had drilled through the deck at an earlier stage. I then slid the wood strip / wiring through the deck opening into the gap between the top of the batteries and the underside of the deck, and ‘fished’ the bulbs through the holes using a piece of thin brass rod with the end bent into a hook.
It would have been better if I’d remembered to take a photo of all this before fitting it – but I did take one of a bulb poking through its hole, and secured with a small piece of plywood which had a central hole drilled into it, then slotted from the hole to one side, allowing the wires to be fed through:
Although fiddly, at least the bulbs can be prized from their holes, and the wood strip / wiring removed if needed.
The companionways etc were then attached with a little superglue, and job done! The next pics taken in dusky conditions show some of the lights (which are turned on / off from the transmitter):
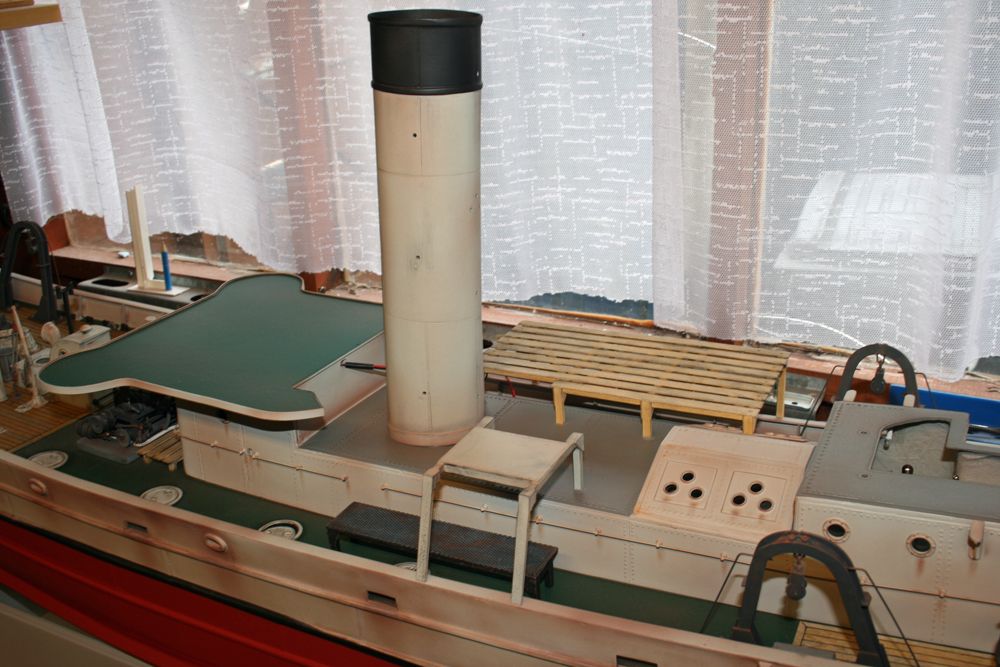
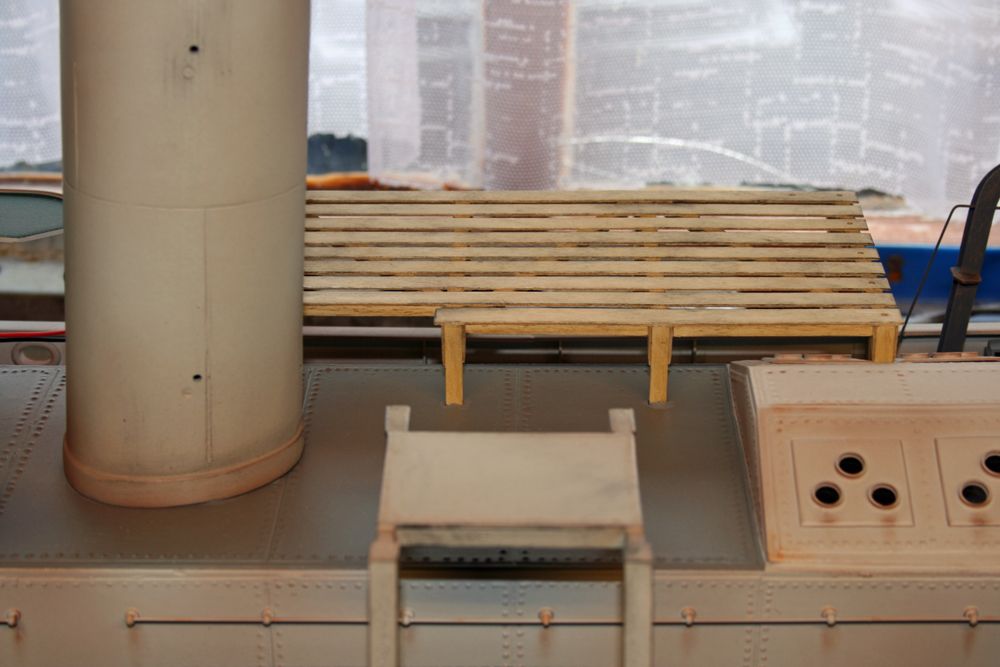
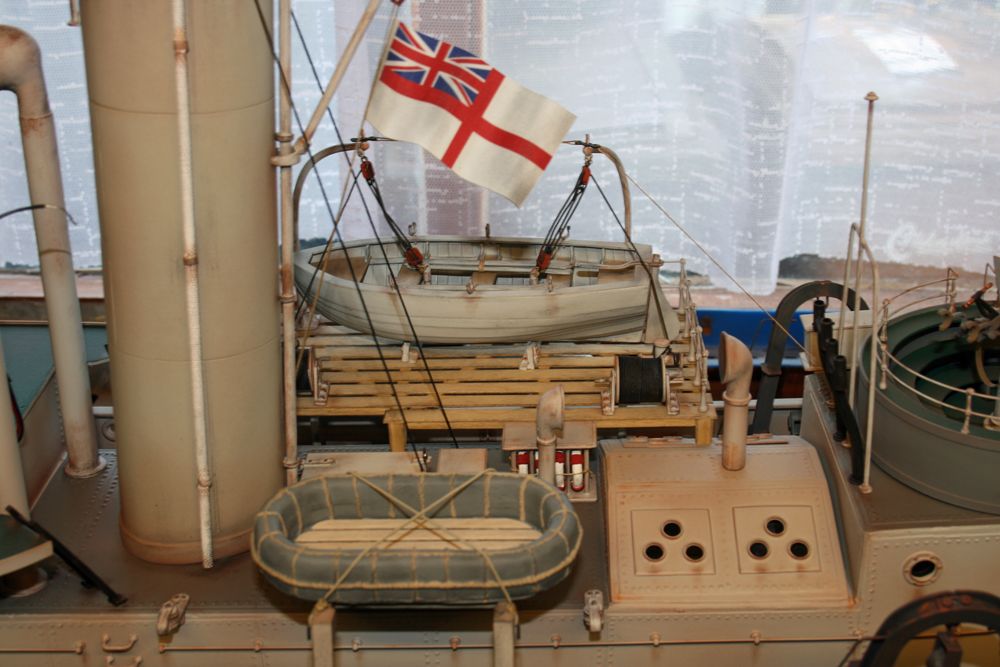
I’ve also finished the funnel detailling, consisting of a small mast at the front, a vent pipe at the rear, a lagged pipe up the port side for the steam whistle, and the flag:
I haven’t taken a separate photo of the white metal components for the funnel as there weren’t that many – four mounting brackets for the mast, three for the lagged pipe, three for the rear vent, plus the flag mast mount and the steam whistle. There’s also several small rope-attachment rings for the funnel support guides.
The next photo is a section of the lagged pipe, with the steam whistle on top:
I started by dry-fitting the three mounts into holes I had drilled at a previous stage, and inserting the core of the pipe which is made from 2.2mm brass rod. Thick superglue was then applied to the rod where it passed through the mounts, and was left to dry.
The rod / mounts assembly was then pulled off the funnel so that I could wrap around the lagging (made from the same 1.5mm ‘rope’ used for the winches on the fore and rear decks) inbetween the mounts and the whistle I had glued to the top. Thick superglue was applied down the length of the brass rod prior to wrapping around the lagging. When dry, I sprayed the whole assembly with grey primer, and then painted the lagging by hand with matt white Humbrol enamel, and the other components in their various colours. Weathering was finally added to complete the assembly, which was then glued to the funnel.
The next pic shows the flag, its mast, and other attachments:
The rear vent is 4mm alloy tube, the flag mast base is a white metal item (as is the pulley), the mast itself I used plastic tube, and the mast capping was cut from 0.5mm thick plasticard using a hole-punch. The flag mast support at the top is made from 1mm brass rod.
The flag is from BECC, and was prepared as follows:
1) Instead of applying a bead of glue around the edge as per the accompanying instructions (to stop the edge of the flag from fraying when trimmed to size), I sprayed the flag with some matt varnish mixed 50/50 with enamel thinners.
2) When virtually dry, I trimmed it to size with a sharp knife and steel rule.
3) I loosley ‘concertinered’ it up, and placed it on the bench with a lightish weight resting on it to hold it in this position (not heavy enough to squash the folds of the flag together)
4) When fully dry (next day), the weight was removed, and the flag could then be ‘teased’ out into the shape you see in the above photo.
Continued in next post . . . . . . .

Paul Godfrey
@paulgodfrey14946
. . . . . Continued from last posting:
5) The flag rope was glued in place, and the end of the flag folded over this, and glued down.
6) A liitle grubiness was added by dry-brushing, and the job was done!
The final photo for now is of the flag rope attached to the cleat on the funnel:
That’s it for now. Next will be the rear gun, and the Carly Float.
Paul.
Paul Godfrey
@paulgodfrey14946
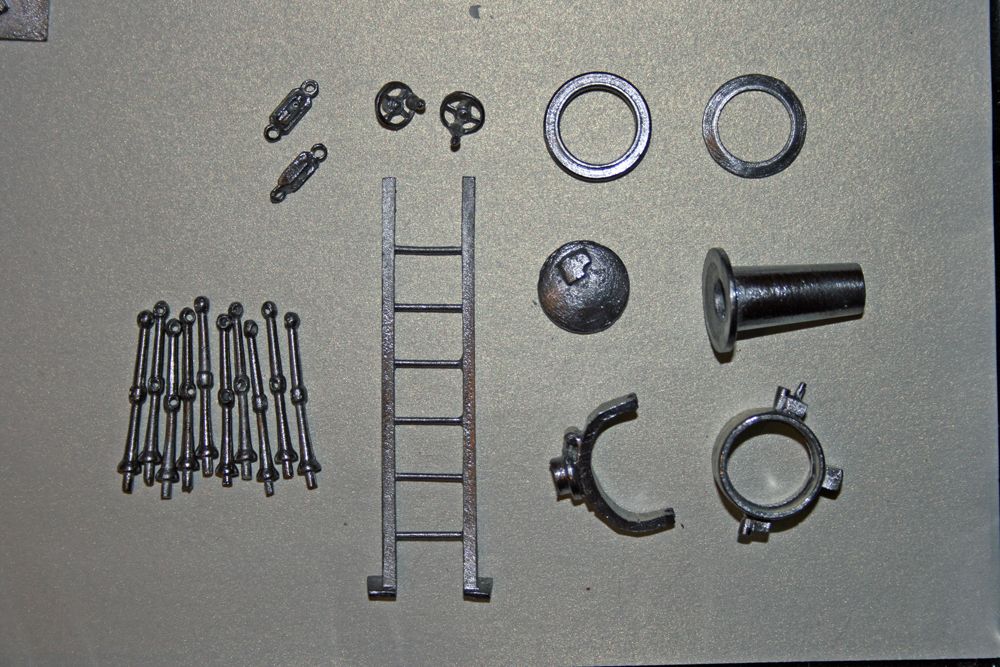
A brief update on what I’ll be doing next, with some photos of the white metal components to be used.
As mentioned in the previous posting, The Carly Float & rear (20mm Oerlikon) Gun are next on the agenda, but I’ve decided to also build the Searchlight (as the components for this were in the same bag as the funnel fittings) and complete the boat deck at the same time.
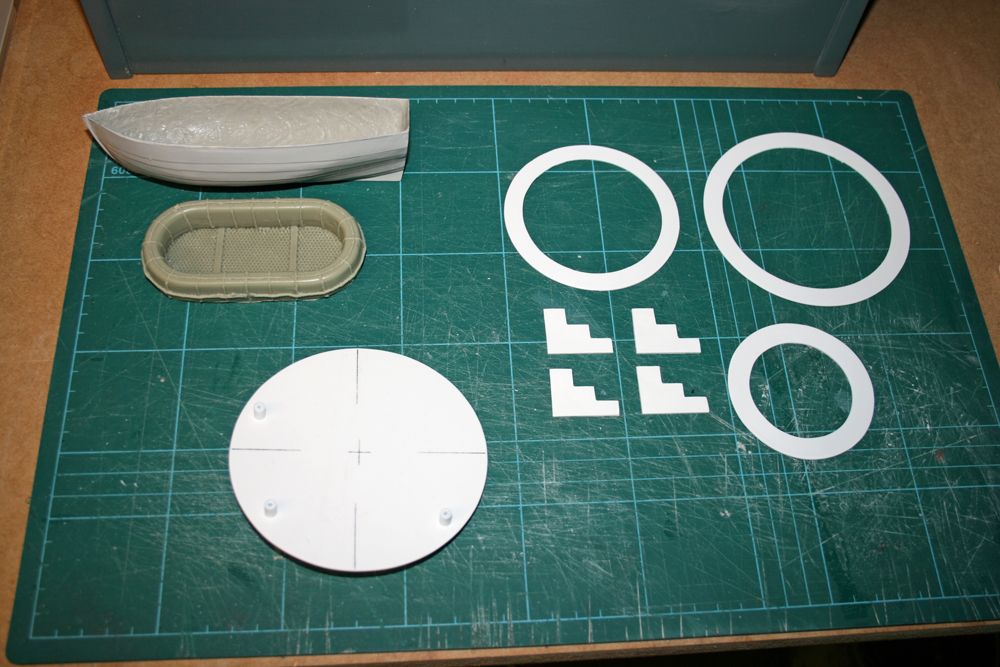
Here’s the cleaned-up metal items for the boat / boat deck, together with the fibreglass boat itself:
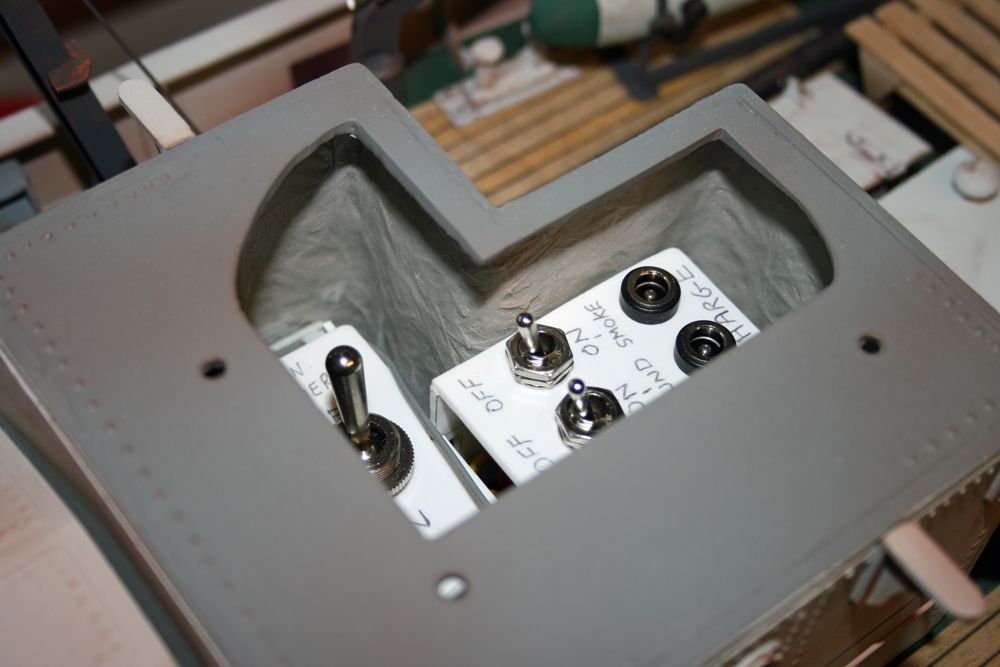
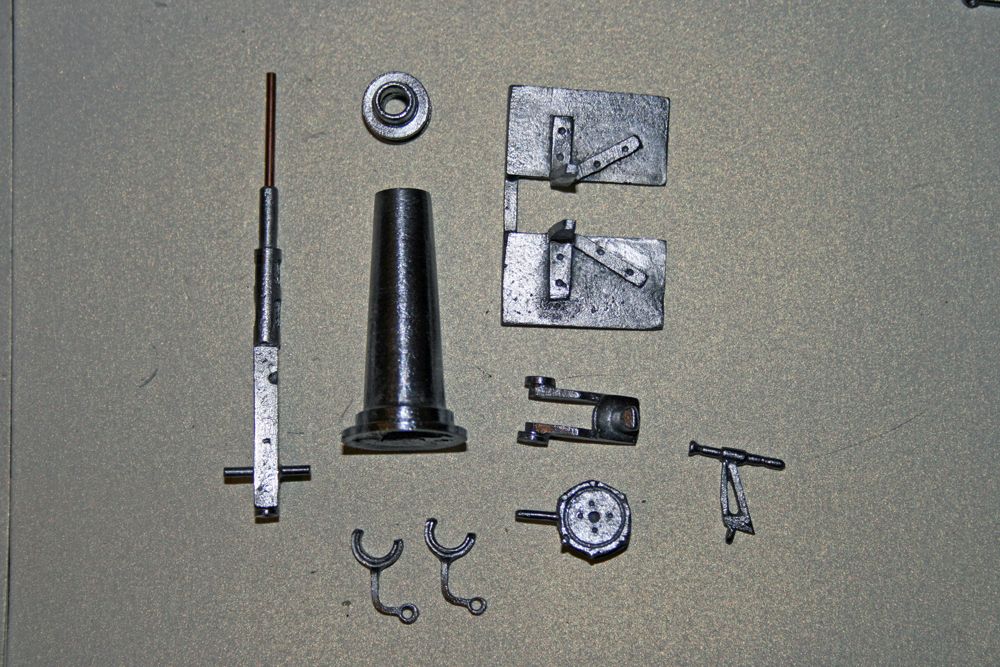
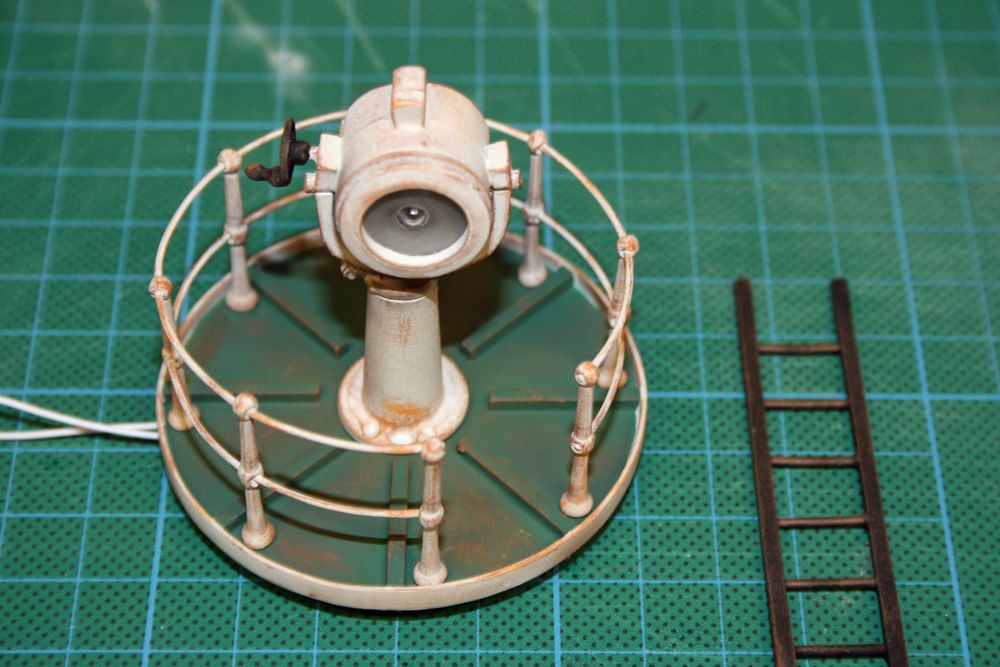
Next is the searchlight. This will have working lights fitted, so consideration needs to be given to incorporating the bulbs and wiring when it comes to building it up:
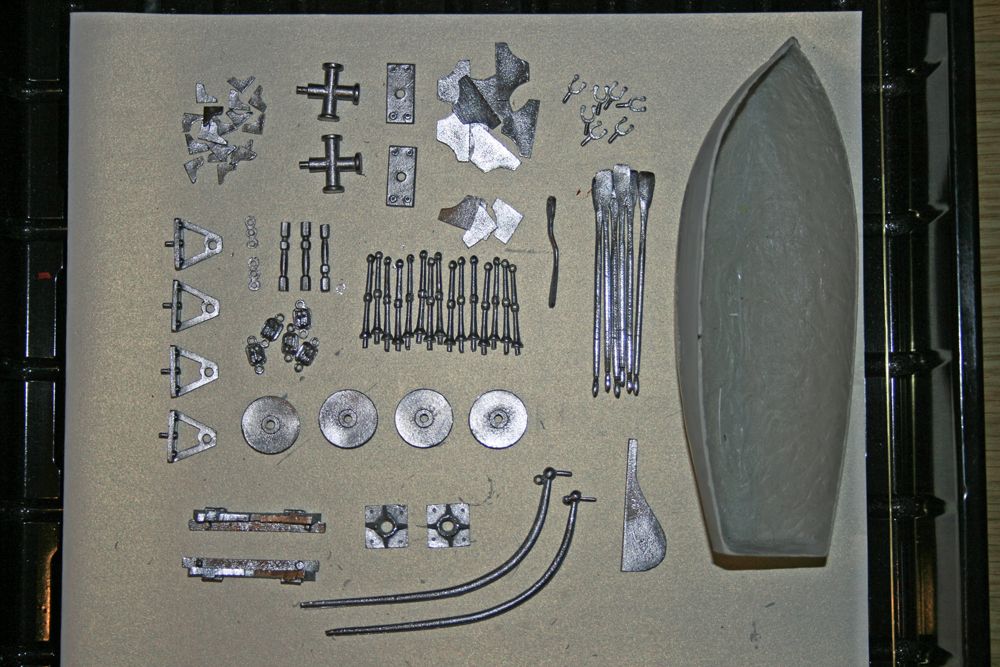
Here’s the cleaned-up rear gun components:
And finally the resin moulding for the Carly float:
Plywood is used for the flooring planks in the Carly float, the thwarts and top capping for the boat, and the searchlight base (constructed with triangular support ribs underneath and a plywood edging as per the forward gun platform).
As I’m building the above assemblies simultaneously, progress should hopefully be fairly quick – more updates to follow over the next few weeks.
Paul.
Paul Godfrey
@paulgodfrey14946
The first of two updates this evening on recent progress (can’t seem to fit everything into a single posting due to the amount of info/photos I usually include!).
The searchlight, Carly Float, boat & boat deck, and rear gun have all now been completed. This post will concentrate on the searchlight & rear gun.
The first photo shows the searchlight mounted on its platform:
Construction of the platform follows the same method as used for the front gun platform, ie plywood disc with a thin plywood strip around the edge, with supports underneath, and wooden ‘treads’ on the upper surface. The white metal components seen in the previous posting fitted together nicely, but prior to construction, holes were drilled in the light housing and the ‘U’ shaped mounting bracket to facilitate the fitting of a working light (12v). The wires pass through these parts, down the lower main mount, and can be seen in the above photo exiting beneath the platform.
The searchlight & its platform will eventually be mounted above the wheelhouse/compass deck, on a thick wooden dowel, approximately level with the tall vents in front of the funnel.
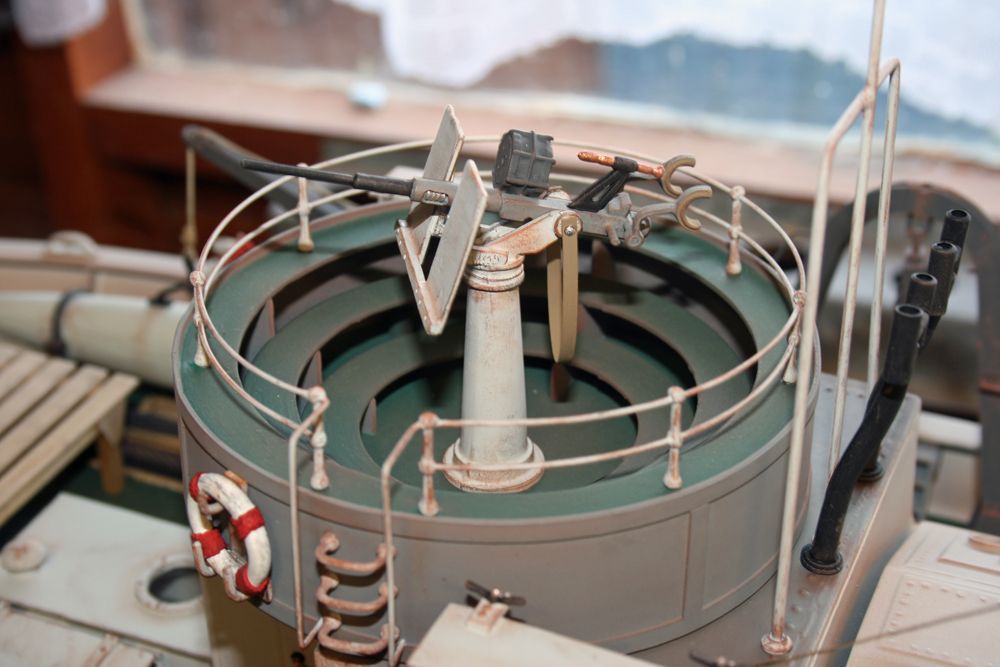
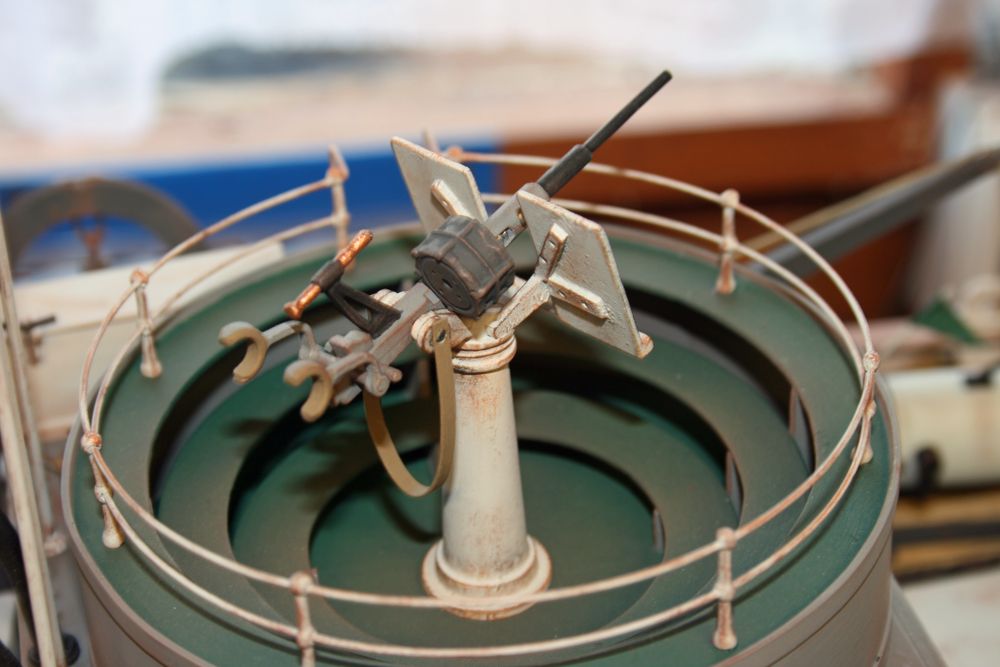
The following photos show the completed rear gun in position:
This is of white metal construction, except for the strap hanging down which was made from very thin plasticard, and the front section of the barrel which is brass wire rod.
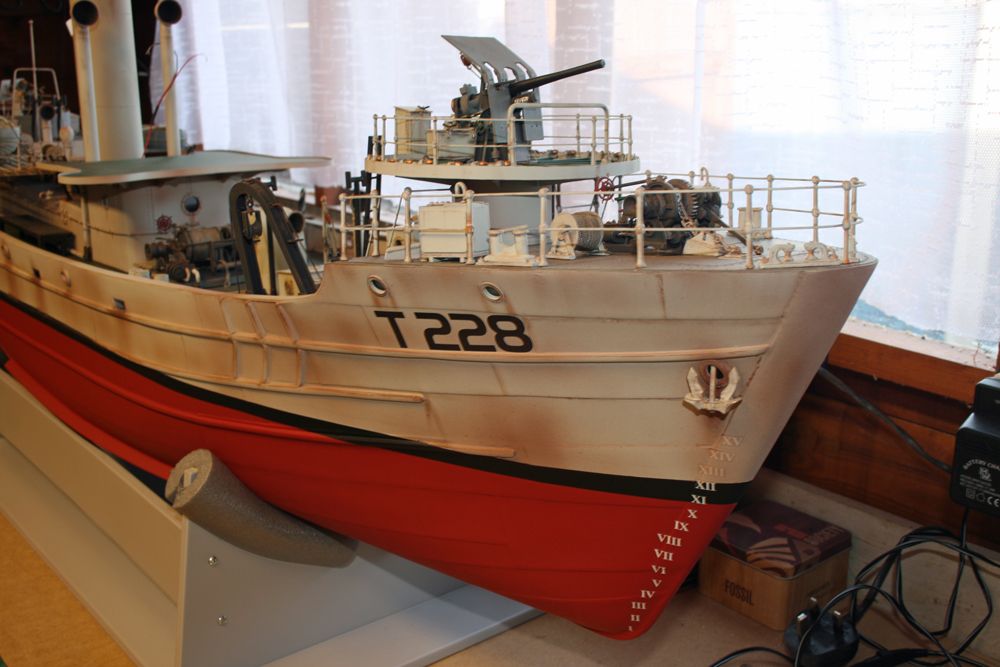
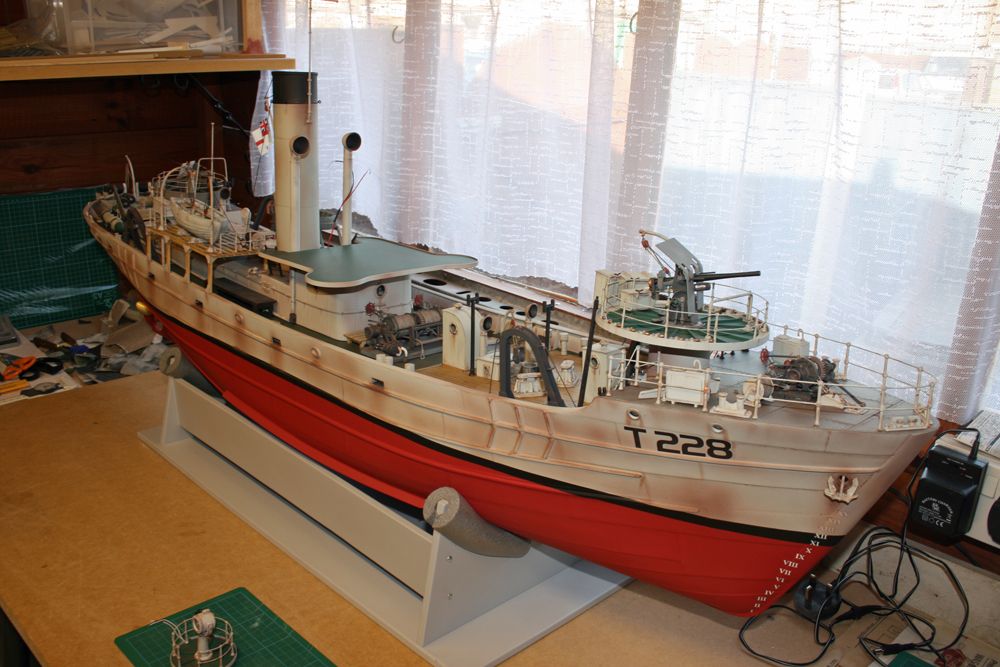
To finish off this first update today, a photo of the bow which hasn’t been photographed that much, as the boat is usually facing the other way!!
More to follow later!
Paul
Paul Godfrey
@paulgodfrey14946
Now for the boat deck & Carly Float.
The Carly Float is made from resin, and has the rope detailing moulded in, so this needs painting by hand after the float itself has been painted. The next photo shows the float on its mount, secured by ropes:
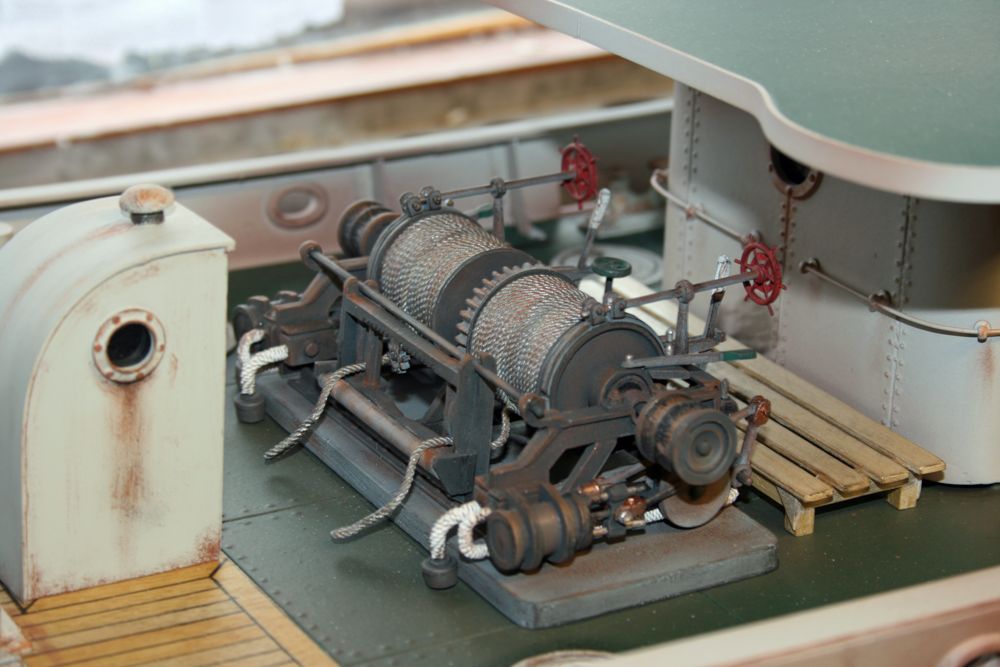
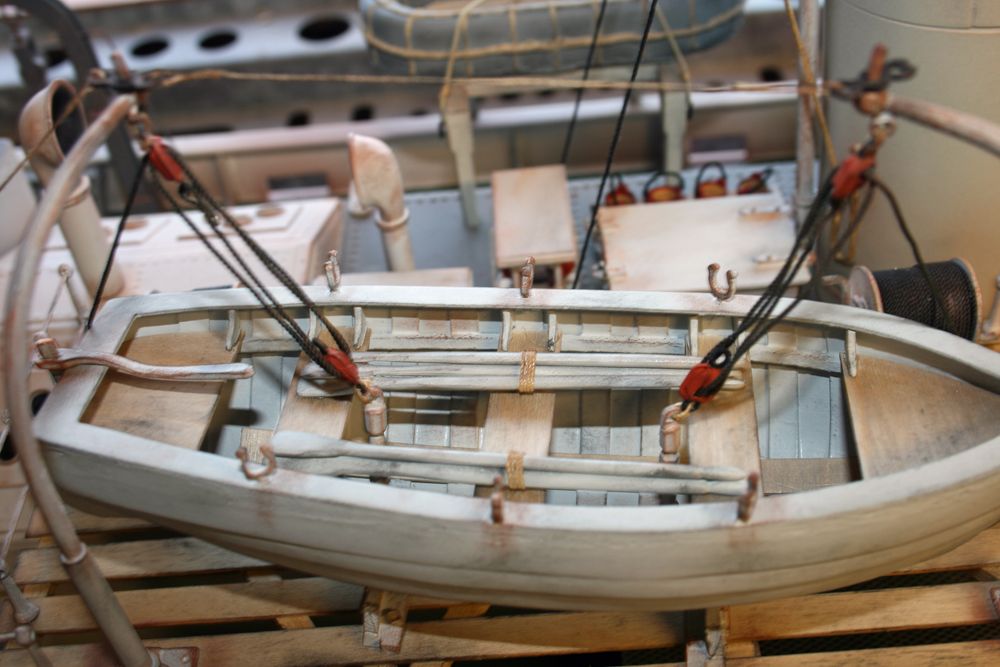
As you would have seen, the boat deck wooden structure was built previously, and the boat and other detail has now been added. This consists of the railings, winches, bollards, davits, and plating to the outer faces of the deck & supports:
The boat is very well detailed, and was built as follows:
1) The fibreglass moulding (as seen in the posting earlier this month) needed the inside smoothed out, and this was done using a couple of applications of P38, sanded after each layer.
2) A length of 2mm square section wood was glued along the inside of the boat, along the line of the keel.
3) Strips of thin card were glued end-on to the wood strip, up to the top edges of the boat. They were evenly spaced from bow to stern, taking into account the positions of the seats and rowlocks, which all needed to line up.
4) further strips of the 2mm square section wood were glued on top of the card strips, from bow to stern, one each side of the boat around 10mm from the top edges – these are the supports for the seats etc.
5) At this stage, the entire inside of the boat was painted light grey.
6) The wooden floorboards, seats, bow and stern pieces were cut to size and fitted, followed by the ‘knees’ which were painted grey.
7) The capping around the top edge was made up (by drawing around the upside-down boat onto the thin ply), and was blended in using model filler. This, and the outside of the boat, was then painted grey.
8) Holes were drilled into the capping piece for the rowlocks, to line up with the seats.
9) The rudder, tiller arm, and oars were the fitted, followed by some weathering.
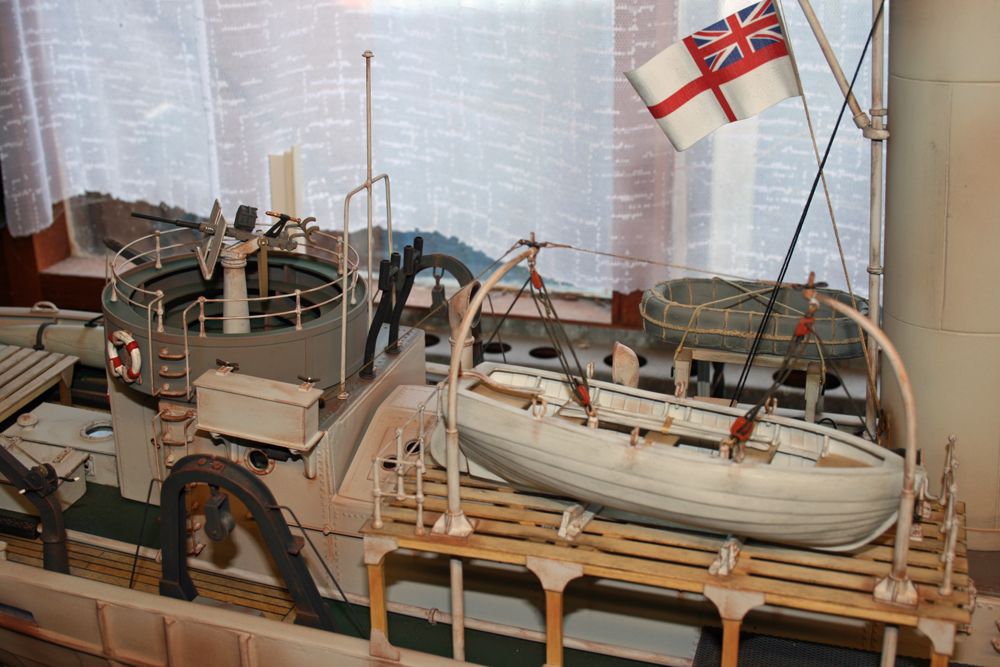
The following photo shows this in more detail:
This also shows the davits, blocks and associated rope.
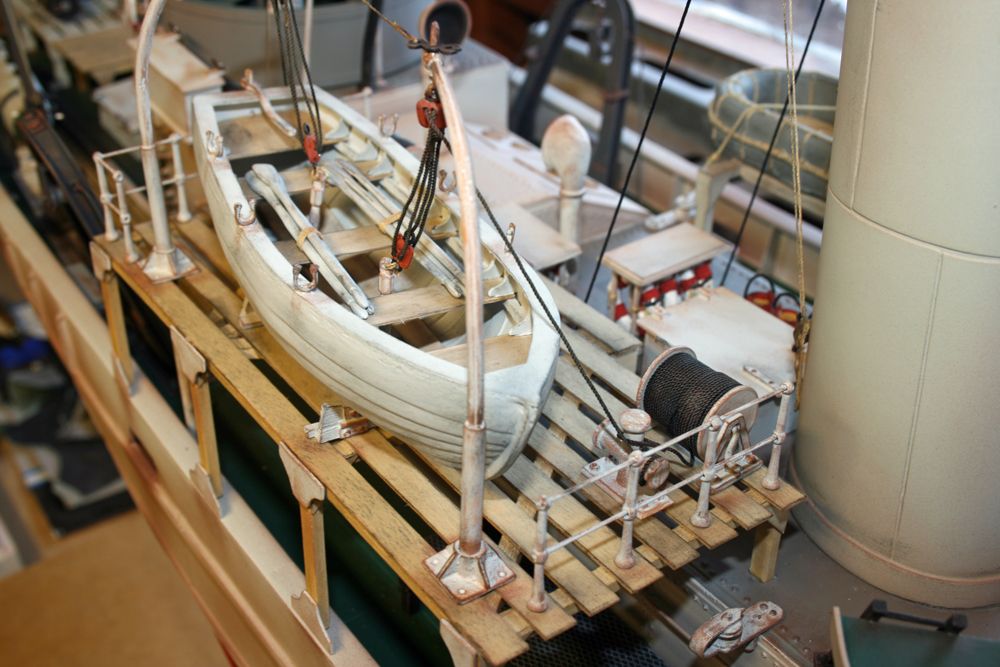
The final photo is the boat as she is to date:
The next stage is the wheelhouse and compass deck, which will then only leave the mast, some odds and ends including the supports to the four gallows, and of course the crew! (I won’t use the five white metal crew included, but will instead buy some of the ‘Wee Friends’ resin figures, as these are of course lighter, and the detail is superb.
Thats it for now,
Paul.

Wallace Manning
@wallacemanning93491
Hello Paul once again what can I say it is really coming together now and looking fab how time flys as you know I have been at mine now for 28 mths.Oh nearly forgot had it in my fish pond over the w/e to try and ballast it up wow it takes alot have had to go and buy some lead pettets online put the photos on line and she weights a ton.
Just keep the good work going.
wallace
Wallace Manning
@wallacemanning93491
Robin its around 56lb in weight I think
wallace
Paul Godfrey
@paulgodfrey14946
Thanks Wallace & Robin,
Thank god it doesn’t weigh a ton, otherwise my workbench would be a pile of matchwood!! Even at 50+ lbs, I’m getting nervous at the thought of transporting it, especially when it’s very easy to damage! (Robin, I may well ask you for some guidance on building a box to keep/transport it in

).
I am very pleased with recent progress except the angle of the ropes between the davits and the small boat – I had fixed the brackets to which the ropes attach inside the boat too near the centre, creating the angle when instead they should be roughly vertical. I knew that I would not be happy until rectified, so with much fiddling about and some modification, the brackets were not only moved towards the ends of the boat, but were also strengthened at the base as well (they would have been easily broken off).
The ropes/blocks are now vertical, and I’m much happier. No more photos taken as yet, but future postings will show what I know is a vast improvement.
Wallace – I’ve now seen your boat in the fishpond, and it’s looking great. Hope there wasn’t any leaks!
Robin, hope to see you Sunday week for the competition, maybe this Sunday as well. Oh, and by the way, my next boat is on order. Remember the Warwick show . . . . . .
Regards,
Paul.

Robin Lee
@robinlee31938
Wallace and Paul – 56 lb! – you will have to start working out at the Gym before tackling that. Problem is not so much the vertical lift but the leaning into the back of a car in order to extract it.

Box – this will add to the weight of course. I wonder if anybody else has ideas about how to handle large models!
Paul – ah yes, PF’s number one rule – if you have made a mistake or something has not turned out right, do not bodge it, start again.
Yes also looking forward to the first regatta having not sailed since October (Ok a short sail after the work party last weekend).
Regards
robin
Wallace Manning
@wallacemanning93491
Paul and Robin — yea its a very heavy ship got told off last week by my girls for lifing it into my pond I use cambelts to lift in/out of the water and it was heavy and that was without thesuperstrut on ,
Its just about fits into the car with all the seats down.
Paul you are like myself if you dont like it re-do it I have done that alot during my build its nearly done around 95% will take it to club show next week but not sailing.
Keep the good work going. wallace


 Colin Bishop
in: All things floating
Colin Bishop
in: All things floating
 Tony Hadley
Keith Long in: Scratch build
 Chris Fellows
in: Build Blogs
Chris Fellows
in: Build Blogs
Bob Abell 2 in: Scratch build
Tim Cooper in: Build Blogs
 Dave Reed
 Paul T
in: Scratch build
Paul T
in: Scratch build
 John W E
 Ray Wood 3
in: Scratch build
Ray Wood 3
in: Scratch build
 Richard Simpson
 mick east
in: Build Blogs
mick east
in: Build Blogs
 ashley needham
in: All things floating
ashley needham
in: All things floating
harry smith 1 in: Collectors’ corner
 sammyk
in: Buy/Sell or Trade
sammyk
in: Buy/Sell or Trade
 Alasdair Allan
in: All things floating
Alasdair Allan
in: All things floating
Richard B in: Steam powered models
Len Morris 2
Bob Wilson in: Soapbox


