The world's leading magazine for all model boating interests
Sir Lancelot
Sir Lancelot
Home › Forums › Building Kits › Sir Lancelot
- This topic is empty.
-
AuthorPosts
-
1 November 2009 at 14:54 #23794
Paul Godfrey
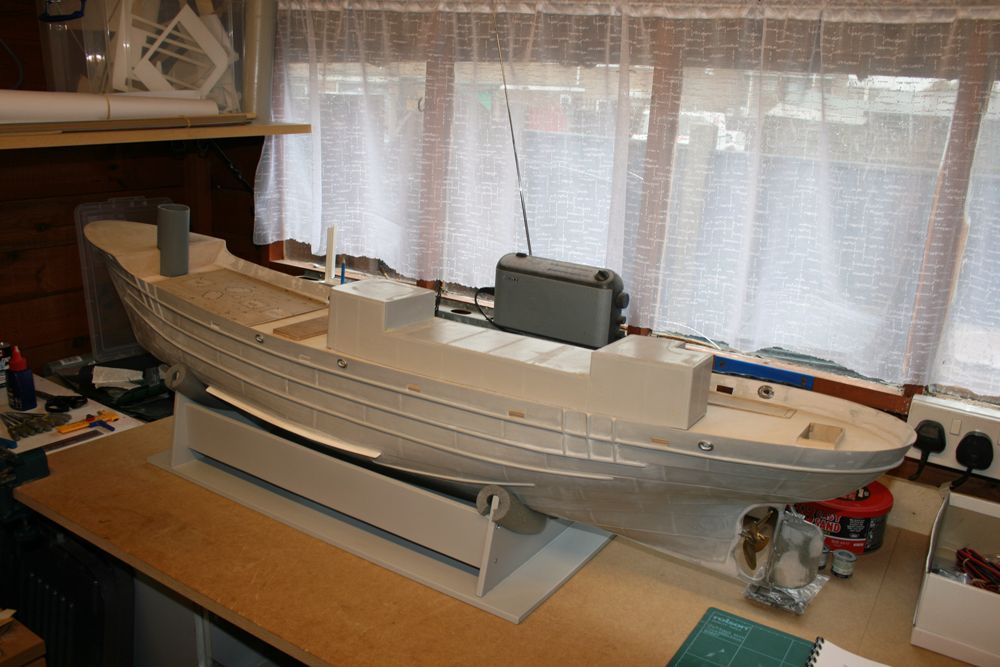
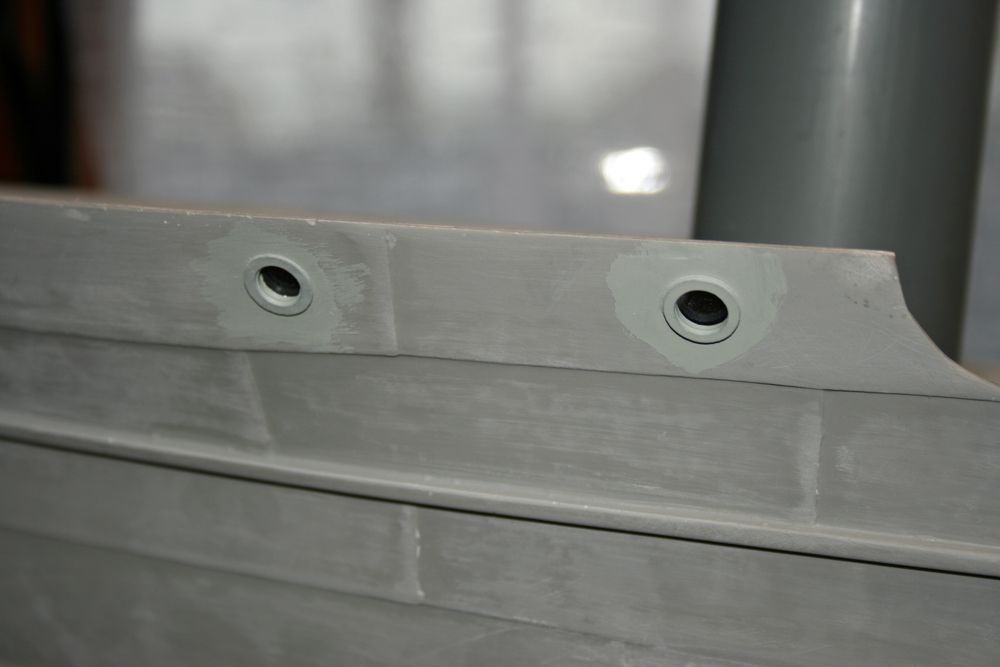
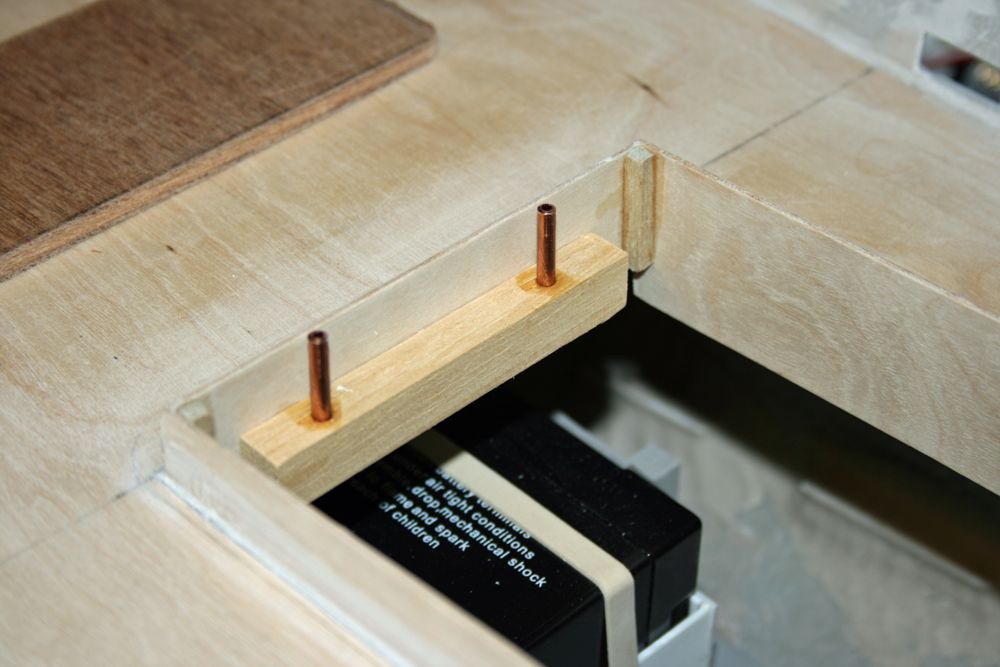
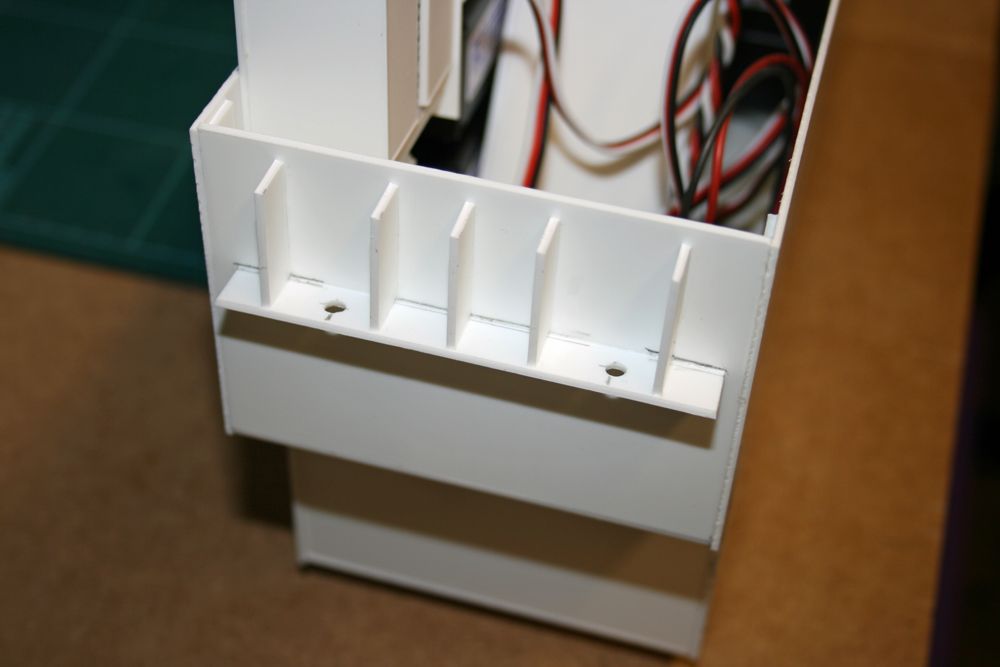
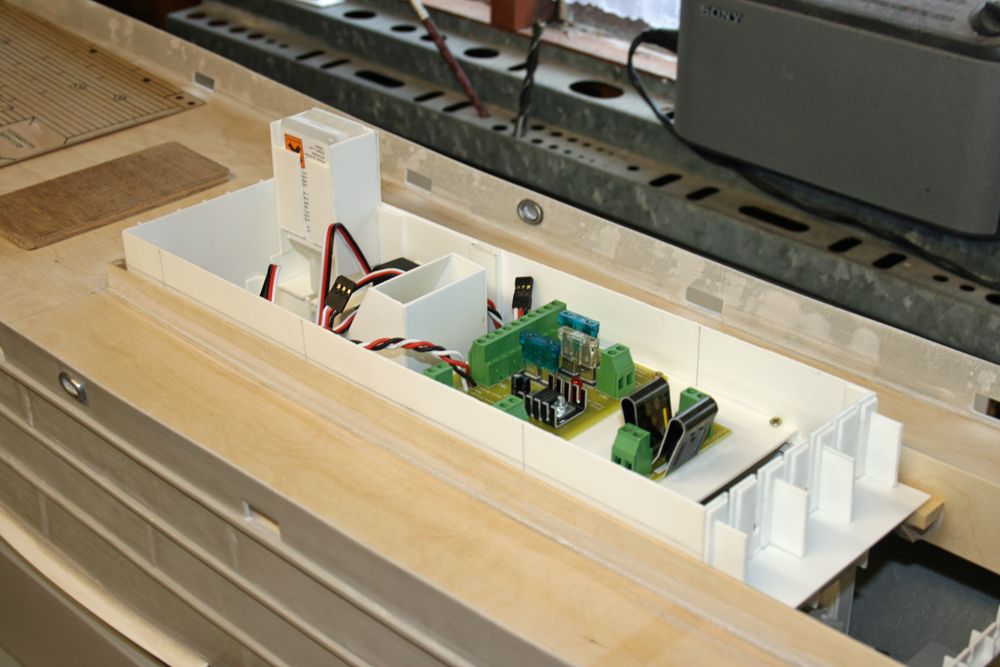
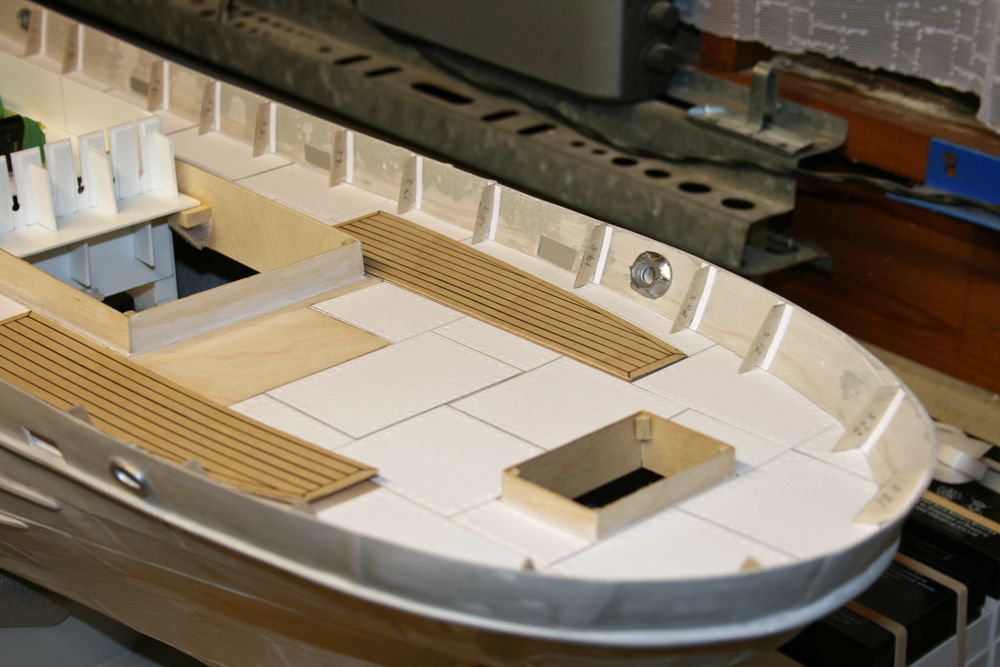
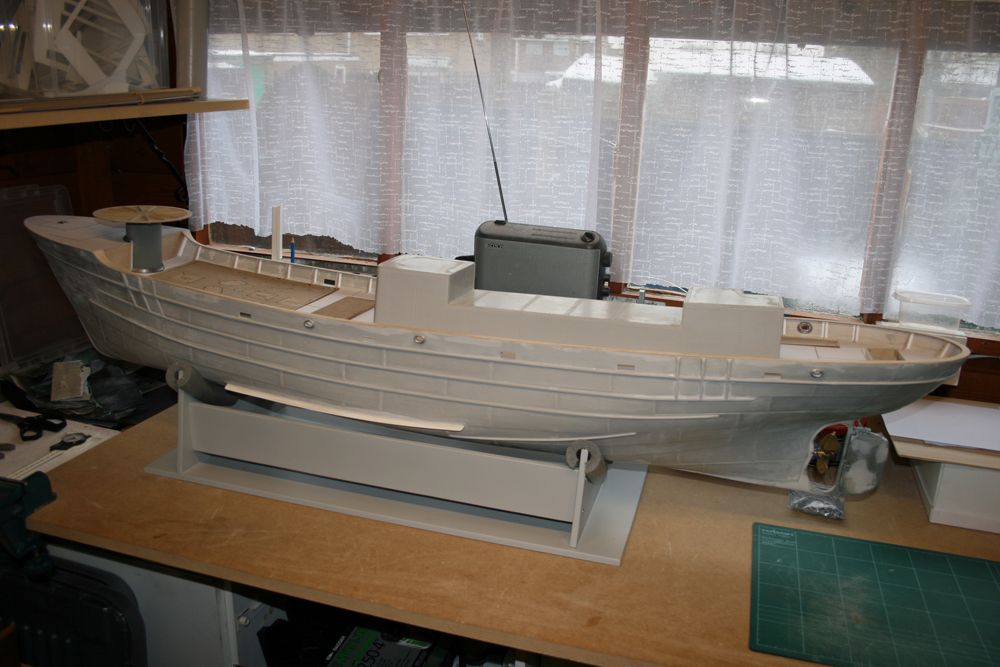
Participant@paulgodfrey14946A little more progress to report.The following photo shows the main & forward decks now fitted, with the bulkheads in place either side of what will become the front gun mounting column.Please note that both the front gun mount and the fiberglass superstructure moulding have not had any work done on them as yet.The three printed plywood deck overlays have just been rested on the main deck at this stage, so that their outlines can be drawn around, and it will be to these lines that the deck plating will be fitted (ie the overlays will eventually be glued directly onto the plywood deck surface, and not onto the plating pieces).The next pic shows the portholes fitted to the bow of the boat, which become inaccessable once the forward deck and bulkheads have been fitted. I therefore decided to paint the portholes in the eventual hull colour, fit the clear acetate behind (cut oversize & strengthened around the edges with P38) before fitting the deck. All I will need to do when painting the hull is to mask off the portholes.The next two photos show the method adopted to mount the front end of the electronics tray.And finally for this brief installment, the electronics tray in place. You can see a plasticard ‘shelf’ at the rear also, but unlike the front which has mounting holes, the rear just rests on wooden supports fitted either side.27 November 2009 at 09:42 #24234DickyD
Participant@dickydAs Barry said, thats much to neat and tidy.A really excellent job so far.Glad to see the ACTion electrics, you wont find better.Richard27 November 2009 at 17:27 #24241Paul Godfrey
Participant@paulgodfrey14946Many thanks Richard.ACTion have been extremely helpful, and I wouldn’t hesitate using them again for my next project.More photos & an update to follow in a couple of weeks.Regards, Paul.Edited By Paul Godfrey on 27/11/2009 17:28:05
5 December 2009 at 18:49 #24433Paul Godfrey
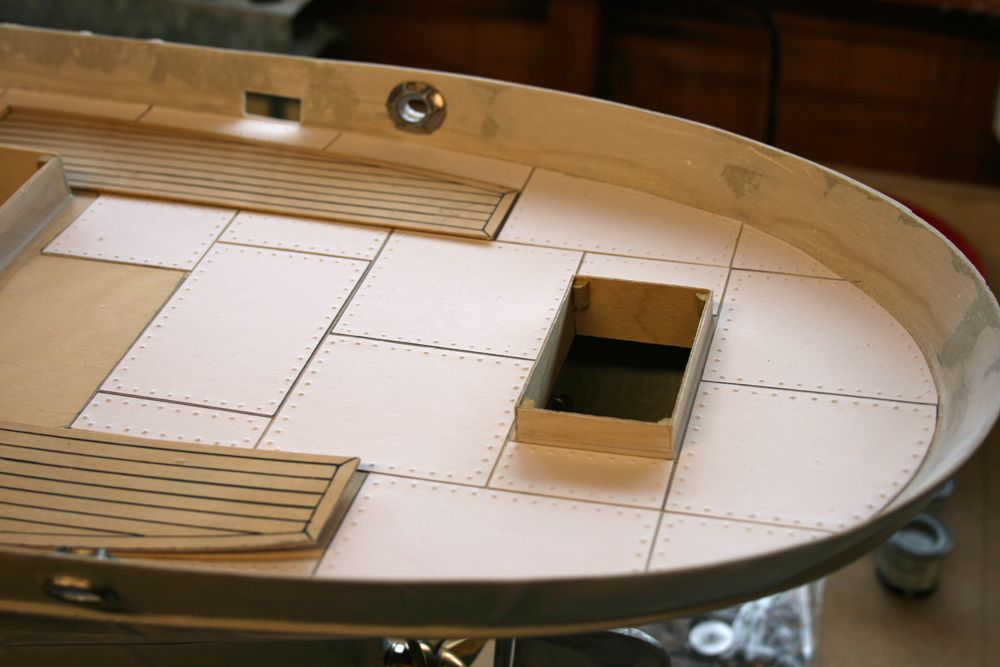
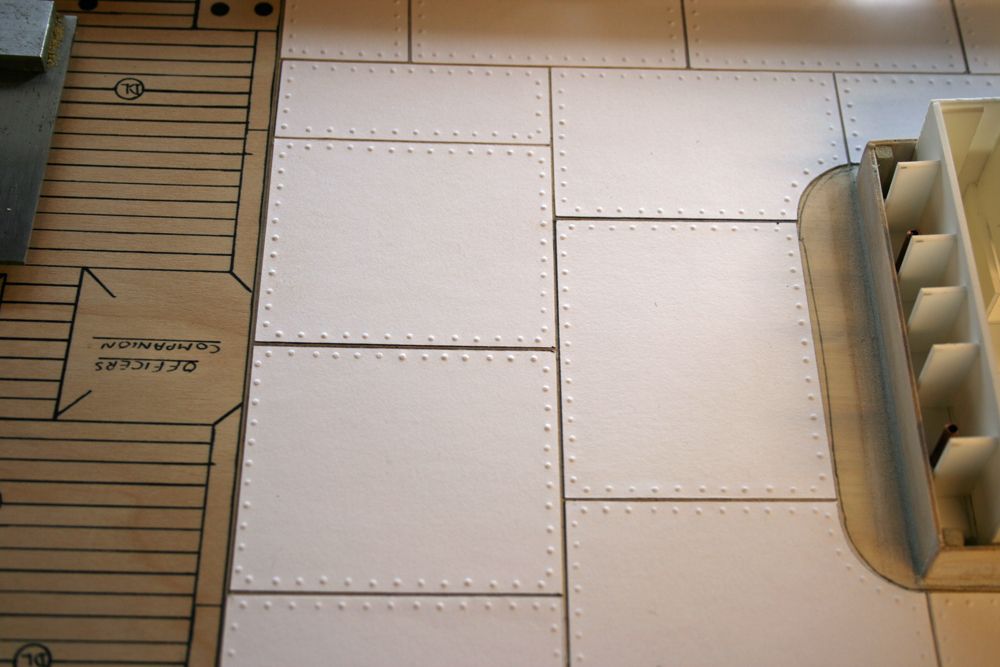
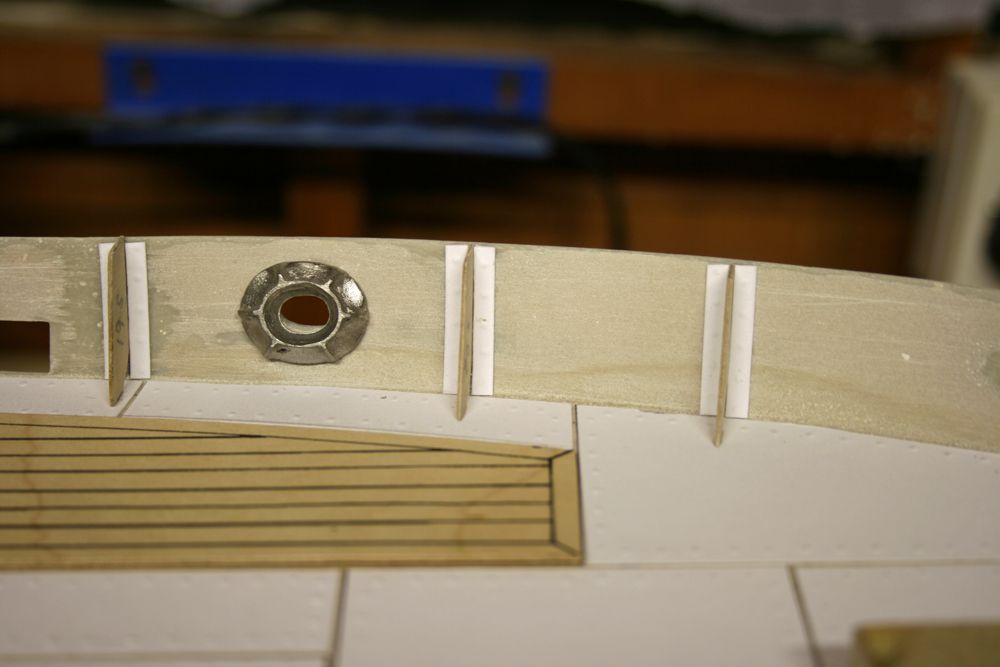
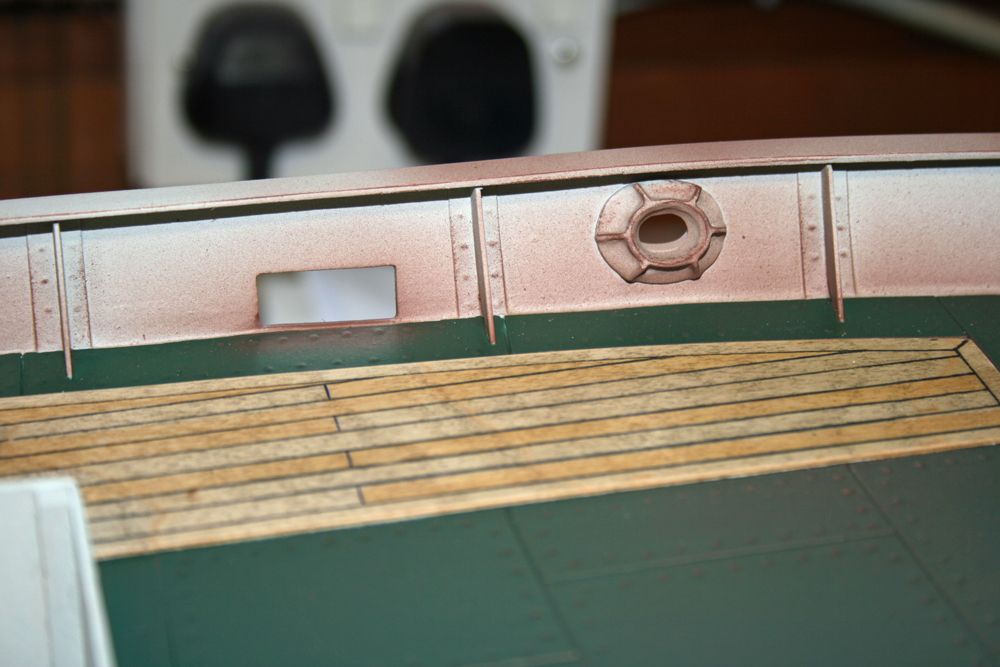
Participant@paulgodfrey14946I’ve now completed the plating of the main deck. For those of you who are unfamiliar with the recommended method (as of course I was!), this involves cutting ‘plates’ from art paper, which is included in the kit, and using something like a blunted dart to press in rivet detail from (what will become) the underside of the plates. Each plate was marked with a line about 3mm from it’s edges, and a mark made every 5mm along these lines for each rivet. The rivets were then punched in, and I estimate there are around 1500 of them! These plates are then stuck onto the deck with pva glue, and I must say look very realistic (Don’t forget to click on the photos for a closer view).Next on the agenda was the bulwark supports, and these proved somewhat tedious! Each one had to be made-to-measure from 0.8mm plywood, sealed with sanding sealer on one side first, then once dry, on the other side. After sanding with fine wet & dry, they were glued on with thick cyano.I then made the decision to fit ‘rivetted’ plates either side of the bulwark supports, made from 3mm strips of art paper in the same way as the deck plating. I do not know whether this ship had these, but I’ve seen them on other ships of a similar age, and in any case, think they will look good, so that’s good enough for me!! Each strip is 1 inch long, and as there are 46 bulwark supports, 92 are required – over 7 1/2 feet in total, with a rivet every 5mm!!Unfortunately, the rivets dont show up particularly well on the following photos due to the camera flash.Edited By Paul Godfrey on 05/12/2009 18:55:31
5 December 2009 at 21:39 #24435Peter Fitness
Participant@peterfitness34857Lovely work, Paul, those rivets are very realistic.
Peter.5 December 2009 at 22:45 #24436Paul Godfrey
Participant@paulgodfrey14946Thanks very much Peter.I’m pleased with how they’ve come out. Probably took around 10 hours of work to prepare and fit the deck ‘plates’, but certainly worth it!Regards, Paul.7 December 2009 at 09:08 #24451Andy Bailey
Participant@andybailey80218Well done , looks great keep up the good work and keep posting
 Regards Andy7 December 2009 at 20:24 #24458
Paul Godfrey
Participant@paulgodfrey14946Thanks for that Andy, much appreciated.Next post in a couple of weeks.Regards, Paul.23 December 2009 at 14:02 #24720Paul Godfrey
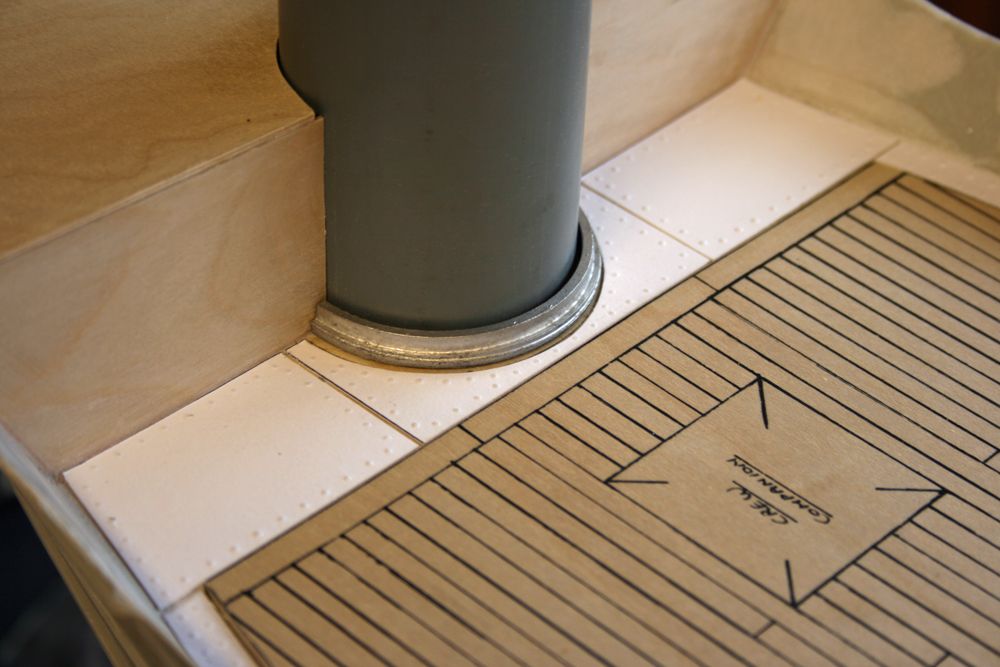
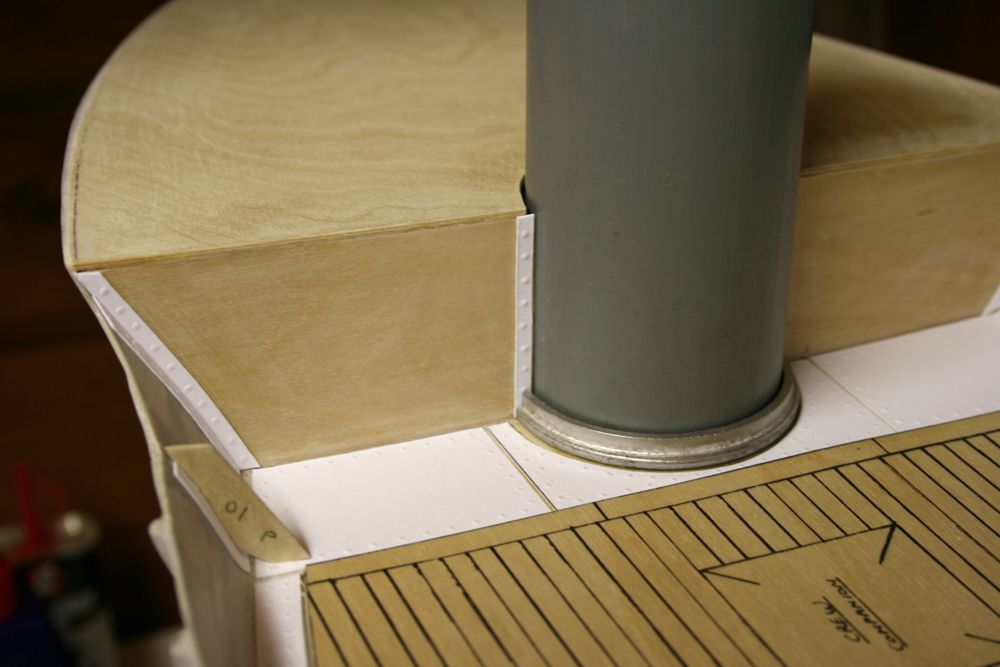
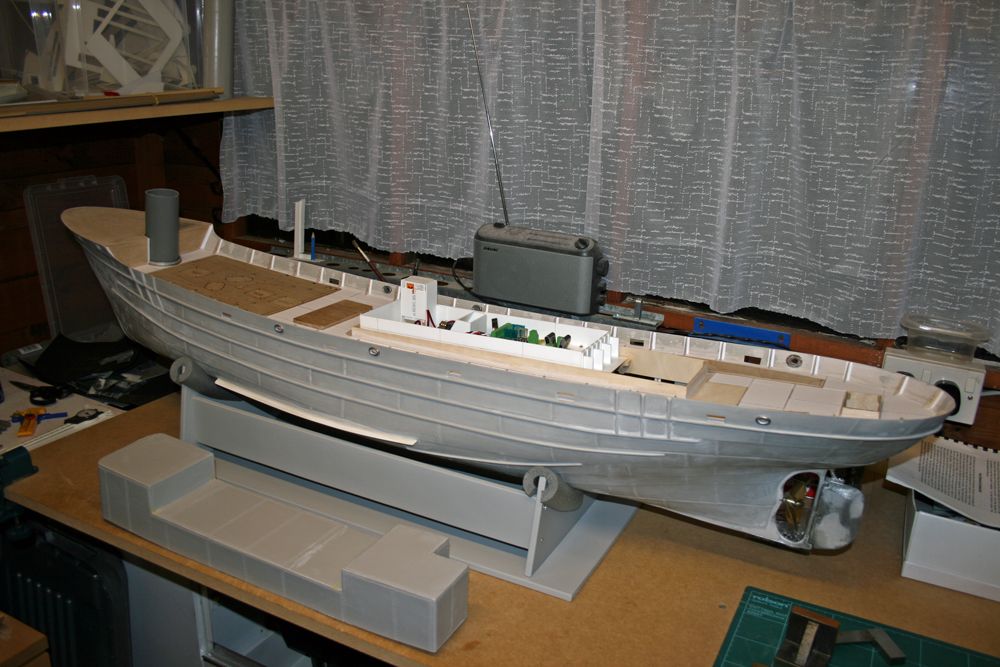
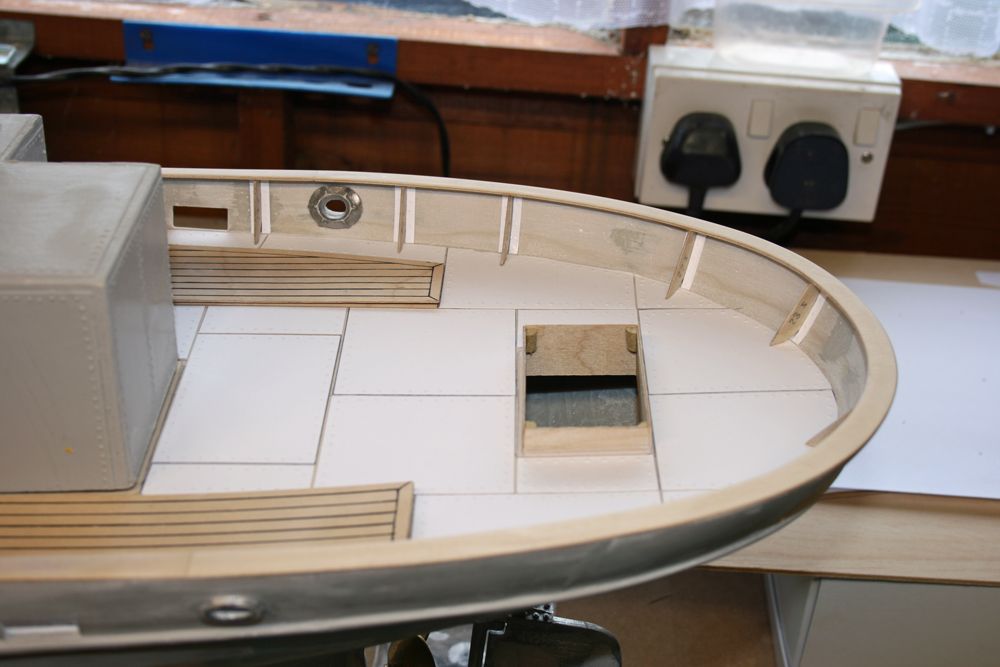
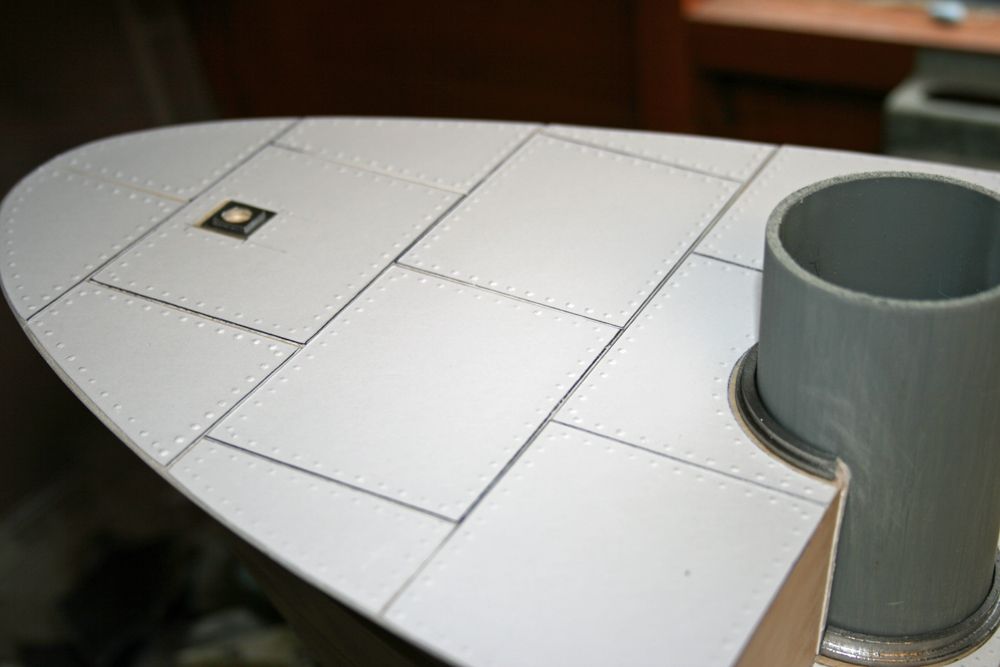
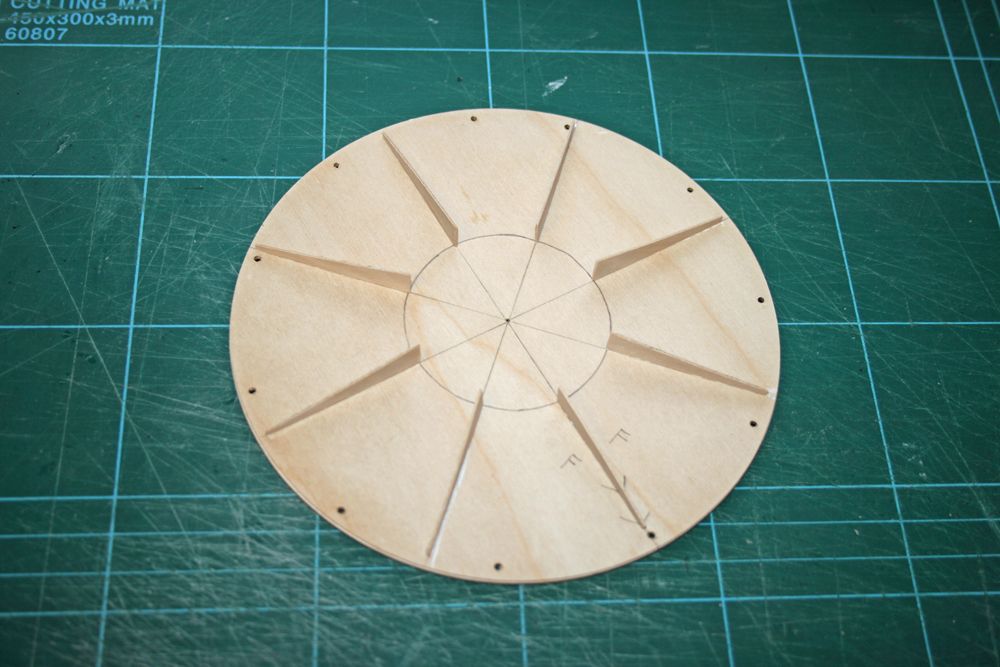
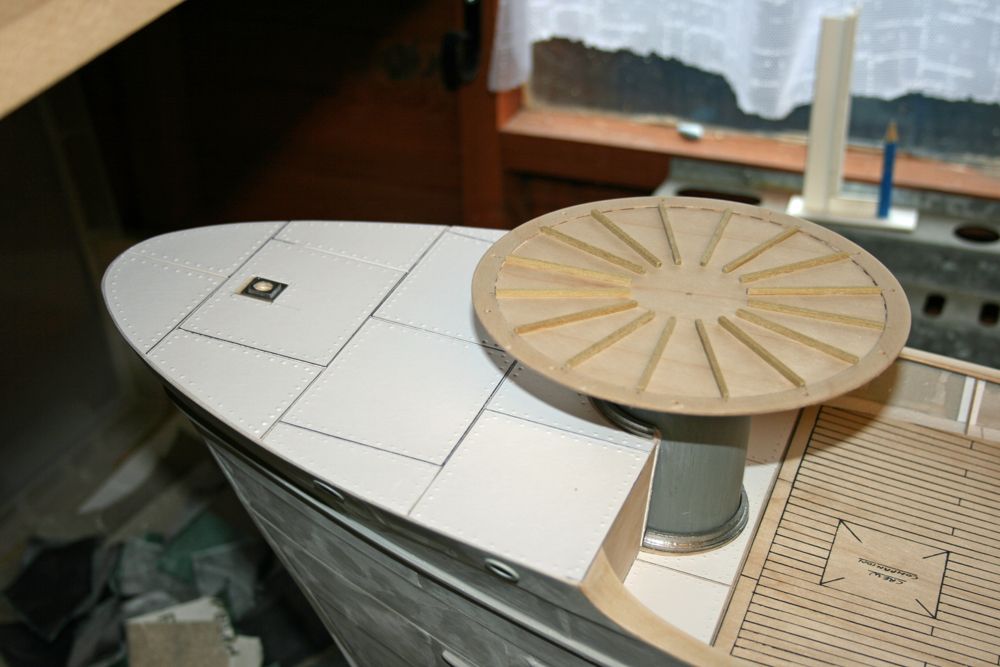
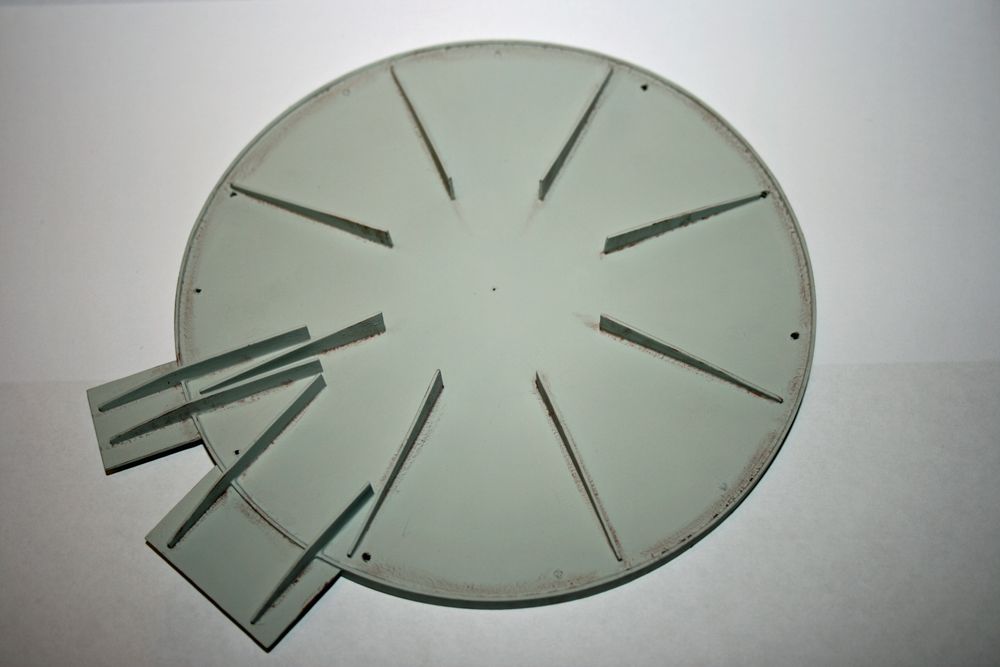
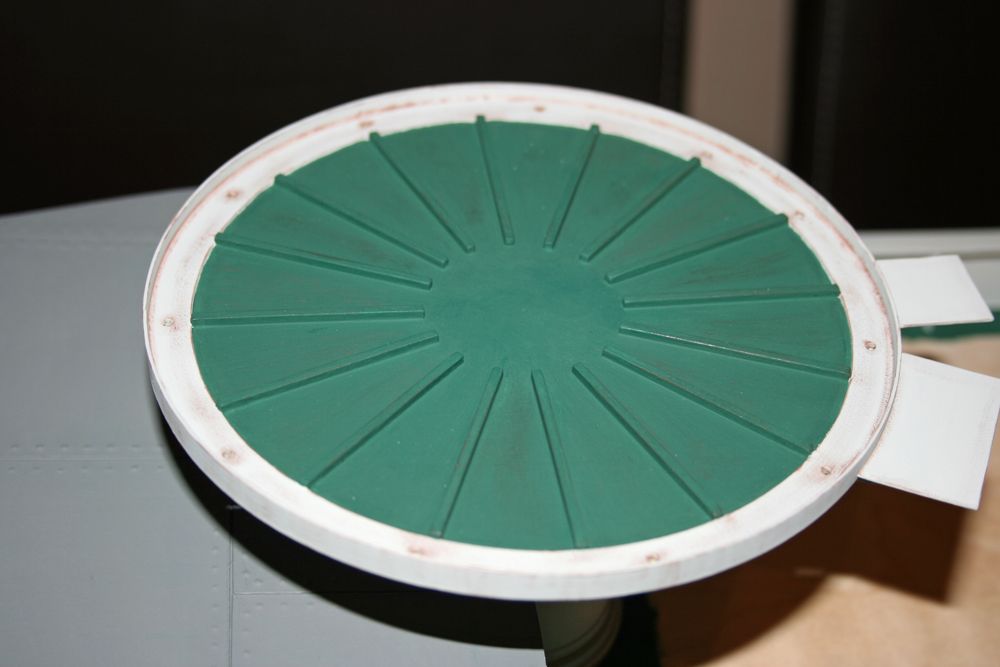
Participant@paulgodfrey14946I’ve now fitted the capping rails to the top of the bulwark and supports. The rear section is a ‘U’ shaped single piece, and one of the plywood sheets within the kit has this drawn onto it – however, before cutting it out, I measured this part, as it appeared to be wider than the hull. This turned out to be the case! (I’m watching with much interest another Sir Lancelot build on the Mayhem site, and it would appear that the builder has also encountered this problem).My solution was to place a piece of thick paper across the rear of the hull, and crease this around the edge to give me the exact profile of the capping rail section required. This was then cut out, transferred onto the ply, then the inner edge drawn to give a uniform width of 9mm. This method was also used for the capping rail pieces along the sides of the boat. The forward -most pieces, which flare out to 18mm and curve upwards sharpely, were cut across the grain to allow easier bending of these sections. The following photo shows the Rear sections of the capping rails:Once the forward capping rails had been fitted and flared into the foredeck, this deck could then be ‘plated’ using the same method as previously described:You can see that the support for the gun platform has now been trimmed to the correct size and angle – the top edge is cut at 90 degrees, and the lower edge is angled to allow for the curve of the deck. The platform will be parallel with the bottom of the boat, and will be horizontal when the boat’s in the water.I wanted to fit this support to the deck before attaching the platform to it for two reasons: 1) With the top of the tube accessible, I have been able to re-inforce the bond to the deck by pouring in some extra epoxy, to give a really strong joint,2) I will probably add some further strips of rivetted paper to where the support attaches to the white metal parts and the bulkheads, and access is much better without the platform in place.On the downside, the platform has eight support brackets which need to be fitted to the underside of it, and this would have been tricky to say the least with the platform in place. I therefore decided to fit these first, by drawing around the support tube (before it was attached to the decks) on the underside of the platform, then fitting the brackets up to this line. The following photo shows what I mean:Because the tube supplied isn’t exactly circular (this cannot be seen, except when looking at the end of the tube, and therefore once the platform is eventually fitted, this won’t matter), I marked both the support tube & platform to indicate the front, so it can be fitted in the exact same position. The next pic shows the platform placed onto the support tube ( When the time comes to fit it permenantly, a piece of lite-ply around 1/8 inch will be cut to fit inside the top of the support tube, and once bonded into position, the platform will be screwed onto it)And finally for now, an overall photo of the boat:The next plan of action will be to paint the hull & decks. I will initially hand-paint the inner bulwarks & supports, and will then spray over these and the decks, followed by the hull, with the light grey to be used for the final colour. This will act as an undercoat for the decks which will be the appropriate shade of green. The lower section of the hull will be painted the correct shade of red, then the black stripe at the waterline.All the best (& happy Christmas), Paul.23 December 2009 at 17:09 #24723Andy Bailey
Participant@andybailey80218Looking very nice Paul its getting there mate , maiden voyage new years day then ? shall look forward to that
 Great build log by the way , its sure to help others along the way Regards Andy23 December 2009 at 17:49 #24725
Robin Lee
Participant@robinlee31938Your build log is very clear and informative Paul. I like the description of your logical approach to the challenges of building a kit of this complexity. If you go on like this PF will be tapping you on the shoulder for an article for MB mag!Have a nice ChristmasRobin23 December 2009 at 19:24 #24726Paul Godfrey
Participant@paulgodfrey14946Many thanks for your comments Andy & Robin.Andy – the boat WILL be ready for it’s maiden voyage on new years day – 2012 !!I hope I’ve struck the right balance between photos and text. Although a photo can be worth a hundred words, some things (well, quite a few actually!) also need an explanation. If anything I’ve said / will say in this log helps someone, that will be great.Robin, perhaps when I build my next boat, Paul can buy the exclusive rights to my build log !!Do both have a good Christmas. Regards, Paul8 January 2010 at 19:41 #24924Wallace Manning
Participant@wallacemanning93491 Hi Paul and a happy new year
just been going over your build again you have done wonders and it looks fab,as you have been following mine on mayhem of my build of the Sir Lancelot I done the deck plating in two parts covering the whole deck and I still used art paper but I used a tool with a wheel which is on my site on mayhem which saved alot of time,i see that around the f/ward gun that you use art paper on the f/ward panel i filled and sanded mine yes I had touble with the capping rail took me two goes to get it right and I strenghen the rail by two layers of ply.Im at the stage where Im fitting the whole boat out and hoping for a spring launch maybe,Have done some of the bits again have put it on site and it looks better.Well i would like to here some conments from Andy and Robin on my build as they some two great builders.wallace8 January 2010 at 20:18 #24926
Hi Paul and a happy new year
just been going over your build again you have done wonders and it looks fab,as you have been following mine on mayhem of my build of the Sir Lancelot I done the deck plating in two parts covering the whole deck and I still used art paper but I used a tool with a wheel which is on my site on mayhem which saved alot of time,i see that around the f/ward gun that you use art paper on the f/ward panel i filled and sanded mine yes I had touble with the capping rail took me two goes to get it right and I strenghen the rail by two layers of ply.Im at the stage where Im fitting the whole boat out and hoping for a spring launch maybe,Have done some of the bits again have put it on site and it looks better.Well i would like to here some conments from Andy and Robin on my build as they some two great builders.wallace8 January 2010 at 20:18 #24926Paul Godfrey
Participant@paulgodfrey14946Thanks for your kind comments, Wallace.I think you’ll agree that there are some parts which don’t fit quite right (or perhaps it’s me!), but there are ways around these problems, and makes it more of a challenge.Your’s is coming along very nicely indeed, and I very much look forward to seeing photos of it in the water later in the year. In the meantime, I’ll keep looking at your build with interest (and wishing mine was nearing the launching stage as well!)My next posting will not be for a few more weeks, but it will be a lengthy one!All the best, and happy new year to you too.Paul.14 February 2010 at 17:14 #25602Paul Godfrey
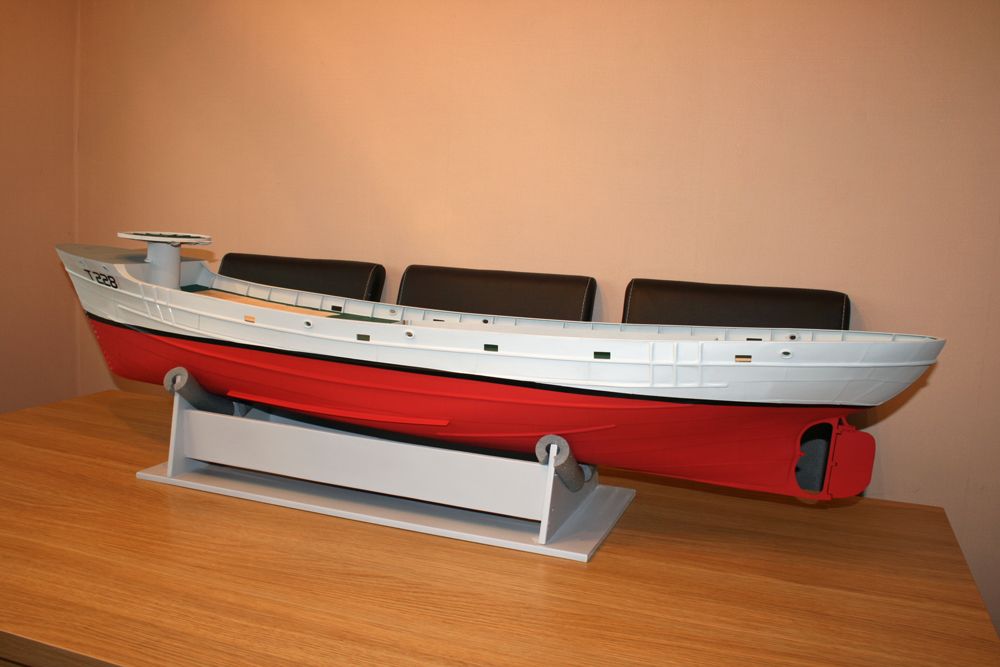
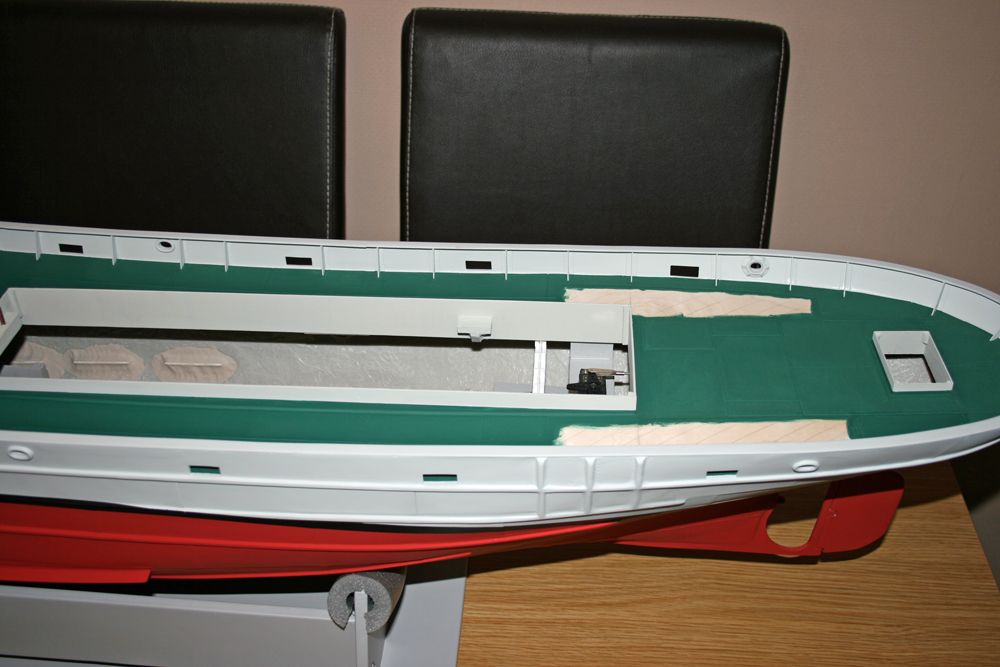
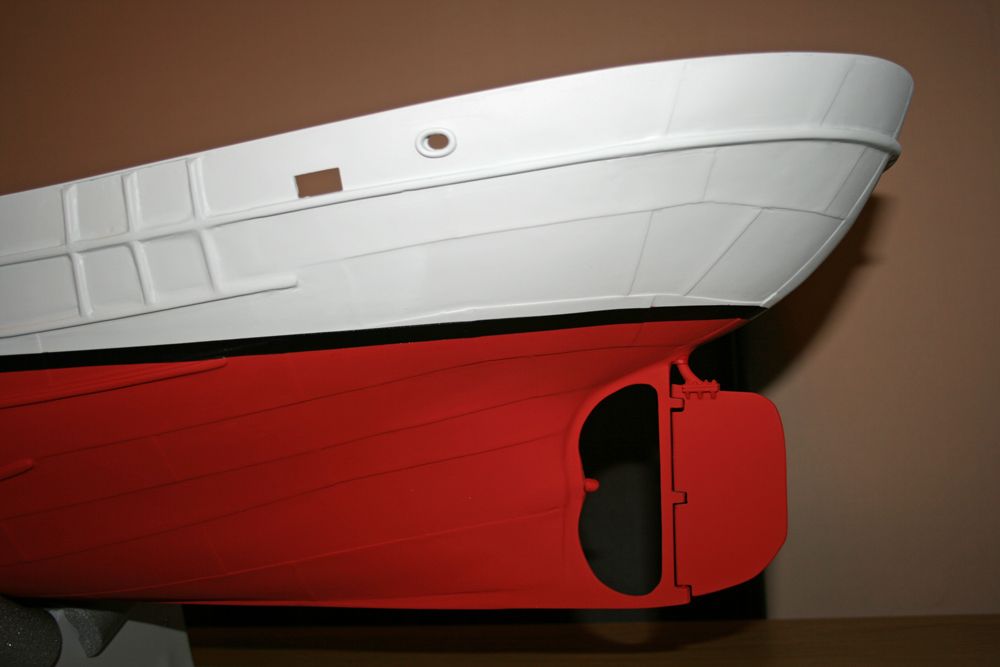
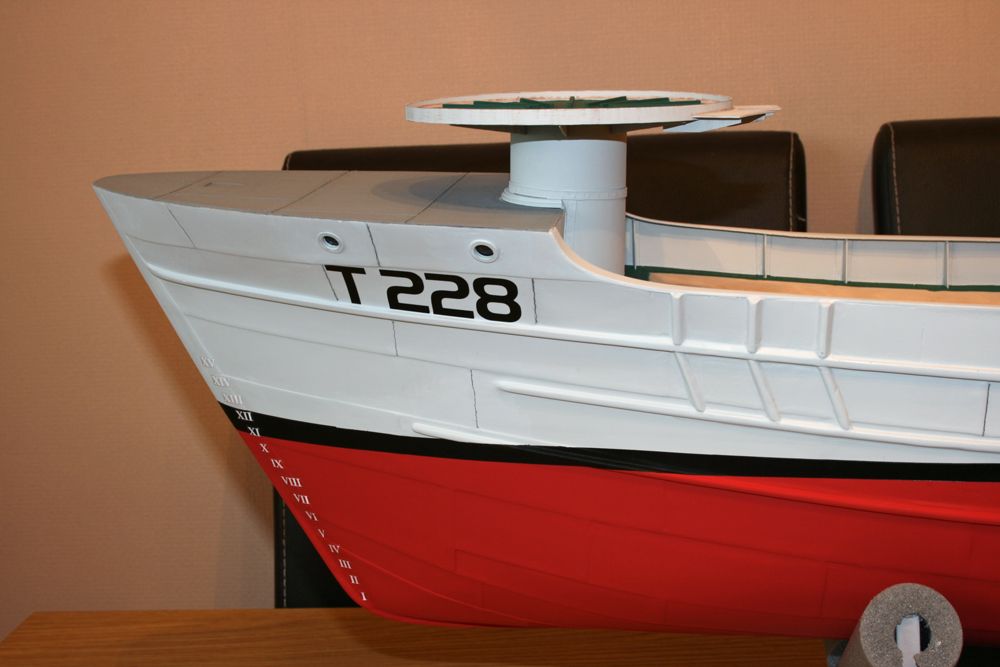
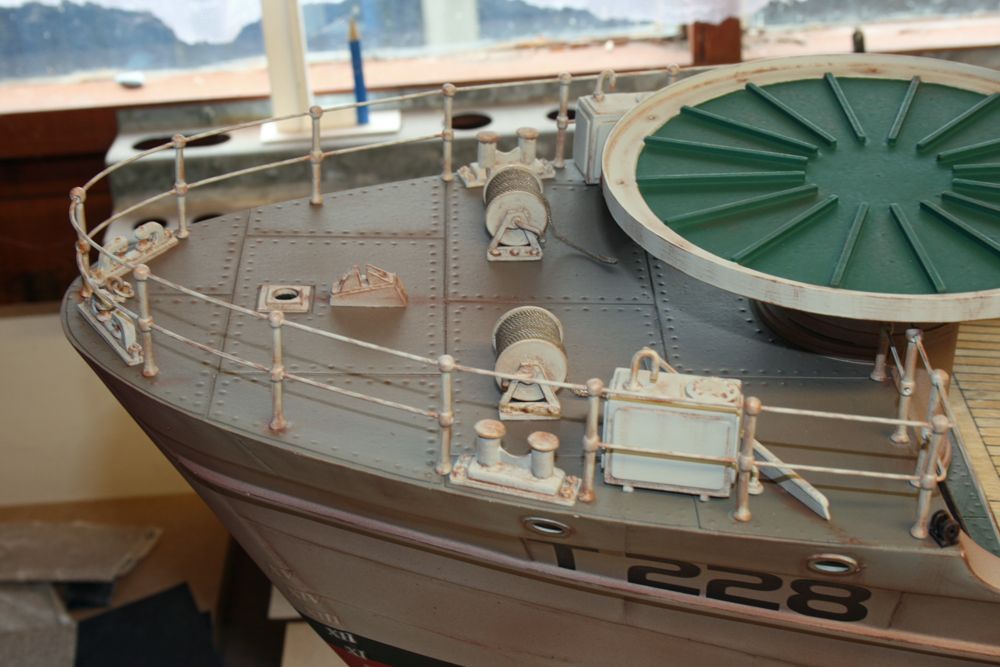
Participant@paulgodfrey14946Since my last post around a month ago, I’ve been painting the hull & decks, and whilst waiting for the coats of paint to dry, I’ve also been working on the various items which will be fitted to the foredeck. The paints used so far (all from the Humbrol enamel range) are as follows:147 Light Grey – matt (hull, bulwarks, gun platform & support, etc).140 Gull Grey – matt (foredeck).153 Insignia Red – matt (lower hull).88 Deck Green – matt (main deck & gun platform floor).85 Black – satin (waterline stripe, etc).113 Rust – matt (as per the name!).82 Orange – matt (used for fresh rust).For the records, I used a new compressor (which has a 3 ltr tank) bought from e-bay, which together with 2 double-action airbrushes, cost around £95. Brilliant!. I have used, however, a Badger 250-4 with an adaptor for all spraying done to date, as this can cover larger areas more quickly. As this is the first time I have ever used a spray gun/airbrush, I did a little practising on scrap material first!!.I have found from experimentation that with matt paints, the mix can be 2 parts paint to 1 part thinners. I’m sure that gloss would probably be more like 1:1 as it is thicker.All spray painting was done in a heated shed, and once dry (left overnight), the boat was brought into the house for the paint to fully cure. As I wanted to spray with as much daylight as possible, this was done at weekends only, and the weeks gap in between allowed the paint to completely dry before the next stage.A few photo’s, followed by a description of what order I did things in:As mentioned in my previous post, I started by painting the inner bulwarks, bulwark supports & capping rails (underside & top) by hand, with the Light Grey. This ensured I got into every nook & crannie, and I must say that using Humbrol enamels was the right choice for me, as coverage was superb, even from just one coat.I then sprayed both decks & the bulwarks etc with the same colour, giving the bulwarks and supports their final coat, and the decks an undercoat onto which the Deck Green could be applied.The entire hull was then given 2 coats of the Light Grey. The best way I found to do this was to lay the boat on it’s side, and spray one side at a time. The reason for this is that there are several rubbing strakes & plating on the hull, and painting the boat on it’s side ensured complete paint coverage.The next weekend saw the lower Red go on, again 2 coats, and again half the hull painted at a time.The black waterline strip was first marked onto the hull using the usual method of a stand with a pencil attached at right-angles. I have made the stand with a vertical piece of 1 inch-square wood, bonded to a wood base, around 4 x 4 inches in size. The pencil is held onto the vertical piece of wood with a clamp, which allows for any adjustment required. Once the 6mm Tamiya masking tape had been applied (VERY tricky due to the rubbing strakes etc), the black paint was applied by brush – 2 coats.The main deck was then brush-painted with the Deck Green (3 coats), and the foredeck with the Gull Grey (2 coats).Next were the pennant numbers, which are supplied in the kit, and the bow depth markings which are from BECC, and these can be seen in the next photo:The bare areas of the main deck are where the 3 prined ply overlays will be fitted.The hull and decks have yet to be weathered in the above photos.Since my previous posting, the gun platform required a little more work prior to painting. This consisted of fitting the 0.8mm ply rim, and the 2 platforms for the storage boxes. The manual & plans are lacking in information regarding the storage box supports, and although I took dozens of photos of Mountfleets own Sir L. at the Warwickshire Model Boat Show in November last year, I was still none the wiser. (I’ve also looked at various reviews of the model, but none show this area in detail). So, modellers licence prevailed, and I designed my own supports which are as follows (note that the platform has had some weathering applied to it):14 February 2010 at 17:58 #25603Paul Godfrey
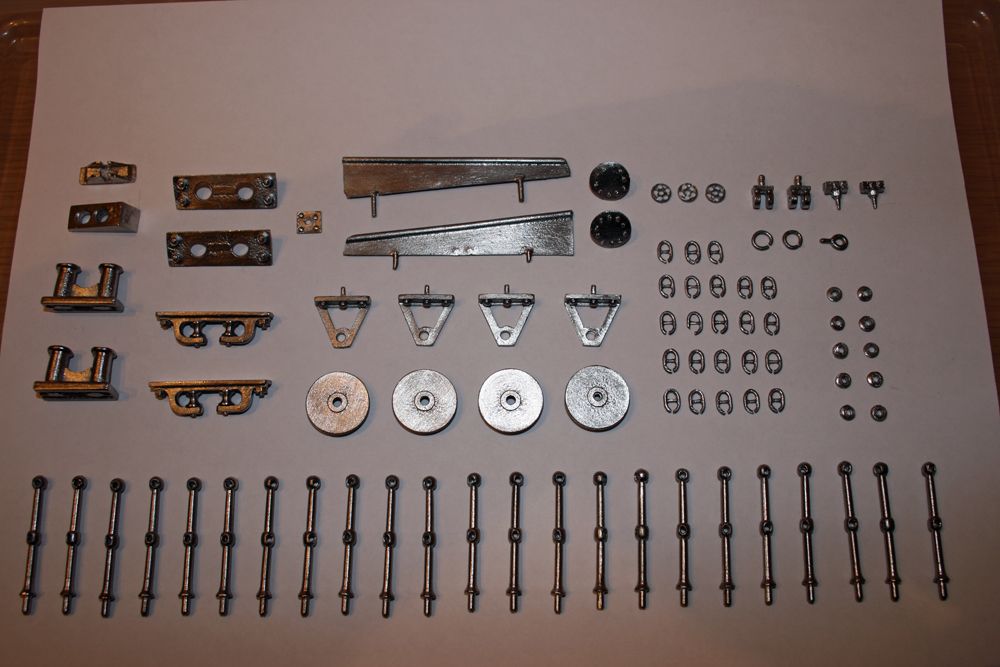
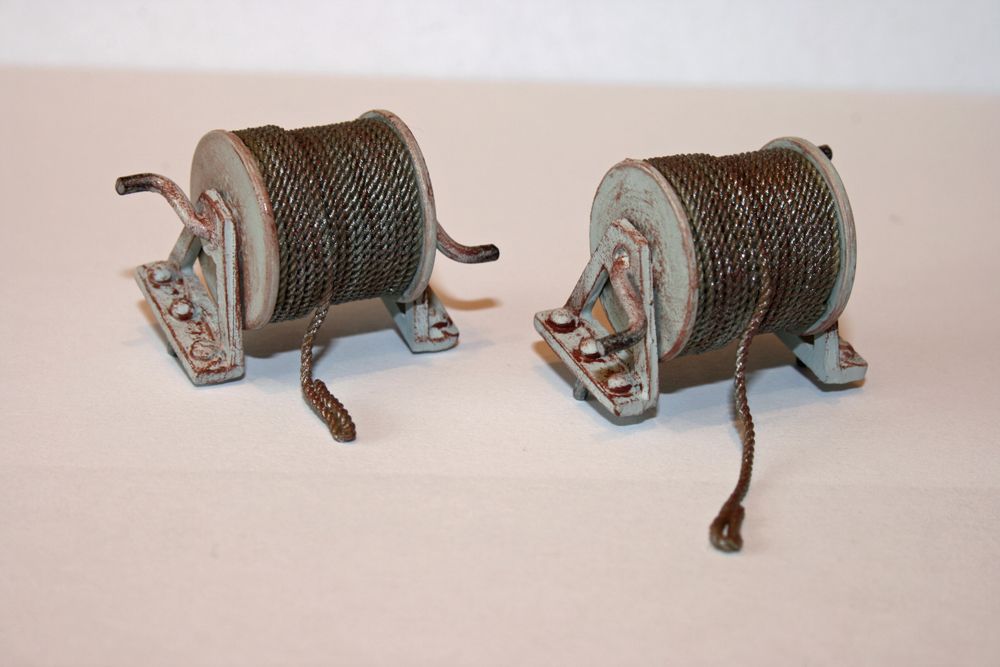
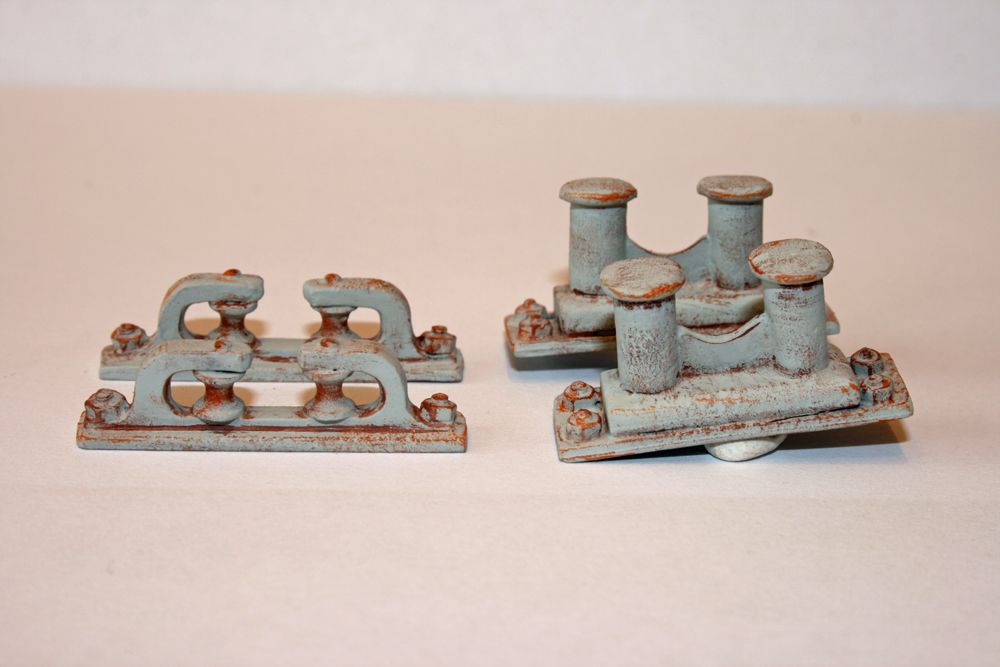
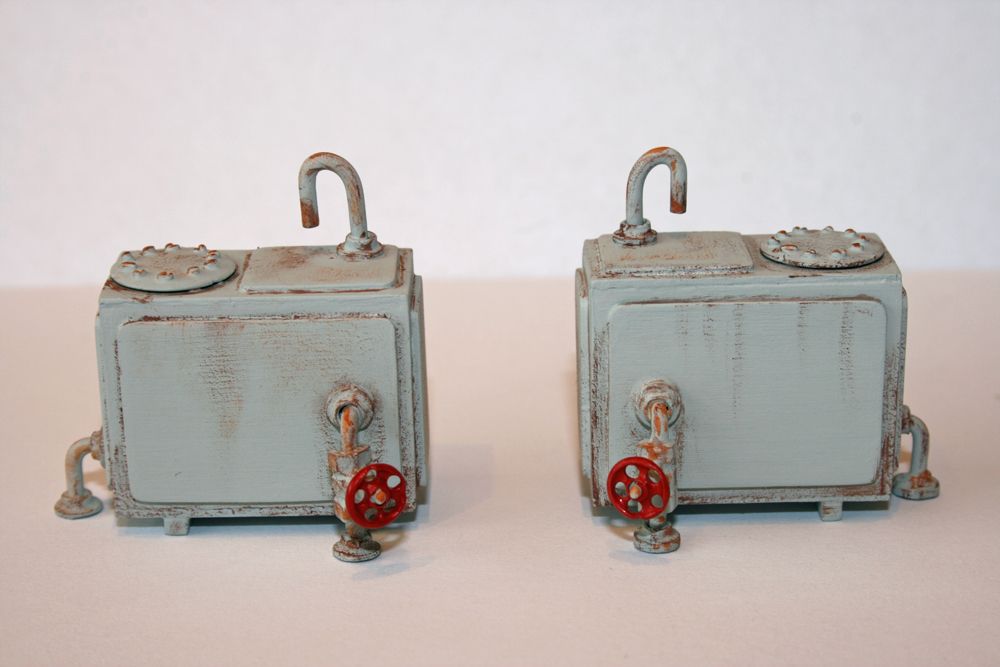
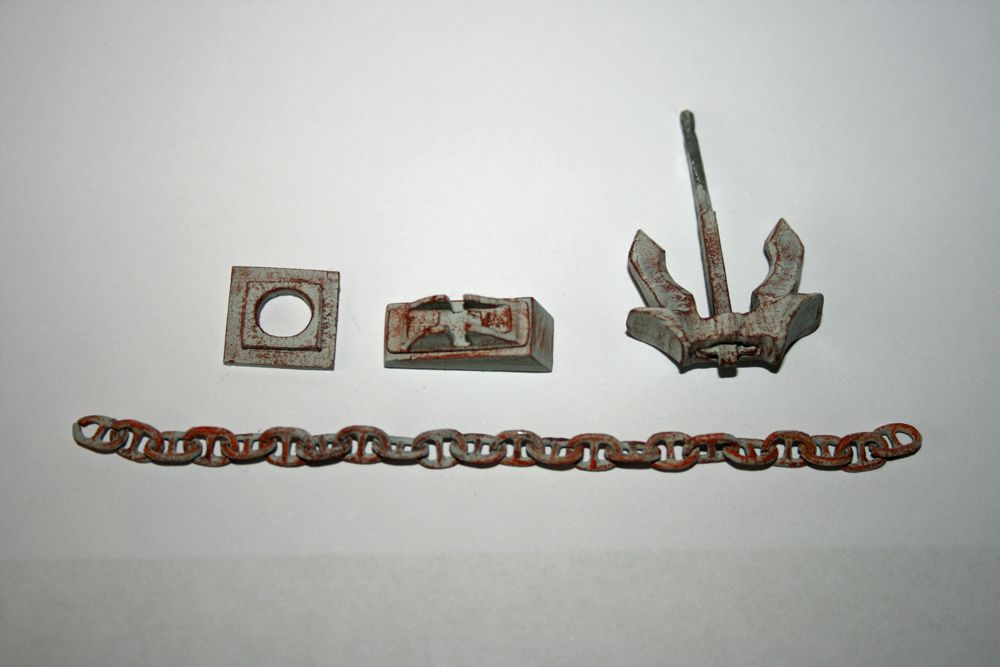
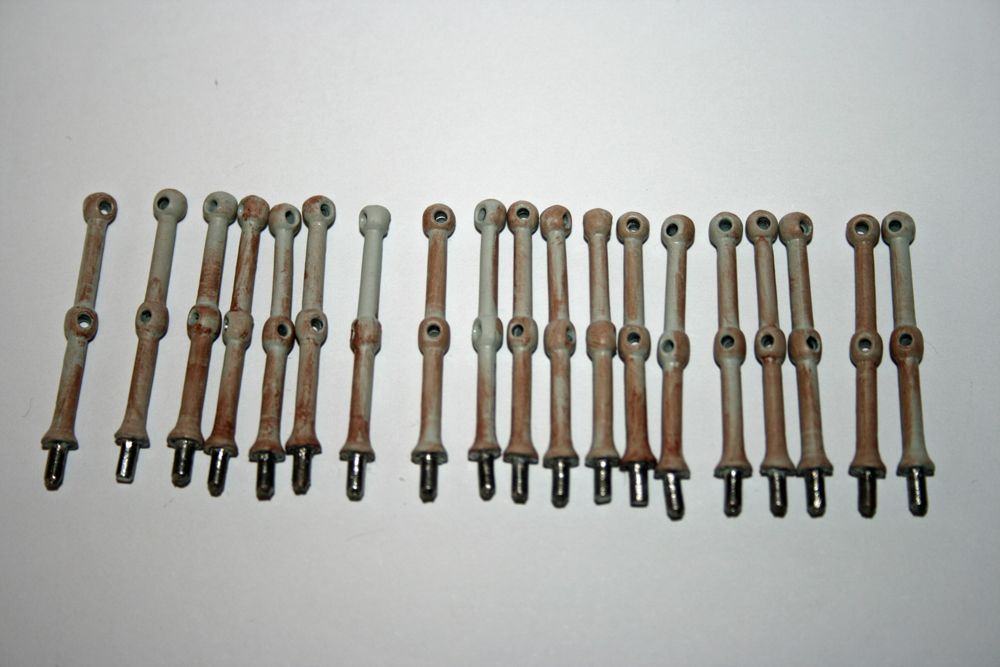
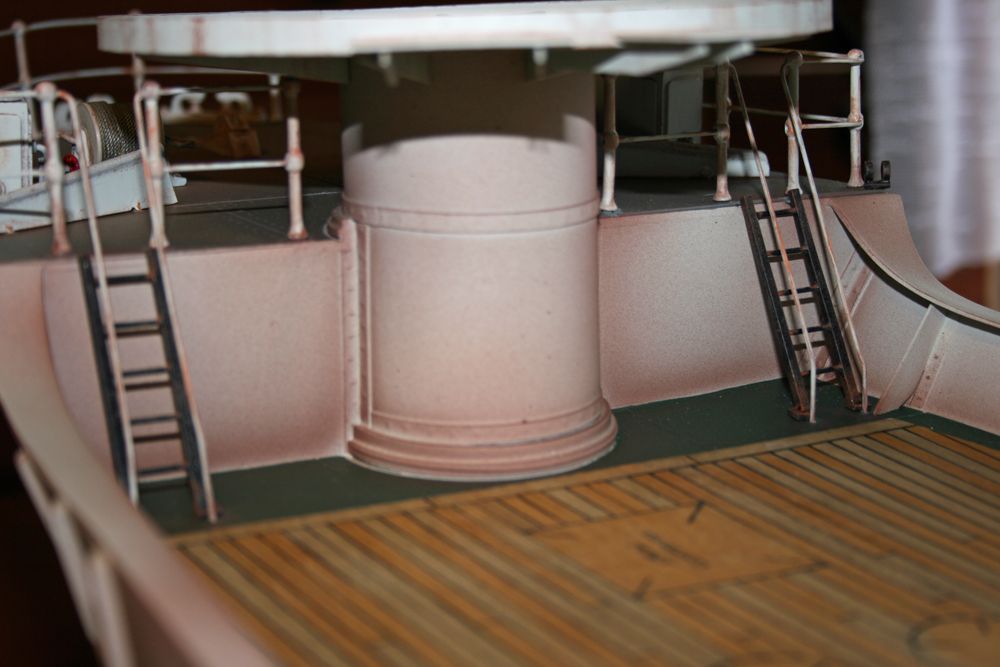
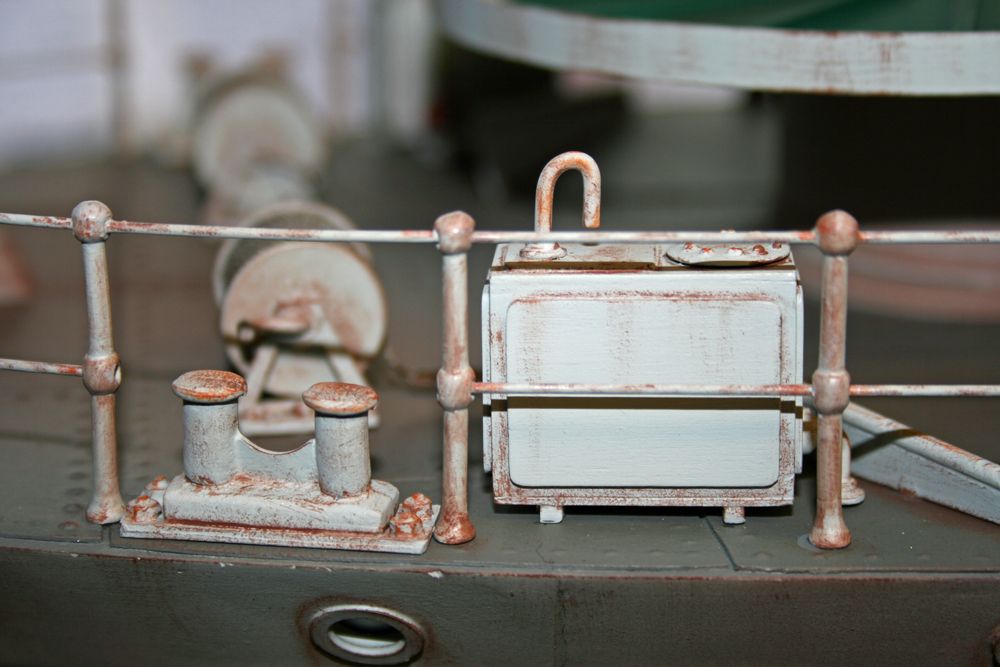
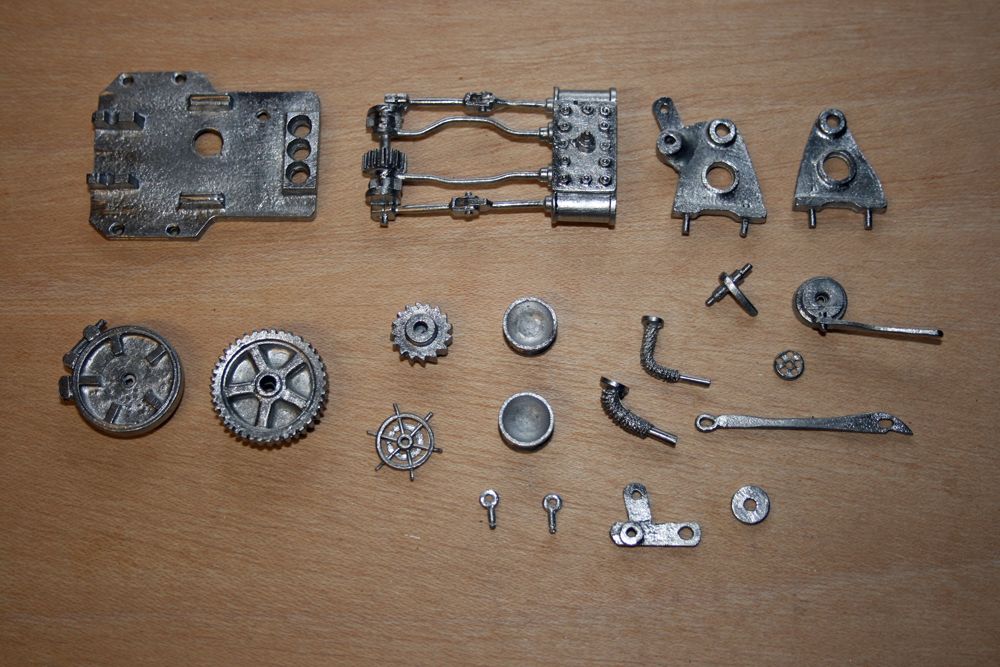
Participant@paulgodfrey14946Cont. . . . . . .Here’s the cleaned-up white metal components, seperately bagged, for the foredeck:The next photo shows the 2 winches. The parts were painted and weathered prior to assembly, and the ‘rope’ (1mm in this case) was purchased, again on e-bay. Once applied to the drums, the rope was painted the rust colour, then when dry, lightly painted over with silver to achieve the desired effect:The next photo shows the fairleads & bollards:And here are the 2 watertanks. The kit includes stripwood, around 15mm square, pieces of which are laminated together then dressed down to achieve the correct size. I decided however, to construct the tanks by building a box from 0.8mm ply, strengthened on the inside prior to fitting the ‘lid’ with PVA glue run down the joints (and will used the same method for the various storage containers etc throughout the boat). The pipes are made from 1.5mm brass wire, and all other components are white metal:The next pic is of the anchor, chain and associated fittings. The chain is made up from individual links as can be seen in the earlier photo of the white metal parts. These links were individually painted before assembling the chain:And finally, the painted and weathered stanchions:You can see that my boat will be quite rusty, but weathering them has really ‘brought them to life’ when compared to how they were just painted grey.The next stage as far as the hull is concerned, is to spray it with coats of RonsealPolyeurethane Varnish (possibly satin, but probably matt – undecided as yet) which will need to be done before fitting any further parts to it. I will be away on holiday the week after next, and will apply the varnish when I come back – this will give plenty of time for the enamel paints to fully harden.In the meantime, I will start on the anchor windlass, and will also bend the foredeck handrails to shape (new wire purchased, as that supplied with the kit is very thin and too easily bent). I will firstly need to paint & fit the 2 ladders between the foredeck & the main deck, either side of the gun platform support, as these dictate the angle of the handrails in this area.I will then construct the forward gun, and finish off the gun platform.Paul.14 February 2010 at 18:44 #25604Robin Lee
Participant@robinlee31938Hi paul. You have done a very good job on the weathering of the water tanks, anchors etc. Will be looking forward to seeing the hull weathering. I have never tried weathering as I feared I would ruin the model. MB mag had a very good article on weathering recently – did you use the techniques describe in the article?Robin14 February 2010 at 19:39 #25605Paul Godfrey
Participant@paulgodfrey14946Hi Robin,Thanks for your comments. The 2-part article you mention was one of the most interesting I’ve read, and has certainly come in very useful. I have used in places the dry-brushing method, and think the results for a first attempt are not bad at all. I’ve also run a small dry-ish brush over the edges of some components to highlight their rusty outline, and this I think has worked well (a good example of this is the photo of the anchor and the items to the left of it – if you imagine these just painted grey, they wouldn’t have as much ‘depth’, and would look quite flat).Oddly enough, the photos of the foredeck furniture do represent the items as they are EXCEPT the water tanks, which look better in reality. The flash seems to have made the dry brushing streaks look much harsher than they actually are.Regards, Paul.24 February 2010 at 21:00 #25717Gary Smith 1
Participant@garysmith1PaulPlease excuse my naivety firstly. I am very new to model boat building but enjoying the challenge.Your build is awesome, but I was very impressed with the electronic trays. Are these plastic card? If so how do you best cut and stick these so accurately. What tools and glues do you use. Your advice and patience is greatly appreciated.Many thanksGary2 March 2010 at 22:37 #25792Paul Godfrey
Participant@paulgodfrey14946Hi Gary,Sorry for not responding sooner, but I’ve just come back from holiday (today in fact!). And many thanks for your comments, by the way.Yes, the electronic ‘tray’ is made from plasticard sheet, 1.5mm thick, and the pieces are stuck together with liquid polystyrene cement (the ones that come with a very fine metal tube to apply the glue accurately).I started off by marking the dimentions of a side piece onto a sheet of plasticard (these sheets are around 12 inches by 10 inches approx, so the length of the tray was set at 12 inches, in order that it could be cut out of a single sheet. For cutting the piece out, you just need a modellers knife with a sharp blade, a steel rule to ensure the cuts are straight, and a cutting mat.Once the two side pieces had been made, I placed one of them onto a flat surface, and using a set-square, drew the lines onto which the end and central upright pieces were to be glued (If you refer back to the previous posts regarding the tray, you can see similar lines drawn on the side-view of the tray – drawn on that occasion on the outside to help describe the compartments and shape of the tray). Then, it was just a case of placing the upright pieces, one at a time, onto their marked lines, supported by a pair of square blocks or engineers set-squares (one each side) to hold the pieces at 90 degrees. Then, a bead of liquid cement could be run along the joint, and allowed to dry (only takes a few minutes before the upright will support itself) before moving on to the next piece. Once all the upright pieces were glued ( and left to fully dry), the other side was attached, followed by the base pieces.I finally fitted some strips on the inside corner joints for added strength. The various other assemblies, such as the fan housing for example, were built in the same way.Hope that helps Gary, but please do not hesitate to ask for further clarification if needed.Regards, Paul.3 March 2010 at 17:08 #25799Gary Smith 1
Participant@garysmith1PaulHope you had a great holiday and many thanks for such an informative response on your return. I found this most helpful and it was greatly appreciated. (ordered a shed load of plasticard today)once againmany thanks Paul, and keep up the good work.24 March 2010 at 17:12 #26065Paul Godfrey
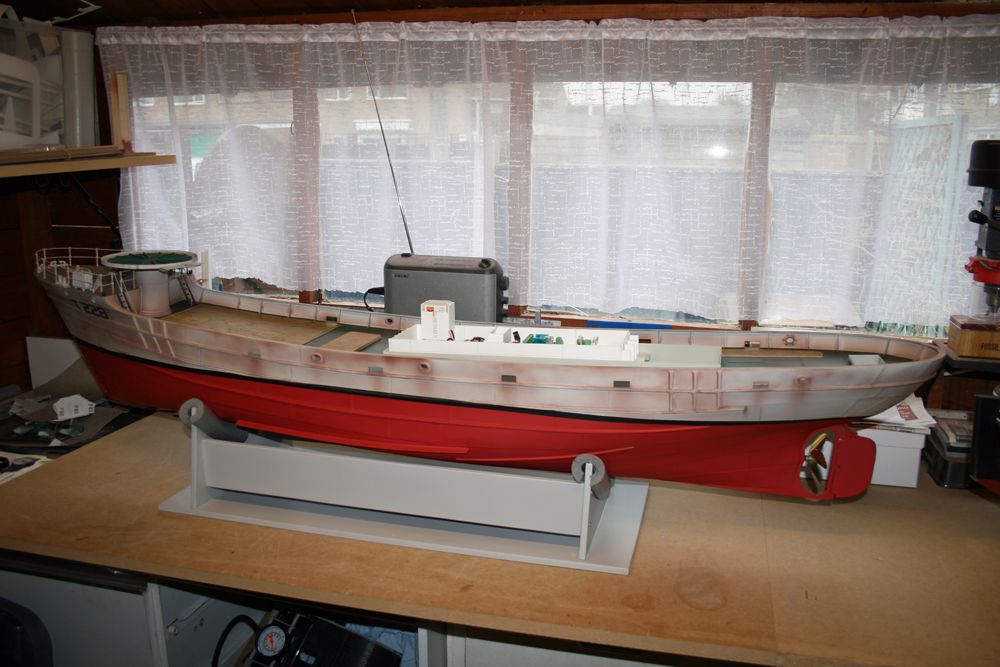
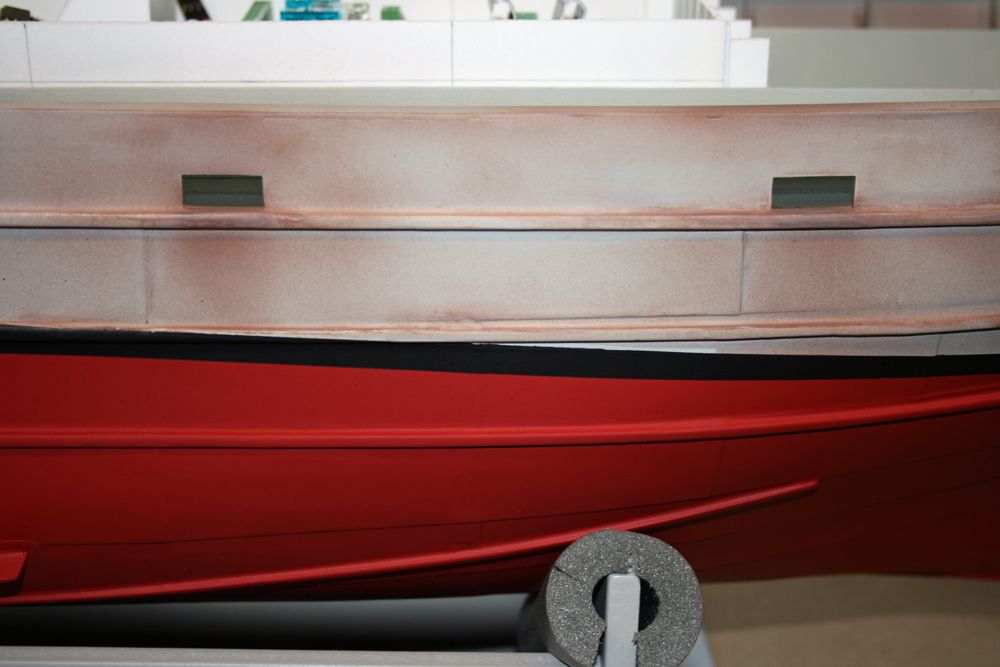
Participant@paulgodfrey14946The hull and decks have now been generally weathered, although as deck fittings etc are attached in the future, further localised wear & dirt will also be added.The hull above the waterline & decks were given an overall weathering using an airbrush, followed by some brushed weathering in more heavilly rusted areas. The entire hull and decks were then given 2 coats of matt polyeurethane varnish, thinned 50/50 with enamel thinners. The following photos show both the entire boat, and some close-up detailing:You can see on both the photo above and the one below how much better the bulwark & bulkhead rivet detail on the art-paper strips shows up. Both photos also show printed deck overlays, and on these I have varnished some of the ‘planks’ by masking off the others with 6mm Tamiya tape. I think this gives a more natural look compared with having all the planks the same colour. The photo below shows the ladders leading from the main deck to the foredeck which were weathered before being fitted. Although not really visible on the photo, I have scraped away a little of the paint centrally on each rung to expose the metal, to represent wear.The following pics are of the almost completed foredeck – only the anchor windlass to be added. All the deck furniture was pre-painted, including the stanchions, as seen in a previous posting.I used 1mm brass wire for the railings, as that supplied in the kit (plastic-coated wire) bent far too easily, and I was fearfull of inflicting accidental damage!The way I fitted the railings was as follows:Firstly, I fitted 2 stanchions (with thick cyano) down each side of the foredeck – the one in front of each bollard, and the ones in front of these. These were left overnight to fully dry. I then bent 2 ‘U’ shaped railings to form the upper and lower front sections, and slid 3 more stanchions onto these, which would become the front-most 3 stanchions (with the fairleads in between). Then a trial fit, by pushing the ends of the railing sections into the 4 previously glued stanchions to see how much wire needs to be trimmed off each end. Once done, the wires were again passed through the attached stanchions, and this time, the 3 front stanchions were glued into their holes. Once set, a little thin cyano was used to attach the railings where they pass through the stanchions.A similar procedure was then used for the rear railing sections. The 3 remaining stanchions on each side were glued in place (where the water tanks are positioned and at the rear-most outer corners) and again left to dry overnight. Lengths of wires were then bent to form the upper and lower rear sections – the upper sections are longer, as they pass over the bollards, and at the other end, become hand-rails for the ladders. A stanchion (which fits at the top, and to the outside of, each ladder, was slid over each pair of railing sections, and trial fitted, then glued, as before. The remaining rear-inner railing sections with 2 stanchions each were then fitted.The railings were then brush-painted, and finally weathered.Hope that sort of makes sense!!Finally for this posting, is a photo of the parts (minus lengths of 1.5mm and 2.2mm wire) for the anchor windlass, which will be my next task.Edited By Paul Godfrey on 24/03/2010 17:16:40
24 March 2010 at 18:12 #26066neil hp
Participant@neilhpnice work, paul.something i have never attempted,looks great.neil.24 March 2010 at 18:14 #26067Dave Milbourn
Participant@davemilbourn48782It’s going to sound rather special, too………. DM24 March 2010 at 19:34 #26071
Paul Godfrey
Participant@paulgodfrey14946Thanks Neil, I don’t think it’s too bad for a first go!Mr Milbourn, your powers of opportunism are to be much admired!!My P100 arrived today, and I am looking forward to having a play at a later date (although I’ve positioned all the other ACTion goodies in the electronics tray, I’ve yet to connect them up). I’ve been asked to do a bit of a presentation on my boat’s electronics & tray at my club’s next meeting in April, so I’ll try and find the time to get it all wired up.For the benefit of those who don’t know what a P100 is, it’s ACTion’s brand spanking new DIGITAL sound module, with actual sampled sounds as opposed to ‘representations’ of sounds. You can buy it as a ‘plug-and-play’ device (no PC needed) complete with a set of sounds of your choice, or with an optional Windows-based utility program on a CD which allows you to select, download & tinker with sounds from your PC. Do have a look at this unit on their website – fascinating stuff!!Paul. -
AuthorPosts
- Please log in to reply to this topic. Registering is free and easy using the links on the menu at the top of this page.
Code of conduct | Forum Help/FAQs
Latest Replies
Home › Forums › Building Kits › Topics
-
- Topic
- Voices
- Posts
- Last Post
-
-
Vic Smeed’s Legacy
Started by:
 Colin Bishop
in: All things floating
- 2
- 2
-
3 hours, 15 minutes ago
 Tony Hadley
-
4D Modelshop
Started by:
Keith Long in: Scratch build
- 6
- 9
-
9 hours, 52 minutes ago
 Colin Bishop
-
Fairey Huntsman 31
1
2
…
5
6
Started by:
 Chris Fellows
in: Build Blogs
- 14
- 139
-
1 day, 7 hours ago
 Chris Fellows
-
Fairey Faun
1
2
3
Started by:
 Chris Fellows
in: Build Blogs
- 7
- 58
-
1 day, 7 hours ago
 Chris Fellows
-
Vic Smeed’s Silver Mist
1
2
…
32
33
Started by:
Bob Abell 2 in: Scratch build
- 4
- 822
-
1 day, 8 hours ago
 Tony Hadley
-
Fairey Huntsman 28
1
2
…
7
8
Started by:
 Chris Fellows
in: Build Blogs
- 1
- 195
-
1 day, 9 hours ago
 Chris Fellows
-
Eezebilt RAF Fire Boat
Started by:
Tim Cooper in: Build Blogs
- 2
- 3
-
1 day, 10 hours ago
 Dave Reed
-
Feathered Friends
Started by:
 Chris Fellows
in: Soapbox
- 3
- 7
-
1 day, 13 hours ago
 Chris Fellows
-
John Cobb’s Crusader
1
2
…
7
8
Started by:
 Paul T
in: Scratch build
- 1
- 192
-
2 days, 9 hours ago
 John W E
-
Complex Automata
Started by:
 Colin Bishop
in: Soapbox
- 1
- 1
-
3 days, 11 hours ago
 Colin Bishop
-
RAF Fireboat ID
Started by:
 Dave Reed
in: Collectors’ corner
- 8
- 24
-
4 days, 13 hours ago
Tim Cooper
-
TID steam tug 42″ – PN Thomas drawing enlarged
1
2
Started by:
 Ray Wood 3
in: Scratch build
- 8
- 33
-
5 days, 7 hours ago
 Richard Simpson
-
Lady of Skye (puffer)
1
2
Started by:
 mick east
in: Build Blogs
- 9
- 43
-
5 days, 17 hours ago
 Richard Simpson
-
Building a hull.
Started by:
 mick east
in: Scratch build
- 7
- 10
-
1 week ago
 Ray Wood 3
-
Todays Boating
1
2
…
210
211
Started by:
 ashley needham
in: All things floating
- 84
- 5,252
-
1 week, 1 day ago
 Colin Bishop
-
Sea Rover Restoration
Started by:
harry smith 1 in: Collectors’ corner
- 4
- 10
-
1 week, 1 day ago
 Richard Simpson
-
WORKSHOP LIGHTING
Started by:
 John W E
in: All things floating
- 9
- 18
-
1 week, 2 days ago
 Colin Bishop
-
Mayhem Website Down
Started by:
 Colin Bishop
in: All things floating
- 4
- 10
-
1 week, 5 days ago
 Colin Bishop
-
MAGGIE M trawler
Started by:
 sammyk
in: Buy/Sell or Trade
- 2
- 3
-
1 week, 5 days ago
 sammyk
-
meter
Started by:
 Alasdair Allan
in: All things floating
- 5
- 16
-
2 weeks ago
 Chris Fellows
-
River Queen 2”- 1’.
Started by:
Richard B in: Steam powered models
- 5
- 7
-
2 weeks, 1 day ago
Richard B
-
Deluxe Superphatic Glue.
Started by:
 Colin Bishop
in: All things floating
- 4
- 12
-
2 weeks, 1 day ago
 Chris Fellows
-
How to add photos to your posts
Started by:
 Colin Bishop
in: Adding Images to Forum Posts
- 3
- 16
-
2 weeks, 1 day ago
Len Morris 2
-
Cataract
Started by:
Bob Wilson in: Soapbox
- 2
- 4
-
2 weeks, 2 days ago
 Colin Bishop
-
The mighty tug Wattle
1
2
3
Started by:
 mick east
in: Build Blogs
- 10
- 61
-
2 weeks, 2 days ago
 Richard Simpson
-
Vic Smeed’s Legacy
-


