HM BARK ENDEAVOUR/caldercraft

Advert

HM BARK ENDEAVOUR/caldercraft

Home Forums Building Kits HM BARK ENDEAVOUR/caldercraft

  • This topic is empty.
Viewing 24 posts - 1 through 24 (of 24 total)
  • Author
    Posts
  • #61322
    captainslog
    Participant
      @captainslog

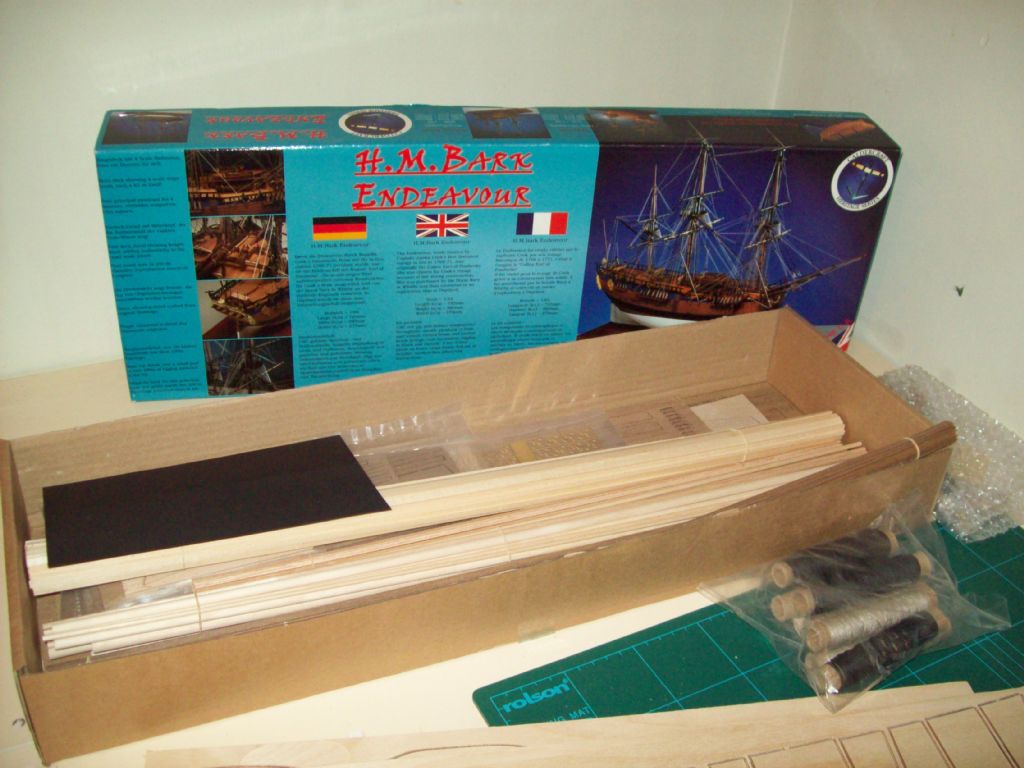
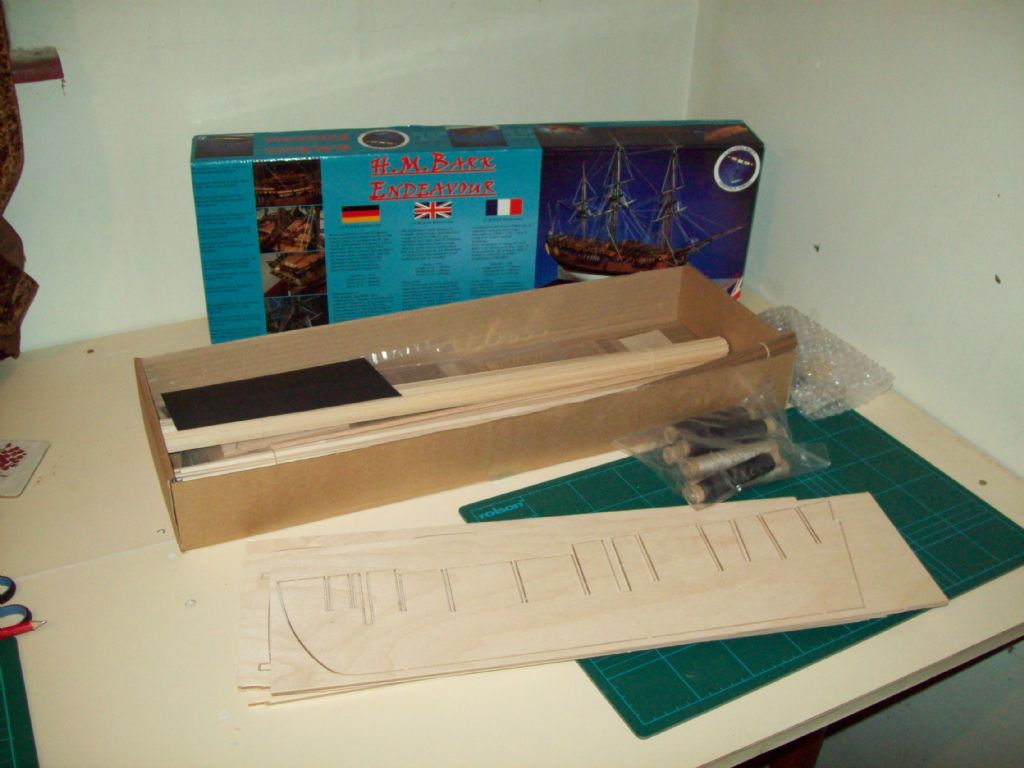
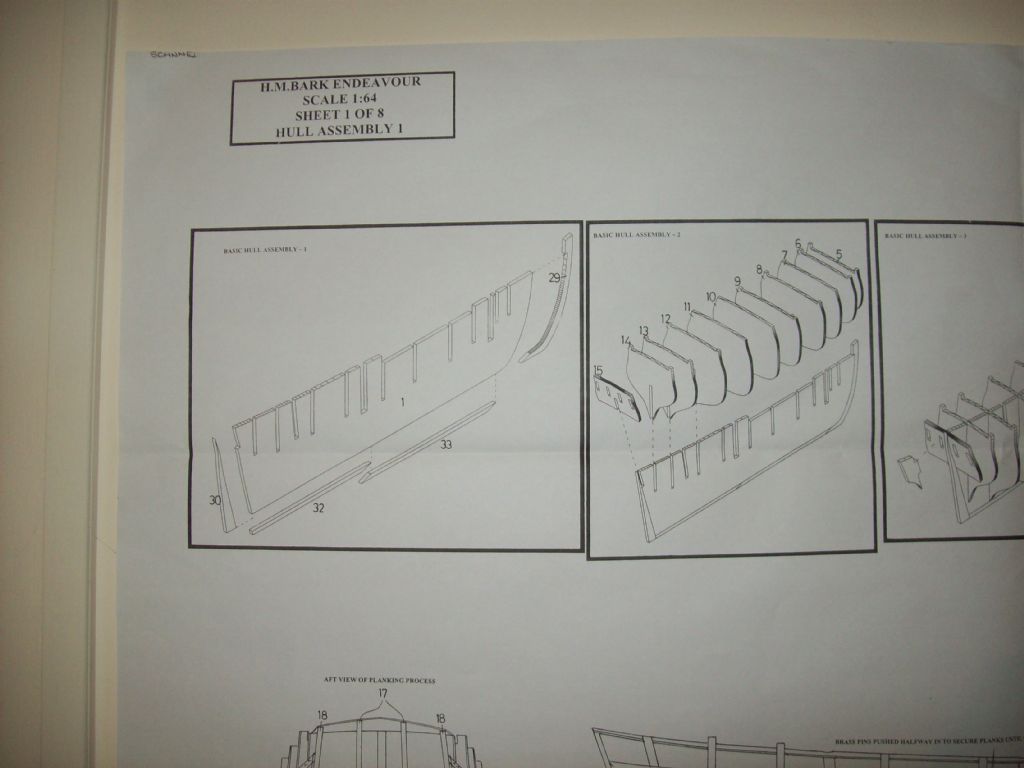
      endeavourWhile on a w/e break in dorset I decided to visit westbourne models and try and find a ship to build with a little bit of a challenge to it. Now, as I have never built this type of ship in wood I have many many years of building behind me. So this is the one I chose, cpt cooks ship, endeavour. I hope to create a build blog over the coming months,but my main reason for doing it is the fact that I will more than likely be needing lots of help. What better place to look than on this forum site. I have looked online but cant seem to find any previous blogs regarding this ship. so hopefully there will be lots of advice and help right here. They say nothing is simple in life, we shall soon see

      endeavour

      Advert
      #6214
      captainslog
      Participant
        @captainslog

        A winter build from westbourne models

        #61325
        Colin Bishop
        Moderator
          @colinbishop34627

          We will look forward with interest to your progress. If you do get stuck then I'm sure you will get plenty of advice – hopefully not too contradictory!

          The kit does make up into a nice model.

          Colin

          #61348
          Peter Fitness
          Participant
            @peterfitness34857

            I will certainly look forward to your progress as the Endeavour has a very special place in Australian history.

            Peter.

            #61353
            captainslog
            Participant
              @captainslog

              Thanks both, peter, 1 reason for this ship is that my aunty has lived there since the 10 bob boats went over in the 60`s. she bought me a book "capt. cooks 3 voyages" when I was 10. brilliant book but I cant find it anywhere. What I cant understand is why there is a lack of build blogs on this ship. I may be wrong but I cant find much on this subject online.

              Reading the instructions, there is a list of tools required for the build. I have 90% of them but I do need needle files. I have looked in the expo catalogue and seen diamond and steel needle files. packs of 5 or 10 and also available single. Can you or colin advise on what to buy? I also need david plane blades, these seem like gold dust to me. I am hoping to get most things from 1 supplier to save on postage. Also, will I need a building jig? All my r/c models have been built without 1 and the hulls have all come out true to form. The advice from the very helpful Westbourne models shop was no. but I have my doubts.

              #61356
              Dave Milbourn
              Participant
                @davemilbourn48782

                I recently bought some David blades from an E-Bay supplier, then found another whose P&P was far less! Expo are at the expensive end of the market; you can buy the same or very similar items for a lot less. These folk are at many of the model shows and their stuff seems good quality **LINK**

                DM

                #61359
                Banjoman
                Participant
                  @banjoman

                  Hello captainslog,

                  I think you may find what you are looking for rin the way of Endeavour build logs (including the Calrdecraft kit) over on the Model Ship World forum (**LINK**). Please note that you need to sign up as a forum member before they'll let you see most of the content, including build logs. I am a member over t here, too, although so far not at all active, however from what I've seen it is one of the main places to be for static age-of-sail ship modelling.

                  As for needle flies, you may have noticed that the multi file sets tend to cost more or the less the same for five or ten as what you pay for a single one of the ones sold as separate items. The old saying is true, I think: you basically tend to get what you pay for! The question therefore becomes one of how good do I need my tools to be?

                  Personally, I confess to a severe case of tool fetischism, and have thus invested fairly heavily in a good collection of Vallorbe needle files, and have found them to be just as good as they ought be be at the price! That said, I don't think that the less expensive sets would be all that bad, either, and they would set you back rather less. I would perhaps be a tad wary of the 10-for-a-fiver sets, but the £15 or so Klein file sets I think might strike a happy medium.

                  Another thing I have found, too, is that 95 % of the time I use only three shapes of needle file: pillar (i.e. basic flat), round (rattail) and triangular, so limiting the number of shapes one buys can put the more expensive individual files better within financial reach.

                  One of the most complete one-stop shops for needle files in the UK is Shesto (**LINK**), who I believe are the whole sale suppliers for most of the specialist model vendors, although you will also find a good assortment at i.a. Cornwall Model Boats, The Shipwright Shop and The Model Dockyard.

                  A word of caution, though, concerning needle files: once you've used one on white metal, it will be almost useless on wood! Not because it won't bite, but because it will stain the wood. I therefore keep two sets of files: one for white metal only, and one for wood and other materials.

                  I also have a few miniature needle files as sold by Eskader in Stockholm: **LINK**. These are about half the size of standard needle files, which sometimes can be very handy. However, I don't think that you particularly need those for your Endeavour project; I just wanted to mention them for the sake of completeness.

                  /Mattias

                  Edited By Banjoman on 13/11/2015 09:42:32

                  Edited By Banjoman on 13/11/2015 09:43:01

                  Edited By Banjoman on 13/11/2015 09:46:13

                  Edited By Banjoman on 13/11/2015 09:47:09

                  #61363
                  Colin Bishop
                  Moderator
                    @colinbishop34627

                    Instructions hould be good but if you have not already seen/got it then the Anatomy of the Ship Endeavour book would be worth investing nt. It has been out a while so you could probably find it second hand.

                    **LINK**

                    Colin

                    #61391
                    Peter Fitness
                    Participant
                      @peterfitness34857

                      Here are some photos of the replica Endeavour, which may give you some inspiration. I took the shots in Darling Harbour, Sydney, back in 2009. I was lucky enough to go on board the ship on a previous visit to Sydney, but I didn't have a camera with me on that occasion. We also saw Endeavour in Greenwich, London, on a visit to the UK in 1997.

                      Peter.

                      2 Endeavour.jpg

                      1 Endeavour.jpg3 Endeavour.jpg4 Endeavour.jpg

                      #62696
                      captainslog
                      Participant
                        @captainslog

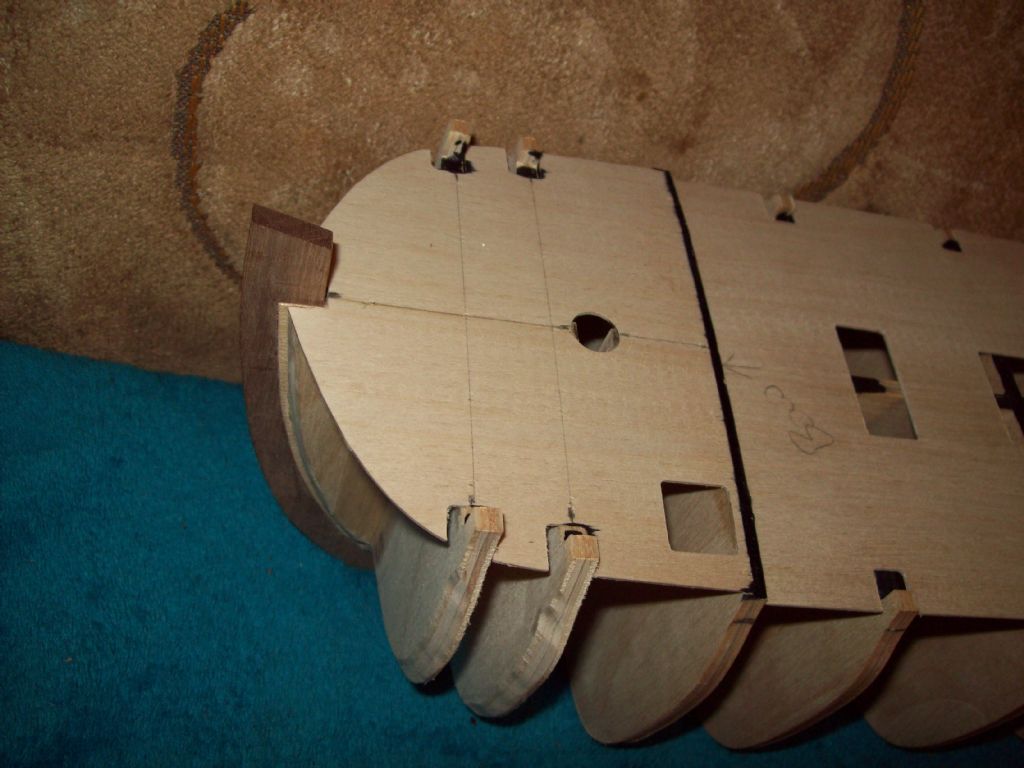
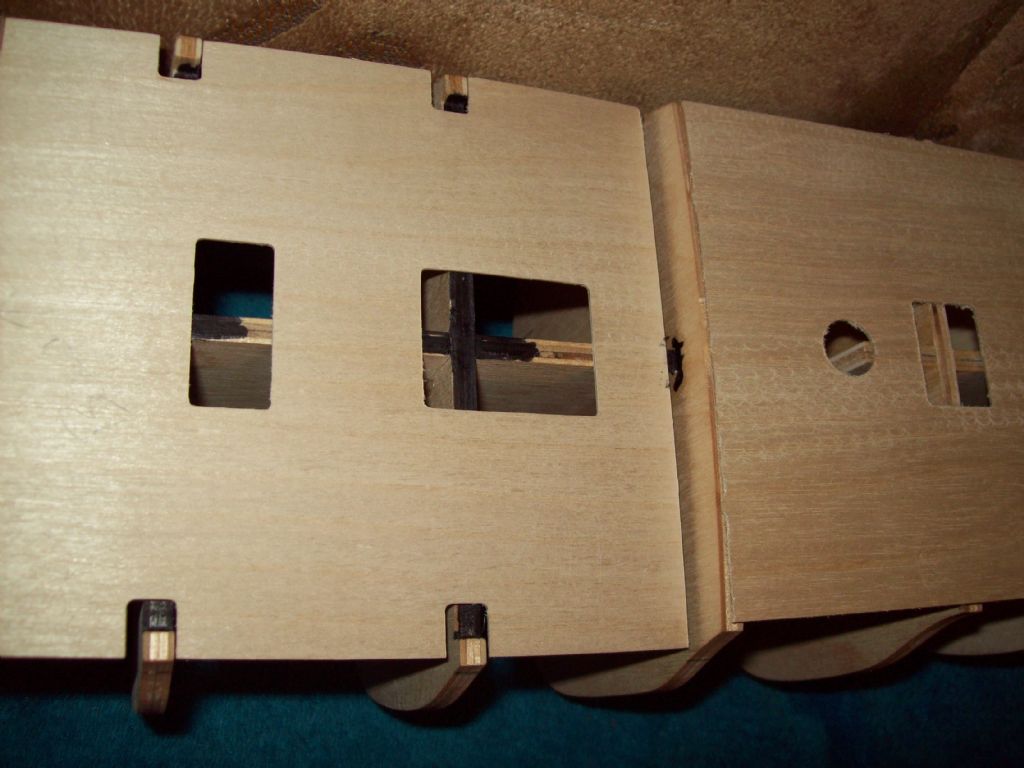
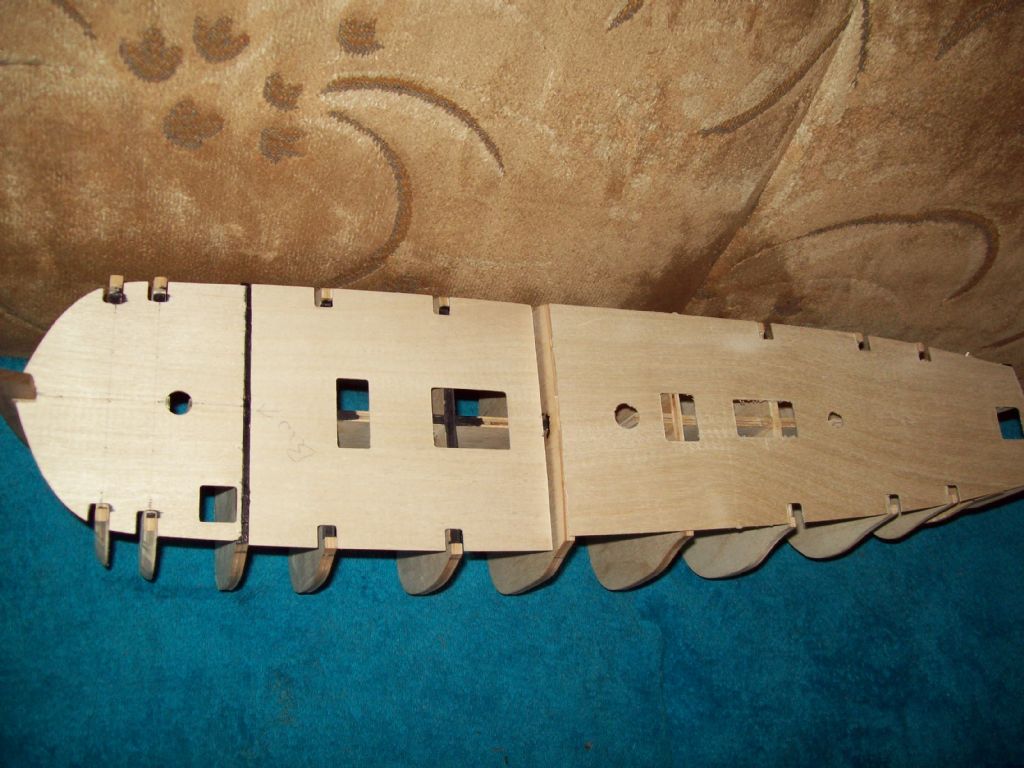
                        endeavour faultsendeavour faultsfirstly, may i apologise for not posting anything, fact is I have not been able to do alot. After receiving many months of treatment my partner had some devastating news to tell me. We are both trying to come to terms with it so my time will be spent mostly with her and not in my workshop. we live in hope as they say.

                        Right back to it then, to say I am a bit dissapointed with the kit so far.

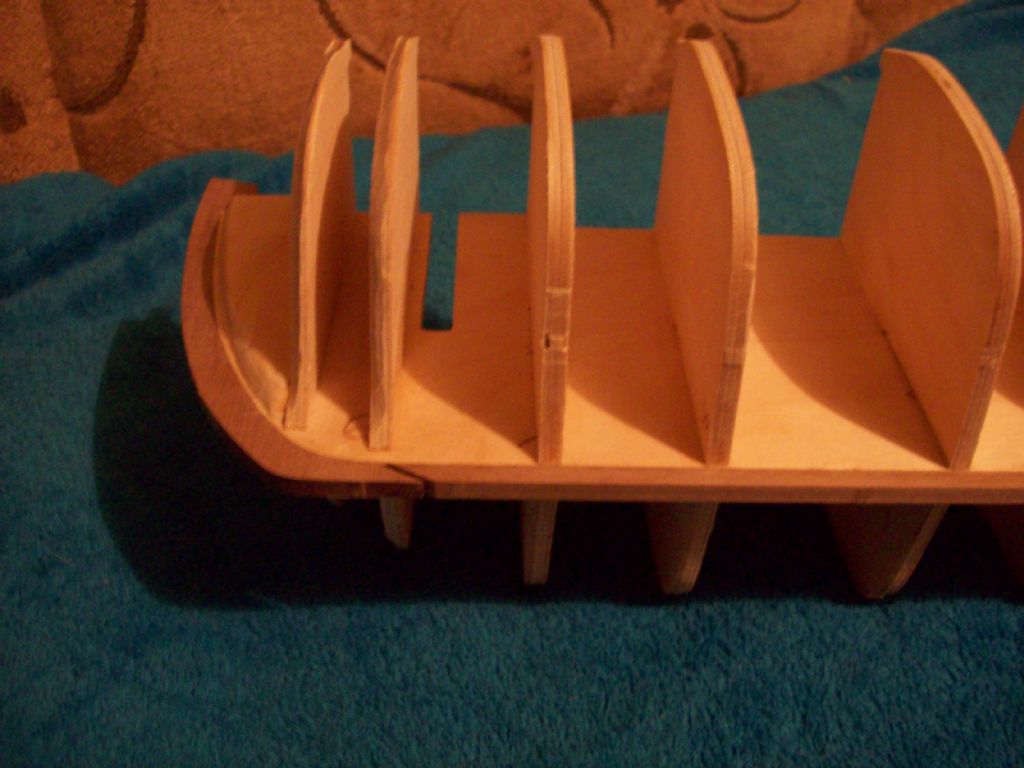
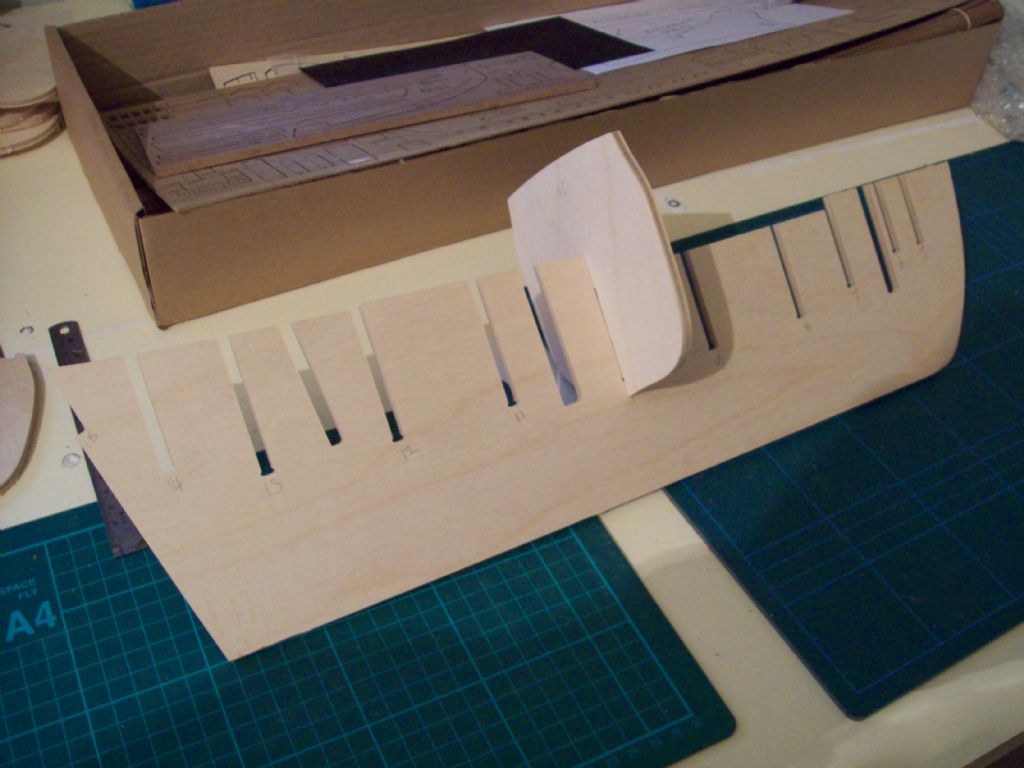
                        1/ written instructions say to glue bulkheads in place first then the walnut keel. however plan sheet 1 shows the opposite sequence. I decided to follow the written instructions. The laser cut slots needed about 30 mins. work opening up the slots for an easy fit. Alot of time for all those b/heads.

                        2/ the walnut keel when fitted leaves a gap of about 3/16" which will need filling. I was hoping to just use clear varnish,but now with filler I will probably need to stain it.

                        endeavour faults

                        #62697
                        captainslog
                        Participant
                          @captainslog

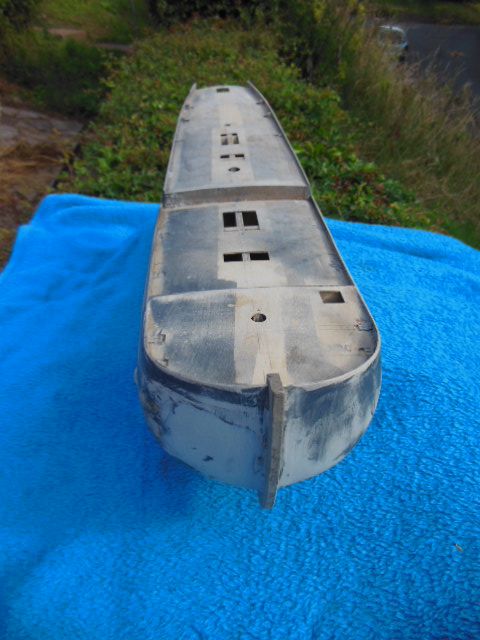
                          endeavour faultsendeavor faultsOnce I had all b/heads and keel fitted it was time for the deck. Now, the b/heads have small noggings sticking up to slot into corresponding slots in the deck. These noggings are 5mm x 5mm. The slots in the deck are 10mm x 8mm !!!.When I placed the decks down they could obviously move 3mm fore/aft as the length of them was also short. The only thing I could do is make sure the mast hole and mast slot in b/head alligned. I then added strips of ply so that the decks were flush with b/head faces. The instructions also state that the decks are sanded back flush with the outsides of the b/heads ready for 1st planking.hardly in my case, they were barely wide enough to reach that far.

                          One important point, care needs to be taken that the bow deck is placed the correct way up. There is 1 hatch cutout. This needs to be placed so that the hatch is on the port side. I very nearly placed it upside down therefore putting it starboard. Luckily I managed to get the anatomy of the ship from the library and checked first. The instructions dont mention this.endeavour faults

                          #62698
                          captainslog
                          Participant
                            @captainslog

                            There are a few more fotos to download on the progress but I am not happy so far. Are these common faults with this type of model? It looks to me the deck pieces have been cut to suit different sized bulkheads, maybe 8mm mdf (I have seen a few reviews of other ships using mdf as the skeleton) However, I havnt been beaten by faulty parts before and I am sure I can get around this. Until next time, and once again apologies to anyone who was waiting for updates, but I do hope to grab a bit of spare time in the workshop.

                            #62894
                            captainslog
                            Participant
                              @captainslog

                              endeavour faultsendeavour faultsendeavour faultsendeavour faults

                              Edited By captainslog on 20/01/2016 06:52:56

                              #62895
                              captainslog
                              Participant
                                @captainslog

                                At this point in time I am ready to bin this. Hardly building into a museum quality kit. Sorry to harp on about this but I have totally lost my patience with this, a waste of £240 as far as I am concerned. I have added pieces of ply to the centre section deck so that I have the required overlap for the first planking (if I reach that stage) The bow decking will have to be removed and a new piece cut as with the stern part. Hopefully it can be done in 1 piece for a template to be drawn. Maybe an experienced builder of this type of ship would have spotted it sooner, maybe I would have spotted it if I had read further into the instructions rather than going step by step. I would then have realised the deck base overlapped the 1st planking. Dissapointment is not the right word. I think a harsh letter to caldercraft is called for, but why should customers have to do this then wait for an explanation and possibly new parts.?

                                #62903
                                Phil H1
                                Participant
                                  @philh196021

                                  I'm not familiar with these kits but I always look for your updates because I'm tempted to build a static model myself ie please don't give up yet.

                                  However, is there any chance that they gave plenty of clearance between the frames and deck cut outs to make sure the deck fits – knowing that the planking would cover the unsightly gaps?

                                  Philh

                                  #62967
                                  captainslog
                                  Participant
                                    @captainslog

                                    Hi Phil, thanks for the encouragment I have been in touch with jotika/caldercraft and the situation has been resolved. They were very good about it and will supply all the parts up to the build so far. Apparently it was all down to the cnc settings. I wont go into any more detail but I am happy with their response and await the new parts so we can start again. So project not binned but delayed. Also I received my new SIP 16" scroll saw today. What a beautiful tool. light attachment and a flexi drive attachment as well. So all tools/build materials now complete. Will start again as soon as i get the parts.thumbs up to jotika

                                    #66462
                                    captainslog
                                    Participant
                                      @captainslog

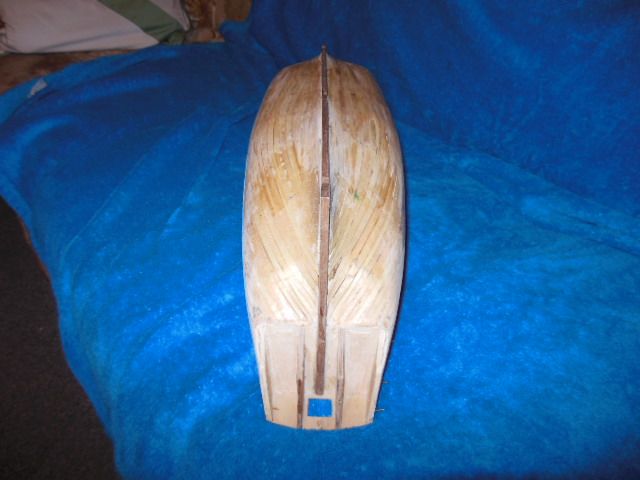
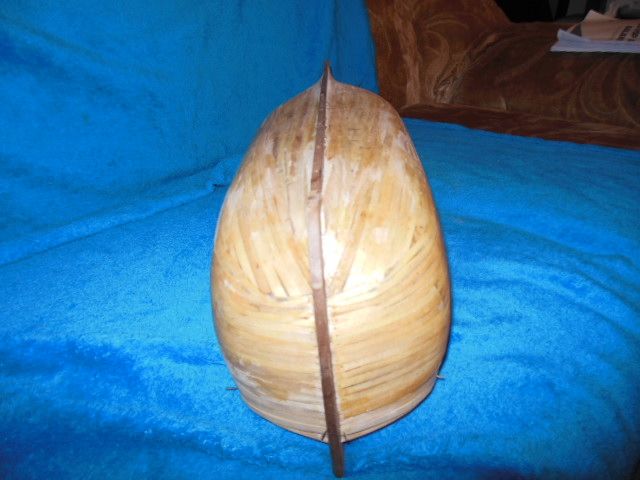
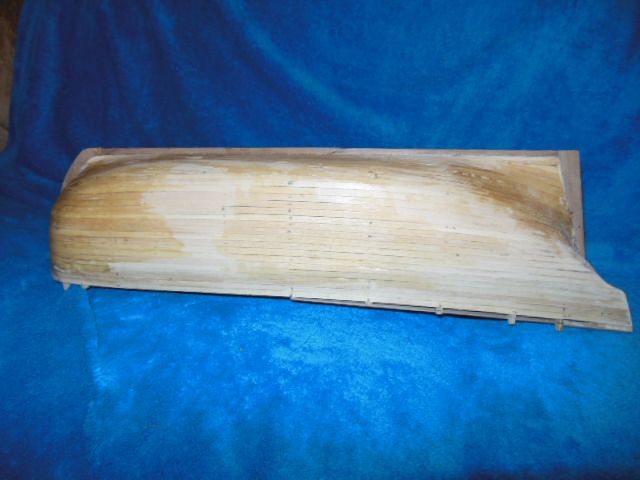
                                      Hi Guys/Gals, I know its been a long time but theres been problems. After being totally disolusioned I decided to take a cruise on the queen elizabeth (cunard) more on that to follow in a seperate thread. Anyway, after the new parts arrived (promptly I may add) I got on with it. 1/2 way through first planking I decided to take it all off, it didnt look right. Finally I got to this stage. There are high and low spots so I will use p38 filler and carefully sand away until it looks right. I did as per instructions, start at the top,work down to the keel using the lime strips full length. Believe me this doesn`t work. In the end I did as I pleased and this is the result.I dont think I did a bad job for a first time (my opinion) but there will be a lot of work before second planking. I have re-ordered anatomy of the ship, cooks endeavour from my library to help in the next bit. Did I say a winter build? how many I wonder. your comments/criticisms much appreciated. see you soon when the p38 filler is on and all looks nice and streamline (hopefully)

                                      #66463
                                      captainslog
                                      Participant
                                        @captainslog

                                        first planking

                                        #66464
                                        captainslog
                                        Participant
                                          @captainslog

                                          first plankingfirst plankingfirst plankingfirst planking

                                          #66465
                                          captainslog
                                          Participant
                                            @captainslog

                                            Oh , and just a mention about the service from cornwall model boats. Caldercraft recommended the admiralty paint set ( I chose the brown hull version rather than the white one) which I ordered on the 7th among a few other things. Standard delivery, and it was on my doorstep this morning the 11th which was over the w/e as well. thats service for you, congrats

                                            #66744
                                            captainslog
                                            Participant
                                              @captainslog

                                              026.jpg024.jpg023.jpgfirst planking completed. I tried to get the hull as smooth and symetrical as possible using p38 easy sand and car undercoat filler. Alot of sanding,filling and spraying. The bulwarks need shaping and stern fascia fitted, but otherwise I am quite pleased with the result.018.jpg

                                              #66745
                                              captainslog
                                              Participant
                                                @captainslog

                                                The instructions for the kit say to start 2nd planking by laying the main wale which is a thicker plank than the the others above and below. However, in the anatomy of the ship it shows the 1st plank immediately above and below the wale to be about 2/3 thickness of wale and approx 1/2 thickness bigger than the remaining planks. (called "thick stuff above and below wale) The remaining planks above "thick stuff" to bulwarkare all same thickness. Below the wale to the keel the remaining planks are known as "diminishing strakes and so there is not a prominent step from the wale as seen above it. Is it worth me following this practice or just go by the instructions and have a thick wale followed by a thinner thickness for the other planks? sorry I couldnt make this point clearer but I hope someone will see what I mean.

                                                #66748
                                                Banjoman
                                                Participant
                                                  @banjoman

                                                  Your point is perfectly clear, and for my part I find a very relevant question to ask!

                                                  In my view, once one has noticed this sort of a discrepancy or imperfection in a kit (and most particularly when one has noticed it in time to actually make a decision about it), and unless the extra effort is really disproportionate to the outcome, it is always worth going that extra mile, and improve on the kit by building it as correctly as one can.

                                                  I see two reasons to do so. One is that once one is aware of such an imperfection, it will irritate one a little bit every time one looks at the finished model. The second is the reverse of that, namely that if one does make the improvement, one will get that recurring little bit of extra pleasure of looking at ones handiwork.

                                                  I suppose that you won't be able to find the required 2/3 thickness timber from what came with the kit (unless there is a sufficient surplus of the "thick stuff" that could be sanded down), but the extra amount needed would not be enormous, I suppose, nor prohibitively expensive, and could be ordered with no difficulty from one of the usual suppliers, e.g. Cornwall Model Boats, The Model Dockyard etc. etc.

                                                  Obviously, I lay no claim for the above reasoning to represent any sort of general truth – it is a description of how I tend to feel about these things – and you must of course weigh up the arguments in the light of how you yourself think and feel about it. In other words, the answer to your question whether it would be "worth […] following this practice" or not should, I think, be answered based on how you are likely to feel about in the long run, not on what other people might or might not think; however, I take the liberty of presenting my opinion in the hope that it might offer you at least some food for thought.

                                                  /Mattias

                                                  Edited By Banjoman on 25/07/2016 19:03:00

                                                  #66819
                                                  captainslog
                                                  Participant
                                                    @captainslog

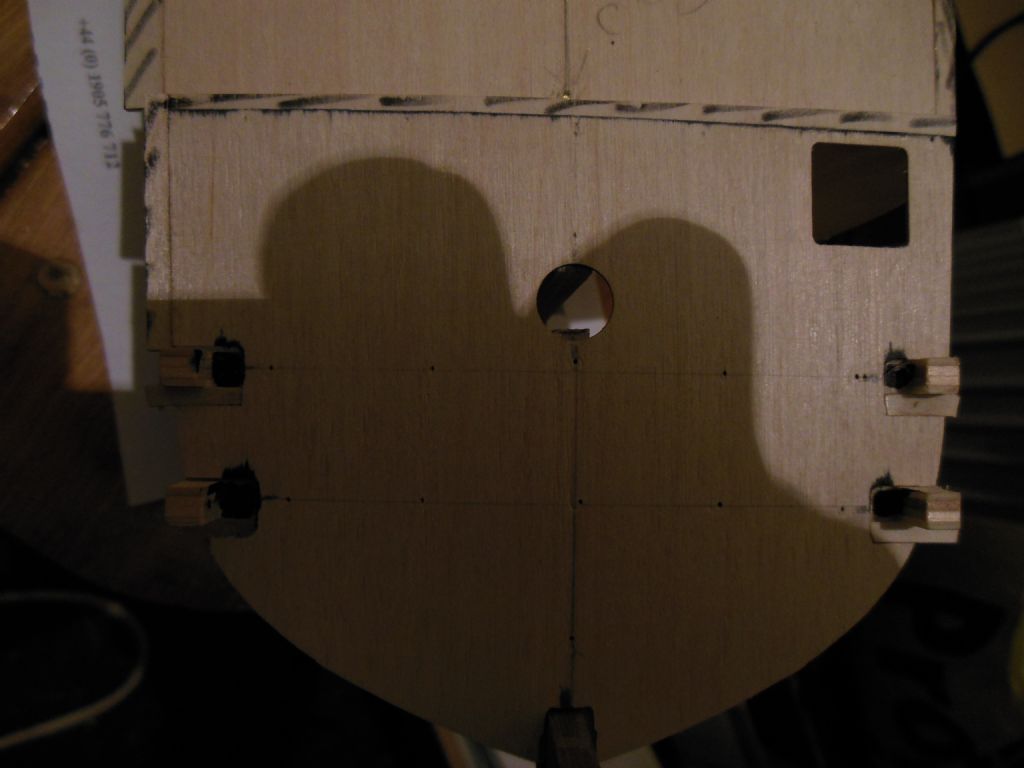
                                                    thanks for the advice mattias, very interesting. just an update for now. just put on the stern fascia and planked the stern counter underneath. Once again theres some sanding and shaping to do before I mark out the wale lines. I have decided to add a thicker plank (thick stuff) immediately above the rest of them to th bulwarks as per instructions. So there will be a step down as per book. However I will add 3 thicker planks below and taper those down to the planking as per plan.The stern counter then has to be cut out where the keel enters the hull to take the actual rudder. The kit shows an odd shaped hole. its an oblong long sides top and bottom curved. The 2 sides angled inwards. but the book shows a circular hole which is then covered with canvas. Obviously to stop any seawater flooding the cabin area. So its going to be a circular hole.

                                                    I realise I am not going to win any prizes for my finished product, but I am so glad I got a copy of this book. I As its my first model of this type I hope to do it justice, however I am a perfectionist(I like to think so anyway) and like you say mattias at the end of the project, I would know it was wrong, even though an onlooker would think otherwisw.

                                                  Viewing 24 posts - 1 through 24 (of 24 total)
                                                  • Please log in to reply to this topic. Registering is free and easy using the links on the menu at the top of this page.

                                                  Code of conduct | Forum Help/FAQs

                                                  Advert

                                                  Latest Replies

                                                  Home Forums Building Kits Topics

                                                  Viewing 25 topics - 1 through 25 (of 25 total)
                                                  Viewing 25 topics - 1 through 25 (of 25 total)

                                                  View full reply list.

                                                  Advert

                                                  Newsletter Sign-up