Help required for building Billings Bluenose II “600”

Advert

Help required for building Billings Bluenose II “600”

Home Forums Beginners Help required for building Billings Bluenose II “600”

  • This topic is empty.
Viewing 25 posts - 101 through 125 (of 135 total)
  • Author
    Posts
  • #76302
    John Arnold 3
    Participant
      @johnarnold3

      Sorry my questions appear never ending.

      I now need to know what I can use to FILL gaps in plastic and are all those plastic parts supplied on the 'webbing' actually PVC? I have small gaps between where the 'roofs' of deck structures meet – each side of the 'roof' is angled so the two parts to the 'roof' leave a semi gap where they meet even though they touch each other at the base – hope you understand what I mean. I guess I could lerave the almost undetectable gaps but I want to make it look as normal as possible.

      I have googled this and found that some filler/putties are suitable for SOME plastics and it concerns me that those plastic parts in a kit might not be compatible.

      Lastly, the ongoing Billings kits saga. I just discovered that the chain supplied for the anchors is only 60mm long yet there are two anchors supplied and two anchors on the actual boat. How on earth can they expect 30mm of chain on each anchor to look authentic? Grrrr!

      Advert
      #76306
      Tim Cooper
      Participant
        @timcooper90034

        John

        If this is a sprue supplied with the kit the it is probably polystyrene and have used the Humbrol and Revell putties for filling. If its a big gap I might use a 2 part filler like Milliput.

        Tim

        #76308
        Banjoman
        Participant
          @banjoman

          John,

          I second what Tim says – it will almost certainly be polystyrene (not least given the fact that the kit recommends using a polystyrene cement to glue those parts together), i.e. the same plastic used in conventional plastic model kits (Airfix et consortes), and either a dedicated polystyrene filler or indeed Milliput should do the job.

          Personally I would be inclined to go for Milliput (**LINK**) traight away, as it is one of my favourite fillers anyway; also, you will find it useful for many other things than the immediate problem. Milliput is easy to apply and can be smoothed and shaped in situ with water on one's finger tip or on a tool tip before it hardens, which cuts down consierably on subsequent sanding. Once it has gone off, it sands beautifullly but can also be carved or even turned (well, not on a piece of plastic kit fitting, but in general). After mixing you have at least half an hour to get into place and shape it to satisfaction, after which it needs three to four hours to go off completely.

          When mixing together the two parts (by kneading), you should be sure to wear appropriate (latex or even better nitrile) gloves, as some people may be or sensitive to epoxies or can develop such a sensitivity through that kind of exposure to the bare skin. For my part, I always wear nitrile gloves for the kneading, but then use my bare fingers for application and smoothing, and so far have had no problems; YMMV, though.

          Mattias

          Edited By Banjoman on 17/03/2018 08:38:10

          #76311
          John Arnold 3
          Participant
            @johnarnold3

            Thanks Tim and Mattias,

            I will try and source Humbrol or Revell putty as it seems I can only get Millput overseas although when I 'googled' Milliput I find that it is a two part EPOXY putty and I can get a locally made two part EPOXY putty from my local hardware **LINK** which is described as for 'most plastics'. Or better still ask Selleys if most plastics includes polystyrene.

            I asked the question as I wondered if adding something to a specific glue (like adding baking powder with CA glue) **LINK** but it looks rather messy and I wanted someone else's opinion.

            Thanks gain


            Edited By John Arnold 3 on 17/03/2018 10:11:40

            #76314
            Banjoman
            Participant
              @banjoman

              John,

              You can get Miliput from Metro Hobbies in Melbourne: **LINK**.

              For my part, I would be a tad wary about other epoxy putties, as they do not necessarily share all the same characteristics. That doesn't mean that they wouldn't work, just that they might behave differently and thus be less (or, fair enough, more) suited for the purpose. Milliput, however, I know for certain and from long experience that it really is the bee's knees!

              That said, if the joints that need filling are relatively small, a Humbrol, Revell or for that matter Tamiya putty specifically intended for polystyrene plastics should do you very nicely.

              And yes, amongst the plastic kit crowd there are all sorts of tricks gotten up to, mixing liquid poly cement and scrap styrene to create thick soups for filler purposes. The thing is, poly cement works by melting the plastic, thus actually welding the joints, and one can play with this to all sorts of purposes. It is risky, though, in the sense that if one overeggs the plastic pudding, things can deform pretty drastically.

              Mattias

              #76324
              John Arnold 3
              Participant
                @johnarnold3

                Thanks Mattias

                I hadn't looked at Metro only BNA (also in Melbourne) and where I have purchased from before. The amount I want to fill is a V shape (where the roof of one side adjoins with the roof of the other side of a normal pitched shaped roof) and about 1mm deep at the deepest point.

                I made a mistake yesterday in reaming out all the holes in all the larger deadeyes from about 0.5mm to 0.75 as I incorrectly worked out that the rigging of them was done with the thicker thread supplied which I tried even after applying CA glue to stiffen it and was having trouble. I had read somewhere of a builder who suggested reaming them and so I did. After I reamed out the last one (44 of them and 3 holes in each) I discovered my error so now the holes are slightly too big. I Then wondered should I buy replacements (would slow the build done waiting for delivery from Cornwall) but it is only noticeable to the 'keen eye'. Silly me should have thought that the dead eye rigging would be with smaller 'rope' than the other rigging. First build – lots to learn.


                Edited By John Arnold 3 on 17/03/2018 23:26:05

                #76358
                Banjoman
                Participant
                  @banjoman

                  John,

                  I have never used the Humbrol/Revell/Tamiya type of filler, so wouldn't know from experience how well (or not) they would handle that; I should think, though, that they would do just fine, so if they are easier for you to source …

                  About the deadeyes, I'd say no worries, it'd have to be an observer, hawkeyed almost beyond mortal ken to spot that difference! I will, however, quote one of Sweden's foremost comedians and satirical writers of the 20th century, Tage Danielsson, at you:

                  "Säll är den som har till rättesnöre, att alltid tänka efter före"

                  (which roughly translates as blessed are they whose guiding principle be, to always come to think of it beforehand )

                  Mattias

                  #76359
                  John Arnold 3
                  Participant
                    @johnarnold3

                    Thanks Mattias

                    I had a chuckle. I have learned such a lot since commencing this build as a 'freshman'.

                    I main thing is that I am so annoyed at spending about 60 minutes drilling/reaming 140+ holes in those deadeyes and soooooo boring excuse the punthinking

                    Now to staining/varnishing the deadeyes (using a few tutorials I found).

                    John

                    #76429
                    John Arnold 3
                    Participant
                      @johnarnold3

                      More tuition required – for painting.

                      I am wondering how to color the (anchor) chain supplied with the kit as the links are so very small. It is made of brass and each link is only around 1.5mm long. Already I have found that painting the hull the 'eyebolts' on the hull (for rigging between the hull and the bowsprit) get filled with paint which is easy enough to fix using a very small drill but I don't fancy having to do that to every link in the chain. Are there other methods for getting rid of the shiny brass look off the chain?

                      Also I am finding painting the top half of the hull (above the water line) to the top edge of the hull (the rail which is white) is difficult trying to paint a straight line so that the paint goes to the top of the hull without getting onto the rail. All I could think of is using masking tape along the top of the rail. Is that the best way?

                      Thanks

                      #76430
                      Banjoman
                      Participant
                        @banjoman

                        John,

                        It is quite hard to paint a chain (not least one that small) in a way that'll look realistic. Although I dare say that it can be done, I have never had any success, and these days won't even try.

                        My preferred method is to use a chemical blackener. The one I use is called Blacken-It, and is made by a US company called A-West, primarily for the model railroad crowd. Here's one supplier in Australia who, alas, seems to be out of stock, at least for the moment: **LINK**.

                        There might be similar products available from gunsmiths, I believe, although I've never checked those possibilities out, as I can usually get my hand on Blacken-It.

                        If you look at p. 10 of my Eilean Mòr thread (**LINK**), there are photos there of both brass bottle screws and shackles, and of a brass anchor chain that have all been chemically blackened.

                        Please note that this product is a soup of acids, and should be handled with proper gloves on; however, it doesn't fume or smell very much, so with reasonable care is not a health hazard. It can be diluted for a longer reaction time but more solid and stable result. It can also re-used, so should go back in the (a) bottle; I prefer to decant into a separate bottle, thereby not diluting or polluting the as-yet unused quantity in the original bottle.

                        And yes: masking off is (almost) always the way to go! With a steady hand and beady eye, it is possible to paint in a pretty straight line, but masking off is so much easier; afterwards, you might need to touch up the occasional spot where the black has invaded the white or vice versa, but that is rather less trouble than trying to do it all freehand …

                        Mattias

                        Edited By Banjoman on 22/03/2018 11:40:36

                        Edited By Banjoman on 22/03/2018 11:40:48

                        #76431
                        Banjoman
                        Participant
                          @banjoman

                          PS. If you have a look in your inbox, you'll find an answer there from last week to your PM to me …

                          Mattias

                          #76438
                          John Arnold 3
                          Participant
                            @johnarnold3

                            Thanks again Mattias,

                            I have found an Australian shop selling a similar product and also pre blackened chains as well (although they are out of stock of the chains) **LINK**

                            I wasn't sure about applying masking tape along an edge (eg hull side to rail) and I will consider that.

                            Thanks too for your other reply – I had not received a notification that it was there.

                            John

                            #76439
                            John Arnold 3
                            Participant
                              @johnarnold3

                              Continuing with yet another question.

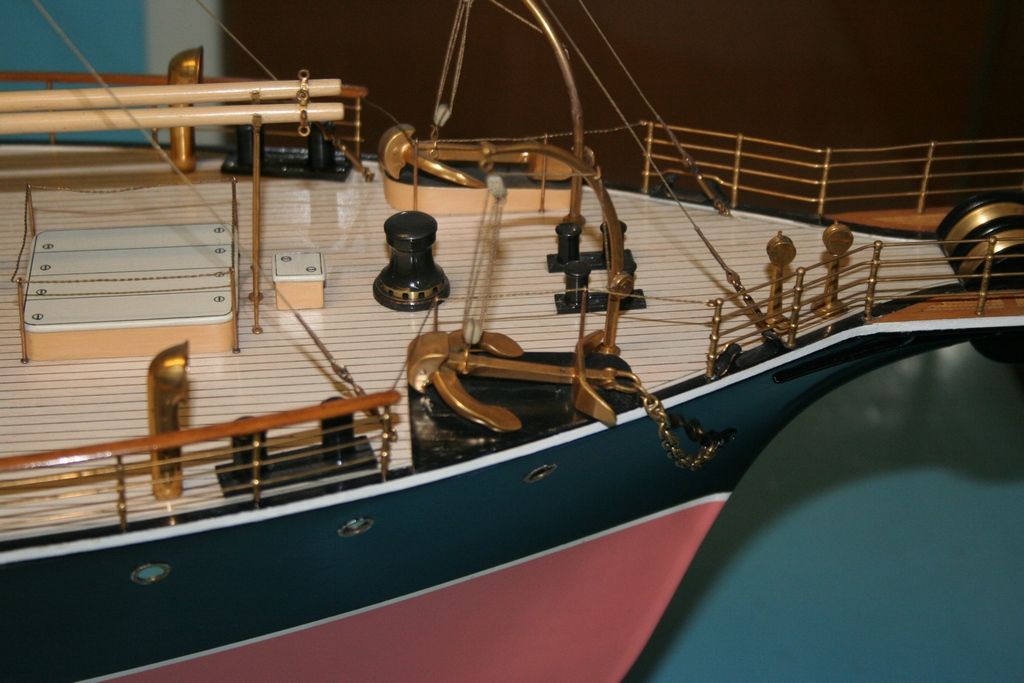
                              In an earlier post I suggested that the chain included with the kit for the anchors was not long enough (I thought that the chains on the anchors would perhaps be attached to a winch). Looking at a video of the real boat that doesn't seem to be the case. The chain attached to the anchors appears to be wrapped around a belaying pin.

                              Can you explain about the chains on the anchors in the attached still from that video. There also is a much heavier chain lying on the deck between a winch and the bow of the boat.

                              Maybe I don't require a lot of chain.

                              bluenose anchors.jpg

                              John

                              #76440
                              Banjoman
                              Participant
                                @banjoman

                                John,

                                The chains that you see between the anchor and the davits cannot be the actual anchor chains; they are way too small and weak for that purpose! I'd say they are just there to hold up the anchors to the davits when the anchors are stowed on board as they are here. The long chain (not the short one attached to the bitts) running along the deck might be the anchor chain; it's hard to say without a clear view of where it comes from and goes to, but the fact that the run of decking underneath it is not varnished like the rest of the deck would support the theory that it is indeed the anchor chain.

                                Mattias

                                #76441
                                John Arnold 3
                                Participant
                                  @johnarnold3

                                  Thanks Mattias

                                  Yes there doesn't seem to be anywhere else to stow the anchors so what you state makes sense. So the very short chain supplied is probably to 'mimic' those chains used to secure the anchors to the davits. Maybe I will still buy some more chain as that supplied probably would only reach between the anchor and the top of the davits instead of back to the top rail and to what looks like belaying pins. Also a heavier scale chain to place where that heavier chain on the deck is which appears to have links twice the size on the chain on the anchors just for a bit more realism (good heavens am I turning into a rivet counter wink?

                                  #76445
                                  Banjoman
                                  Participant
                                    @banjoman

                                    John,

                                    It has happened to many a modeler that the rivets got to them in the end, so why should you be immune?!

                                    More seriously, no not necessarily a rivet counter, but perhaps a rivet acknowledger?!

                                    By this I mean that a rivet ignorer won't even notice that a surface is composed of riveted plates, but just make it flat; a rivet acknowledger will know that there are plate lines and rivets, and try to reproduce them to at least a general effect level; while a real rivet counter will strive for an exact reproduction of the original plate pattern and count and measure the exact number, size and placement of the rivets.

                                    And so on, mutatis mutandis, for all other aspects of a build.

                                    My personal view is that all these approaches have an equal intrinsic value, because I firmly believe that the only person whose opinion really counts is the builder. If rivets leave you cold, don't bother with'em! If one too few or too many makes you break out in a painful rash, by all means get a-counting!

                                    I will say, though, that once you have thought about a possible improvement on the basic approach, it is usually better to go through with it, as otherwise you risk having to live with that slight, internal wince of dissatisfaction every time you look at the result. I say usually, because of course one has to weigh up additional expenditure of money and time against the level of improvement and against the general level of achievement (one super-detailed item on an otherwise stand-off scale build risks looking rather out of place, if you see what I mean) aimed for.

                                    I bought some lovely, extremely fine link copper chain a while back, and shall go through my archives tonight or tomorrow to see if I can find out where that came from (I don't remember of the top of my head), and if I find it, post a link here.

                                    Mattias

                                    Edited By Banjoman on 23/03/2018 09:31:51

                                    Edited By Banjoman on 23/03/2018 09:32:30

                                    #76447
                                    John Arnold 3
                                    Participant
                                      @johnarnold3

                                      Re watching a video of the real boat has revealed more about the heavier chain.

                                      At one end it appears to be attached to a winch (first image) and the other end goes forward and through the hawsehole.

                                      The second image shows a chain from the hawsehole back to the davit where the anchor is stowed.

                                      I wonder why the heavier chain is not connected directly to the anchor.

                                      BTW my model kit did not come with a hawsehole or even anything on the plan to suggest that there is one. I find that strange. Cornwall boats doesn't list hawseholes less than about 11mm which at 1:100 means one on the real boat 1.0m wide which seems too large. Maybe that is why I didn't get any. Can't be bothered trying to make two, maybe use small brass portholes or use the instructions I found for another manufacturer's kit viz

                                      Carefully drill starter holes for the hawseholes,  as  shown in the plans. Expand the holesto their proper oval shapes by using miniaturefiles. To simulate the lips of the holes, apply HardMolding Paste, which is a gel medium available in
                                      artist supply stores, with a toothpick until it is  theproper shape. You may be required to apply multiple
                                      coats of the paste to achieve good results.
                                       

                                      I have sourced some fine brass chain with links 1.5mm long which is good for scale 1:100. Cheap $8 posted.


                                      bluenose anchors 2.jpg

                                      bluenose anchors 1.jpg

                                      Edited By John Arnold 3 on 23/03/2018 09:54:57

                                      Edited By John Arnold 3 on 23/03/2018 09:56:24

                                      Edited By John Arnold 3 on 23/03/2018 09:57:40

                                      Edited By John Arnold 3 on 23/03/2018 10:03:05

                                      #76448
                                      Banjoman
                                      Participant
                                        @banjoman

                                        John,

                                        If you look again at the photos in your last post, I think you'll find that the anchor chain is actually shackled to the port anchor!

                                        In the first photo you can (just) see a metal object pointing outboard and downwards behind the top of the anchor stem; I'm reasonably sure that that is a second shackle that connects the chain with the more visible shackle that in its turn is bolted to the eye of the anchor stem. There are thus two shackles involved: one bolted to the eye of the anchor stem, the other bolted to one of the final links of the chain, and the two shackles taken through one another.

                                        If you think about it, this is a fairly logical set-up in a situation where both the eye of the anchor stem and the chain link are too small for the eye shank of the shackle to pass through either.

                                        Likewise, the second photo shows the anchor chain going over the bulwark top but not up to the davit! Instead, it seems to end up pretty much around the shackle end of the anchor …

                                        Mattias

                                        Edited By Banjoman on 23/03/2018 10:32:27

                                        #76449
                                        Colin Bishop
                                        Moderator
                                          @colinbishop34627

                                          John,

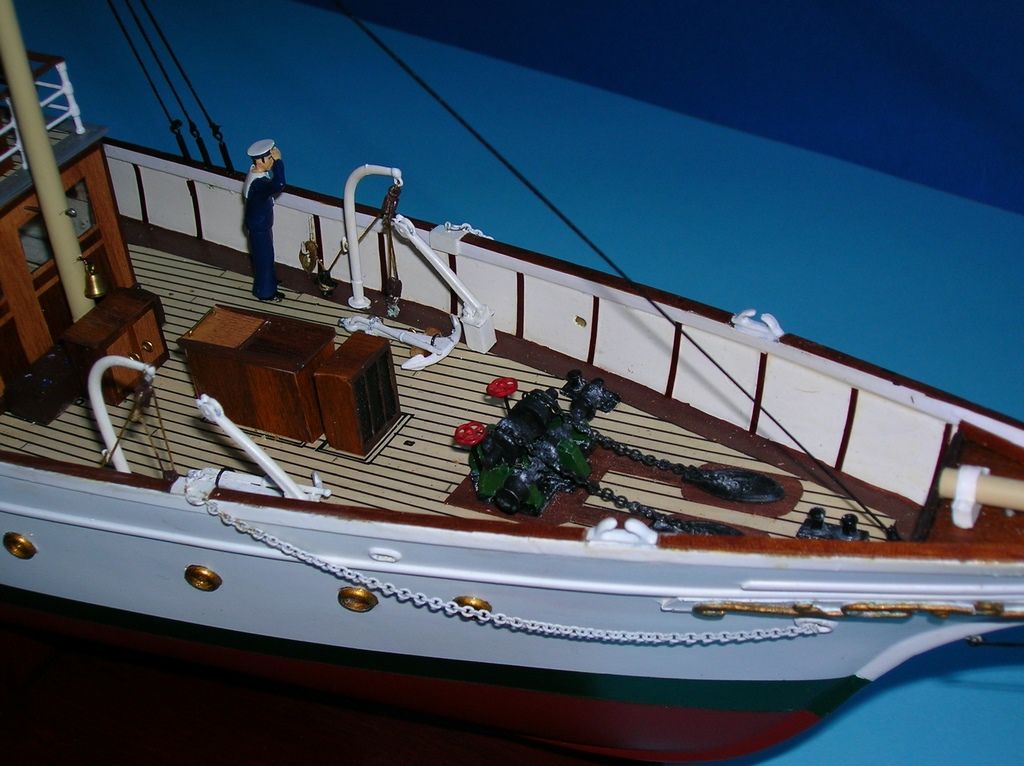
                                          I had the same issues when looking at the anchor handling arrangements on my Deans steam yacht kit. The key is to understand what needs to be done. Basically, in its stowed position the anchor usually has the main anchor chain attached to its stock, led over the side and back up through the hawsehole where it runs back to the windlass or capstan and then drops down into the chain locker below deck.

                                          So, to drop the anchor it first needs to be lifted up to clear the bulwarks before being dangled over the side and released. When raising anchor, the windlass/capstan is used to pull it up under the bow from where it can be grappled and hoisted back aboard for stowage.

                                          There are many different ways of doing this although the principle remains the same. Sometimes a single davit is used to raise the heavier fluke end and the stock is manhandled over the bulwark or rail, other times a second davit is used so that one supports the stock and the other the flukes and the whole thing is swivelled over the side.

                                          Before they closed the Science Museum Marine Gallery I took the opportunity to go and photograph the anchoring arrangements on a number of models and they were almost all different in detail!

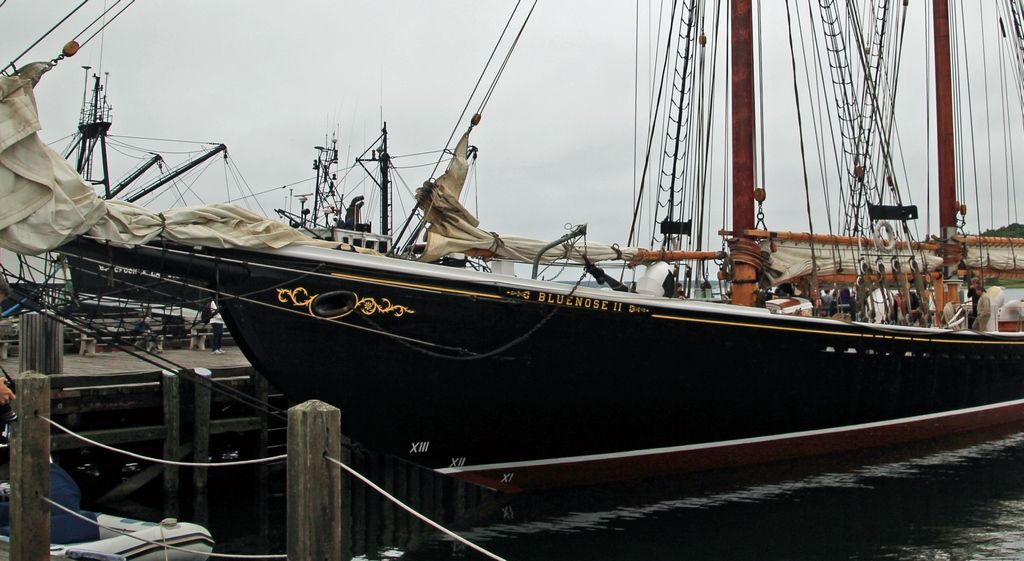
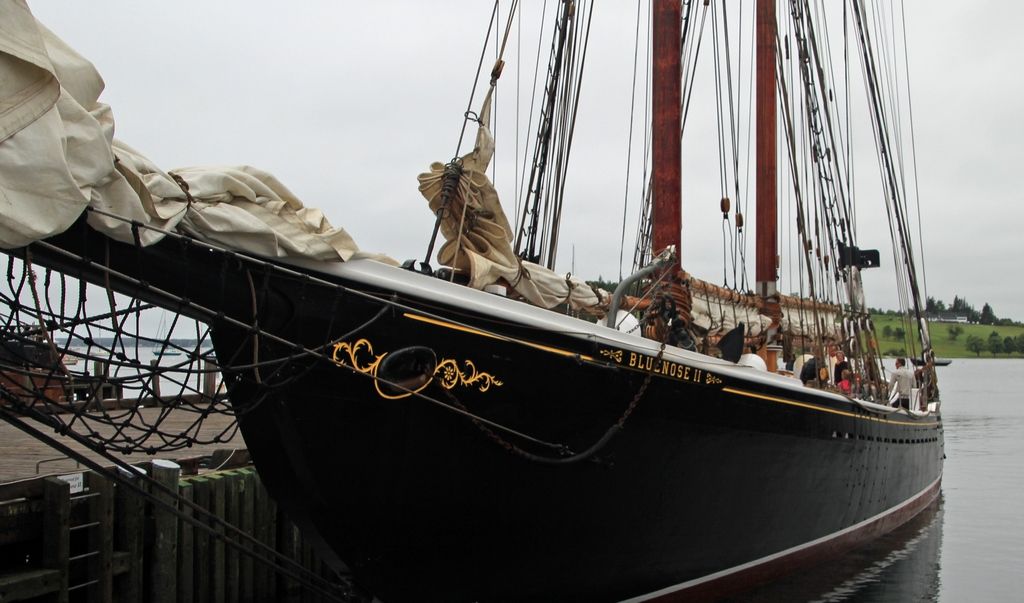
                                          There are remarkably few images of the foredeck of Bluenose II online either in full size or model form but it is evident that the anchor arrangements have changed over the years. I take it from your illustration that you are depicting the present setup. When I photographed her last year I got a shot of the port side showing the chain led from the hawsehole back aft over the bulwark to the anchor. It is obvious that the port anchor is the main one as the davit, and apparently the anchor, on the starboard side is clearly much lighter and probably used as a secondary anchor.

                                          The main anchor clearly has the stock attached to the davit and there is no obvious means of lifting the flukes but this might be done via a tackle attached to the mast which would also make it easier to lower the anchor to the water before letting it go.

                                          Somebody else on here might be able to shed a bit more light on things as far as Bluenose is concerned but I hope this explanation and the photos below will give you something to go on.

                                          Colin

                                          album l miltiades.jpg

                                          medea anchor.jpg

                                          album l anchor 1.jpg

                                          album l anchor 2.jpg

                                          #76453
                                          John Arnold 3
                                          Participant
                                            @johnarnold3

                                            Thanks Mattias and Colin.

                                            Colin the second image 'explains' it all so thanks for those. I must say those and some images of models by Mattias lookk like museum quality models especially the painting finish although they are probably done with an airbrush which makes it easier than brush for a fine finish I'm sure.

                                            Colin I assume you visited Lunenberg, Nova Scotia in Canada to get those photos? According to the official web site you can have a harbor cruise onboard for $64 – that's not cheap. I too 'experienced' Bluenose 2 a few years ago during a cruise from Quebec to Boston. Little did I realise at the time that I would one day be building a model of it and indeed when I purchased the kit I didn't realise that I had seen the real thing until I happened to watch my home movie again.

                                            Now here's another thing I have noticed. The kit supplies and the plane shows a lot more sail than any image or video I have seen of the Bluenose II. It appears that the top most sails are reefed. I guess those top sails are only used when speed is required? I also note that the joins in the strips of sailcloth (Mattias will remind me of the name) are not noticeable in this image.

                                            Lastly please advise how to insert images. I can do it by adding images to my album and select from there (insert image from album) but everytime I click on the IMAGE icon the image is inserted but I cannot save as I get a message advising that the post is too long.

                                            bluenose.jpg

                                            bluenose model.jpg

                                            John

                                            #76454
                                            Colin Bishop
                                            Moderator
                                              @colinbishop34627

                                              John,

                                              I'm afraid it is a quirk of the software that you can only insert images from an album.

                                              Yes, in 2016 we did a two week driving tour of Nova Scotia and just happened to stop off at Lunenberg as the Bluenose II was preparing to depart. on a local trip. Expensive, as you say, but it seemed to be quite well patronised. I rather suspect that for tourist excursions she operates as a motor sailer so not too much sail required and the vessel will not heel too much in gusts.

                                              The first of my images is a builder's model of the liner SS Miltiades of 1903 build for the Aberdeen line's UK to Australia service. She was later lengthened. The model was displayed in the London Science Museum until a couple of years or so ago when they regrettably closed their marine gallery. You can see what it looked like here:

                                              **LINK**

                                              The second image is my Deans Marine sy Medea kit which I have modified to some extent into a generic steam yacht of the period.

                                              Colin

                                              #76457
                                              John Arnold 3
                                              Participant
                                                @johnarnold3

                                                That museum looks fantastic.

                                                BTW I probably have posted this link before but in case you didn't see it here is a few seconds of the video I did at Lunenberg – probably the same wharf as where you saw it **LINK**

                                                Here in Sydney (an hour from me) you can sail on a square rigger with sails set but they don't heel much although quite expensive too although the price includes a meal. Apparently you can help set sails and climb a mast **LINK**


                                                And lastly here is another video I just found which shows in details lots of the Bluenose and in it I just notices that the bowsprit is black and I had stained it the same color as the masts – easily fixed I guess and but I wished I had known before I painted the parts where the rigging is attached black before attaching to the bowsprit. Would have been much easier painting everything black at the same time.  http://www.youtube.com/watch?v=vlNmSkJ8wK4

                                                John

                                                Edited By John Arnold 3 on 24/03/2018 00:35:11

                                                Edited By John Arnold 3 on 24/03/2018 00:39:01

                                                Edited By John Arnold 3 on 24/03/2018 00:41:35

                                                Edited By John Arnold 3 on 24/03/2018 00:42:14

                                                #76462
                                                Colin Bishop
                                                Moderator
                                                  @colinbishop34627

                                                  John,

                                                  Thanks for the links.

                                                  Yes, the museum gallery was a shiplover's delight and I remember seeing it when it opened in 1963 when it was very popular. Interest has waned over the years and the gallery was never updated. Consequently while the rest of the museum was bursting with visitors it was often almost deserted and the museum concluded that they could make better use of the space. The models are now in store elsewhere but can be viewed for research purposes by appointment.

                                                  Your second video shows thet the starboard anchor on Bluenose II is in fact quite substantial yet the davit is clearly a lot smaller than the portside one.

                                                  Colin

                                                  #76483
                                                  John Arnold 3
                                                  Participant
                                                    @johnarnold3

                                                    Well (at last) I have finished painting the hull. The Tamiya 5mm masking tape worked well although there were a couple of minor 'bleeds' under it even though I used Banjoman's suggestion of painting the first coat the same color as the color under the masking tape but I was able to fix those with a very small brush and a steady hand. I must say that I am VERY pleased with the finish using brushes (I don't have an air brush) but I wonder if using an air brush would result in less 'bleeding' under masking tape.

                                                    A friend has agreed to sew the sails for me as she is used to using a sewing machine and using patterns. I was looking back on Banjoman's excellent series of posts in the thread entitled MOONBEAM and particularly the posts regarding sail making **LINK** One of the posts appears to state that the writer marked the sails to represent where the pieces of sailcloth are stitched together using a pencil and I am wondering did I read that correctly.

                                                    Banjoman and others have mentioned using a sewing machine however I'm not sure if I like the effect looking at images of static models of the Bluenose. I had considered using a fine point spirit marker but think that being wet it would 'bleed' out and look terrible. What are successful ways of making those 'lines', sewing machine, pencil (what grade)?

                                                    Thanks

                                                    #76484
                                                    Banjoman
                                                    Participant
                                                      @banjoman

                                                      John,

                                                      I did indeed first mark out those lines very lightly with a soft (4B) pencil; I then used a sewing machine to apply a line of stitching along and completely covering each of the pencil lines.

                                                      I suppose if one were to look very carefully, the pencil markings would still be visible here and there, but otherwise they were to all intents and purposes obliterated by the subsequent stitching.

                                                      For sails like yours, I think I would probably have opted for stitching the lines on as well, but with a thread only a few shades darker than the sail cloth, so that they wouldn't stand out too much. I quite agree that to use a much darker thread (e.g. black on white) would over-emphasize the lines and make them look exaggerated and out of scale (which of course they are, strictly speaking, true scale stitching being quite impossible to achieve at most scales).

                                                      A thread just a shade darker than the cloth, on the other hand, should provide the desired visual effect, as it would look line and represent the turned-over cloth edges that, at normal distances of observation, is what you actually see on the full-size sails rather than the stitching.

                                                      Mattias

                                                    Viewing 25 posts - 101 through 125 (of 135 total)
                                                    • Please log in to reply to this topic. Registering is free and easy using the links on the menu at the top of this page.

                                                    Code of conduct | Forum Help/FAQs

                                                    Advert

                                                    Latest Replies

                                                    Home Forums Beginners Topics

                                                    Viewing 25 topics - 1 through 25 (of 25 total)
                                                    Viewing 25 topics - 1 through 25 (of 25 total)

                                                    View full reply list.

                                                    Advert

                                                    Newsletter Sign-up