Another billings slo-mo-shun

Advert

Another billings slo-mo-shun

Home Forums Building Kits Another billings slo-mo-shun

  • This topic is empty.
Viewing 25 posts - 76 through 100 (of 177 total)
  • Author
    Posts
  • #26391
    Phil Winks 1
    Participant
      @philwinks1
      Hi Bob they are here I believe the screw section is 2mm so that 4mm frames can be pre-drilled to accept them and I’ve heard good things about their holding ability. a little silicone spray on the screw thread prevents them sticking. Miskin models are, I believe from south wales/newport area so I’m hopefull that he will be at the south west model show this weekend and I maybe will save on postage.
       
       
      Phil 
      Advert
      #26393
      Bob Abell 2
      Participant
        @bobabell2
        Hello Phil
         
        I understand now………………You could make you own really, out of fine wood screws and a bit of ingenuity?
         
        Bob
        #26394
        Phil Winks 1
        Participant
          @philwinks1
          Very true Bob or even a bit of brass bar,
           
           the real clever bit is the handle as apparently it allows a lot of control on tension without the fiddle of a screwdriver, makes them a one handed tool
           
          The Big question is can I be fussed with the bother of making about 15 or 20 of them. Hang on thats £20 !!! answer yes I can !!!
           
          Fine brass wood screws 1/2″ no 4 or smaller (where can I find No 2 brass wood screws I wonder) soldered to a bit of round bar or into 1/8th tube, and a micro file handle, a little epoxy!  job sorted.
           
          Thanks Bob Inspiration just when I need it
           
          Phil
           
          Nb fine screws = servo screws usually made of brass! cooking on gas now
          #26396
          Bob Abell 2
          Participant
            @bobabell2
            How`s about……………….Servo screws with a blob of P51 and a washer?
             
            It`s a cheapjack way, but it will get you going……..plus the feeling of smuggness thrown in!
             
            Bob
            #26398
            Phil Winks 1
            Participant
              @philwinks1
              great Idea Bob just one prob (isn’t there always) my unlimited supply of servo screws has  a limit lol I had a look in the box this morning only 2 left hmm I’ll find some somewhere maybe get some at the weekend.
               
              no real rush as the motors/bty/esc/rx/servo won’t be here for a month at least which gives me time to take my time over the veneering.  That bit will be perfect, I’m determined about that!
               
              On with the other bits 1st then. Thats the scoop, the steering transfer, and the cockpit!.
               
              The transome cover can be fitted allowing the gubbins at the tail to be readied plenty for this week then finish the fore deck next week
               
              Phil
              #26399
              Pierre
              Participant
                @pierre
                Hi Phil
                 
                Thanks for posting details of those planking clamps – I’ve just finished the first planking of Jotika’s “HMS Endeavour” and was wondering  how to go about securing the second planking. (I hate working with CA glue)  Off to workshop to see what wood screws are available. I thought of epoxing them into some dowelling and using some aluminium section for the foot.
                 
                Pierre
                #26400
                Bob Abell 2
                Participant
                  @bobabell2
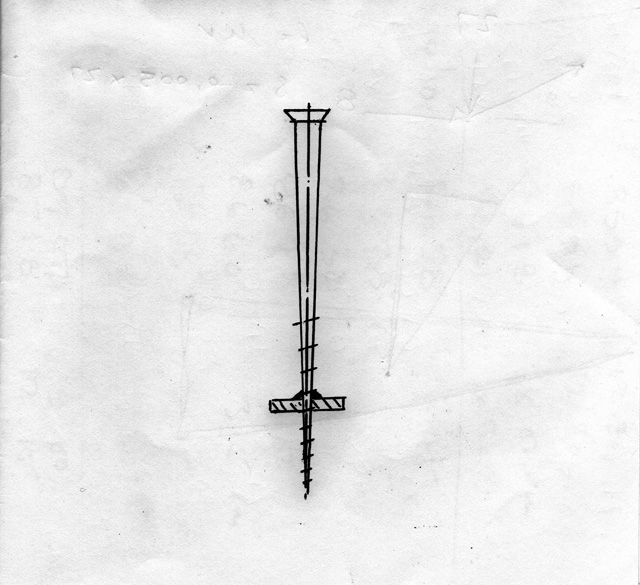
                  How about this then?…….Gents
                   
                  Another spiffin` idea from Bob
                  #26411
                  Phil Winks 1
                  Participant
                    @philwinks1
                    Glad to have helped Pierre I would be interested to see details of what you come up with as a result. that looks interesting Bob is it a wood screw or have I mis-interpreted?
                     
                    Now some pics of the details in hand the steering transfer box pre-paint looks good enough to me and the idea of using a control snake has allowed me to hide the contol details pretty effectively
                     

                    the snake outer inside the hull is still waiting to be fitted to the cokpit base to stiffen it up. the servo will be fitted to the left of the propshaft with the RX on the right to help the lateral balance


                    everything is just dry fitted at present and while I was at it I thought lets see how it’s going to look


                    And with the cowl/hatch removed it looks like plenty of room to swap bty’s

                    Now to take it all off and spend the rest of the week painting sanding painting sanding while I devise some plank clamps lol

                     
                    Phil

                    Edited By Phil Winks 1 on 14/04/2010 19:31:19

                    #26415
                    Bob Abell 2
                    Participant
                      @bobabell2
                      Thanks looking nice now, Phil
                       
                      Can`t make out what that “Liquorice Allsort” is at the back, on the left?
                       
                      Bob
                       
                      PS …..My plank clamp is supposed to be a long slender woodscrew, with a washer soldered on
                      #26417
                      Phil Winks 1
                      Participant
                        @philwinks1
                        Brilliant idea Bob prob work just great would need some slim wood screws the frames are, well you know! only 4mm thick.
                         
                         
                        Liquorice allsort lol go back a page mate
                         
                        Or look at this
                         
                         
                        steering transferbox mate
                         
                        Phil

                         
                        #26421
                        Bob Abell 2
                        Participant
                          @bobabell2
                          I was only pulling your leg, mate!
                           
                          The cockpit area is very neat and tidy
                           
                          Bob
                          #26422
                          Phil Winks 1
                          Participant
                            @philwinks1
                            Thankyou Bob
                             
                            The finishing touch that will make the Allsort? more realistic is the 2 coneccting rods one solid one from the actuator to an arm fixed to the rudder to move it and one fixed at each end comprising a tube at one end and a rod at the other to simulate the damper should look quite industrial and being from nylon control snake very light. the ridges as you can see are nylon cord. they are fixed with super glue which has caused them to become solid (Sandably solid) some ali paint should complete the picture
                             
                            Phil
                            #26429
                            Phil Winks 1
                            Participant
                              @philwinks1
                              On the transferbox/rudder linkage subject, I’ve had to shelve the two rods idea as it didn’t work at this scale, however what I’ve got is a good representation, the con rod is only dry fit here!
                               

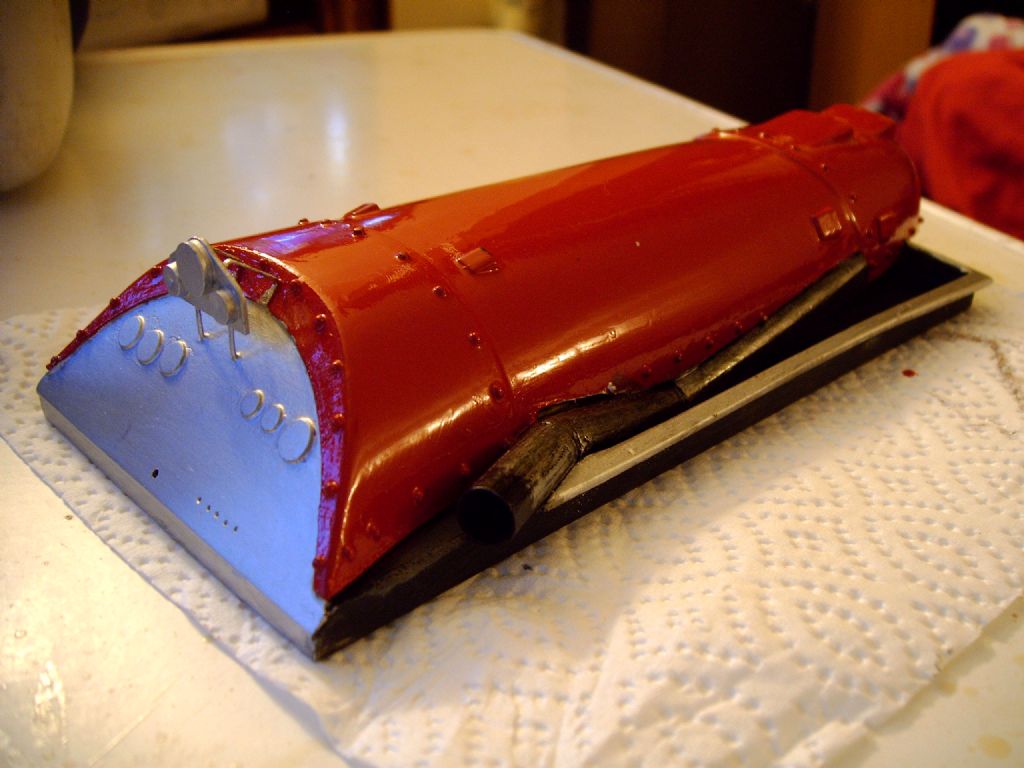
                              Also the paint job on the engine cowl/cockpit and fin is coming along nicely. However I am struggling with the exhaust colour still chance to find something more appropriate at the weekend,


                              Also I have a design for and prototype of the planking clamp and it works


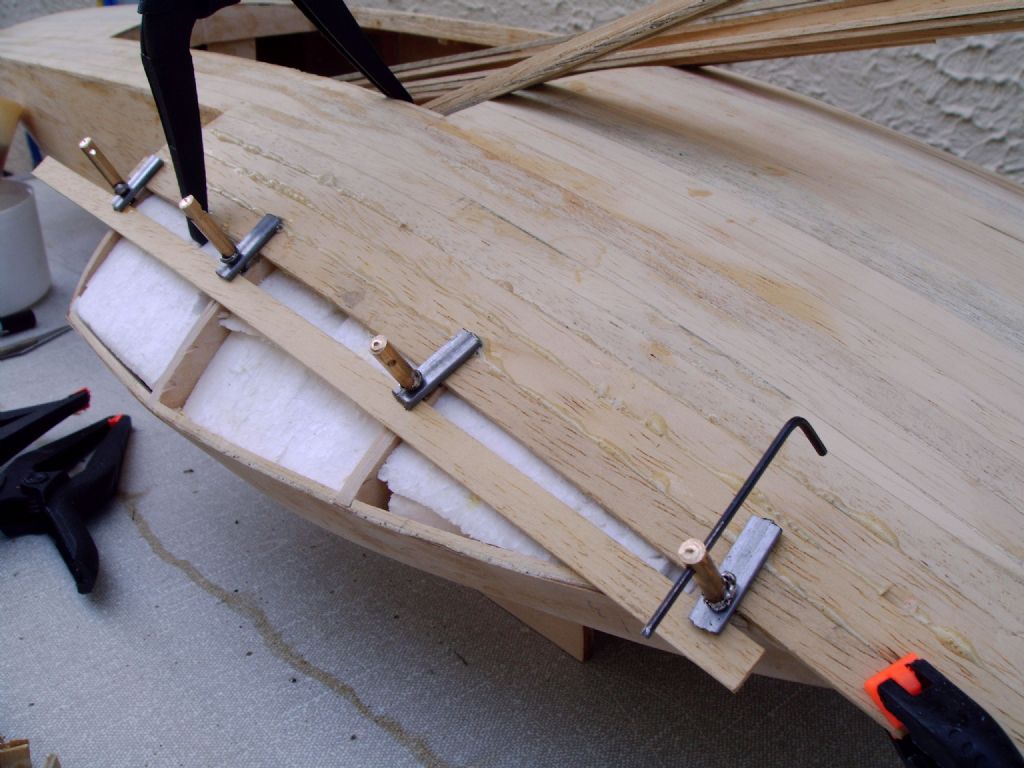
                              It’s made from a 1/2″ No3 (2mm) brass wood screw soldered to a short length of brass tube epoxied into a length of 3/8″ dowel, the foot is as seen a piece of 3mm ply. I have plans for some 3x8mm stainless bar to replace this if it doesn’t prove to hard to drill it. A 1.5mm hole drilled into the frame takes the clamp without danger of splitting, and still grips well enough to allow ample pressure. Total cost was : screws 20 for £1.20 Glue £1.99 for a large double syringe, app 30ml,  the rest from my recycling facility.

                               
                              Got to be better than a quid a piece eh
                               
                              Phil

                              Edited By Phil Winks 1 on 15/04/2010 19:54:25

                              #26431
                              Bob Abell 2
                              Participant
                                @bobabell2
                                Well done, Phil……….Those homemade plankin` screws should last you forever now!
                                 
                                The engine cover looks very pretty and neat………Got a driver yet?
                                 
                                Bob
                                #26434
                                Phil Winks 1
                                Participant
                                  @philwinks1
                                  No Driver yet Bob! however I’m at the south west model show this sunday!  and I keep sneaking into toy shops etc  when we’re out the, seat is living in my pocket for reference.
                                   
                                   
                                  Phil
                                  #26441
                                  Len Ochiltree
                                  Participant
                                    @lenochiltree67043
                                    Well done Bob and Phil with the home made planking devices.
                                     
                                    What a pair of Plankers
                                    #26443
                                    Bob Abell 2
                                    Participant
                                      @bobabell2
                                      Thanks, Len
                                       
                                      Necessity was the Motherhood of Invention…………..so the saying goes……and it`s true!
                                       
                                      Bob
                                      #26445
                                      Phil Winks 1
                                      Participant
                                        @philwinks1
                                        Thanks Len! As Bob says neccesity as they say and the result makes the using all the more satisfying.
                                         
                                        Phil
                                        #26494
                                        Phil Winks 1
                                        Participant
                                          @philwinks1
                                          Here you go chaps I’ve found the materials to improve the plank clamp. 3x8mm flat steel bar and some slightly longer screws 16×2.5mm this has achieved two things, 1st a vastly improved clamp force, and 2nd the bar is far less likely to be accidentally glued to the plank being clamped! the brass rod handle is drilled to take that small Allen key as a Tommy bar and using them is a breeze.
                                           
                                          The loose plank at the back of the clamps is merely a spacer to keep the clamp paralell to the frame edge


                                          so with 8 in my clamp arsenal the deck will get done in the next couple of days. then its on to sanding and the dreaded veneering.
                                           
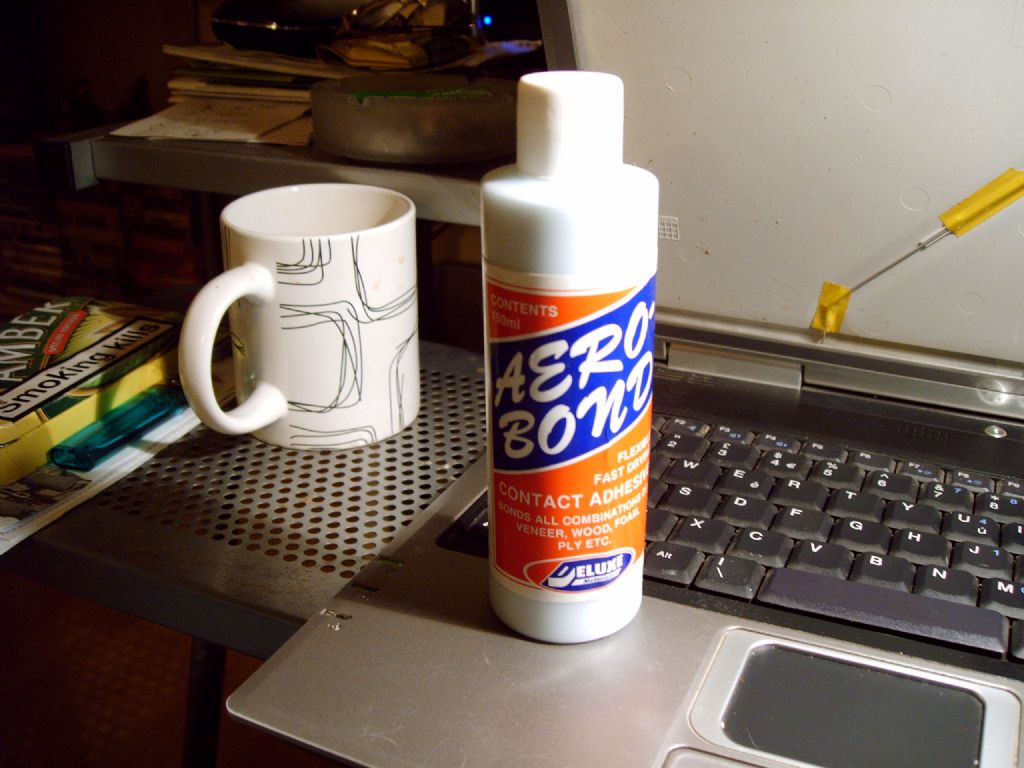
                                          I made the decision over the weekend to use a specialist contact adhesive that I got from “Deluxe Materials” while at the show, hopefully that and a wallpaper seam roller should see it all go on with no drama, and more importantly no gaps or bubbles.
                                           
                                          Phil

                                          Edited By Phil Winks 1 on 20/04/2010 16:42:27

                                          #26500
                                          Phil Winks 1
                                          Participant
                                            @philwinks1
                                            Not one to sit around doing nowt the paint box has been out again and I now feel much happier about the paintwork to the engine cowl. also I feel after many failed attempts that the exhaust colour is just about right
                                             

                                            obviously the dash needs some work! namely the dials and switches

                                             
                                            Phil
                                            #26502
                                            Bob Abell 2
                                            Participant
                                              @bobabell2
                                              Looking nice, Phil
                                               
                                              I`ll bet you can`t wait to start the veneering!
                                               
                                              Not forgetting the varnishing too!
                                               
                                              Bob
                                              #26504
                                              Phil Winks 1
                                              Participant
                                                @philwinks1
                                                The veneering is now something I am actually looking forward to Bob having chatted to the guy who sold me the specialist glue. It’s something from my aircraft past used for veneering wings and similar, something you may have used in the past
                                                 

                                                Areo bond water based contact adhesive a cracking glue that dries clear and allows a little slip prior to sticking fast with pressure from a roller (wallpaper seam roller does well) No really nasty smells and water clean up while wet. and as lightweight as they come. don’t know why I never thought of this before many thanks to D&M models.

                                                 
                                                Phil
                                                #26518
                                                Telstar
                                                Participant
                                                  @telstar
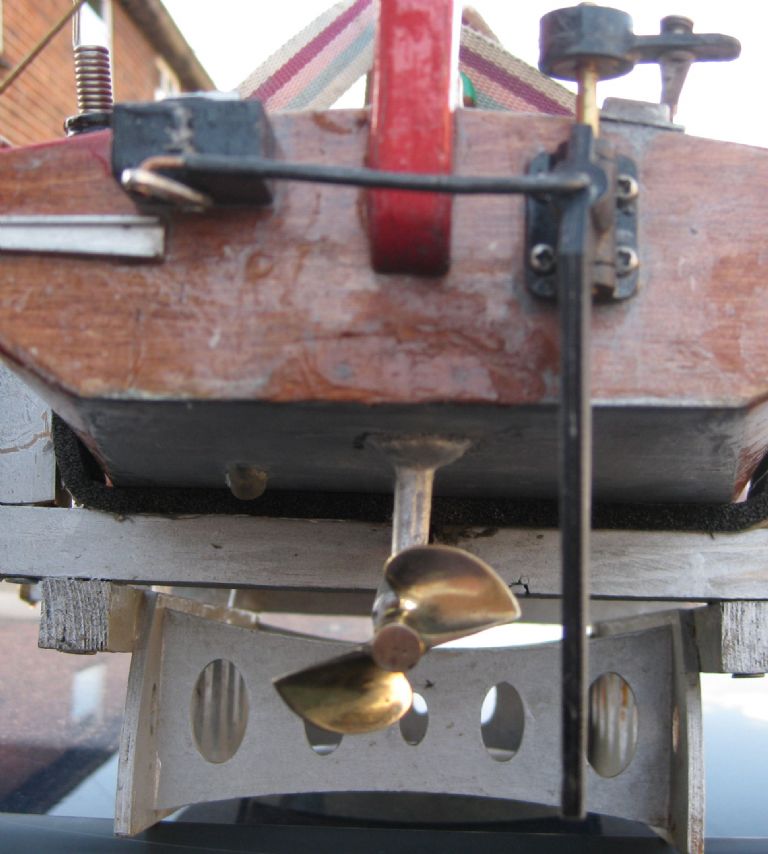
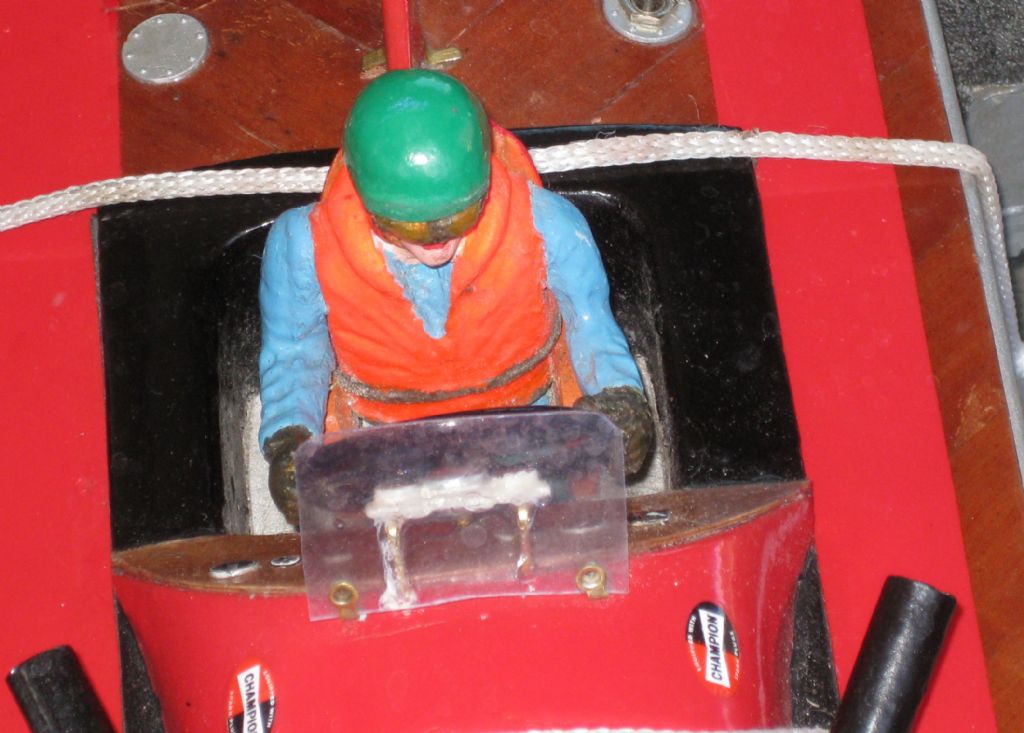
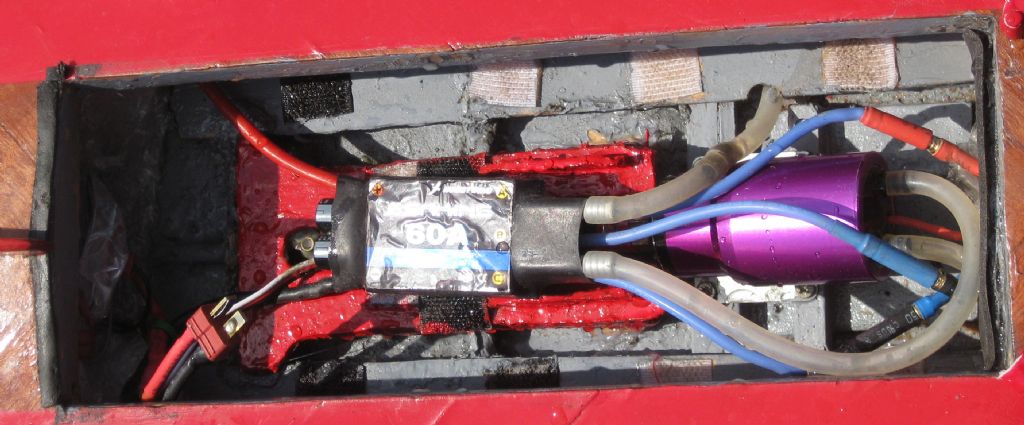
                                                  Hi Guys   Before I went on hol you asked for some info,
                                                     The prop on the boat is a Propshop 3514 brass,
                                                     The crew is a modified pilot figure mail ordered from the U S it seems impossable to get anything other than head & shoulders over here.
                                                  pics self explanatery


                                                  Cheers Tom

                                                  #26519
                                                  Phil Winks 1
                                                  Participant
                                                    @philwinks1
                                                    Thanks Tom really helpfull esp the prop size that’s always a bone of contention shame that motor manf don’t make recomendations as far as prop sizes go. can’t understand why either as the aircraft motor manf do so it’s not that hard to determine with the right kit.
                                                     
                                                    I must get a telemetry setup to check these things (I wish lol)
                                                     
                                                    Phil
                                                    #26520
                                                    Telstar
                                                    Participant
                                                      @telstar
                                                      Hi Phil     The lack of technical info for motor/prop combinations is one of my pet rants,
                                                      that is why I build a test rig (dynamometer) to look at motor performance. Some of the results opened my eyes, (eg at max power out some motors are less the 50% efficient, and lose 100watt of battery power Heating up the model).
                                                      Following on from those tests I have been trying to run a test rig for prop output/performance. It needs to be adaptable for different props, controlable and give measurable readings.
                                                      My latest is a low pressure pump in which the prop under test is the impeller, the motor is one that I have all the info from previous tests. The proposal is to measure the amount of water moved per minute, at various speeds under controlled conditions. This may enable me to find the most efficient rpm for a given prop, how big a motor is needed to achieve this etc.
                                                      In full size engineering, the first parameter when selecting a motor was Horsepower(watts in metric) then max speed required, after which came motor size, type etc.
                                                      With model motors the case size seems to be paramount, and motors with the same number eg 540, from different suppliers give different performances.
                                                      Sorry about the rant, you mentioned something I do find exasperating
                                                       
                                                      Breathless Tom
                                                    Viewing 25 posts - 76 through 100 (of 177 total)
                                                    • Please log in to reply to this topic. Registering is free and easy using the links on the menu at the top of this page.

                                                    Code of conduct | Forum Help/FAQs

                                                    Advert

                                                    Latest Replies

                                                    Home Forums Building Kits Topics

                                                    Viewing 25 topics - 1 through 25 (of 25 total)
                                                    Viewing 25 topics - 1 through 25 (of 25 total)

                                                    View full reply list.

                                                    Advert

                                                    Newsletter Sign-up