Another billings slo-mo-shun

Advert

Another billings slo-mo-shun

Home Forums Building Kits Another billings slo-mo-shun

  • This topic is empty.
Viewing 25 posts - 51 through 75 (of 177 total)
  • Author
    Posts
  • #26252
    Bob Abell 2
    Participant
      @bobabell2
      You are doing well there, Phil
       
      Didn`t like the pepper box grill, so I inprovised on my engine cowl
       
      The new 68mm props arrived today……..Look OK to me……………Have now removed the wave splitter also.
       
      Bob
      Advert
      #26253
      Phil Winks 1
      Participant
        @philwinks1
        Thanks Bob. from these photo’s I notice the bits that the “sump” like bits are suposed to represent are more rounded and tighter to the bottom of the exhaust so think I’ll be looking to do something better looking.
         
        I need to trim the exhausts a little too.
         
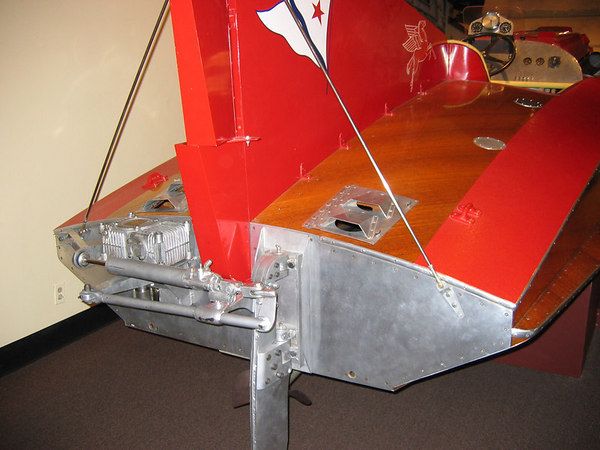
        If you look closely Bob these photo’s show a work in progress just look at the ali cladding to the ride surfaces in that head on shot! the left side is missing!
         
        And that gap fwd of the exhausts is inpracticable at best I think its an unfinished restoration to be honest.
         
        Phil
        #26278
        Phil Winks 1
        Participant
          @philwinks1
          Not a lot happened to this build this weekend although the sponson bottom skins have been added and an air intake added to the top of the front of the engine cowl. waiting on glue drying now so some pics tomorrow.
           
           
          Been busy with the easter day fun sail most of the weekend so not even had time to demolish an easter egg till now that is  now where have they got too.
           
           
          Phil (on his very own egg hunt)
          #26296
          Phil Winks 1
          Participant
            @philwinks1
            Well Chaps comes in fits and starts this one
             
            I was thinking it was starting to stall but a couple of hours in the shed an suddenly it seems so close. well a lot closer anyway.
             
            I’ve found another issue in the width of the 2nd and 3rd formers from the front. however reducing these will give a slightly narrower nose profile (look at the head on view below)
             

            The engine cowl is more or less ready for paint some adj neccassery to the top line of the exhaust tray to follow the deck curve. the inlets on the nose area are pretty close now to the original.


            The tail fin is ready to fit also. I used model aircraft type plastic hinges for the air rudder

            And thats it for now.

             
            Phil
            #26298
            Bob Abell 2
            Participant
              @bobabell2
              It`s coming along nicely, Phil…………….Looks very business like!
               
              What about the hatch?………Make it a big `un………then you could replace it, if necessary with a simple cover…….for aerobatics!
               
              Be careful before you chop the formers…….they were ok for me……….they twist in a most unusual manner………I used a wide sheet at first, then trimmed off to suit…….ending up with a slender piece, see the photograph
               
              I repeat, the kit wood for this piece may be too thin
               
              Is the fin solid?………Cut it all out and solarfilm it?
               
              Bob
              #26301
              Phil Winks 1
              Participant
                @philwinks1
                Hi Bob there is no piece for the hatch it’s formed by the cowl and surround plenty light enough and rigid. can’t say what will happen when the cut out is formed but it seems pretty rigid although I have plans for the frame in the centre of the hatch area which by the way is app 10″ x 4″ plenty big enough I feel and I’ve found a place for the steering servo that doesn’t require another hatch possible because Brushless motors are minuscule compared to brushed equivalents
                 
                The fin is 1mm ply and 3mm frame and weighs less than 4grams so not much lightening available there. the seat on the other hand weighs nearly 50g so it’s pretty much of to the bin with it and a lighter replacement to be sourced. I will try hollowing it 1st though.
                 
                Now while watching telly I couldn’t resist getting the 1st paint on the cowl. It’s only a 1st coat but looks promising
                 

                Now that’s more like it

                 
                Phil
                #26305
                Bob Abell 2
                Participant
                  @bobabell2
                  Hello Phil
                   
                  Just a small point…………….It would have been nicer if you had left the exhaust pipes as  separate items……..even mount them to something loose inside, so that they shake about, when the motor runs…………….I like the brass ends on the pipes.
                   
                  Don`t like wobbly paint lines!……..So split `em off, before you get too advanced
                   
                  Don`t understand why the dials are there at this early stage?
                   
                   
                  Sorry to nit pick………Bob
                  #26310
                  Phil Winks 1
                  Participant
                    @philwinks1
                    Hi Bob that idea for the exhaust is a cracker! However I feel it maybe impracticable at this scale. I will look into it though. Also the motor will run at such a speed there had better be no vibration, or  it will part company with its mount!! Disastorous at best.
                     
                    The dials you can see are merely the background bits and won’t get their  faces/bezels till the paint’s been rubbed down and re-coated several times.
                     
                    The wobbly line is where I’ve over-painted onto the exhaust these will eventually be a steely blue/bronze colour with some relief work to represent the sections at the cylinder exhaust outlet’s.
                     
                    Most of this work won’t happen now till the assy has had its final trim to fit in the hatch area.
                     
                    Phil
                    #26345
                    Phil Winks 1
                    Participant
                      @philwinks1
                      A few more bits have happened in the last few days so here’s the WIP’s
                       
                      1st the propshaft tube is in all lined up, I used a dummy motor to  get it right

                      this done its on with planking the aft sides

                      And the sponson side skins. here the oversize frames 7 & 8 become apparent but nothing a razor plane can’t sort out

                      then as I came to the last few planks on the aft sides the need to fit a stealer plank immediately above the curve under the stern provided a moment of accidental design genius (well I think so) the plank in question has a butt join above and a lap joint below and covers a triangular area. the initial intention was to remove the excess after the glue had dried but what I’m looking at here is so like a spray rail that it may well stay put

                      The clamp is covering the way it naturally flows into the sides but trust me it looks so right it may stay.

                       
                      And now as you can see the rest of the deck is in the process of being planked
                       
                       
                      Phil

                      Edited By Phil Winks 1 on 09/04/2010 20:45:26

                      Edited By Phil Winks 1 on 09/04/2010 20:46:51

                      #26346
                      Bob Abell 2
                      Participant
                        @bobabell2
                        You look as though you`re having fun there, Phil……..( Isn`t it awkward at times? )
                         
                        I didn`t like the stern section shape………….. A true triangular shape would have been more sensible…………..With a sharp edge……………………Like the full size boat photo
                         
                        Too late now, of course
                         
                        In fact, your little stroke of genius, has covered the area up nicely………Must be the new pills you`re on!….lol
                         
                        Bob
                        #26347
                        Phil Winks 1
                        Participant
                          @philwinks1
                          Thankyou for that Bob hopefully this is a short term treatment and all will be well in a week or two!.
                           
                          Yes the accidental stroke of genius had a smile on my face I must admit I had been thinking how I could tidy that area without deviating to much and as those 2″ pieces of plank went in it really was a eureka moment Pam thought I’d lost it lol. Well we have had two straight very sunny days on the trot down here so she could be exscused for thinking I’d spent to much time outside in the sun. which I have, still the garden’s looking more like it should now. even the sweet pea’s are sprouting well.
                           
                          Phil
                           
                           
                          #26348
                          Phil Winks 1
                          Participant
                            @philwinks1
                            One thing occurs to me I have not yet made any firm plans on water  inlets and I think before the finall deck planks go on I should,
                             
                            So how about those little inlet/outlet units on the rear of the sponsons (like little blisters that scoop it in and eventually spit it out too) one for the motor and one for the esc or  should I go for a tube and scoop at the rear in the prop wash supplying both?
                             
                            the latter would be more efficient at all speeds
                             
                            still a little undecided also an ariel tube running inside the deck might be a good idea to keep the fragile wire away from harm
                             
                            good job I’ve only put another 2 deckplanks on lol
                             
                            Phil
                            #26355
                            Phil Winks 1
                            Participant
                              @philwinks1
                              further on the water pickup issue this is what I’ve come up with
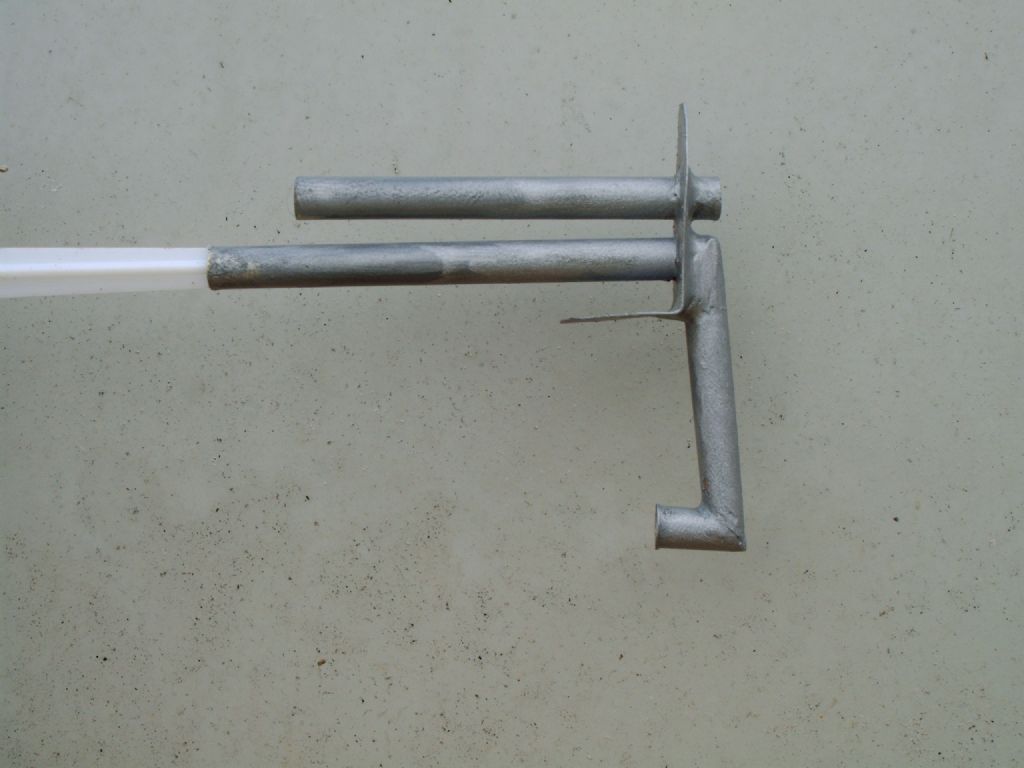
                              As esc’s esp those new fangled brushless jobs actually get hotter on half throttle than they do on full. (something to do with FET switching and current limiting) I need a pick up that uses the prop thrust so it works well at low speeds so putting a pickup on the bottom of the sponsons is prob out off the proverbial window and what I’ve done is engineer one from old telescopic aerial tube (A superb supply of thin walled brass tube) and it looks a bit like this
                              Actually exactly like this lol
                              from 4.3mm tube 
                              designed as a combined inlet/outlet it fits through the transom below the fin (offset rudder makes this possible) and hopefully will be reasonably innocuous.
                              I will need to make a hatch under the fin to fit this and that could be sealed before veneering once this is fitted. Any way it’s all I’ve got at the min so any suggestionsaccepted.

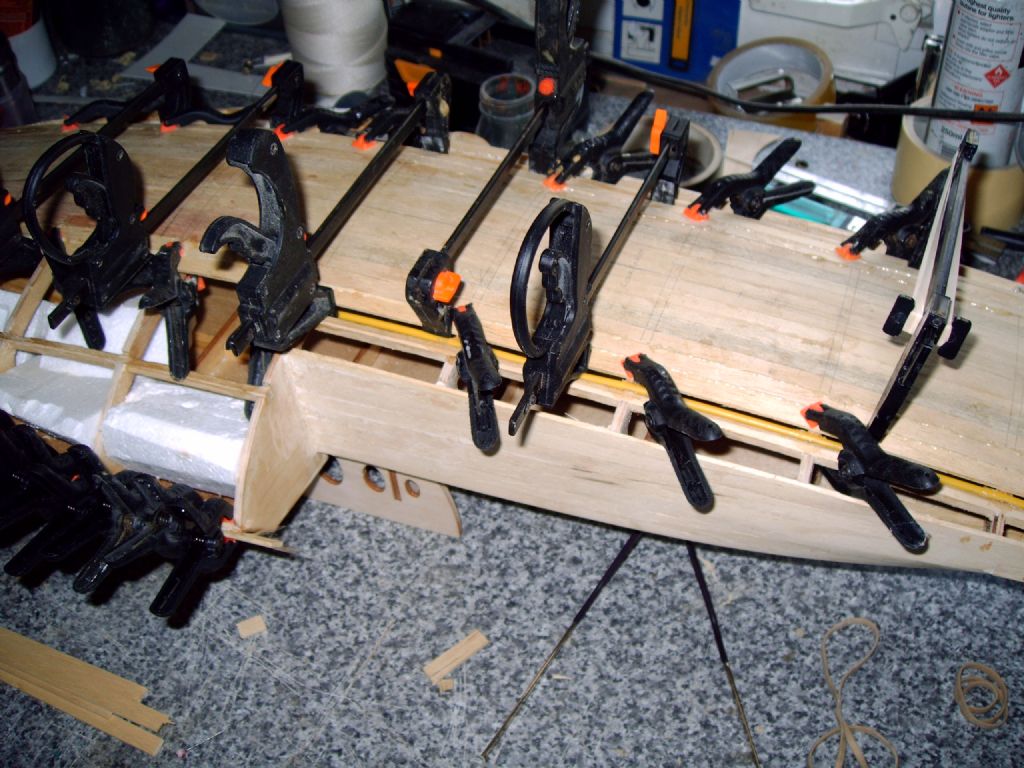
                              the possibility of a long wire ariel to hide was easy I’ve placed a plastic tube from the hatch area back along under where the deck planks will go to feed it into when/if installed. (here’s hoping I get the 2.4ghz set for my birthday) you will need to look closely next to the last plank currently fitted to find it amongst the clamps


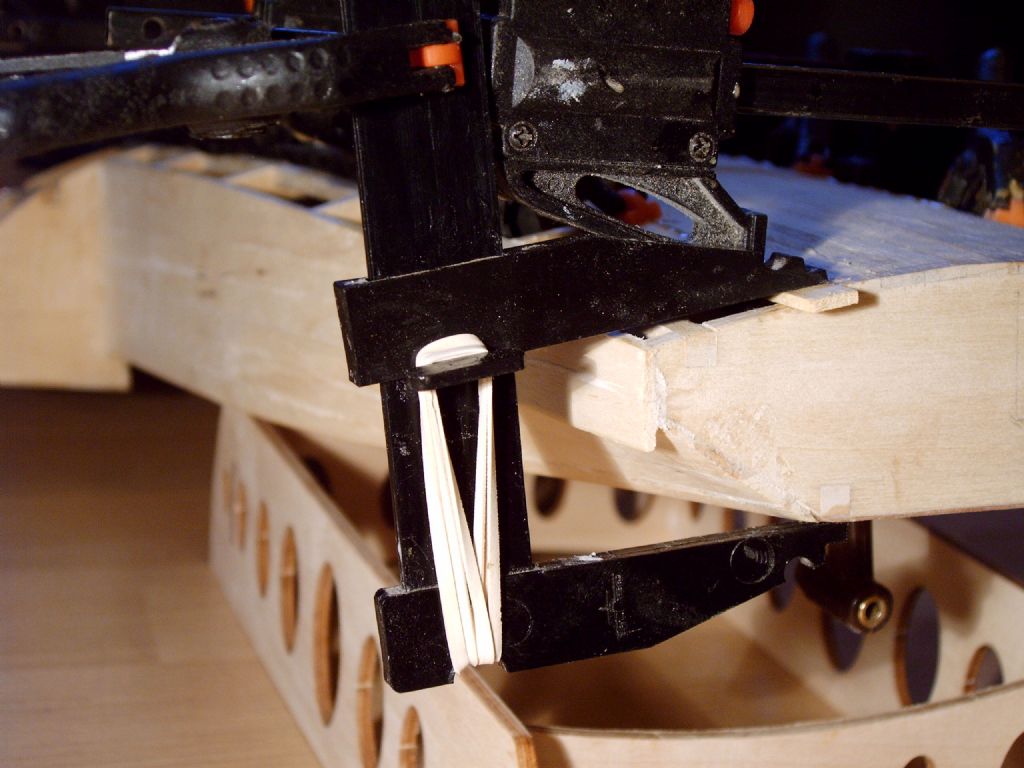
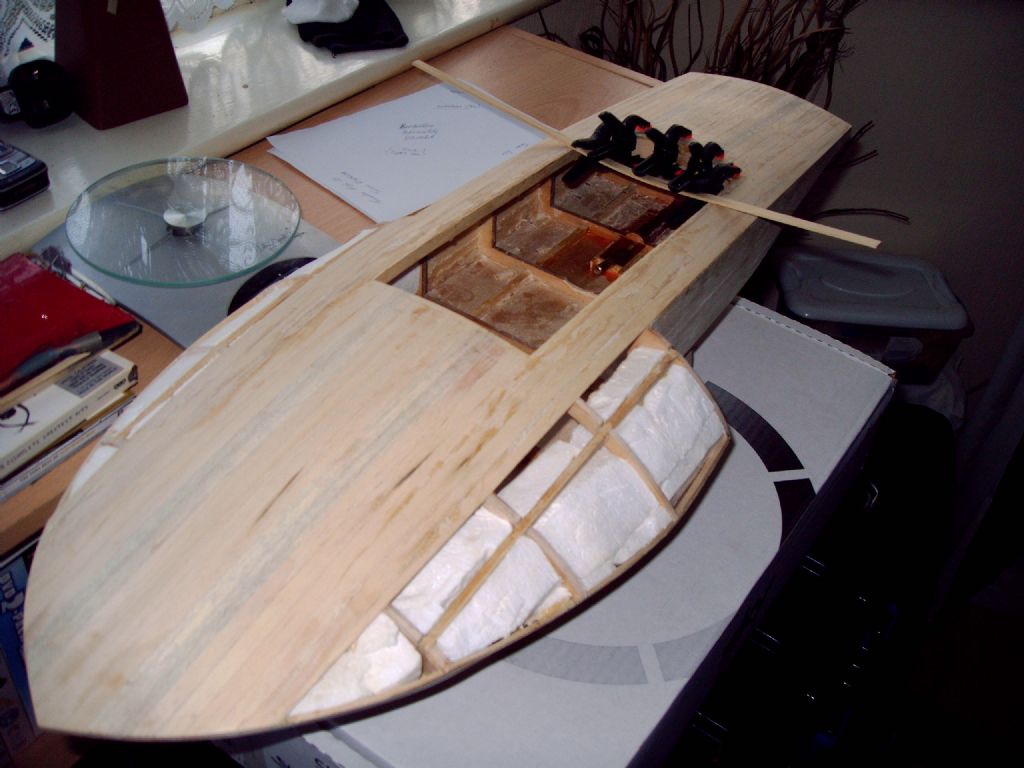
                              the multitude of clamps along the top off the sponson are holding the additional timber 8×1.8mm plank thats required to beef up the sponson side skins 1mm ply to allow a good joint between deck and said skin and this also helps keep the correct curve to the side skins. the plank you can see outside of the skins is covered in sellotape so no glue grabs it and is merely setting the curve so as to aviod the threepenny bit effect that would otherwise happen.

                              ps: it pays to have loads of clamps when building currently 41 of those little spring jobs and still buying lol and yes lots of epf in the sponsons in case the unthinkable happens!! Hell it happened to the real one !!

                              Phil

                              Edited By Phil Winks 1 on 10/04/2010 19:37:45

                              #26359
                              Bob Abell 2
                              Participant
                                @bobabell2
                                Hello Phil
                                 
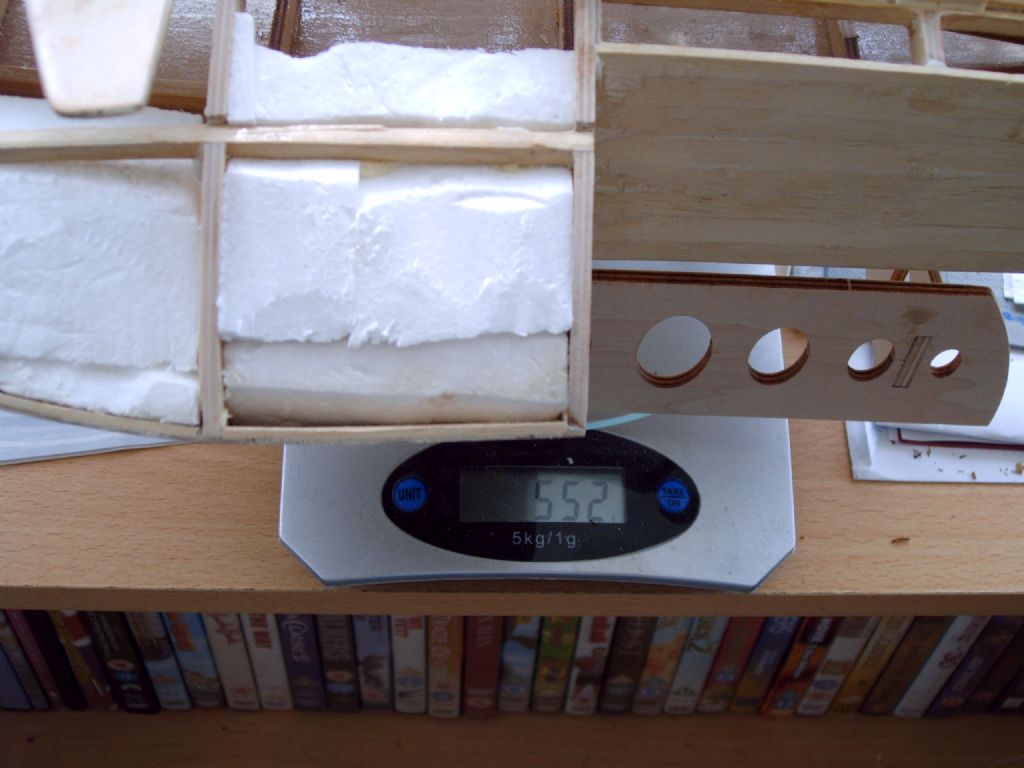
                                What is the weight of the hull, to date?………That lightweight foam looks heavy?
                                 
                                Bob
                                #26361
                                Phil Winks 1
                                Participant
                                  @philwinks1
                                  Hi Bob currently 552g and that’s including the fin, rudder, that water inlet, and the cowl,


                                  Still about ten planks, (5g) a tiny amount of 1.5mm ply, the seat. (Which has been trimmed down from 49g to 20g) most of that veneer (about 70g) and the paint.  To go on.

                                   
                                  So she will be a lot over my optimistic 500g empty target.
                                   
                                  prob more like 750g!!!  However on the plus side those who know, and are running similar sized hydro’s, on very similar power set ups, are running at 1.5+kg rtr weight.
                                   
                                  So as my power/rx set up should weigh (according to mnf fig’s) 500g. I feel optimistic that a recreation of the 1952 water speed record attempt should be on the cards.
                                   
                                  The seat by the way is currently waiting on a second coat of paint, and in its trimmed down state looks 100% more like the real one. Photo to follow soon.
                                   
                                  I do feel that 20 or so grams of epf is worth it for the safety factor in the event of a blow over! Which I believe is still possible on this power setup. Also the rx is going in a balloon (I hope) and all electrical cons will get some form of waterproofing
                                   
                                  So what do you think of the scoop? it’s the best I can think of at the min but still not sure there isn’t a better way without silly lengths of silicone running to a wedge rudder/pickup!
                                   
                                  Phil

                                  Edited By Phil Winks 1 on 11/04/2010 15:36:30

                                  #26363
                                  Bob Abell 2
                                  Participant
                                    @bobabell2
                                    Hello Phil
                                     
                                    Are you going to varnish the interior to seal the joints?……..Will be impossible later, with all the EPF installed
                                     
                                    Just a thought……….Bob
                                    #26365
                                    Phil Winks 1
                                    Participant
                                      @philwinks1
                                      Already done Bob ! 2 coats then a ultra lightweight glass tissue strip on the hull side/bottom interface then 2 more coats (just like we used to glass glider wings for strength) have another look at the pic above and look just beyond the foam it’s all shiny mate.
                                       
                                      now please excuse the slip with the red paint (1st coat only) this is the new cut down slimline seat looking much more like it should
                                       

                                      with a huge amount of unwanted resin removed from the base and back it also allows me to shift the hatch to just behind the frame instead of just fwd of it thus I only need to cut 4 frames to make the hatch not 5 .


                                      Phil
                                      #26374
                                      Telstar
                                      Participant
                                        @telstar
                                        Hi Phil,
                                        I have nbeen following your thread with interest, and Bob’s epic,
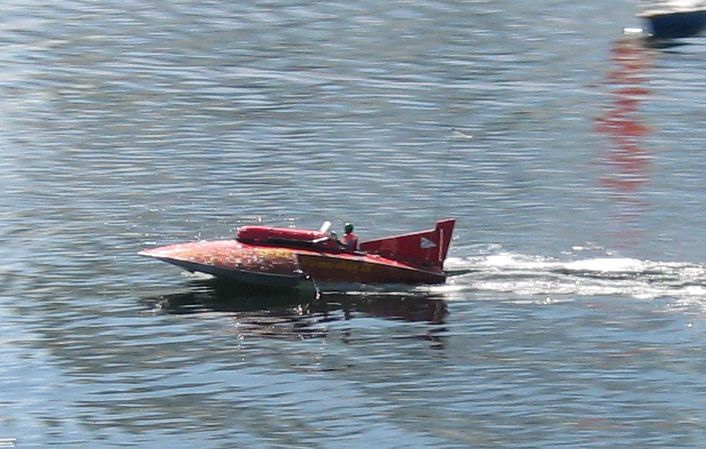
                                        Thought you may be interested in this photo taken yesterday.
                                        It’s a billings kit electric powered, it ran for about 20 min at near full speed,
                                        We have just fitted a brushless motor system, this was first trials.
                                        Cheers Tom

                                        Edited By Telstar on 12/04/2010 12:45:02

                                        #26375
                                        Bob Abell 2
                                        Participant
                                          @bobabell2
                                          Hello Tom
                                           
                                          Nice to hear from you once more!………….Nice picture and on the plane too!
                                           
                                          Will you post a few more pix of the motor mountings, water scoop and rudder etc, we like to see these things!
                                           
                                          Are you going to mod the sponson tips, as we`ve been dicussing lately?……..See my thread for my mod
                                           
                                          Regards…..Bob
                                          #26376
                                          Phil Winks 1
                                          Participant
                                            @philwinks1
                                            It looks to me like that’s a sorted Kit Tom. You do realise this makes you the forum expert on this kit
                                             
                                             I’d be so interested to Know what motor/bty/esc you have in her.
                                             
                                            what prop and what she weighs RTR.
                                             
                                            20 mins sounds a good running time for my purposes. also an idea of her physical speed on the plane,would be nice
                                             
                                            Also and quite important this where did you recruit  the crew ?????
                                             
                                            Have to say from that pic that’s about the best performance I’ve seen so far from the various builds of this kit and believe me I looked at a few
                                             
                                            Phil (delighted to see this is possible)
                                            #26379
                                            Telstar
                                            Participant
                                              @telstar
                                              Hi Guys 
                                               I’m sorry can’t take the credit for the kit build, it was build by my mate Dave.
                                              He built it and fitted a “normal” brushed motor, but even when he ran it on 2off 8cell nicads in series 19v  he was not happy with it snowploughing through the water.
                                              I got involved when we changed the motor to brushless and setup the electrics.
                                               
                                              I have been “playing” with motors and made a dynamometer (test rig) to enable me to quantify various motor performances, with some “quality” model motors being only 45% efficiant no wonder they run hot.  however this little brushless (off e-bay) is very similar to the one one Phil’s thread with the Hobbywing water cooled ESc, it is supplied by 2off 2cell LiPo’s in series ( 2 to help with balance one each side) giving 14.8v max and 5000mAH and less weight the one 3000mAH 8cell NiCd .
                                              The exact numbers is not at hand just at the moment, (I have moved to my next “plaything” a test jig to measure the performance of different props under controlled parameters and variable speeds)  but as soon as I get back from The Lakes where I am visiting family I will get you the requested info and photos
                                              Cheers Tom

                                              Edited By Telstar on 12/04/2010 17:05:22

                                              #26380
                                              Phil Winks 1
                                              Participant
                                                @philwinks1
                                                Thanks Tom sounds like I’m on the right lines. I’ve  just gone for a slightly lighter/lower capacity/cheaper bty option at the min (can my plastic stand the 5000mah 2s1p LiPo’s I wonder) 
                                                 
                                                The figures you’ve given so far suggest 222w  at 15A (20mins on a 5000 = 15A) is being used. (ball park figs but well within the limits of the motor/esc)
                                                 
                                                and I suspect the weight (based on big 5000mah bty’s) when confirmed will be in the 1.5 to 2kg region
                                                 
                                                so with lighter bty’s it’s poss, is it not, a similar performance will be produced (power/weight & all that)
                                                 
                                                the prop size is really the only variable left in my mind (both posn/angle and size/pitch)
                                                 
                                                Maybe I’ve got the wrong guy but do you/did you used to post on modelflying.co.uk??
                                                It’s the Dynamometer that rings a bell.
                                                 
                                                Phil (feeling vindicated with his choice grunt provider )
                                                #26382
                                                Phil Winks 1
                                                Participant
                                                  @philwinks1
                                                  Well with the bottom skins fitted and a desicion made on things that need doing before buttoning her up the deck planks are going on as you will see in the following pics.
                                                   
                                                  also now I’m outboard of the hatch/cowling/cockpit area this has been cut with NO drama’s at all only 3 frames have needed cutting so far and 1 more to go for the cockpit.
                                                   
                                                  this has allowed me to also trim the sides of the cowl and make a start on the lipping around it. the red paint is now at 3 coats on the cowl and is showing some promise.
                                                  the lipping will be trimmed to about 3mm and moulded to a shallow D sect then painted aluminium colour

                                                  another issue I’m addressing while individuall deck planks dry is how the control from a servo at one side of the cockpit can be transfered to the rudder as invisibly as possible and the answer is in the detail attached to the transome. there is a huge transfer box bolted there on the full size and as I model this I’m fitting a bellcrank under it to take the business end of an aircraft type control snake to shift the rudder much as they did on the real one

                                                  So lets see how close I can get to this idea

                                                   
                                                  Phil
                                                  #26387
                                                  Phil Winks 1
                                                  Participant
                                                    @philwinks1
                                                    Another wip for you all, the hatch opening is complete, or will be when the clamps come off.


                                                    still working on the steering transfer box and cotemplating purchasing some of those natty planking clamps this weekend to facilitate the fitting of the last of the deck planks as the alternatives are not looking too favourable at the min.

                                                     
                                                    the cockpit will be next. I’m making it semi permanently fitted ie: held in with 2 screws as removal will only be neccessary to access the steering servo and poss the rx and the cowl area should provide adequate access for bty changing.
                                                     
                                                    Phil
                                                    #26389
                                                    Bob Abell 2
                                                    Participant
                                                      @bobabell2
                                                      Coming along nicely now, Phil
                                                       
                                                      Post a picture of these so called planking clamps…..I`m curious
                                                       
                                                      Bob
                                                    Viewing 25 posts - 51 through 75 (of 177 total)
                                                    • Please log in to reply to this topic. Registering is free and easy using the links on the menu at the top of this page.

                                                    Code of conduct | Forum Help/FAQs

                                                    Advert

                                                    Latest Replies

                                                    Home Forums Building Kits Topics

                                                    Viewing 25 topics - 1 through 25 (of 25 total)
                                                    Viewing 25 topics - 1 through 25 (of 25 total)

                                                    View full reply list.

                                                    Advert

                                                    Newsletter Sign-up