Alteration to build

Advert

Alteration to build

Home Forums Building Kits Alteration to build

  • This topic is empty.
Viewing 18 posts - 1 through 18 (of 18 total)
  • Author
    Posts
  • #59378
    BRYAN ASTON
    Participant
      @bryanaston57723

      Greetings all

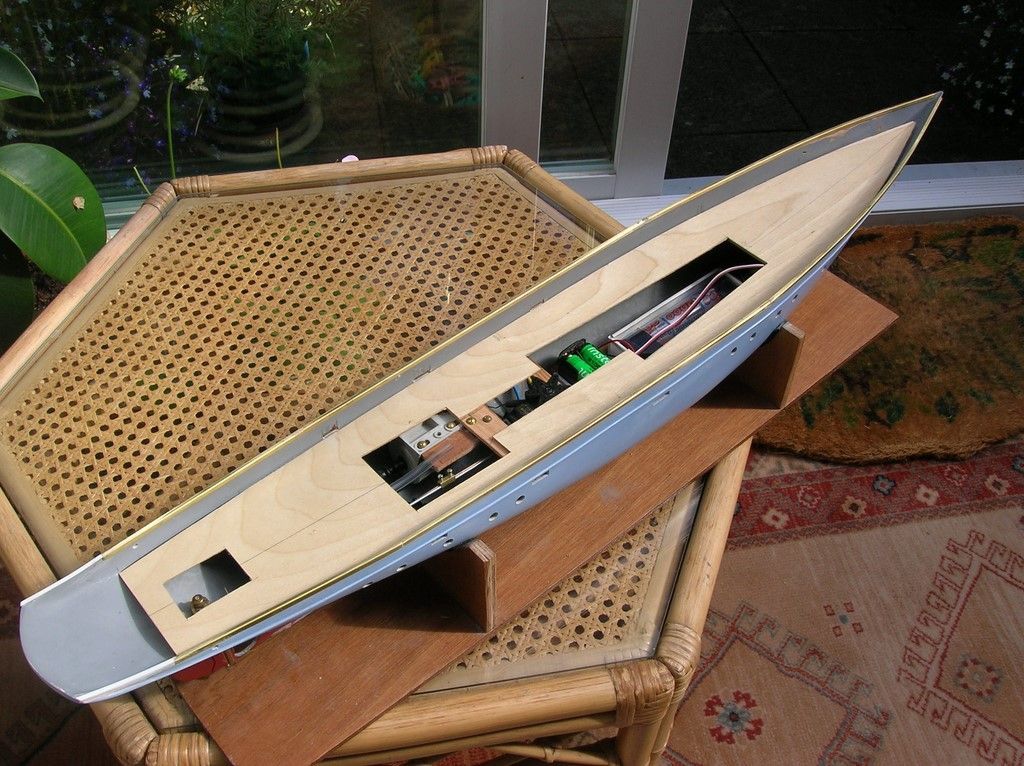
      I swore to myself I would not build any more boats as I have run out of room to store them all , six in 18 months,however having read the article in 65 years of Model Boats where Colin Bishop built the SY MEDEA ,I bought the kit, I always find kits complicated, much easier scratch building boats , my question is has anyone ever built this kit where the complete deck can be removed with all the superstructure so that the various workings are easily got at for repairs etc. as the plans only show narrow openings in the deck.

      In the meantime I shall continue to stick the cabins together, I wish I had smaller fingers.

      Yours in hope

      Bryan

      Advert
      #6196
      BRYAN ASTON
      Participant
        @bryanaston57723
        #59379
        Colin Bishop
        Moderator
          @colinbishop34627

          Bryan,

          I imagine that with a bit of ingenuity you could get the middle bit to lift off but bear in mind that the deck does curve considerably fore and aft due to its sheer. However, I think the main problem would be that with this little model you will inevitably get water coming on board and without coamings around the deck openings some, if not all, will find its way below.

          It's not impossible to manage with the small openings if you do some of the preparatory work before the deck goes on as I did. After that it's a case of keyhole surgery….wink

          Colin

          #59380
          Kimosubby Shipyards
          Participant
            @kimosubbyshipyards

            Bryan and Colin,

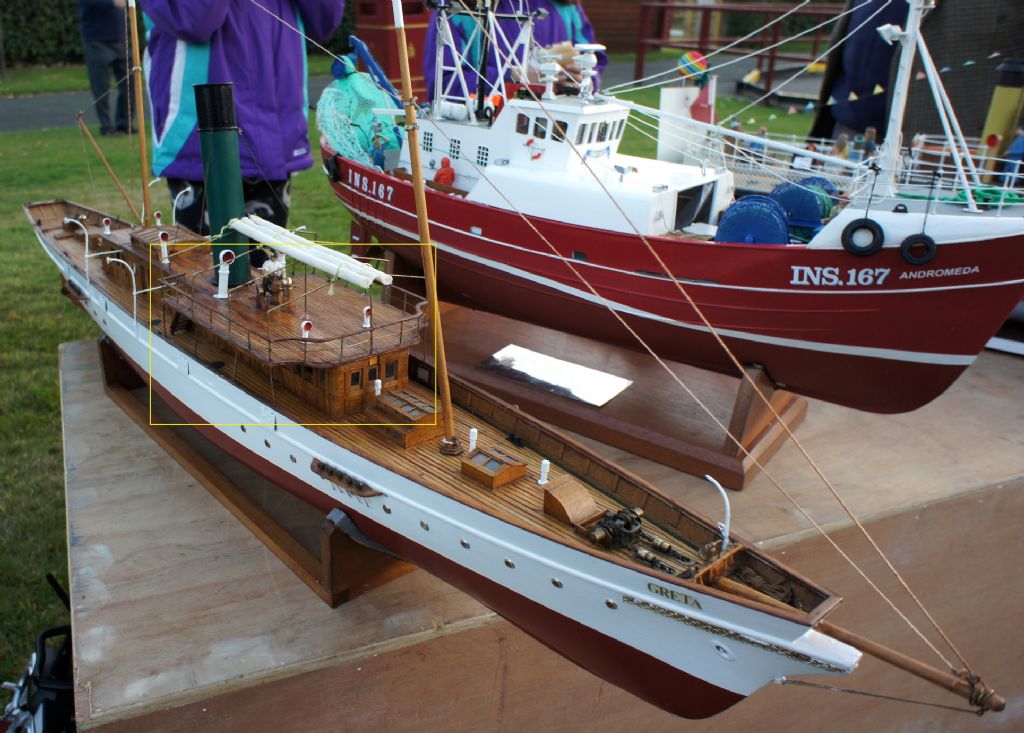
            a colleague has the SY Greta and he has the whole deck-house forward of the smoke stack and including the working smoke stack removable as shown (yellow squared zone). I might possibly get another image tomorrow with the access exposed, wish me luck.

            SY Greta.

            sy greta steved.jpg

            Aye, Kim

            #59383
            Colin Bishop
            Moderator
              @colinbishop34627

              The problem with access to the Medea hull is the footprint of the long, narrow and irregular shaped deckhouses which don't leave many options. But I didn't find any real difficulty, you just need to think things through in advance. My article in the 2015 Special Issue shows how I tackled it.

              Colin

              Medea Deck

              Edited By Colin Bishop, Website Editor on 25/07/2015 09:27:58

              #59385
              BRYAN ASTON
              Participant
                @bryanaston57723

                Greetings Kiimo and Colin

                Kiimo. thank you for the photo and I look forward to the next photo if poss.

                Colin ,I have copied your wooden deck , I find wood easier to work with than plastic.

                I have your article in one hand and the other one has the building manual, it makes building difficult.

                I was only intending to have the part of the deck that covered the workings removable the rest of the deck would be fixed , but until I have built the superstructure I cannot tell what's what ,all suggestions welcome.

                Bryan

                #59386
                Colin Bishop
                Moderator
                  @colinbishop34627

                  With my model. the coamings inside the deckhouses are higher than the openings at deck level in the bulwarks so any water that comes on deck runs over the side and anything left just sits there and can't get into the boat.. If you make part of the deck itself removable then it will be a problem (but not impossible) to adequately seal the hatch. I took what I thought was the path of least resistance!

                  Everything will come out through the small opening but I made sure it all fitted and was removable before I glued the deck down. It should only be infrequently necessary to actually get into the inside of the model once it is completed so any fiddly stuff can be done at home on the workbench. I always find opening up a model at the pondside to be a recipe for damaging something!

                  Colin

                  #59565
                  BRYAN ASTON
                  Participant
                    @bryanaston57723

                    Greetings To Colin Bishop

                    I am steadily ploughing through the SY MEDEA build ,the build instructions are a bit vague at times as you say in your article, I have just one question ,did you completely cover the cabin superstructure with FABLON ? as the instructions tell me to paint it .

                    Regards Bryan slowly going mad.

                    #59566
                    Colin Bishop
                    Moderator
                      @colinbishop34627

                      Bryan,

                      All the cabin 'wood' panelled areas on the superstructure are Fablon, the funnel base is painted white. I used two varieties of Fablon, the lighter shade as the background and a darker one for the simulated panels. I then sealed it all with matt Ronseal polyurethane varnish.

                      If you Google 'steam yacht Medea' there are a lot of images of the original vessel and my model looks very similar to the panelling shown.

                      Now you know why I amended my model to be a 'generic' steam yacht!

                      Hope this helps,

                      Colin

                      #59590
                      BRYAN ASTON
                      Participant
                        @bryanaston57723

                        Colin

                        Thank you for your help,I have now got to find where to buy FABLON locally, or get in on eBay.

                        The saga continues, watch this space

                        Bryan

                        #59594
                        Colin Bishop
                        Moderator
                          @colinbishop34627

                          I don't know where you live Bryan but Wilkinson's usually stock it. **LINK**

                          You can see (and buy) the range here: **LINK**

                          Colin

                          #59604
                          BRYAN ASTON
                          Participant
                            @bryanaston57723

                            Colin

                            I live in sunny Southend on Sea and following your link It turns out the local Wilco has got it in stock so thank you for the link.

                            Bryan still slowly going mad

                            #59759
                            BRYAN ASTON
                            Participant
                              @bryanaston57723

                              Greetings all SY Medea

                              Colin how did you construct the battery charging points for the sub c 7.2 v battery without having to disconnect the esc, did you use a v lead with one connector secured inside the modified forward companionway thus removing the need to keep detaching the superstructure, this is probably very simple but I am getting old.

                              Regards

                              Bryan still going slowly mad

                              #59762
                              Colin Bishop
                              Moderator
                                @colinbishop34627

                                Bryan,

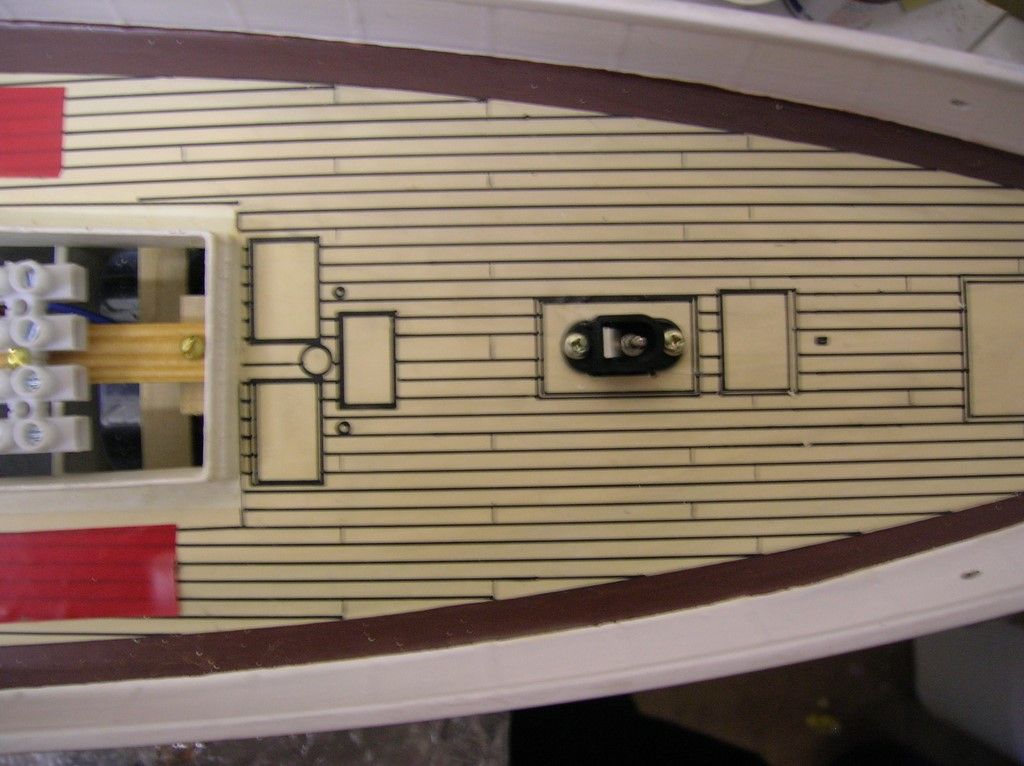
                                I don't use a ESC BEC to power the RX, it has its own battery. So I have two charging points, each connected directly to the main and RX batteries respectively. One is situated under the removable modified forward companionway, (see pic below) the other is underneath the also removable skylight aft of the main accommodation. Both sockets are mounted on part of the deck which is permanently fixed to the model so there is no removal of the superstructure needed when charging.

                                Colin

                                (who went mad a long time ago….)

                                medea charging point.jpg

                                #59867
                                BRYAN ASTON
                                Participant
                                  @bryanaston57723

                                  Colin

                                  It's me again ,can you let me know what stanchions you used on your Medea because the ones that came with the kit are rubbish they bend as soon as you touch them, apart from that I am slowly getting there.

                                  Bryan

                                  #59868
                                  Colin Bishop
                                  Moderator
                                    @colinbishop34627

                                    Bryan, I used the ones in the kit actually and stuck a stripwood handrail on top. You can buy brass ones though, try Cornwall Model Boats or one of the other general modelling suppliers.

                                    Glad to here you are making progress. What did you eventually decide to do in respect of getting access to the inside of the completed model?

                                    Colin

                                    #59897
                                    BRYAN ASTON
                                    Participant
                                      @bryanaston57723

                                      Greetings Colin

                                      I have sent away for stronger brass stanchions I can't use those white metal things.

                                      I have improved the access to the inside of the model by straightening the shape of the opening in the deck and slightly altering the footprint of the superstructure, no problem ,it is difficult to spot.

                                      Regarding my query a short while ago , how can you recharge a 7.2 v battery stick without removing the superstructure because you would have to break the connection to the esc and after charging it reconnecting to complete the circuit. what connectors did you use,I can understand the other recharging socket.

                                      Onwards and upwards

                                      Bryan

                                      #59908
                                      Colin Bishop
                                      Moderator
                                        @colinbishop34627

                                        Bryan,

                                        Your stanchions will look better than mine!

                                        Re the charging, I should have explained in more detail. If you look at the photo at the bottom of page 71 in the Special Issue you will see two small brown boxes, one on each side of the deck just ahead of the aft skylight. These removable boxes conceal very small toggle switches one of which breaks the line from the positive main battery terminal to the ESC, the other the line from the RX positive battery terminal to the RX. These are used to energise the main and RX circuits respectively. The two charging sockets (which are identical) connect directly to the battery terminals.

                                        So when the switches are in the off position the batteries are effectively isolated and there is no live circuit connection between the charger sockets and the ESC or RX which makes it safe to connect the chargers. The status of the main and RX circuits is confirmed by the two red LEDs mounted under the central skylight between the lifeboats which are shown in the photo at the bottom of page 72. These light up when the main and RX battery circuits are live.

                                        In the bottom right photo on page 70 you can see a fuse at the front of the hull opening which sits between the main battery positive terminal and the switch/ESC.

                                        The two toggle switches are simply mounted in holes in the deck with a small coaming round them to keep water out. The plasticard boxes just fit over the top.

                                        The location of the various bits does complicate the wiring runs but it is all logical enough and works well.

                                        Hope this explanation helps,

                                        Colin

                                      Viewing 18 posts - 1 through 18 (of 18 total)
                                      • Please log in to reply to this topic. Registering is free and easy using the links on the menu at the top of this page.

                                      Code of conduct | Forum Help/FAQs

                                      Advert

                                      Latest Replies

                                      Home Forums Building Kits Topics

                                      Viewing 25 topics - 1 through 25 (of 25 total)
                                      Viewing 25 topics - 1 through 25 (of 25 total)

                                      View full reply list.

                                      Advert

                                      Newsletter Sign-up