Vintage yacht 36R

Advert

Vintage yacht 36R

Home Forums Scratch build Vintage yacht 36R

  • This topic is empty.
Viewing 25 posts - 1 through 25 (of 106 total)
  • Author
    Posts
  • #39562
    Bob Abell 2
    Participant
      @bobabell2

      Hello Kim

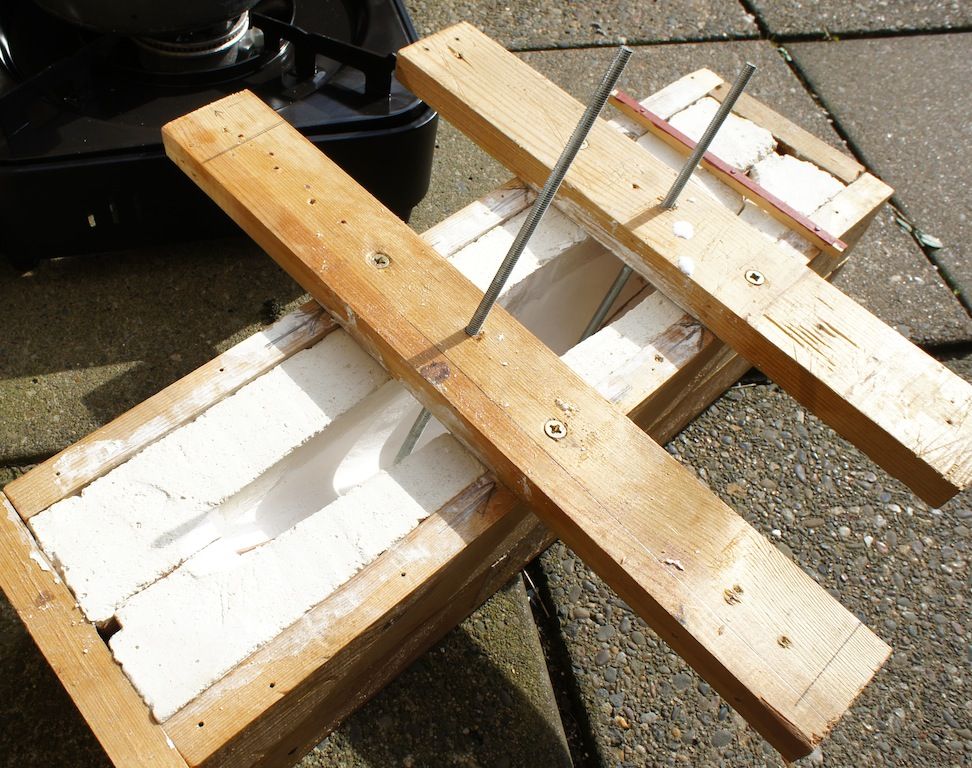
      I think this is the Skylark mould box

      The box needs to be very strong and at casting time, it should be surrounded by household bricks for safety.
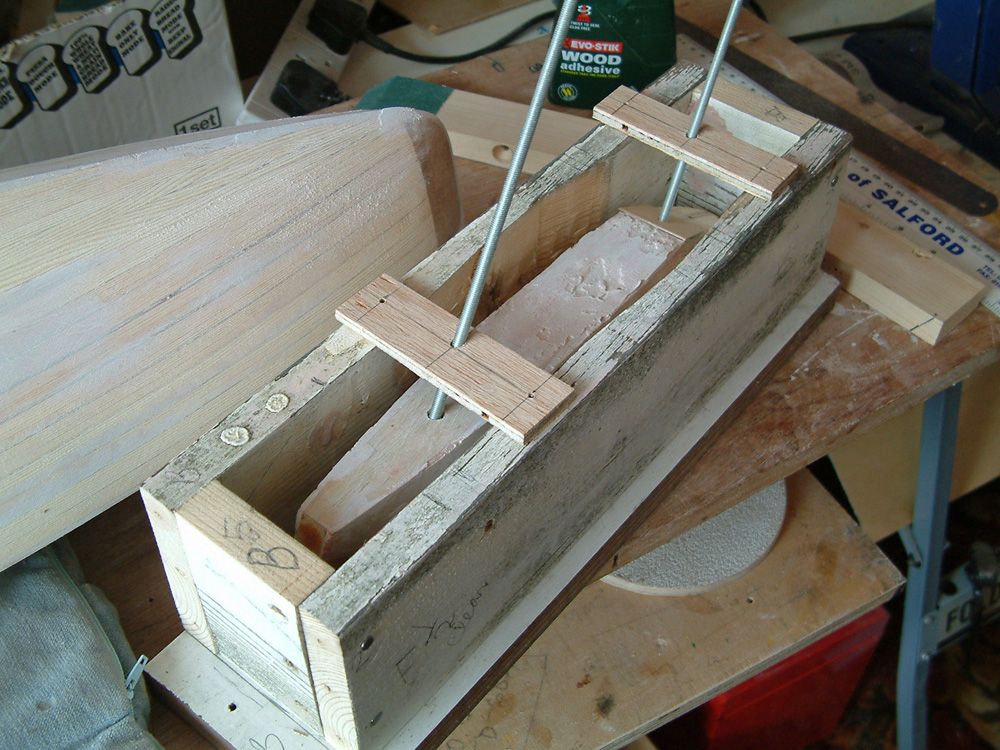
      yacht keel.jpg

      The mould needs to be accurately located and thought given to the retaining rods. In the photo they are shown in the plug. The rods protrude through the plug and into the box base.

      Plaster is poured around the greased plug and allowed to set.

      The plug and rods are removed and the mould is allowed the dry out completely. The rods have nuts locked together to act as a grip and returned to the mould and finally aligned with the top plates.

      Wear protective clothing for the casting process, just in case. Cover your face as much as possible and wear goggles

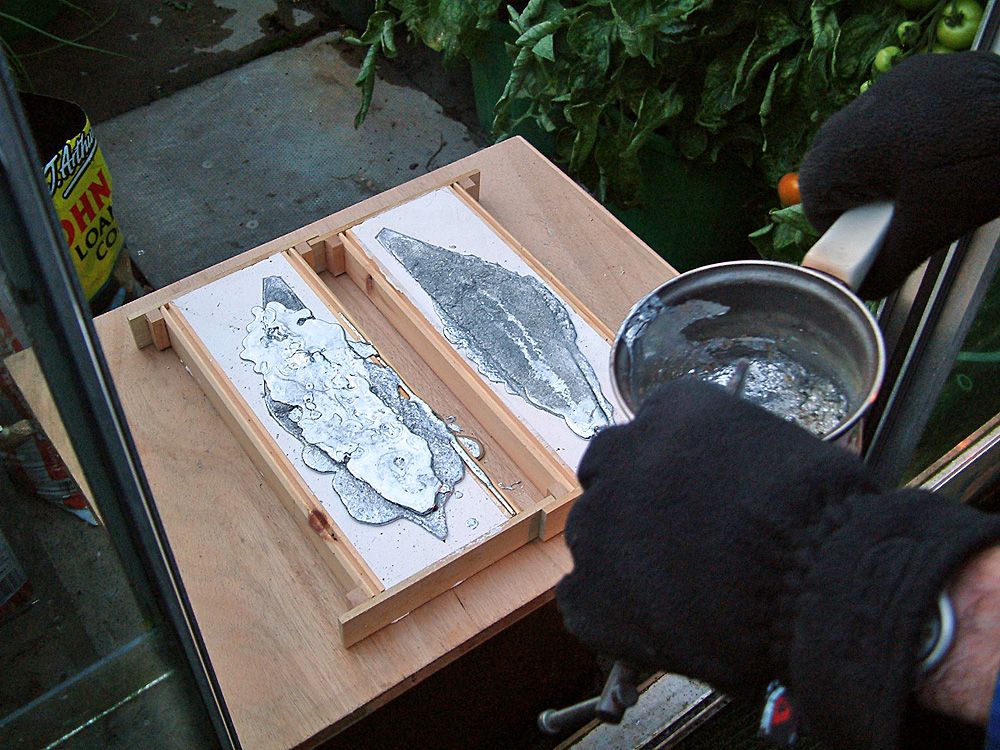
      Use an old pan with two G clamps as handles. I use the kitchen stove for melting the lead….with the door open.

      Place the mould on a table outdoors. Make sure access from the stove to the casting table is free from obstructions. Pour the molten lead into the mould. This is normally an anti climax as usually nothing exciting happens!

      If you`ve not melted enough lead, just top up the mould a second time

      Don`t forget to spoon off the top slag before filling the mould.

      When cool, remove the casting by breaking open the plaster etc and fettle the casting to suit the keel.
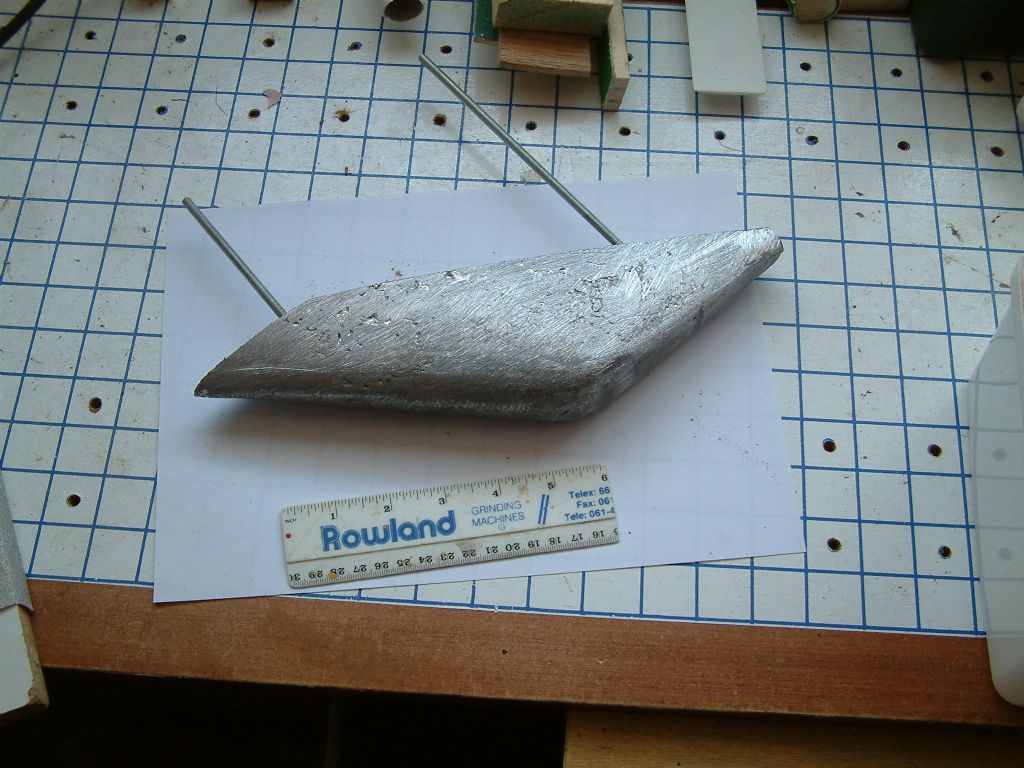
      casting

      The finished lead insert.

      Your questions are welcome

      I`ll have a look for more pictures now……BOB

      Advert
      #6868
      Bob Abell 2
      Participant
        @bobabell2

        For Kimmosubby ship yards

        #39563
        Bob Abell 2
        Participant
          @bobabell2

          This is another method of casting the lead

          Same model, but different builder. The lead is cast in two halves and bolted together.

          The fixing rods are sandwiched later

          split mould

          Bob

          #39564
          Bob Abell 2
          Participant
            @bobabell2

            The pair of finished models…..

            skylarks 36r.jpg

            Bob

            #39571
            Kimosubby Shipyards
            Participant
              @kimosubbyshipyards

              Hi Bob,

              yes, I thought that photo was the Skylark ballast mould. Thanks for a very comprehensive list of your procedure and the warnings.

              I've poured lead before, IOM ballast, using P-o-Paris mould dried in an oven. My fault the first time was to make the entry hole too small, and not make a second hole to let out the hot air. My third attempt worked well, and I still have the mould halves. I melted the lead on the chimney of a Chimnea! Good job I wasn't BBQing that day.

              I'll let you know how I progress, thanks again, Kimosubby

              #39584
              Bob Abell 2
              Participant
                @bobabell2

                The VMYG event at Llandudno will be held on June 15/16 2013 and is for Vintage 36R yachts only

                Starts at 10.30am

                The lovely yachting pond is on the West Shore in beautiful surroundings

                More details closer to the time

                Bob

                #39587
                Kimosubby Shipyards
                Participant
                  @kimosubbyshipyards

                  Bob,

                  there are two of us coming from IOM and we'll be in N Wales from Thursday dinner time. We've booked in Colwyn Bay for 3 nights so we can get one day's practice on the Friday. We are also bringing some other yachts, IOM and a Phigit and maybe a couple of footies, so we can play all day.

                  Cut the keel and stuck the remains on the hull so I can complete the planking. Plug looks good, made the box too. Now will fill and smooth plug then create the mould using plaster, It'll have to be a splitting along the centre mould as there's a slight tapering curvature to the plug, and an end that will be below the upper surafce of the mould, which will be dummy plugged as well.

                  I'll post some bits soon.

                  Thanks again Bob, Kimosubby.

                  #39591
                  Gareth Jones
                  Participant
                    @garethjones79649

                    Hi Bob,

                    My wife Elizabeth has a 36R Razorbill hull as one of her projects but she is unlikely to finish it before the Llandudno event. However we might come along and have a look at some of the other 36R yachts to get some ideas on the sail rig. 

                    On the VMYG website it also says 'and team Pugwash (all)' alongside the Llandudno event. Have you any idea what thats all about?

                    Gareth

                    Edited By Gareth Jones on 09/03/2013 14:16:07

                    #39593
                    Bob Abell 2
                    Participant
                      @bobabell2

                      Hello Gareth

                      I noticed the mention of Pugwash too, but no idea what it refers to, but I think there is a modeller of the same name on the Mayhem website…….I think

                      Hope to meet you and the missus at Llandudno in June?

                      Car parking could be a problem,but we'll survive

                      Bob

                      #39597
                      Kimosubby Shipyards
                      Participant
                        @kimosubbyshipyards

                        Hi Bob and all vintage 36R sailors/builders.

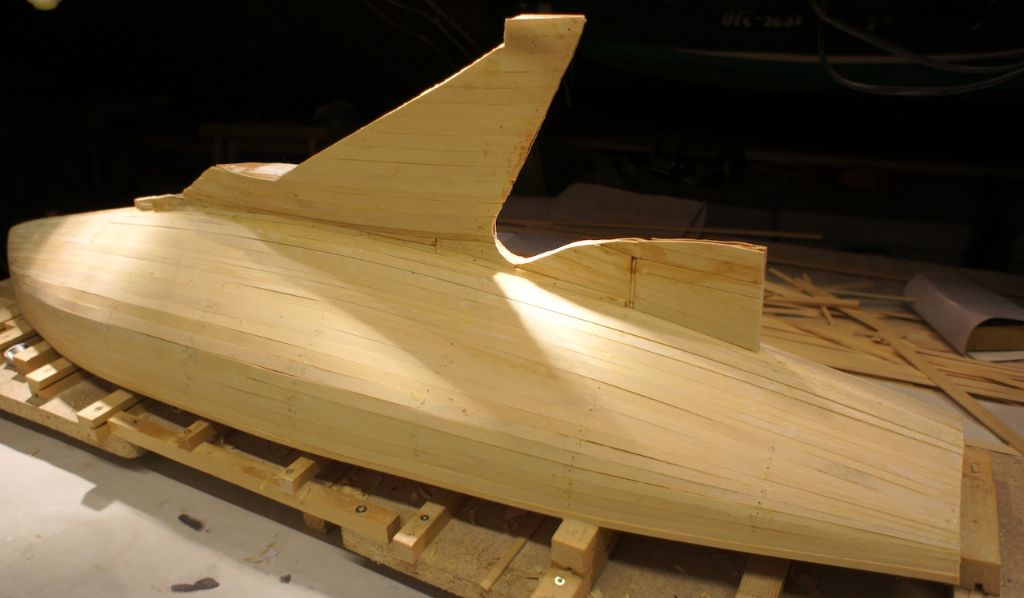
                        As promised, here's progress to date, just taken this snap.

                        dsc03551 copy.jpg

                        The greyed part is the ballast plug, covered in filler and ready to rub down tomorrow and start mould making. Mould box just showing behind the hull. The planking is very near finished, will be tomorrow, so I can then take her off the board and put some additional frames inside to hold the planks whilst sanding. Planking is jetulong wood, having cut the planks myself (but I've no planner so a bit variable in thickness). Still its very soft and easy to sand.

                        Kimosubby.

                        #39598
                        Bob Abell 2
                        Participant
                          @bobabell2

                          Hello Kim

                          Thanks for posting your build. It brings back fond memories of our models, way back in 2004

                          At the moment, my pictures have gone AWOL

                          I can`t remember now, how the lead is held in now, and from here, it looks quite a tricky problem?

                          Oh, now I remember, the rods are through the hull

                          Keep up the good work and hope to see you in June

                          Bob

                          #39719
                          Kimosubby Shipyards
                          Participant
                            @kimosubbyshipyards

                            A fine sunny morning here in Ramsey.

                            Busy day yesterday, managed to complete all the hull planking on the Skylark, now awaiting the ballast lead to be fitted so that the keel can be sanded to fit. Off with the lead again and I can remove her from the blocks and turn her over, then fit some additional strip frames inside the hull to secure the planking before filling and sanding the whole hull. I'll have to make a stand too.

                            hullcomplete.jpg

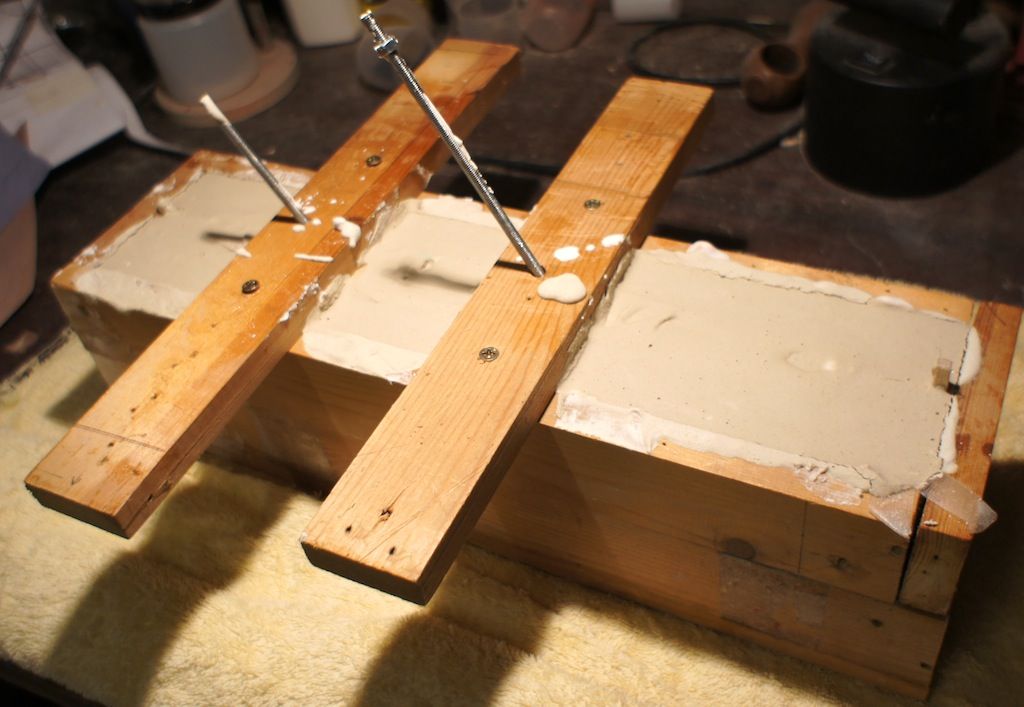
                            The ballast plug (section of the keel) fully shaped and filled and sanded, was coated nicely with vaseline and secured in the mould box. A good sloppy mix of plaster gently poured in, topped off about 10 minutes later after it had set with a bit extra to fill the mould up.

                            I have laid the plug in a light weight single sheet of 0.4mm birch ply, again vaseline coated, hoping that this will create a vertical halving of the mould. Fingers crossed. The plug is wider at the base than at where it joins the hull, so it couldn't be pulled out directly, and I don't want to ruin the plug in case I have to make a second attempt at the mould.

                            ballastmould.jpg

                            I'll leave it to dry out for a couple of days and then spring the mould box, wish me luck. It seems quite wet this morning, buts its only been curing for 18 hours. Once the block is out of the box it'll dry quicker anyway.

                            Kimosubby

                            Edited By Kimosubby Shipyards on 17/03/2013 10:49:08

                            #39722
                            Bob Abell 2
                            Participant
                              @bobabell2

                              You are doing well there, Kimo!

                              You could have got round the problem of the keel being fatter at the bottom, by having a wider central piece that could be removed vertically and allowing the sides to move to the centre?

                              The 0.4mm may be too narrow?

                              Remove the wood when you can, to help the plaster dry quicker, but return it to the mould when dry

                              Show us the mould before you fill with the molten lead…….For last minute comments?

                              Bob

                              #39725
                              Kimosubby Shipyards
                              Participant
                                @kimosubbyshipyards

                                I thought maybe to do that, but then I'd loose the thickness of two saw cuts, but thinking on I could then have substituted thin ply again. I'll see what this has done, any repeat I'll try that way.

                                Will try and ease the block from the mould box now, just drop off both ends and one side – voila.

                                I'll still let dry a bit before I attempt the split though.

                                Thanks for your words of encouragement Bob, Kim.

                                #39729
                                Kimosubby Shipyards
                                Participant
                                  @kimosubbyshipyards

                                  Hi Bob,

                                  itchy fingers, couldn't wait, and had the DM syndrome – grand children came round so I had "an urgent task in the workshop".

                                  The whole block came easily out the box, just took off an end and a side.

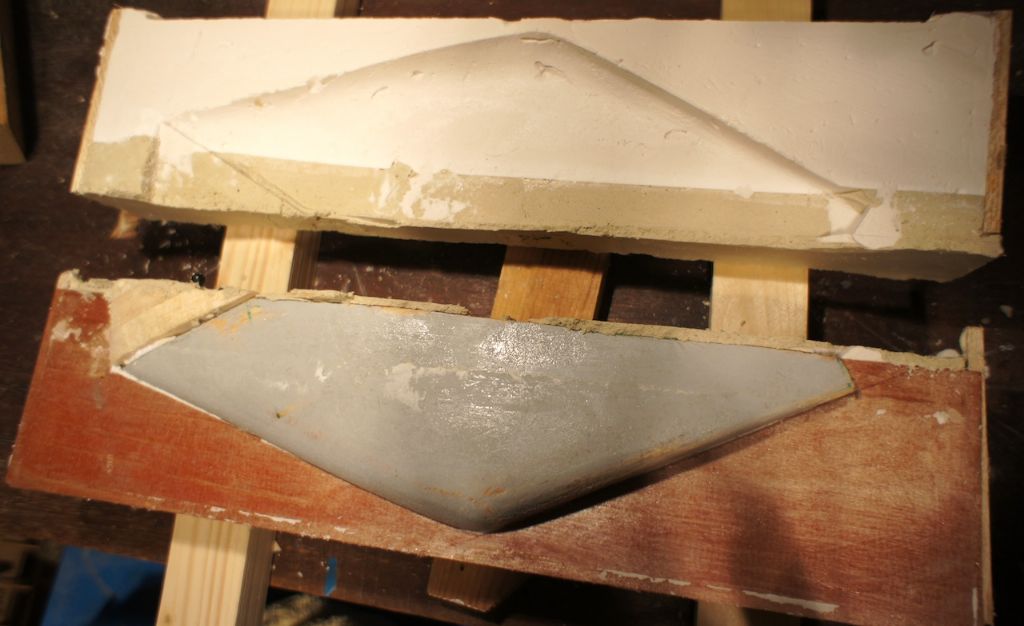
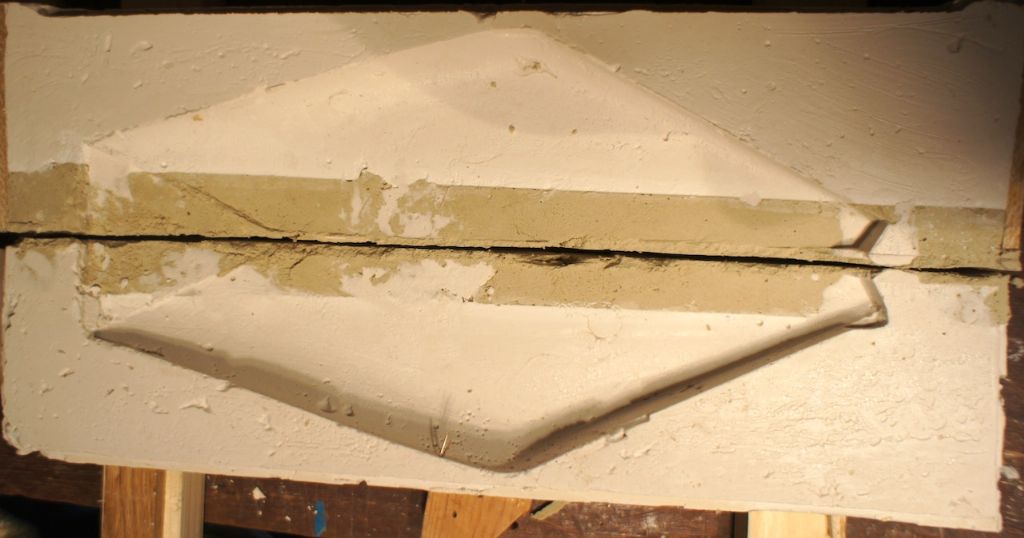
                                  firstseparation.jpg

                                  Laid on supports and very easily teased the two halves apart with the ply working excellently, it having been well coated in vaseline. You can see it still on the lower half above. Lifted plug free and the two halves look nice and clean, very few air bubbles.

                                  twohalvestogether.jpg

                                  You will notice a difference in the plaster – two layers, that's because I ran out of plaster of paris and resorted to using a quick top off with finishing repair plaster.

                                  I'm well chuffed with the result. I'll need to square off the top of each half with the plug back in to set the top face height. You may also notice in the upper image that I inserted another plug which is the angled upper part of the ballast, that part parallel to the hull waterline. I may just fill the whole with lead and cut this after, what are your thoughts Bob? Doing it that way precludes having that overhang to fill with molten lead.

                                  Now both pieces are drying. I'm on you Island as from Thursday for a week, so they can dry in piece.

                                  Kimosubby.

                                  #39732
                                  Bob Abell 2
                                  Participant
                                    @bobabell2

                                    You could ignore the slanted bit at the front and saw off later, but mine cast ok

                                    Can`t see any location provision for the tie rods?

                                    Bob

                                    #39734
                                    Kimosubby Shipyards
                                    Participant
                                      @kimosubbyshipyards

                                      They are embedded in the two cross timbers I took off to get the plug out. If you look back a couple of posts you'll see them. I could also insert some cross wires in the mould to secure the lower ends, is that your idea?

                                       I'll re-assemble all and get their angles correct before any pouring and filling though. I've tried drilling lead blocks before – take it slow and empty the drill head every few turns else it all jams solid.

                                      I'm using three rods to secure the ballast, I noted yours had two. I'm always tempted to over do just in case.

                                      Kim


                                      Edited By Kimosubby Shipyards on 17/03/2013 16:20:13

                                      #39738
                                      Bob Abell 2
                                      Participant
                                        @bobabell2

                                        Hello Kimmo

                                        My rods protruded through the keel and into the plaster at the bottom for top and bottom support

                                        The protrusions were sawn off after casting

                                        It's a tricky job getting the angles right…….That's why I mentioned it before you cast the lead!

                                        Bob

                                        #39739
                                        Kimosubby Shipyards
                                        Participant
                                          @kimosubbyshipyards

                                          Sounds a very good idea, I'll have to get a longer drill bit though, but I think I have one in the ordinary tool box for drilling walls etc. It'll do to get through the balsa plug. Once I've the makings of the hole in the mould I can finish it off with a file.

                                          Good tip Bob, keep 'em coming, Kim

                                          #39740
                                          Bob Abell 2
                                          Participant
                                            @bobabell2

                                            Hello Kimmo……….You need to be very careful now, as the tie rods should have passed through the mould and into the box bottom…………before pouring the plaster!

                                            You don't need a long drill……….You need some very accurate marking out!

                                            Use the inside of the box as a drawing board and draw the path of the tie rods through the keel and drill two holes in the wooden base.

                                            The next tricky job is to drill the plaster mould, so that the rods can pass through……..All very awkward and tricky. This area will need sealing with plaster

                                            I did say in my opening post…." Be aware of the tie rods"

                                            The hull will need drilling through to take the tie rods now. (I used a profile spine before planking the hull and had the holes positioned at this stage)

                                            It's a bit messy now, but all the best, Kimmo

                                            Bob

                                            #39741
                                            Bob Abell 2
                                            Participant
                                              @bobabell2

                                              Hello Kimmo again

                                              Looking at your photo showing the tie rods in place and the mould filled with plaster……How have you set the angle of the tie rods?…….As they look about right

                                              Bob

                                              #39751
                                              Kimosubby Shipyards
                                              Participant
                                                @kimosubbyshipyards

                                                Hi Bob,

                                                the tie rods are fitted to the plug, two go straight through and I used those to then drill the hull holes at their correct angle. The third hole (longest) was a bit more awkward, but it is already drilled in the hull and the plug. I've fitted the plug plus tie rods back to the hull so I know they align correctly and have allowed a small amount of play so that when I eventually tighten up I can get the ballast to the exact position. A small amount of "stick like ….." for a gasket should also make it water tight too.

                                                I'll still get the rods through the bottom of the mould when I reassemble it, that gives me a fixed bottom point to ensure correct angle. To do that I'll put the plug back in and just drill down the holes already there. As I said two already emerge through the bottom of the plug, there's just the long hole to fettle, and I allowed extra rod length anyway.

                                                Kim

                                                #39753
                                                Bob Abell 2
                                                Participant
                                                  @bobabell2

                                                  Well done, Kimmo

                                                  Pleased to read, you have sorted it out!

                                                  Bob

                                                  #39977
                                                  Kimosubby Shipyards
                                                  Participant
                                                    @kimosubbyshipyards

                                                    Hi Bob,

                                                    got back home Monday evening to find half the Island cut off by snow. So Tuesday and Wednesday out digging for sheep up on the mountain (under 10 – 15 foot of snow in places) to assist the farmers – not many found alive (sheeo that is).

                                                    Still, completed the mould assembly with rods in at correct angles and held by passing down into the base of the mould as per your suggestion. Then calculated mass of lead required.

                                                    readytopour.jpg

                                                    Took the plug and did a proper eureka, by collecting the water volume overflowing from a filled container into a jug. Jug plus water onto scales and tared to zero – emptied jug and back on scales gave me mass water. Assume 1g = 1cm^3 then density lead is 11.34 g/cm^3. About 570 g water collected, hence about 6.5Kg lead required to be melted (a bit extra to allow for spillage etc.)

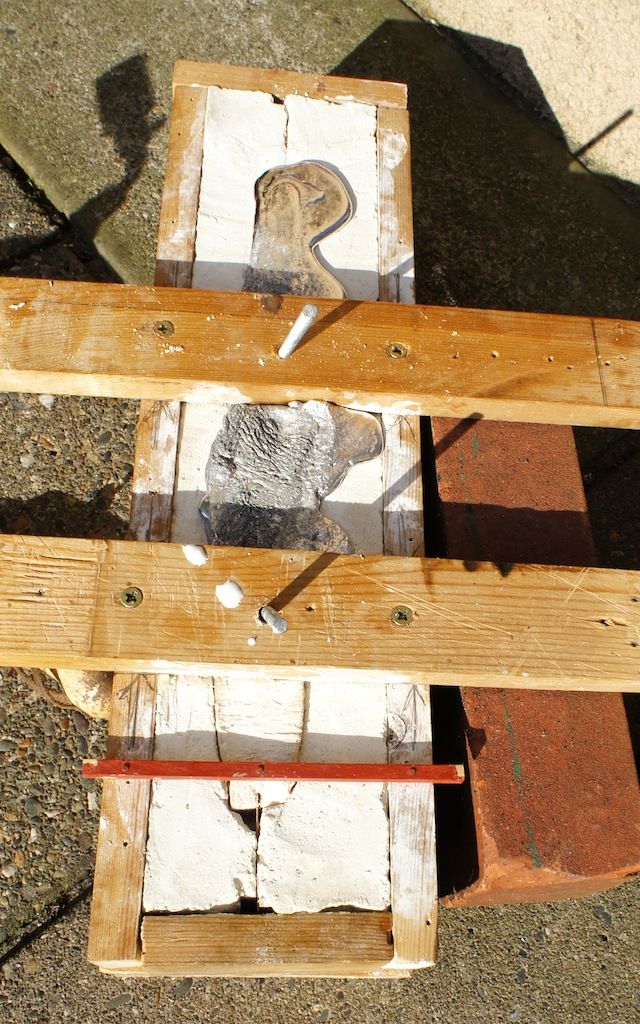
                                                    Melted outside on a small burner and blow torch. When floating debris removed, poured into mould. Enough lead to fill mould to just overflow and a small amount left in melting pan.

                                                    leadinandtoppedoff.jpg

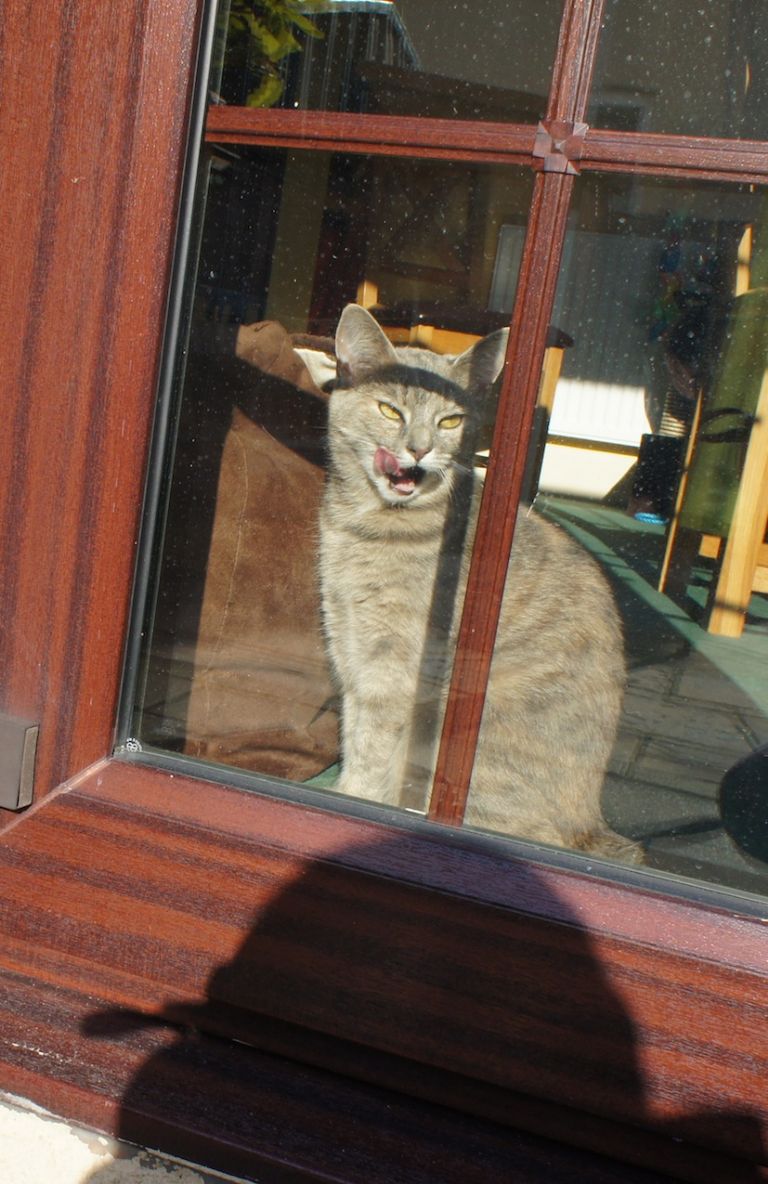
                                                    Looks good, so I checked with the foundry mistress (who usually helps out in the workshop but with molten lead about she was shut indoors), who looked suitably unimpressed. I am leaving the casting to cool overnight.

                                                    thefoundrymistress.jpg

                                                    I'll let you know what I find when I open up up tomorrow. Cheers, Kimmo.


                                                    Edited By Kimosubby Shipyards on 29/03/2013 16:41:55

                                                    #39981
                                                    Bob Abell 2
                                                    Participant
                                                      @bobabell2

                                                      Hi Kimmo

                                                      It`s really sad, how the poor sheep have suffered this winter…..Never known it to be as bad as this!

                                                      Opening a sort of Pandora`s Box?….eh?

                                                      It`ll be ok. I`m sure……..It`s always an anti climax

                                                      Bob

                                                      Edited By Bob Abell on 29/03/2013 19:40:00

                                                    Viewing 25 posts - 1 through 25 (of 106 total)
                                                    • Please log in to reply to this topic. Registering is free and easy using the links on the menu at the top of this page.

                                                    Code of conduct | Forum Help/FAQs

                                                    Advert

                                                    Latest Replies

                                                    Home Forums Scratch build Topics

                                                    Viewing 25 topics - 1 through 25 (of 25 total)
                                                    Viewing 25 topics - 1 through 25 (of 25 total)

                                                    View full reply list.

                                                    Advert

                                                    Newsletter Sign-up