Tiddler by Vic Smeed

Advert

Tiddler by Vic Smeed

Home Forums Beginners Tiddler by Vic Smeed

  • This topic is empty.
Viewing 25 posts - 26 through 50 (of 98 total)
  • Author
    Posts
  • #54598
    Philip Hale
    Participant
      @philiphale

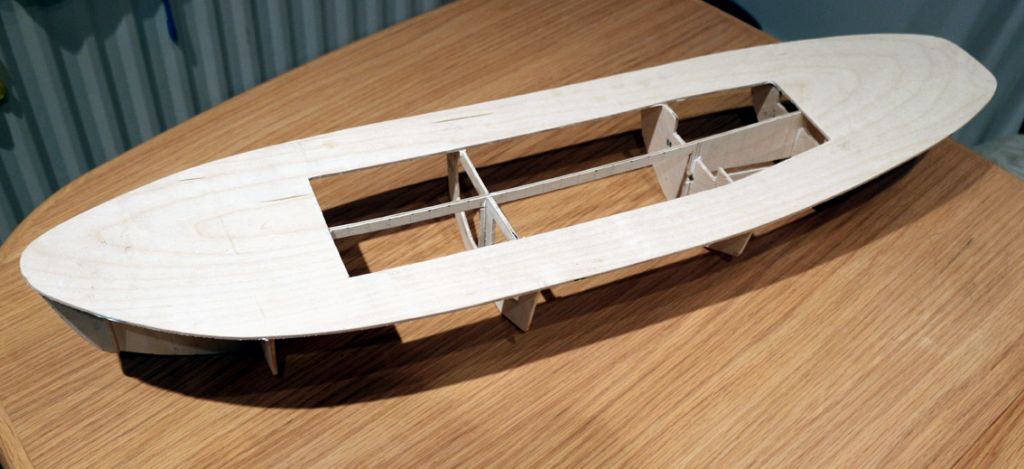
      Looks like it went together ok in the end but it took a fair bit of patience and many G clamps. Oh – I'm also quite impressed with the glue. I have seen references to various super glues but I had some skirting board glue handy. Perhaps it will all dissolve when it hits the water but it is impressive on dry plywood.

      tiddler tug dec2014 04a - copy.jpg

      Advert
      #54599
      Philip Hale
      Participant
        @philiphale

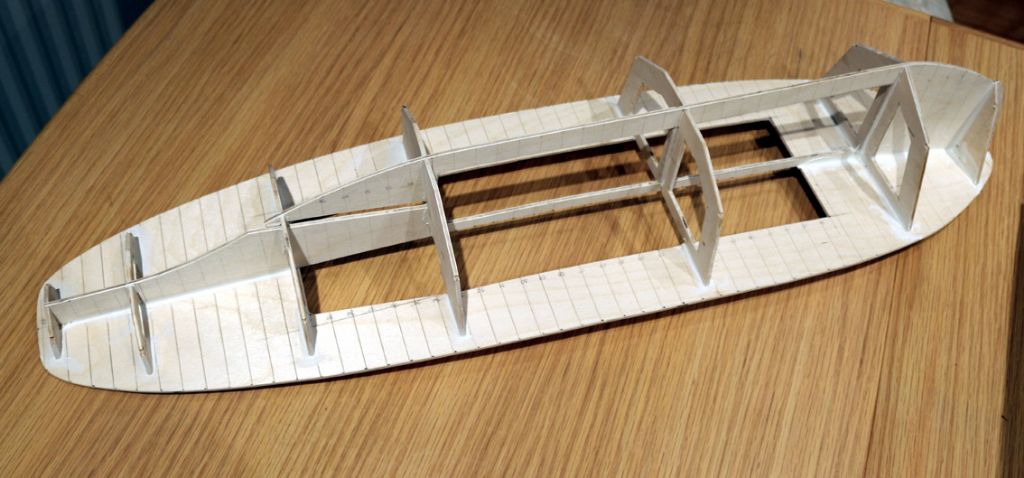
        The underside. I was having fun trying to persuade the 1/8" plywood deck to bend so I attacked the underside with a craft knife. You might just be able to see some of the port to starboard cuts. I guess the next bit of fun – after a sanding and check of the dimensions – is to fit the 1/8" square spruce stringers.

        I will say that I had my doubts about using 1/8" for the frames and backbone but the backbone is quite straight and the structure so far appears to be very strong. Maybe I'll come unstuck later on.

        PhilH

        tiddler tug dec2014 5a - copy.jpg

        #54900
        Philip Hale
        Participant
          @philiphale

          I have now planked the hull – pictures to follow – using 1/8" sheet balsa wood and I think I have seen enough boat build logs on here to be able to complete the waterproof skin e.g., plenty of sanding, filler – probably fibre glass tissue followed by layers of primer and paint etc.

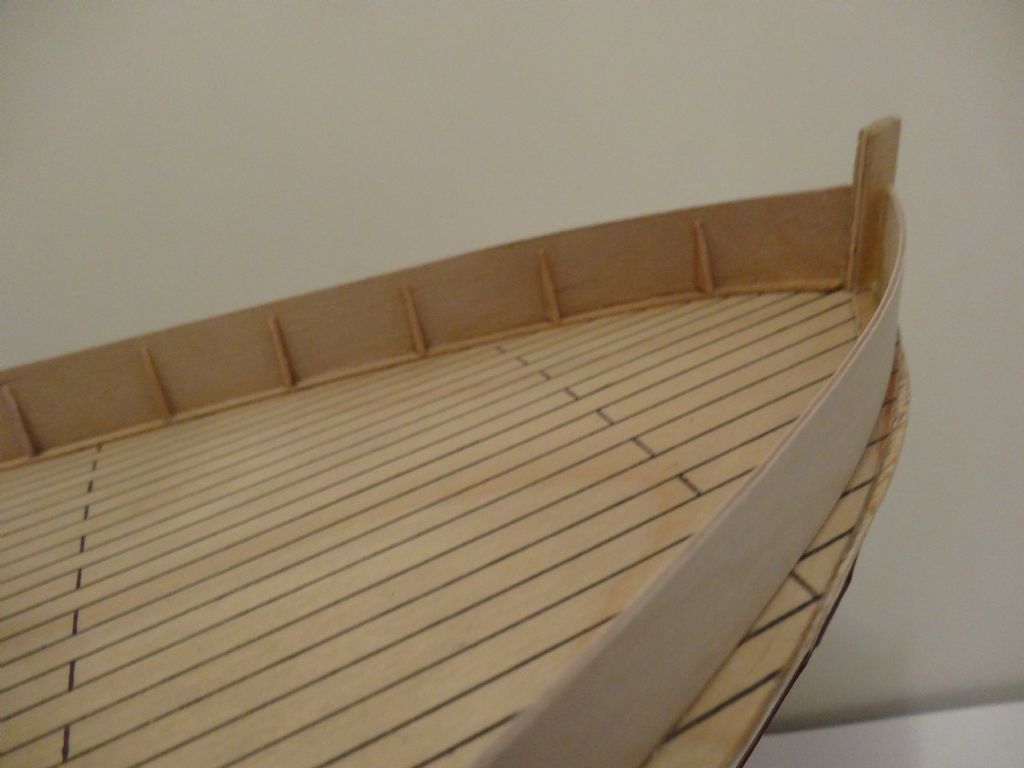
          I am looking for tips on how to build, fix and finish the bulwarks because these look as though they might be very tricky to get a neat finish. Does this sound like a good sequence?

          1. Sand/ finish the deck whilst there are no obstructions – including its paint finish.

          2. Make the mock frame extensions from 1/32"plywood, 42off, paint the same colour as the deck and fix in position using super glue.

          3. Cut the bulwarks to shape and paint the inside surface then super glue in position onto the frame extensions.

          4. Fit the handrail type capping – probably 1/32" plywood using super glue.

          Any other better sequences from experience would be appreciated.

          PhilH -….. Happy New Year

          #54902
          Paul T
          Participant
            @pault84577

            Hello Phil

            Excellent work and you must have the patience of a saint having cut everything out with a fretsaw.

            Your bulwark build sequence is exactly the same way as I built my Tid (except that I don't use superglue)

            Paul

            #54911
            Philip Hale
            Participant
              @philiphale

              Paul,

              I have previously cut similar shapes through 2 layers of 1/8" mild steel plate using a hacksaw and files – so in comparison – the fretsaw went through the ply like a knife through butter.

              Thanks for confirming my proposed sequence for the bulwarks. I proposed superglue to try and prevent excess glue smudges but I am having mixed results with it. It sometimes glues really well but I sometimes have problems with it. For example, superglue was brilliant for fixing the 1/8" square spruce stringers in place on the hull but it wouldn't stick the balsa sheet in place for some strange reason. I had to go back to my tube of skirting board glue which I suspect is some form of very strong PVA type stuff. What glue would you recommend?

              PhilH

              #54913
              Paul T
              Participant
                @pault84577

                Hi Phil

                Skirting board glue is neoprene and very messy, I either use waterproof PVA for general work or twin pack epoxy (Araldite) for joints that are going to be under stress.

                Paul

                #54915
                Philip Hale
                Participant
                  @philiphale

                  Paul,

                  Yes I agree that the skirting board stuff is messy but thankfully – none of it is on show so far.

                  Ah – yes the wonderful epoxy. I have used that before for metals and sometimes in combination with an industrial hair dryer. It can be incredible stuff. However, it can also be a bit 'stringy' when applied PVA dries clearish though doesn't it?

                  PhilH

                  #54921
                  Banjoman
                  Participant
                    @banjoman

                    Hello Philip,

                    No matter which glue you use, if you apply it to painted surfaces you are effectively glueing together to films of paint, and the joint will never be stronger than the paint's adhesion to the underlying material.

                    This is not really a problem if whatever it is that has been glued won't be subject to much stress, but if a joint between bits that have to be prepainted also needs to be able to resist some force, I have always found it better to mask off at least part of the surfaces to be joined before painting, in order to create a glue joint directly between the materials.

                    And yes, mal PVA glue will dry quite clear, although any surplus outside the joint will still form a visible blob. On the other hand, it is usually quite easy to remove that excess after setting up the joint but before it has dried with (depending on circumstances) a small piece of kichen roll, a scrap piece of strip wood or (for some joints) something like a round-tip (2A-type) pair of tweezers to create a clean joint.

                    /Mattias

                    #54924
                    Tony Hadley
                    Participant
                      @tonyhadley

                      Phil,

                      The build is looking excellent. For the bulwarks on my Guardsman, I used Deluxe Materials Aliphatic Resin after asking the question as which is the best glue. Aliphatic Resin, came recommended and and after buying, it is superb. Not the quickest drying glue and the joint is best held under pressure for a while. As Banloman says though, the paint will need to be removed where the glued joint is.

                      http://www.modelboats.co.uk/forums/postings.asp?th=101226

                      This is Guardsman's bulwark detail in progress. At the stern where the curvature is greater, I used a really flexible 0.8mm ply, grain vertical.

                      guardsman (50).jpg

                      #54946
                      Philip Hale
                      Participant
                        @philiphale

                        Very neat that Tony.

                        Am I being a bit paranoid regarding the need to prepare the inner surface of the bulwarks for painting? Looking at your picture – it looks like it would be a tricky operation to get a piece of wet and dry near the inner surface when fixed in position – specially on Tiddler because the bulwarks lean inwards.

                        PhilH

                        #54976
                        Tony Hadley
                        Participant
                          @tonyhadley

                          Thanks for the positive comments Philip.

                          The ply was given a light sanding before glueing in place, the only further finishing I plan to do is check for any glue which wasn't wiped off and remove with a small file and fine glass paper. Afterwards, apply a coat of Eze-Kote before painting.

                          Like your Tiddler, the stern the bulwarks also lean in (at the stern). Quite difficult to get the curve as well as the lean, but a little at a time and masking tape to hold in place worked. One section took a couple of attempts, but got there in the end.

                          #55088
                          Philip Hale
                          Participant
                            @philiphale

                            OK Tony/ Mattias. Ill change the sequence to get a proper wood to wood joint – thanks for the advice.

                            I have now filled the hull defects below the deck with lightweight filler, covered it in heavy weight model aircraft tissue, applied 6 coats of sanding sealer and got two coats of sprayed, grey primer on. It is starting to get close but still has a couple of minor defects to sort out. I might now need to use car body filler to sort them out.

                            However, progress has now halted for a while. My central heating boiler has just failed. I was hoping it would last to spring so I could do some mods to the heating and plumbing but – not to be. I now need to get the soft solder out.

                            Phil H

                            #56264
                            Philip Hale
                            Participant
                              @philiphale

                              Well,

                              Central heating rebuilt and fixed. That's the good news.

                              The bad news is a major problem with Tiddler. As I rubbed down and applied coats of spray primer I was getting one or two small bubbles in the tissue. I assume this is either from the paint creeping under the tissue joints or through small holes in the skin. It wasn't too bad until I experimented with a top coat which created a surface that a common toad would be proud to wear. I'm not so sure whether this can be cured but I guess this is one reason why we have guys who dislike this balsa type construction method. I certainly do. Any solutions apart from scrapping and starting again with a PLYOOD skin?

                              Phil H

                              #56277
                              Paul T
                              Participant
                                @pault84577

                                Hello Phil

                                It sound like you have used incompatible materials and the top coat has reacted with the primer.

                                If so the only solution is to rub it back down and start again.

                                If you list the materials that you have used I can check the compatibility and see if this is the problem.

                                Paul

                                #56280
                                Philip Hale
                                Participant
                                  @philiphale

                                  Paul,

                                  I agree it does seem to be some sort of reaction – perhaps it was the skirting board glue used for the main frame parts but the lower coats of cellulose were perfectly fine on the balsa and tissue. Things started going toad shaped after the tissue went on but the sequence was

                                  Cellulose sanding sealer on the balsa sheet

                                  Model aeroplane light weight filler

                                  Model aeroplane tissue with cellulose dope brushed through

                                  Cellulose sanding sealer

                                  Cellulose grey primer

                                  Cellulose paint top coat.

                                  Phil H

                                  #56285
                                  Paul T
                                  Participant
                                    @pault84577

                                    Hello Phil

                                    Are the products from the same manufacturer and are they all new?

                                    I still think that its a reaction between primer and top coat, did you rub down between coats and how much time did you leave between coats.

                                    Paul

                                    #56292
                                    Philip Hale
                                    Participant
                                      @philiphale

                                      OK,

                                      The dope and sanding sealer were from the same place, same manufacturer – bought this year. The spray primer and paint have been used successfully together but they are from different manufacturers to eachother and different to the dope. the spray paints are a maximum of 2 years old.

                                      The rub down was between every single coat. Each coat was very light because I hate runs with an interval of hours between each coat. I would apply the coat then go and do something else.

                                      This is how it appears….. something in the spray would penetrate the tissue 'melting' or reacting with one of the sub tissue layers causing the tissue to delaminate locally and either shrink or expand causing a bubble in the tissue. So yes I think there could be a reaction between the spray paint and the dope.

                                      Phil H

                                      #56339
                                      Philip Hale
                                      Participant
                                        @philiphale

                                        I have now stripped all the balsa wood off the hull – so I'm back to the basic frame minus the stringers. On the bright side – I get to do it all again. I think I will use plywood this time with no clever covering materials – just plywood, probably a bit of filler and paints – all from the same manufacturer.

                                        Phil H

                                        #56347
                                        Paul T
                                        Participant
                                          @pault84577

                                          Hi Phil

                                          This type of painting problem happens to all of us, even with the best equipment, optimum temperature and perfect humidity a paint job can still 'go west'.

                                          So don't be disheartened as you are in very good company, just grit your teeth and put it down to Sods Law

                                          Paul

                                          #56348
                                          Philip Hale
                                          Participant
                                            @philiphale

                                            Paul,

                                            Thanks for that. I was also encouraged by a visit to the Boat Museum yesterday too. I noticed that a very high proportion of model boats appeared to use some form of moulded hull. That made me more determined to carry on with wood for the hull.

                                            I am thinking of 1/8" ply for the very bottom of the hull with 1/16" ply for the stern tube area and rest of the sides. I had a go at 'bending it over the frames last night and it looked like it might work. What do you think?

                                            Phil H

                                            #56352
                                            Paul T
                                            Participant
                                              @pault84577

                                              Hi Phil

                                              The hardest parts to bend are where the hull panels gather above the propeller.

                                              I think that 1/16 would be perfect but if it becomes tight you can always use a little steam to persuade it.

                                              Paul

                                              #56357
                                              Tony Hadley
                                              Participant
                                                @tonyhadley

                                                Sorry to read about the problem Philip.

                                                Many wooden kits use 1/32 (0.8mm) ply for the skins, but as you are building a larger model than the plan, I would go with Pauls suggestion of 1/16 (1.5mm) ply skins.

                                                #56441
                                                Philip Hale
                                                Participant
                                                  @philiphale

                                                  Thanks Tony and Pau.

                                                  I have rubbed down the frame and replaced the stringers. This has given me a bit of time to think and do a little bit more research. Would I be better going for the Eze-cote system? I have noticed it can be used for glass fibre tissue and brushes wash off in water. If that approach was used – what paint (top coat) can be sprayed onto the sealer?

                                                  PhilH

                                                  #56445
                                                  Paul T
                                                  Participant
                                                    @pault84577

                                                    Hello Philip

                                                    Personally I would wait until the skin is on before making any decisions about filling and priming as there is a very good chance that you wont need to use the Eze-cote system.

                                                    When building with plywood I use P40 body filler wherever there are holes / dents, then a quick rub down before priming with a spray can.

                                                    Paul

                                                    Universal disclaimer relating to personal choice and preferences

                                                    #56451
                                                    Tony Hadley
                                                    Participant
                                                      @tonyhadley

                                                      As Paul says, there is no need to use Eze-kote on ply skins, it is really for balsa and foam models. Traditionally ply skins were filled at the edges (or where required), given a coat of sanding sealer before sanding and painting. Nowadays, I would be inclined to use spray primer instead of sanding sealer for the first coat as Paul suggests in the previous post.

                                                      Paul wrote a good item on finishing and painting as a Members Contribution on this site –

                                                      **LINK**

                                                    Viewing 25 posts - 26 through 50 (of 98 total)
                                                    • Please log in to reply to this topic. Registering is free and easy using the links on the menu at the top of this page.

                                                    Code of conduct | Forum Help/FAQs

                                                    Advert

                                                    Latest Replies

                                                    Home Forums Beginners Topics

                                                    Viewing 25 topics - 1 through 25 (of 25 total)
                                                    Viewing 25 topics - 1 through 25 (of 25 total)

                                                    View full reply list.

                                                    Advert

                                                    Newsletter Sign-up