How to get that perfect finish
By Paul Thomason aka “The Fat Controller”

Enjoy more Model Boats Magazine reading in the monthly magazine.
Click here to subscribe & save.
Tools and Materials:
The old adage of buy cheap buy twice is especially true when it comes to creating a perfect paint or varnish finish and you should always buy the best that you can afford. But in this dont assume that expensive means good it could just mean a big retail profit so always carefully inspect the quality of whatever you are buying.
A good example of this are domestic paint brushes, we have all at one time or another used the value paint brush sets that are available at all the DIY stores and suffered the problems of bristles being left behind in the fresh paint and a finish that you could plant potatoes in,
These types of brushes are really only fit for painting fences or undersealing cars and certainly not suited to giving your lovingly created model a superb finish.
So when choosing a paint brush have a good look at the head and check the quality and firmness of the bristles, give individual bristles a good hard tug to see if they come loose and look at how the head is attached to the handle to make sure that it is not loose.
Then inspect the head more closely, poor quality brushes have course bristles and have an uneven shape or tip whereas good quality brushes will have fine soft bristles that are tapered, the tip will be level and non of the bristle ends will be split.
Good quality brushes are like quality tools and if cared for will last a lifetime so always carefully clean and dry them after every use.
As with tools there are different types of brush to suit the particular needs of the individual and the following are just three different examples
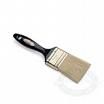 Premium Quality Ox Hair
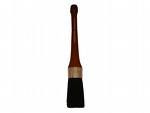 Oval varnish Brush
 Curved Bristles
Be warned that these brushes do not come cheap and so you should be prepared for a shock when you get to the till.
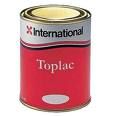
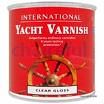
Paints and varnishes are just the same in being available in value varieties so try to avoid own brand products which can be inferior and go for quality recognised manufacturers, even then make sure that you fully read the instructions and understand exactly what the product will do.
Personally I prefer to use International Yacht paints and varnishes, yes they are hideously expensive and the paint is usually only available from boatyards but over the years I have found that they produce consistently high quality results as they are durable and don’t fade.
Lastly we come to masking tape which again is available in value packs, these might be alright for masking a garage door or an old Cortina but can be next to useless when it comes to working on model boats, the problem with cheap tape is that the paint can bleed up through the adhesive leaving spiders legs of paint on your pristine surface.
Always use quality masking tape and when using make sure that you fully press down the leading edge of the tape to ensure a crisp and clean paint line.
Preparing the surface:
The way in which the surface of the wood is prepared prior to applying the finish is vital, as a clean, dry and smooth surface is the most important basis for a quality finish so the watch words are:
Preparation, Preparation, Preparation.
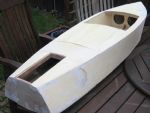
Barrel back inner ply skin during the sanding process to smooth the timber and remove all excess glue
This might sound rather clichéd but it is a true today as it was 100 years ago that the better the preparation the better the finish.
At this point it is worth remembering that whatever remains on the surface of the wood will prevent your chosen finish from adhering correctly and result in unsightly blemishes on the finished surface.
One of the best examples of this problem is glue residue, the removal of excess water based resin glues is easily solved by wiping away before they have time to set and is more a case of care and attention than a real problem.
However other glues are rather more difficult remove and great care must be taken to ensure that all residue is removed either during application or after drying.
Try applying less glue and being more precise in its use this will mean that less glue will squeeze out of the joint and you will have less waste to remove, not only is this good practice it is also economical as these adhesives are expensive.
Another problem residue but usually only on a restoration project can be paint stripper which by its very nature it is an invidious product designed to work its way into layers of paint so if it left on for to long it will bury itself deep in the grain of the wood and cause havoc when you try repainting, so make sure that all the residue is washed off and that the wood is fully dry before painting.
Sanding the wood to get it smooth it a tried a trusted method of preparing for painting, sanding is a straight forward procedure providing you follow some basic rules.
1/ Always sand with the grain.
2/ Keep the sandpaper square and flat on the surface.
3/ Use consistent pressure when sanding to avoid dishing the surface.
4/ Check the work to ensure that you dont remove too much or work out of square.
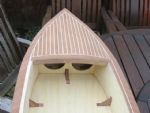
Applying the mahogany planking again taking great care to remove all excess glue
60 g Aluminium Oxide is really coarse and is great for removing material fast.
100 g Aluminium Oxide is smoother than the 60 but still good for shifting material.
250 g Aluminium Oxide gives a nice smooth finish which is ok for painting on.
1200 g Wet & Dry, I use this on painted surfaces to get a mirror like deep finish.
2400 g Wet & Dry, I use this on varnished surfaces for the perfect blemish free finish.
The process of sanding is simple but time consuming and there are no short cuts especially if you wish to achieve that perfect finish so be prepared to invest plenty of time and effort..
Sealing the wood:
The surfaces of most woods are porous and will absorb whatever liquid is applied to it. This can be a problem as quite a large number of coats could be required before the finish begins to have any visible effect, this is especially true with varnish, and dont be disappointed when you apply the first coat onto your smoothly sanded timber as the moisture will raise the grain and appear to ruin the surface.
You will need to repeat the sanding process and smooth down the grain on this and possibly five subsequent coats.
To minimise these problems it is desirable to use a surface sealer, these come in liquid form and are simply brushed onto the porous surface. When dry all that is required is a light sanding before the finishing varnish is applied.
Wood Stains
Sometimes you might wish to change the colour of the wood, a common example is the wish to darken birch ply to a shade of mahogany.
There is a very large range of wood stains available but if you cant find the exact shade that you want then just like fillers it can be possible to mix the stains to get the right colour.
But remember that just like fillers dont mix manufacturers and always test your results on a piece of scrap wood before applying to the model.
Stains can be applied by either brush or pad but the most important factor is to make sure that you achieve an even and smear free surface, try not to overlap the strokes especially after they have dried as this will just appear as a second coat which will be correspondingly darker than the surrounding area.
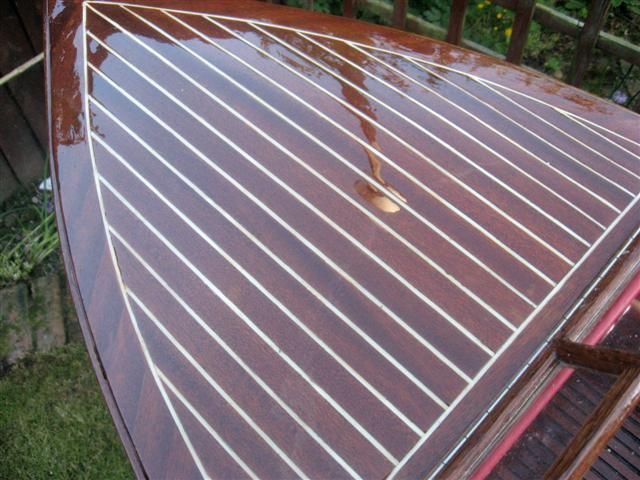
When you are satisfied with the preparation of the surface, pour a measured amount of varnish into a small, clean container then dilute the varnish with 10% thinners, for this check with the manufacturers instructions, when diluted use a clean brush or cloth to apply the mixture.
Always brush with the grain and apply sparingly and before leaving the first coat to dry make sure that any drips or runs that might have appeared are brushed gently back into the surface.
Although some varnishes are fast drying you should still wait for 24 hours to ensure that it is fully dried.
The first coat of varnish might raise the grain so dont be disappointed if your carefully prepared work becomes rough, simply use a fine sandpaper such as 1200g and gently sand the surface, always sand with the grain. Apply the second coat, this time of undiluted varnish, using the same care that you took with the first and allow to dry then lightly sand smooth.
You should repeat this process several times until you achieve the finish that you require although obviously dont sand the final coat.
It should go without saying that you must do everything that you can to minimise any dust or the possibility of dust when varnishing so it is usually best not to varnish in your normal work area as there will be all sorts of dust and debris in the atmosphere. You also need to watchful of temperature and humidity as both can ruin a great finish by giving a milky haze to the dry coat, this is called Bloom and if you get it then you will have to sand and start the last coat again.
My grandfather once told me that a perfect brushed varnish finish was like the holy grail, everyone has heard about it but no one has ever seen it.
In fact he speculated that the best place to varnish would be an uninhabited Pacific desert island where there would be perfect temperature and humidity, no dust and no insects
And he was right varnishing can be a most frustrating process.
.jpg)
The last problem are insects as they just love to land on your newly applied surface, if you are lucky you will spot it and be able to remove the little bugger before the varnish sets it in place. If not then when the varnish is fully dry a little local light sanding and delicate brushwork should restore the perfect finish.
.jpg)
An option that furniture makers employ is to use a rubbing compound on the final coat of varnish and then a few coats of polish for that really deep mellow finish.
.jpg)
In conclusion I realise that these particular techniques might seem old fashioned and very time consuming to some readers and I make no apology for this as they are a tried and tested methods of achieving the perfect finish, but I do accept that some readers might have been put off by the amount of time involved in building up and rubbing down the decorative finish when there are faster and more modern processes available.
I have carefully avoided talking about spraying as mixing the methodologies might cause confusion and, if these ramblings are well received, the differing techniques of spraying would make a suitable subject for a separate article.
I hope these notes will be of some help to the reader in getting that professional finish to which we all aspire


