Shemarah II

Advert

Shemarah II

Home Forums Scratch build Shemarah II

  • This topic is empty.
Viewing 25 posts - 301 through 325 (of 371 total)
  • Author
    Posts
  • #42349
    ARTHUR COLLETT
    Participant
      @arthurcollett48040

      Hi Gareth

      your model is looking soooooo nice. Question: What type of weathering powder do you use and do you use a sealing agent to prevent it from washing or rubbing off. MIG products make use off a sealer.

      Regards

      Arthur

      Advert
      #42460
      Gareth Jones
      Participant
        @garethjones79649

        Hi Arthur,

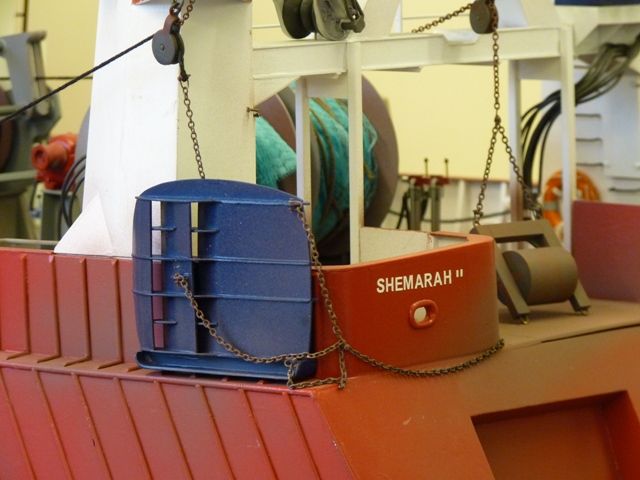
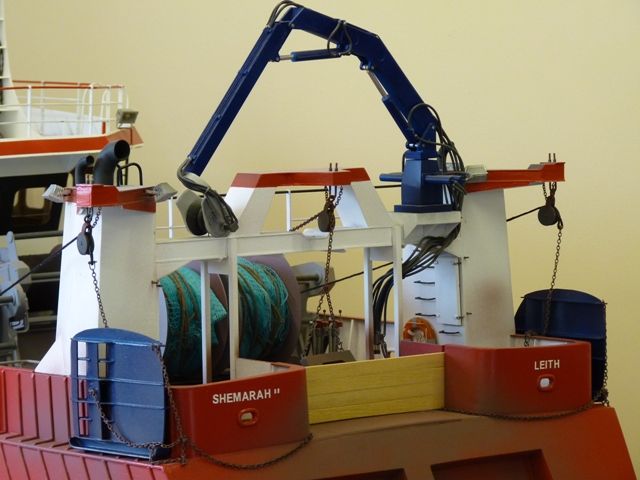
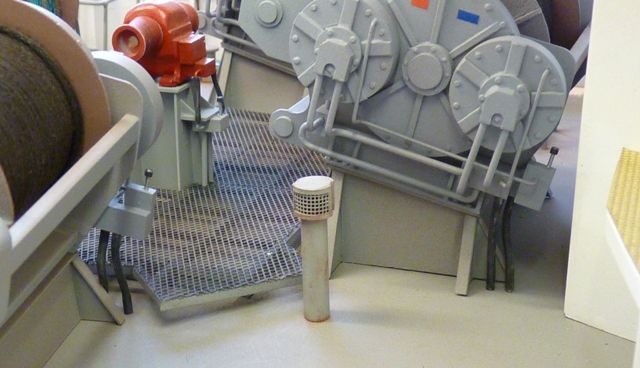
        I am using Humbrol weathering powder. For some reason the 'Rust' colour is difficult to get hold of at the moment so I am using the 'Iron Oxide' colour. Not sure what the difference is really but it looks quite good, particularly when applied sparingly on to matt surfaces. I have sealed some of the smaller parts like the ventilators using satin varnish but I have not sealed the larger areas such as the deck and bulwarks yet.

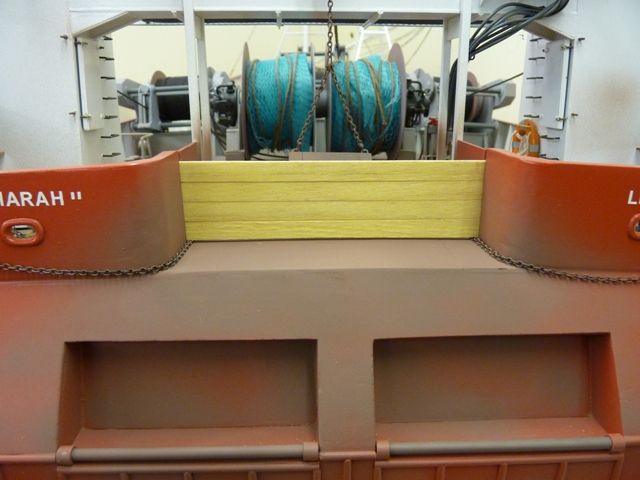
        I have applied quite a lot in the area of the deck adjacent to the hatch under the A frame which gets a battering from the trawl nets when they are hauled on board with the catch. That area does not look very convincing so I am going to try and wipe it off and have another go. Maybe wiping it off with a damp cloth or tissue will stain the deck and look more convincing, in which case serendipity will have taken over. Maybe it will look even worse and I will have to respray that bit with the airbrush and start again.

        The current job is the trawl doors and clump. The doors are quite a complicated shape with several curved sections. The photos I have of Shemarah with the trawl doors visible suggests they are Bison doors so I am trying to replicate them, together with the associated rigging bridles.

        Gareth

        #42462
        ARTHUR COLLETT
        Participant
          @arthurcollett48040

          Thanks Gareth

          I Cannot find any Humbrol Weathering powder in South Africa yet. I have tried the MIG powders and works very well but quite expensive here.

          Thanks for the info. Looking forward to your next posting

          Arthur

          #42593
          Gareth Jones
          Participant
            @garethjones79649

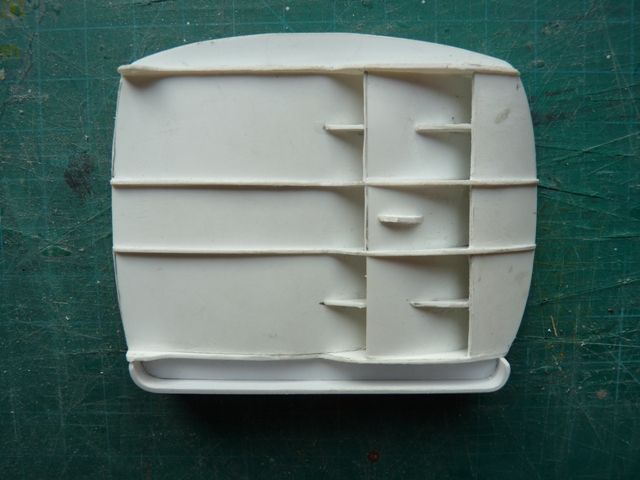
            The last week has been spent trying to make the trawl doors. I have a couple of pictures of Shemarah with trawl doors mounted on the shelves at the aft sides of the hull and these were good enough to scale the proportions of the parts. Overall they come out around 85 mm long and 70 mm high.

            I started to make them in 0.75 mm styrene and as a first attempt cut the vertical plates, bent them to what seemed an appropriate curved shape and tried to join them with sections of a circular ring. It quickly became apparent this was not going to work as the gap between the plates is not of constant width. I therefore cut the vertical plates into three pieces and then glued these to the two centre ribs and end ribs. The short intermediate ribs were made as separate items by a laborious proces of trial and error sanding to shape. However the end result is quite good.

            shemarah 354.jpg

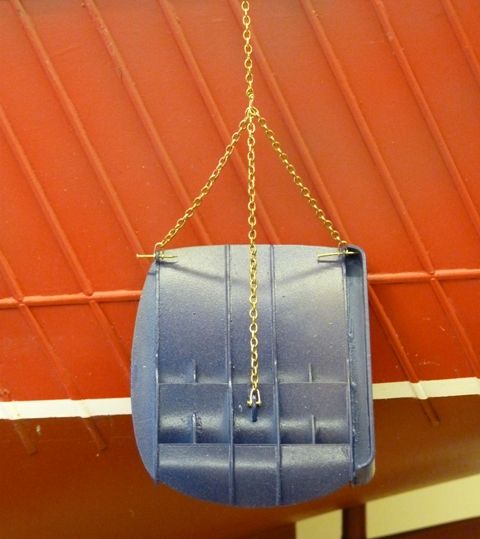
            I now need to add the attachment for the trawl warp on the inside face of the door. The chains which connect the door to the bridles for the net attach to the outer face end ribs and the small bracket in the middle. I now have another dozen brass wire shackles to make to hold all that together when I have made the door for the other side.

            shemarah 355.jpg

            As pointed out by Bob Abell in the thread on 3D printing, it might be nice one day in the future to press a button and produce an accurate solid model of a part like this. However I suspect trying to define the shape of all the parts in the software would be pretty difficult and there would no doubt be a lot of satisfaction in being able to do so. However as Dave Wooley pointed out, making the part yourself from scratch is very satisfying as long as it looks realistic and would work in practice,, even if its not 100% accurate. When people say to you where did you get your winches or trawl doors from you can honestly say I made them and get great satisfaction from the look of amazement on their face.

            Gareth

            #42596
            LARRY WHETTON
            Participant
              @larrywhetton68737

              Good morning Gareth,

              Build is looking first class, trawl doors are spot on ,

              my arctic trawler trawl doors have not been fitted yet because of lack of info,

              but still searching , on the jobs to do list, will have another search one day ,

              not to well at the moment, but enjoying following your build,

              cheers Larry..

              #42617
              Gareth Jones
              Participant
                @garethjones79649

                Hi Larry,

                I am glad you like the trawl doors and pleased to see that you are still keeping an interest in modelling, even if you are not well enough to do much yourself. I am always interested to read your posts and I hope you dont sell up your tools and give up modelling altogether. I hope you get well soon and get on and finish Kingston Peridot. There are plenty of pictures of trawl doors on the web, its just a matter of finding the right ones. I have seen a few models of that particular trawler, some of them very good indeed and its a popular local subject.

                I can remember watching the television news of the loss of the three Hull trawlers when I was a student. If I remember correctly 'Big' Lil Billocca was one of those campaigning in Hull for better safety standards. There are now plans to erect a new memorial to all the fishermen lost from Hull. The number is enormous over 6000 lives lost according to the local paper.

                Gareth

                #43103
                Gareth Jones
                Participant
                  @garethjones79649

                  Both trawl doors are now complete and painted. I have started to make up the chain sections of the bridles which attach the outer face of the doors to the outer wings of the nets. Unfortunately I don't have enough suitably sized chain so I have had to order some more for the inboard sections.

                  shemarah 356.jpg

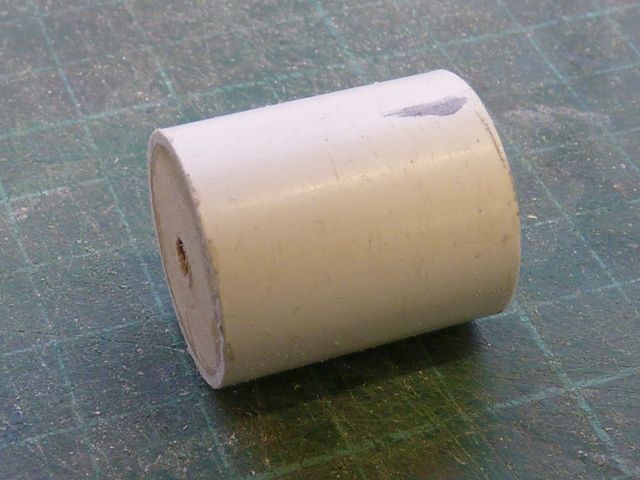
                  I have also started on the clump. By a stroke of serendipity I found I had two spare wooden discs left over from making the winches.

                  shemarah 357.jpg

                  When I have finished these two items I plan to make the remaining ventilator and then make up the sacrificial anodes which protect the hull from corrosion. There are about 20 of these fixed to the hull, keel, bilge keels, kort nozzle and rudder. Once they are in place I can start on the remaining major job which is the wheelhouse. I am going to try and make a concerted effort to get on with that in September as it now looks like I will be returning to work again in October and spare time will be at a premium for another 6 months or so. However I hope to get Shemarah externally complete by the end of the year – our next project is already in the planning phase.

                  Gareth

                  #43137
                  Gareth Jones
                  Participant
                    @garethjones79649

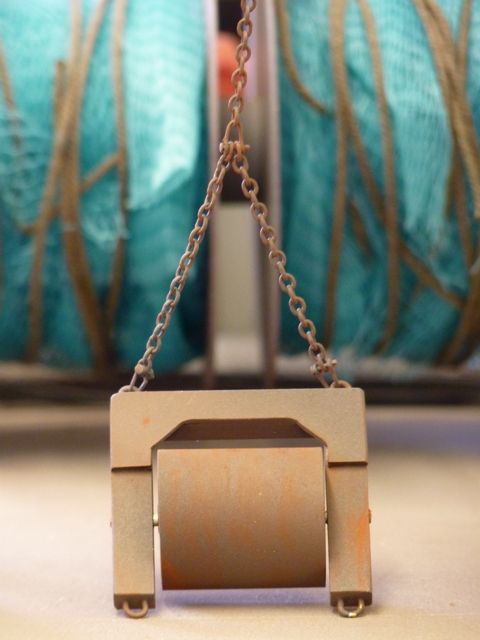
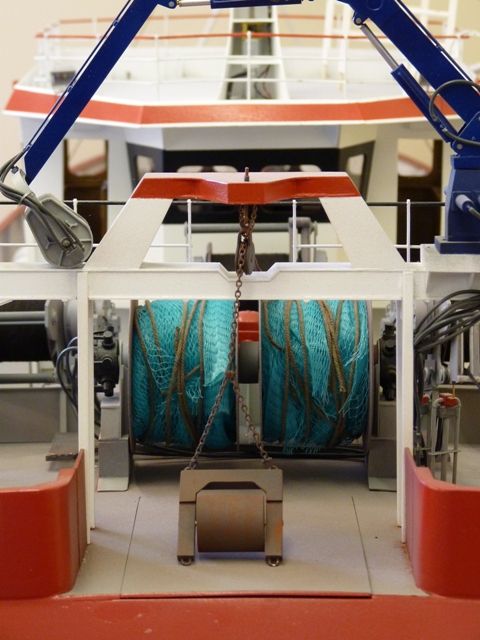
                    The clump is now complete apart from the bottom pair of chains.

                    shemarah 358.jpg

                    shemarah 359.jpg

                    The next step till the additional chain arrives is to make the remaining ventilator.

                    Gareth

                    #43142
                    LARRY WHETTON
                    Participant
                      @larrywhetton68737

                      Hello Gareth,

                      First class work, sould do vey well in model shows worthy of gold medel,

                      back in the workshop now feeling better but quite of the woods yet,

                      but junk ready for launch , and started another fishing boat . Kingfisher,…

                      will the useral plank on frame my scratch build winches and plenty of weathering ,

                      you mentioned hull trawlers was in the army in the late 50tys and was stationed in hull as a T.A instructor , teaching armoured driving, all sorts of tanks,

                      used go down the fish dock areas , to local dances had many a good night with the trawler men , all ways had a load of money , and the latest fashoins , and took taxis every where,

                      this when Hull had fish dock , times where good but hard they earned the money ,

                      as you say many perished at sea and ther wear many accidents,

                      all for the price of a cod supper , but at that time fisions fetaliser had nealy 70%

                      of catches for fish meal,………

                      still looking for trawel door info……..cheers for now great blog and model …Larry..

                      #43149
                      Gareth Jones
                      Participant
                        @garethjones79649

                        Glad you are feeling better and enjoying the blog Larry.

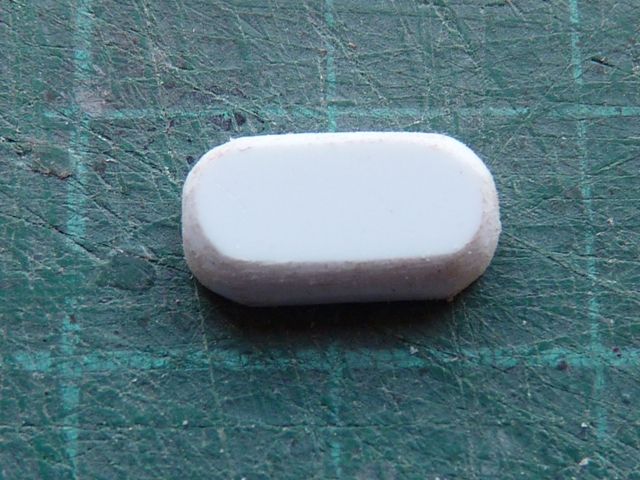
                        Last night I made the first of the sacrificial anodes from some 6 mm x 2.5 mm styrene strip.

                        shemarah 360.jpg

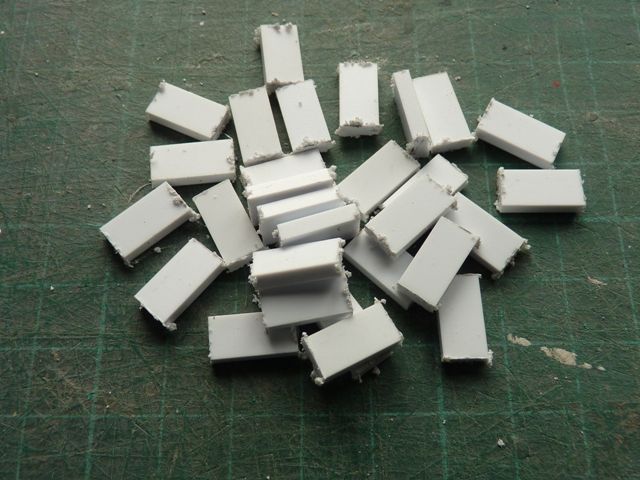
                        By the time I have sanded the remaining 27 to shape I will have no thumbnail left. Might have been a good example to try resin casting for the first time.

                        shemarah 361.jpg

                        Gareth

                        #43246
                        Gareth Jones
                        Participant
                          @garethjones79649

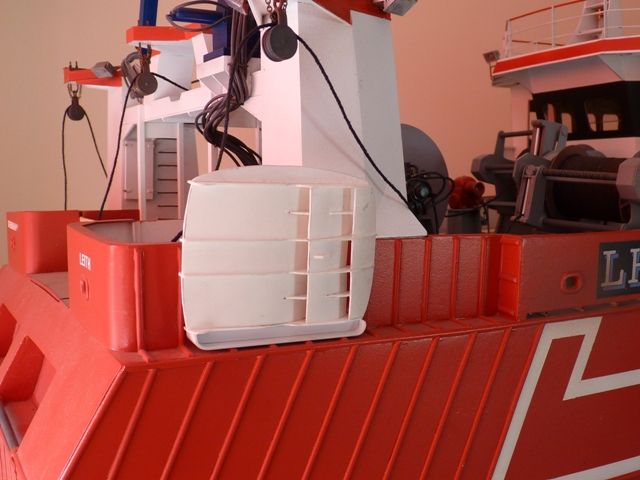
                          The trawl doors are now finished and seated on the shelves on the rear of the hull. Unfortunately my materials estimating was not very good and I have run out of chain again. I still need another half metre or so to make up the loops that secure the doors to the uprights of the stern gallows and two lengths to attach the clump to the net bridles.

                          shemarah 362.jpg

                          Another job that needs doing is the access panel over the rudder servo in the rear of the deck has lifted at its right hand rear edge. It was only tacked down with superglue so that I could if required gain access to the servo at a future date. I will have to prise it off and reseat it, then fill and spray over the edges to hide the joint.

                          shemarah 363.jpg

                          The remaining ventilator has been added on the starboard side behind the wheel house.

                          shemarah 364.jpg

                          The next task is to file all the sacrificial anodes to shape, spray them and fix them to the hull. After that it is really just the wheelhouse that needs finishing. However we have a couple of regattas over the next few weeks and I don't want to start taking the wheelhouse to bits before them so that job will be held up until the middle of next month.

                          On Sunday I will be off to Haydock Park, although Shemarah will be staying at home. I am on the lookout for some more convincing trawl netting and some 1:24 crew members. I might even find out what a breasthook is.

                          Gareth

                          Edited By Gareth Jones on 23/08/2013 18:44:22

                          Edited By Gareth Jones on 23/08/2013 18:45:14

                          #43365
                          Gareth Jones
                          Participant
                            @garethjones79649

                            The access panel over the rudder servo has now been reseated by shaving the panel landing with a sharp chisel and then tacking the panel back down with superglue. The joint has been filled and sprayed over and now looks much neater than before.

                            shemarah 365.jpg

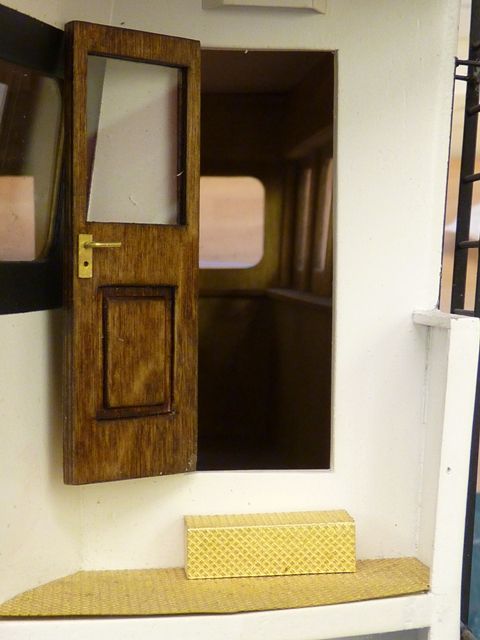
                            The wheel house doors were made some time ago when I was building the wheel house itself. They are made the same way with three layers of 1/32 ply with a slot left in the middle one to take the clear styrene 'glass' They have now been stained and varnished and the door handle fitted. Although they have working hinges these are for appearance only and the doors are actually fixed to the rear side of the wheel house with short brass pins at the top and bottom corners.

                            shemarah 366.jpg

                            The step has also now been made and the treadplate fitted to it, ready to be sprayed before attaching the treadplate to the main part of the floof in this area. The next job is either to make up the steps for each side or the frames which hold a lifebelt and fire extinguisher inboard of each door.

                            Gareth

                            #43551
                            Gareth Jones
                            Participant
                              @garethjones79649

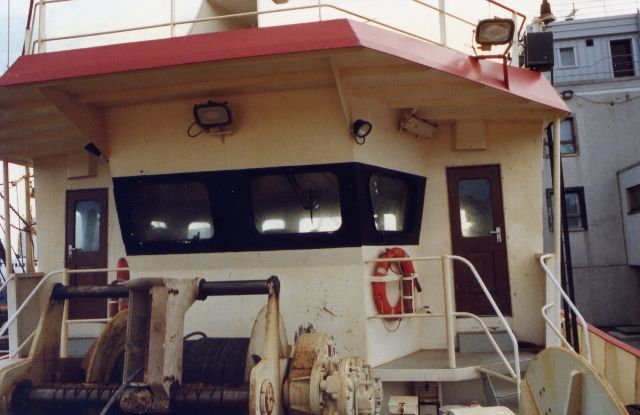
                              Last week I had a bit of an oh bu**er moment with Shemarah. I was looking to see if I had enough bits of brass strip to make the supports for the lifebelts and fire extinguishers which fix to the wheelhouse sides as shown in the photo below, taken by Jim Pottinger as part of his research for the plans.

                              shemarah 367.jpg

                              I had made the lifebelts some time ago so I offered one up to the model and realised it was not going to fit inside the railings around the platform. When I checked the model against the plans and photograph it was apparent that the plan and (model) were wrong. The plan shows the platform stopping about 10 mm short of the aft wall of the wheelhouse, as shown in this old photo from the build, below.

                              In reality the platform should extend to be flush with the rear wheelhouse wall as shown in the upper photo. It's probably a good job I checked at that stage, as building a new platform is not too difficult. It would have been a real pain If I had built all the railings first and then had to do them all over again as well.

                              Future Shemarah builders – take note.

                              Gareth

                              #43559
                              ARTHUR COLLETT
                              Participant
                                @arthurcollett48040

                                Hi Gareth.

                                Had a lot of those look and look again moments just to wonder how did i miss that. Dont you feel alone. I think a lot of model builders fall in this catagory as well. At least it can be rectified.

                                Regards

                                Arthur

                                #43847
                                Gareth Jones
                                Participant
                                  @garethjones79649

                                  I have now started on the wheelhouse again.

                                  The first step was to remove the rear platforms in order to modify them to the correct shape. This turned out to be more complicated than I thought as they were not separate pieces but part of the main wheel house floor. Instead of just snapping them off at the glued joint I had to cut them off and then clean up the edges.

                                  I have fitted the wheelhouse floor covering which is made from a piece of garden weed membrane, fixed down with spray adhesive. In the picture below you can see the pieces of the same material which were fixed to the steps about a year ago. Its surprising how much it has faded to grey over time.

                                  The consoles have been varnished and I am now experimenting with bits of perspex and LEDs trying to make some realistic illuminated displays. If I manage to make something lifelike I will put some pictures up.

                                  shemarah 368.jpg

                                  I have purchased a couple of 1:24 swivel chairs from Battlecrafts but they will need some modifications to make them representative of Shemarah's. The main changes are to add head rests and raise up the height of the seat. Still plenty of work to do before its finished.

                                  Gareth

                                  #43856
                                  LARRY WHETTON
                                  Participant
                                    @larrywhetton68737

                                    Hello Gareth,

                                    Another master class , super detail, have looked at modelshipworld site ihave a friend,

                                    building a card built model of shcarnhorst in Malta i seen the model in his work shop ,

                                    the detail as to be seen , take a look at this site some good tips to be had ,

                                    and the model builds are must see ………http://modelshipworld.com……

                                    cheers Larry….

                                    Edited By LARRY WHETTONboatman77 on 19/09/2013 16:11:47

                                    Edited By LARRY WHETTONboatman77 on 19/09/2013 16:13:17

                                    #43863
                                    Gareth Jones
                                    Participant
                                      @garethjones79649

                                      Hi Larry,

                                      I had a quick look at the website, although the link did not work correctly. I think it should be **LINK**  There are some pretty impressive models being built out there in the world. I have not yet found the Scharnhorst model that you refer to but I will have another look sometime later.

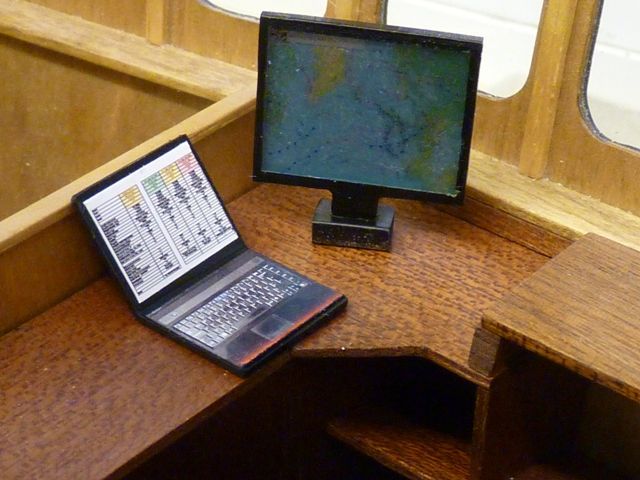
                                      My first attempt at illuminated displays was not a great success, First of all I did a laptop from a single piece of 1 mm styrene, scored and bent in the middle to give the basic shape. The keyboard is a photograph of my daughters laptop and the display is a screen shot copied to a photograph. The photos were then sized appropriately and then printed. The edges of the prints were blacked using a felt tipped pen after cutting them from the sheet. The effect is quite good as you can see in the photo below.

                                      shemarah 369.jpg

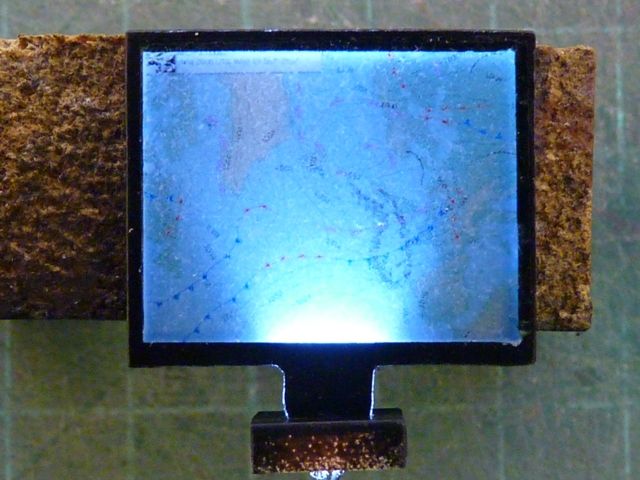
                                      Behind the laptop is a first trial attempt at a flat screen display, of which there are several in Shemarah. It is made from a piece of 2 mm perspex, approx 25 mm x 20 mm with a 5 mm wide tongue on the bottom which engages in a short piece of styrene rectangular tube. The display screen area was masked off and the rest of the piece given a coat of silver paint and then a coat of satin black. The screen display is a weather chart, printed on clear inkjet decal paper. In the base of the unit is a micro LED and when that is illuminated the display looks as shown below.

                                      shemarah 370.jpg

                                      Unfortunately, as I expected it is not evenly lit and the display is very thin and washed out. I had a second attempt in which I used silver foil rather than silver paint but that is not really any better, so its back to the drawing board and try something else, although I am not sure what at the moment. I am sure someone somewhere must have done something suitable. The fall back situation will be to use photos as on the lap top and just illuminate the interior of the wheel house generally with some LEDs.

                                      Gareth

                                      Edited By Gareth Jones on 19/09/2013 19:44:28

                                      #43865
                                      LARRY WHETTON
                                      Participant
                                        @larrywhetton68737

                                        Hi Gareth,

                                        sorry about link , but still worth a look ,

                                        litle laptop looks ok so is the screen map ,

                                        so keep up good work , at least its not a toy boat,

                                        great build , is the plan a model boat one?……cheers Larry..

                                        Edited By LARRY WHETTONboatman77 on 19/09/2013 20:16:46

                                        #43870
                                        ashley needham
                                        Participant
                                          @ashleyneedham69188

                                          Gareth. Illuminated exit signs and so on acheive the effect of just the lettering being illuminated by matting up the things required to glow…the light does not come through the flat walls of the acrylic panels, just when it meets the "bumpy" bits.

                                          I am struggling to think, due to the small size of your screen how this might help but it is an angle to approach from. Perhaps having the picture on top of a thin sheet of acrylic sheet, and having the rear surface matted up with wet`n`dry..with, if poss, a more back-lit led might acheive a more uniform light-up, from the rear ??

                                          Stunning work so far.

                                          Ashley

                                          #44205
                                          Gareth Jones
                                          Participant
                                            @garethjones79649

                                            I tried Ashley's suggestion of making the back face of the perpex matt to try and scatter the light forward rather than reflect it. Unfortunately I made a mistake and painted the back face matt black afterwards. I think this resulted in a rear face that absorbed all the light rather than scattered it as the resulting screen view was much too dim. There was still a very uneven look to the lighting, brighter close to the LED source than at the outer edges.

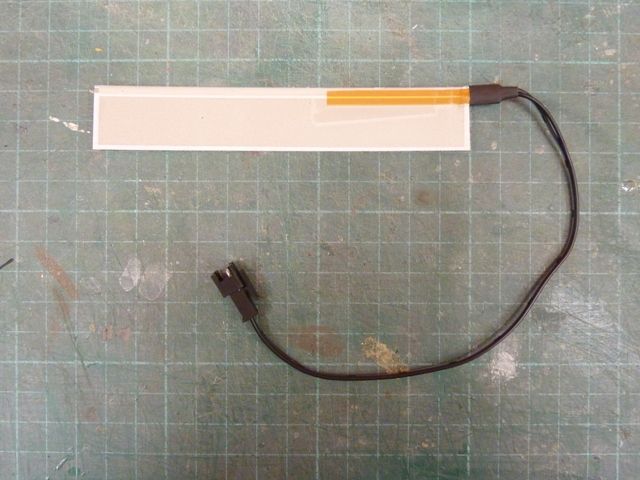
                                            I then decided to try another approach and found a website which sells electroluminescent wire, tape and panels **LINK**. I ordered two short lengths of tape 12.5 cm x 2 cm plus the inverter/driver which is a small box, about half the size of a box of matches. This runs off a 12 volt supply so should be easy to install and power in Shemarah.

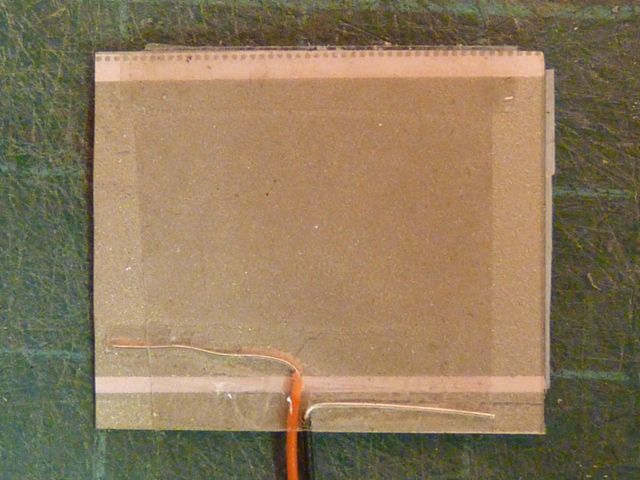
                                            First look at the bits when they arrived was a bit disappointing in that the connections to the tape are quite large and there seemed no easy way to reduce the overall size. The picture below shows one of the pieces of tape.

                                            shemarah 371.jpg

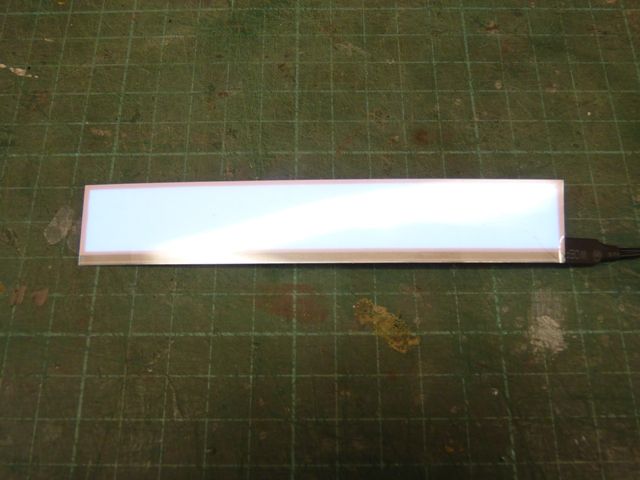
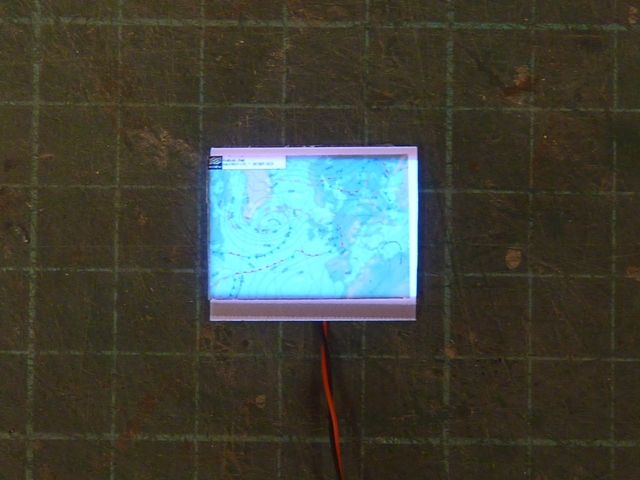
                                            When illuminated it glows with a slightly bluish light. Its available in a variety of colours and I ordered the plain white.

                                            shemarah 372.jpg

                                            The next step was to investigate the contacts and I slit along one edge of the tape and peeled back the clear sealing film. I experimented by touching the two contact areas with bare wire supplied from the inverted and the tape lit up as before. A word of caution here, I don't know what voltage the inverter puts out but it doesn't half sting if you touch the bare wires.

                                            I then cut a short length of tape from the far end of the strip, away from the connector and taped on two lengths of single core wire which I usually use for wiring up LEDs. The piece was about the size of the main displays in Shemarah, around 20 x 25 mm. Here is a view of the back of the tape showing the connections.

                                            shemarah 373.jpg

                                            I then carefully peeled off one of my previous transfers, made using Crafty Computer Paper's white waterslide decal material. I stuck this over the illuminated side of the tape and voila…

                                            shemarah 374.jpg

                                            It works really well, very evenly and quite brightly lit. I now need to tidy up the whole thing to look life a normal flat screen display and jobs a good un. The same principle can be applied to the other illuminated displays in the wheelhouse and potentially, the ceiling lights which are relatively large flat areas rather than discrete spot lights. The strips of tape cost £5 each and the driver £7. It should be possible to get most if not all of the required lights from the material I have and the driver will power a far bigger area of tape than I plan to use. I will post some more photos when I have a completed panel assembly rather than just a trial mock up.

                                            Gareth

                                            #46460
                                            David Hardenbrook
                                            Participant
                                              @davidhardenbrook99598

                                              Hello Gareth

                                              Thank you for answering my off forum questions in regards to building the Shemarah II. They were very helpful and understandable.

                                              I have some more questions that more oriented toward reading the drawings. They may be obvious for experienced scale builders, but this is my first build I still have a lot to learn.

                                              1) In tracing out the various frame members, did you establish some sort of base line over the frame shapes such that the initial frame was longer (higher) than the finished length? In addition was this plane of extended length then placed upside down on the building board.?

                                              2) As the frames are first cut from the plywood some pictures show a slight arc line drawn in approximately 75% up from the bottom. Are these lines determined from the drawing's deck camber lines? If so, is it the deck line or the shelter deck camber line?

                                              Also, the camber lines are clearly drawn for frames 5 – 10, but how would these lines be determined for frames 0 – 4?

                                              3) Is the finished height of the frames determined by :

                                              A) where this arc hits the outboard frame edge (as above), or

                                              B) where the shelter deck sheer line crosses the frames as shown in the profile drawing on page 4 of 4 ?

                                              Best regards,

                                              Dave Hardenbrook

                                              #46472
                                              Gareth Jones
                                              Participant
                                                @garethjones79649

                                                Hi David,

                                                I am glad the information in the PM answered your questions. I will try and answer your latest ones here on the forum.

                                                1. I extended all the frames upwards to a line 40 mm above waterline 8. The frames were fixed to the building board at this top edge so the whole structure was build upside down with the waterlines parallel to the building board. The highest point of the bulwarks is at the bow and its about 45 mm above waterline 8. Therefore when you come to fit the skin on the frames its not possible to do this front bit until the structure is removed from the building board. You could extend the frames a bit further, say to 50 mm above waterline 8, but that would 'waste' more plywood when the top part of the frame is cut away later. I found adding the bow skin later was no problem.

                                                2. I was a bit puzzled by these lines as well but I think I understand them. On the right hand side of the body plan there are two roughly horizontal arcs around waterline 5. I believe the upper one marks the points where the main deck outer edge intersects with the frames. The lower line is the true camber of the main deck. The position and camber of the main deck is a bit academic really as you cant see it when the model is complete – unless you are planning a super detailed inside.

                                                I made a template of the shelter deck camber using the profile shown at frame 5 on the left hand side of the body plan and used the same template for the finished shape of all the frames or deck beams.

                                                3. I think the answer to this question is both A and B are correct but there are some small discrepancies between the various views. If you look at the line of the shelter deck, towards the top of the right hand side of the body plan, it intersects frame 10 11 mm below waterline 8. If you look at the the side elevation, the top outer edge of frame 10 is about 12 mm below waterline 8. I think the discrepancies are down to small drafting errors or have arisen when the drawings were printed. I found it was easier to take the outer top edge of each frame from the side elevation of the lines on sheet 4 rather than the body plan on sheet 3, i.e. as in B in your questions

                                                I hope that all makes sense but feel free to come up with any more questions you have. I have also sent you a second email message/ Let me know what you would like me to do about the additional information.

                                                Regards

                                                Gareth

                                                Edited By Gareth Jones on 19/01/2014 08:23:20

                                                #46473
                                                Gareth Jones
                                                Participant
                                                  @garethjones79649

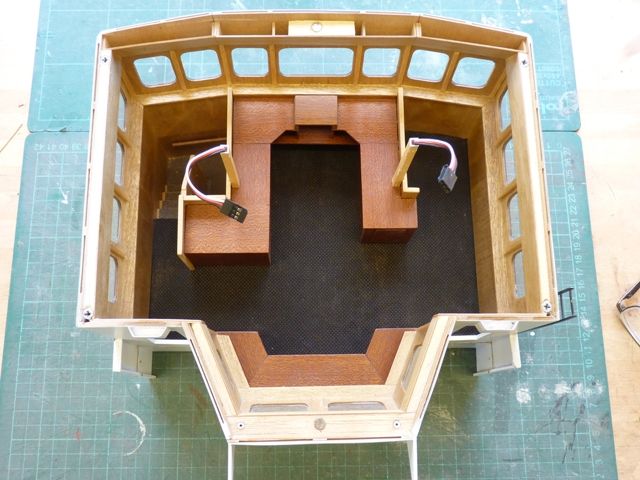
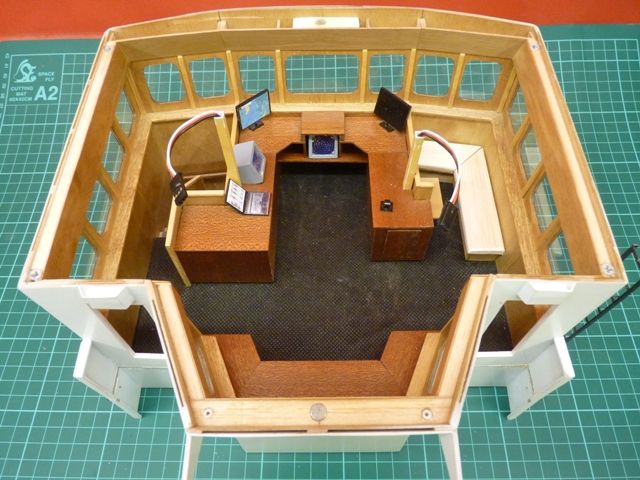
                                                  Just in case everyone is wondering if I have abandoned my model of Shemarah, the answer is no, I just got a bit bogged down and frustrated trying to make illuminated displays for the wheelhouse. Its still my long term aim but I have now decided to come back to that some time in the future. I have now started making a set of 'dumb' displays and instruments so that the model can be completed in a more reasonable timescale, although I am not promising a date. Here's a view ofthe progress so far. At the moment I am working on the bench seat and table to the right hand side.

                                                  shemarah 375.jpg

                                                  Sharp eyed readers might also spot I got a new cutting mat for Christmas. I am going to try and keep it nice and clean, mainly as a photographic background rather than a working mat.

                                                  Gareth

                                                  #46636
                                                  Gareth Jones
                                                  Participant
                                                    @garethjones79649

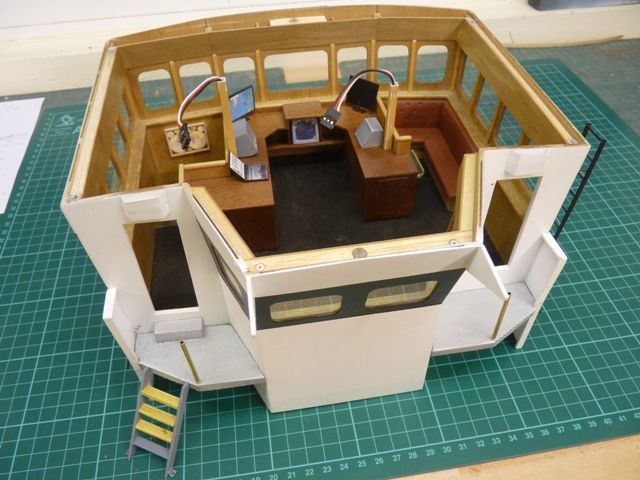
                                                    A bit more progress made on the wheelhouse this weekend.

                                                    shemarah 376.jpg

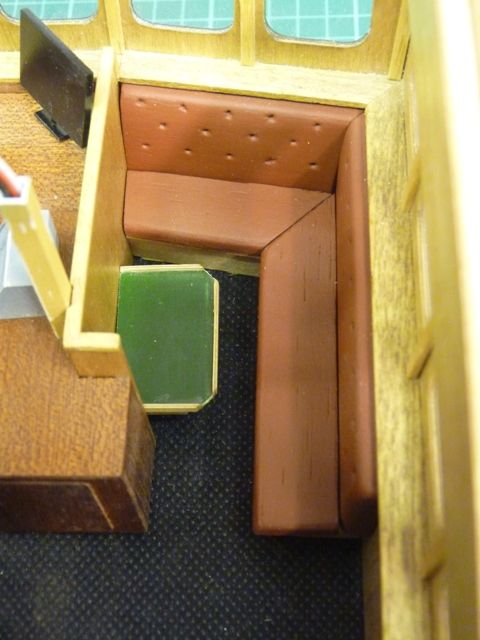
                                                    The bench seats and table have been finished, although not yet fixed in position. The cushions are made from some 6 mm balsa sheet. The back cushions have been given that 'buttoned' look by dimpling them with the pointed end of a large screw before painting them. The table is covered with Solartex sprayed dark green.

                                                    shemarah 377.jpg

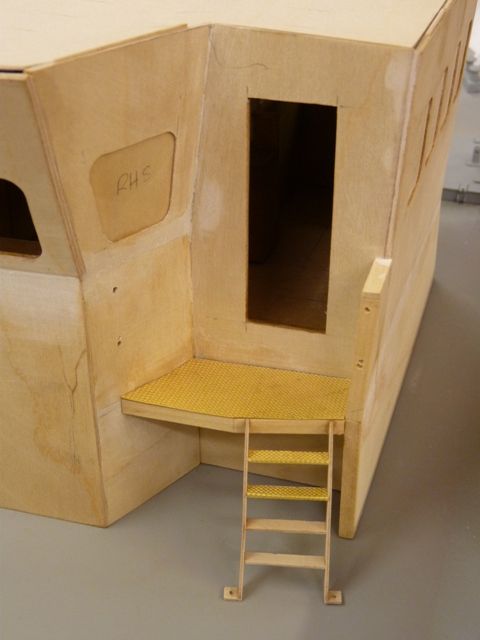
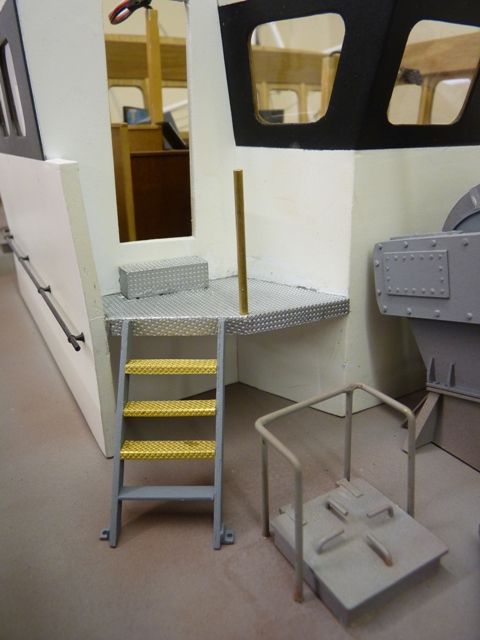
                                                    The new platforms have been added to the rear of the wheelhouse. The original ones were too short and should have extended back to line up with the aft wall rather than stopping about 15 mm short as the drawing shows. The chequerplate floor is made using a photoetched sheet from a company called Kit Form Services who specialise in 1:24 scale miltary vehicles and the materials to make them.

                                                    shemarah 378.jpg

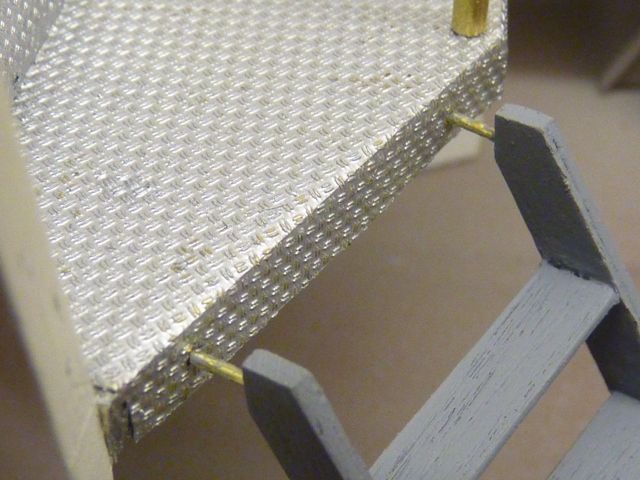
                                                    The railings are going to be a bit tricky as they are quite a complicated shape with a collection of different angles. The steps are made from 1/16 ply sides with 1/32 ply treads, again to be covered by chequerplate. Since the steps have to be attached to the wheelhouse and the wheelhouse is removable the steps will be a bit vulnerable to damage. To aid security they are pinned to the edge of the platform by 1/32 brass wire inserted into the sides . The hatch in the deck was originally positioned about 15 mm to the left of the position shown and would have been in the way of the steps. Consequently it had to come off, and I filled the holes and resprayed the deck before moving it to the right.

                                                    shemarah 379.jpg

                                                    #46644
                                                    LARRY WHETTON
                                                    Participant
                                                      @larrywhetton68737

                                                      Good morning Gareth ,

                                                      Its like a breath of fresh air to follow Shemarah 2 blog ,

                                                      a proper build and to gold medal finish hope it sails as well at looks.?..

                                                      a great scratch build , and a ace finish ..

                                                      can not wait to back to my part built boats ,

                                                      cheers Larry…..

                                                    Viewing 25 posts - 301 through 325 (of 371 total)
                                                    • Please log in to reply to this topic. Registering is free and easy using the links on the menu at the top of this page.

                                                    Code of conduct | Forum Help/FAQs

                                                    Advert

                                                    Latest Replies

                                                    Home Forums Scratch build Topics

                                                    Viewing 25 topics - 1 through 25 (of 25 total)
                                                    Viewing 25 topics - 1 through 25 (of 25 total)

                                                    View full reply list.

                                                    Advert

                                                    Newsletter Sign-up