Prototype build of ELLIE

Advert

Prototype build of ELLIE

Home Forums Scratch build Prototype build of ELLIE

  • This topic is empty.
Viewing 25 posts - 401 through 425 (of 1,441 total)
  • Author
    Posts
  • #43420
    Bob Abell 2
    Participant
      @bobabell2

      Hello Paul

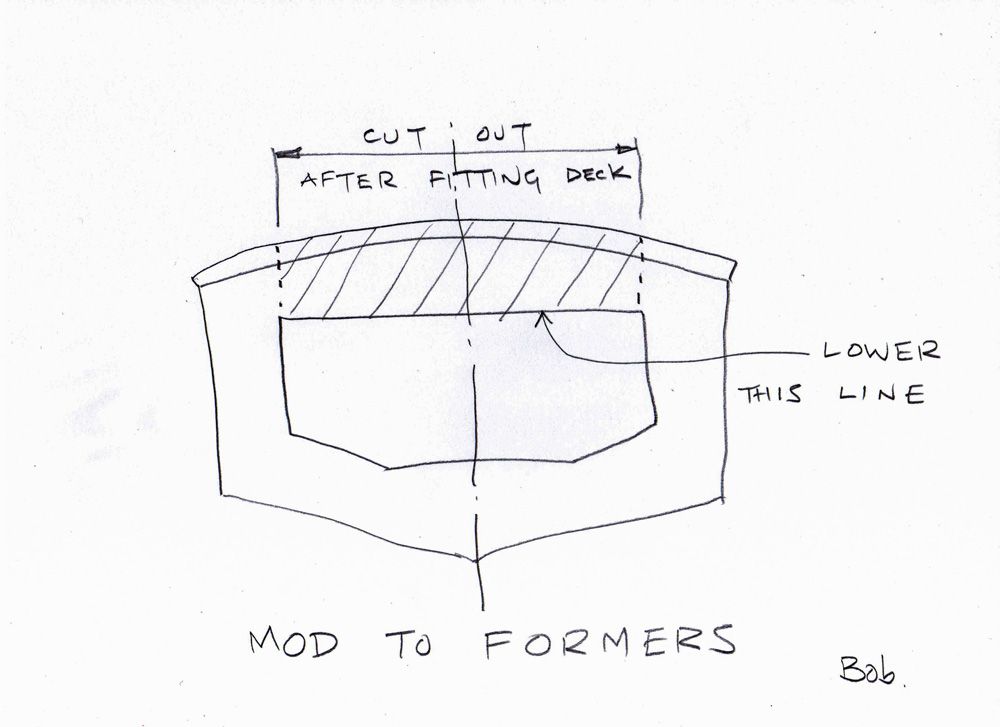
      Take the above Former 3 as an example

      When the surplus material is cut off as you show…..There is no camber for the deck to bend round

      What is the camber height?……..I need to make a few top camber strips for the deck to bend round

      Bob

      Advert
      #43421
      Bob Abell 2
      Participant
        @bobabell2

        Like this….

        former mod.jpg

        #43422
        Paul T
        Participant
          @pault84577

          Bob

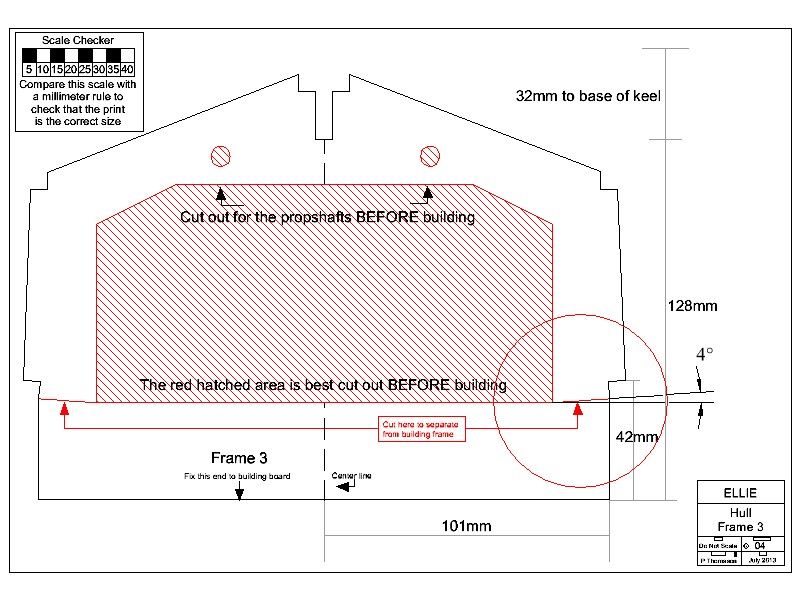
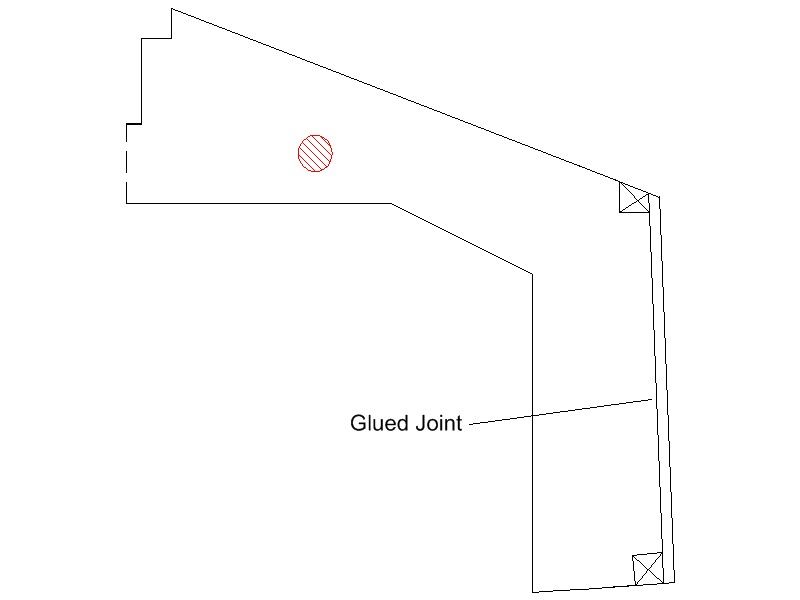
          We are at cross purposes as I hadn't intended the deck to be fitted in the way you have drawn. The camber is shown on the frames at 4deg

          frame 3 camber.jpg

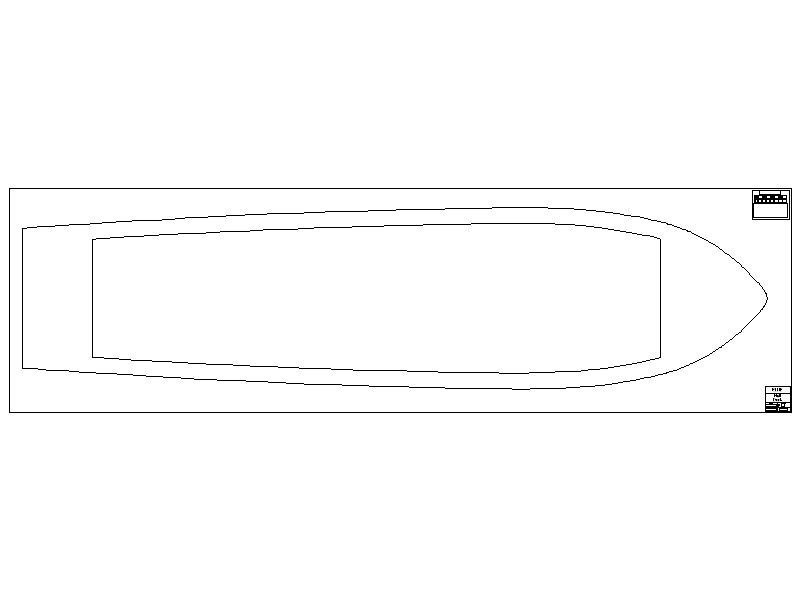
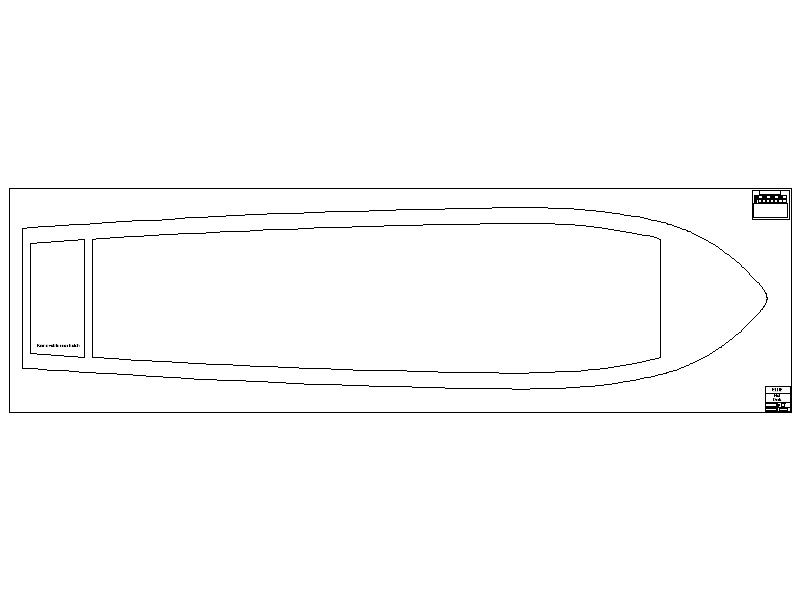
          And I intended the deck to be pre cut before being fitted.

          ellie deck.jpg

          #43423
          Bob Abell 2
          Participant
            @bobabell2

            The camber supports need to be quite strong, as the 4mm ply doesn't like the bend!

            Bob

            #43424
            Bob Abell 2
            Participant
              @bobabell2

              Hello Paul

              I see what you mean, but if the deck is cutout before fitting, the camber will only appear fore and aft and the sides will be just inclined strips

              It's makes bending easier anyway

              Shall we do it that way then?

              Disgruntled shop floor manager…lol

              #43425
              Paul T
              Participant
                @pault84577

                Hello Bob

                Re Camber supports: The strength of the camber supports comes from the buttress action of the frame being glued to the skin.

                frame 3 buttress.jpg

                Re Camber on the side decks: What appears as an inclined plane is actually the extreme end of the original camber with the central section removed, as the side deck width is so narrow it appears as a straight line but actually has a very shallow curve.

                Paul

                Edited By Paul T on 31/08/2013 08:21:42

                #43426
                Bob Abell 2
                Participant
                  @bobabell2

                  Hello Red Leader

                  I will do as you recommend and see how it turns out

                  How do we get access to the rudder mech, when the deck is on?

                  Bob

                  #43428
                  Paul T
                  Participant
                    @pault84577

                    Bob

                    Access to the steering gear is via a small removable deck panel which I have failed to include on the deck drawing (doh) sorry Bob and its no excuse but my mind is elsewhere at the moment.

                    The rear deck panel is on the draft drawings but I didn't transfer it to the issue set.

                    Paul

                    #43430
                    Bob Abell 2
                    Participant
                      @bobabell2

                      OK Paul

                      I`ll not mither you too much today

                      Just need to know where the hole in the deck is, at the front, relative to a former. Your drawing shows a large radius prow…..I`ve got a sharp point

                      Bob

                      #43431
                      ashley needham
                      Participant
                        @ashleyneedham69188

                        Do we have reasonable "hand access" to the rear of the boat (under the deck) without a small access hatch?? I have been using those nylon tillers..they can be done up to grip the 5mm rudder post tightly..enough to be secure, but can be fitted on "blind" ok if there is a nice chamfer on the top of the post; remove servo arm connection, fit rudder tiller, , re-fit servo end. Job done.. Use a small nyloc nut and the rudder stays there no probs, and can be adjusted by hand if trimming is required. ALSO, if you hit something underwater, the rudder tends to twist rather than bend, and is easily re-adjusted afterwards.

                        Ashley

                        #43432
                        Paul T
                        Participant
                          @pault84577

                          Bob

                          I have amended drawing 11 to include the rear deck access hatch and have emailed a copy to you.

                          ellie deck r1.jpg

                          #43434
                          Paul T
                          Participant
                            @pault84577

                            Hello Ashley

                            There is no hand access to the rear compartment as Frame 6 is full height and solid as it becomes the rear of the well deck for the sports fisher version.

                            I didn't want to specify the type of rudder equipment as I wanted the builder to have a choice but I do like the idea of what you have suggested

                            Paul

                            #43435
                            John Shire
                            Participant
                              @johnshire55937

                              I am confused between the terms Frame and Former I understand what Paul means by frame but what is Bob referring to?

                              I am also confused by this mornings discussion about the deck and frame 6 because Pauls drawing clearly shows a raised section that would protrude above deck level but Bobs photo of the hull after the building frame has been removed shows frame 6 cut level with the deck, which came first or am I being stupid.

                              John

                              #43436
                              Bob Abell 2
                              Participant
                                @bobabell2

                                John

                                Former and Frame have the same meaning in this case……..We do this to keep the Noobs on their toes!……lol

                                The lump sticking up, is not required on the Broads Cruiser version

                                To create a camber in the deck…..I have a cunning plan!

                                I am going to try to squeeze the deck with wide clamps and sort of buckle the deck

                                Might work?

                                Bob

                                #43437
                                Dave Milbourn
                                Participant
                                  @davemilbourn48782

                                  John
                                  Frame, former and bulkhead are all terms in general use for the same parts i.e. the vertical bits which extend across the hull from keel to deck. I don't know if one is more correct than the others, but I've no doubt that this subject would be debated ad infinitum on other Internet forums…….
                                  Frame #6 is drawn with an upstand above deck level which forms the rear edge of the coaming. This is also shown on Paul's building sequence drawing. Bob has his own cunning plan, it seems!
                                  Dave M

                                  Edited By Dave Milbourn on 31/08/2013 10:54:45

                                  #43438
                                  Bob Abell 2
                                  Participant
                                    @bobabell2

                                    Hello Dave

                                    I`m sure that Paul said it wasn`t on the Cruiser, so I`ve cut mine off!

                                    It`s not a problem anyway

                                    Bob

                                    #43440
                                    Bob Abell 2
                                    Participant
                                      @bobabell2

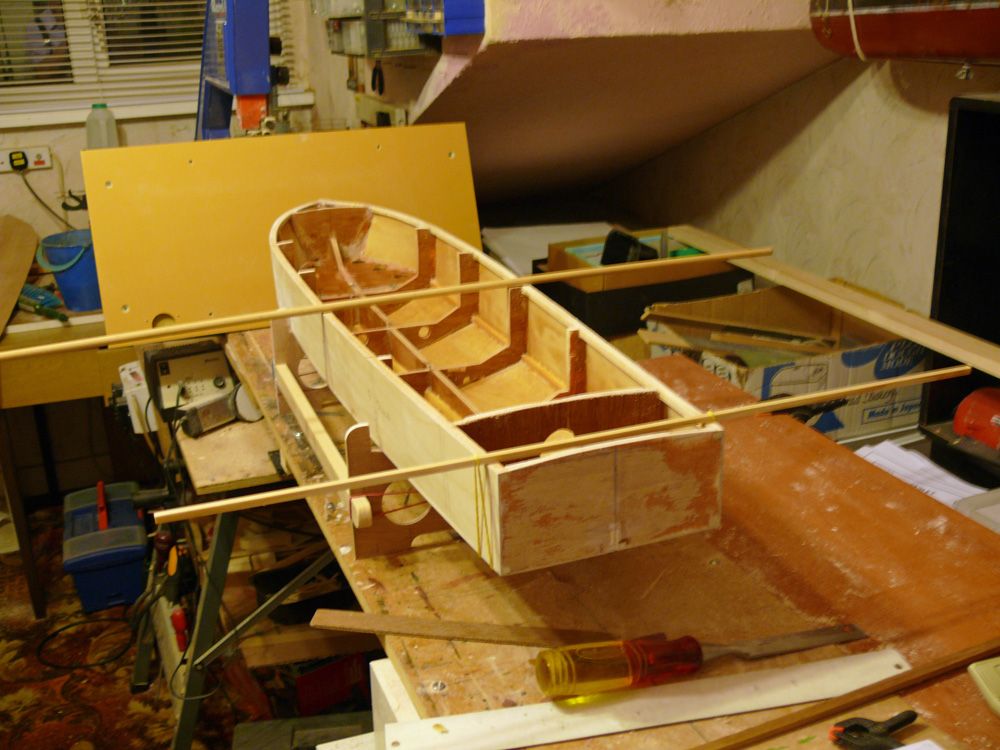
                                      Gave the inside of the hull, two coats of varnish, including the sealed bow section, by drilling a few holes in the top of the breadhook

                                      Also drilled a large hole in Former 6 in case access was needed to the rudder mechanism

                                      inside varnish.jpg

                                      Not decided when or how the deck opening will be done

                                      Bob

                                      #43448
                                      Bob Abell 2
                                      Participant
                                        @bobabell2

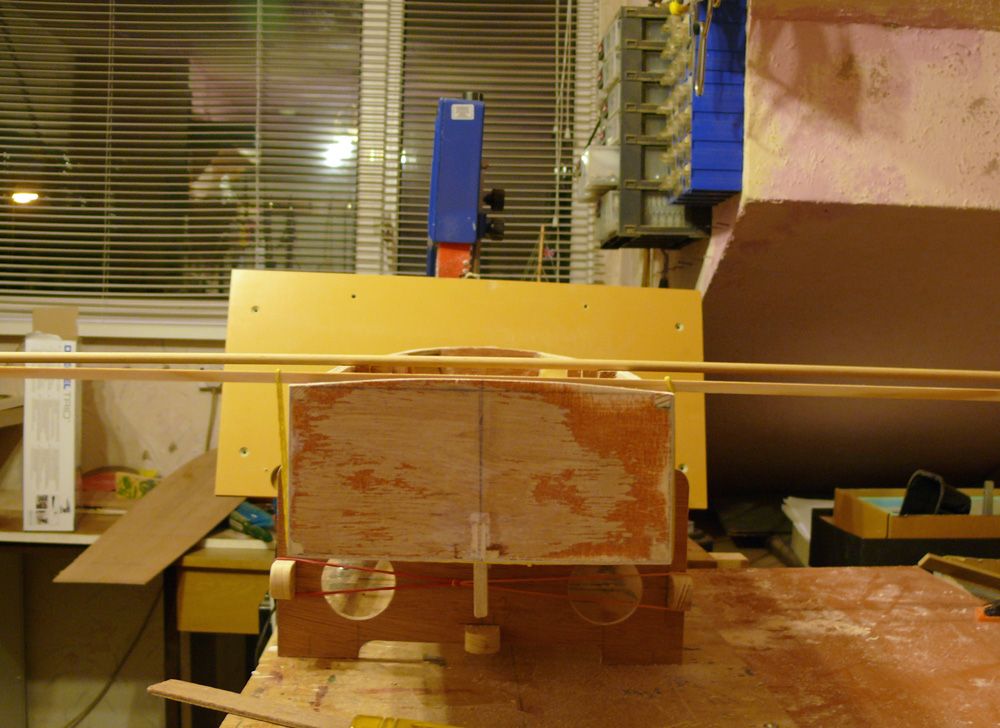
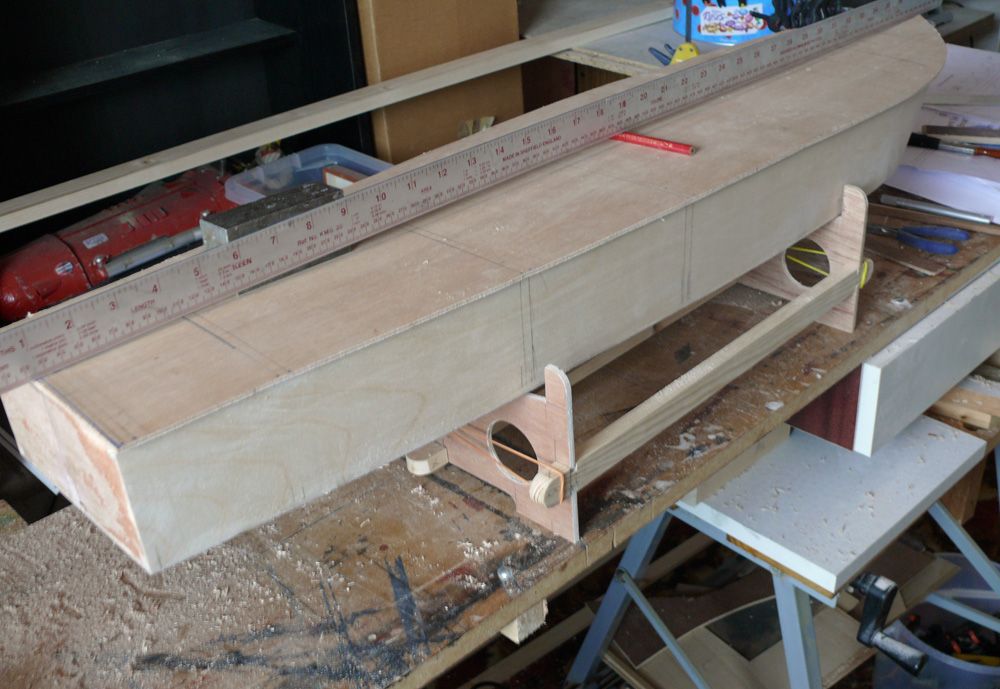
                                        Alignment check………This process is rather long winded, so take your time and work slowly and carefully

                                        Ensure that the rear end is correct and square etc

                                        If the side walls are slightly out of plonk……Average out the error and create a vertical axis line….ie……Get the best out of what you`ve got!

                                        Use the vertical axis as a datum……Sand the top edge to obtain squareness

                                        Select two straight lengths of wood

                                        Secure one strip to the rear with a lacky band……..This is now your "reference sighter"

                                        Place the other strip along the hull and look down the hull and compare the strips for parallelism

                                        Sand the hull to correct this……..Repeat this process lots of times along the hull top edge

                                        Bear in mind that the top edge should have a gradual sweep from midships to bows and aft

                                        Stand back and study the correctness of the top edge

                                        The deck needs to be quite flat and uniform…..Place on top of hull top edge

                                        Sand off any high points……..A few hollows can be ignored, as the gaps can be easily filled
                                        alignment check.jpg

                                        alignment check.jpg

                                        sighting.jpg

                                        Sighting the deck edges


                                        Sorry for the excessive instructions, but for Newbies, this is good advice

                                        When you reach this stage…..Ask as many questions as you like

                                        Bob

                                        Edited By Bob Abell on 31/08/2013 22:45:50

                                        #43450
                                        Bob Abell 2
                                        Participant
                                          @bobabell2

                                          The job is moving fast now!

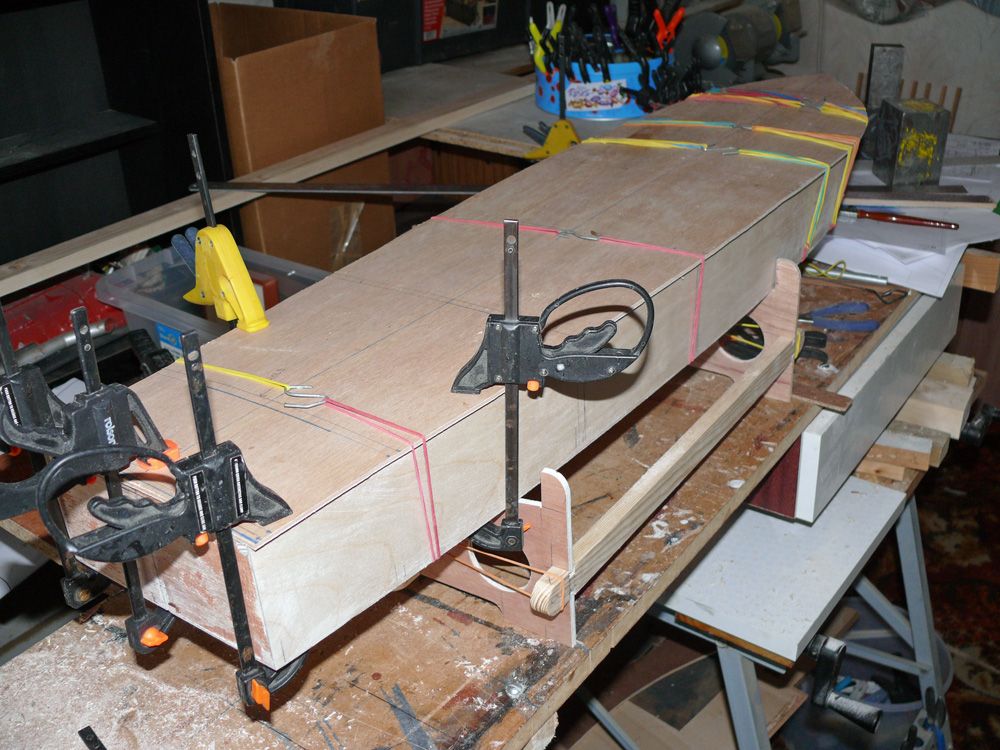
                                          Tonight, I've glued the top deck on the hull and piled all sorts of weighty stuff on top to achieve the camber fore and aft. Plus dozens of lacky bands, it's wise to use slow drying glue, as it takes about 30 mins to clamp the deck in place

                                          Tomorrow, the glue will be dry and the fun begins……..Shaping the top deck!

                                          Good night chaps…..Bob

                                          ps….Best wishes to Paul

                                          #43451
                                          John Shire
                                          Participant
                                            @johnshire55937

                                            I understand the commentary regarding the deck camber and Bobs excellent lesson in sighting for level.

                                            But I don't understand is that the drawing shows a 4 degree angle on the top of the frames and the 6 x 6 stringer that runs along the top of the hull but Bobs lesson in sighting is telling us to make this angle flat.

                                            As I said I really dont understand and have probably missed something obvious.

                                            John

                                            #43452
                                            Bob Abell 2
                                            Participant
                                              @bobabell2

                                              Shop floor to management…….He's back!

                                              Oh!….Hello John

                                              We are pleased that you are studying the drawings with great care and are on the ball!….but….

                                              The stringers are angled slightly, 4 degrees in 6mm is hardly noticeable anyway! The sticks are resting on the peaks

                                              So they are not flat after all!

                                              I'm only checking for top edge equality

                                              The deck material is 5mm thick, so the camber could be sanded in?

                                              Thanks for your interest….Bob

                                              #43453
                                              Bob Abell 2
                                              Participant
                                                @bobabell2

                                                This is a cleaned up version of the "holding down" of the deck

                                                It was a hideous pile of all sorts of scrap iron and not a pretty sight!

                                                If you intend to build this model, it`s time to amass a good selection of handy chunks

                                                I later thought that using 1.5mm ply would have been a better option…….Make a note, Miss Jones

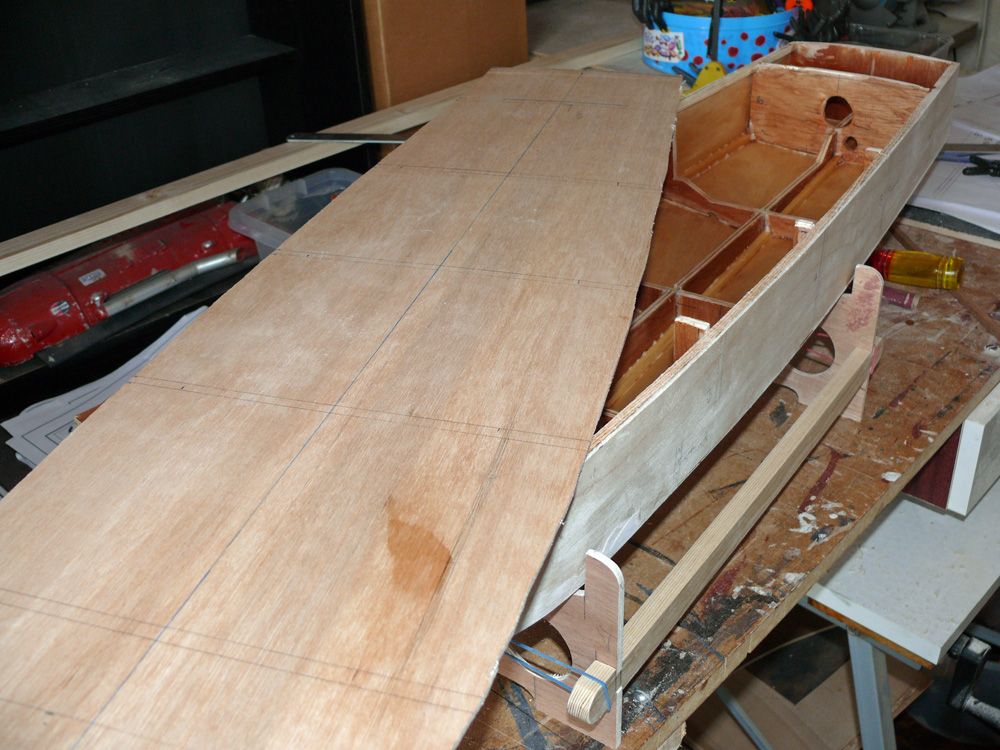
                                                deck glued on hull.jpg

                                                The deck has sheer….ie It is hollow ish in the centre and slopes up slightly to the front and back. The forward camber is the highest point and has caused the deck to be higher over the prow by as much as 2mm! Filler will soon put his minor discrepancy in order

                                                The next job is very rewarding……Planing the periphery and cutting the centre section out

                                                Paul suggested cutting the middle out first, then the camber would be easier to create

                                                This is the builders option

                                                Bob

                                                #43454
                                                Bob Abell 2
                                                Participant
                                                  @bobabell2

                                                  Hello chaps………..My goodness!………..September already!

                                                  How time flies, when we get stuck in!

                                                  Just for interest, the sheer in my case amounts to 6mm midships

                                                  Which is ok for a vintage cruiser

                                                  It`s interesting to note that the Great Eastern had no sheer whatsoever!

                                                  sheer.jpg

                                                  Bob

                                                  #43456
                                                  Paul T
                                                  Participant
                                                    @pault84577

                                                    John

                                                    Thank you for taking such a keen interest in the model, whilst I have aimed to produce accurate drawings for newcomers to understand and be able to work to I don't expect experienced builders to follow them in every detail.

                                                    Where experienced builders are concerned the designs become simple guidelines that can be embellished and changed to suit a particular need or style of building.

                                                    Different people see things in different ways and I hope that my designs can be flexible enough to accommodate everyones requirements.

                                                    Bob is tackling the build in his own unique style and highlighting elements of the design in a ways that hadn't occurred to me [and I wouldn't have it any other way] after all if we were all the same the world would be a boring place.

                                                    Paul

                                                    #43457
                                                    Paul T
                                                    Participant
                                                      @pault84577

                                                      Bob

                                                      I have a confession regarding the bow.

                                                      On my first prototype I couldn't achieve a curved nose to the bow (see the pics) and on the second build I opted for a solid section in front of Frame 1 that I could shape.

                                                      I was hoping that you would have a more practical way of doing the job so this is why I haven't said anything until now.

                                                      Paul frown

                                                    Viewing 25 posts - 401 through 425 (of 1,441 total)
                                                    • Please log in to reply to this topic. Registering is free and easy using the links on the menu at the top of this page.

                                                    Code of conduct | Forum Help/FAQs

                                                    Advert

                                                    Latest Replies

                                                    Home Forums Scratch build Topics

                                                    Viewing 25 topics - 1 through 25 (of 25 total)
                                                    Viewing 25 topics - 1 through 25 (of 25 total)

                                                    View full reply list.

                                                    Advert

                                                    Newsletter Sign-up