Prototype build of ELLIE

Advert

Prototype build of ELLIE

Home Forums Scratch build Prototype build of ELLIE

  • This topic is empty.
Viewing 25 posts - 376 through 400 (of 1,441 total)
  • Author
    Posts
  • #43360
    Paul T
    Participant
      @pault84577

      Bob

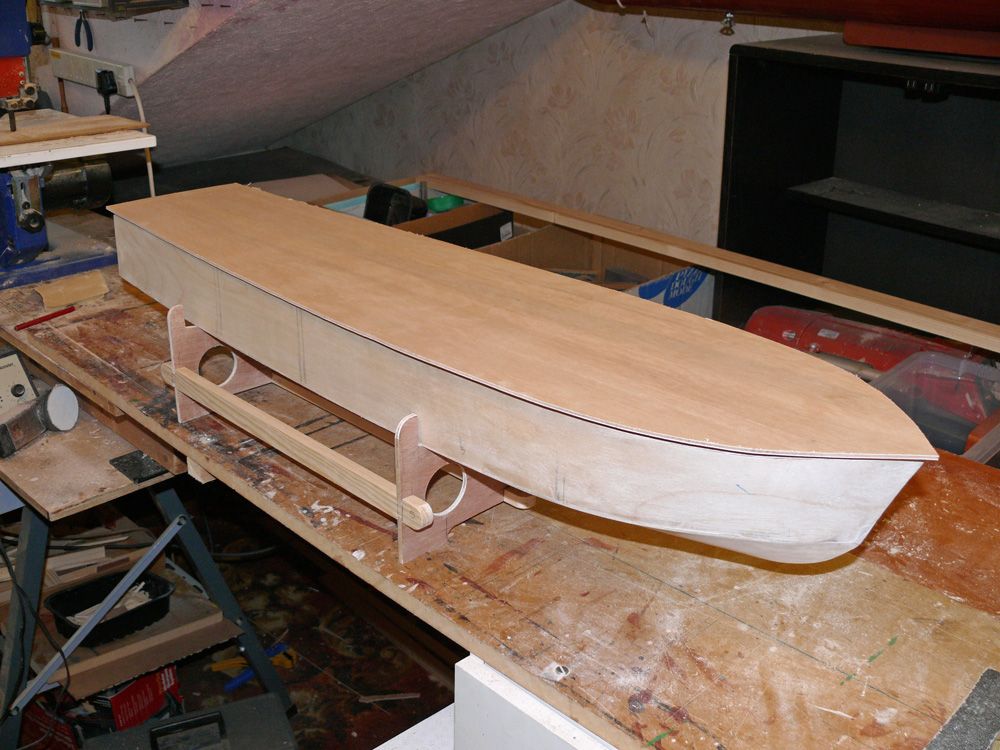
      The stand is perfect for the model and far better than the one I have drawn so if you don't mind I will copy yours, could you send me a set of dims so that I can get it right.

      The hull looks super now the building extensions have been removed and hopefully everything is all plumb and square.

      The top floor sends its heartfelt thanks for doing such a first rate job.

      Paul

      Advert
      #43362
      Bob Abell 2
      Participant
        @bobabell2

        Hello Paul

        Will do it on CAD tomorrow…..I need the practice these days

        Clockin` off the job now

        G`nite….P

        Bob

        #43363
        ashley needham
        Participant
          @ashleyneedham69188

          Bob (tomorrow) Looks good.

          I was worried a bit that bending the thick(ish) ply around the bow formers was a bit…difficult.. and may be a hidden minus with what is otherwise a simple plan?

          Ashley

          #43366
          Paul T
          Participant
            @pault84577

            Hello Bob

            It will be nice to see your CAD skills in action.

            Hello Ashley

            Bobs choice of ply was far thinner than specified and in retrospect he made the right choice, but I'm not sure that hardboard would have survived such rigorous treatment.wink

            Paul

            #43369
            ashley needham
            Participant
              @ashleyneedham69188

              I can only disagree, as hardboard would become quite pliable when wetted, and cope EASILY with the curvature .

              Ashley smile d

              #43371
              ashley needham
              Participant
                @ashleyneedham69188

                Could you remind me how thick the skin is?? I have just reread the posts from the beginning but lost the will to live at P14.

                Ashley

                #43372
                Bob Abell 2
                Participant
                  @bobabell2

                  Hello Ashley

                  The skin thickness is 1.5mm….That's 1/16" in real money

                  Hardboard?……That's as bad as using indoor PVA…..If not worse!

                  Bob

                  #43373
                  Bob Abell 2
                  Participant
                    @bobabell2

                    Hello Ashley

                    The skin thickness is 1.5mm….That's 1/16" in real money

                    Hardboard?……That's as bad as using indoor PVA…..If not worse!

                    Bob

                    #43376
                    Paul T
                    Participant
                      @pault84577

                      Dear All

                      This is a good time to explain to those who are a little confused about the references to hardboard and indoor PVA.

                      Both Ashley and Bob as experienced model builders have preferences for using different materials some of which might seem odd to any newcomer.

                      For example interior PVA which isn't waterproof and dissolves when exposed to moisture, Bob uses this in the full knowledge of its shortcomings and compensates for them by correctly sealing the glued areas with paint or varnish.

                      Hardboard becomes soft when exposed to moisture and Ashley uses this knowledge to form hardboard into tight hull shapes after which he fully dries the material before sealing it to prevent any further changes.

                      Both non waterproof glue and hardboard are perfectly suitable materials when used by experienced modellers.

                      Paul

                      #43377
                      Bob Abell 2
                      Participant
                        @bobabell2

                        Hi Chaps

                        We agree with the comments made by Paul, regarding Indoor PVA and the humble hardboard

                        But, here`s a word of warning……Models made with these materials should not be left in the garage over winter!

                        The materials will certainly soften in time

                        Got to admit though, I`ve have left models over winter and they have come to no harm!

                        If you value your model……Take them indoors

                        Bob

                        Edited By Bob Abell on 29/08/2013 08:02:15

                        #43379
                        Dave Milbourn
                        Participant
                          @davemilbourn48782

                          I use Aliphatic Resin glue for all wood-wood joints. It ain't cheap if you buy the small bottle but 500ml is about the same price as the equivalent bottle of EvoStick Waterproof PVA (Blue bottle). It sets up quicker and sands easier than PVA. I'm afraid I can't see the point of using non-waterproof PVA in a model boat.
                          Dave M

                          #43381
                          Nigel Edwards
                          Participant
                            @nigeledwards16506

                            Been Following great build looking forward to seeing it finnished.. Hope you dont mind me sharing on your post on a glue point although I am new to boat building and being on a budget I had no proplems using D4 Wood Glue Solvent free industrial grade, high strength wood adhesive. Totally waterproof, impact and temperature resistant, and sets in just 10 minutes with good clean joints Dries clear only £5.98 for 1L from Toolstation.

                            #43383
                            Dave Milbourn
                            Participant
                              @davemilbourn48782

                              Thanks for that, Nigel. Might well give that a try.

                              Dave

                              #43387
                              Nigel Edwards
                              Participant
                                @nigeledwards16506
                                Posted by Dave Milbourn on 29/08/2013 11:54:27:

                                Thanks for that, Nigel. Might well give that a try.

                                Dave

                                Your welcome Dave I find toolstaition handy for some items as they can be cheeper than other places..

                                #43392
                                Bob Abell 2
                                Participant
                                  @bobabell2

                                  Thank you, Nigel

                                  I`ll get some in…..Sounds just the stuff we need, although. I`ve never heard of it

                                  Bob

                                  #43395
                                  Paul T
                                  Participant
                                    @pault84577

                                    Nigel

                                    Be careful how and where you store the D4 as it is very susceptible to temperatures and to achieve the 6 month shelf life it must be stored between 15 and 25 deg C (which is basically summer time)

                                    Paul

                                    #43396
                                    Nigel Edwards
                                    Participant
                                      @nigeledwards16506
                                      Posted by Paul T on 29/08/2013 18:49:24:

                                      Nigel

                                      Be careful how and where you store the D4 as it is very susceptible to temperatures and to achieve the 6 month shelf life it must be stored between 15 and 25 deg C (which is basically summer time)

                                      Paul

                                      Thanks for the info Paul I will bear that in mind.. I was not aware of this.. looks like its best for craftsman who will likley use lots of it within a few months, might be best using another product if your only a occassional builder. sorry if i got you all excited about this glue its works a treat for me and I shall not waste any as I have other projects on the go plus another boat build soon and the price was right thats what got me excited about it…Keep up the good work guys looking forward to seeing the finished boat and plans once released.. Nigel

                                      #43398
                                      Paul T
                                      Participant
                                        @pault84577

                                        I am pleased to announce that Bobs endeavours have been appreciated and that even though the testing is not complete the 1st sale of the design has taken place.

                                        As a very experienced modeller he has taken the sports fisher version in the full knowledge that the designs are still being tested and I look forward to seeing the results.

                                        Please note that I don't intend to release any more plans until the testing is fully completed.

                                        #43399
                                        Bob Abell 2
                                        Participant
                                          @bobabell2

                                          Well done, Paul

                                          Looking forward to the builders efforts!

                                          Bob

                                          #43402
                                          Bob Abell 2
                                          Participant
                                            @bobabell2

                                            Hi! chaps and…………Hi! Noobs especially

                                            Got sealed orders from Red Leader!

                                            It says……."Tell `em about the cracks"……Er?…….What`s he on about now?…….More jokes?

                                            No!……..The filler……you plonker!

                                            OK Roger!

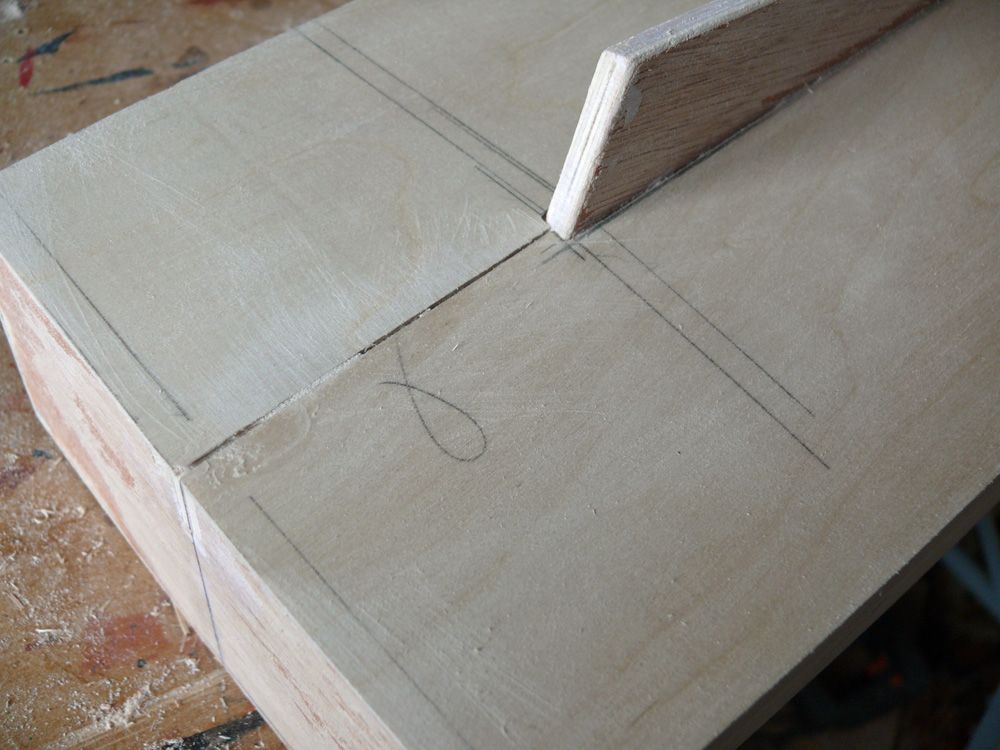
                                            Occasionally, we have the need to hide our poor workmanship!……Sloppy joints etc

                                            We need to fill the gaps with filler

                                            What sort of filler?………. I hear you ask

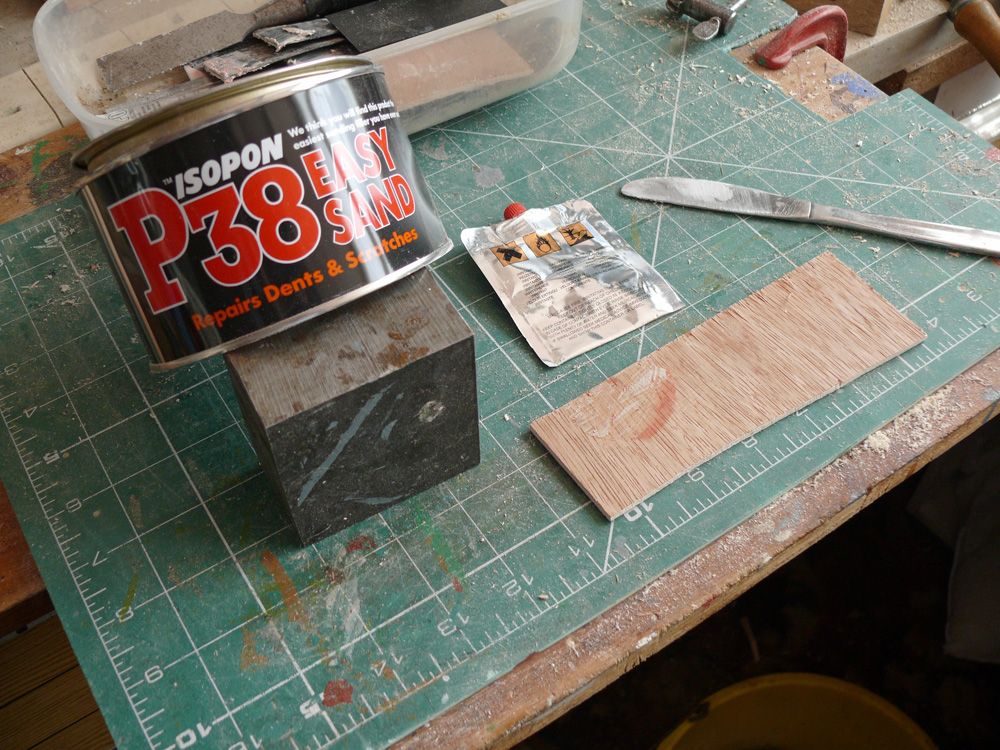
                                            This stuff……..P38…………From all good filler shops and also Halfords

                                            filler ingredients.jpg

                                            The cracks

                                            crack no 1.jpg

                                            More cracks

                                            crack no 2.jpg

                                            The filler needs to be mixed……..Back in 5 mins……

                                            Bob

                                            #43403
                                            Bob Abell 2
                                            Participant
                                              @bobabell2

                                              5 mins later….

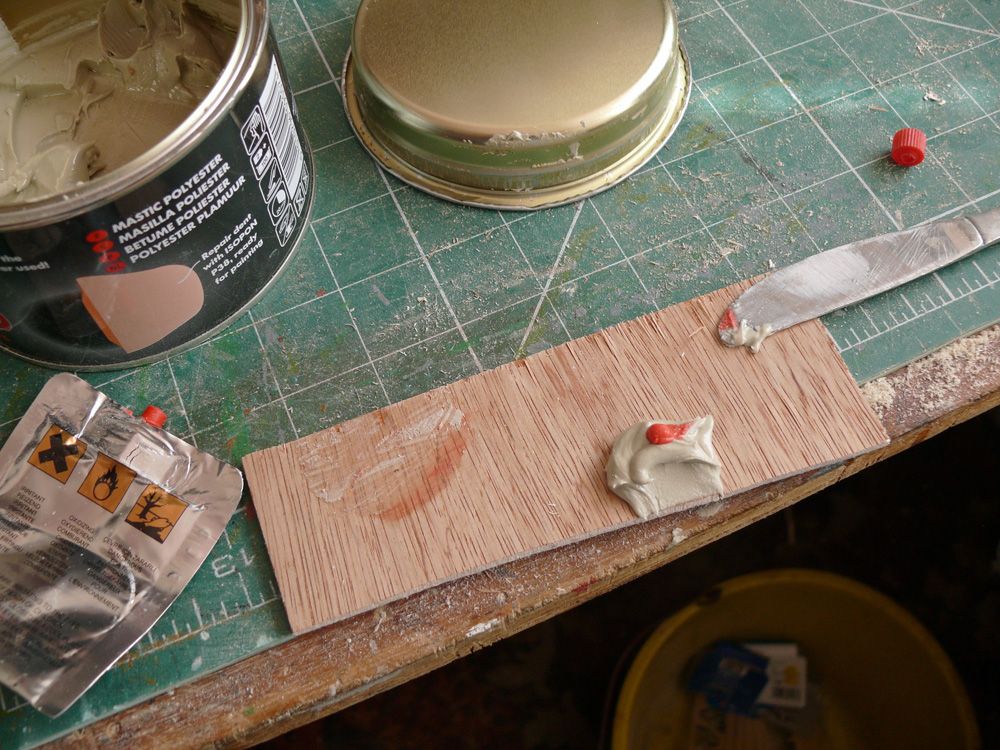
                                              This is about right for the Filler and Hardener proportions…..

                                              (I always seem to end up with plenty of hardener left over)

                                              filler proportions.jpg

                                              Then we mix it with a spatula or your butter knife

                                              Then!!!!!!!………We need to work fast………As we`ve only got 5 mins before the mixture starts setting

                                              filler applied.jpg

                                              After about 1/2 an hour, the surplus can be cut off with a knife or chisel

                                              After about 2 hours, the filler can be sanded down, and we should wear a dust mask for this job

                                              Back shortly……

                                              Bob

                                              #43404
                                              Paul T
                                              Participant
                                                @pault84577

                                                A note about dust masks

                                                The usual elastic around the head masks that everyone knows as a dust mask are only suitable for everyday brushing up of general household debris. This type of mask is classified as P1 or even cheaper Comfort Masks and they are just about useless.

                                                For the work that Bob is doing i.e. a sanding process that produces a fine particulate it is advisable to use a minimum P2 type mask.

                                                For those who are not sure what the difference is have a look at this link

                                                http://www.screwfix.com/c/safety-workwear/respiratory-protection-dust-masks/cat850348

                                                Don't forget that you only get issued with one pair of eyes and one pair of lungs so DO NOT take chances with either

                                                Paul


                                                Edited By Paul T on 30/08/2013 14:49:43

                                                #43411
                                                Bob Abell 2
                                                Participant
                                                  @bobabell2

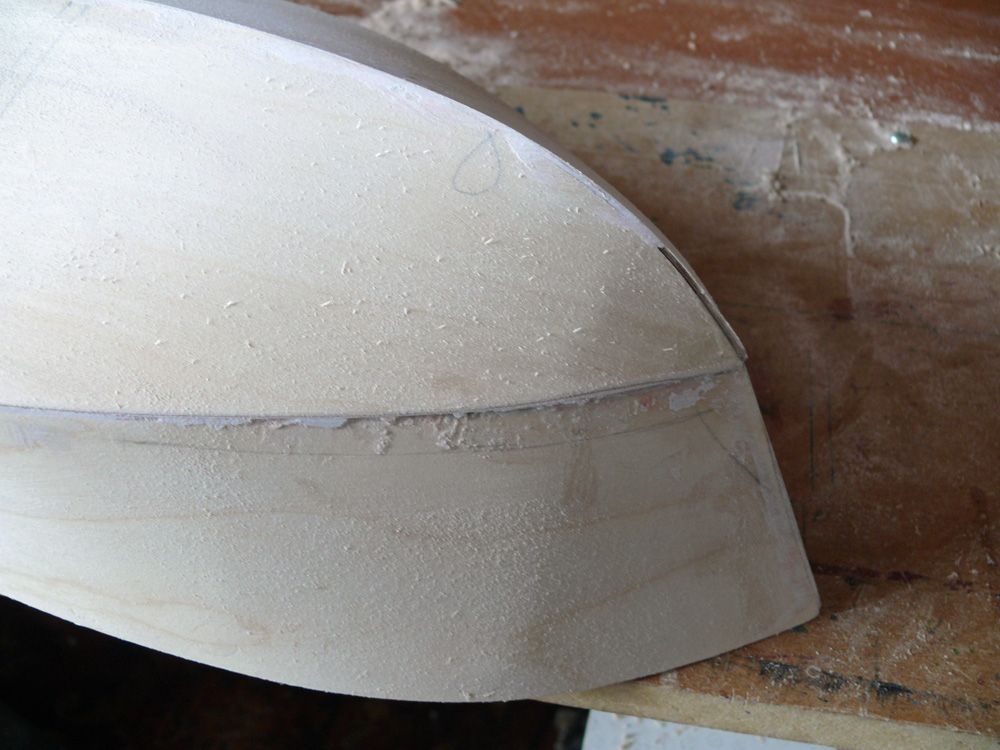
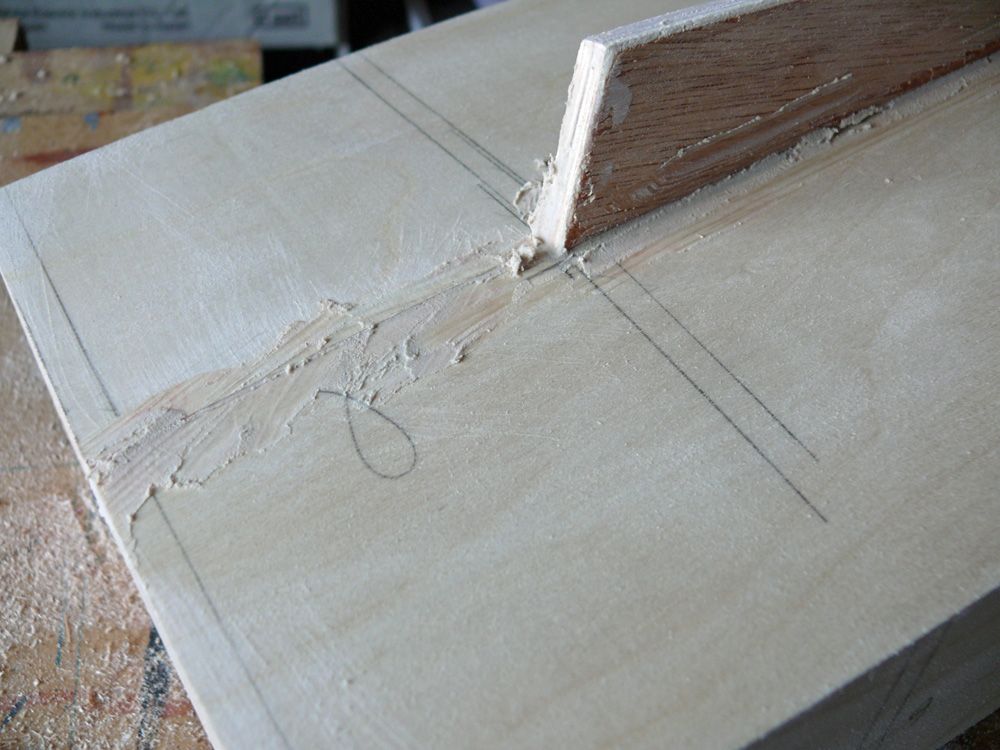
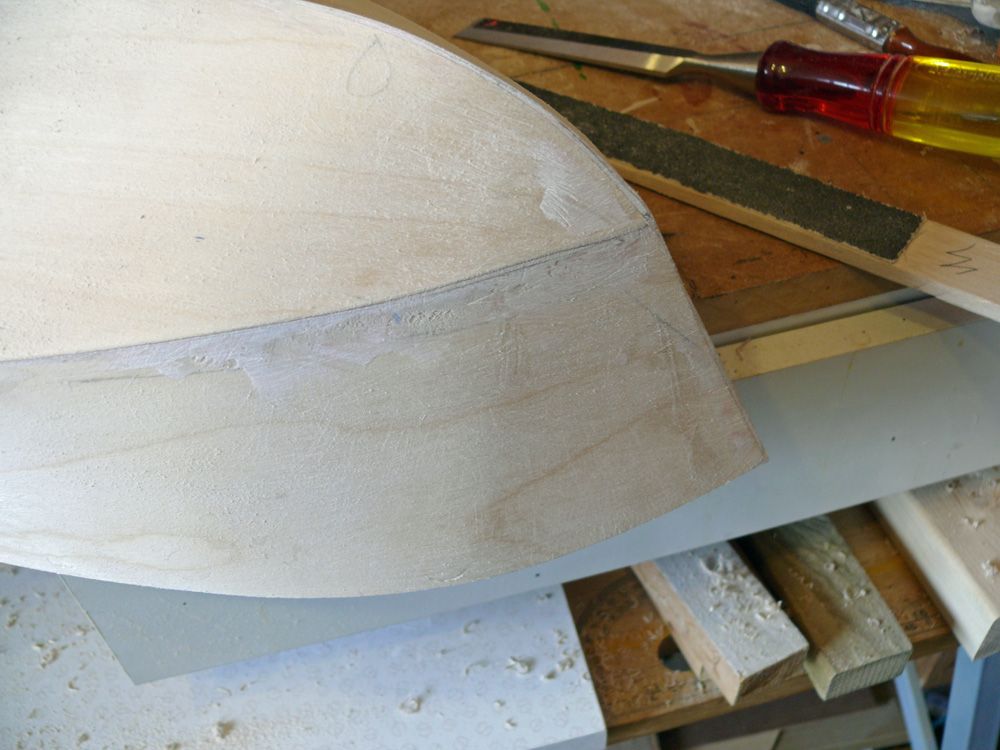
                                                  Just to show you the result of the filler

                                                  cracks filled.jpg

                                                  Now for the deck build

                                                  Bob

                                                  #43415
                                                  Bob Abell 2
                                                  Participant
                                                    @bobabell2

                                                    Shop floor to Drawing Office……….Minor disaster!

                                                    Can see a problem, Red Leader!

                                                    The deck has a camber, but there`s no way of achieving it!

                                                    All the formers need the top camber profile, which will get cut off when the hatch opening is cut out

                                                    top deck start.jpg

                                                    It`s the norm to have the same deck radius throughout the length of the hull

                                                    What is the camber at the widest hull width, please?……I can make my own camber tops, that can be glued alongside the existing formers

                                                    All the formers need modifying to show the top camber…..Sorry Paul

                                                    The former No 6 with the protruding top edge, will need modding too

                                                    Bob

                                                    #43419
                                                    Paul T
                                                    Participant
                                                      @pault84577

                                                      Bob

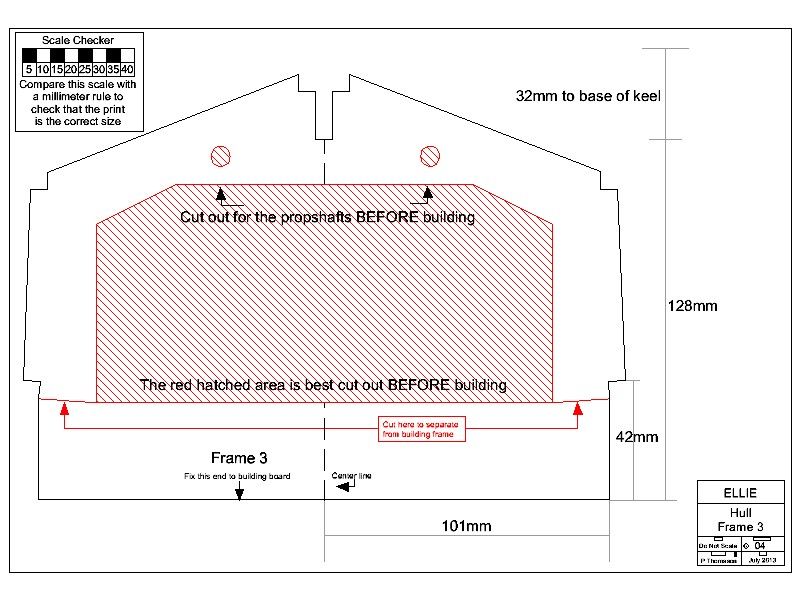
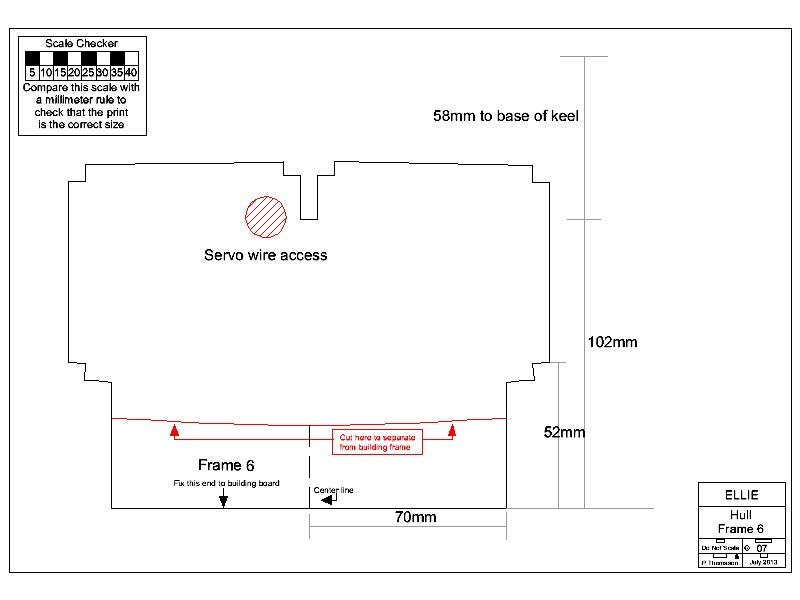
                                                      The deck camber and extended section to Frame 6 are already detailed on the drawings

                                                      frame 3.jpg

                                                      frame 6.jpg

                                                      Is this correct or are we at cross purposes

                                                      Paul

                                                    Viewing 25 posts - 376 through 400 (of 1,441 total)
                                                    • Please log in to reply to this topic. Registering is free and easy using the links on the menu at the top of this page.

                                                    Code of conduct | Forum Help/FAQs

                                                    Advert

                                                    Latest Replies

                                                    Home Forums Scratch build Topics

                                                    Viewing 25 topics - 1 through 25 (of 25 total)
                                                    Viewing 25 topics - 1 through 25 (of 25 total)

                                                    View full reply list.

                                                    Advert

                                                    Newsletter Sign-up