Fairey Huntress Winter Special 2017

Advert

Fairey Huntress Winter Special 2017

Home Forums Scratch build Fairey Huntress Winter Special 2017

  • This topic is empty.
Viewing 25 posts - 51 through 75 (of 87 total)
  • Author
    Posts
  • #74590
    Derek Bradley
    Participant
      @derekbradley32270

      Many thanks, Dave. I was thinking of using Eze Kote also and had already had a look at the video on youtube. I have also read good reports of it in the various magazines. Another trip to Slec is on the cards for early next year. Thanks for the compliment about my woodwork – I am working through everything fairly slowly (at my age I can't work very fastfrown) and I am hoping that the finished model will look good both and off the water.

      Derek.

      Advert
      #74591
      Derek Bradley
      Participant
        @derekbradley32270

        Apologies – just realised there is an 'on' missing between 'both' and 'and' in my last posting.

        #74597
        Chris Fellows
        Participant
          @chrisfellows72943

          Derek – You're making good progress and it's looking mighty fine.

          Is the whole of the hull skinned in ply or have you used balsa block at the bow?

          Chris

          Edited By Chris Fellows on 20/12/2017 22:08:23

          #74598
          Derek Bradley
          Participant
            @derekbradley32270

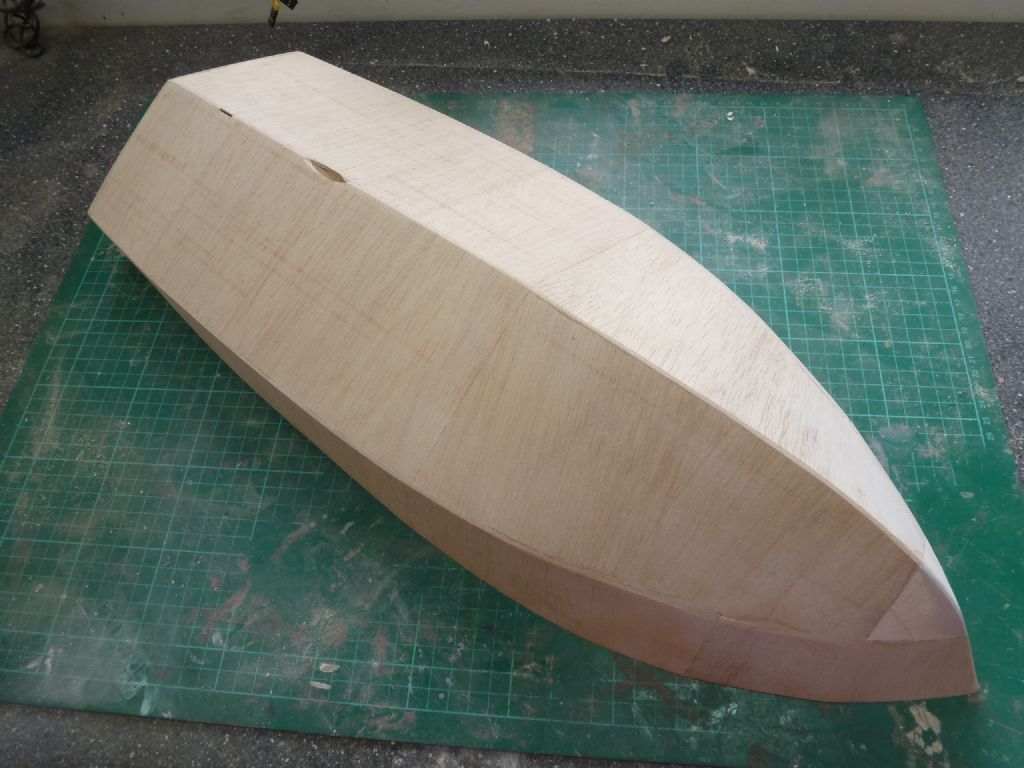
            Thanks, Chris. I used liteply to completely skin the hull as I did not particularly want to use balsa block on this larger scale boat but I must admit that it was the very devil getting the pieces to fit in each side of the bow. Each side of the bottom of the hull is made up of one long piece from the stern forward and then two pieces to make up the bow although getting the curvature on these pieces was rather difficult. I am still not sure that it is perfect and I have sanded the pieces in as much as I dare so, fingers crossed, I am hoping that it will look right when fibreglassed. The hull sides were not too bad although, again, I found it rather difficult to fair them into the bottom pieces especially where the join goes from an overlap to a butt joint. I am sure that if I were to start again I would do some things slightly differently.

            Derek.

            #74605
            harry smith 1
            Participant
              @harrysmith1

              Hi Derek

              I steamed my plywood skins over a kettle, support each end and weight it in the middle.

              Over bending is OK as it is easy to pull into the boat frames with clamps and rubber bands.

              As for motor for the boat a 35-36mm brushless for a bit of performance.

              The Hobbyking 3639-1100 or 3648-1450 which are a straight change over.

              ESC a 100 Amp to handle up to 6S.

              Battery 3S or 4S 5800mah 40C.

              Prop 38-40mm 2 blade is a good starter.

              I found the 3 blade props use more power, but, better slow end speed.

              Battery position behind the step down in the cockpit area.

              I have not installed trim tabs as I think they are not required.

              I maybe wrong if I go to 4S,but, I think the boat is fast as it is !!!

              But me being me I will have to try it !!!

              Checkout my post Precedent Huntsman 34

              Harry Smith

              #74606
              Dave Milbourn
              Participant
                @davemilbourn48782

                although getting the curvature on these pieces was rather difficult

                That's why I always prefer to run the surface grain of the skins across the hull and not length-wise. The side skins also run from chine to gunwale. It makes following the curve so much easier and there's plenty of thickness there to get a decent butt joint where two sheets join.

                019.jpg

                Dave M

                #74609
                Derek Bradley
                Participant
                  @derekbradley32270

                  Thanks, Dave. I realised my mistake when I was skinning the first side but decided to push on, realising more and more that it would have been easier to skin the hull in the way you recommend. I did think of cutting the bow area skins off but gave up on the idea as I would probably have made a bigger mess of it and that Deluxe Aliphatic Resin sticks better than the proverbial.

                  Thanks, Harry, for all the info. Up to now I have only bought the motor – Turnigy Aerodrive D3548/6, 790KV – a 15" prop shaft tube with oiler and shaft from Mobile Marine Models – and a 44mm 3 blade racing prop (as opposed to a scale prop & recommended by the maker). I got the prop from a gentleman recommended by Dave Milbourn and I'm blowed if I can remember or find his details at the moment but it is a lovely, well made prop.

                  Dave, somewhat against your advice I am going to use a 6mm shaft tube (as opposed to 8mm) as I felt that if it was well made, with an oiler and well supported along its length it would be perfectly adequate – hope I'm right!

                  Derek.

                  #74612
                  harry smith 1
                  Participant
                    @harrysmith1

                    Hi Derek

                    Like Dave I use 4mm shaft with 8mm tube, Teflon bearing on the bottom and brass or roller bearing on top.

                    Silicon plumber's tap grease via the oiler.

                    As I am very limited to props and Hobbyking have drop to 2 blade 40mm CNC 1.4 pitch was my go to prop.

                    I have a 2 blade 40mm 1.6 pitch one on my 1920 Gentleman's Runabout with a 3639-1100kv 800watt on 3S which has a good turn of speed, but, not a rocket!!

                    My Sea Commander 34" HAS A D3548/4 1100KV 910watt(sister motor to yours), a cracking good motor.

                    Harry Smith

                    #74621
                    Dave Milbourn
                    Participant
                      @davemilbourn48782

                      Derek

                      I did use a 6mm tube + 4mm shaft on the 23" Huntress and fitted a P-bracket. This has proved to be fine in practice but your model is 50% bigger. I suppose that as long as the shaft itself is 4mm diameter and well supported then you 'll probably get away with it. I do wonder about a 15" shaft whipping at the centre, though.
                      The prop supplier is Simon Higgins of Protean Design – he that was Mr Prop Shop, then wasn't, and has arisen from Swann Castings a sadder and wiser man. I'm pretty sure he's on Facebook. His props are the best. Full stop.

                      DM

                      Edited By Dave Milbourn on 21/12/2017 14:52:39

                      #74622
                      Derek Bradley
                      Participant
                        @derekbradley32270

                        Thanks for the reminders, Dave. I could not agree with you more about Simon Higgins props – excellent. I'm sure I had an email address for him but that also appears to have wandered off somewhere on its own and got lostsad.

                        #74623
                        Dave Milbourn
                        Participant
                          @davemilbourn48782

                          protean design details.jpg

                          #74625
                          Chris Fellows
                          Participant
                            @chrisfellows72943
                            Posted by Dave Milbourn on 21/12/2017 14:43:53:

                            Derek

                            I did use a 6mm tube + 4mm shaft on the 23" Huntress and fitted a P-bracket. This has proved to be fine in practice but your model is 50% bigger. I suppose that as long as the shaft itself is 4mm diameter and well supported then you 'll probably get away with it. I do wonder about a 15" shaft whipping at the centre, though.
                            The prop supplier is Simon Higgins of Protean Design – he that was Mr Prop Shop, then wasn't, and has arisen from Swann Castings a sadder and wiser man. I'm pretty sure he's on Facebook. His props are the best. Full stop.

                            DM

                            Edited By Dave Milbourn on 21/12/2017 14:52:39

                            With my lack of patience with wanting to get on with the Swordsman drawings I bought a 450mm (395mm tube) Raboesch prop shaft with an 8mm tube and 4mm stainless shaft as Cornwall Model Boats were out of stock of the 5mm shaft one at the time. I've regretted my haste as was also worried about whip but I guess Raboesch must be happy with the design as it's rated to 15,000 rpm. The shaft is pretty stiff though so whip shouldn't be a problem.

                            But I'm going to get a 5mm one though and use the 4mm in a smaller boat with the tube and shaft reduced in length to suit.

                                  Chris

                            Edited By Chris Fellows on 21/12/2017 20:35:28

                            Edited By Chris Fellows on 21/12/2017 20:38:48

                            #75067
                            Derek Bradley
                            Participant
                              @derekbradley32270

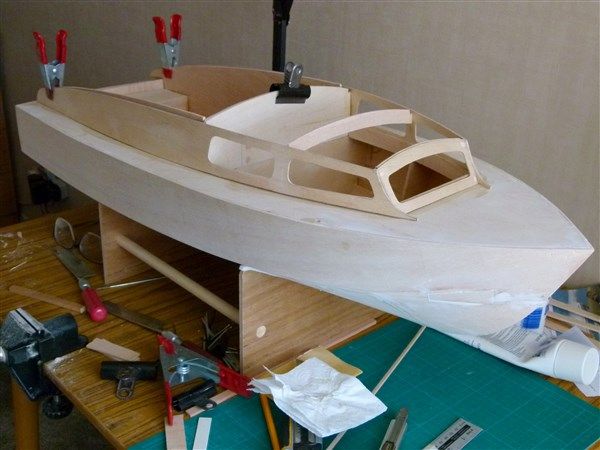
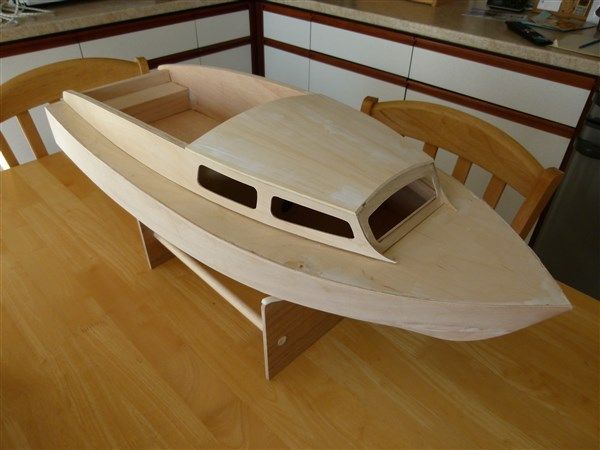
                              At last beginning (slowly) to look like a Huntress. Just a couple of small queries for Dave Milbourn – should the cockpit bulkhead be glued to Frame 4A and, if so, should the cabin roof extend rearwards to cover the top of the cockpit bulkhead? Many thanks.

                              Derek.

                              #75069
                              Dave Milbourn
                              Participant
                                @davemilbourn48782

                                No. The upper frame is tacked onto the top of the lower bulkhead. If you look at Pic 22 you can see that I used a couple of temporary strips of 3mm liteply. The roof planking then covers the edge of the upper frame and is sanded flush with it at the back. Once the planking is done you sever the two strips with a razor saw so that you can lift the cabin structure off the hull.The bulkhead which forms the front face of the cockpit interior sticks slightly up above the roof level and is sanded back flush – see Pic 35.

                                Dave M

                                #75071
                                Derek Bradley
                                Participant
                                  @derekbradley32270

                                  Thanks, Dave. I have got past the stage of tacking 4A to the Frame 4 bulkhead and once the superstructure sides and front were securely glued in place I 'untacked' 4A from 4. I have cut out and built the cockpit as per plans and instructions and when I temporarily clamp the cockpit to the cabin superstructure the tops line up perfectly. Please don't think that I am criticising your drawings or instructions (that's the last thing I would do) but I feel that it is necessary that I get this part of the build absolutely right. I could see from pic 35 how you built your boats but I feel that the cockpit front should be glued to 4A the (now free) upper part of bulkhead 4 and I also feel that the cabin roof should extend over the top of 4A to strengthen the whole of the structure as, so far as I can see, when complete the whole of the cabin and cockpit lift off in one piece to gain access to the interior of the hull. Please correct me if you think I am wrong but, as I have said, I am not criticising, just trying to get answers for my build before I make a mistake which could not be rectified without tearing things apart and rebuilding..

                                  Derek.

                                  #75080
                                  Dave Milbourn
                                  Participant
                                    @davemilbourn48782

                                    I could see from pic 35 how you built your boats but I feel that the cockpit front should be glued to 4A

                                    It is, Derek.

                                    I also feel that the cabin roof should extend over the top of 4A to strengthen the whole of the structure

                                    I can't see that it makes any significant difference, but it does give a cleaner edge to the top of the frame as opposed to the raw ends of planking. I note that you say you built the whole cockpit and then temporarily clamped it to the cabin. I recommend building it up as part of the whole whilst held down onto the hull, because you risk building a twist into the thing if you treat these as separate sub-assemblies.

                                    There's no right or wrong way here, by the way. I did say that I've built a couple more than you have so it's only reasonable to indicate how I went about it. I understand that there are one or two folk who actually do read instructions before they find they've painted themselves into a corner!

                                    Your model seems to going ahead at some speed and very nicely. I'll look forward to seeing the rest of your build.

                                    Dave M

                                    #75082
                                    Derek Bradley
                                    Participant
                                      @derekbradley32270

                                      Many thanks, Dave. I keep going back to your article in the magazine and re-reading to try to make sure I am getting things right but I am fighting a battle against age and memory (and not always winning). I am continuing the build, as you suggest, with all the superstructure clamped to the hull in the hope that I will not end up with any twists but, unfortunately, the sheets of both birch ply and liteply had some significant warps and, with some parts, it has been difficult to correct. Scratch building model boats is like playing chess – you have to think several moves ahead so that you don't find yourself painted into that corner.

                                      So far as I can recall, this is my first completely scratch built model as, in the past, I have always built on to a GRP hull.

                                      Derek.

                                      #75089
                                      Dave Milbourn
                                      Participant
                                        @davemilbourn48782

                                        Derek

                                        I would recommend sticking to the text as far as possible, especially if it's your first venture into building from plans. I thoroughly debugged it and – apart from one or two words which crept in at the proofing-reading stage – it reads OK as regards the building order. I hoped that the photos would make up for any shortcomings in my written description.
                                        Models with GRP hulls are a totally different animal, as you are finding! I prefer working with wood any day.

                                        Dave M

                                        #75093
                                        Chris Fellows
                                        Participant
                                          @chrisfellows72943

                                          Derek – looking good.

                                          I'm in no position to say anything about construction etc. but I guess your concern over strengthening the structure has come about because you have increased the size of the model?

                                          Chris

                                          #75106
                                          Derek Bradley
                                          Participant
                                            @derekbradley32270

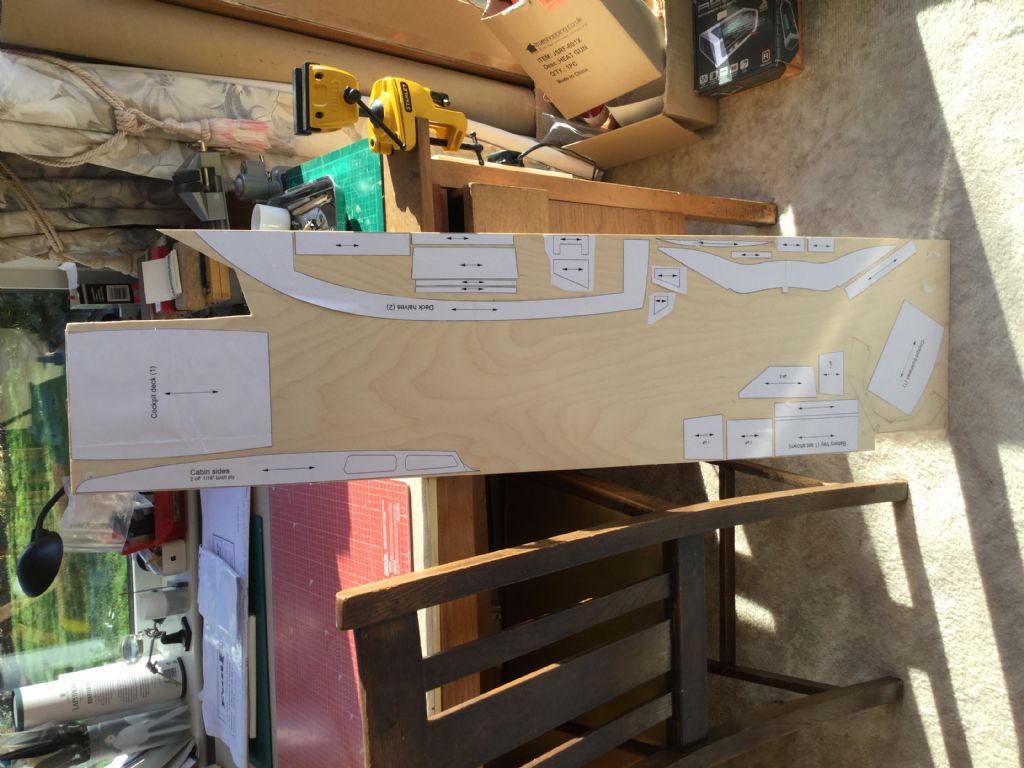
                                            Chris, I think that you are right to a certain extent but the main factor in the increase in size is ignoring some of the sizes shown in the enlarged drawings and increasing them by a factor of 1.5, or whatever size I might deem to be appropriate. Also trying to avoid mistakes which would have meant ripping it all apart or starting again. I have no dispute with what Dave says about my build but, even if I had wanted to I could not have built up the cabin/cockpit in one piece in/on the hull as the liteply was too badly warped. I have never had such a bad warping problem from my favourite suppliers before and wonder if it was due to buying it in winter when the ply might not have been completely dry – just a guess.

                                            Another thought comes to mind – why is no one else building this model as it is a cracking little boat and I would think that Slec now have all the laser cut parts ready.

                                            Derek.

                                            #75114
                                            Dave Milbourn
                                            Participant
                                              @davemilbourn48782

                                              Another thought comes to mind – why is no one else building this model as it is a cracking little boat and I would think that Slec now have all the laser cut parts ready.

                                              secret

                                              DM

                                              #75115
                                              Rumration
                                              Participant
                                                @rumration

                                                Rest assured I am:

                                                6197f47b-715d-4a9e-804e-3ce583467ffe.jpeg

                                                #75125
                                                Derek Bradley
                                                Participant
                                                  @derekbradley32270

                                                  Nice to see that I am not on my own !

                                                  Derek.

                                                  #75661
                                                  Derek Bradley
                                                  Participant
                                                    @derekbradley32270

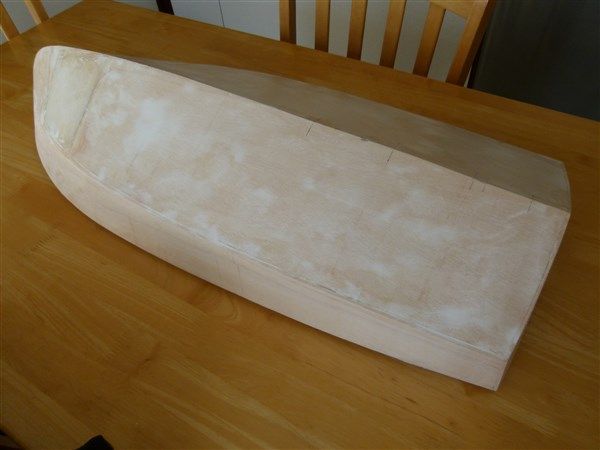
                                                    Well, things are progressing slowly again. This was my first ever attempt at fibreglassing. It all went reasonably well and I am not unhappy with the result. I used the recommended grade of glass cloth with Deluxe Eze-Kote rather than risk upsetting anyone (no names) with the fumes and smell of a 2 pack resin. Don't take any notice of the lighter coloured patches – it is just some of the lightweight filler showing through.

                                                    Cabin roof planked and that also worked out quite well. I used 1/8" sheet obechi and cut it into strips slightly longer than the roof. I tapered the strips from 3/8" to 1/8" along their length and this worked out almost exactly apart from a couple of pieces 1/4" to 1/8" each side and then the curved pieces to finish along the edges. The next step will be to fibreglass it.

                                                    I am not a very fast builder but it keeps me out of mischief.wink

                                                    Derek.

                                                    Just a little PS. I recently bought a tub of lightweight filler from Toolstation and, when I picked it up off the counter, I thought it was empty it was so light. It works just fine but does need a little thinning with water to get the right consistency.

                                                    #75668
                                                    Dave Milbourn
                                                    Participant
                                                      @davemilbourn48782

                                                      Nice job of the planking, Derek. BTW epoxy finishing resin doesn't smell anything like as bad as ordinary polyester resin.
                                                      What was the name of the filler you bought?

                                                      DM

                                                    Viewing 25 posts - 51 through 75 (of 87 total)
                                                    • Please log in to reply to this topic. Registering is free and easy using the links on the menu at the top of this page.

                                                    Code of conduct | Forum Help/FAQs

                                                    Advert

                                                    Latest Replies

                                                    Home Forums Scratch build Topics

                                                    Viewing 25 topics - 1 through 25 (of 25 total)
                                                    Viewing 25 topics - 1 through 25 (of 25 total)

                                                    View full reply list.

                                                    Advert

                                                    Newsletter Sign-up