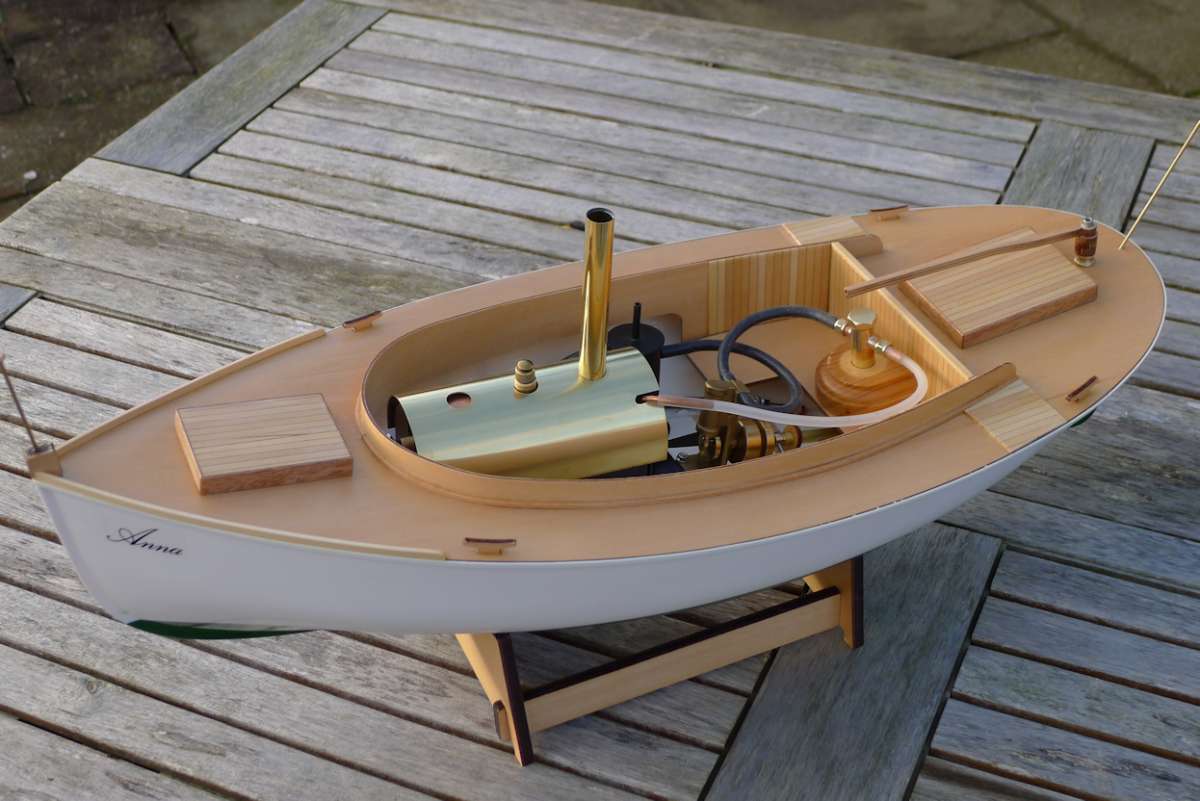
Elliott Bay Steamer

Advert

Elliott Bay Steamer

Home Forums Building Kits Elliott Bay Steamer

  • This topic has 16 replies, 2 voices, and was last updated 1 year ago by Richard Simpson.
Viewing 17 posts - 1 through 17 (of 17 total)
  • Author
    Posts
  • #74872
    Tim Rowe
    Participant
      @timrowe83142

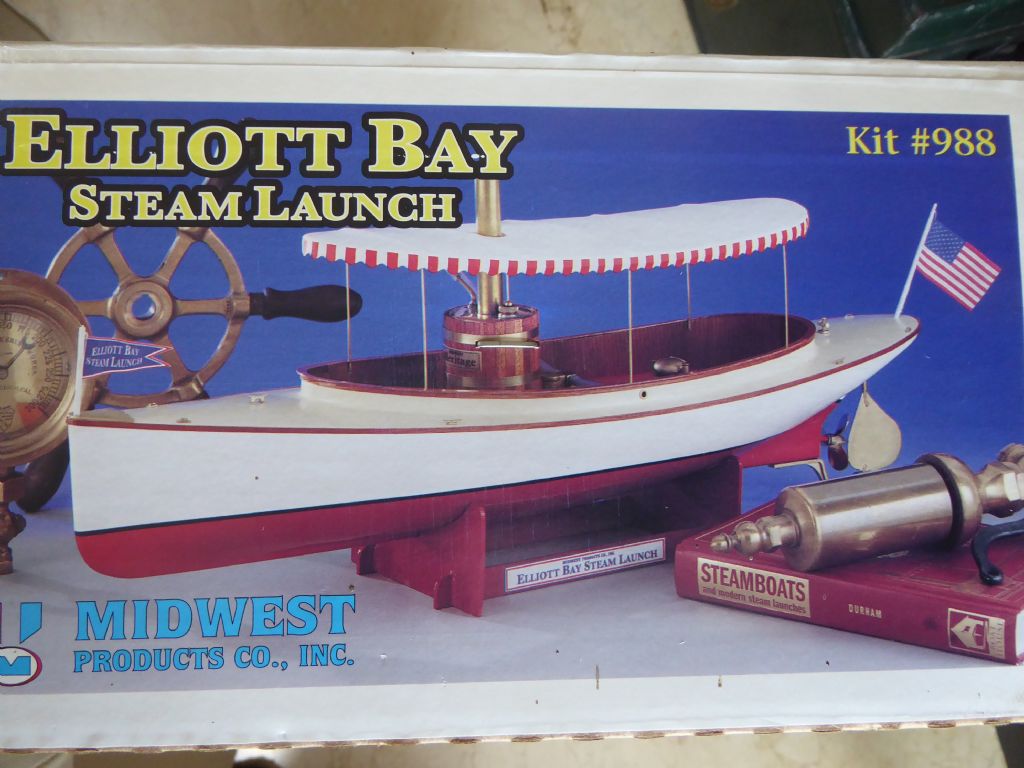
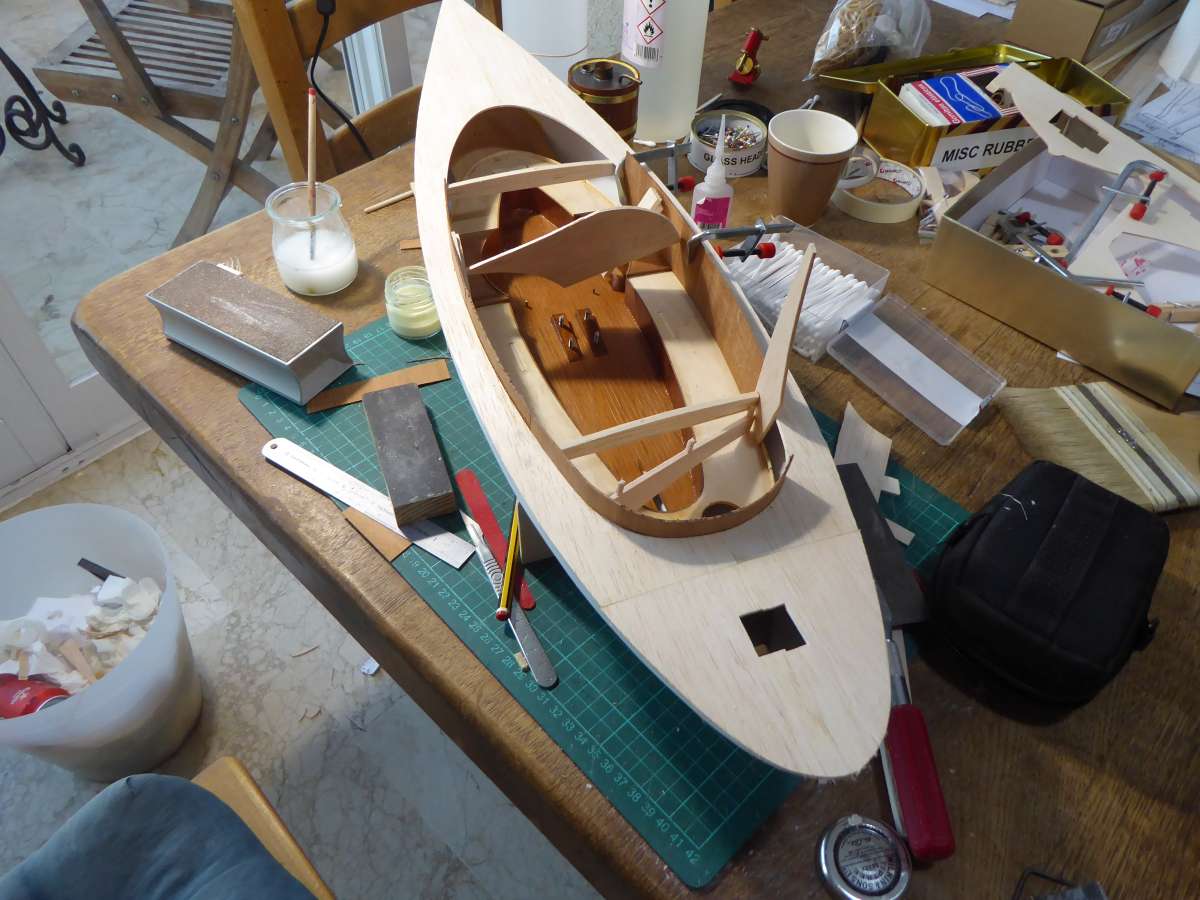
      A lucky moment on Ebay secured a Midwest kit of the Elliott Bay Steamer including the engine and boiler package.

      Elliott Bay 1

      Something fairly quick and easy or so I imagined but I did get a bit carried away. It comes in quite a large box to house the vacuum moulded hull and deck plus all the bits and pieces except glue and paint.
      ​The moulded hull was reasonably fair but the deep narrow draw at the bow had left the material a bit thin and flexible. Elsewhere it was reasonably strong helped by the curvy sections. The quality of the wood was good and there was plenty of it. The same could not be said for the fittings but more of that later. The instructions were OK up to a point but followed to the letter would leave a weak hull to deck join and the placing of the battery switch on the foredeck is frankly daft.
      ​This is not a build blog but a snapshot version concentrating on the variations I decided to do and the reasons why.

      Advert
      #6287
      Tim Rowe
      Participant
        @timrowe83142

        Freelancing

        #74873
        Dave Milbourn
        Participant
          @davemilbourn48782

          Tim

          Your comments are interesting. I've only ever handled two Midwest kits and both were absolutely beyond criticism of any kind. That said, both were wood kits [Boothbay Maine Lobster Boat and aerobatic model aircraft "Mach 1"]. Sadly Midwest don't seem to produce kits of any kind any more.

          Dave M

          Edited By Dave Milbourn on 06/01/2018 18:21:54

          #74876
          Tim Rowe
          Participant
            @timrowe83142

            Dave
            ​I also have a little Midwest (Apprentice) dinghy kit and I would agree with you. The cutting and the wood selection was perfect. I think it only has a brass spit pin for the painter so I would agree with you completely.

            Tim

            #76631
            Tim Rowe
            Participant
              @timrowe83142

              I did start with good intentions but got distracted building a twin engine RC aircraft in the 2018 Mass Build. There is some planking and other techniques that might be of interest. If you want to take a peek click here

              ​Having a good study of the plans and instructions is always a good idea. By doing this I made some early decisions about the build and what I would like to change. I also did some checking around on the internet and some very useful pointers came up and I have cribbed some of those. I will confess when they crop up.

              The little oscillating engine is shown connected to the prop shaft with a length of silicone tubing. For one thing the prop shaft and the engine shaft are slightly different sizes with the engine being smaller. The tubing could probably cope with this but the real problem is the alignment.
              These little engines are fun to watch and operate but have very little power. The engine is shown mounted flat in the cockpit floor and the prop shaft is at quite a different angle. This will soak up a lot of power and may even stop the engine working properly.
              Elliott Bay 7

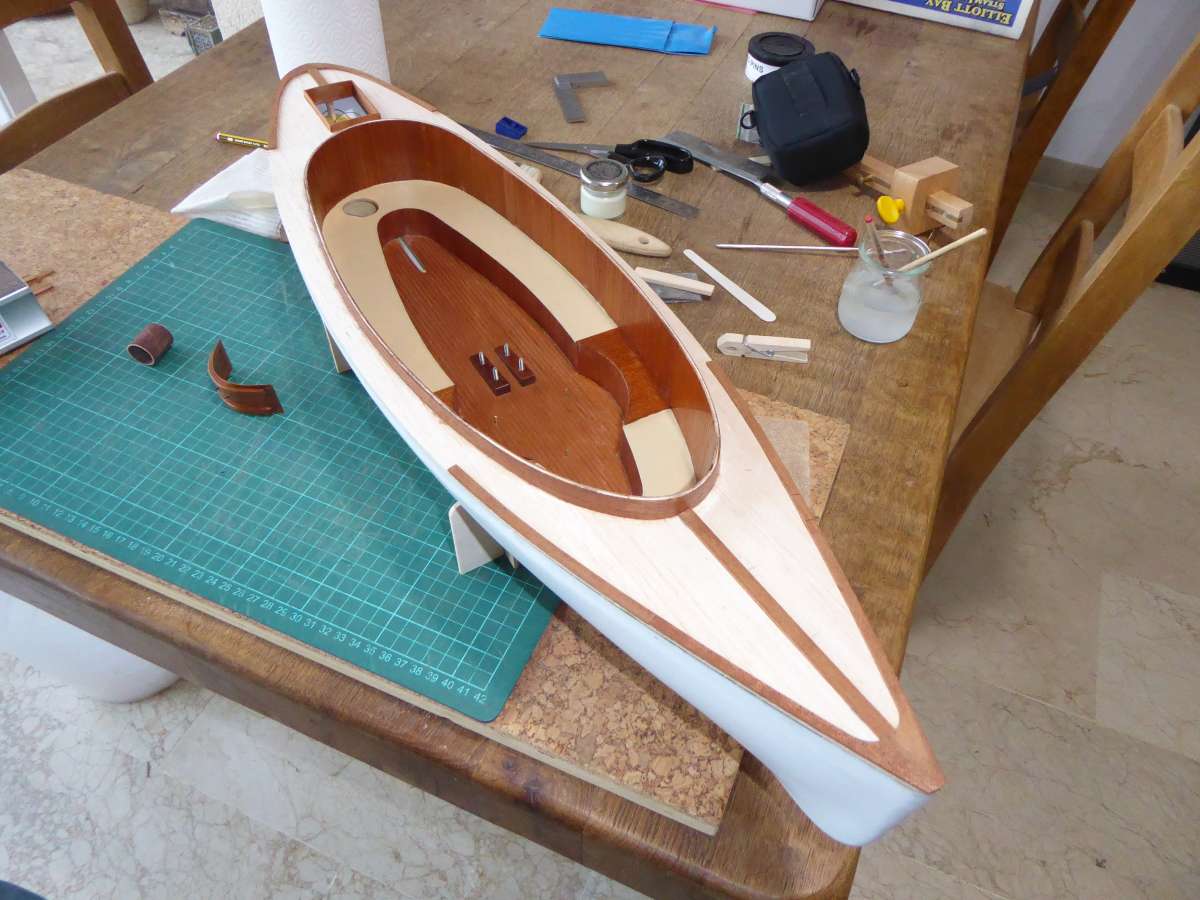
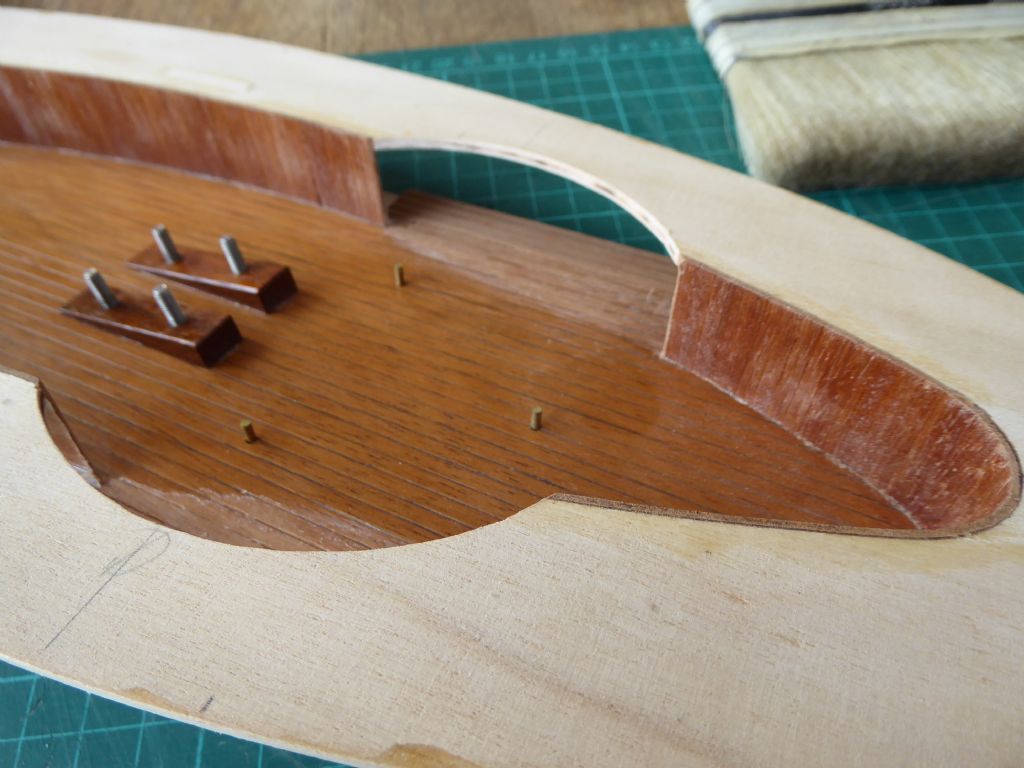
              Engine bearers were made in mahogany to bring the engine at the right height and angle to match the propeller shaft. The "bolts" are M3 stainless steel cheese head machine screws inserted from below.

              ​The cut-outs in the coaming sides were cut out after having built them according to the plan. On the internet there was a note about how close the firebox of the boiler came to the woodwork and I am sure they were correct. This was the fix and completed it looks very nice.
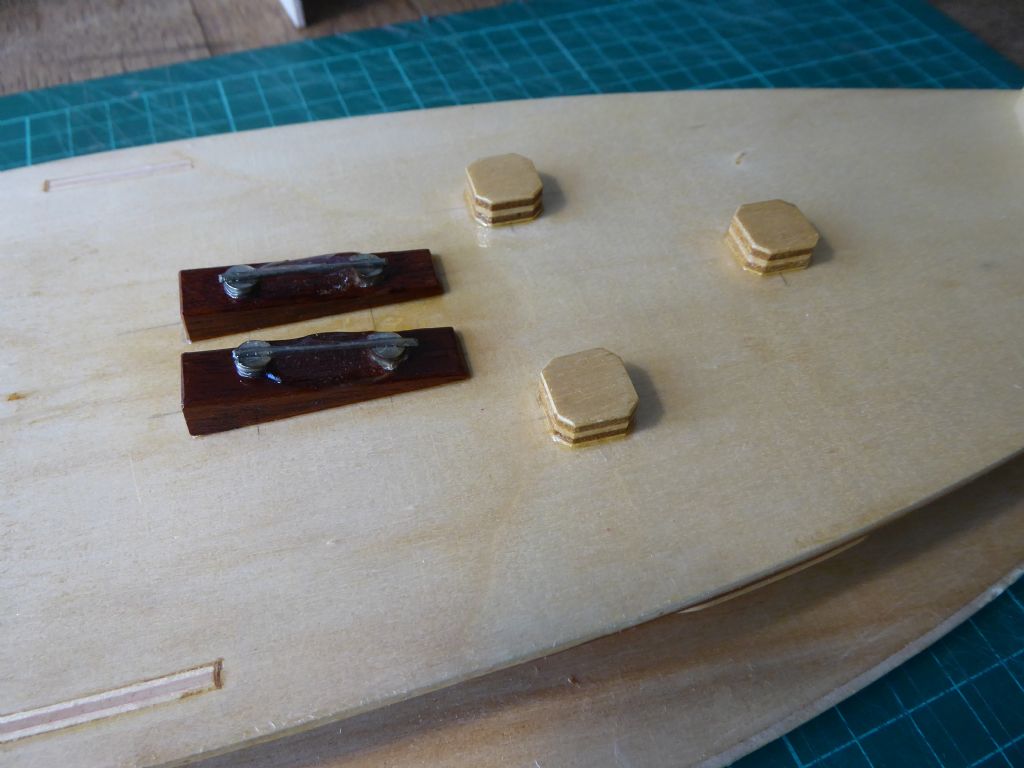
              p1000976.jpg

              ​This is the underside of the cockpit sole and show duplicate sections of the bearers glued in place so that the heads of the machine screws have a parallel surface to work on. The slots of the machine screws are lined up to take a short length of piano wire. Don't use soft wire as it is not nearly so strong. The wires were held in place with dollops of epoxy.
              ​The three pads (not on the plan) are to take the pins to locate the boiler. The holes for the pins can now be blind which will stop water leaking through.
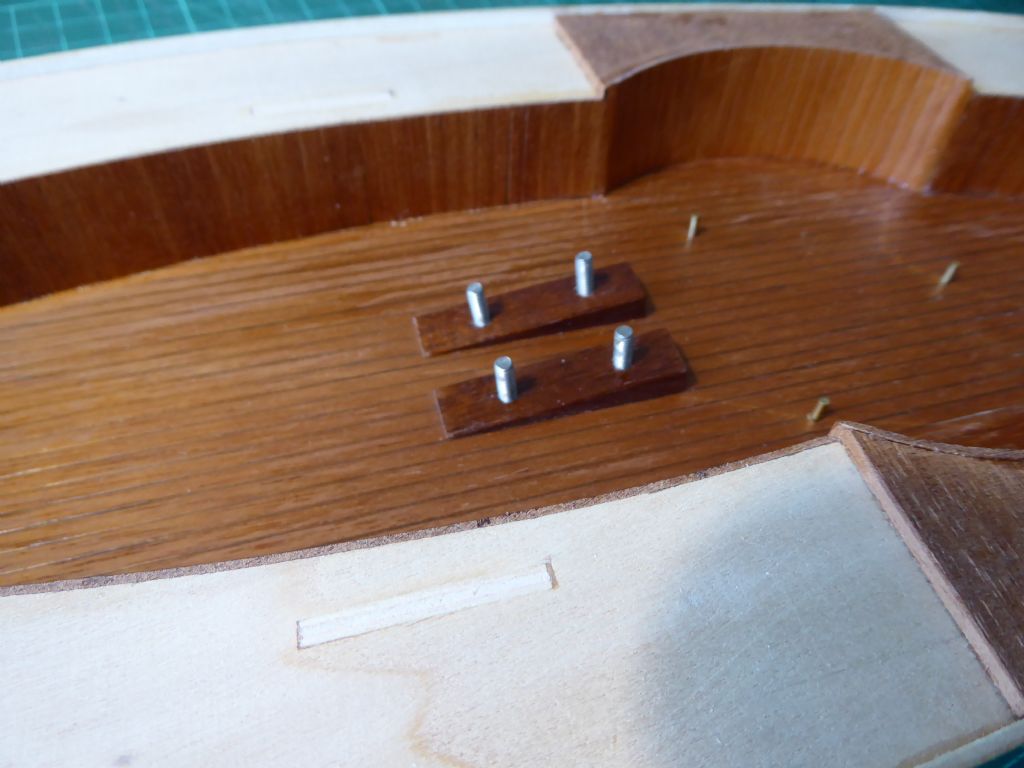
              p1000974.jpg

              ​This is what the scalloped out area looked like after re-sheeting and no there is a decent amount of clearance around the firebox.

              Tim

              #120897
              Tim Rowe
              Participant
                @timrowe83142

                Just to prove some of my projects teak a very long time, I last posted on this boat 6 years ago.  Hard to believe.

                It is now within a gnats whisker of being finished and it odd moments between Eventide and Will Duck I have actually got to the stage of painting the hull.  I hate cleaning pain brushes (along with sanding the edges of plywood) so it helps to have a few things to paint at the same time.

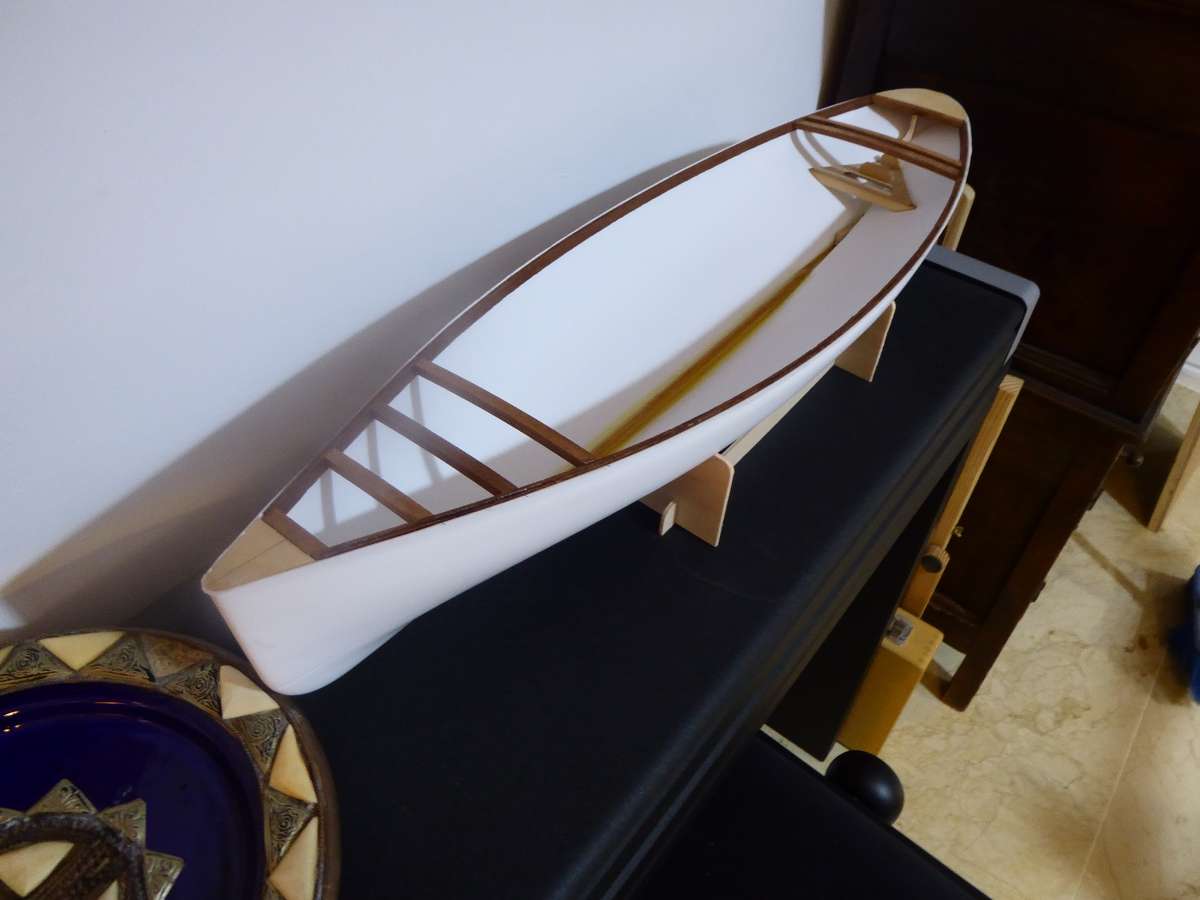
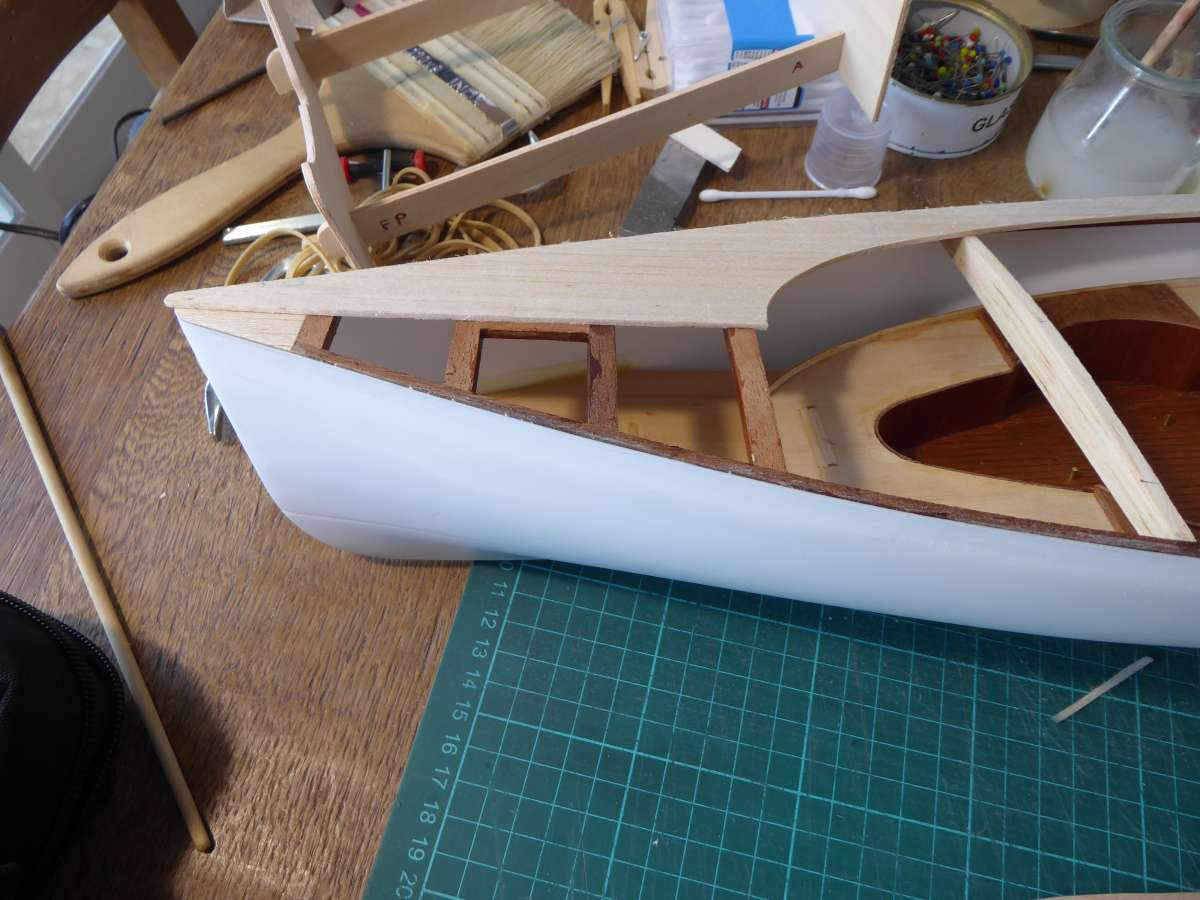
                The kit comes with a vacuum formed deck.  It wasn’t a very good fit and it lacked definition. In a rash moment I decided to make my own deck and coaming and to make sure there was no going  back I cut the supplied one to pieces.  Many times later I wondered if that was a mistake because some of the work was quite challenging.

                P1000951

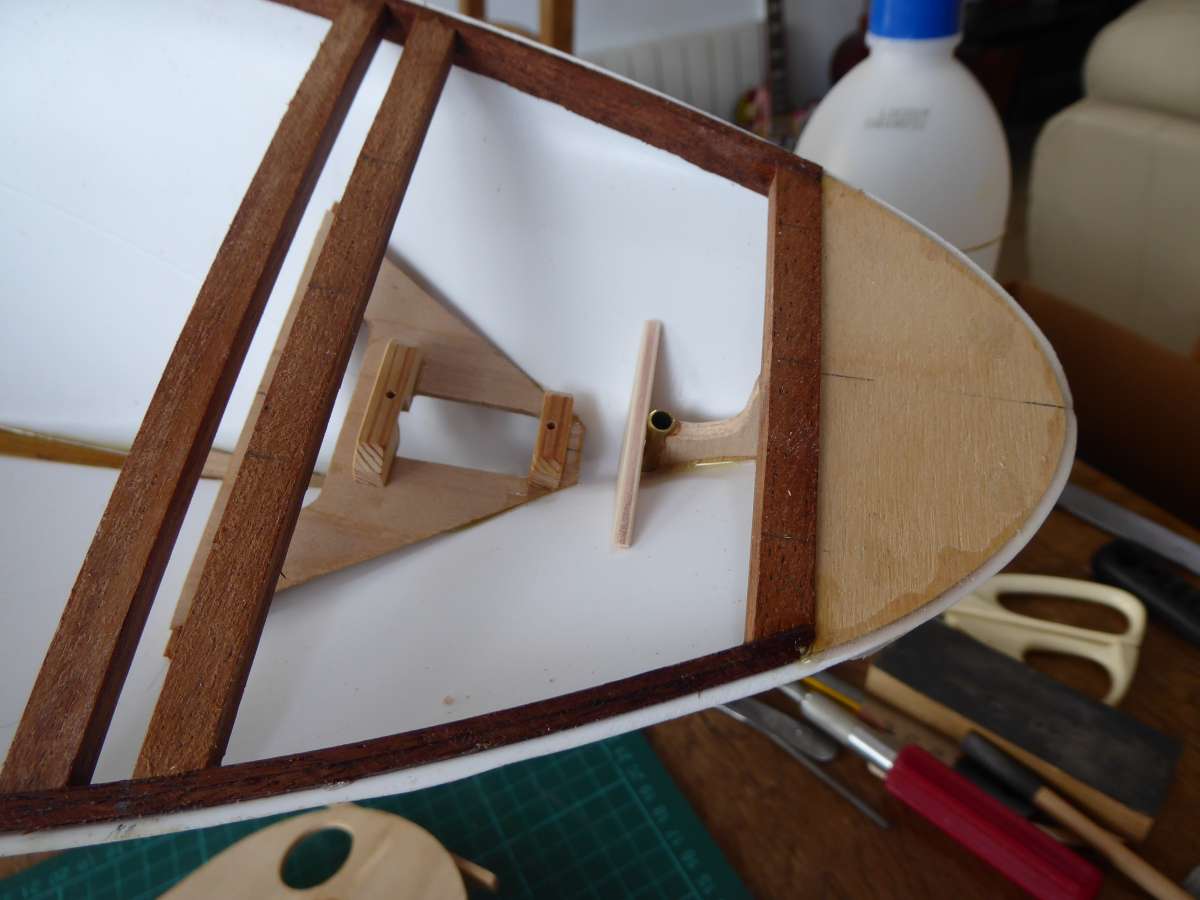
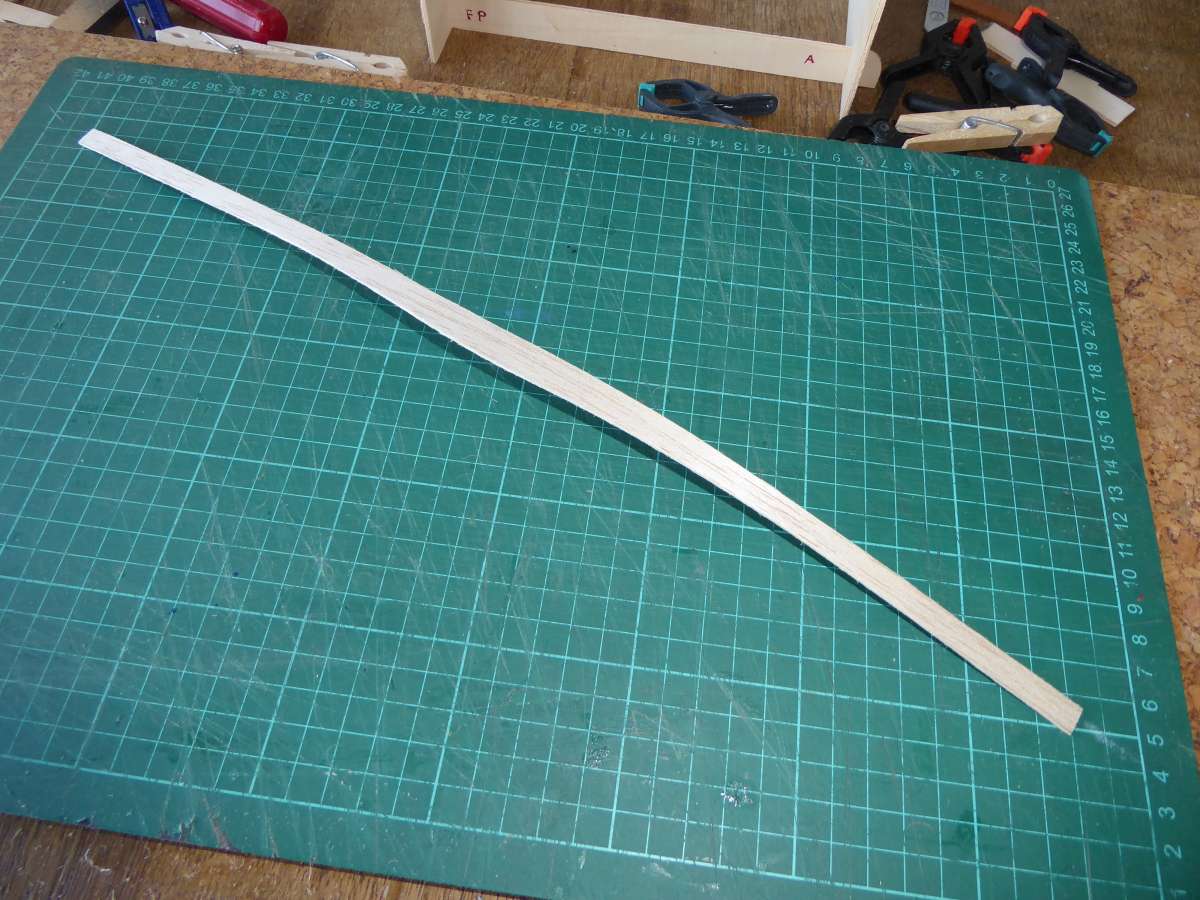
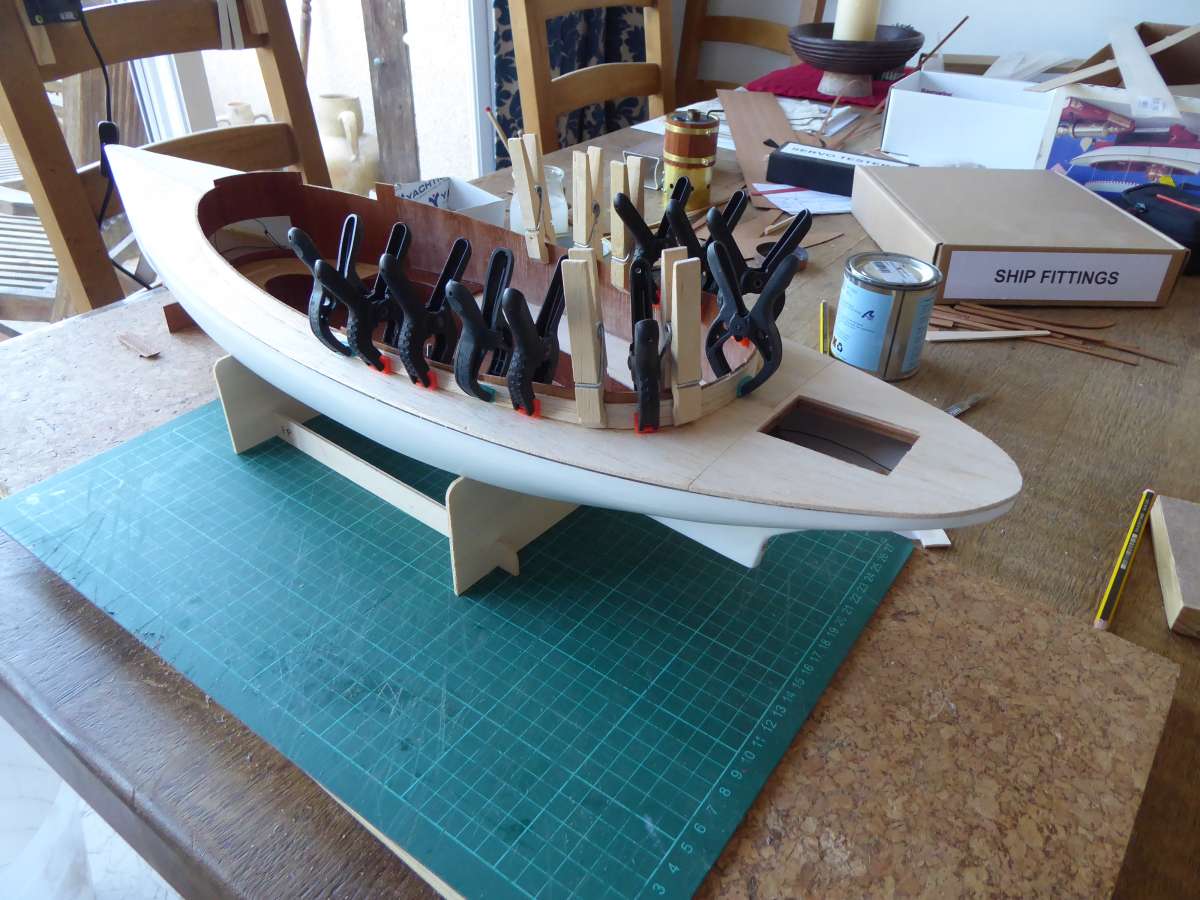
                The gusset at the bow is Liteply and the inwhale around the edge of the hull is laminated from thin strips of mahogany.  The cambered deck beams are likewise laminated mahogany.  It is easy to set up a jig and make the beams in pairs.  Two per day allowing the glue to set overnight.  The beams are then notched into the inwhale.

                The keel was very thin due to the deep draw of the vacuum moulding so I flood the keel internally with epoxy with some strands of glass let in for good measure.

                P1000964

                Like the bow, the stern has a gusset and the rudder trunk and servo mount for the steering are in place.

                Ready now for the subdeck.

                Tim

                #120898
                Tim Rowe
                Participant
                  @timrowe83142

                  Please excuse the typos!

                  #120912
                  Richard Simpson
                  Participant
                    @richardsimpson88330

                    Hi Tim,  Time passes by frighteningly fast these days!  I dug out an article I did for Model Boats Magazine to copy for someone only this morning and was amazed to see it was written 12 years ago!

                    Nice to see you’ve got this thread going again.  Always like seeing a steamer going together.


                    #120918
                    Tim Rowe
                    Participant
                      @timrowe83142

                      Time accelerates does it not Richard.  This is a very simple Steamer compared with your works of art.

                      P1000985

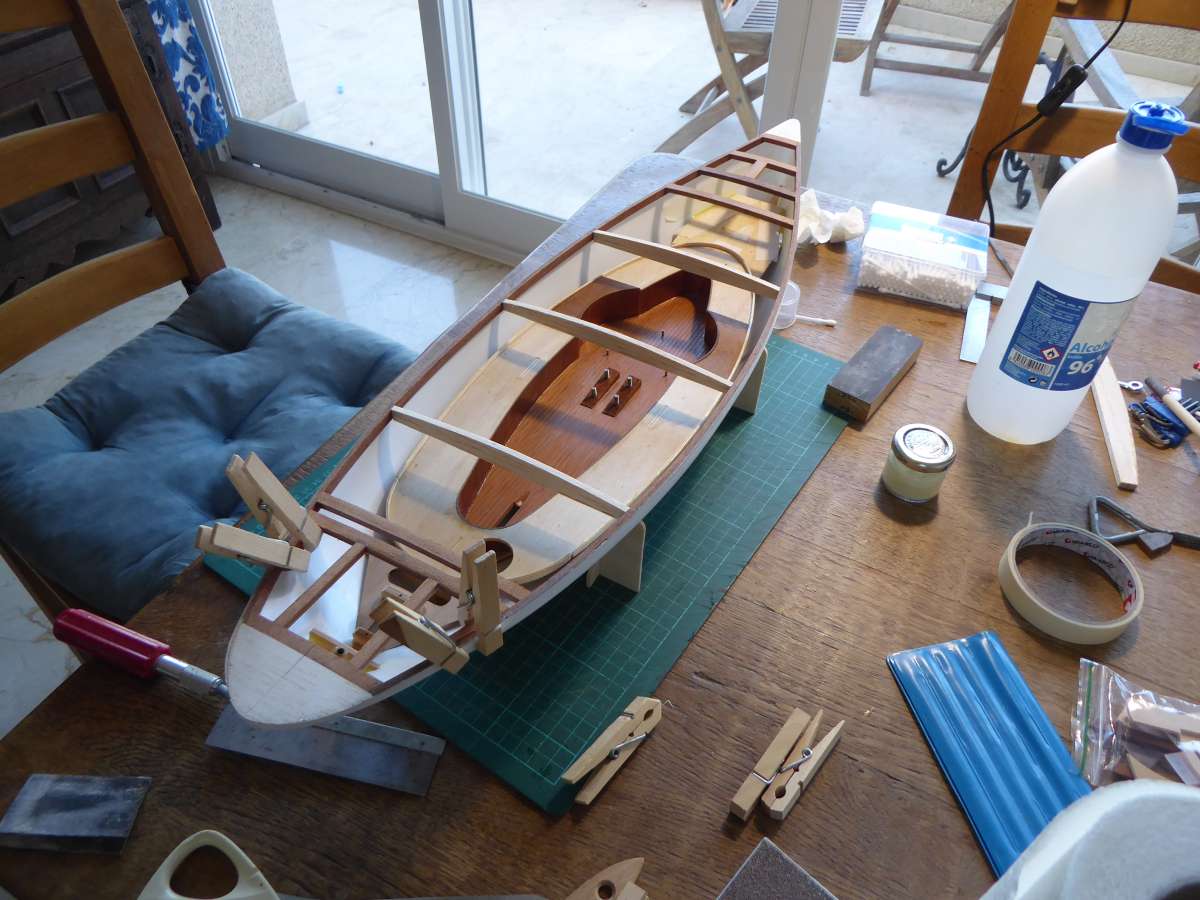
                      All the deck supports are in place. The longitudinal at the bow is for the bollards and if I remember correctly the doubled aft beams support the aft bollards that are double.  This is a stage to think ahead a bit about what deck fittings will be going on because with any underdeck support they will be vulnerable.

                      The two beams in the middle are temporary and are there to help maintain the correct camber along the side decks.  They are balsa and will be cut away later when the coaming are in place and everything is self supporting.

                      P1000987

                      My usual balsa for the subdeck. Bends easily, sands easily and I always have some.  This is 1.5mm and the panels on the underside are pre-sealed with epoxy.  Essential with balsa but maybe not with ply as long as it is good quality.  When time to assemble I “paint” the epoxy onto the bare areas and this seals them at the same time as sticking them to the deck beams.

                      P1000988

                      First half of the foredeck in place and you can see how the temporary beams are doing their jobs.

                      P1000992

                      P1000993

                      The kit supplies fake tongue and groove in panels and here the aft one is being persuaded to go into place.  You can just see a curved on the cockpit base for the bottom of the panel to be glued to.  It also make sure that the panels are vertical.

                      Tim


                      #120937
                      Tim Rowe
                      Participant
                        @timrowe83142

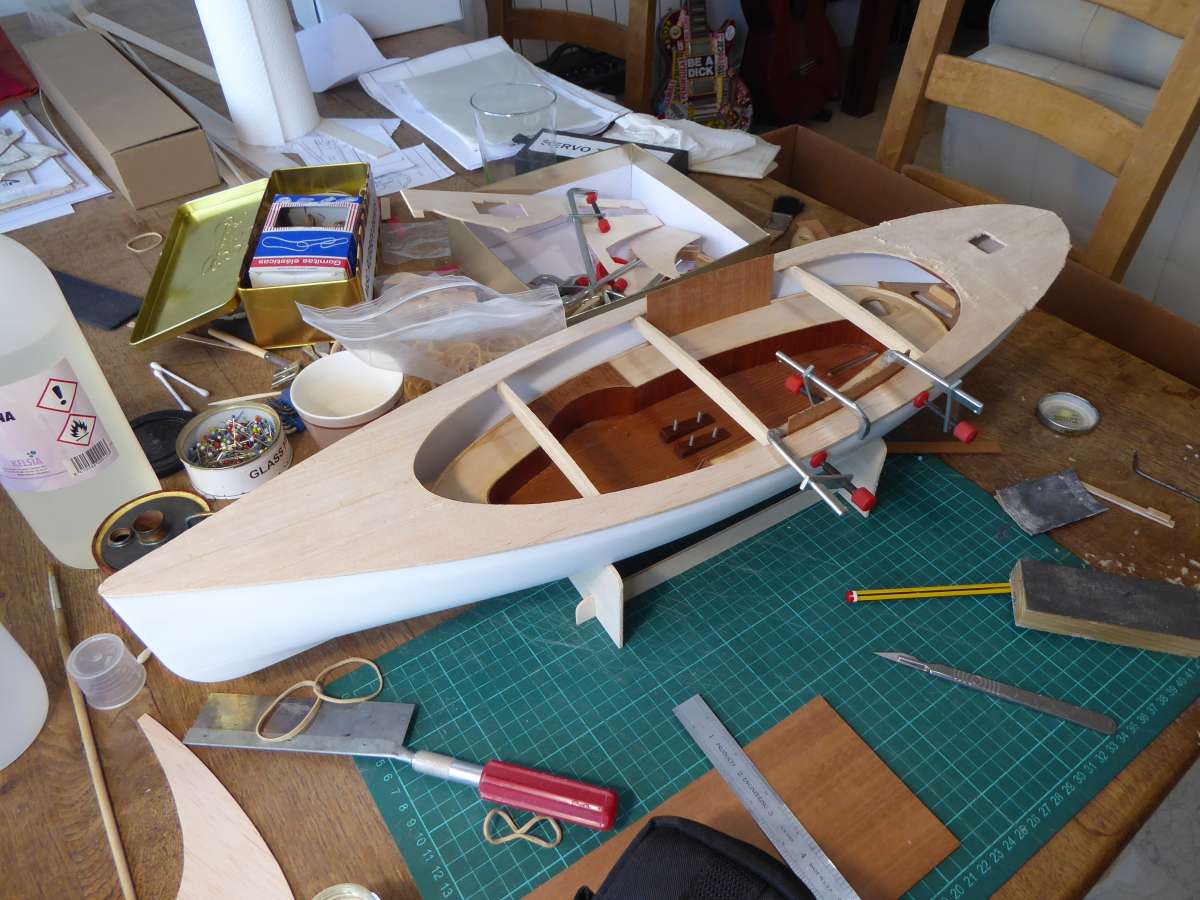
                        Some more progress on the coaming.

                        P1000995

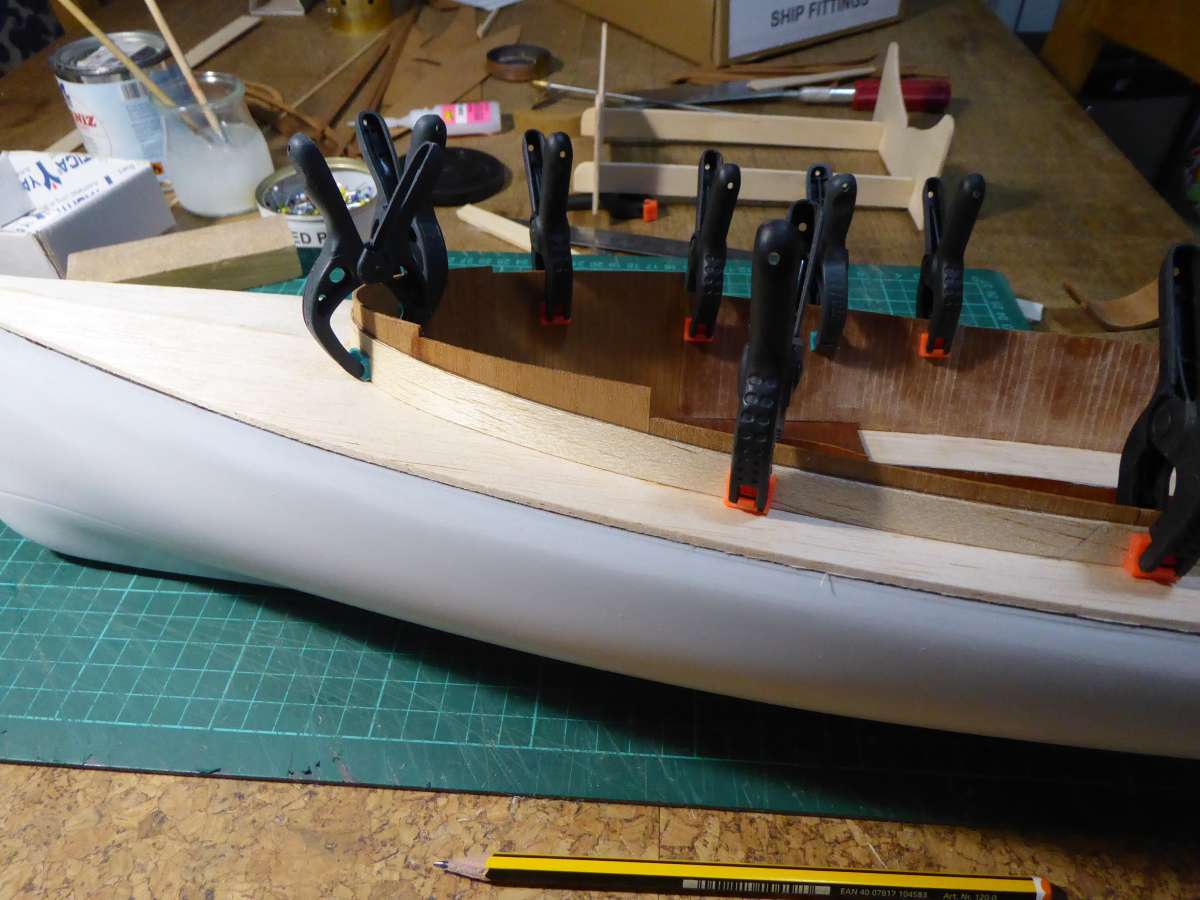
                        The temporary beans are still in place with some extra shores to coax the coamings into place.  When nearly all in place, the beams can be removed because the deck is well supported and the hols filled with short sections of the pre-grooved panels.

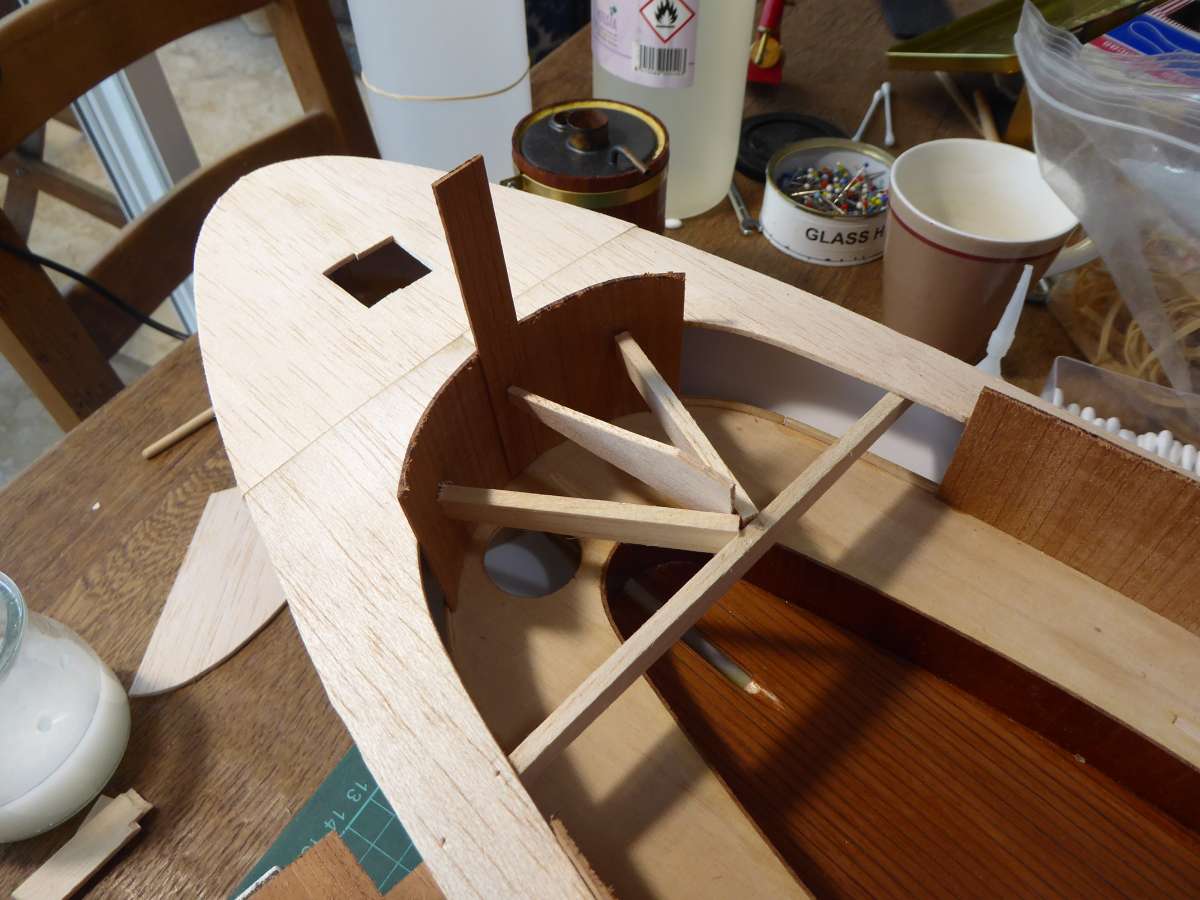
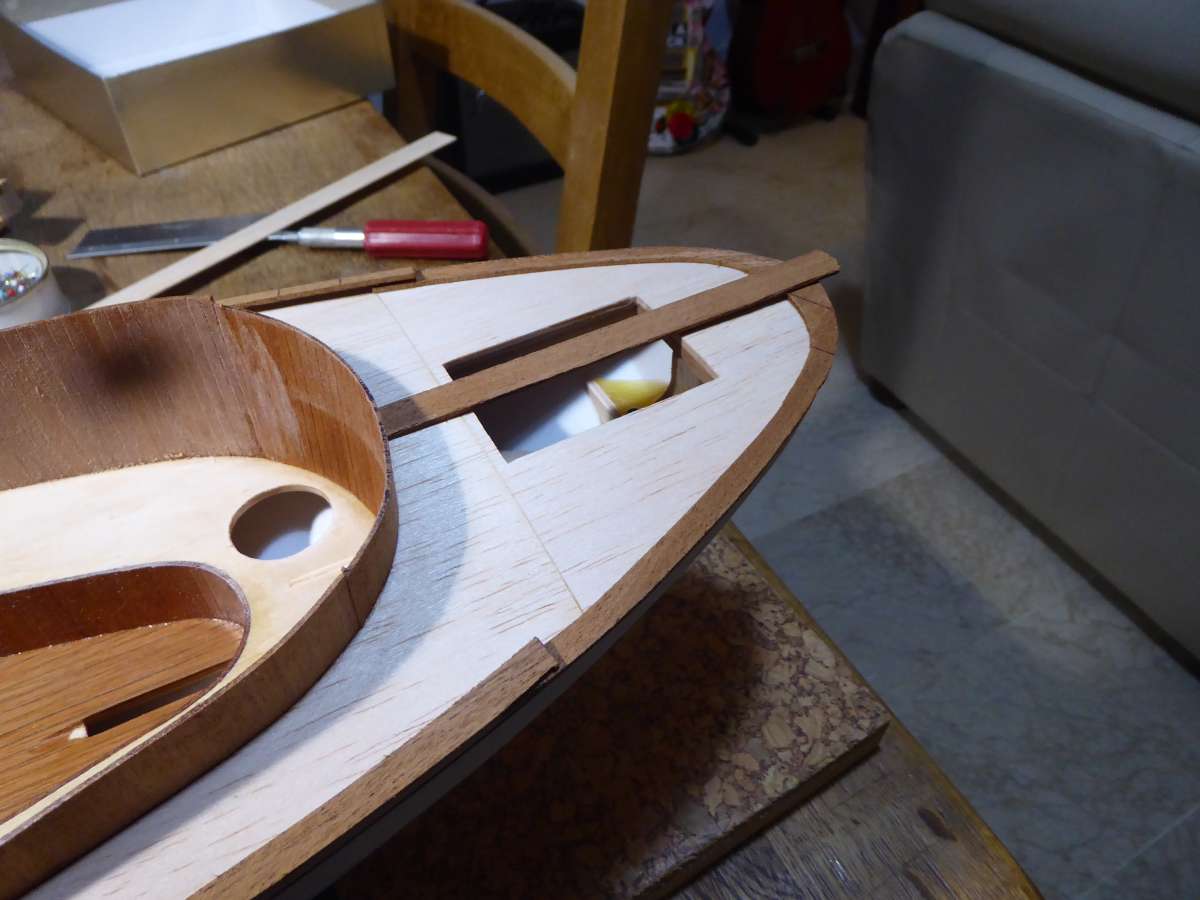
                        Time now to think ahead a bit and the the forward section needs to have a hatch.  This is where the battery and receiver will go.  The hatch will need supporting at the correct curve to match the coaming.

                        P1010675

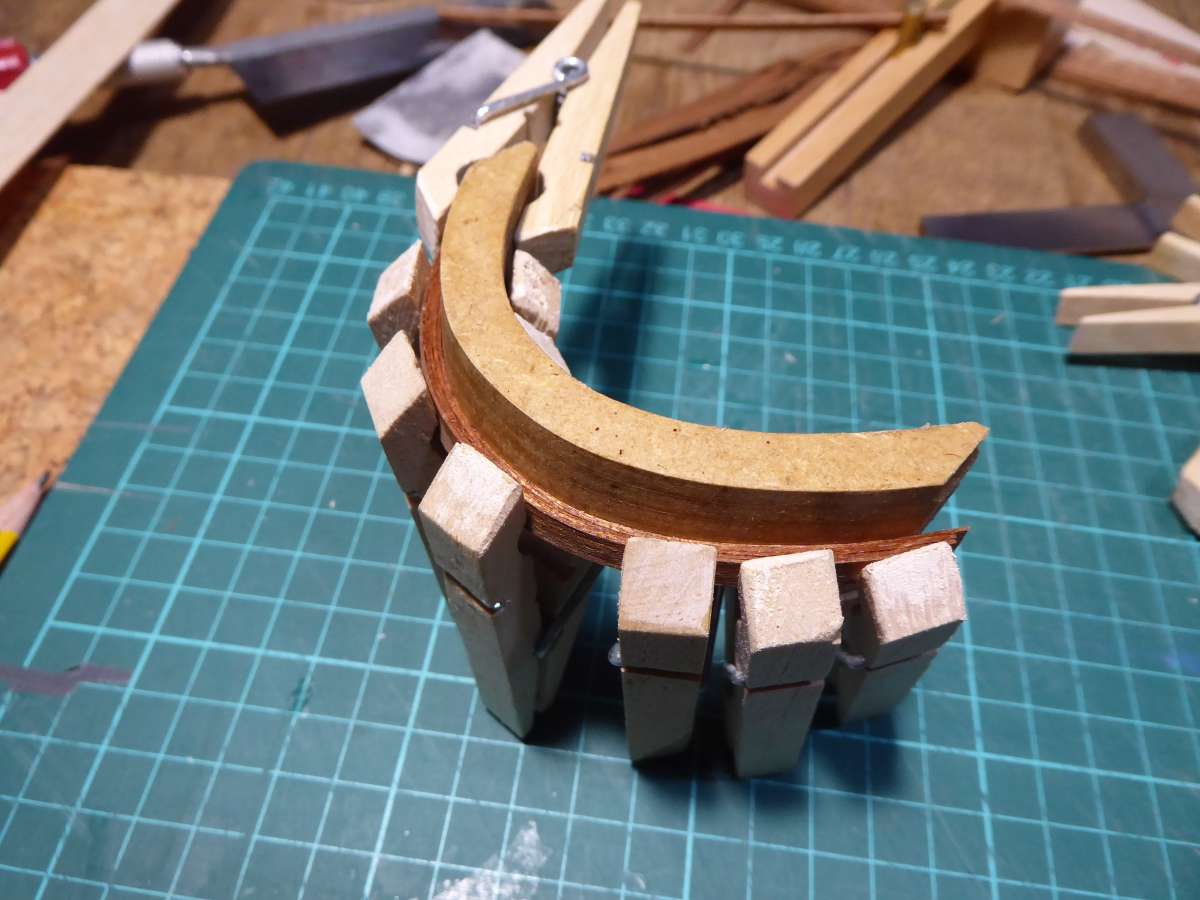
                        A former was made in MDF and some very thin strips of mahogany laminated in place.

                        P1010677

                        Here the hatch section is carefully cut out of the coaming using a razor saw.  The laminated supports will hold the hatch in the right shape.  I still haven’t decided how to hold the hatch in place.  Thinking of some elastic and a dummy handle and dummy hinges.

                        Tim


                        #120938
                        Tim Rowe
                        Participant
                          @timrowe83142

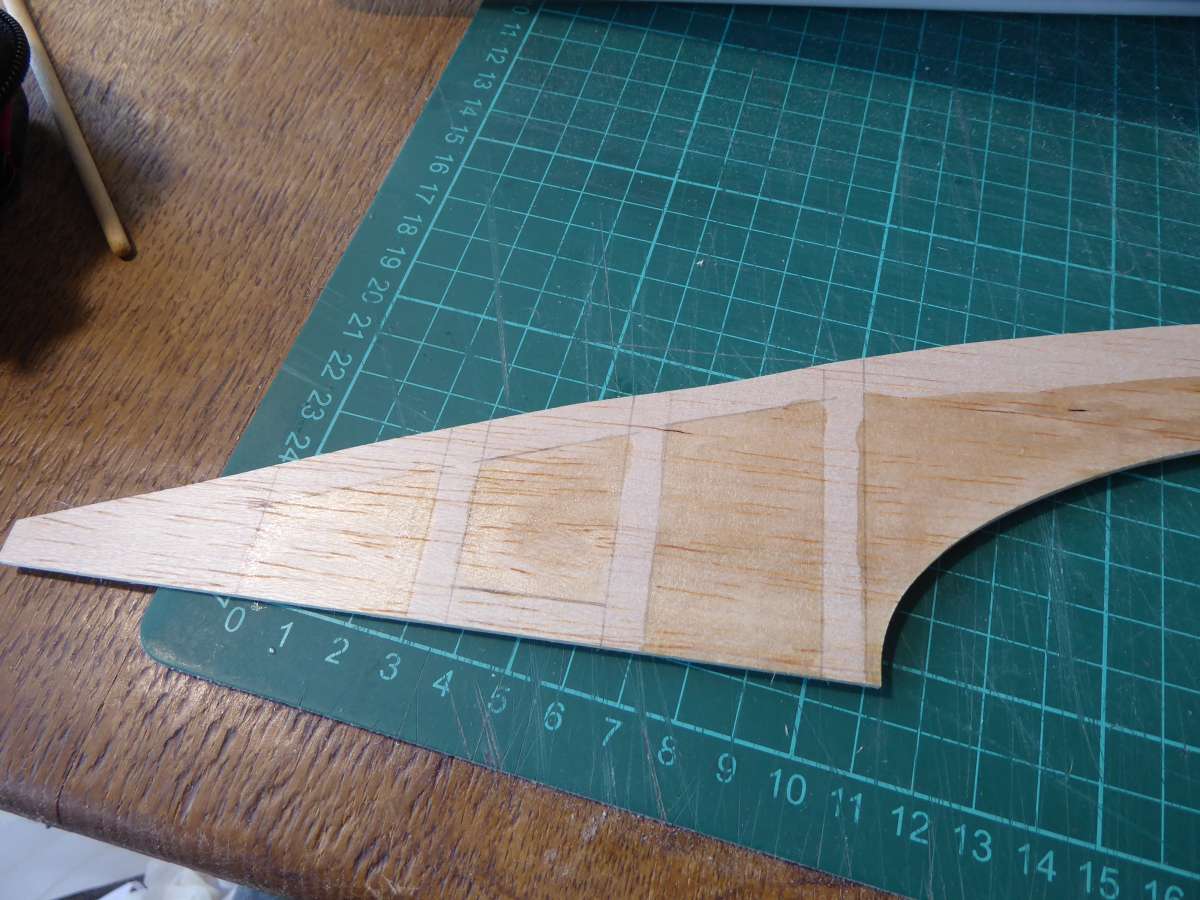
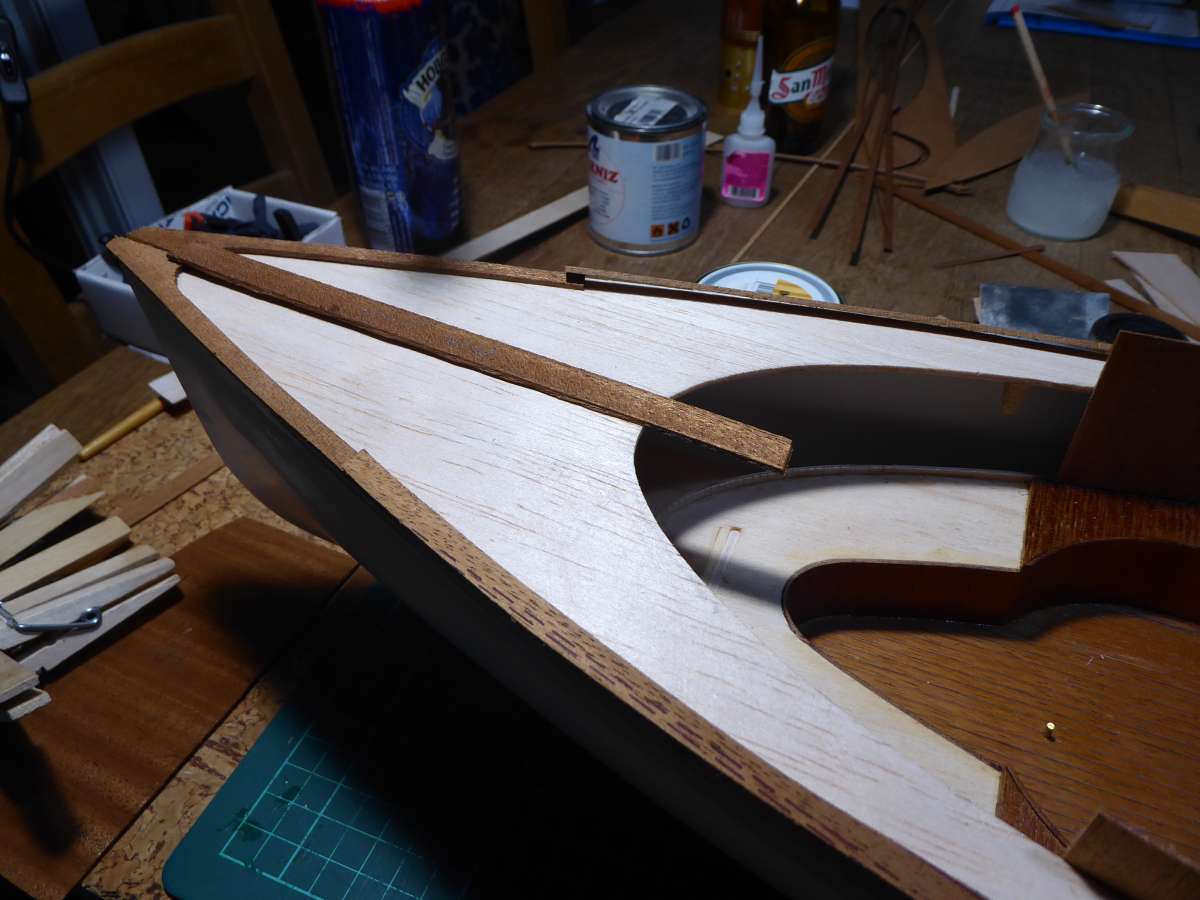
                          While the glue dries there is time to get started on the deck.  It will have a mahogany king plank and also mahogany covering boards.

                          P1010680

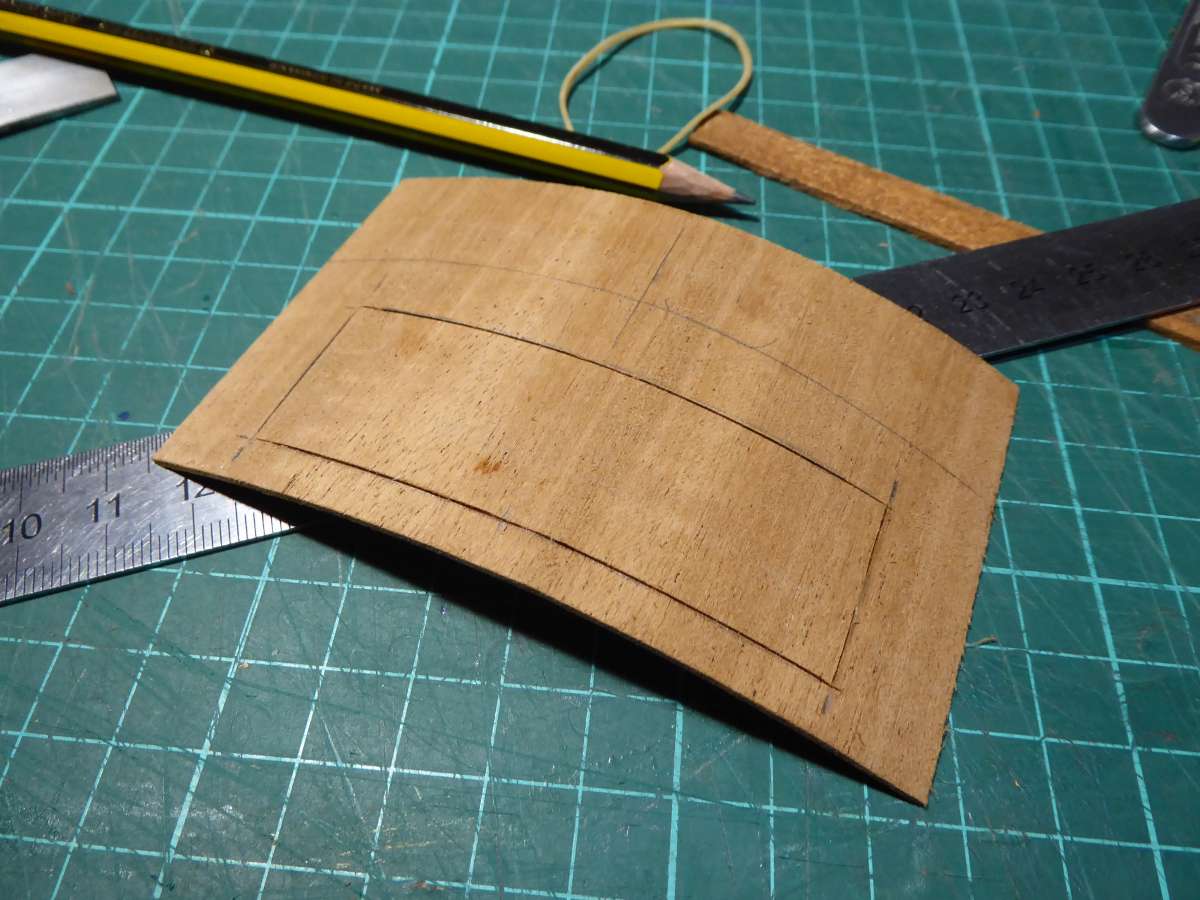
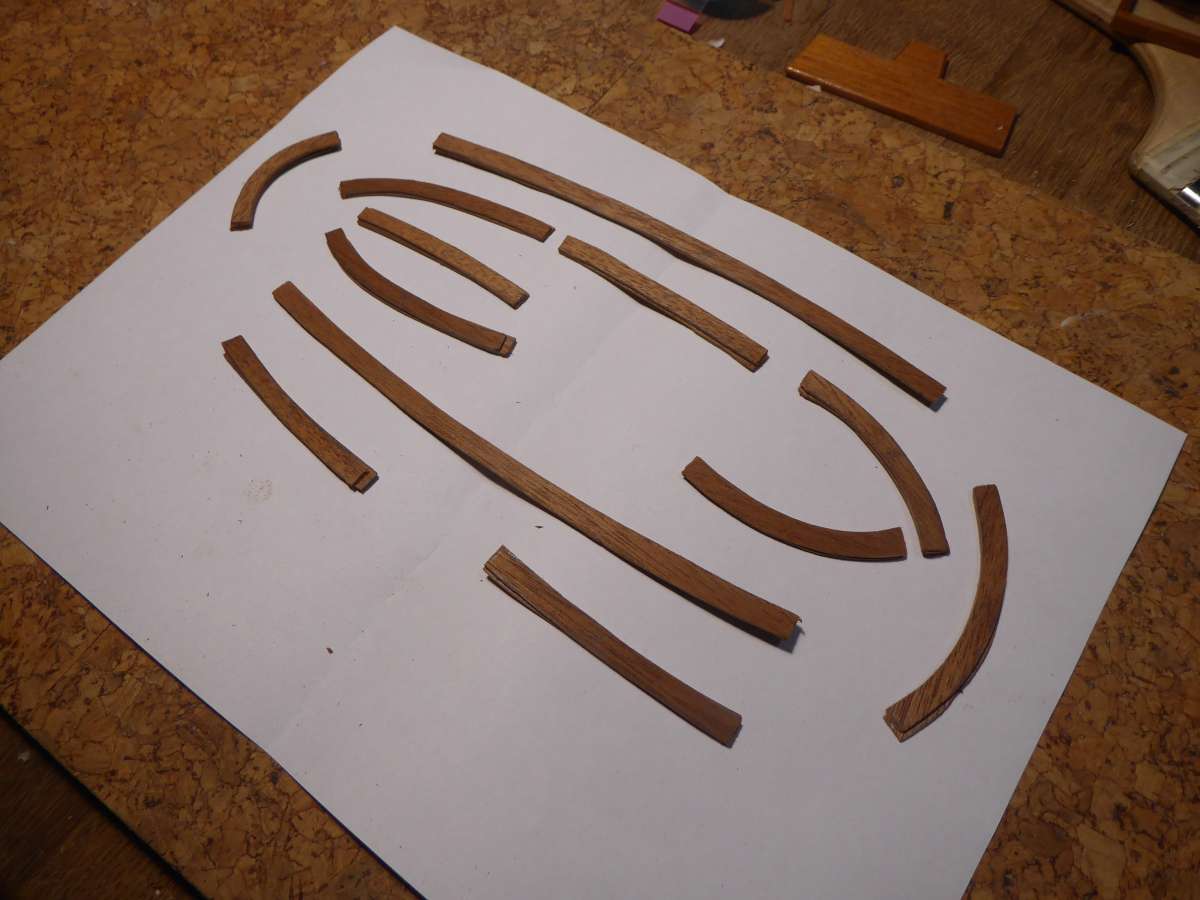
                          Because the covering boards are curved to follow the deck edge, they have to be in sections so that the grain of the woo does not become too short.  The tighter the curve the shorter the sections need to be.  Here are the pices roughed out for the foredeck.

                          P1010679

                          And the same for the aft deck. The bits around the stern are necessarily very short.

                          Tim


                          #120944
                          Richard Simpson
                          Participant
                            @richardsimpson88330

                            Looking very neat Tim.  I’ve used small magnets to hold hatches in place in the past quite successfully.  With small ones like this though if you build the hatch around the coaming you should get a really snug fit that would be enough to keep it in place.

                            These are held by the snug fit only:

                            26-11-16-09KrickAnnaComplete6

                            #120945
                            Tim Rowe
                            Participant
                              @timrowe83142

                              Nice model Richard.

                              The aft hatch on Elliott Bay is a snug fit like yours.  I will go for magnets as you suggest.  I bought some ages ago on Ebay so all I have to do is find them!

                              The kit coaming was plastic and discarded so I built up a new one.

                              P1010684

                              This is the core of the coaming in 1mm balsa.  The shape had to be developed to fit the camber and sheer of the deck and  the varying height of the coaming.  This was not too hard as the balsa was wrapped around and spiled directly off the deck.

                              P1010681

                              This gives a good fit on the deck and the reference for trimming off the internal part of the coaming.

                              P1010687

                              Here it goes around the stern.

                              P1010738

                              The balsa core of the coaming was then finished with mahogany veneer.  Literally fractions of a millimetre thick in order to lay around the curves.

                              Finally the coaming needs a capping.

                              P1040308

                              These were roughed out and the lengths chosen to minimise the short grain.  The planks are doubled-up to give the capping a bit of substance and a generous sanding allowance for finishing.

                              Tim


                              #121111
                              Tim Rowe
                              Participant
                                @timrowe83142

                                I was probably too busy getting superglue off my fingers or worrying about becoming permanently attached to my camera to take photos of the decking in progress.

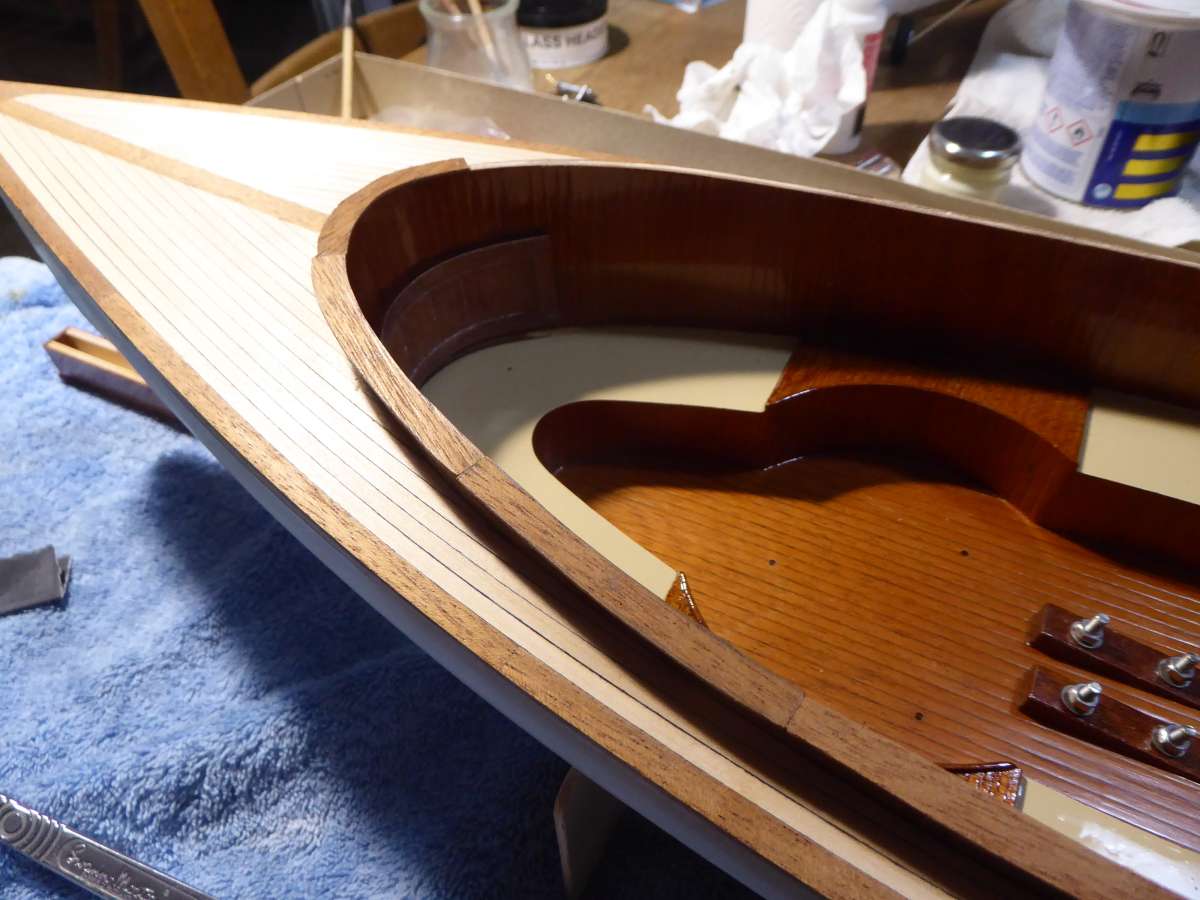
                                The king planks, margins and covering boards were mahogany and the deck planks, I don’t know but some light coloured strips I had from somewhere.  To simulate the black caulking I blacked the edges of the planks with a black waterproof marking pen.  It was a bit of a gamble but I want very fine lines and it worked.

                                The deck is what is called a swept deck where the planks follow to line of the deck edge.  This is very much yacht style as supposed to workboat.  The planking was started from the outside working inwards and each plank was firmly pushed up against its neighbour to maintain the curve and spot glued with rapid cyano.  Once in place, the cyano was run along the edge to full secure the plank.   It was time consuming getting the planks ends to fit nicely and to get a nice join around the coaming.

                                Here is the result

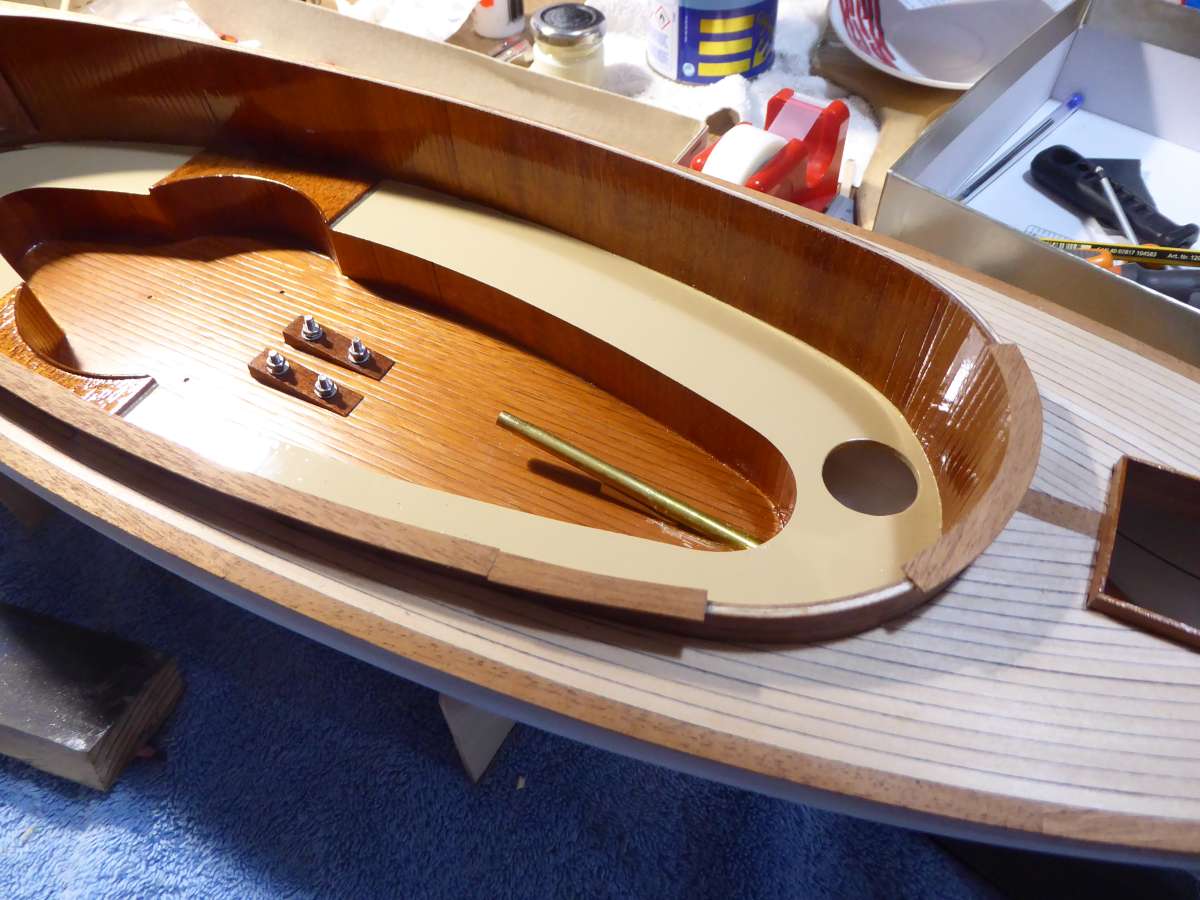
                                P1040317

                                P1040318

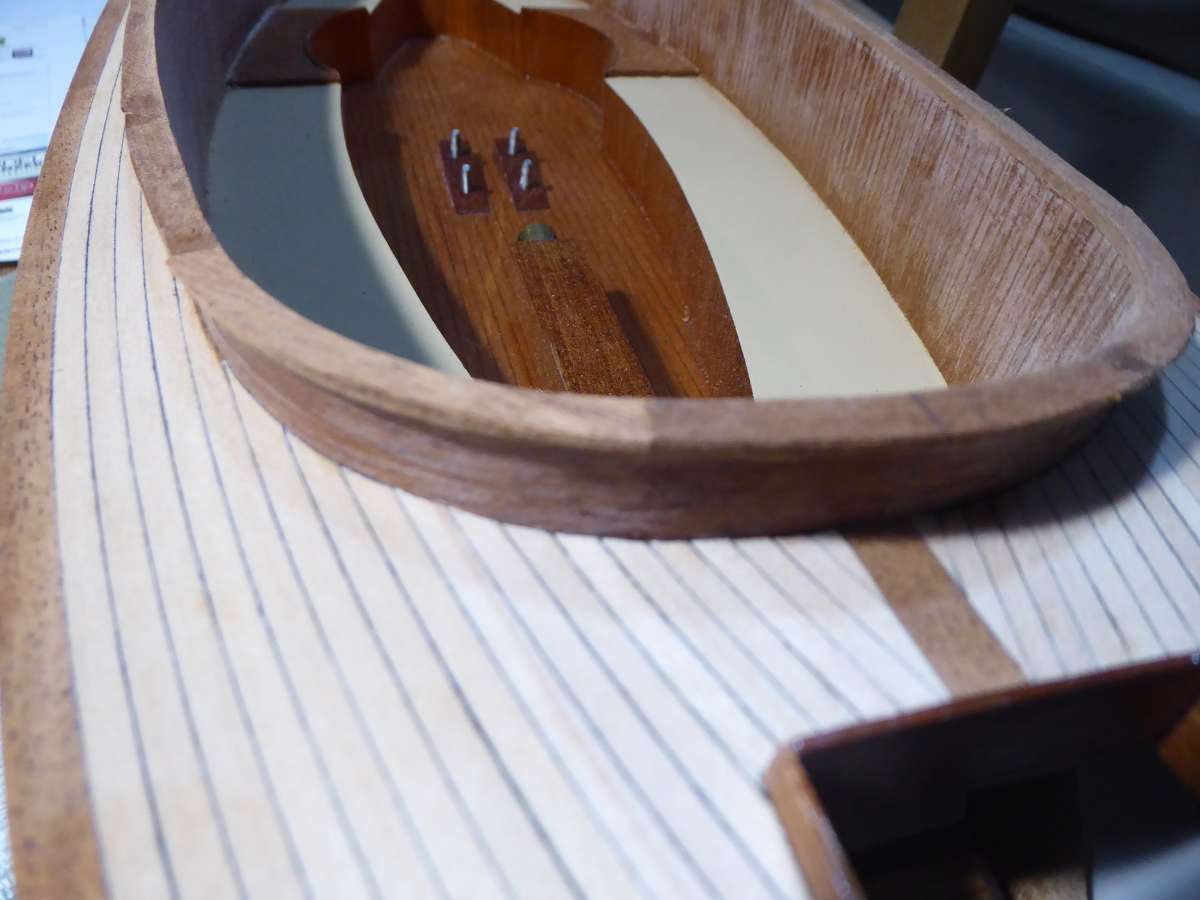
                                The individual pieces for the capping of the coaming  are being trial fitted.

                                Tim


                                #121112
                                Richard Simpson
                                Participant
                                  @richardsimpson88330

                                  Superb job on the decking Tim.  Get a coat of varnish on that and watch it come to life.  She really is looking good.  You can’t beat a display of nicely varnished wood to set off a steam plant.

                                  #121126
                                  Tim Rowe
                                  Participant
                                    @timrowe83142

                                    Thanks Richard, I agree. After varnishing the deck I am toying with the idea of flatting off the planked areas with fine wire wool and just keep the mahogany high gloss.  if it doesn’t work I can always apply another coat.

                                    P1040326

                                    Capping now on and ready for sanding to a nice oval profile.

                                    P1040347

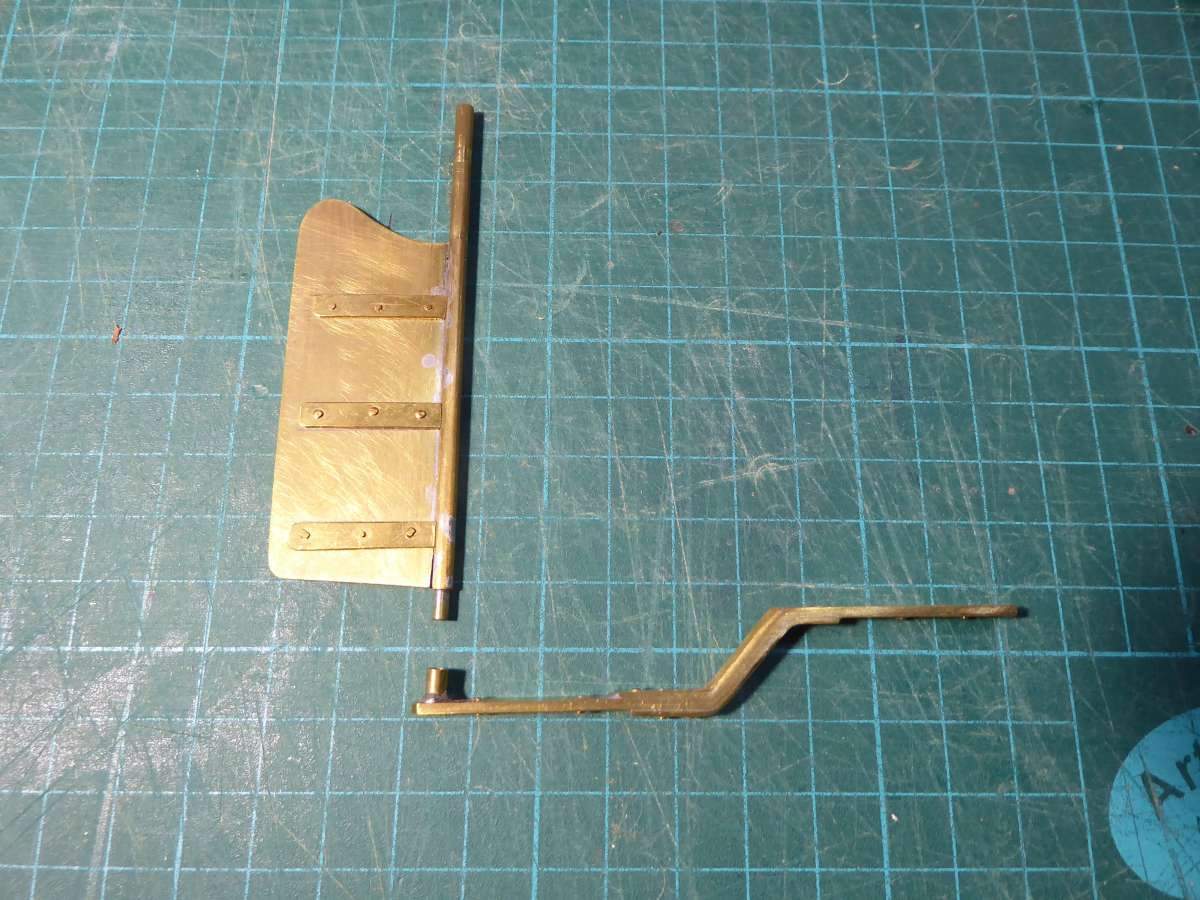
                                    The white metal rudder and skeg supplied with the kit were a bit shabby so Elliott Bay has a new brass rudder and fabricated skeg.

                                    The supplied propeller is quite a nice brass one but is far to large for the tiny oscillating steam engine so I cut two blades off a smaller, 4 blade plastic propeller. I will have to find a photo.

                                    Tim


                                    #121127
                                    Richard Simpson
                                    Participant
                                      @richardsimpson88330

                                      Rudder definitely a huge improvement and probably a good bit lighter.  My preferred varnish has always been a satin finish.  High gloss always seems to look a bit unrealistic on a model for me.  Combinations can work well though, as you suggest.

                                    Viewing 17 posts - 1 through 17 (of 17 total)
                                    • Please log in to reply to this topic. Registering is free and easy using the links on the menu at the top of this page.

                                    Code of conduct | Forum Help/FAQs

                                    Advert

                                    Latest Replies

                                    Home Forums Building Kits Topics

                                    Viewing 25 topics - 1 through 25 (of 25 total)
                                    Viewing 25 topics - 1 through 25 (of 25 total)

                                    View full reply list.

                                    Advert

                                    Newsletter Sign-up