Tiddler by Vic Smeed

Advert

Tiddler by Vic Smeed

Home Forums Beginners Tiddler by Vic Smeed

  • This topic is empty.
Viewing 25 posts - 51 through 75 (of 98 total)
  • Author
    Posts
  • #57215
    Philip Hale
    Participant
      @philiphale

      Right, I have no problem if any of you suggest that I have lost the plot because I changed my mind again.

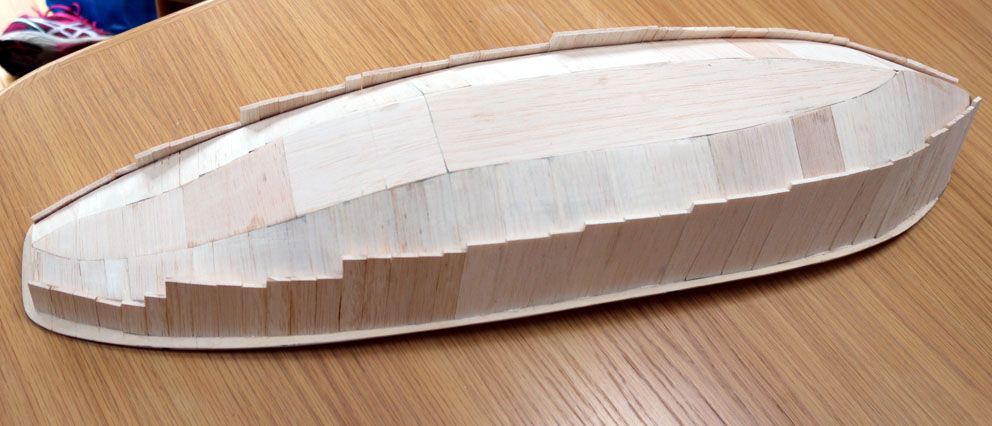
      I had a bit of time to think and I looked at the small amount of 1/16" plywood versus the multiple sheets of 1/8" balsa that I had. Yes – I could easily order some more ply but I did the equivalent of getting back on the horse again and decided to have crack at balsa planking. This was combined with my view that if loads of other guys have made this construction method work – surely I can do it too???

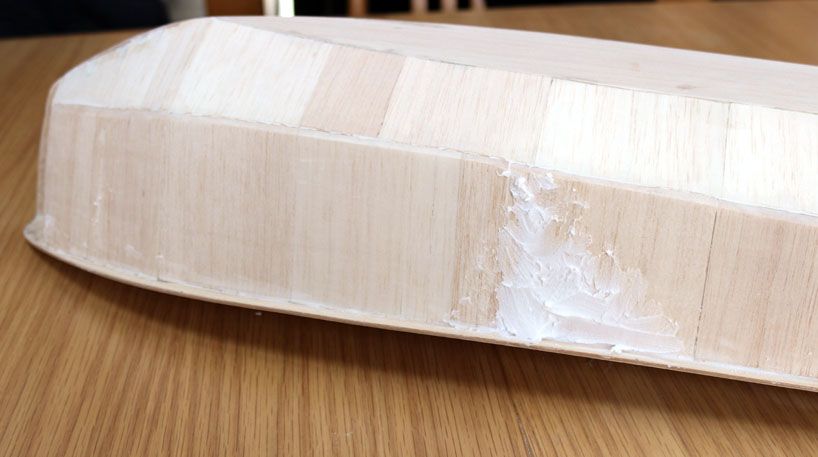
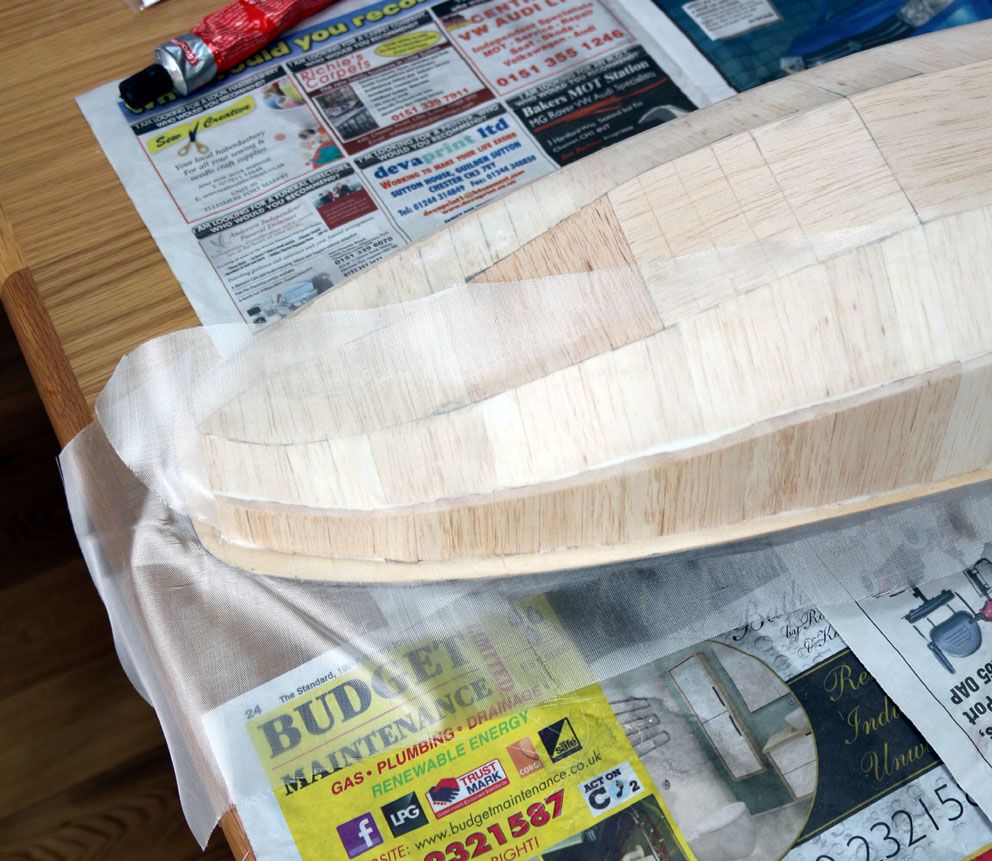
      So here we are. The first shot shows the new embryo hull followed by the filler, a good rub down and application of EZe-Kote resin/ light weight fibreglass.

      I now have a rebuilt hull that appears to be very strong. My next mission is to install the prop shaft and make a brass rudder.

      I might need some help with the paint though. I am a bit nervous about trusting cellulose primer from Halfords – or will it be ok on the Eze-Kote – any opinions would be welcome. My alternative is to find the mini Humbrol spray gun that I bought years ago, give it a good clean and get hold of a modern paint system and a compressor. Again, any opinions would be very welcome.

      PhilH

      new planking - copy.jpg

      filler - copy.jpg

      fibreglass tissue - copy.jpg

      Advert
      #57216
      Paul T
      Participant
        @pault84577

        Hi Phil

        When using a paint that you are not sure of it is best to do a sample test on a scrap piece of balsa, spray it and leave it for 24 hours.

        Try using a Halfords primer/sealer as the first coat.

        Paul

        #57219
        Dave Milbourn
        Participant
          @davemilbourn48782

          Phil

          I have just finished my second Huntsman model and used EzeCote and glass cloth. After a couple of coats of resin on top of the cloth I sanded the hull down with 320 silicon-carbide paper, dusted off and then applied Halfords Primer/Filler from a spray can. This is high-build stuff, yellow in colour, and only needed the one coat, rubbed down, before applying the primer. Again, this was Halfords spray can stuff, as were the gloss coats. It looks pretty damn good – even if I say it m'sen, m'duck! The secrets are to use several thin coats and allow each to dry before applying the next. You can tell if it's dry by sticking your nose right next to it. If you can still smell even a trace of the solvent then it ain't dry enough.

          Dave M

          #57222
          Banjoman
          Participant
            @banjoman

            Hello Phil,

            I do not wish to disparage in any way rattle can paints or discourage you from using them; I have very little personal experience of these anyway. Obviously and as always, Paul T is spot on when he says that one should first test any unkown or doubtful combinations of surface treatments on a piece of scrap before applying them to a model.

            However, as you mentioned that you might at some point be interested in trying out spray gun application of "a modern paint system", I just wanted to say that I have been very happy indeed with the Vallejo Premium RC Color (**LINK**) range of acrylic polyurethane paints. These are primarily intended for r/c car bodies, and are thus tougher and more resilient than most other acrylic model paints. The pigments are fabulous, with an extremely good coverage, and the paints are equally suited to brush and airbrush application.

            Being acrylic, no solvents are involved, so while not odorless they are completely pong free (if you spray them on, though, even with acrylics always wear a good half mask to avoid breathing in miniscule particles of paint).

            The range of colours is much more limited than e.g. Humbrols, but they are eminently suited to mixing, and I have made up a number of shades to suit my needs.

            I have gotten equally good results on GRP, styrene, metals and woods.

            On the disadvantage side, like all acrylics they dry from the outside in, so although they will be dry to the touch within 15 to 30 minutes, real and thorough curing of in particular larger surfaces can, depending on conditions, take several days. Although a previous coat can be oversprayed within hours, I would usually not attempt e.g. masking off before the paint had been left to cure for at least 48 hours.

            They are rather less easy to find than many other model paints, so should anyone wish to try them out, they would probably have to order them online. One webshop in the UK that I know carries them is Model Hobbies: **LINK** who by the way also sells these paints through Amazon UK.

            Again, I am in no way trying to dissuade you from using spray cans, but just wanted to mention this in my view rather excellent range of paints.

            /Mattias

            #57280
            Philip Hale
            Participant
              @philiphale

              Thanks everyone,

              Paul/ Dave – I will have a go using the Halfords products for this build but yes I will definitely prepare a sample before using it on the boat because I'm definitely not planking this frame three times.

              Mattias, Thanks for the links. I will try and find my old mini air brush and clean it up ready for future projects. As stated above – Ill use the spray cans for this job because thinking about it – I only really need satin black, red for the bottom and white for the superstructure. I am a long way from this decision yet but I haven't decided whether to prepare a squeaky clean, just painted appearance for the boat or a weathered, rust streaked look. The airbrush might be handy if I go for the latter.

              PhilH

              #57282
              Dave Milbourn
              Participant
                @davemilbourn48782

                Phil

                Other secrets are to remove all traces of dust before painting (I use a stiff paint brush and then a tack-rag); not to work when the ambient temperature is less than about 15°; shake the can for at least 2 minutes before using it and then every fifteen seconds or so during spraying; hold the can about 9" from the work (any nearer and you'll risk paint runs; further away and it's orange peel), and invert the can and spray to clear the nozzle after each use. Some folk also stand the can in a jug of warm water to maintain the pressure in between coats.
                The two biggest enemies of a decent finish are dust and impatience. It also helps if you stick to one type of paint for the whole job.
                Good luck.

                Dave M

                #61395
                Phil H1
                Participant
                  @philh196021

                  Right I'm back after another period of house decorating etc. You might also notice that I have lost my original model boats profile.

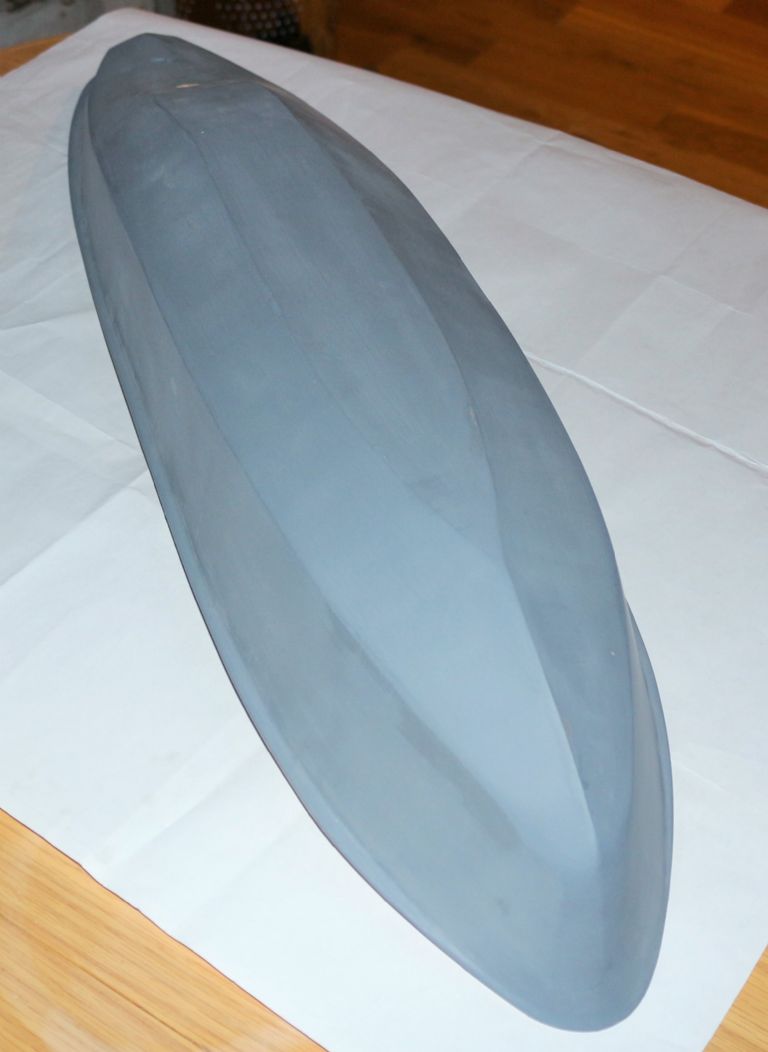
                  Anyway, I did the EzeCote system following Daves recipe and hey presto, a nice smooth bubble free hull that almost looks the part. Ive also added the propshaft and fabricated a rudder from bits of brass. I'll try posting some pictures tomorrow.

                  Nice to be back.

                  PhilH

                  #61417
                  Phil H1
                  Participant
                    @philh196021

                    The original hull with new balsa planking and fibre glass/ EzeCote resin finish. There are now just a couple of areas that need small amounts of car body filler.

                    New hull planking

                    #61418
                    Phil H1
                    Participant
                      @philh196021

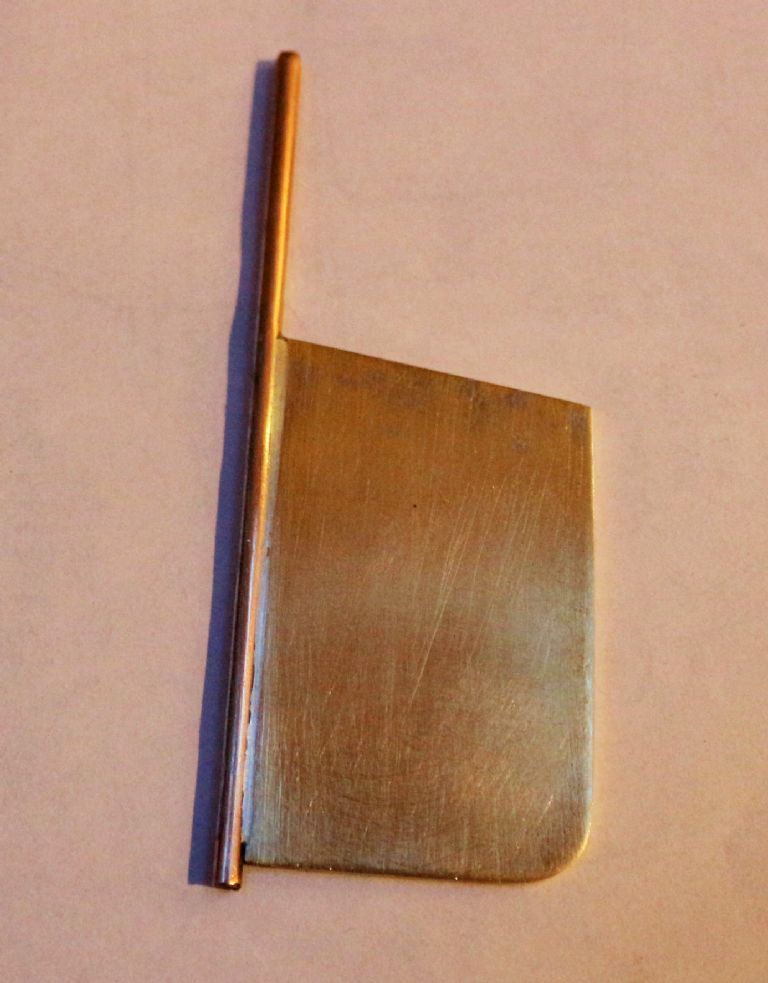
                      The rudder consisting of a 1/8" brass rod soldered to a piece of 16g brass sheet.

                      Rudder

                      #61419
                      Phil H1
                      Participant
                        @philh196021

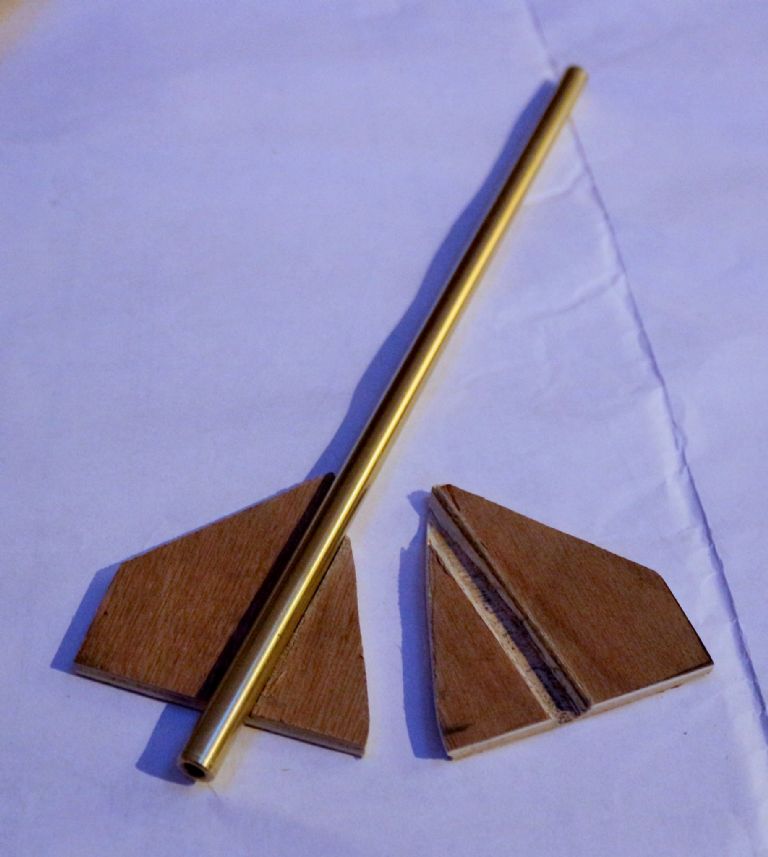
                        The shortened stern tube and its support. The plywood support is slightly different to the model design but I thought it would be less fiddly to use two plywood halves to sandwich the tube. Future pictures will show where it goes.

                        Stern tube

                        #61420
                        Tony Hadley
                        Participant
                          @tonyhadley

                          Welcome back Phil, nice to see you back. Funny how "life" gets in the way of model building.

                          The hull is looking good and looking forward to seeing further progress with the model (obviously as time permits).

                          Tony

                          #61580
                          Phil H1
                          Participant
                            @philh196021

                            Thanks Tony. I now have a couple more questions.

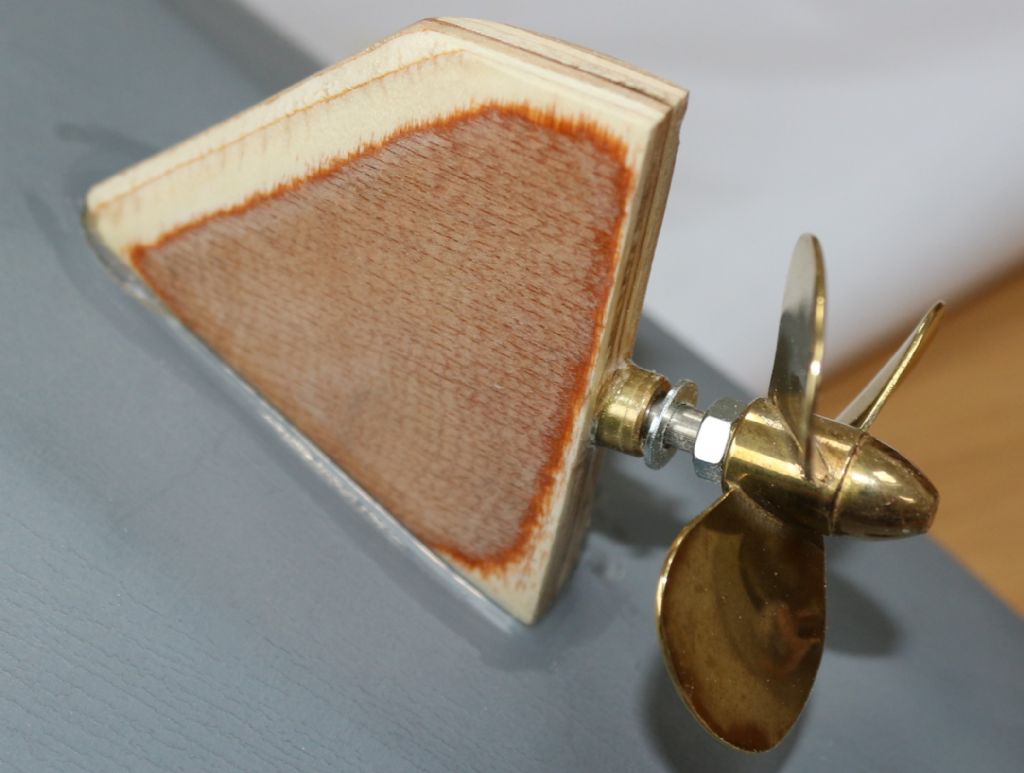
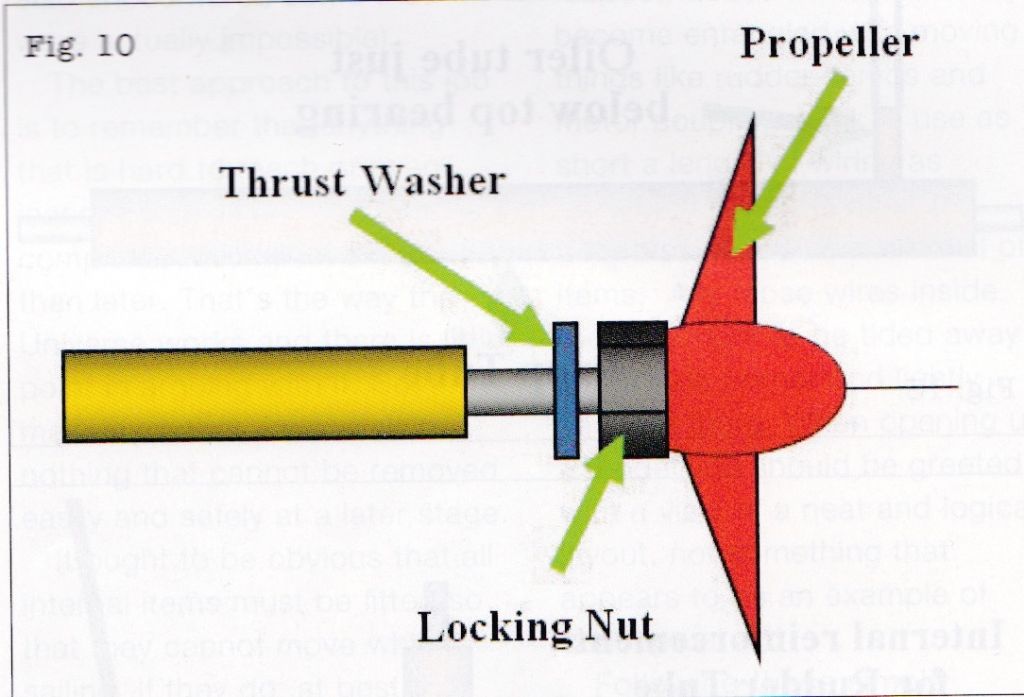
                            Having bought a shiny new 50mm brass propeller….. is this the recommended securing method i.e., prop shaft bearing, washer, locknut and propeller to prevent the loss of the prop in reverse?

                            I think I read this recommendation before somewhere but just thought I'd check because it is obviously diverting from a nice, scale arrangement i.e., the fitters would need a rather large spanner.

                            Prop

                            #61582
                            Phil H1
                            Participant
                              @philh196021

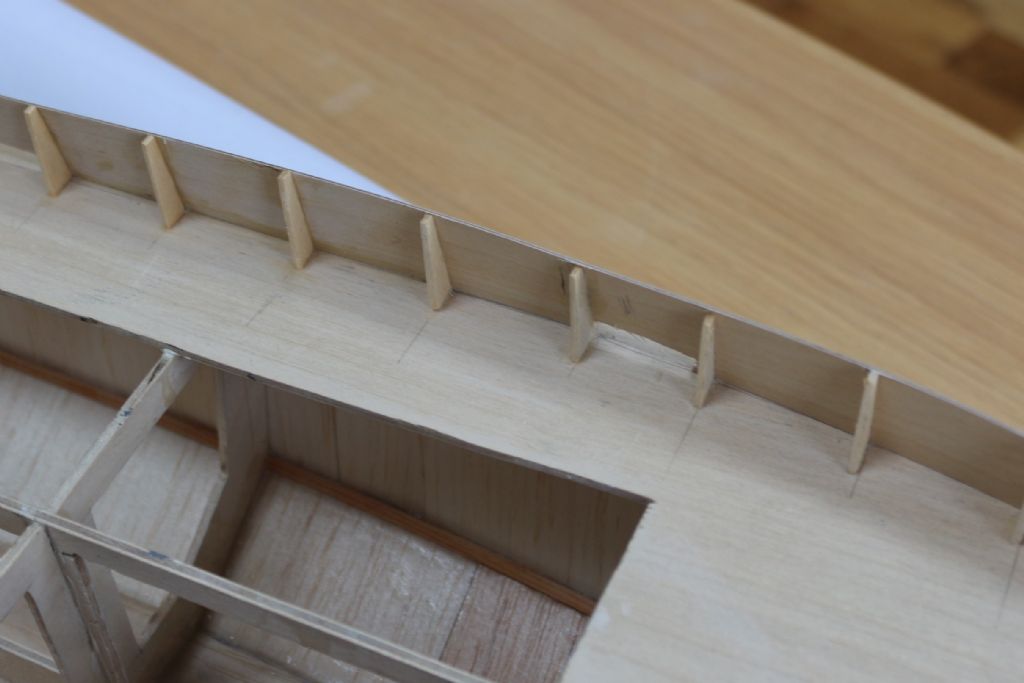
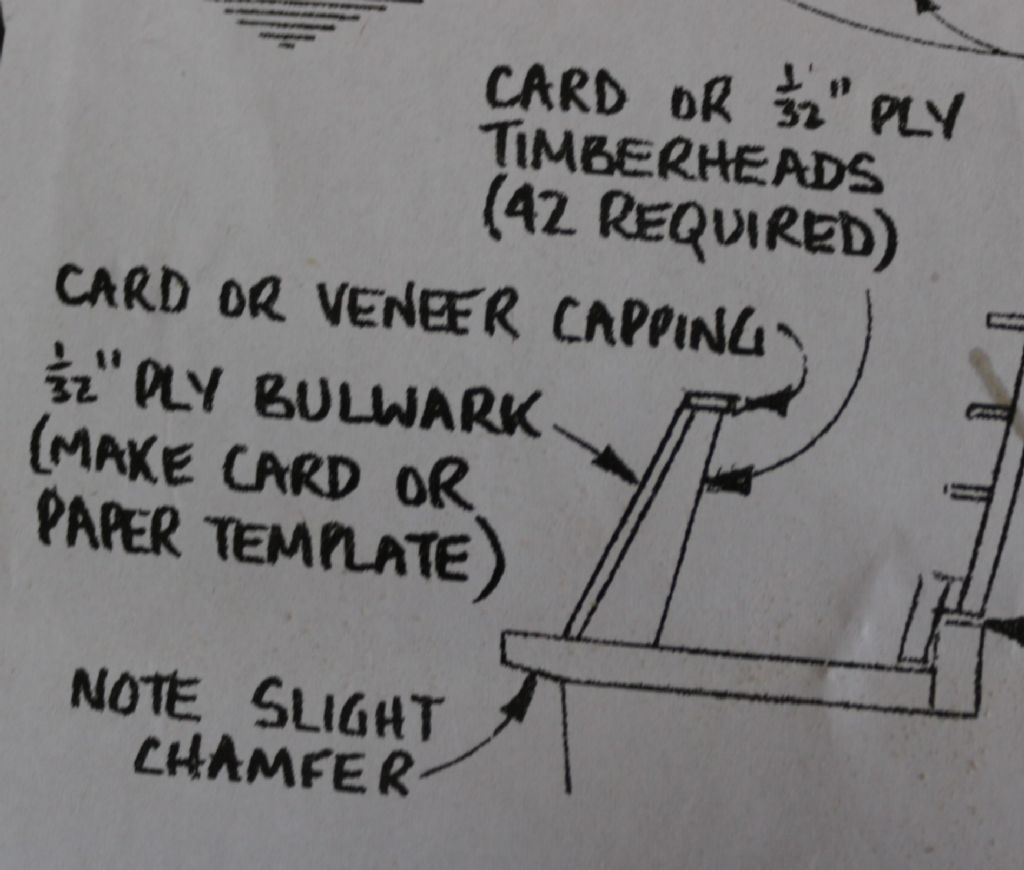
                              Bulwark

                              The second question…… I've managed to add the timberheads and bulwarks (first picture). I have searched for pictures of the TIDs and from what I can see on the grainy pictures off the net, the model drawing (second picture)seems to reflect what is shown on the photographs of the TID fabricated segments i.e., a relatively thin plate is welded onto the top of the bulwark and is flush with the outside of the bulwark but overhangs the timberheads slightly inboard. I know these tugs were built in a hurry but would they not have added a timber cap, handrail type section on top of the plate – sort of oval section or did they just leave the thin plate with relatively sharp edges?

                              Capping detail question

                              #61585
                              Paul T
                              Participant
                                @pault84577

                                Hi Phil

                                They had timber capping's that overhung the rail and enclosed the edges.

                                Paul

                                #61590
                                Tony Hadley
                                Participant
                                  @tonyhadley

                                  In the 2011 Model Boats Construction Special, Glynn Guest wrote an excellent item (Drive Lines) part of the item covered adjusting the thrust. An extract from part of text (Drive Line Adjustment) which Glynn wrote –

                                  "Pushing on the propeller presses the thrust washer at its end onto the lower bearing, pulling on the propeller (i.e. as when moving astern) pull the couplings thrust washer onto the upper bearing. I will suggest that you aim for the smallest amount of 'play' possible by adjusting the coupling and/or the propeller positions on the shaft. Less than a millimetre would be best."

                                  #61591
                                  Tony Hadley
                                  Participant
                                    @tonyhadley

                                    Forgot to post these accompanying drawings –

                                    prop thrust (1) .jpeg

                                    prop thrust (2) .jpeg

                                    #61613
                                    Phil H1
                                    Participant
                                      @philh196021

                                      Thanks Paul. I will make the capping out of strip that is about 1/16 thick. I'll sand it flush with the bulwark and let it overhang the timber heads on the inside just like Vics drawing.

                                      Thanks Tony, i hadn't considered the bit on thrust at this stage. My first issue was to stop the prop from falling off but that additional bit is very helpful for shortening the shaft correctly when I get myself a motor.

                                      Philh

                                      #61618
                                      Paul T
                                      Participant
                                        @pault84577

                                        Hi Phil

                                        I used a strip of teak to make the capping's on one TID because I thought that it would be more in keeping with the full size boats.

                                        I set up my dinky little Dremel router table with what was then a brand new Dremel 200 and square cut tool with the intention of routing out the centre of the handrail so that it would fit snugly onto its base.

                                        Big mistake!

                                        I hadn't forgotten how tough teak can be I just didn't think that a little piece would be a problem especially as I had set the tool to take just 2mm off.

                                        The cutting head lasted less than 15 seconds before it became a smoking ruin and the Dremel 200 was more than a little warm………I hasten to add that the cutting head was also a Dremel product and not one of these cheap things.

                                        I eventually completed the teak handrail by setting up my full size router and cursing my way through the near destruction of a very expensive cutting head.

                                        Next time…if there is a next time..I will use ash or chestnut and a teak stain.

                                        Paul

                                        #61619
                                        Phil H1
                                        Participant
                                          @philh196021

                                          Paul,

                                          I'll avoid the teak then. I have got some strip wood about 3/8" x 1/16". I'll try to glue it on in sections then sand the profile. The strips are light colour bought from a model shop. I suspect they are normally used as planking material.

                                          I think the bulwarks and timberheads have been the trickiest bit on the boat so far.

                                          I notice from the web pictures that these little tugs were definitely working boats that were well worn and well worked. I will probably spray the entire hull including the bulwarks and capping in satin black.

                                          Philh

                                          #61849
                                          Phil H1
                                          Participant
                                            @philh196021

                                            I thought it might be a good idea to look at the drive system. I looked at the motors supplied by Mobile Marine Models and there appears to be two models of motor to go for i.e., the T4A and the T12. There is clearly a huge difference in price and presumably performance.

                                            Is my 30"ish long Tiddler with a 50mm diameter prop likely to be blown about too easily if I go for the cheaper T4A option? Has anybody had the opportunity to compare their performance?

                                            Philh

                                            #61858
                                            Phil H1
                                            Participant
                                              @philh196021

                                              Just spoken with a very helpful chap at Mobile Marine. If I buy from them, they recommend a T12 motor. There was concern that the TID has quite a high superstructure and might suffer from significant wind resistance.

                                              I have also been looking at the battery sizes, and a decent battery, say a 5Ah, 12v sealed lead acid – which also acts as ballast will require surgery (removal of a large portion of the spine) and strengthening to the inside of the boat.

                                              The chap (sorry I didn't catch his name) also suggested a 15A speed controller with a 10A fuse. He went on to suggest a Planet 5 radio.

                                              Does all this sound about right?

                                              Philh

                                              #61861
                                              Colin Bishop
                                              Moderator
                                                @colinbishop34627

                                                For batteries get a suitable NiMH pack from Component Shop. Lots of sizes, voltages and capacities to choose from to suit the space and access available and it will get the weight down lower than a lead acid.

                                                They will even make you a bespoke size if you ask nicely.

                                                Colin

                                                #61863
                                                Phil H1
                                                Participant
                                                  @philh196021

                                                  Colin,

                                                  I can see a 7.2v 5Ah standard pack for about £25. Is that the type of thing you mean but possibly with additional cells?

                                                  Philh

                                                  #61867
                                                  Phil H1
                                                  Participant
                                                    @philh196021

                                                    Colin, I found the catalogue download button and can now see all sorts of options for the batteries. Many will require less if any surgery and yes I've seen the offer for customer packs. Thanks very much.

                                                    It also has a nice table for the brushed motors with many of them at a more comfortable price.

                                                    Philh.

                                                    #61868
                                                    Colin Bishop
                                                    Moderator
                                                      @colinbishop34627

                                                      They are good people to deal with, prices and postage both very reasonable.

                                                      Colin

                                                    Viewing 25 posts - 51 through 75 (of 98 total)
                                                    • Please log in to reply to this topic. Registering is free and easy using the links on the menu at the top of this page.

                                                    Code of conduct | Forum Help/FAQs

                                                    Advert

                                                    Latest Replies

                                                    Home Forums Beginners Topics

                                                    Viewing 25 topics - 1 through 25 (of 25 total)
                                                    Viewing 25 topics - 1 through 25 (of 25 total)

                                                    View full reply list.

                                                    Advert

                                                    Newsletter Sign-up