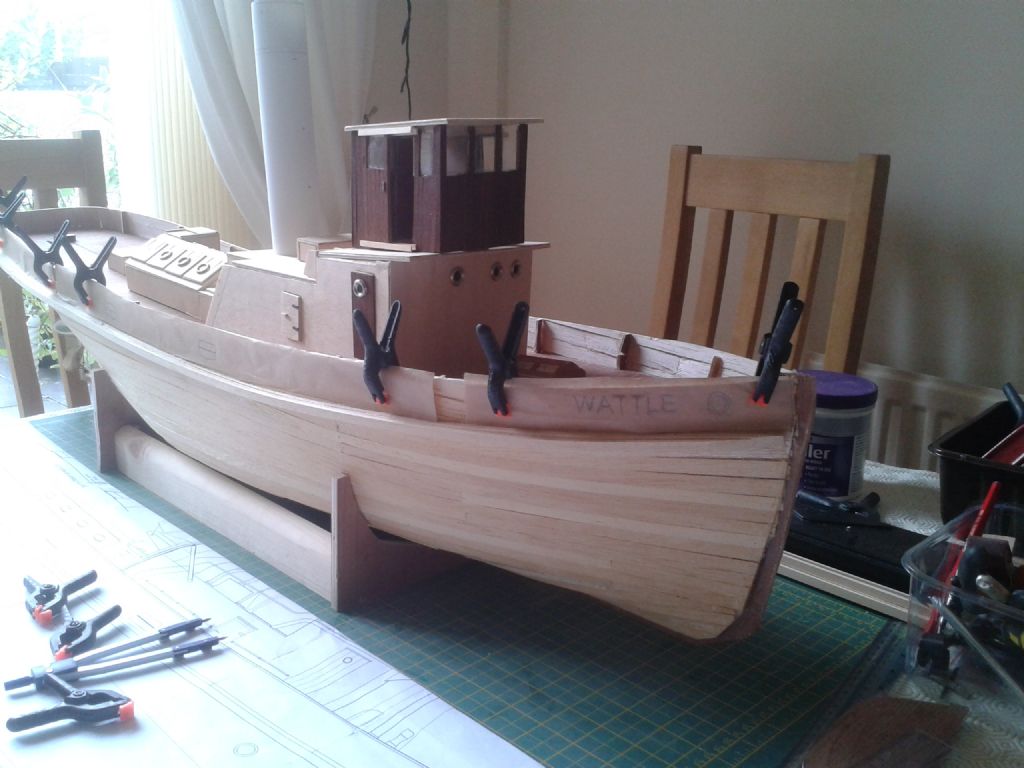
Steam Tug WATTLE

Advert

Steam Tug WATTLE

Home Forums Scratch build Steam Tug WATTLE

  • This topic is empty.
Viewing 25 posts - 51 through 75 (of 380 total)
  • Author
    Posts
  • #50405
    IAN_I
    Participant
      @ian_i

      Thanks Mick..

      port/Starboard lights

      Page one on this thread.. John Parker ( Yabbie1)….said…

      >>There should be stanchions for the railings at the corners of the bridge deck. Somehow I convinced myself that there originally wasn’t, as they would interfere with the running lights (later moved to the top of the wheelhouse). However, it appears the running lights were mounted outboard of the stanchions, overhanging the edges of the bridge deck.<<

      As he got the rubber stamp of approval from the Wattle society…lol

      I can not find a picture of the wattle with fitted lights?

      I will stick with the plan..at the moment.

      Best regards,

      Ian

      Advert
      #50633
      IAN_I
      Participant
        @ian_i

        Slow progress at the moment, with good weather and hols.

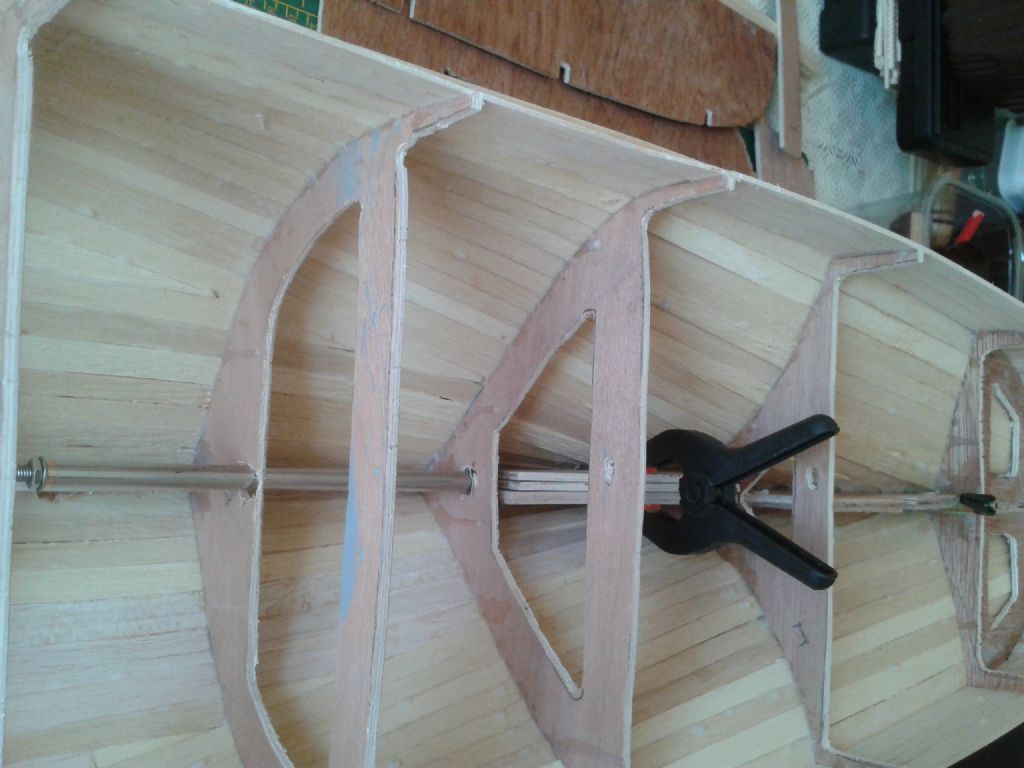
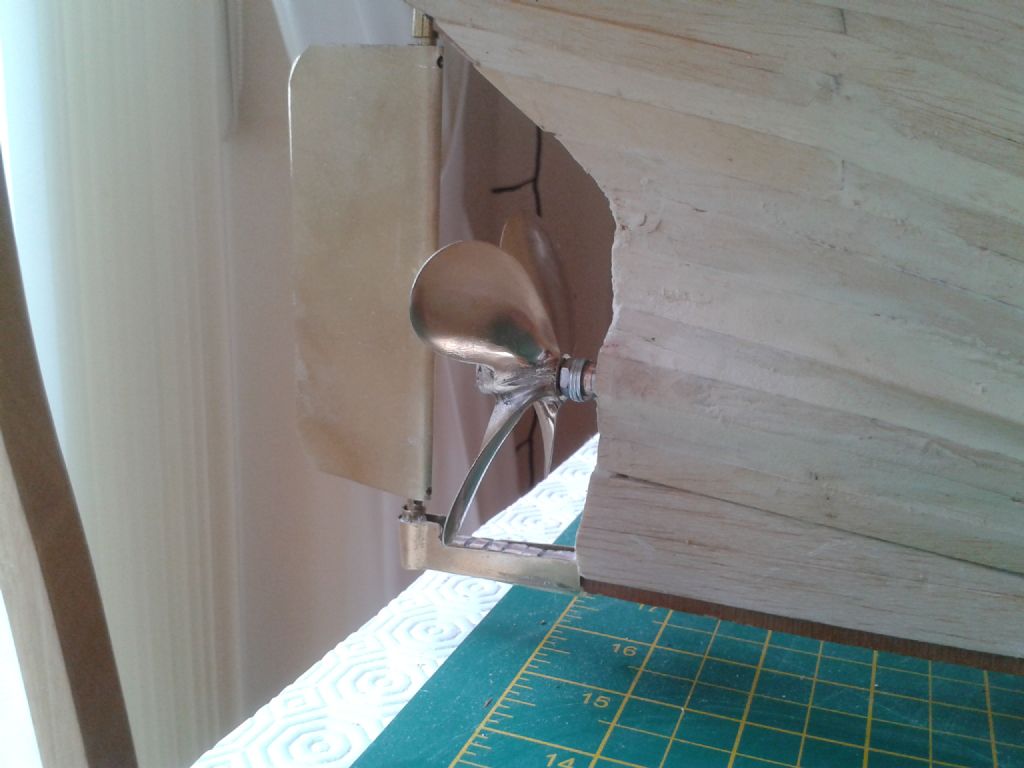
        Prop shop delivery to day so loose fit the shaft and propeller

        To see how it looks…

        shaft1.jpg

        #50634
        IAN_I
        Participant
          @ian_i

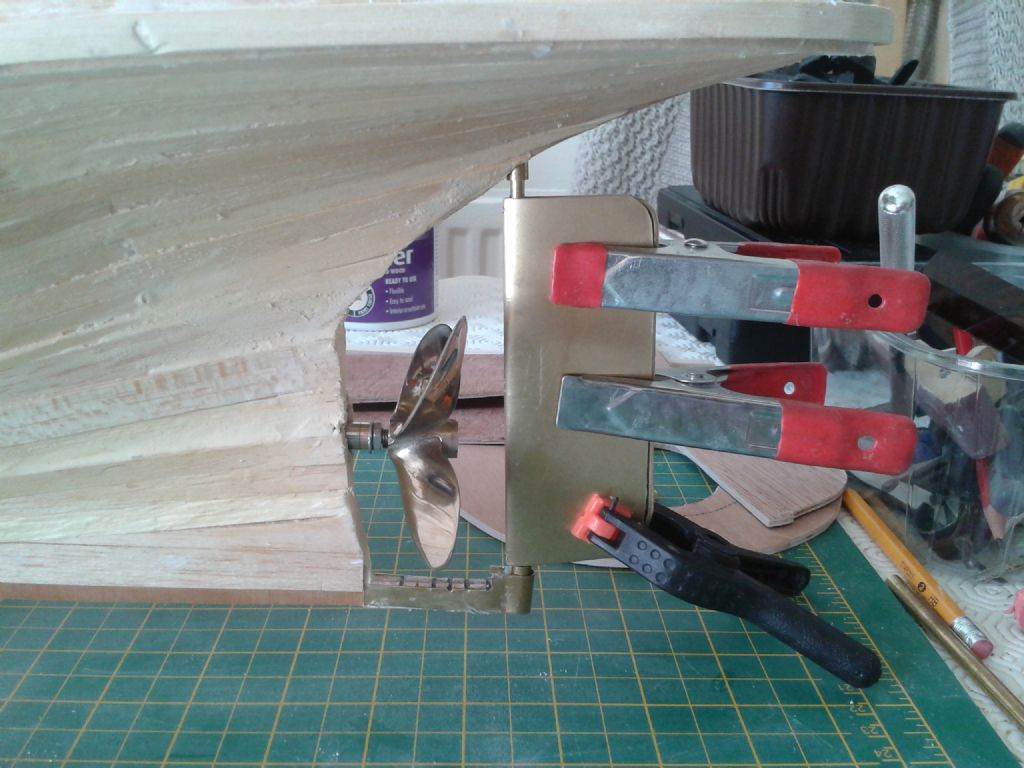
          Brass prop.. and rudder

          rudder and prop.jpg

          #50636
          michael wilkins
          Participant
            @michaelwilkins74576

            good going I am just past this stage have just covered the rudder with some fine glass and epoxy am sanding it down now then its finished,

            started on fitting the motor cut the relevent parts just have to make a bed for it to lie in,

            today later.

            mick

            #50641
            Amy jane September
            Participant
              @amyjaneseptember49770

              Looking good, Ian.

              There's something special about fitting the prop, don't you think? (Especially a shiny 3 bladed brass one!)

              #50665
              michael wilkins
              Participant
                @michaelwilkins74576

                yes even at this stage it begins to look like a boat the prop is excellent a work of art on its own it would look nice on the mantle piece alongside of my old rad cap "the feather in our bonnet" from a guy truck,

                I am just finishing the rudder its ready for primer now then put on the propeller then take a couple of pictures and post them.

                laters

                mick

                #50671
                IAN_I
                Participant
                  @ian_i

                  Hi … Mick and AJ..

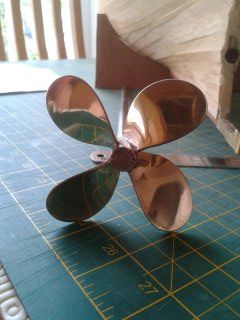
                  The prop is a real looker.. and has 4 blades..

                  4 blade prop.jpg

                  #50672
                  IAN_I
                  Participant
                    @ian_i

                    As you say …AJ there is something about the brass look of the prop.. a bit magpie shiny magic.

                    And to Mick.. you are well ahead of myself and look forward to the pictures.

                    I was that taken with the brass look of the prop, I am assembling a brass plate rudder.

                    Not sure of the end shape of this as the plan only show a side view, don't know if the original rudder tapers?

                    By the way.. Mick… have you any thoughts on the electronics..?

                    will you fit a on off switch box,, to control the lights and battery packs to steam and servo's ?

                    Regards,

                    Ian

                    #50686
                    michael wilkins
                    Participant
                      @michaelwilkins74576

                      aye I spotted the rudder with the brass shim on it, the rudder is indeed tapered to a fine edge also faired on the front edge rounded,

                      yes I am puzled over the electronic side have written in to the magazine but suprize never got a reply, I will be putting a switch box in though for the smoke box and lightsI have a split cable for the smoker and the motor, I notice on the mag article there are 3 switches I can make out,

                      I will ring the magazine to find out why I never even received an acknowledgement and can they ask the man if he would consider an article on wiring the Wattle.

                      mick

                      #50708
                      IAN_I
                      Participant
                        @ian_i

                        Hi…Mick,

                        I think it was Dave Milburn the tech wizard around here that pointed me in the direction of power supplies/electronics and some one else mentioned the Westbourne models for wire diagrams..

                        westbourne-model.co.uk/images/help/

                        I suppose we could ask the man himself, if he has any diagrams of the Wattle wiring?

                        Yaby1 ( John Parker)…. He might be kind enough to share.

                        In Johns article model Boats Winter 2013, he said…

                        Motor used was the T24 (12 to 24v) from Mobile Marine Models.

                        As they say …other suppliers are available….

                        Regards,

                        Ian

                        #50724
                        Yabbie1
                        Participant
                          @yabbie1

                          Mick,

                          I am puzzled and a bit taken aback by your comment, for after being alerted to your posting by the magazine I posted a reply the next day. Have you looked under All Things Floating where you posted your request, under Electronics Help?

                          I repeat what I wrote here to save anyone looking for it, and will try and get around to posting a wiring diagram in a few days – I didn't do one at the time.

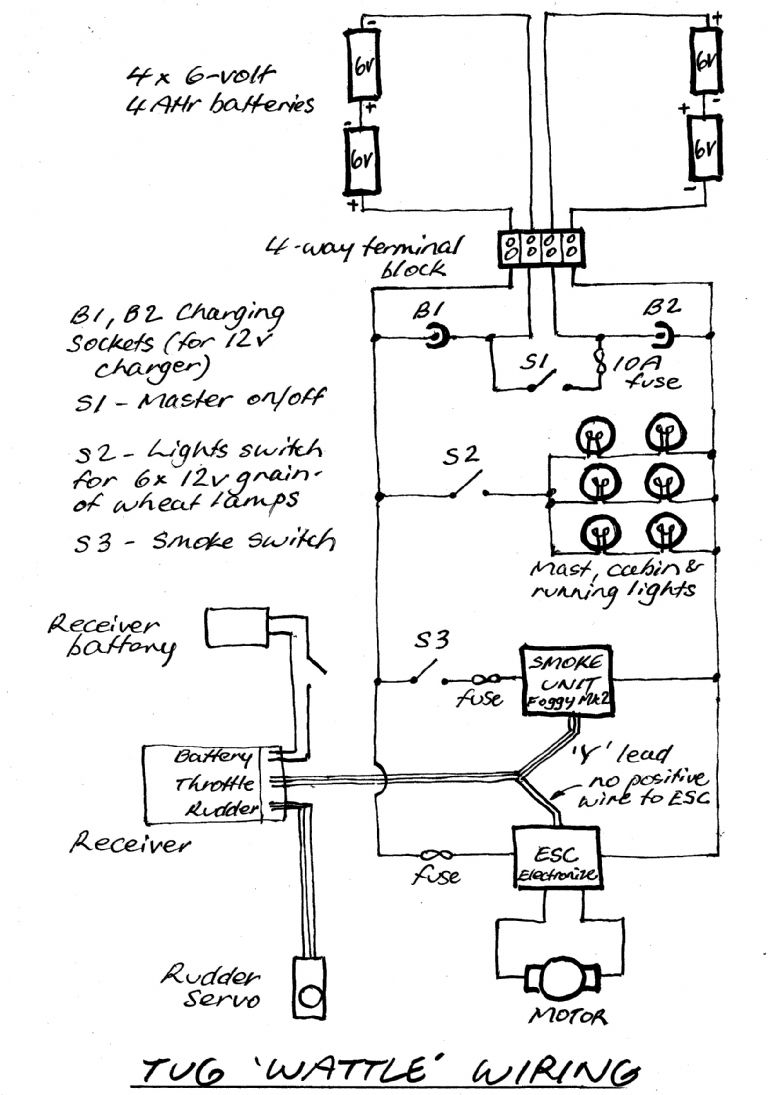
                          Assuming you’re using a 24 volt system, the four 6 volt batteries (which can be held down with zip ties, join two together if they’re not long enough and thread through holes in the battery tray) are connected as two 12 volt batteries (two series pairs). Connections are made to two recharging sockets so that they can be recharged separately with a 12 volt charger. The main on/off switch, on a panel under the engine house, puts the two 12 volt pairs in series for the main 24 volt supply.

                          Wiring of the motor and speed controller is then straightforward, as per the Electronize instructions. In this case I used a separate 4.8 volt battery for the receiver rather than make use of the speed controller’s BEC function (there’s a lot of voltage to drop), so I disconnected the red wire on the speed controller to receiver lead.

                          A nebuliser smoke generator like I used also requires 24 volts, it gets this via an on/off switch on the switch panel via a 1 amp fuse, as per the Foggy Mk II instructions. It also plugs into the throttle channel of the receiver via a Y-lead to sense the motor speed.

                          Lights are 12 volt grain of wheat incandescent ones, I think they look better than white LEDs on a model like this. They are connected in series pairs to allow them to run from the 24 volt line. For example, if you have 6 lamps, connect them so that you have three parallel branches, each consisting of two lamps in series. Either use another switch to turn these on or off, or do it remotely using one of the receiver channels and an RC switch such as the Dimension Engineering Pico Switch.

                          Sound systems requirements vary a lot. If yours requires 12 volts, you can tap the main supply to provide this. Other voltages may require a separate battery or suitable voltage regulator. Most require a separate RC switcher to turn the sound on or off, for, say, a horn. An engine sound could be switched manually or via RC, and will likely also have a connection to the throttle channel to synchronise the sound to the speed.

                          Yabbie1/John

                          #50746
                          IAN_I
                          Participant
                            @ian_i

                            Hi John…

                            Many thanks for the input on the components for this model tug boat Wattle, of your design.

                            It answer lots of questions on the make up and design features and will help with the assembly.

                            Best regards,

                            Ian

                            #50750
                            michael wilkins
                            Participant
                              @michaelwilkins74576

                              Hi! John, sorry I never found it, but alls well that ends well looking forward to seeing anything on the wiring,

                              I have acquired all that you recommend in the mag article, so far the only thing thats required is to swap the led lights that I have which are the yellow ones which supposedly look more like the old oil lamps and a battery for the electronize speed control,

                              you make it sound so easy but I am a numpty with electronics so thank you so much for coming back,

                              all the best

                              mick

                              #50784
                              Yabbie1
                              Participant
                                @yabbie1

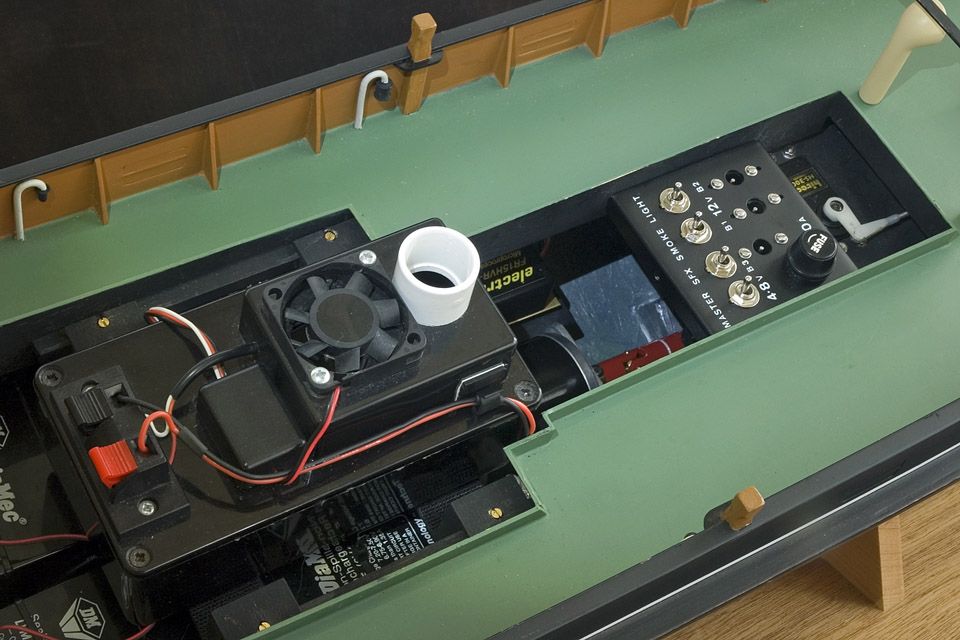
                                Okay Wattlers, here's a wiring diagram, scrappy alas but it shows the arrangement. The only unusual aspect is having 4 x 6 volt batteries instead of a single drive battery. The article photo showing the switch panel got trimmed a little tight, so here is the full photo. The panel lifts out for access below to the coupling etc. I also fitted a switch and speaker for a sound system but have not yet decided on what to fit. The Wattle's engine is so quiet they tell me you can have a normal conversation whilst standing alongside it in the engine room, so perhaps you only need a good steam whistle. Finally, re the running lights, I found a photo showing them mounted outboard of the bridge deck. Alas the archive drawings I worked from only had a side elevation and did not reveal this.

                                wattle switch panel.jpgwattle wiring.jpgcompass swing 1936.jpg

                                #50786
                                IAN_I
                                Participant
                                  @ian_i

                                  Hi John…

                                  That is great… many thanks for your time and explanation of the wiring.

                                  It is a great help to me and explains how to move forward on the layout.

                                  Also thank for the added bonus of the Wattle picture.

                                  Best regards,

                                  Ian ( Wattler2)

                                  #50918
                                  michael wilkins
                                  Participant
                                    @michaelwilkins74576

                                    Hi! John, if you can remember where you acquired the battery charging sockets you show on the picture of Wattle could you point me in the right direction "please" I have been trawling all the model boating sites and no one seems to have anything that I could find 2 days almost glued to the computer searching not a blimp can I find except much bigger items,

                                    cant remember if I mentioned it but I have made a battery tray am looking at lining up and setting the motor in it looks almost parallel to the keel so wont be too hard,

                                    are you on with anything just now, I have two small models in mind a Pollpero gaffer and and another similar, I would like to build a Scaffie a working one though,

                                    regards

                                    mick

                                    #50919
                                    Yabbie1
                                    Participant
                                      @yabbie1

                                      Mick, you need to go to an electronics shop and buy a couple of DC power chassis mount sockets and matching plugs, very commonly used for power supplies and so on. See: **LINK** and its variants – this shop is in Melbourne, but you would have something similar locally. They have a central pin that the plug goes over, with the other contact being the surrounding sleeve, coaxial style.

                                      Yes, I'm working on other models, but my lips are sealed – keep reading Model Boats! Because of this I'm afraid I can't spend much time on the forum, just look in from time to time. Good luck with your build.

                                      Yabbie1

                                      #50935
                                      michael wilkins
                                      Participant
                                        @michaelwilkins74576

                                        have to have a gigle as its a 200 mile round trip to the nearest Maplins in Glasgow,

                                        I have a subscription to both model mags so not to miss anything juicy,

                                        thanks for taking the time to answer,

                                        all the best

                                        Michael.

                                        #50945
                                        IAN_I
                                        Participant
                                          @ian_i

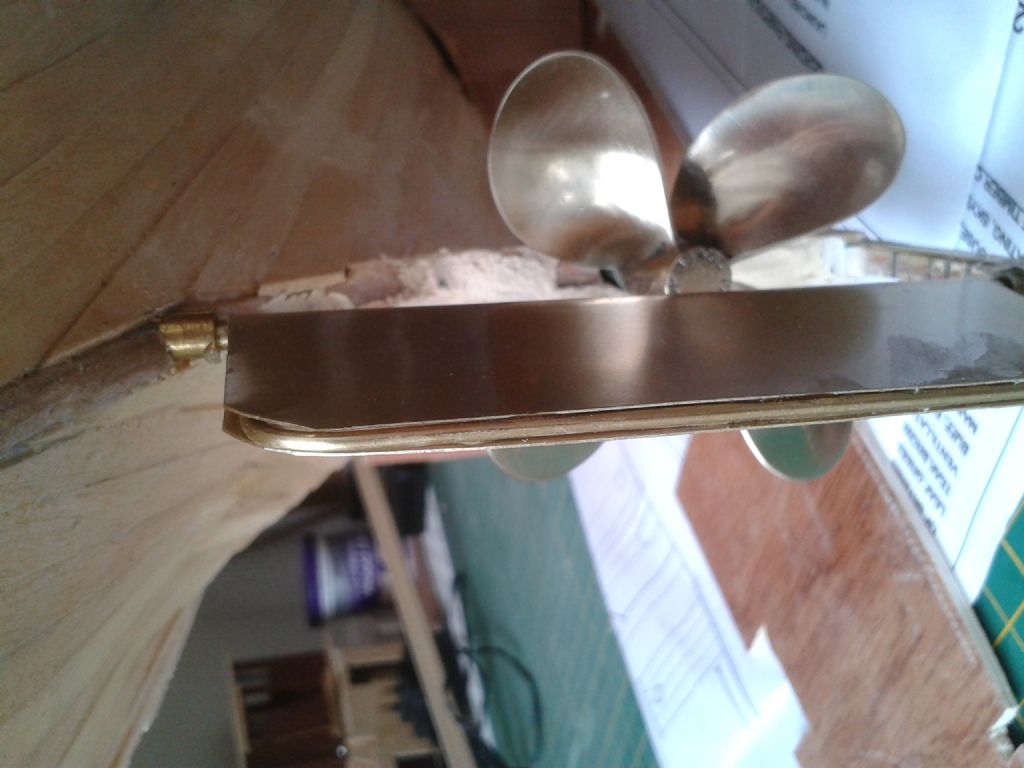
                                          more pics of the rudder and prop assembly…

                                          rudder1.jpg

                                          #50946
                                          IAN_I
                                          Participant
                                            @ian_i

                                            rear view rudder and prop..

                                            rudder2.jpg

                                            #50947
                                            IAN_I
                                            Participant
                                              @ian_i

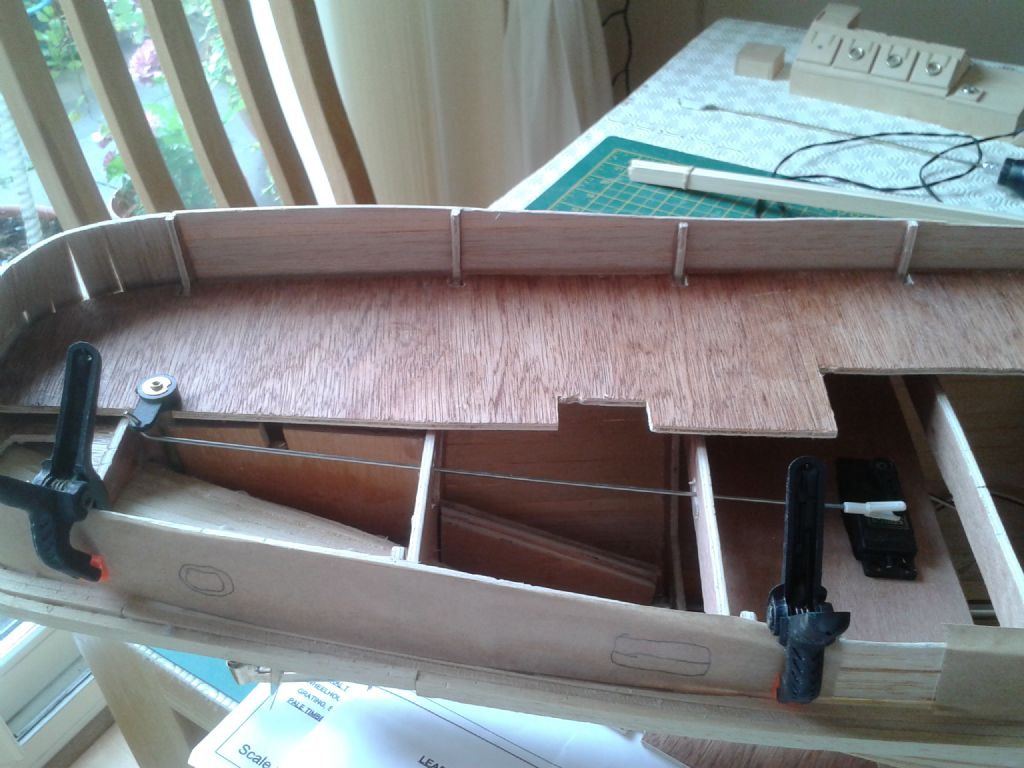
                                              rudder and servo link..

                                              rudder drive1.jpg

                                              #50948
                                              IAN_I
                                              Participant
                                                @ian_i

                                                mapping port holes…

                                                port hole1.jpg

                                                #50951
                                                michael wilkins
                                                Participant
                                                  @michaelwilkins74576

                                                  WOW YER SKIPIN ALONG FINE THERE i HAVE JUST MADE A BATTERY SHELF AND PUT THE SPONSON ROUND THE HULL, sorry for shouting didnt realize it was on cap lock LOL!,

                                                  have to line up the motor and fix it in then the servo,

                                                  will you be filling the rudder in round edges?,

                                                  John sent me a link for the charging sockets but its sold out an cant find anything that resembles the one he sent! but there is a smaller one 2.2 not 2.5.

                                                  I was suprized how easy it was to get the strips around the stern but I have built a few guitars and I did it the same way we make the linings just cut a strip roughly to length then mark of around the curves and put a saw mark every 1/8" it bends round a treat no problem,

                                                  laters duty calls

                                                  mick

                                                  #50954
                                                  Amy jane September
                                                  Participant
                                                    @amyjaneseptember49770

                                                    Ahh She's coming to life, Ian. And a pleasure to watch it is too.

                                                    I wouldn't give you tuppence for the modern gin palaces, but these old girls had soul!

                                                    #50957
                                                    IAN_I
                                                    Participant
                                                      @ian_i

                                                      Hi Mick..

                                                      I m skipping alone but have to back track every so often, its the way i have learn to build in this fascinating hobby.

                                                      I like to see the scale is ok and things are positioned in the correct place.

                                                      I will take the deck off and go back to assembling the motor and battery trays.

                                                      The rudder will be round edged as in the plan, this is all to be fixed at a later date, once I start sanding and filling.

                                                      Then the slow process of water proofing and painting.

                                                      Because of the drying time and painting, I have already been eyeing up the sister tug Craig, John has plans and info on this build in the winter 2008 model boat mag.

                                                      The strips round the stern, I did exactly as you … wet them after small cuts along the edge and a little het to help with the bend.

                                                      Johns help with the components and wiring is great and will as you look into the ordering of the switches and all

                                                      when I can, they might be back in stock by then…lol

                                                      Ian

                                                    Viewing 25 posts - 51 through 75 (of 380 total)
                                                    • Please log in to reply to this topic. Registering is free and easy using the links on the menu at the top of this page.

                                                    Code of conduct | Forum Help/FAQs

                                                    Advert

                                                    Latest Replies

                                                    Home Forums Scratch build Topics

                                                    Viewing 25 topics - 1 through 25 (of 25 total)
                                                    Viewing 25 topics - 1 through 25 (of 25 total)

                                                    View full reply list.

                                                    Advert

                                                    Newsletter Sign-up