MM337

Advert

MM337

Home Forums Scratch build MM337

Viewing 25 posts - 26 through 50 (of 95 total)
  • Author
    Posts
  • #122386
    Ray Wood 3
    Participant
      @raywood3

      Hi Cheddar,

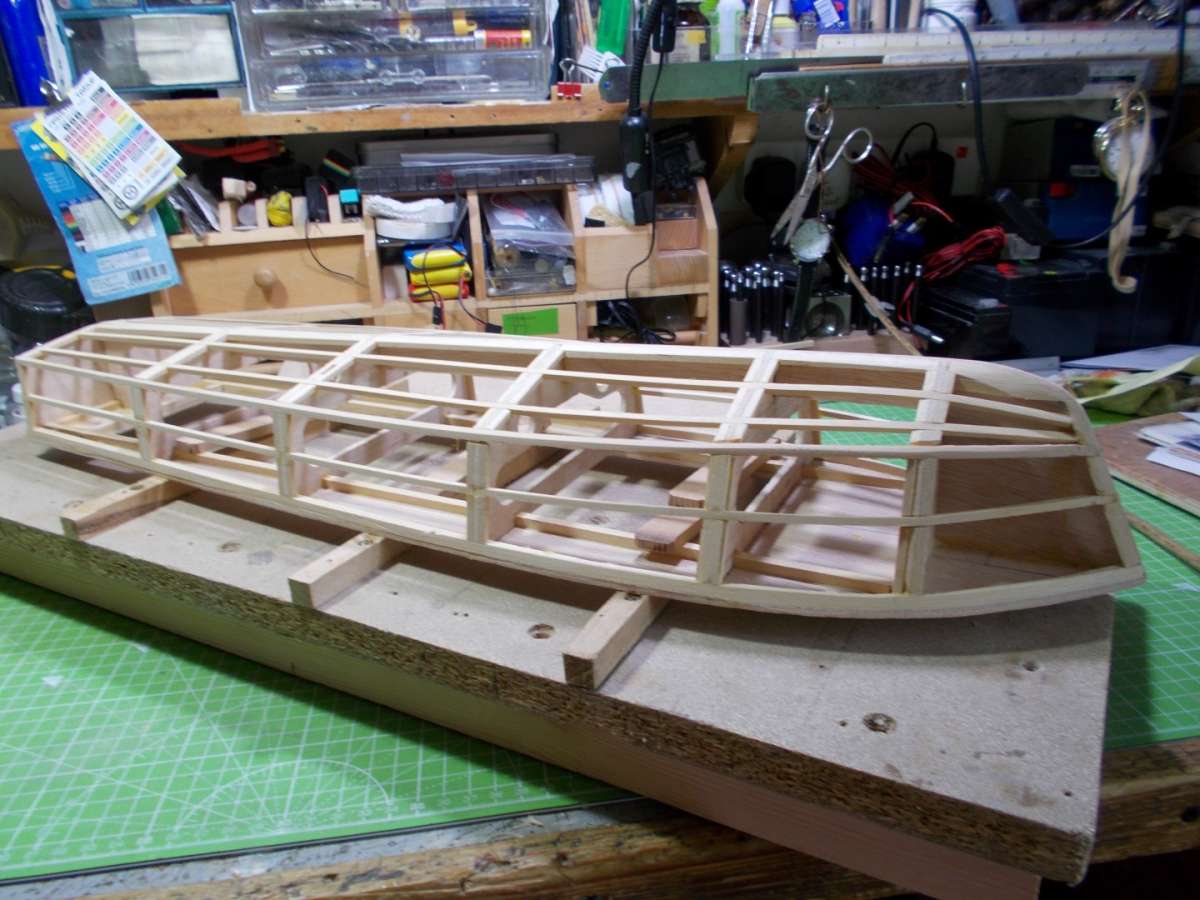
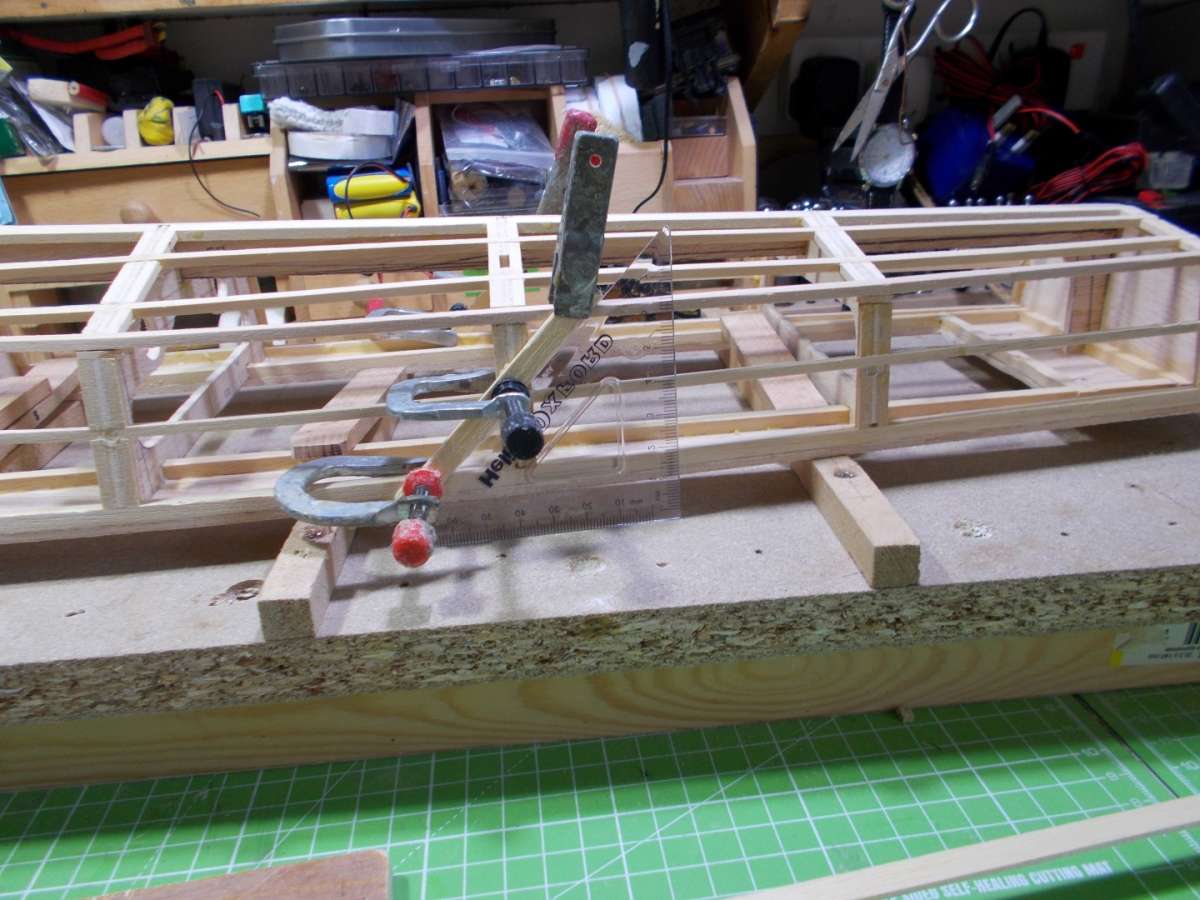
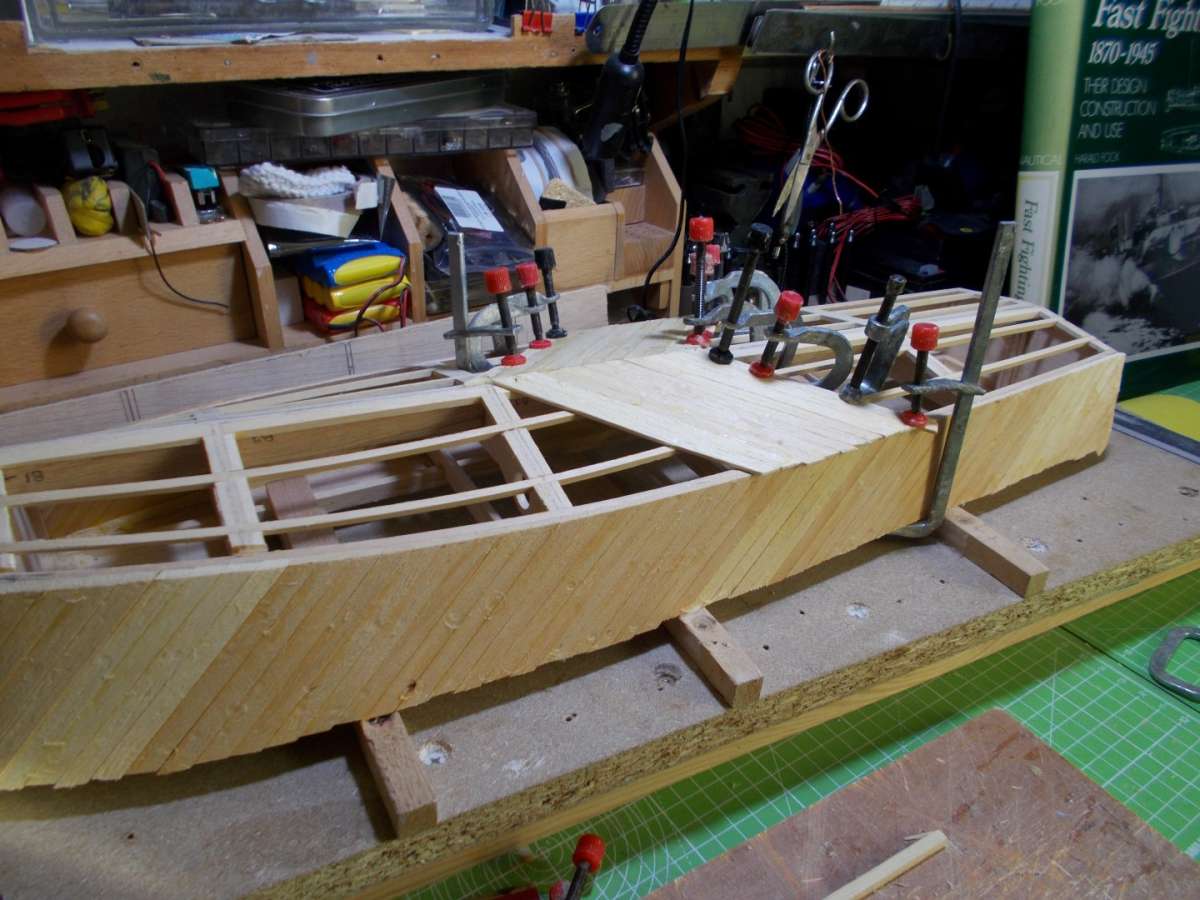
      As the bottom & sides are slightly concave a single sheet of ply won’t like being a compound curve, double diagonal planking is much better 2 layers of 1/32″ ply , and that’s the fullsize practice 🙂

      White Marlin build thread may help.

      Regards Ray

      Advert
      #122390
      John W E
      Participant
        @johnwe

        hi there

        If you are going to go down the route of diagonal planking; it may be advisable to add one or two more stringers.   Do this down the length of the hull, mainly on the bottom and possibly a short stringer on the side.

        Couple of pictures here, just to show how I have diagonally planked my latest model.

        I used 10mm x 1.5mm obechi strip for the planking.

        John

        BLOOD 4 (1) (Large)BLOOD5BLOOD 7A (Large)

        #122411
        cheddar24man
        Participant
          @cheddar24man
          #122412
          cheddar24man
          Participant
            @cheddar24man

            Just a quickie, what is the real colour Battleship Grey?? Apart from going to the MOD, is it out there somewhere?

            Also, should one paint (my MTB) matt or gloss?


            #122413
            John W E
            Participant
              @johnwe

              https://www.whiteensignmodels.com/c/British+Royal+Navy/1260/1/mtb2 (2)mtb2 (1)hi there

              This may be of help to you to choose the paints for your model.

              Two scans which I will try and put on –

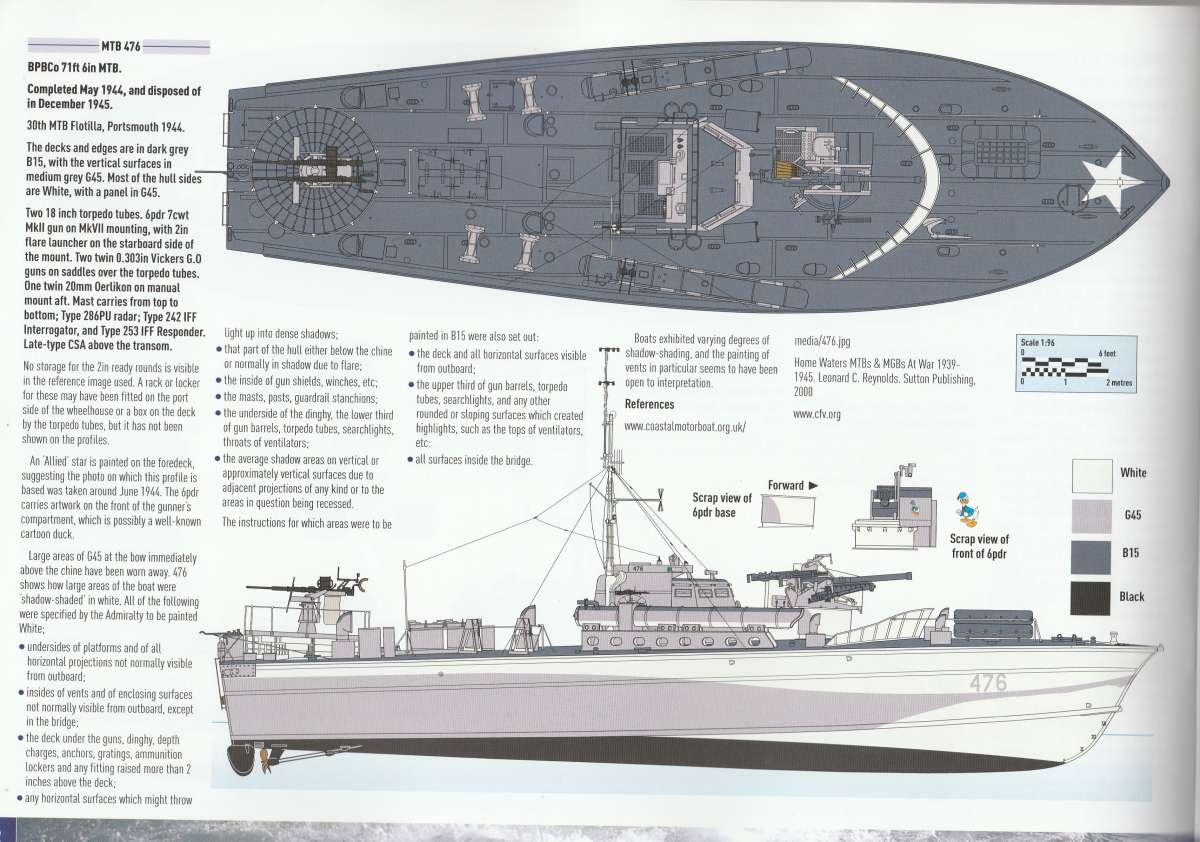
              one is hopefully of your finished model; and it should give you an idea of the colour scheme.  This comes from a book ‘British Motor Torpedo Boats 1939 to 1945 – by Tony Bryan’.

              The other one is of a British Power Boat MTB – this scan you will note has a colour chart beside it; but, sadly it doesn’t pick up the true colours.   You will see there are codes beside the scan =

              white colour (standard ) – mat

              G45 is a grey colour code mat

              Blue colour B15 – mat

              Black for the hull bottom mat

              Then generally I personally give my models a coat of satin varnish – from either the Humbrol or Tamya range of paints.

              This seals all of the colours in.

              For where you want to purchase your colours – sadly I don’t think the Company – White Ensign paints are in business now.  They do have a colour chart though, on their website, which will help you a lot in your choice of colours.

              So here goes; will try and put the links in.


              #122415
              Ray Wood 3
              Participant
                @raywood3

                Hi All,

                I must confess I use Halfords grey primer for my MTB main colour 🙂

                Regards Ray

                #122418
                Colin Bishop
                Moderator
                  @colinbishop34627

                  Agree with Ray, that is a good option. Maybe then spray with Halfords Satin Lacquer as gloss rarely looks right on a scale model.

                  Colin

                  #122420
                  cheddar24man
                  Participant
                    @cheddar24man

                    I like that guys!! Double coat and a decent colour!! Thanks.

                    #122427
                    cheddar24man
                    Participant
                      @cheddar24man

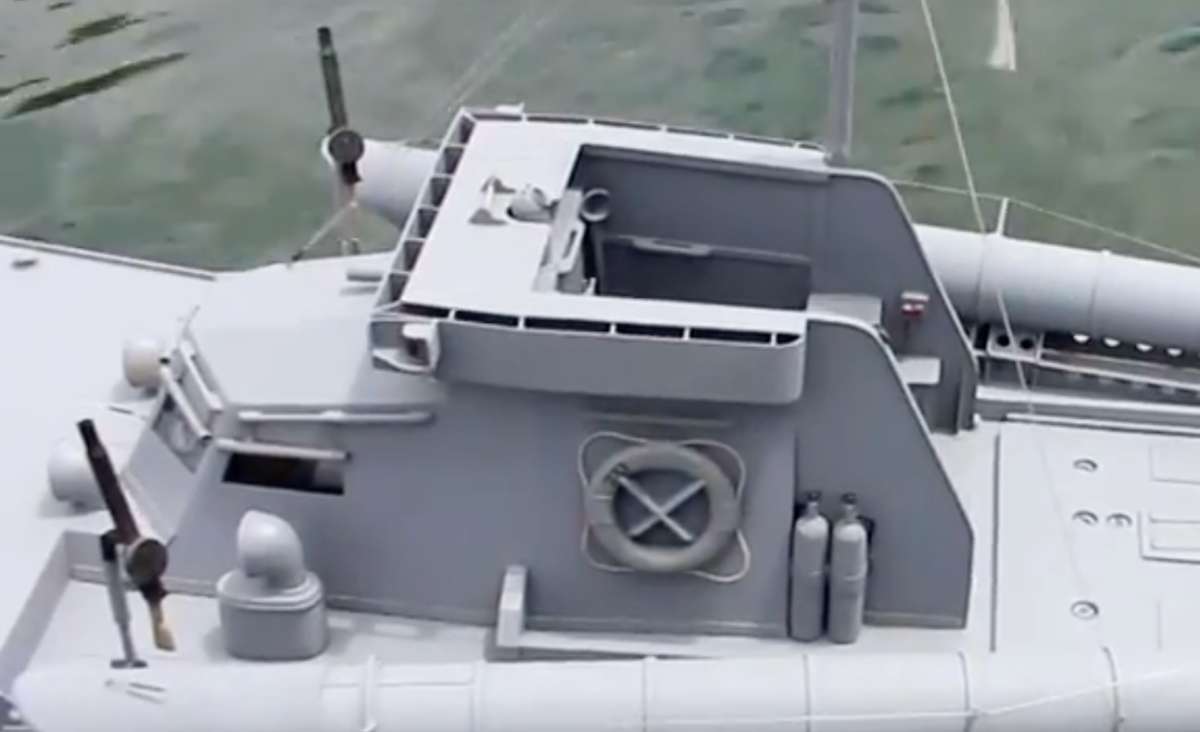
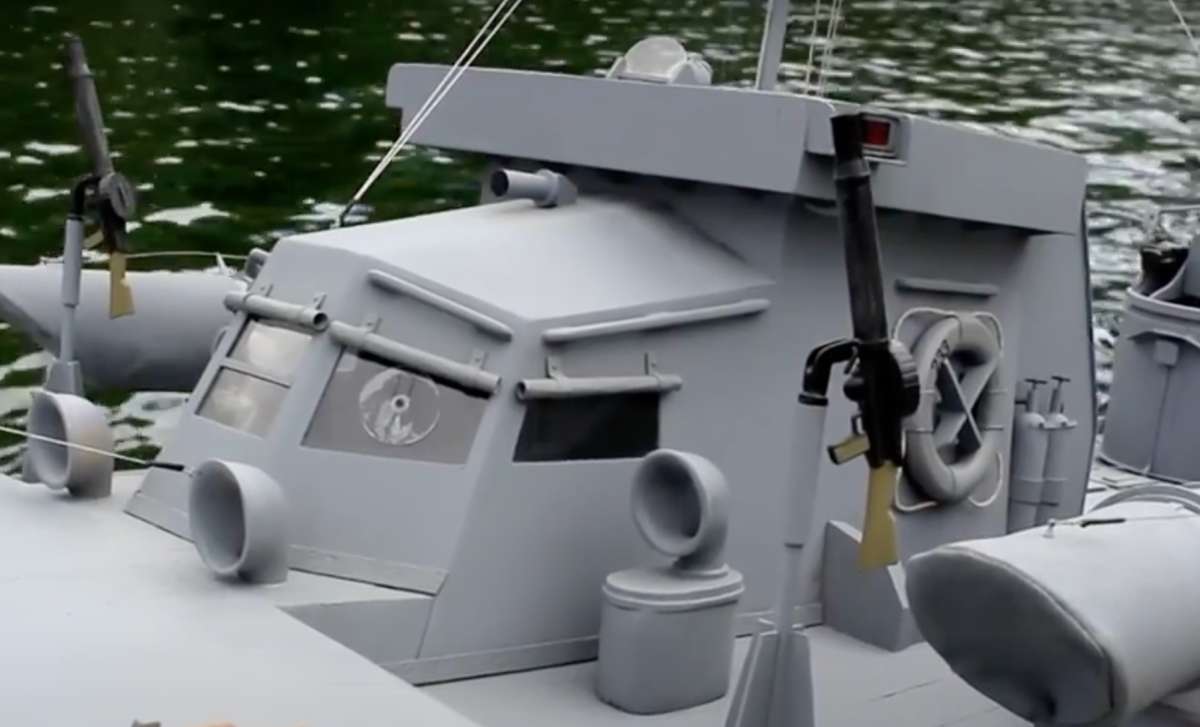
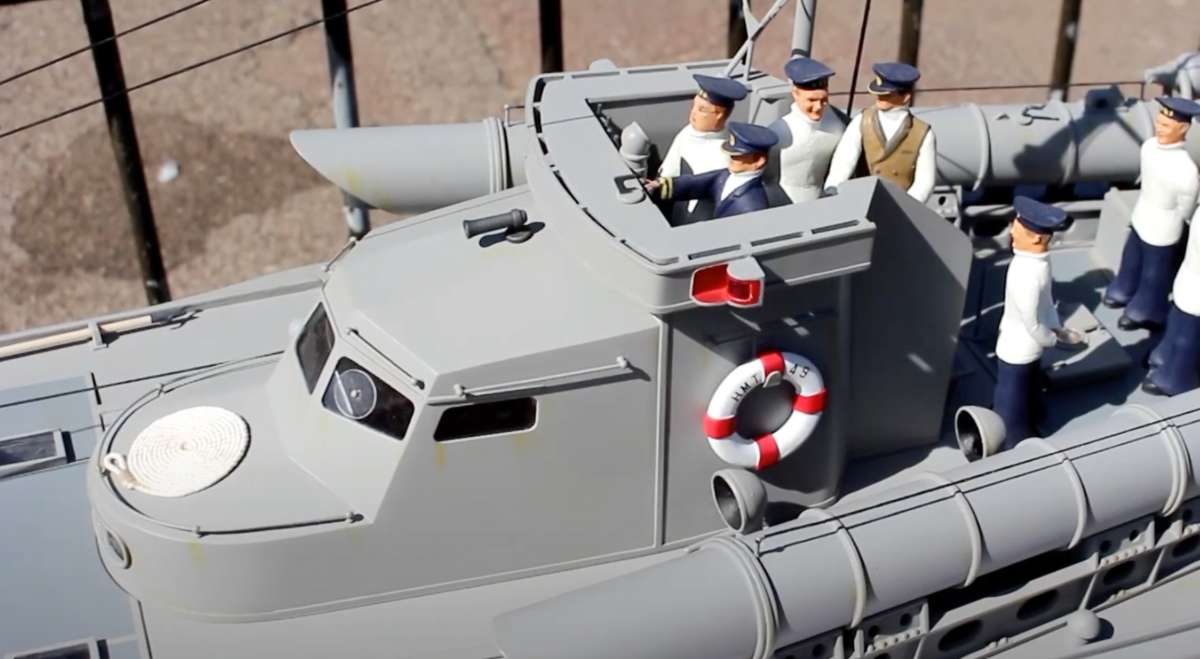
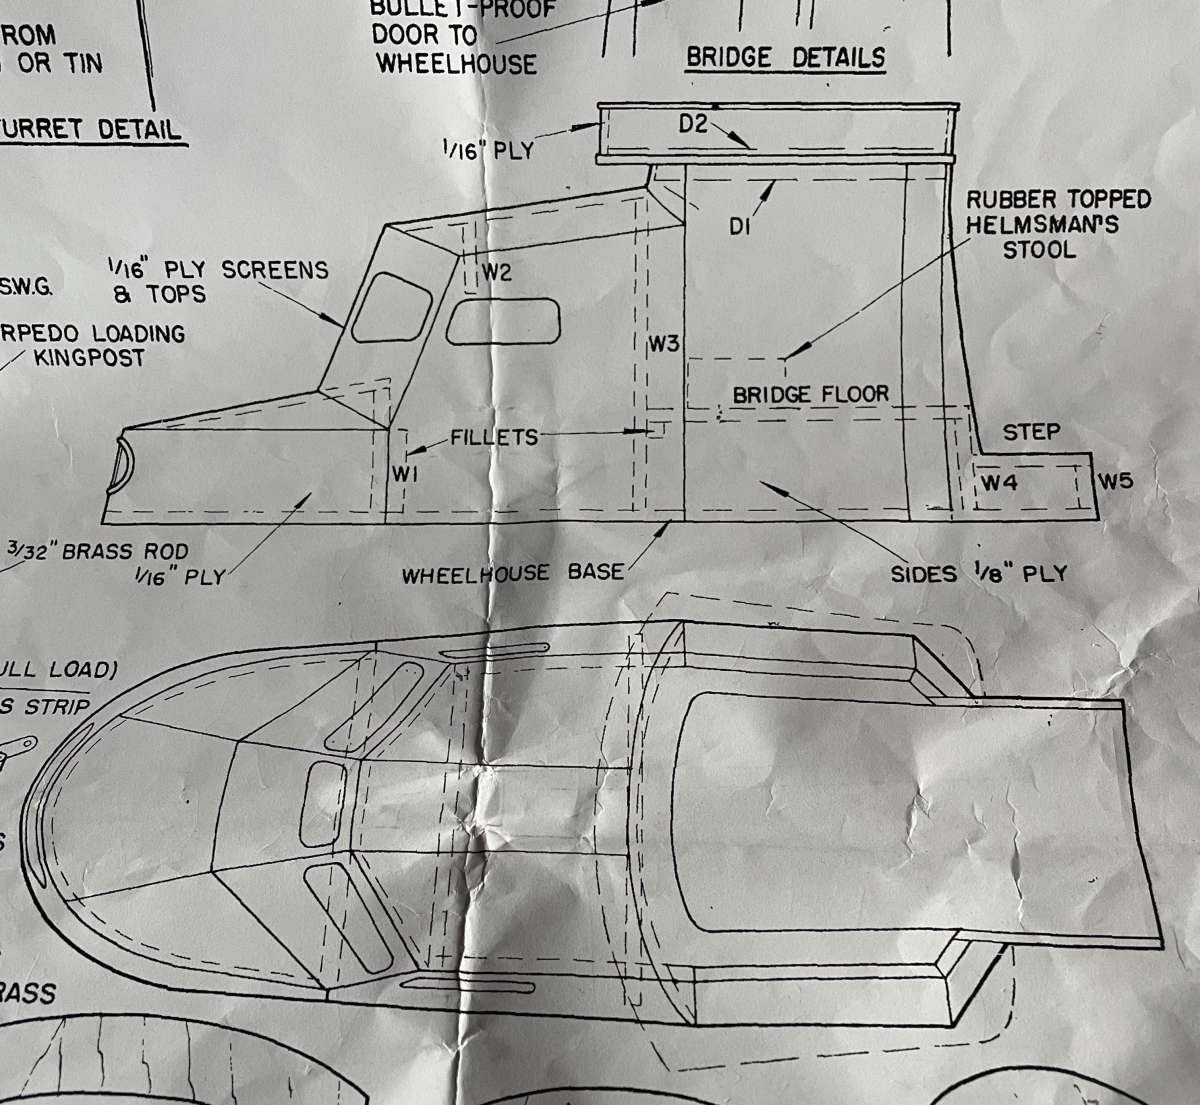
                      While I decide how to plank the hull, thought I’d play with a few of the deck fittings, specifically the bridge. For help on this I found Colin Vass’s beautiful build on YouTube, and several others, but none of their completed bridges bear any resemblance to the one on the plans?

                      Does one just do what you like with this sort of thing? I can’t work out what the plan is telling me to do at the top of the bridge, D2 seems to be stuck on top of D1??

                      Another thing I can’t work out is where are the access hatches to install/access the RC/motor compartments? There is nothing on the plan that I can see?

                      Bridge3Bridge2Bridge1Plan

                      #122430
                      cheddar24man
                      Participant
                        @cheddar24man

                        That’s beautiful John. Definitely food for thought!!

                        #122433
                        Ray Wood 3
                        Participant
                          @raywood3

                          Hi Cheddar,

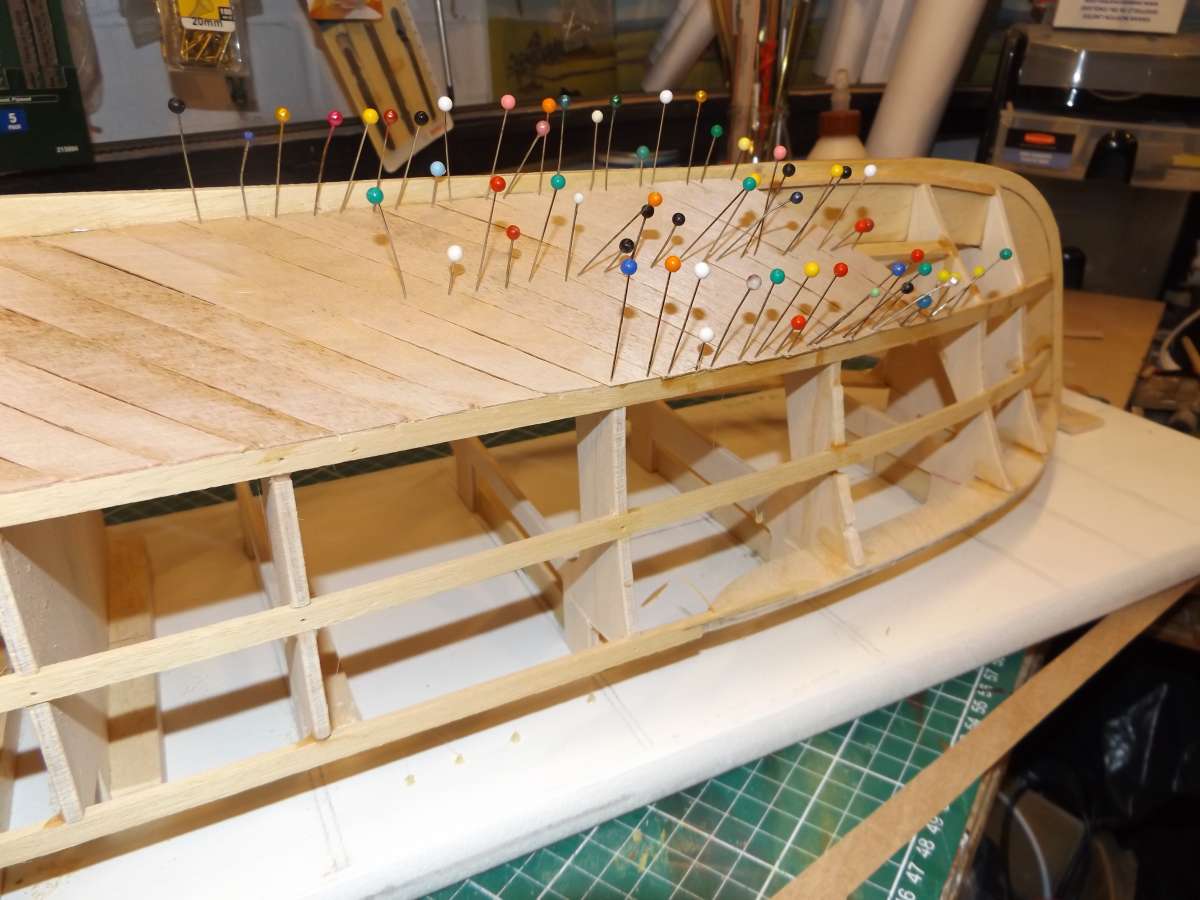
                          It looks like the wheelhouse comes off as a unit maybe where the motors will be ? and you need a decent large deck hatch behine that one for the battery and RC equipment, this is the first layer of 1/32 ply stripsWM DD Planking going on my White Marlin which basically had a Vosper Thorneycroft MTB hull with a cabin.

                          Regards Ray

                          #122435
                          cheddar24man
                          Participant
                            @cheddar24man

                            Thanks Ray, just might go that way as I have a sheet of 0.8mm ply, quite easy to cut it into strips, they look about 2cm wide?

                            #122436
                            Ray Wood 3
                            Participant
                              @raywood3

                              Hi Cheddar,

                              I think they were 1/2″ strips 280 pieces in the first layer 🙂

                              Well worth the effort.

                              Regards Ray

                              #122449
                              cheddar24man
                              Participant
                                @cheddar24man

                                Hi Ray. I notice all the pins holding the planks down. I tend to use a drop of supper glue to hold bits in place, or is that not a good idea? Once happy with things use wood glue.

                                #122450
                                Ray Wood 3
                                Participant
                                  @raywood3

                                  Hi Cheddar,

                                  I keep the use of superglue to a minimum as my workshop doesn’t have much ventilation and the fumes bother me, better safe than sorry, Gorilla woodworking glue PVA is cheap and works fine 🙂

                                  Lightweight water based filler sorts out the pin holes in the second layer.

                                  Regards Ray

                                  #122452
                                  Richard Simpson
                                  Participant
                                    @richardsimpson88330

                                    I’m totally with Ray on this one.

                                    One challenge with superglue can be when you use the very thin type with an absorbent material.  It soaks in so fast and evaporates so quickly that it gives off a particularly strong toxic cloud of vapour.  A couple of years ago I was making a rope fender by sticking a piece of thick cord to a rubbing strake on the outside of the hull with thin cyano.  It was an African Queen model.  I caught the fumes in my left eye and it has felt dry and uncomfortable ever since.

                                    I am now very cautious with superglue and only use it when absolutely necessary.

                                    #122459
                                    Colin Bishop
                                    Moderator
                                      @colinbishop34627

                                      I have just sent Lindsey a two part article on modelling materials which covers constructional materials, adhesives and paints and finishes. In the adhesive section I have said that automatically reaching for the superglue when something needs to be stuck to something else should be resisted, as while cyano is very useful, it is not as good as using the adhesives intended for the materials you are joining.

                                      When you see the corrosive effect superglue has on clear plastic it is not something I want anywhere near me!

                                      Colin

                                      #122469
                                      cheddar24man
                                      Participant
                                        @cheddar24man

                                        I am only using the Superglue to tack pieces, then EvoStick wood glue to finally bond.

                                        I find the worst fume generator is using superglue on Balsa but it certainly speeds up a build! My “workbench”, I don’t have a workshop, is in our well ventilated garage! Must make sure I cover my wife’s Smart Brabus before sanding🤣🤣

                                        #122486
                                        cheddar24man
                                        Participant
                                          @cheddar24man

                                          Right, a bit more help please.

                                          Firstly, there are no markings on the plans showing where the “hatches” are.

                                          Presumably one needs access to most of the inner hull so maybe two large “hatches” covering most of the fore and aft deck area. Where these “hatches” are there would need to be a lip protruding above the deck level to prevent water ingress and the “hatches” would fit over these lips. All the “on deck” structures, bridge, gun etc would be mounted on these “hatches”.

                                          Secondly, it looks that the completed model will weight in at just under 1Kg so my thoughts turn to the propulsion system. I’m not too worried whether it planes or not. The plan calls for a single, central propeller, there being a channel through the keel to accommodate this. I’m thinking a direct drive brushless motor with reversible ESC but how does one make sure the motor/shaft/propeller are matched up. From the angle of the shaft through the keel it looks like it can accommodate up to a 40mm diameter propeller.


                                          #122487
                                          cheddar24man
                                          Participant
                                            @cheddar24man

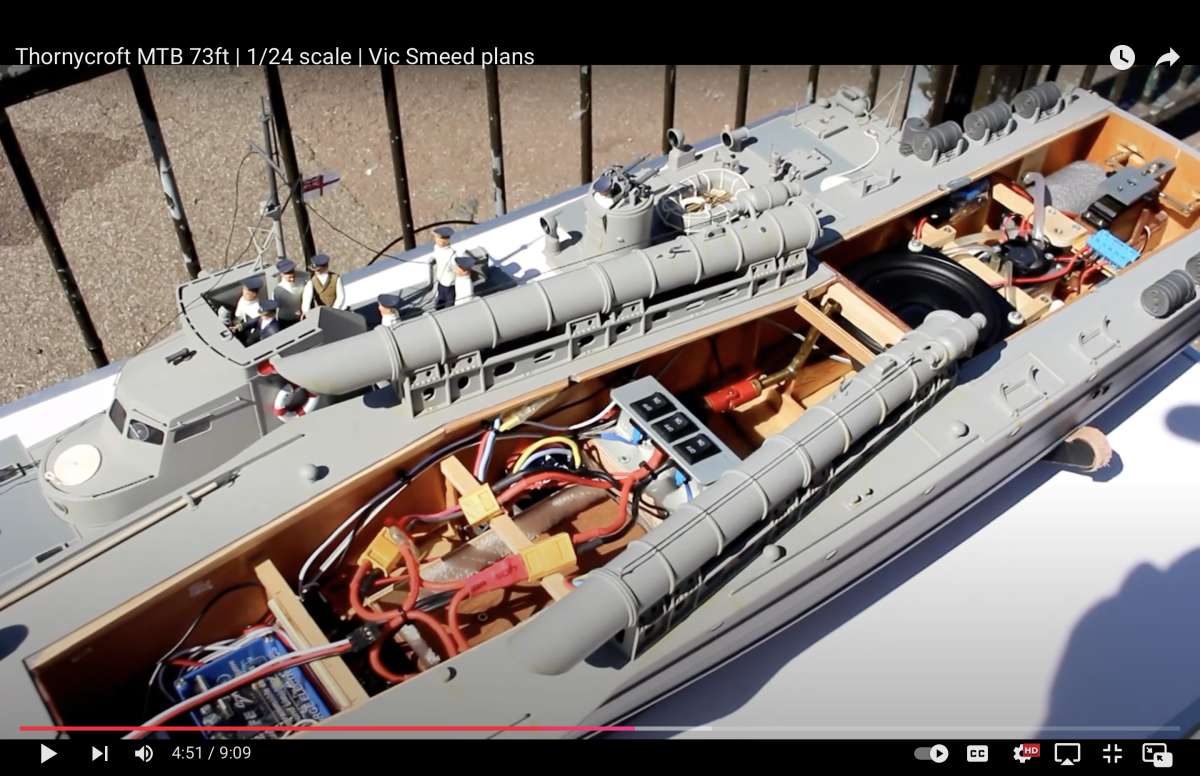
                                            Further to my last, it looks like almost the whole top comes off in Colin Vass’s build! Looks like the way to go!!

                                            Screenshot 2024-09-28 at 10.11.18

                                            #122488
                                            Richard Simpson
                                            Participant
                                              @richardsimpson88330

                                              In answer to the first part, you’ve answered your own question, yes you need access to the internals.  How you arrange this is frequently up to the modeller to design himself.  I recently finished an Irish Sea Coaster that had access through the main hatch and a removeable accommodation section but I wanted mor access for efficient operation of a steam plant so I incorporated a removeable bridge section as well.

                                              For your type of craft the normal access is via a removeable bridge/accommodation unit that lifts off in one piece.  This would normally sit over a raised coaming and possibly have some sort of hidden screws to hold it down or maybe a couple of magnets incorporated somewhere to hold the piece in place.  If this doesn’t give you enough access you might have to consider a section of deck to be removable.  This can be tricky if it is supposed to be flush so you need to consider sealing it with either a rubber joint or even a smear of vaseline.  Most models will incorporate a hatch above the rudder stock to give access to the tiller arm and the servo connection.  I have a number of models with removeable sections that are not even held in place and rely on simply being a good fit to keep them in place.  The danger with this is if the model ever gets overturned you may loose the removeable section.

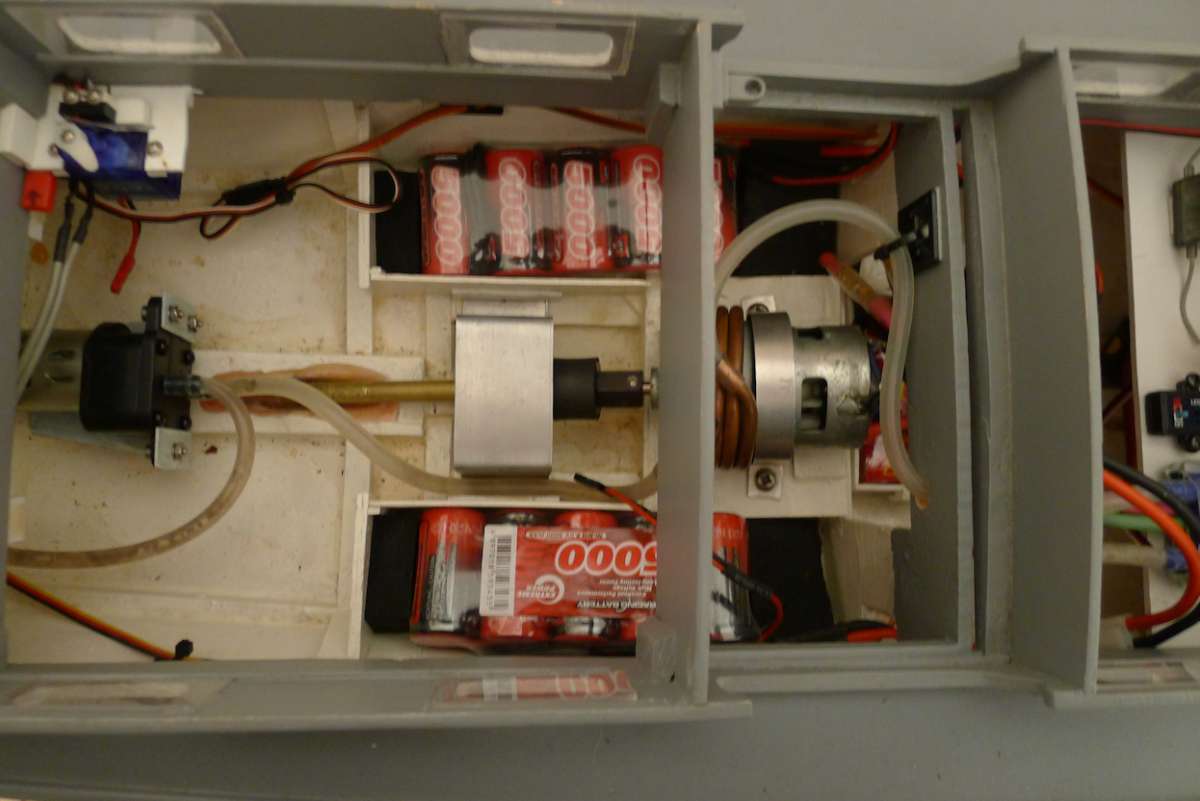
                                              As regards propulsion I tend to keep brushless motors in their place.  They have a far better power to weight ratio than brushed motors but I only consider this as useful if the space available is limited or you want all out performance.  Frequently brushed motors are more than enough for a model and using them allows more flexible use of batteries, chargers and speed controllers.  Many modellers will tell you that brushless are just as easy and convenient to use, I totally disagree.

                                              When it comes to alignment it is really up to you to think the process through and come up with a method that accommodates your particular propulsion arrangement.  The rule of thumb though is to temporarily make up the drive line with solid components.  This may require a temporary longer than normal shaft and frequently replacing the coupling with a piece of solid bar.  When everything is assembled rigidly with the propeller on the end to ensure clearances and position are OK the motor mount and the stern tube can all be epoxied in place.  The temporary shaft and coupling can then be removed, everything filled in and smoothed over before finally fitting the actual shaft, prop, coupling and motor, which should then hopefully all be perfectly in line.

                                              #122490
                                              Colin Bishop
                                              Moderator
                                                @colinbishop34627

                                                Lots of good advice from Richard there but a brushed motor/NiMH power pack might struggle a bit to get a decent performance for an MTB at that size.

                                                Your model is not a million miles away from the SLEC Fairey Huntress kit in size and expected performance. There is a recommended power train on the SLEC site which would appear to be very suitable for your model.

                                                Huntress 1/8 Scale 34in (863mm) Designed by Dave Milbourn

                                                Brushless motors do require particular speed controllers and are usually associated with LiPo batteries which need the right chargers but a useful halfway house is to fit a brushless motor which is far more efficient than a brushed one and then use a conventional NiMH power pack with more straightforward charging requirements. The motor doesn’t care which type of battery the electricity comes from.

                                                Colin

                                                #122492
                                                cheddar24man
                                                Participant
                                                  @cheddar24man

                                                  Once again, many thanks Colin, just the job and not too expensive!

                                                  #122493
                                                  Colin Bishop
                                                  Moderator
                                                    @colinbishop34627

                                                    If you decide to go down that route then the SLEC LiPo recommendation is for 2S or 3S  batteries  (7.4v or 11.1v)

                                                    Choosing NiMH batteries I would think that  a 9.6v pack would probably do the job and give realistic performance.

                                                    https://www.componentshop.co.uk/batteries/radio-control/large-power-packs/9-6v-and-above.html

                                                    No guarantees though!

                                                    Colin


                                                    #122502
                                                    Richard Simpson
                                                    Participant
                                                      @richardsimpson88330

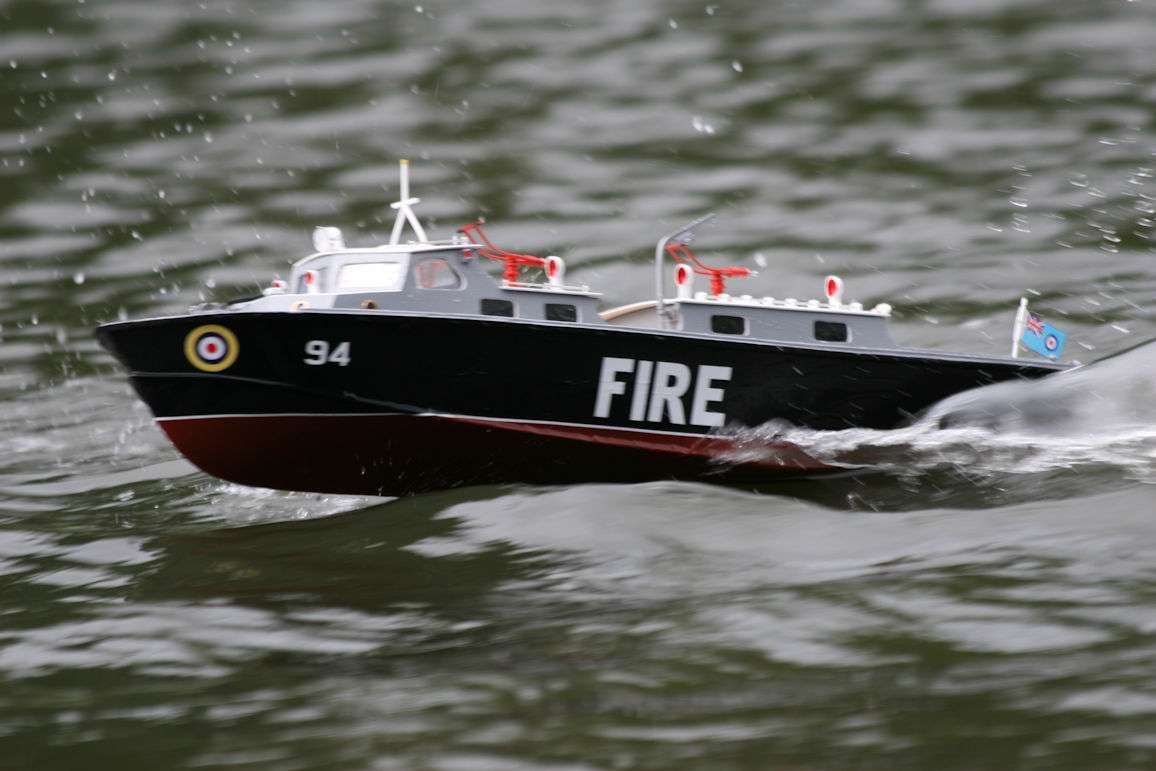
                                                      Just as an example this is my RAF launch at around the same sort of size.  The roomy hull does allow for a nice big brushed motor and with 12V going through it will plane to around half way along the hull.


                                                      26-07-09-19WiltonParkFireTender2


                                                      29-01-23-01RAFFireTender1

                                                    Viewing 25 posts - 26 through 50 (of 95 total)
                                                    • Please log in to reply to this topic. Registering is free and easy using the links on the menu at the top of this page.

                                                    Code of conduct | Forum Help/FAQs

                                                    Advert

                                                    Latest Replies

                                                    Home Forums Scratch build Topics

                                                    Viewing 25 topics - 1 through 25 (of 25 total)
                                                    Viewing 25 topics - 1 through 25 (of 25 total)

                                                    View full reply list.

                                                    Advert

                                                    Newsletter Sign-up