ROY BURTON describes his efforts and how to overcome problems
 [article].jpg)
I thought it might be of interest to fellow Model Boats readers to write up a few of my notes based on my experiences and how I solved ongoing problems. I have endeavoured here to be practical about installing a steam plant and its commissioning. The recipient was Topaz, an elegant Edwardian steam powered river launch that was produced as a full 1:12 scale kit by Marten, Howes & Baylis, 45 inches (1144mm) long, beam 8 inches (203mm) and with a maximum draft of 3 inches. Displacement of around 10lbs (4.5kgs) was expected and the steaming duration depending on the type of steam plant used. The plus points of the model are that the saloon has a galley and separate w.c.; the seats in the saloon are upholstered and the floor carpeted; doors and a covered steering position lead into the open engine bay which contains the steam plant and its accessories and at the bows is a large open seat and bay which has under it a tank that can supply water to the boiler so as to increase the running time.
Sadly, the kit was withdrawn from their production list in early 2011 so I will not dwell on its construction, but emphasise how best to go about steam plant installation which is applicable to any open launch of this type. Much of this is being covered by Richard Simpson in his regular Boiler Room column, but this is record of my efforts, warts and all!
Enjoy more Model Boats Magazine reading in the monthly magazine.
Click here to subscribe & save.
Perhaps not enough space?
Taking a closer look at Topaz, I realised that there is only very limited space within the confines of the engine bay for the boiler and engine. Space is at premium, so it is very important that the weight and size of the steam plant is carefully considered. Too heavy a plant and the model will not float properly or perform as intended.
The basic model had been constructed with the propshaft installed and it was now possible to explore the practicalities of a new steam plant installation. As a ‘post-it’ note here, if you are buying a secondhand steam engine, then it’s always best to see it working under steam and request the valid test certificate if applicable. If in doubt ask someone who knows about these things! Also, it is worth noting that in many models the steam plant is often mounted as a single unit on a base plate. Thus it is not that difficult to upgrade to a different steam plant, that is provided it will fit!
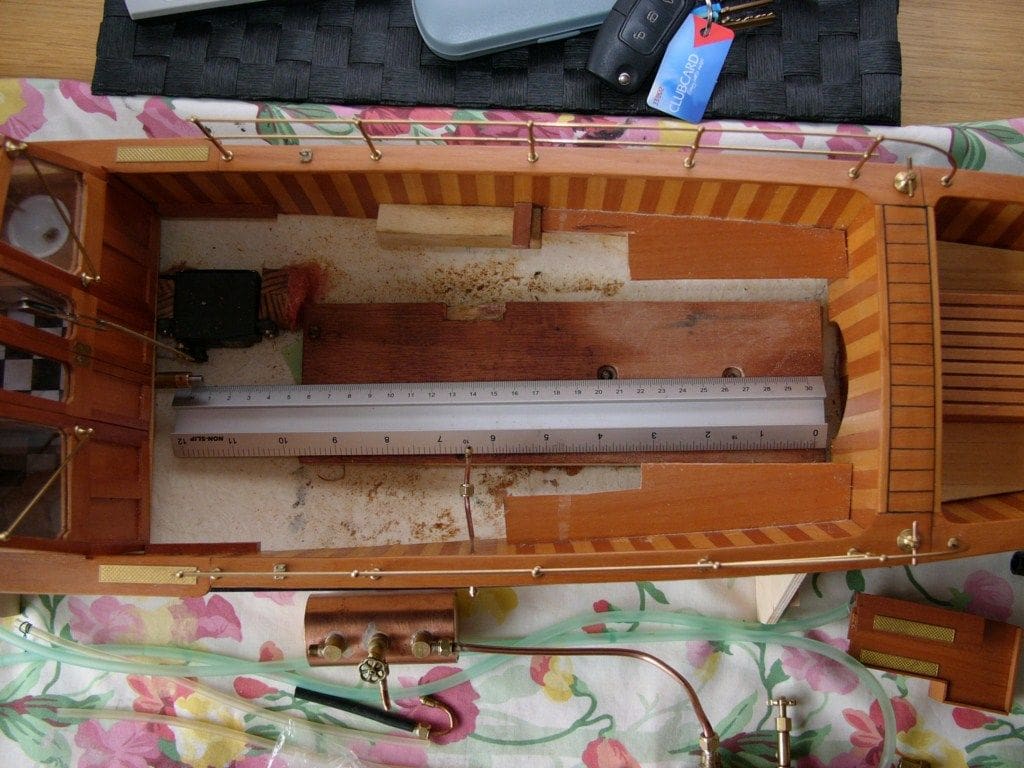
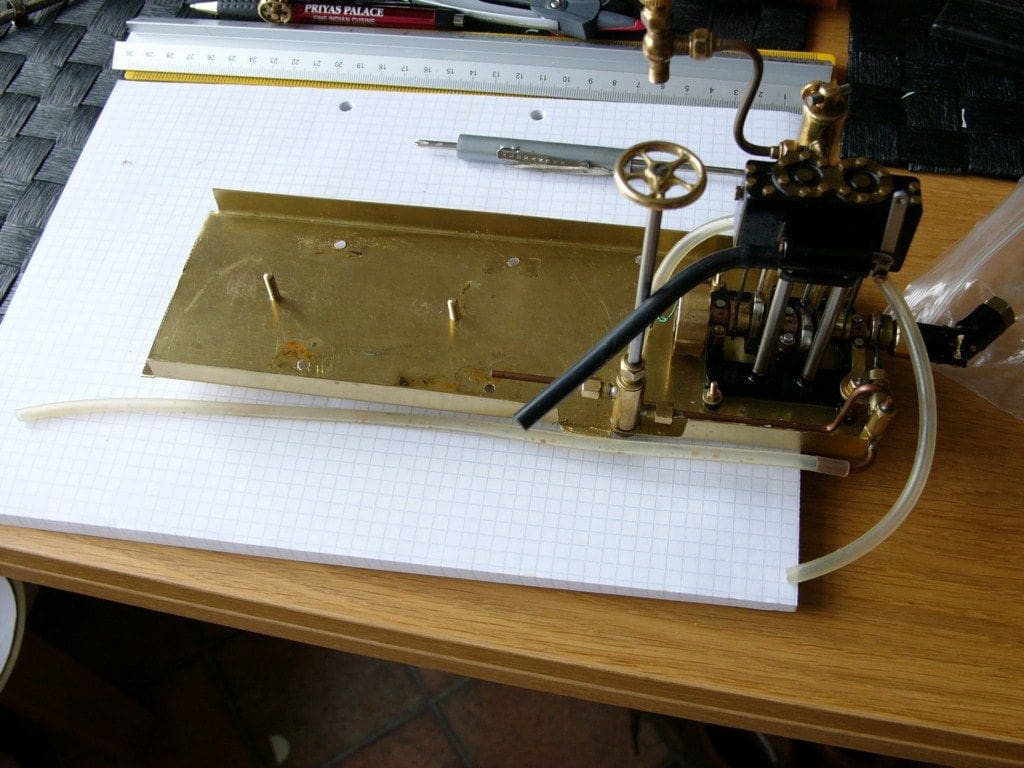
Photo 1 is of an empty engine bay with ruler in place as the first task was to see if it were all practicable with the steam plant I now had in mind, which was to be a Maxwell Hemmens Caton engine with a matching boiler. This engine is small and compact and of an the ideal size for this project, with the advantage of having a mechanical pump. The engines were I understand, made on CNC machines and therefore have precise tolerances, but still required to be run in. On that point, even an old and little used engine will perform better if run regularly.
The Caton engine, Photo 2, is a double acting piston valve marine steam engine with a 3/8 inch bore and 5/8 inch stroke and thus very compact and powerful, and is quite capable of propelling a large hull such as that of Topaz. As it so happens, this particular engine (but not the boiler) dates from the late 1980’s and will run all day quite happily, but currently it is not listed on the Maxwell Hemmens website.
What size boiler?
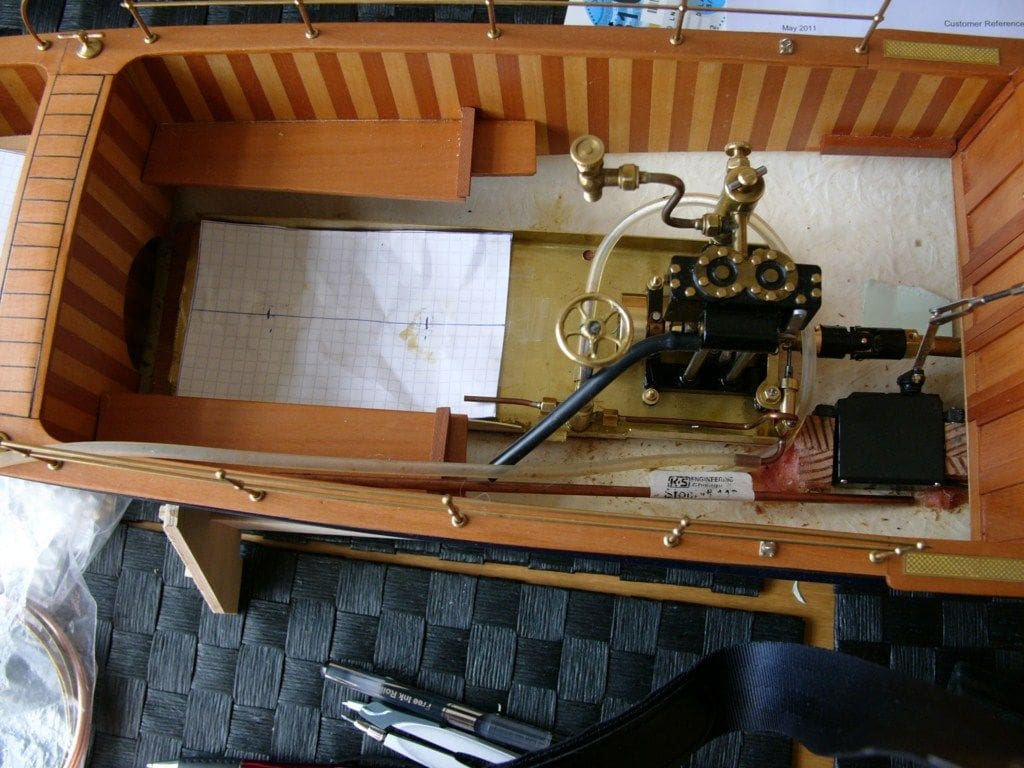
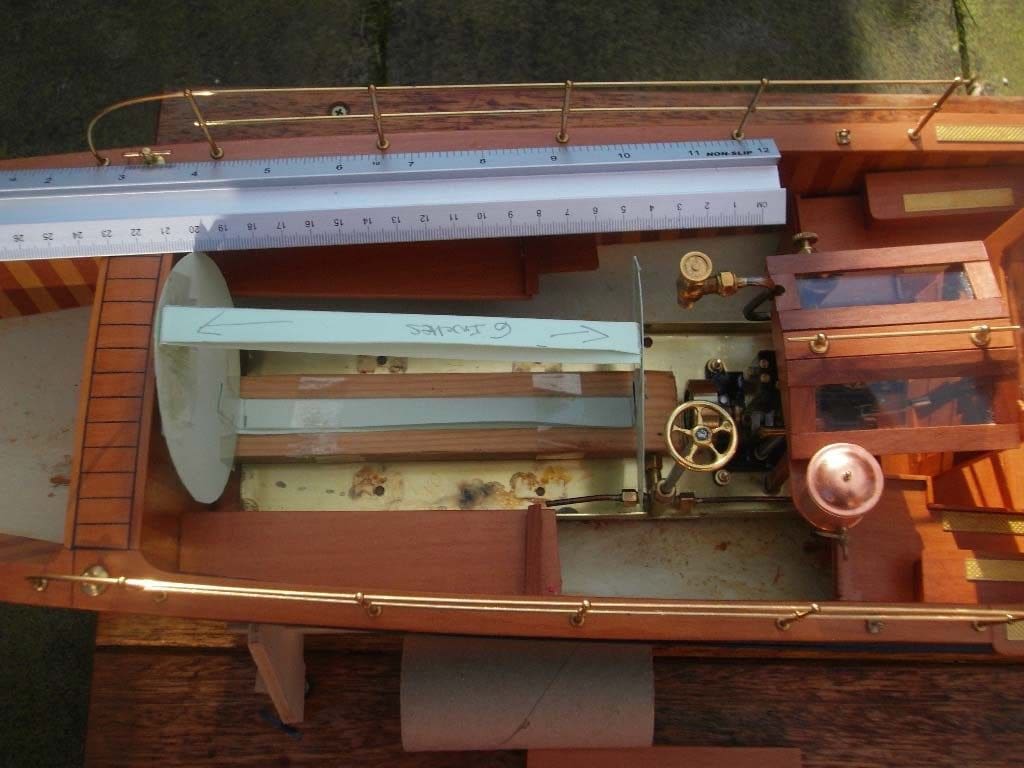
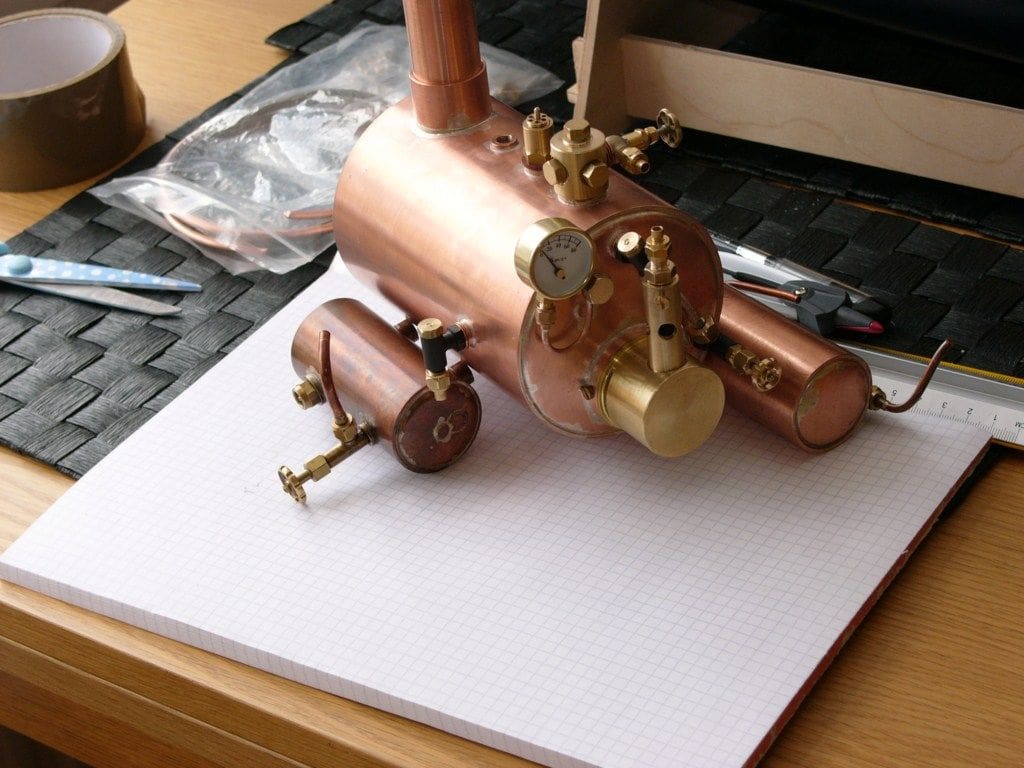
Photo 3 has the engine temporarily in place with a template for a 5 inch (12.5cm) boiler laid in front of it. Photo 4 is of the same exercise, but with a mocked-up 6 inch (15cm) long boiler. Mike Abbott of Maccsteam Ltd. had previously made a boiler for me, so I was pleased to be able to discuss this project with him. After lengthy discussions, we agreed on a horizontal boiler with eight cross tubes, but just 5 inches (12.5cm) long and a diameter of 3.5 inches (8.75cm). Photo 5 is of the supplied ‘bare’ boiler and Photo 6 is of the boiler and engine on the base plate being tested for size. The 6 inch boiler would have been just too long and larger than required, hence the 5 inch being selected.
The new boiler was not superheated, my preference being ‘wet’ steam which seems to like the Caton engine. All of Maccsteam’s boilers are supplied with test certificates conforming to the safety rules of the MPBA (Model Power Boat Association) of whom I am proud to be a member! It si worth noting that the MPBA provides £10m third party liability for its members which is well in excess of the £5m often demanded by local authorities (and private) lake owners nowadays.
Boiler testing?
The boiler was supplied specifically to meet the needs of the Caton engine and was tested to 120psi, twice the normal maximum operating pressure of 60psi when the safety valve would operate. In practice, the best operating pressure for the Caton engine is 45psi and it also has an extra globe valve fitted improving its performance rather than just relying on the steam valve on the boiler.
It’s very important to match the size of the new boiler’s maximum working pressure to the actual working pressure of the engine, hence my listening to what Mike Abbott had to say. Over, or under, boiler to engine pressure can cause problems when trying to control the engine when under steam, As a further note; ceramic burners have improved enormously and now only take a few minutes to heat a boiler to working pressure. Maccsteam provide a complete service with the boiler and ancillaries including the burner. It is worth bearing in mind that as supplied and tested, the certificate is only valid if NO modifications are made.
Flushing?
Using a new boiler for the first time requires ‘flushing out’ a few times to get rid of all the impurities from the manufacturing process. The usual method is to raise the steam pressure to approx. 30 to 40psi, turn off the heat and open up the blow down valve on the sight glass. This action will then flush out all the steam and boiling water. If you don’t thoroughly flush and clean the boiler before (and regularly) during normal use, the safety valve can stick open because of ‘gunge’ building up in the system.
Lagging?
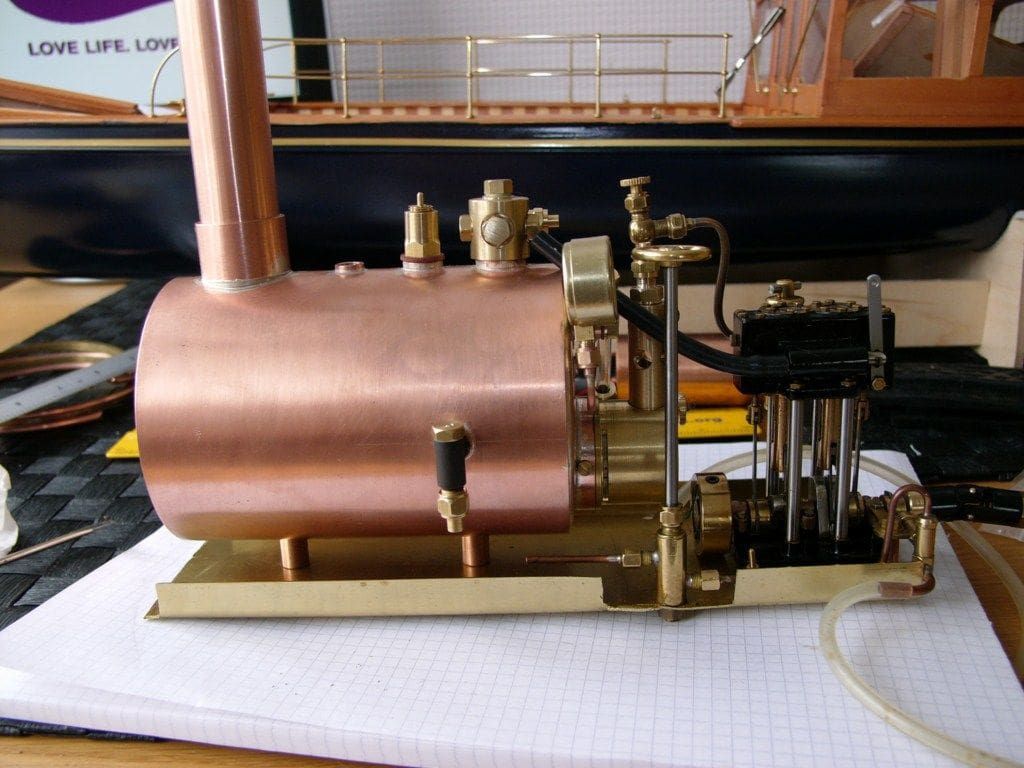
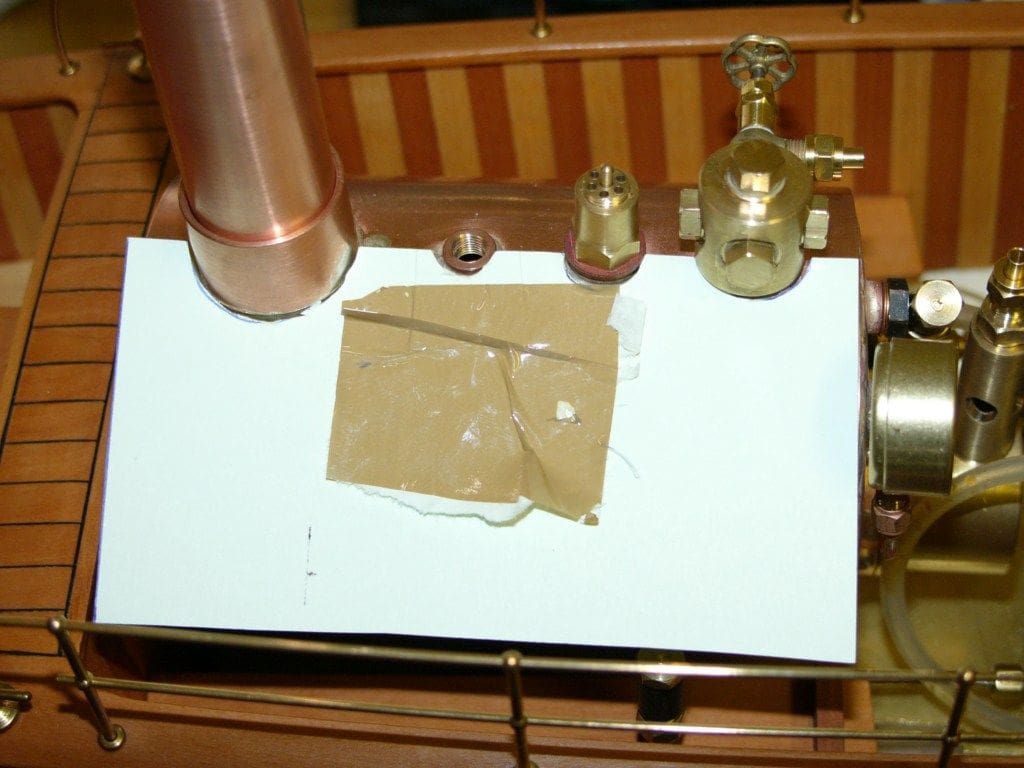
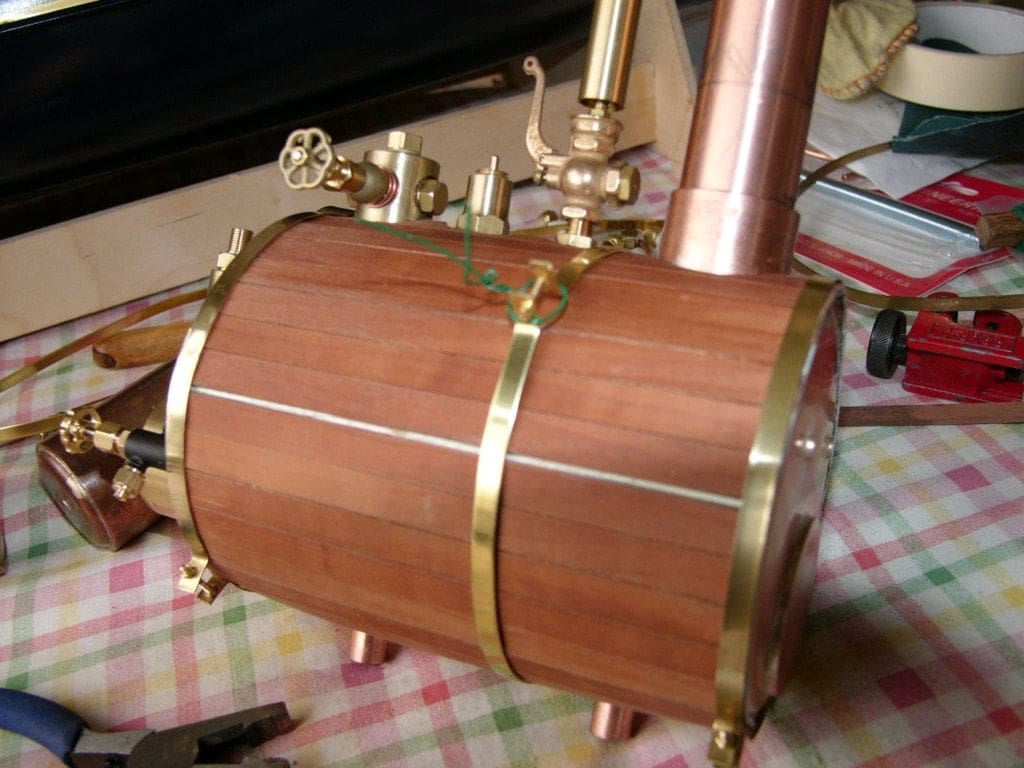
This is a necessary task, as it helps reduce heat loss from the boiler. My method is to use a thin layer of insulating material and then plank round and over the boiler. A template as in Photo 7, will enable the necessary holes to be cut with ease in the insulation and wood. Cherry wood was used for ‘planking’ the engine , as this blended in nicely with the deck of the launch. This was then held in place with four brass 3/16 inch bands, secured with 10BA brass nuts and bolts. Photo 8 has the wood planks in place and one brass strap fitted.
Bench testing
This is not a bad idea! In fact, carry out several bench tests of the steam plant prior to finally installing it in the model. It’s a good idea to get to know how long it takes to raise steam and the actual running time of the engine from a full boiler. It is also handy to know the flow rate of a mechanical pump (if fitted), as this will extend the run time.
And a problem….
The mechanical pump developed an air lock so although supposedly self-priming, on first operation, any air in the tubing was drawn into the pump and caused an air lock so it would not self-prime. The solution to this was to make up some extra copper piping with a bypass valve, Photo 9, that rises up and over the level of the pump to enable the air to more easily escape, which leads nicely on to silver soldering.

Silver soldering
This is not difficult, but lots of heat is required and care must be exercised as the temperatures for successful silver soldering can be more than 650 degrees F. Although you could manage without this skill, sooner or later you will need it when installing a steam plant as inevitably bespoke pipework will need to be assembled. So, here follow a few words about this.
A hearth will need to be made up from special fire bricks (not normal house building types) and then plenty of heat, a suitable flux, a clean workpiece and silver solder rods are all that are required, the key being to get the work piece to a temperature where the flux becomes totally fluid and just the touch of the silver solder has it drawn into the joint by capillary action. The heat source can be the traditional small pressurised gas can with a blowtorch head. Wear protective clothing plus eye protection and have some means of putting out a fire if one should accidentally drop the blowtorch whilst it is lit!
Steam trap condenser tank
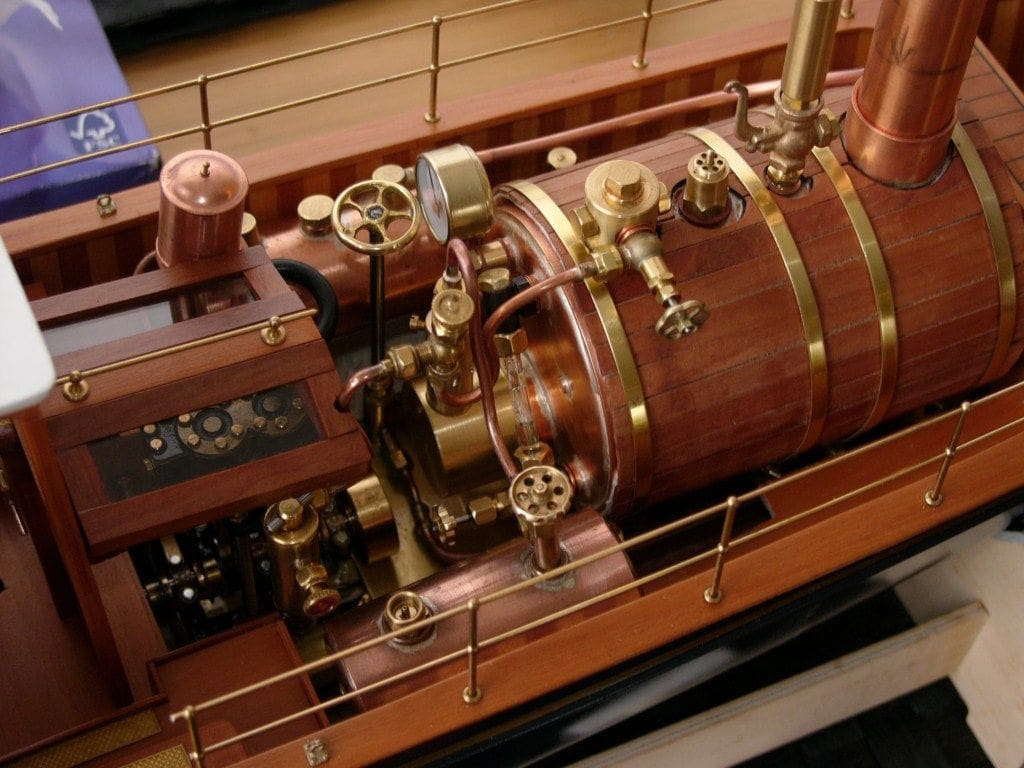
On the port side of Topaz sits the steam condenser and separator tank which as the name suggests, separates the exhaust steam from oil, retaining the oil and feeding the exhaust steam to the funnel. This tank (also supplied by Maccsteam) can be seen at the side of the engine at the top of Photo 10 (the gas tank is on the starboard side at the bottom of the picture). Although not essential, the separator tank is a positive thing environmentally and should be included in the steam plant if at all possible.
So in summary thus far, installing a steam plant in any model may well require changes and layout modifications through the process to achieve what you intend. This is no different from full size ships, where although the design might be perfect in theory, in practice it often isn’t!
Steam engine running tips
As you are progressing through your build, it’s a good idea to remember that what you are trying to achieve is a working practical steam launch and things can crop up that you don’t necessary remember and there was one such problem for me.
When fitting the propshaft, under steaming conditions this must be able to rotate as smoothly as possible, because if it’s stiff then that can mean the difference of the engine needing 60 psi rather than 30 psi, with consequent reduced running time. The propshaft was over-greased, thus causing drag, so it was all cleaned and a silicone grease substituted to others to lubricate it and act as a water barrier. Also, it may be that the engine runs better in one direction than the other. Although not ideal, it might be best to change the type of propeller (left hand or righthand) to make best use of the engine’s natural rotation preference. There is no law that says a single screw boat must have a LH (or RH) propeller. Also, the oil you use to lubricate the engine can enhance its performance, but the wrong grade can have a detrimental effect. John Hemmens provided me with very useful advice about engine lubrication and getting its valve timing just right.
On the water
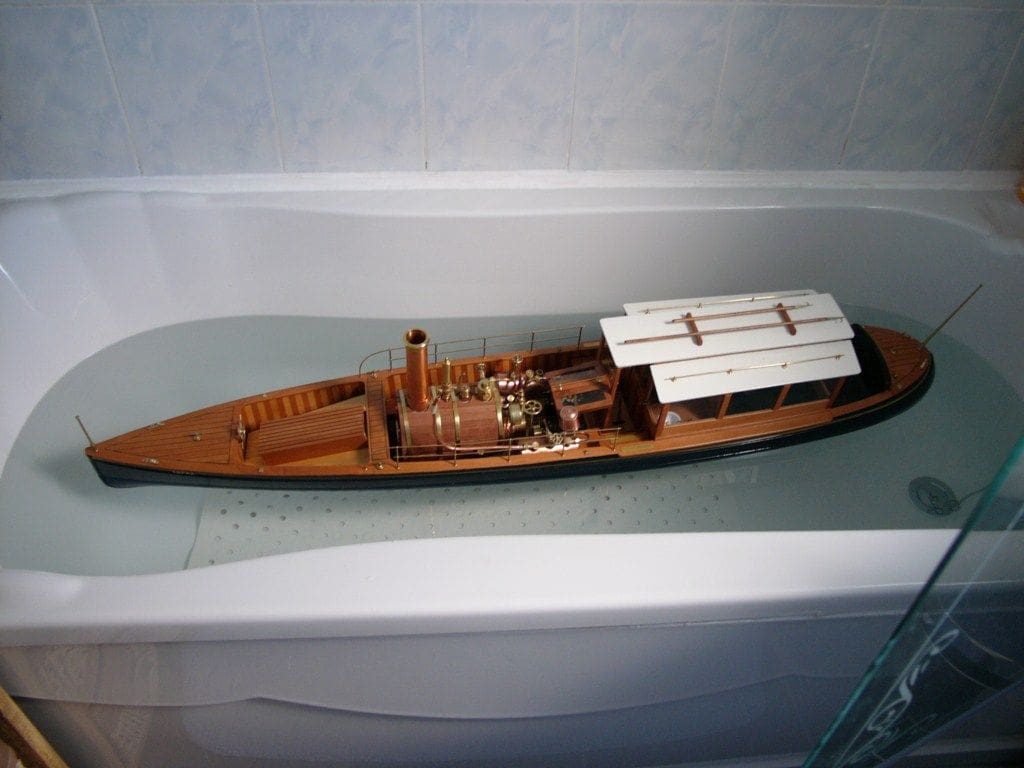
This is a 1:12 scale model, but the steam plant is heavy, so therefore Topaz is prone to roll. The bath is as good a place as any to check the waterline etc. So, with care, I forced the model over to see how quickly she rolled back upright. Much easier at home than at the pondside, Photo 11!
Off to the lake….
The maiden sail took place at Greenock Model Yacht and Powerboat Boat Club. On the whole, it sailed well, but was a bit sluggish. By increasing the steam pressure to the engine (within the boiler’s safe limits) the engine performed better and about 20 minutes steaming was achieved. So the initial trials in the summer of 2011 were successful. With more fettling, I hope to extend the running time as I become more familiar with the steam plant’s characteristics.
Useful web addresses
Maccsteam: www.Maccsteam.com
PPS Steam Models and DJ engineering: www.pps-steam-models.co.uk
SteamFittings.co.uk: www.steamfittings.co.uk
JoTIKa Ltd: www.jotika-ltd.com
Prop Shop: www.prop-shop.co.uk
Mainsteam Models: www.mainsteam.co.uk
Maxwell Hemmens: www.steamengines.co.uk
Crimple Powder Coating: www.crimplepowdercoating.co.uk
Everything Airbrush Ltd: www.everythingairbrush.com
John Hemmens: www.steamengines.co.uk
Below are some further photos showing the detail of this lovely model.


