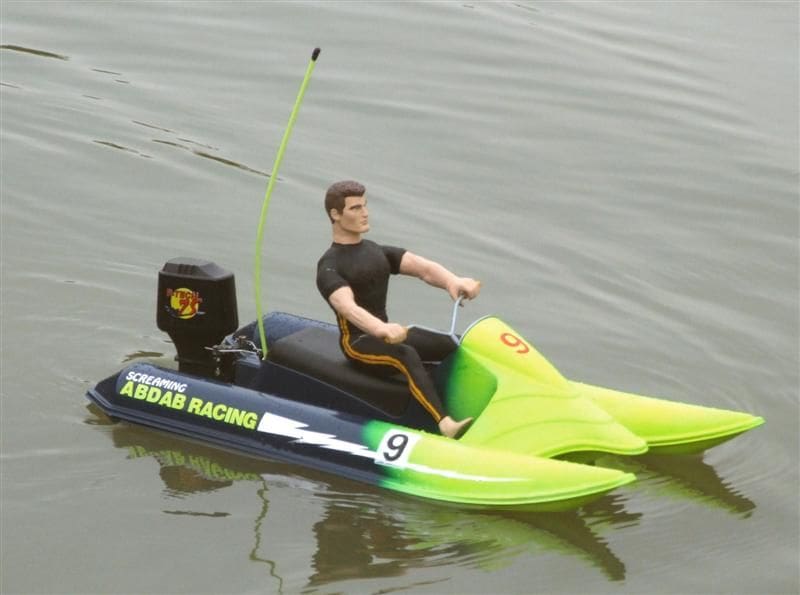
Phil Parker with a simple explanation of this skill
.jpg)
It’s been said that a good paint job can make a mediocre model into a superb one. It’s also true that poor painting can ruin even the greatest example of the modelmakers art. Because we all know this to be true, the finishing stages are approached by many with trepidation. Traditionally we’ve slapped on Humbrol with a brush, using techniques that haven’t changed since our days building Airfix kits. Anything more advanced is viewed with suspicion or awe. To step up is scary and involves buying expensive equipment which we have to learn how to use. In this article I hope to demystify spray painting a bit and explain what you need and how to use the gear. First of all let me say that there is nothing wrong with paint applied with a brush. Care, good preparation and quality brushes will give results nearly as impressive as a sprayed finish. But you need to stop using the cheapo brushes and get used to paying four or five quid for a sable brush. Quality takes time too. If you slap the paint on and try to cover with a single coat you’ll be disappointed. Many thin coats are the recipe for flawless paint and each must be left to dry fully in a dust free environment and then probably rubbed down before overcoating again.
So you want to try spraying?
Enjoy more Model Boats Magazine reading in the monthly magazine.
Click here to subscribe & save.
Well the simplest solution is to head down to the local car suppliers and buy paint in aerosol spray cans. Obviously the range of colours will be a bit limited, but if you have a look in the Yellow Pages it is possible to find companies that will mix a spray can to your exact requirements. I know this because when I needed to touch up my orange car I visited one. The book of orange had over 30 pages, each with ten shades on it. The man matched them to the car and went away to mix the cans up for a perfect match. Buying paint this way has the advantage that you can ask for it in matt or satin finish. Gloss paint never looks right to me on a model especially a warship (yes I have seen this). The only possible exception is a lifeboat as the RNLI crews spend a lot of time cleaning things.
One colour I always spray from a can is matt red oxide. The commonly available primer is just the right colour to my eye for below the waterline on many models. It’s also very easy to use. As long as you shake the can for at least a couple of minutes (thorough mixing is essential for all spray paint) it’s difficult not to get a good finish. Primer isn’t waterproof though, so you have to consider a top coat of varnish to seal it in, especially on wooden hulls.
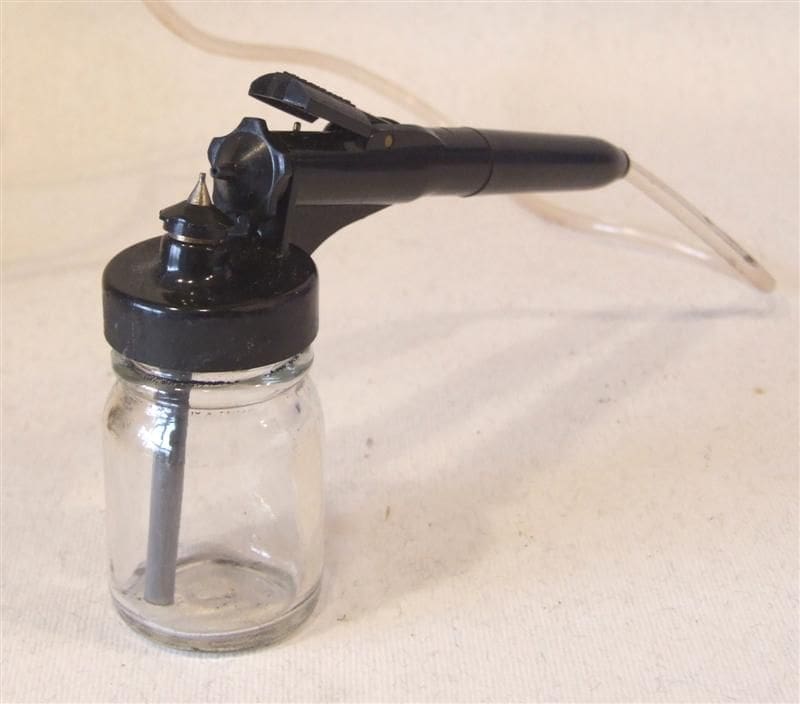
If you fancy a move on from the aerosol can, then the next step is an airbrush. You have to consider the type and how you plan to power it. The cheapest sort is a spray gun available for less than £15 from several tool suppliers and sometimes offered free to new Model Boats subscribers. Now, in most modelling disciplines this type of spray gun is often frowned on. It’s unsophisticated, with the air and paint being mixed outside the body of the tool, the paint finish isn’t the greatest in the world and you have little control over the air/paint mix. This overlooks one important fact in our favour – our models are generally big in relation to a 1:72 scale tank. We don’t consider a boat eighteen inches long to be a big model, but to paint this you will need quite a lot of paint being flung quickly and this makes the spray gun ideal. Okay, a cheap tool isn’t going to be the best in the world and if you fancy building glass case models then you’ll want to spend more money, but it will do the job surprisingly well.
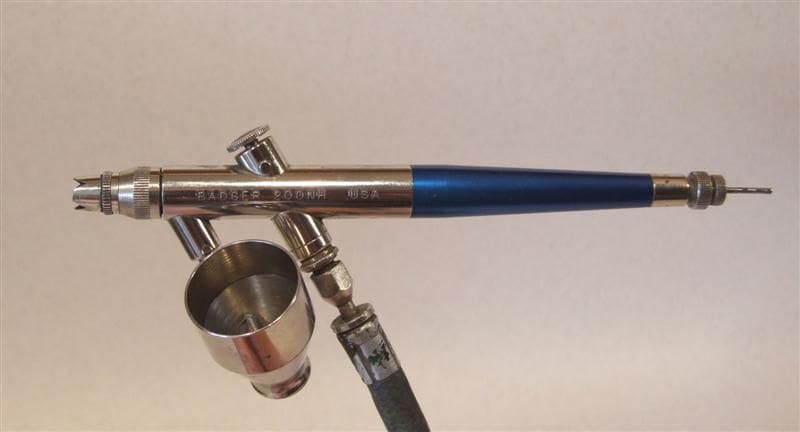
Next up is a proper airbrush. For years I’ve used a Badger 200, a simple single action airbrush, for my railway modelling and it’s also seen action on my boats. Single action indicates that the button on top simply controls the air. On a double action airbrush the control manages both the air supply and the paint/air ratio. To control the latter, on the 200 you turn a screw at the back end of the tool. This is fine for most work, but as you progress you might want the extra flexibility, and probably by that point though you’ll have a far better idea of what you are doing. The basic airbrush will still have its uses, so it won’t be money wasted.
The biggest problem with the airbrush is the relatively narrow spray pattern. When painting, the trick is to work along the model always keeping a wet edge. The sprays should overlap each other slightly for a seamless join. The spray guns wide spray pattern allows for fewer passes than the airbrush. I’ll admit to spending many happy hours chasing over a modest sized model trying to build up a depth of colour with my airbrush and sworn I’ll do all the painting in future with aerosols, but then I’m not the most patient person in the world.
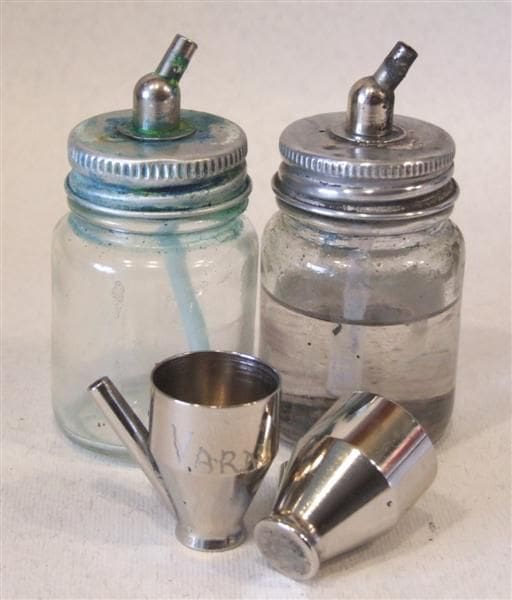
When choosing an airbrush you need to think about how the paint is carried. Most models allow you to clip on a paint cup or bottle. The latter is needed for boats as you’ll want to mix up whole tinlets of paint at a time and the cup is not big enough for this. Buy spare cups and plenty of bottles too. I’d also recommend a paint cup or bottle just for the varnish, to avoid colour contamination at the final stage.
Air supply
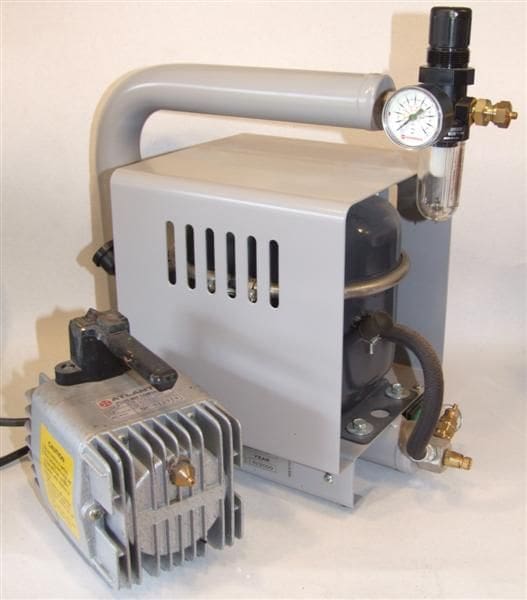
The airbrush or spray gun isn’t any use on its own as you need an air supply. To be honest, this means a compressor. I know you can buy canned compressed air, but it’s expensive at around £5 for 400ml (not enough for a boat) and troublesome. The pressure in the can drops as you use it, so for best results it should be stood in a bowl of warm water to prevent this. They will run out just before you finish the job and you won’t have a spare handy. I did try them in my early spraying days and was very disheartened when the pressure plummeted while I worked the paint which had been a mist then came out as big blobs and ruined the model.
Oh, and car tyre adaptors. Yes they are available and yes you can run the tools off them, but do you really want the spare tyre from you car in the modelling room and do you really want to have to pump it up every five minutes?
A compressor therefore might look like an expensive bit of kit, but in the long run will pay for itself. In fact if you forget to put the tyre back in the car after a spraying session then the bruises you’ll suffer from your passengers when you have a puncture will be enough to convince you. There are several types of compressor ranging from the simple diaphragm type which run continuously, are a bit noisy and give merely adequate air pressure, to huge jobs with reserve tanks which run intermittently to charge the tank when the pressure drops. Cost is between £65 and £350 with some bargains to be had at shows and on the secondhand market. At this point I’d talk to the suppliers and ask advice. All I can say is that I have two and most of the work is done with the cheap one. The only time I’ve needed more pressure was for a grit blasting gun.
Other requirements
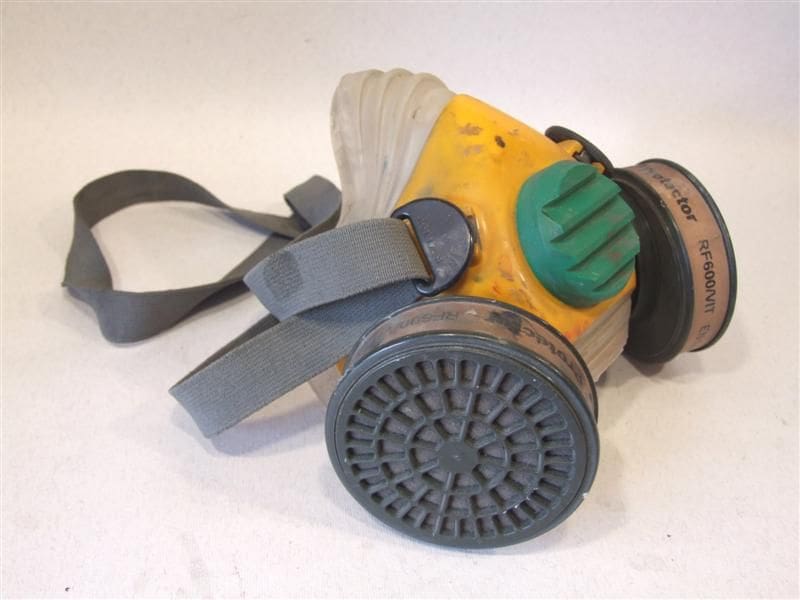
A face mask. You need one of these or you will die, or at the very least make yourself seriously ill. Visit a motoring accessory shop and get something designed for when spraying cars. Buy one with replaceable filter cartridges and make sure they are rated for paint and not just dust. DIY store paper masks intended for dust will not do the job.
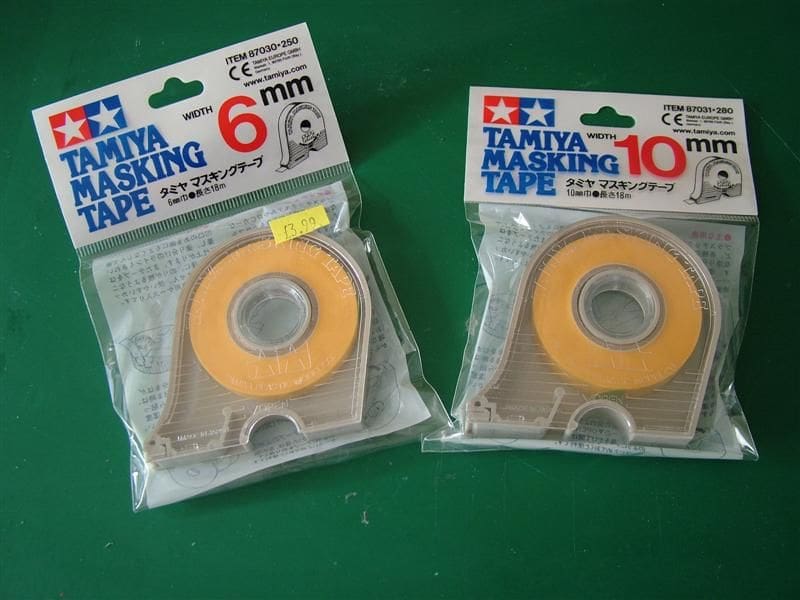
Masking tape. Use proper stuff intended for models not the car masking version, because the former gives a much cleaner line. Some cheap car masking tape is handy to have around, as you can cover a lot with paper and hold it with the cheaper tape, but mask the important lines with the best tape and you won’t regret it.
Airbrush cleaner. This comes in a spray can and includes oil for the mechanism.
Thinners. I use cellulose for all paint except acrylics where I use water. Used with enamel it dries faster than with the official correct stuff, reducing the chance of dust getting in the wet paint.
Also useful are; paint stirrers, kitchen towel, paper for masking, turpentine or white spirit and cotton buds for cleaning out the tool at the end of the session. If using newspaper for masking make sure the ink will not come off on to the model.
Paint choices
Your options for paints are numerous and flexible. I usually use Humbrol enamels which need to be mixed a bit less than 50:50 with the thinners. Revell paints tend to be thinner and need diluting less except their florescent yellow which is like spraying jelly. Games Workshop acrylics are good too if thinned down with water and offer some very bright colours with interesting names. Be careful mixing the two on a single model acrylic paints sprayed over enamel will react with the base coat. I like to varnish models to protect the transfers. While the model varnishes are fine you’ll find them expensive to use on the larger model. However there is nothing to stop you spraying domestic varnish from a DIY store. I’ve used Ronseal Yacht Varnish successfully, although it did yellow the white paint a little. Several professional painters use this in preference to the little tinlets. Do use a fresh supply though for each model, as an airbrush is very susceptible to bits in the paint and will easily become blocked.
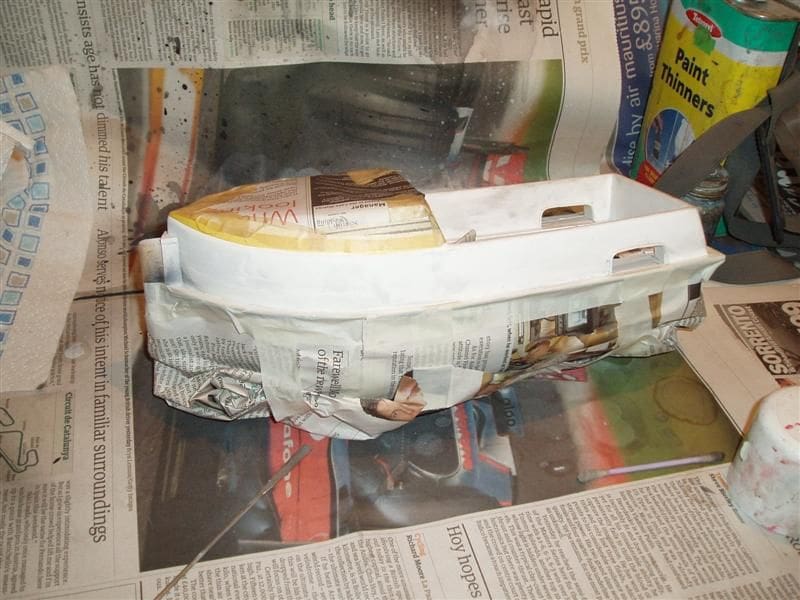
For your first attempts find a suitable draught and dust free place to work. I use a bench in the garage because the door can be shut to keep the worst of the smell out of the house. Also, for test purposes, don’t use the model you have spend months building. A cheap plastic bowl will do the job. Paint it with primer from an aerosol to give your top coat something to grip.
Once dry, mix up the paint and thinners. You are aiming for a consistency of milk but this will come with practice. Too thin is fine, it just takes longer to build up depth of colour. Test the airbrush with turps or white spirit on to some newspaper. Then attach the paint jar and spray some of this on to the paper until the colour comes through. Next start the spraying of the model or bowl and pass the spray over it keeping about six inches away. Once past, stop spraying. Then repeat, overlapping the last paint line. When you’ve finished the coat I like to warm the paint with an old hair drier so it dries before dust can settle. If you’ve over-thinned the paint do this and then put another layer on.
To be honest there is no substitute for practice. Things will go wrong, but you’ll learn how to cope. One cardinal piece of advice if you get blobs or runs, leave them alone. Don’t try and wipe the paint off with a cloth. Once dry, the excess can be gently sanded off and touched back in. Mind you, I still try wiping and I’ve just written this advice.
Once you are happy, clean the tool. First run turps though it. Then brush cleaner. Clean the orifices with cotton buds and more brush cleaner. Finally finish off with airbrush cleaner. As a precision tool, an airbrush benefits from a good cleaning and it’s easier to do it immediately after painting rather than before a new session.
Spray painting is unfairly seen as scary. The truth is that if you can use an aerosol can, you can use an airbrush. The only difference is that you have to thin the paint yourself and in this article I have only scratched the surface of the subject. Others I’m sure will be happy to expand on other aspects such as fancy paint schemes for racing boats or weathering for working ones. Sadly there is a high initial cost, but after this the costs are tiny and much cheaper than buying lots of quality brushes!