RICHARD SIMPSON and some thoughts on these useful techniques
Whether or not to add weathering to a model is one of those subjects that will be discussed to the end of time and most people seem to have a very definite preference as to how they finish their models. Some prefer the pristine ‘out of the shipyard’ look whilst some others at the other end of the spectrum go for the battered and bruised, blackened and dirtied model that looks just about ready for the breakers yard rather than the pond.
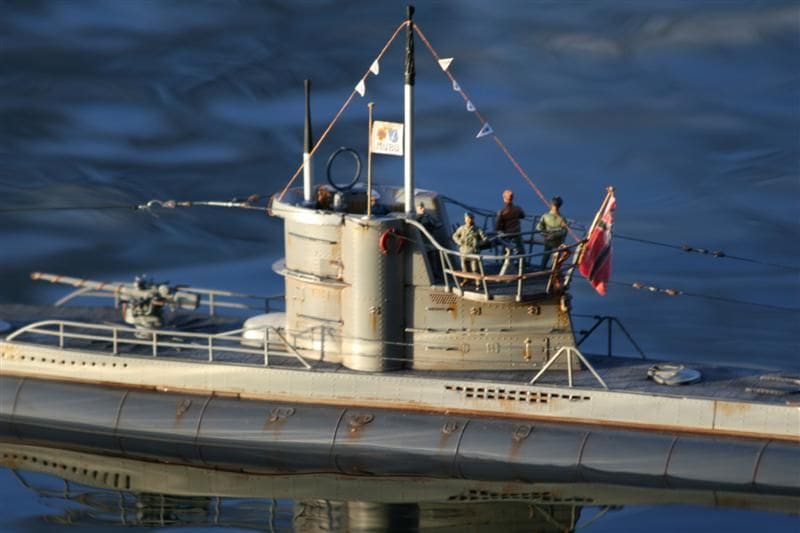
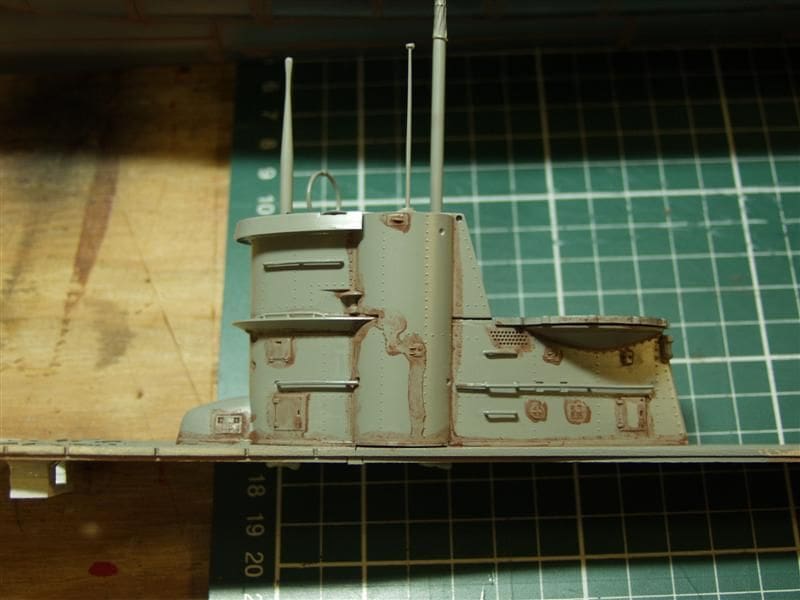
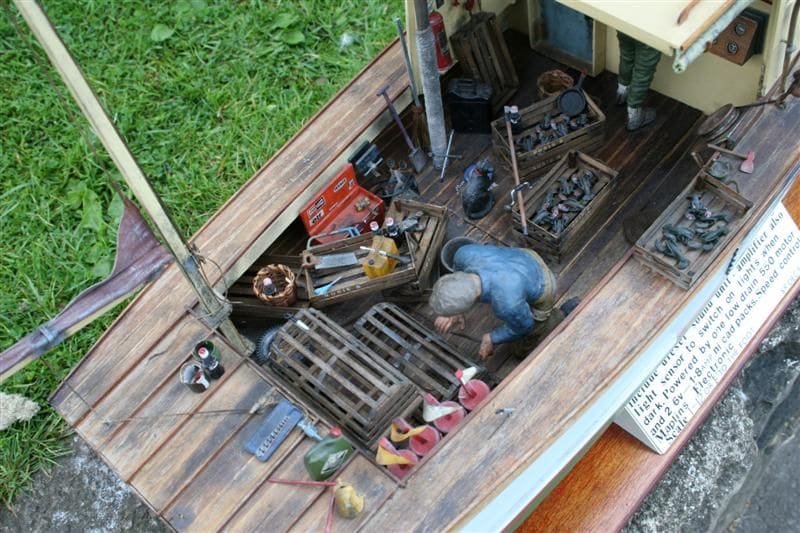
My own philosophy on weathering is really carried over from plastic modelling, which is something that I have continued to do for most of my life ever since my first Airfix HMS Ajax at the age of six, and the techniques I use all owe their origins to that hobby. My desire with my own modelling is to create a perfect miniature of the real thing, as it was at a particular point in time and therefore the purpose of weathering is to help me achieve that aim, Photo 1. I of course never actually manage that, but that then always gives you something to strive for in your future modelling. Too many people fall into the trap of thinking that weathering is all about making a model look dirty when in actual fact it is all about making it look simply used and far more thought is required to achieve that level of realism than simply adding some dirt and grime.
Enjoy more Model Boats Magazine reading.
Click here to subscribe & save.
Planning
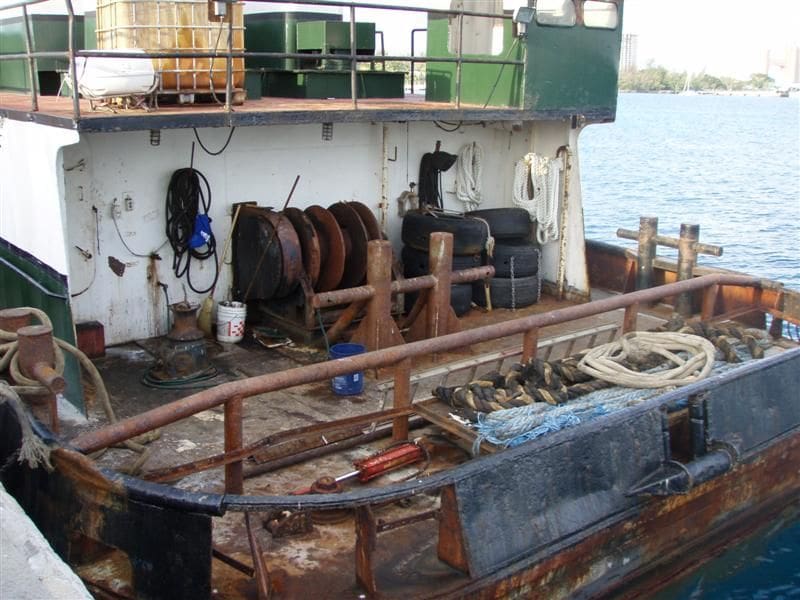
Here we go then; planning and preparation is the key, but with weathering as with any other part of the build you need to think about what you want to achieve and how you want to achieve it. The first thing to do is to study the real thing as much as you can. This can be in photographs or ideally by actually visiting vessels of the type being modelled. Decommissioned ships are perfect as they give you the opportunity to see a ship that has seen many years of service, so weathering opportunities are easier to spot and it also lets you take your own pictures of specific areas that you want to emulate, Photo 2. The type of vessel that you are modelling will also dictate the level and techniques that you want to use, as well as the scale to consider in the planning stage. If you think of a modern warship to a scale of 1/96, then the weathering would actually be quite insignificant and hardly noticeable if you imagine the real thing from a scale distance, but a coastal steamer to 1/35 scale may well require considerably more weathering to achieve an appropriate level of realism. At this stage you need to study the real ship as much as possible, identify the aspects of it that are as a result of wear and tear and then decide on how you are going to create the effect. Then, once you have made your decision, you have to put some thought into how you are going to apply the effect. Just a couple of good examples of weathering are the warping ends on winch gear where the ropes always wear the paint away to bare metal and the cylindrical portion of bollards that also get worn away by the action of the ropes.
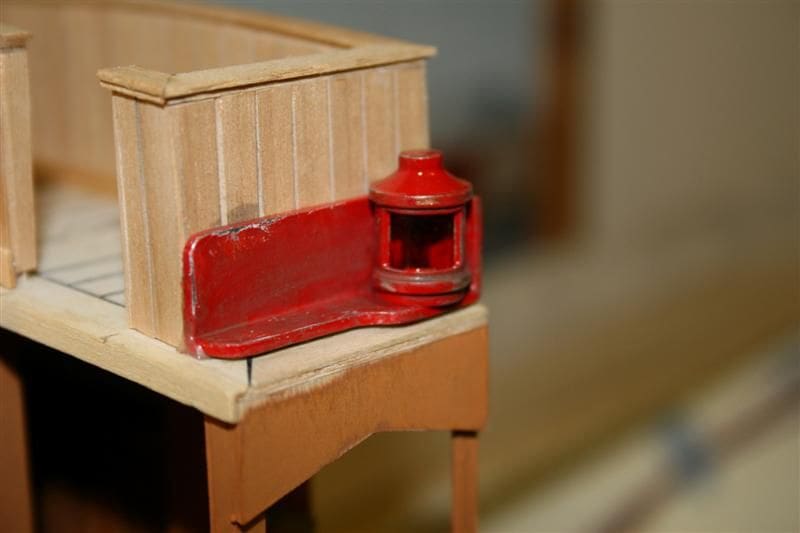
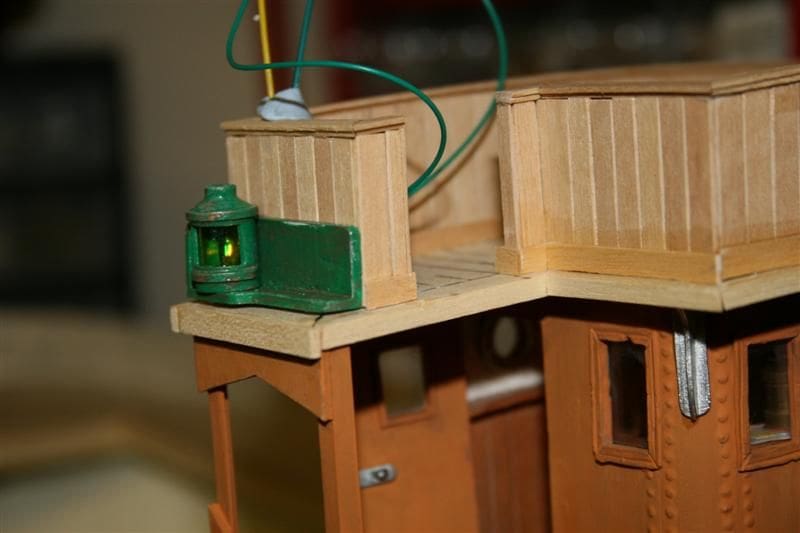
Simple techniques such as painting the items then eroding the paint away with fine wet and dry sandpaper cut into very thin strips which are then dragged over the worn areas, make a huge difference to the realism of the item. Another one is navigation light fittings which may well be supplied as either white metal or brass fittings in a kit. The construction of all ship’s lamps up to a change in regulations in the 1980s was of copper, so paint your lamps with copper paint, then over the top with red or green gloss before finally carefully scuffing some of the top coat away to reveal the copper underneath, Photo 3.
One trap to fall into is doing weathering as you go along when making a model and finding, usually far too late, that the various finished parts look significantly different. This can happen when a model takes a number of years to complete and can lead to the overall effect being quite odd. The best method is to wait until you have finished and then do all the weathering in one go, unless of course there are areas that will not be accessible at that point. That way you can be consistent in your weathering techniques and colours and ensure that the winch you built two years previously ends up looking the same as the capstan you built last week.
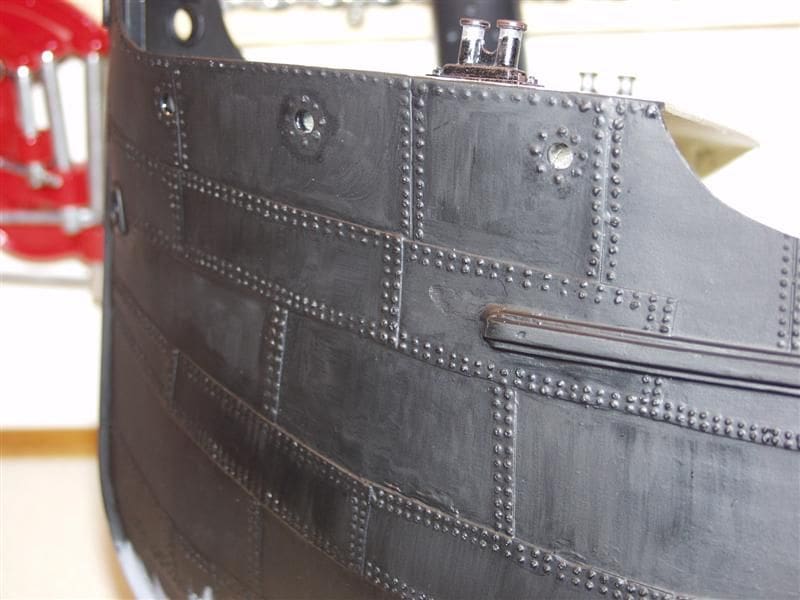
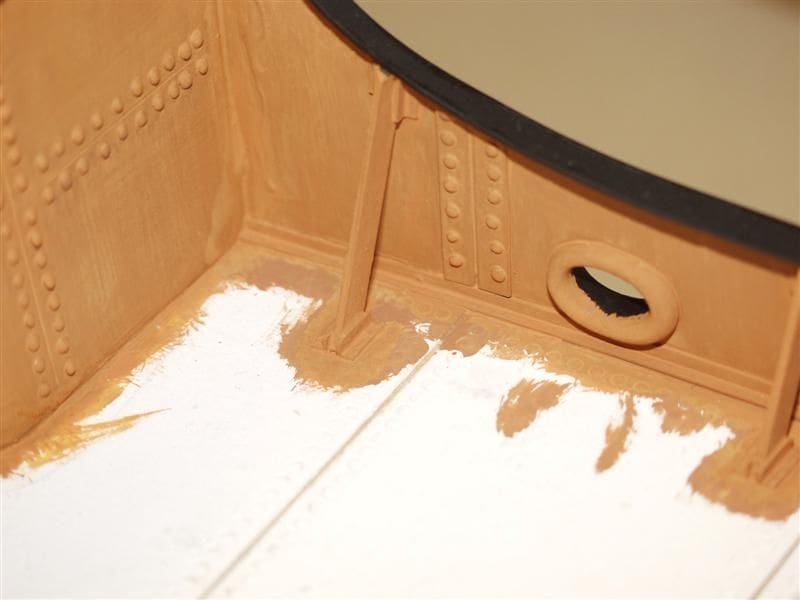
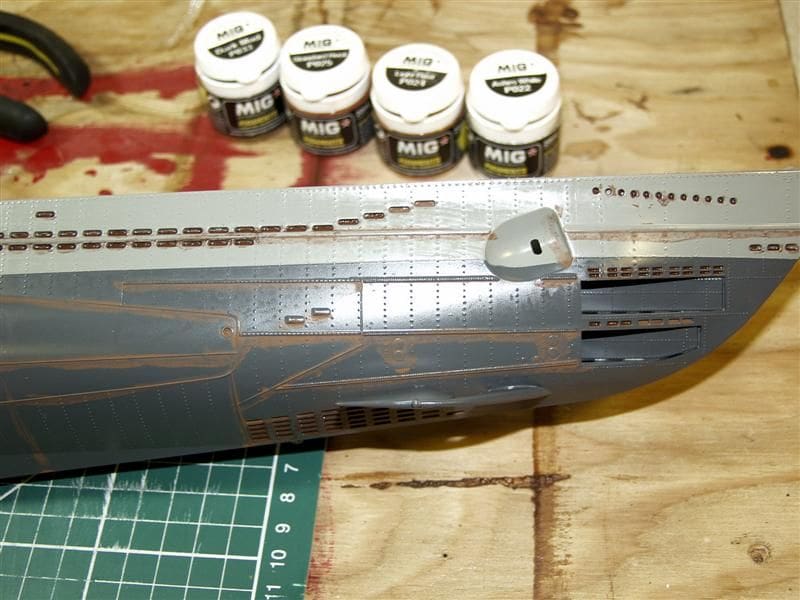
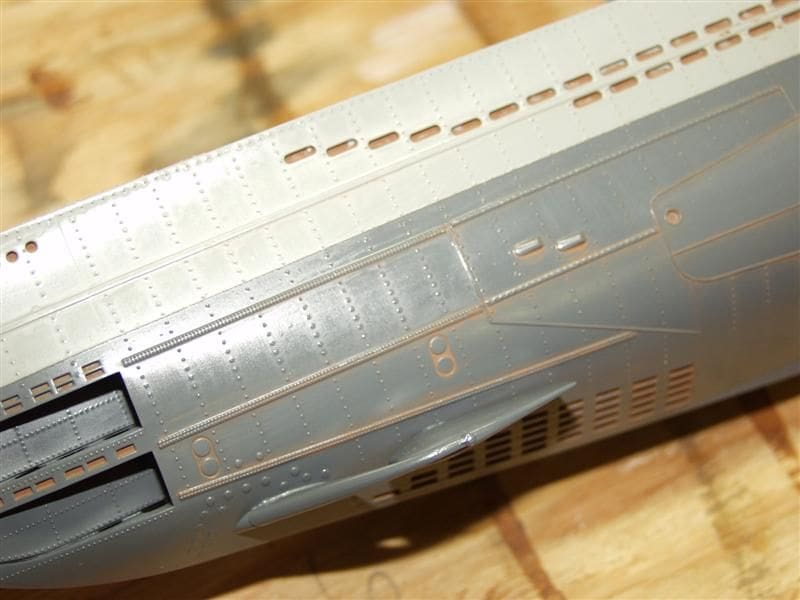
Part of your preparation is also the foundation for weathering that you create while you are making the model in the first place. Considerations here all revolve around the paint finishes, which will ultimately have an effect on the weathering techniques that you will put over them later. One good tip is to try to avoid using paint straight from the tin. Modelling paints are very bright and when scaled down can actually look unrealistic. If you are creating a weathered looking vessel consider adding a small spot of brown or grey to white paint to take the brilliance away from it and modify other paints in a similar manner. Paint finishes also play a big part so don’t think that matt or gloss are your only options. A plated hull in black can be made much more realistic by mixing matt and gloss paint to form a satin finish which can then be varied slightly to paint different plates. This will make the plate detail stand out before any weathering starts, Photo 4. Don’t worry though when the paint does not dry as fast as it looks, because matt paint dries first and the surface looks dry but gloss paint has to dry over a longer period, so it may well not be safe to handle until the next day. Sometimes it can be worth considering using what you might think of as an undesirable feature by allowing undercoats to show through slightly. I have used a dark earth mixed with a small amount of orange to give two base coats on my old coaster and then finished with a single coat of the same orange mixed with the same brown. The darker undercoat shows through the lighter orange on top very subtly and enhances the overall colour which in this case is more effective than going for a perfect overall consistent colour, Photo 5.
Another preparation trick is to consider the surface finish. For some models a high gloss coat is very desirable, but for a model that you want to weather, trying to recreate the original is the challenge. Old vessels could well come from a period when spray equipment was not used, so to spray the paint on such a vessel will achieve a very even perfect coat which could be a long way from the real thing. I always paint such models by hand with a small flat brush which helps to generate a bit of texture more appropriate to the real surface.
With this article I want to start off by looking at two very basic weathering techniques, which form the foundation for many others, but which on their own will take your model to a whole new level. They are both very simple, but they transform your model for relatively little effort and you definitely get a good result from these two on their own. The two things we are going to look at now are washes and dry brushing.
Washes
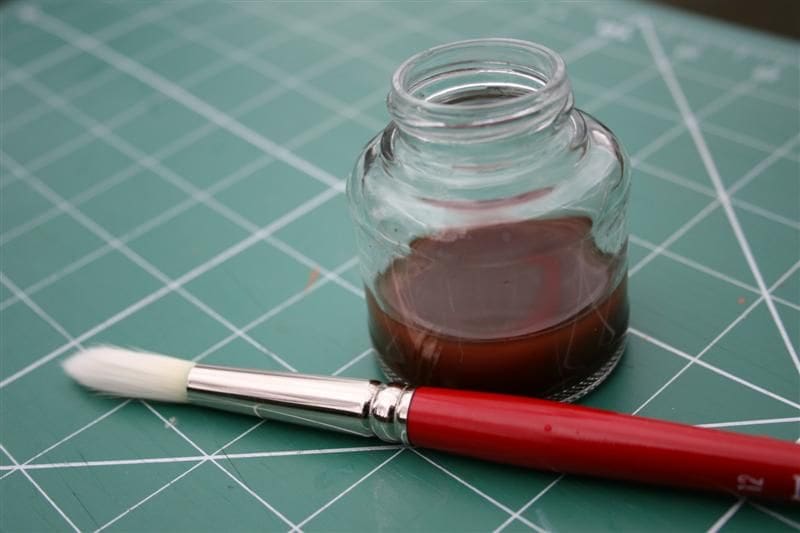
Like so many things, the term ‘Washes’ covers quite a wide spectrum in itself and a wash can be of any one of a number of mediums. The way to think of it though is that a wash will enhance areas of shadow. A wash consists of a solvent such as water or enamel thinners containing a small amount of pigment such as enamel paint, watercolour paint, pastels, powdered pigments, oil paints or whatever paint you deem appropriate. The idea is to make the wash very thin or watery and will consist of only a few drops of pigment in a large quantity of solvent, Photo 6. Some people, including myself, have actually used dirty thinners from the brush cleaning jar as a wash, which is about the level of pigment you want and it actually works very well. The medium you decide to use for the wash is generally dictated by the finish of the surface you want to apply it to as basically you do not want the solvent to affect the base. If you are applying a wash over enamel paint you could use a water colour wash or a thinners and oil paint wash, but the important thing is that you do not use a solvent that will attack the base coat. Care has to be exercised when using white spirit or turpentine. They both clean brushes, but turpentine can prevent enamel paint drying. Cellulose cannot be safely used over enamel paint, but in reverse the enamel will not attack the cellulose. One of the problems is that many of the solvents used nowadays are synthetic and have different properties from the older varieties. They often smell different as well!
One thing to remember is that if you are using a water based wash over a gloss surface it is always best to add just a spot of washing up liquid. This will break the surface tension of the water and stop it from forming beads that sit on the surface. If you see bubbles coming from the area of your model you may have used too much. As always, test before attacking your new pride and joy with the weathering brush!
The colour of the wash will also very much depend on the model you are building and where the wash is to be applied. Areas around a coal bunker will almost certainly benefit from a dark colour, almost black, whereas light coloured vertical bulkhead plate joints would look odd in such a stark colour so a much toned down brown would be more appropriate. The best advice is to always experiment on scrap material until you are happy with the overall effect and try to imagine what the entire model will look like when completed.
Wash application
There are two basic ways of applying a wash. One is by applying it all over a model and allowing it to flow into the shadow areas and the other is to apply it more carefully to areas of recessed detail then remove the excess afterwards leaving only the detail parts with wash on them. This is the normal technique used on model aircraft panel lines, but can just as easily be applied to plate joints on a boat. Considering the first method, this may be for a model that requires heavier weathering such as a coaster, collier or barge where you want to simulate heavy use. The wash is best applied over a matt surface where it will also shade the surface as well as collecting in the recessed detail. If you are applying a wash such as this then you should apply an area in one session, as successive coats will overlay the first and could cause patches and uneven cover. You should also bear in mind how gravity is going to affect the wash and such items as a box shape could well be done one side at a time to better control the coverage. A number of light coats could help you to build up the effect, but if you are using a water based wash this will almost certainly dissolve the previous coats and you will loose control over the effect. The challenge with this type of wash is that it is a lot more difficult to remove if you are not happy with it when applied over a matt surface, so possibly you need more experimentation beforehand before you commit to your model.
The second method should only be applied over a gloss surface so if your model is to have a matt finish then it will require a clear gloss coat first to which to apply the wash. This can consist of a clear gloss enamel or even clear gloss varnish, but one of the most widely used in the plastic model world is Johnson’s Kleer Floor Polish. This is basically no more than a clear gloss acrylic covering that dries thin and evenly without hiding detail or colour. It may well require two coats of the Kleer to give a reasonably glossy surface for the wash. Once the gloss surface has dried you can then apply the wash, not all over with a large brush, but a bit more controlled over the recessed detail only, Photo 7. The wash will flow into the detail and dry and because it is on a gloss surface, the excess can now easily be removed. If it is a water based wash this could even be done with a damp cloth by very lightly wiping over the surface of the finish, being careful not to remove the wash in the recessed detail but only the wash on the surface, Photo 8. If you have used an oil based wash then you could be removing it with turpentine with either a rag or cotton buds, but the idea remains the same, you are removing the excess and leaving the wash in only the recesses. One beauty of this technique is that if you are not happy then the wash can relatively easily be removed and you can start all over again.
Those then are the two very basic methods of applying washes for different applications and which give quite different results. As with all aspects of modelling but especially finishes, I would always strongly recommend practising on scraps with different paints and washes to give to the best chance of achieving the results you are after when you actually decide to commit to the model. When the wash process is completed and you are happy with it you are usually best applying a top clear coat in the finish you want to seal it all in. This is obviously considerably more important with a water based wash on a model boat! Clear coats of varnish, enamel or Kleer can be either sprayed or brush painted to enhance the surface texture if that is what you are trying to achieve.
Dry brushing
Whereas washes do a very good job of enhancing shadow areas, to really complete the effect you also need to consider how to bring the highlights out as well. Instead of making the shadows darker we now need to make the highlights that bit lighter and the easiest way of achieving this is with dry brushing. Dry brushing is another technique widely used in the plastic model world and is a means of applying paint to the raised areas of a surface only. These are the parts of a component that would catch the light and therefore painting them in a lighter colour will enhance that effect. Dry brushing can easily be done with enamel or even oil paints, but enamels tend to be that bit easier to apply and control and with the paint being available in matt, gloss and metallic finishes, it is also much more versatile. Acrylic paints can also be used, but they suffer from the fact that they dry so much quicker and are much more difficult to control. I therefore always use enamel paints for dry brushing. Another good use of dry brushing is to create an effect of wear and tear on a part, which can be done by the application of metallic paints to an area of a model to simulate the fact that paint finishes have been worn away exposing the metallic surface below. This can look particularly effective on such things as machinery where paint is worn off handles or on the handrails around a ship.
To start off with dry brushing it is probably that bit easier to have a go at highlights on a matt surface. The matt surface takes the paint more evenly, so a drier brush can be used which makes building up the effect a little bit easier to control and to achieve smooth shading. The best technique with highlighted areas is to start off with the base colour with which you painted the entire item and add some small spots of white to a sample of it. You are looking at creating a slightly lighter shade rather than something that looks obviously different, so go easy on adding the white. When you are happy with the shade, use a large but soft brush and get a small amount on the brush. Then you wipe it off again with a piece of kitchen roll that you have to hand. Don’t worry about having a roll next to you for this as you will need a lot and your wife will soon get fed up looking for the spare she thought she had and start to buy you your own. When you have wiped the paint off the brush, flick it backwards and forwards over the white kitchen roll. You will probably have to wipe it again, then try flicking it over the paper again. You are looking for shading rather than the actual application of paint and by that stage the brush will almost be dry. When you are happy that you can only just make out some paint on the paper, have a go at applying it to the model. You need to flick the brush over the component, quickly and fairly vigorously and you should see a shading of the highlights starting to appear. Being nearly dry the paint on the brush does not last too long, so you will spend most of your time putting paint on the brush then wiping it off again and you need to be striving for a consistency in the amount of paint and the action you use in applying it. If you have the shade of the paint right and the quantity correct, then you will see the highlights bring the part to life and it will immediately look so much more realistic, Photo 9. You can with practice do a heavier application with a slightly adjusted base colour then go over with a more modified base in a lighter application to produce quite effective and subtle shading. Once again practice on scrap material before committing to the model, but you will be surprised at how easy it is to achieve very impressive results.
If you want to use dry brushing to produce worn paint effects then you need to select a metallic paint such as gunmetal or metallic grey and do the same thing over the item. Don’t go for something as harsh as silver as it will be far too obvious and look odd. As with all weathering effects they should enhance the model without being obvious and subtle shading is far more effective than heavy applications of dirt coloured paint. If you get the metallic paint application correct it will look like the painted surface has been worn away to reveal the bare metal underneath, which itself is then polished with use. This technique works well with gloss or satin painted items of machinery with the application of a matt metallic paint. Once again different shades can be added over each other to build up the effect, but take care not to overdo it, Photo 10.
Conclusion
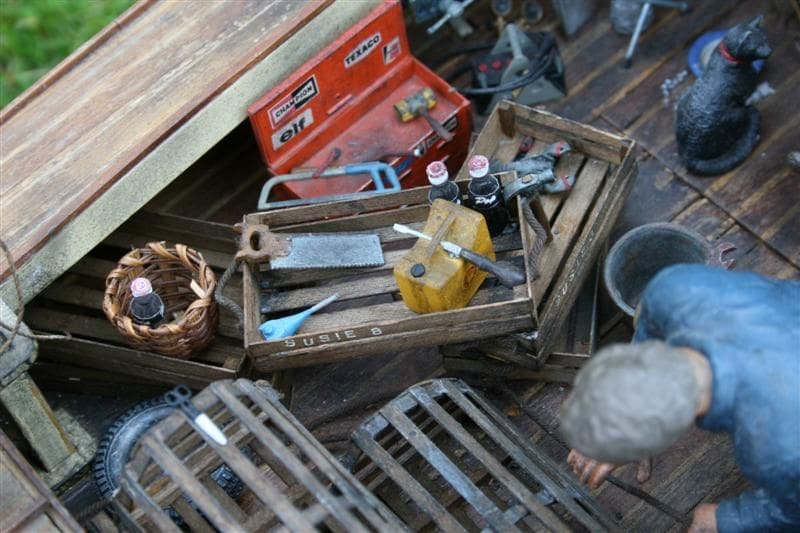
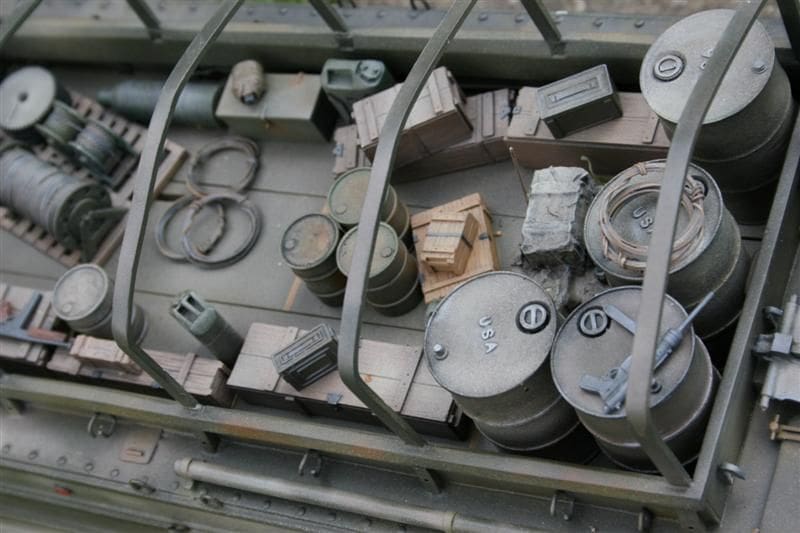
So there we have two basic but very effective means of weathering that on their own will transform your model. They also form a foundation for other more advanced techniques that we will explore in the next article, but in the meantime try some of these things out on scrap and get a feel for how they can be used. It is worth having a look at well made and painted military vehicle dioramas to show what can be achieved.
If you really want to stretch yourself get one of your old dusty models out of the attic, wash them off and have a play. You can’t beat having a ‘paint hack’ to hand to try things out on before you commit to your model. The beauty of a paint hack is that you can give it another coat of sprayed on grey primer and start all over again!