Richard Simpson tries out some of the new and upgraded products from this much-loved manufacturer…
I am sure I’m not alone in being a modeller who has been putting together various types of models all my life and who has, over the years, accumulated a veritable stash of products. I certainly have a small drawer full of Humbrol enamel tinlets which I started to collect as a teenager, and it still surprises me today when I open one up and find the paint in just as good a condition as it was when the lid was last placed on the tin more than 40 years ago!
Equally, therefore, I imagine I wasn’t the only one who, several months ago, was concerned to see the rash of postings on various online forums prophesising the end of the Humbrol enamel tinlet. This speculation was prompted by word that new regulations banning the sale of products that contained an anti-skinning agent used in Humbrol’s enamel paint were being brought into force. The only way to find out what was actually going on was to speak directly with the one of the team at Humbrol, which numerous people did, and the response was that while the rumours regarding the anti-skinning agent were true, Humbrol was already in the process of redesigning the formula of its enamel paints across the entire range and this would soon be on the shelves. Shortly after, the following statement was issued by Humbrol’s UK spokesperson, Mr. Jamie Buchanan: “Over the past 18 months we have very much focused on Humbrol product development. Not only bringing new products to the market but also improving existing products, we are very keen to showcase this as broadly within the Hobby and modelling market. We are very proud of the Brand and products within and what the future holds for Humbrol, exciting times!”
Enjoy more Model Boats Magazine reading.
Click here to subscribe & save.
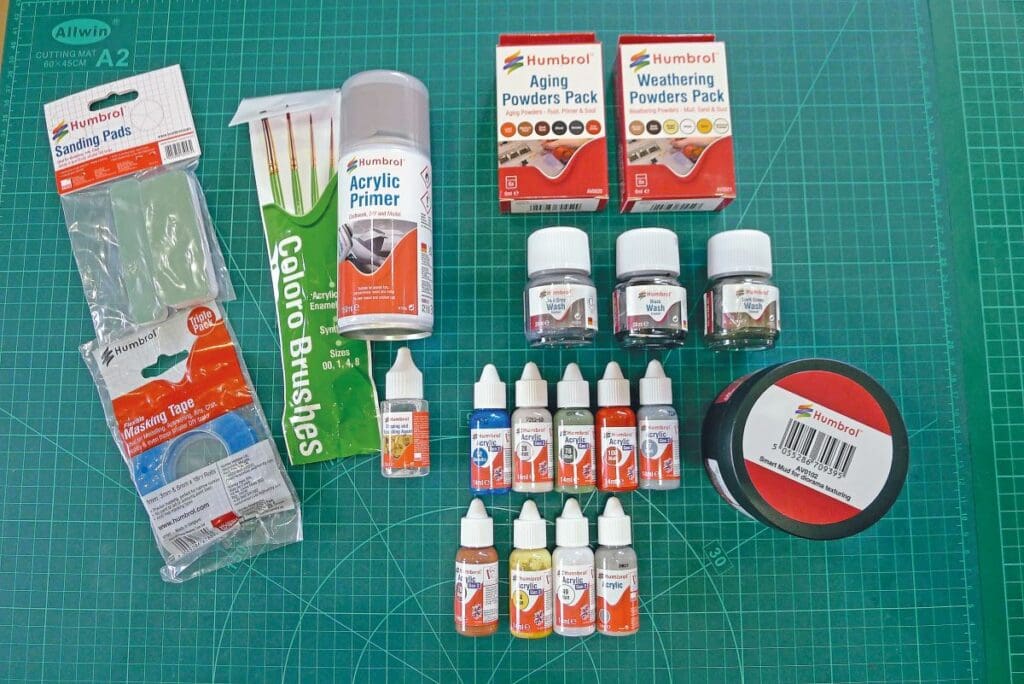
During my conversations with Jaimie came an offer to try out some of the new and redesigned products. Recently, therefore, a package of Humbrol products arrived for review (see Photo 1). As I am in the process of building a Billings kit of the African Queen at the time, I thought a good idea to try out some of these new products on the model as this would enable me to compare them with the brands I’d normally use. Consequently, I put the boiler together out of sequence with the instructions so I could use this a test bed, particularly as it provided quite a range of different media. What follows, then, are some of my initial observations…
Primer
A rattle can of primer was included in my Humbrol package, so the obvious first step was to prime whatever parts I was going to have a play with. The grey acrylic primer, in a 150 ml can, received was, therefore, given a good shake before I tried applying it to a ModelU resin figure and various parts of the African Queen steam plant. I am pleased to report that it sprayed nice and evenly and that the paint dried quickly to form a very smooth regular coating which was fine enough to not obscure any detail (see Photo 2).
Acrylics
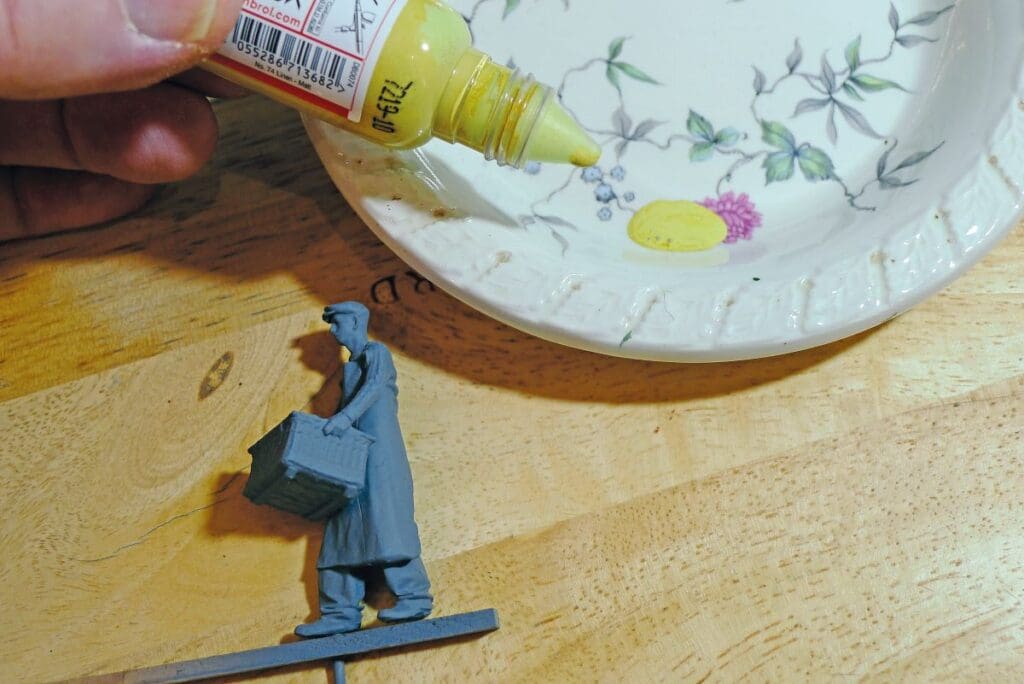
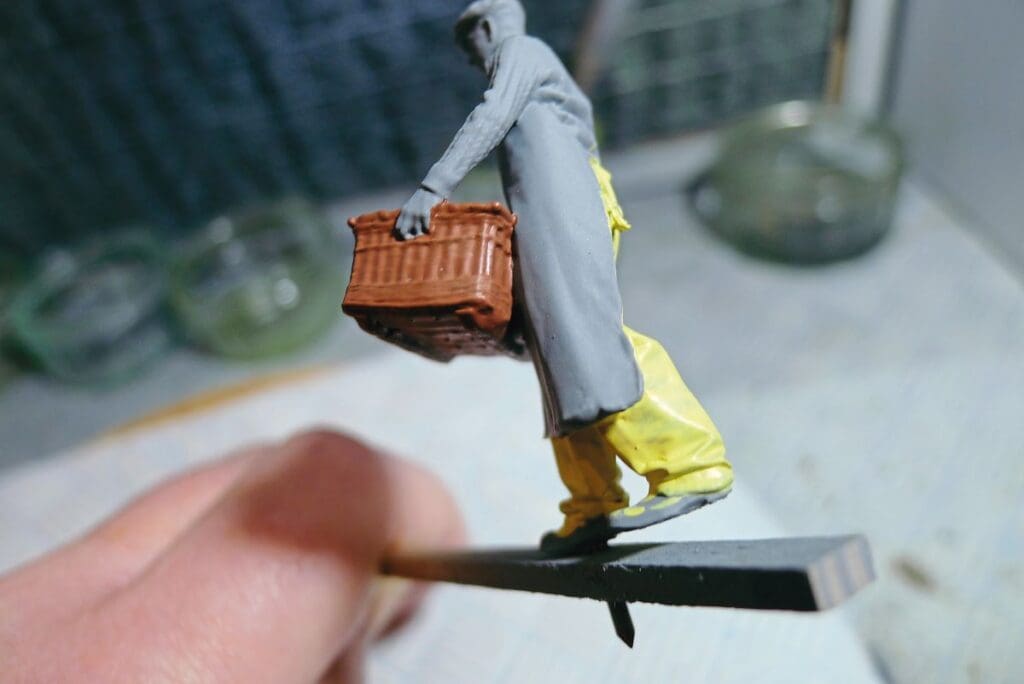
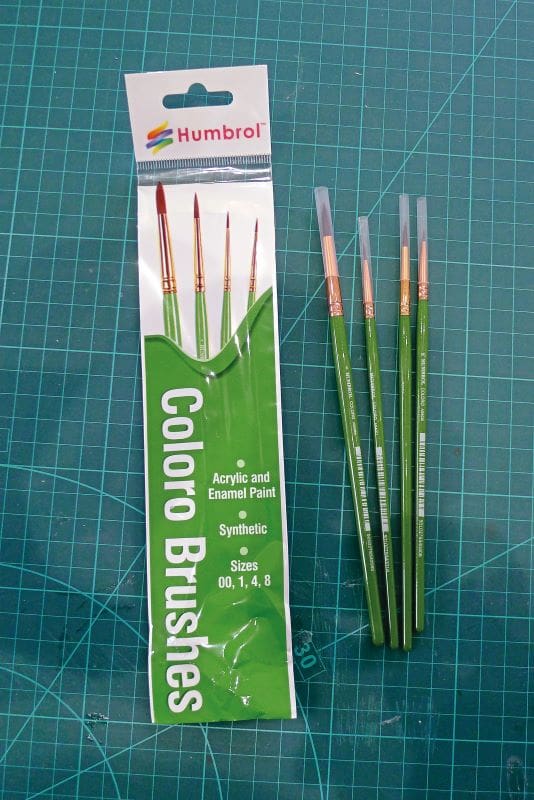
Humbrol’s second generation formula water based acrylic paint is supplied in 14ml squeezable plastic bottles. This enables your paints to be squeezed out in small quantities onto a mixing palate, or old saucer, to enable easy blending of your colour and watering down as required (see Photo 3). I applied a yellow to my figure’s waterproofs and a brown to the wicker basket neat from the bottle. The yellow definitely required two coats to cover the grey primer, but the brown covered perfectly with just one. Obviously, a white primer would be better for the yellow. So, when painting something that necessitates the application of various colours, such as a figure, you first have to decide which colour/s you’d prefer to coat twice before selecting an appropriate colour primer (see Photo 4). To apply the acrylic paint, I used Humbrol synthetic Coloro brushes. These brushes allowed me to achieve a perfectly even and satisfyingly smooth finish (see Photo 5), which, even if I say so myself, looked quite cool complemented by the copper-coloured ferrules.
Chipping fluid
I didn’t realise that Humbrol now produce a chipping fluid, so I was keen to give it a go and see how it performed. I’ve used both other manufacturers products and the good old hairspray technique for producing chipped paint effects in the past but have always tended to fall back on the hairspray as it’s so cheap and easy to work with. I was, therefore, interested to see how the Humbrol product compared and decided to chip the paint on the boiler funnel.
The first part of this process involves applying a metallic coloured base coat, so for this I used Humbrol Metal Cote enamel paint over the whole top of the boiler. I like Metal Cote as you can buff it up after it has dried to produce a very realistic metallic sheen, which can be even more effective than a dry brushing process. The Metal Cote was applied by brush and then followed by some matt rust-coloured enamel applied in random splodges (see Photo 6).
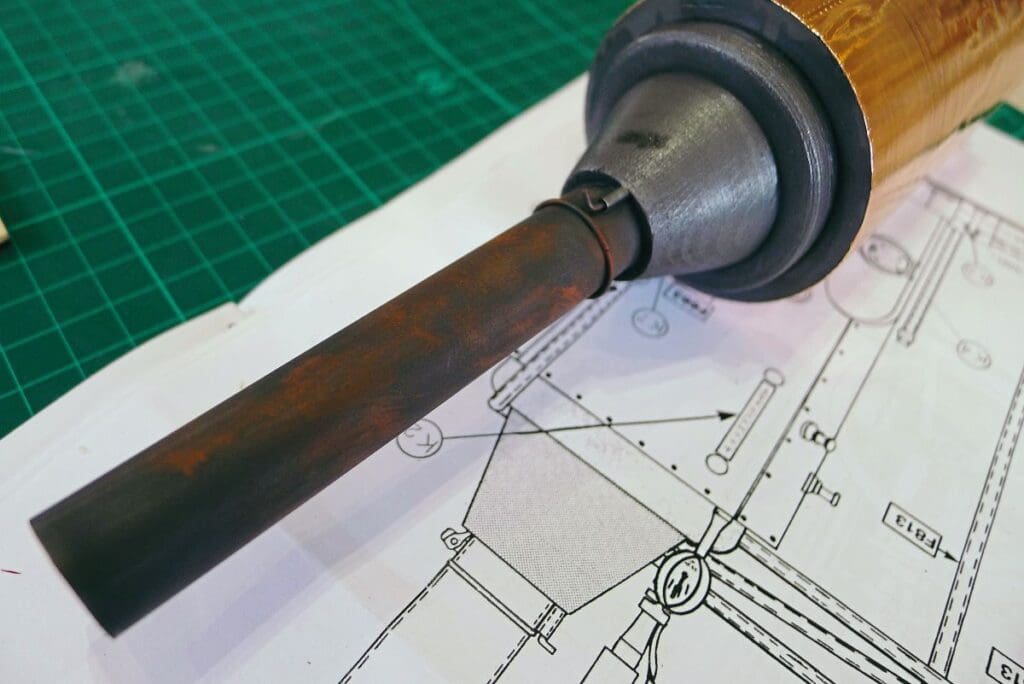
When it came to applying the chipping fluid the first noticeable property was the fact that it was thicker than any fluid I have seen before. This made applying the fluid with a brush very much easier and much more convenient than I was used to, so the fluid was applied in a couple of minutes. This was then left to dry until the next day, when a coat of water-based acrylic paint was airbrushed over the funnel (for this process to work you must use a water-based acrylic). Again, I used a Humbrol Generation 2 water-based acrylic. I watered this down to enable it to spray successfully but I think my ratio was, at 50-50, a little too wet, so I would suggest a ratio of 70-30 might be better for airbrushing. Once the acrylic grey had dried, it was sprayed with clean water from the airbrush before the paint surface was teased with a small brush. Humbrol’s acrylic paint lifted just as I’d hoped, giving nicely chipped paint effects and revealing the rusted metallic surface below. A word of caution here: great care needs to be taken with the chipping effect, as too much water and too much enthusiasm with the brush can remove too much paint!
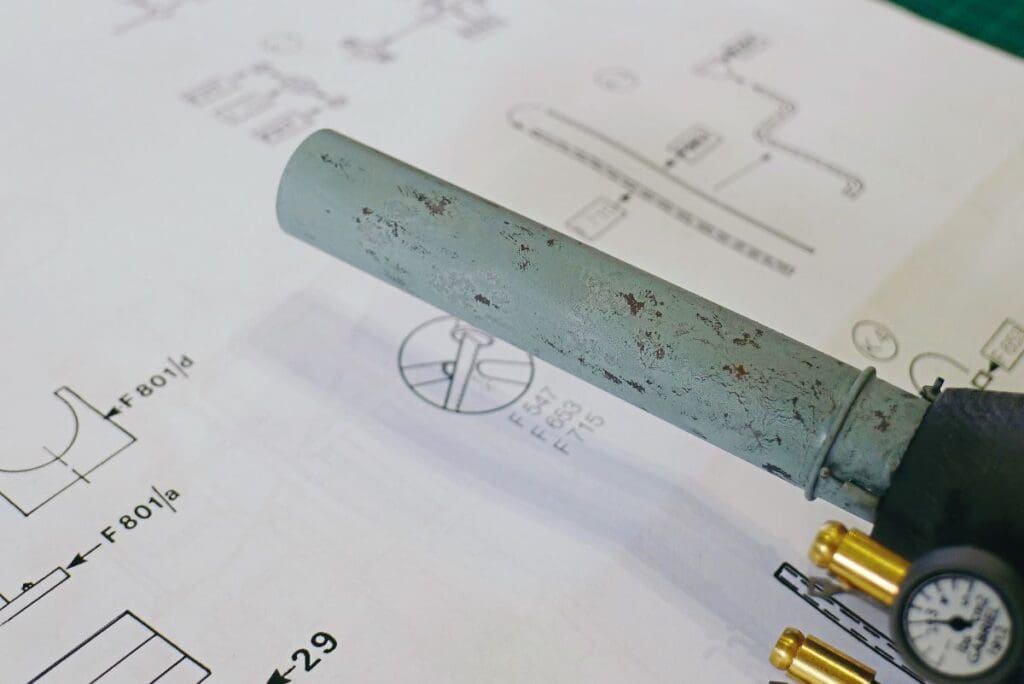
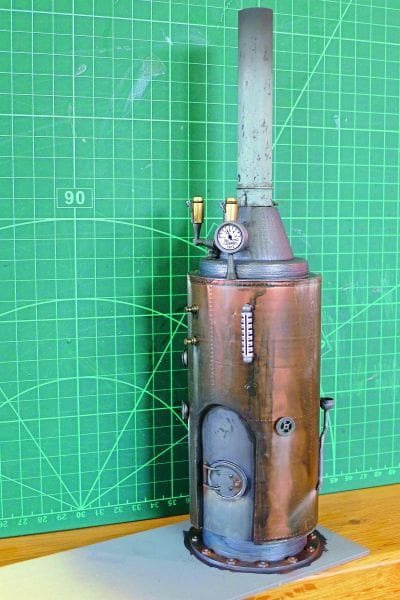
Humbrol’s chipping fluid certainly proved to be both easy to use and very effective, and the water-based acrylic paint airbrushed well, giving a nice even coat. At the end of the day, I had a nicely chipped funnel for my boiler (see Photo 7).
Pigment powders
Pigment powders consist basically of finely ground coloured powders. When these powders are applied to a surface, the minute particles of powder get caught in the equally minute surface textures they are being applied to. Consequently, a rougher surface, such as a matt finish, holds on to pigments much more easily and readily than either a satin or a gloss surface does, and hence the finer the particles of the pigment, the better they will adhere to, and remain on, a surface.
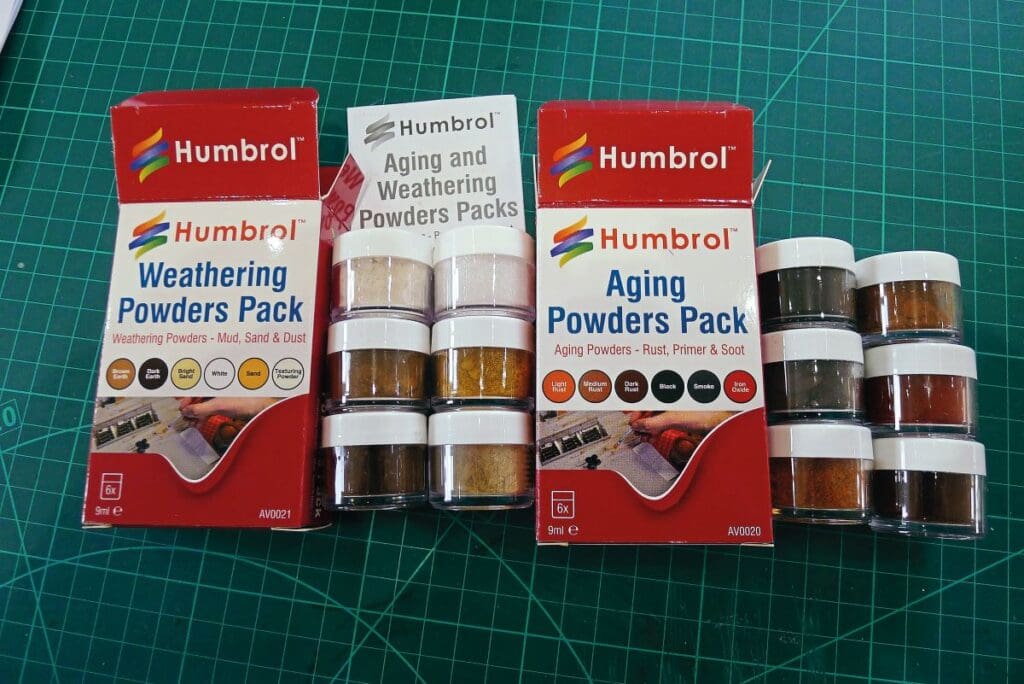
Humbrol pigments are not aimed at the high end of the market and so do not adhere as well as the very expensive, very fine, pigments used by professional modellers. They do, however, open up a whole new area of possible effects to the serious hobbyist, within a much more reasonable price bracket. They are available in either individual 45ml bottles or in sets of six different colours, organized around type of use, with one set even incorporating a texture enhancing powder to help with the creation of mud and scenic textures (see Photo 8).
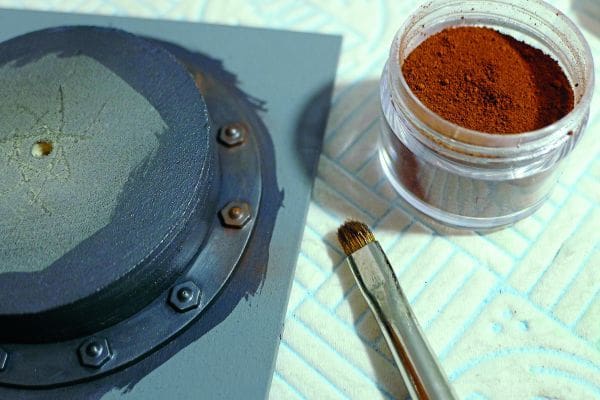
What the pigment particle size means is that the Humbrol pigments will not adhere easily to satin or gloss surfaces but work perfectly well on matt surfaces. I enhanced some holding down nuts on the boiler base that had been pre-painted with Metal Cote Gunmetal paint and the pigment held well to the surface (see Photo 9). The pigments didn’t hold so well to a satin finished surface, but if this is a requirement for a particular model then the surface could be made more accommodating by either spraying or brush painting a coat of matt acrylic varnish over the top of your paintwork before applying the pigments.
Washes
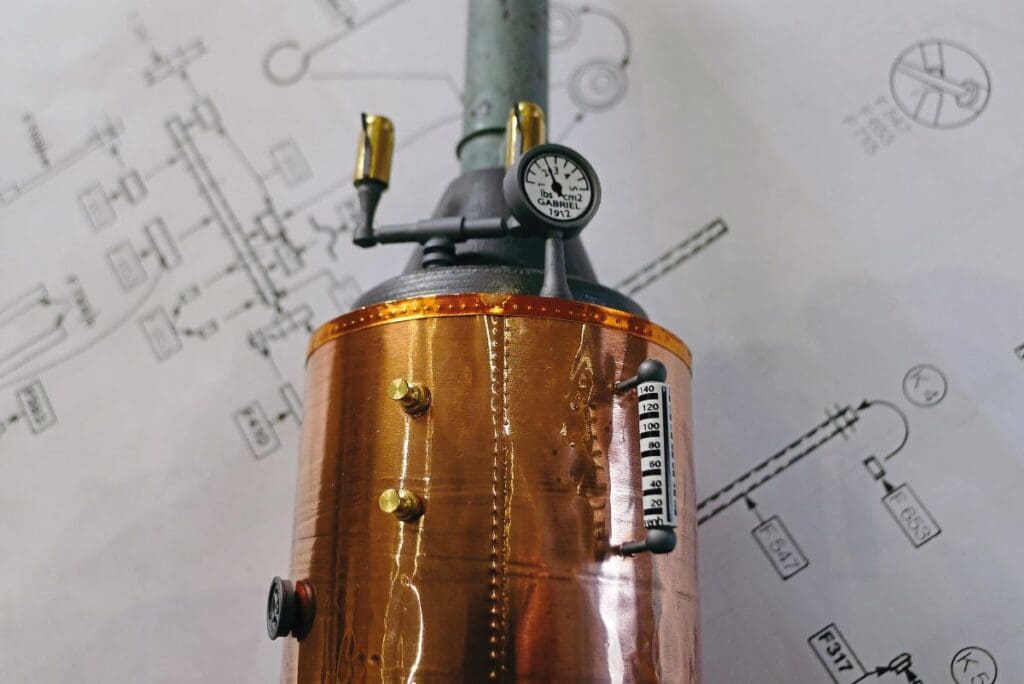
The next thing I wanted to have a look at was the washes. While washes are basically nothing more than very highly thinned down paint, and therefore very easy to make yourself, the great beauty of purchased washes is the fact that you have a consistency of colour across not just a single project but a number of projects. I chose to do a wash over the boiler surface to enhance the detail of the riveted surface and the knocked around cladding as well as the metal fittings and the wooden boiler top, thereby seeing it on metal, wood and plastic surfaces (see Photo 10).
I am used to being able to apply a wash, wait for it to dry, and then remove most of it with a wide flat dampened brush, leaving the wash only in the recesses of the detail. Unfortunately, the Humbrol wash caught me out slightly because it refused to be removed after being applied only a couple of hours previously (see Photo 11). Luckily, in this case the boiler will be having further weathering done to it to bring it more in line with the movie version of the African Queen, but it did remind me that a test piece is invaluable when first using a new product. The Humbrol wash did seem to be unusually dense when compared with other washes, so I suspect a good deal of thinning down may be required. On the plus side, of course, this will make it go a lot further.
Enamel paint
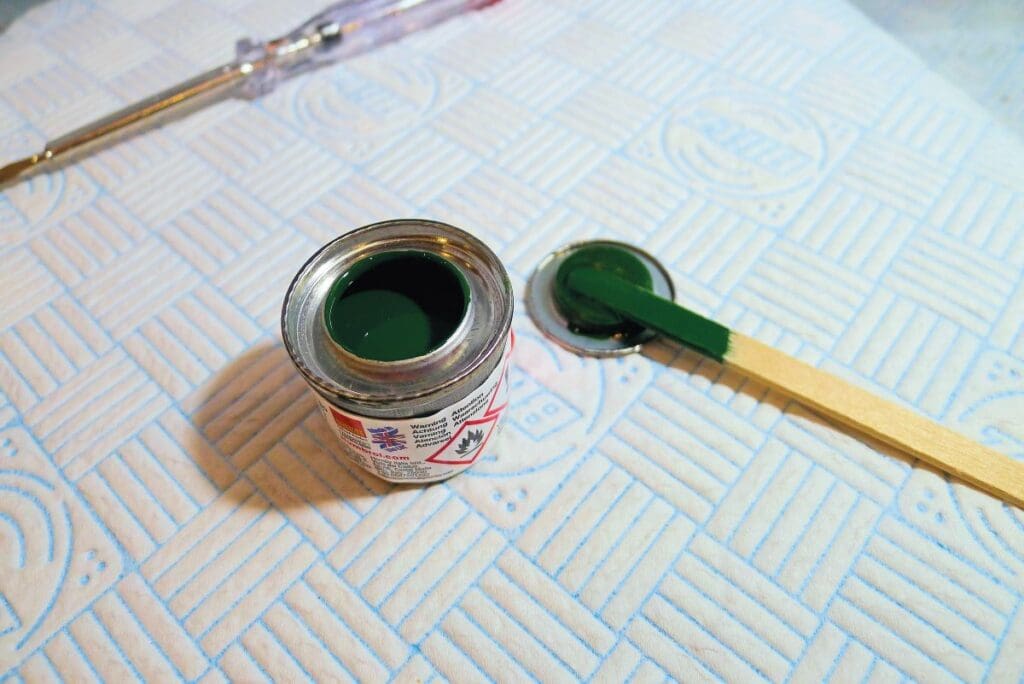
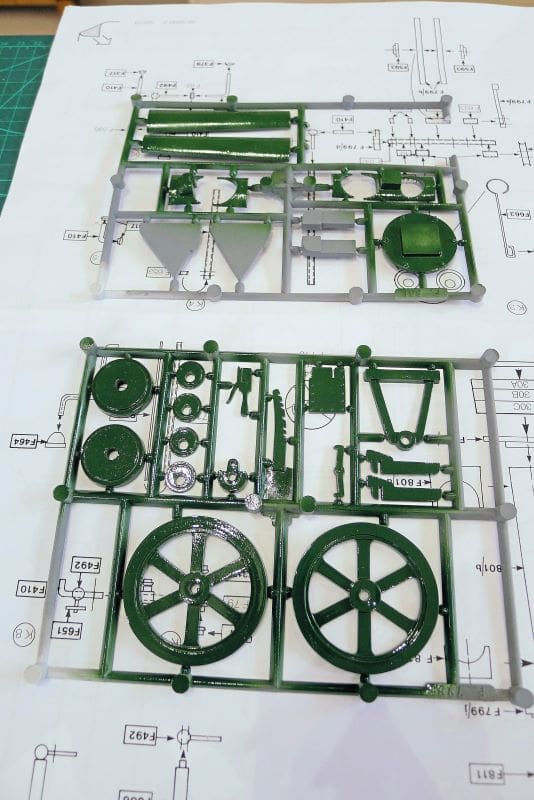
Going right back to the beginning of this article, the one product that I was particularly interested was the new formula enamel paint. Humbrol had sent me a couple of tinlets to try out, so I thought I would have a go at airbrushing the green components of the African Queen’s engine. I left the parts on their plastic sprues for convenience, safe in the knowledge that subsequent weathering would cover up the touched-up attachment points, and first of all gave them a coat of the Humbrol acrylic primer. A couple of days later I opened the tinlet of gloss green enamel and gave it a good stir (see Photo 12). I then mixed up some green gloss enamel in around a 60-40 ratio of paint to thinners and give the parts a couple of coats with the airbrush.
The paint behaved as expected in the airbrush, coated the parts well and left a very pleasing high gloss finish. The density was certainly as good as any other enamel I have ever used. I didn’t touch the parts until the next day, by which point the paint had dried to a hard surface (see Photo 13). I have to say there doesn’t appear to be any noticeable change in performance between the previous formula paint and the new formula, so I for one will be very happy to continue using Humbrol enamels as I always have done.
Conclusions
I think the Humbrol enamel and acrylic paints can hold their head up and be seen as equal to any other product on the market. Coverage and finish are good and when applied by either brush or airbrush these products give pleasing results.
I think it’s a brave and welcome move to see Humbrol taking tentative steps into more serious areas of modelling techniques and finishes, and while they are generally not aimed at competing with the very high-end products favoured by the serious/professional scale modeller they do offer access to techniques previously outside the price range of the enthusiastic hobbyist. This in itself can only be good for the hobby and will maybe tempt less experienced modellers to have a go at things like chipping effects, washes, pigments and other weathering techniques.
Sourcing Humbrol products
Humbrol products are available from all good hobby stockists or directly from Humbrol at:
Website: https://uk.humbrol.com/
Phone Customer Service: +44 (0)1843 233502 Phone Technical Service: +44 (0)1843 233512

