Richard Simpson on how to paint really credible crew figures using techniques, tips and tricks that really work…
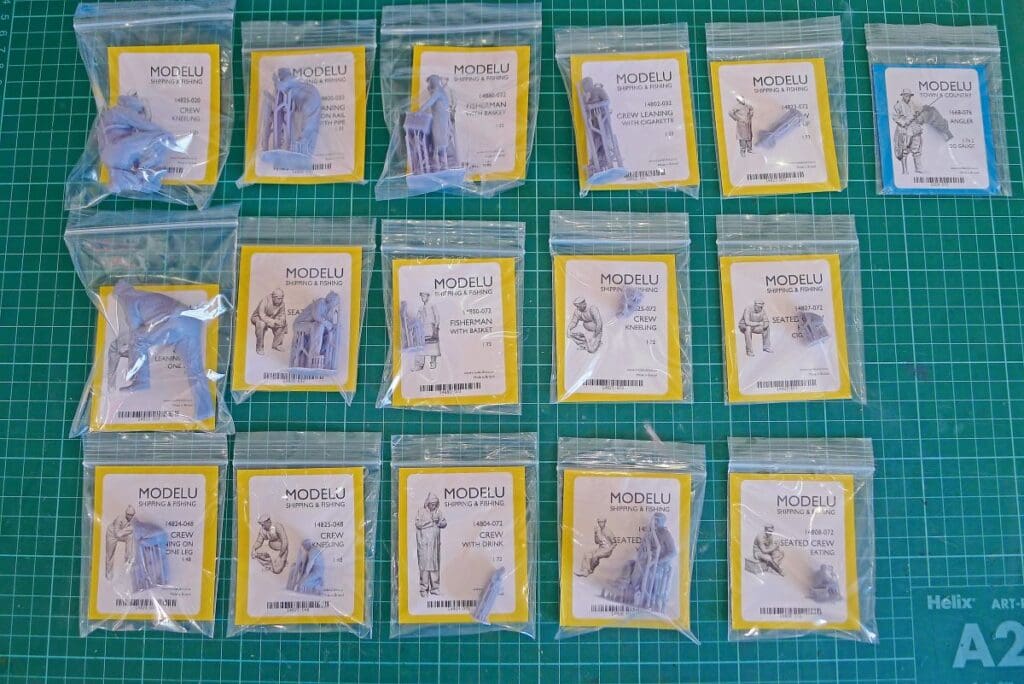
You may remember in the September 2022 issue of Model Boats it was announced that resin figure manufacturer ModelU had started producing a range of new figures aimed at the model boat market (see Photo 1). I followed this up in the October 2022 issue with a brief explanation of the company’s manufacturing process, i.e., how real-life figures are scanned in order to create perfectly scaled down replicas, and an overview of the new 3D printed crew figures. So, as ModelU had been kind enough to send me a couple of unpainted sample figures to examine, the next step seemed fairly obvious!
I have previously written on the topic of adding figures to model boats (see the November 2021 issue of Model Boats Magazine) but this time around I will be providing a step-by-step guide to painting them, in order to try and break down, and take some of the fear out of, what some modellers perceive to be very complex and daunting task. My aim is not to demonstrate how beautiful show standard Napoleonic bust models are created but simply to share some techniques that you can try out for yourself, and which will help you add that little bit more life and visual interest to your model boats.
Enjoy more Model Boats Magazine reading in the monthly magazine.
Click here to subscribe & save.
Different strokes…
In this article we’ll be be looking at two examples of the same figure but produced in different scales. By doing so, you will be able to see how and why, determined by size, different approaches are taken and therefore decide which strategy it will be most useful to adopt when it comes to your own projects. One option tends to work better for larger figures while the other tends to work better for smaller ones.
Firstly though, just a brief word about one particular aspect of figure painting that seems to put some modellers off the whole idea: the eyes…
Eye test
As a very rough guide I always tend to think that for 1:35 scale figures, and smaller, you really don’t need to consider painting eyes onto a face. Some modellers go for a simple coloured spot; I tend to leave well alone. My way of looking at it is this… Measure the height of the figure’s face you intend to paint. Next, get a few magazines out and flick through them. Look for a picture of a face of the same dimension as the figure you’ll be painting. When you find one or two, hold the magazine at arm’s length and ask yourself “Can I really see the eyes?” If you can’t, job done! With larger figures, however, you will probably need to consider painting the eyes.
Larger figures
For larger figures we are going to look at a technique that creates dark and light areas by what is known as pre-shading. This is nothing more than pre-painting the darker areas of shadow before applying a thinned coloured paint over that; this will allow the darker areas to show through and create the illusion that there are areas of shade within the final finish.
As ModelU also offer a painting service, courtesy of Mr Dan Evason, I asked him to demonstrate this technique for us on a 1:20 scale figure so that we can see the effects it’s possible to achieve.
Acrylic paints tend to work better here, as they dry and then harden fast, thus allowing things to progress very quickly. This does, however, mean that you’ll have to work swiftly while blending areas such as flesh tones. Alternatively, you could consider changing to enamels for these areas. That said, eyes, are definitely easier to tackle with acrylics.
Smaller figures
For the purposes of this article, I decided to work on finishing a 1:48 scale figure to compare and contrast with the 1:20 scale figure Dan had kindly agreed to paint.
For smaller figures a more traditional painting method tends to work better. This is the old tried and tested wash and brush up technique that we’ve looked at many times in the past in this magazine. A base colour is first applied and allowed to dry thoroughly, then a very thin wash is painted over it. This wash should collect in all the nooks and crannies of the detail and will then dry out significantly darker in the areas where shadow would naturally fall. Once dry, highlights can then be picked out by adding a spot of light grey to the base colour and then dry brushing this over the surface. With smaller figures you might find it easier to use acrylic paint as a base colour, and then an enamel wash to ensure you do not disturb the base with the high concentration of thinners. Flesh can, again, be either acrylic or enamel and, while you don’t have the eyes to worry about, you might find blending a little easier with enamel.
Preparation
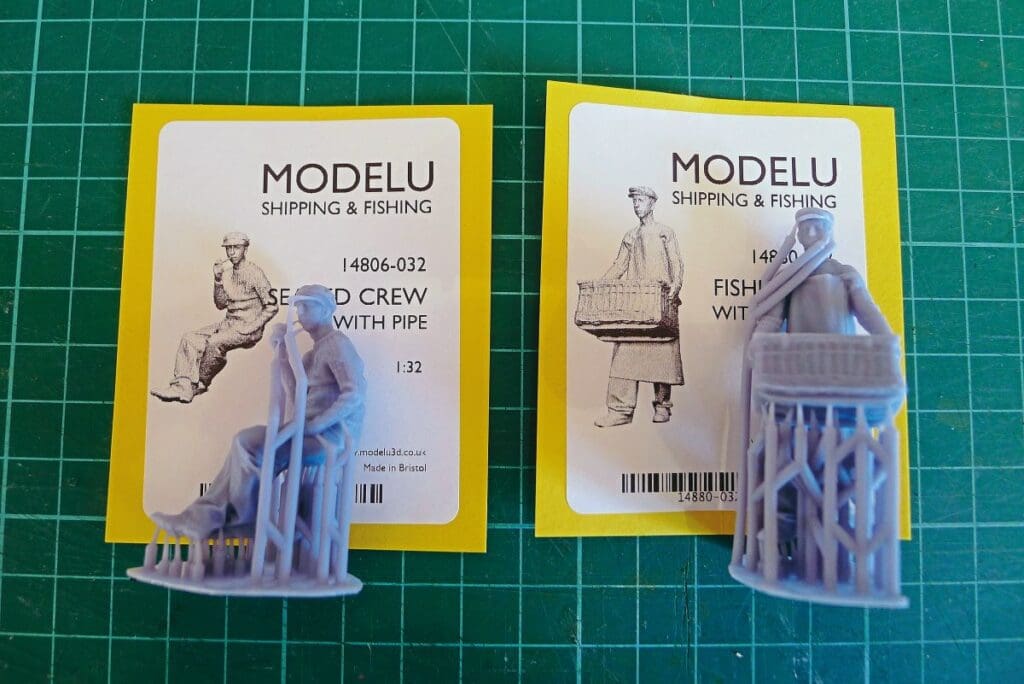
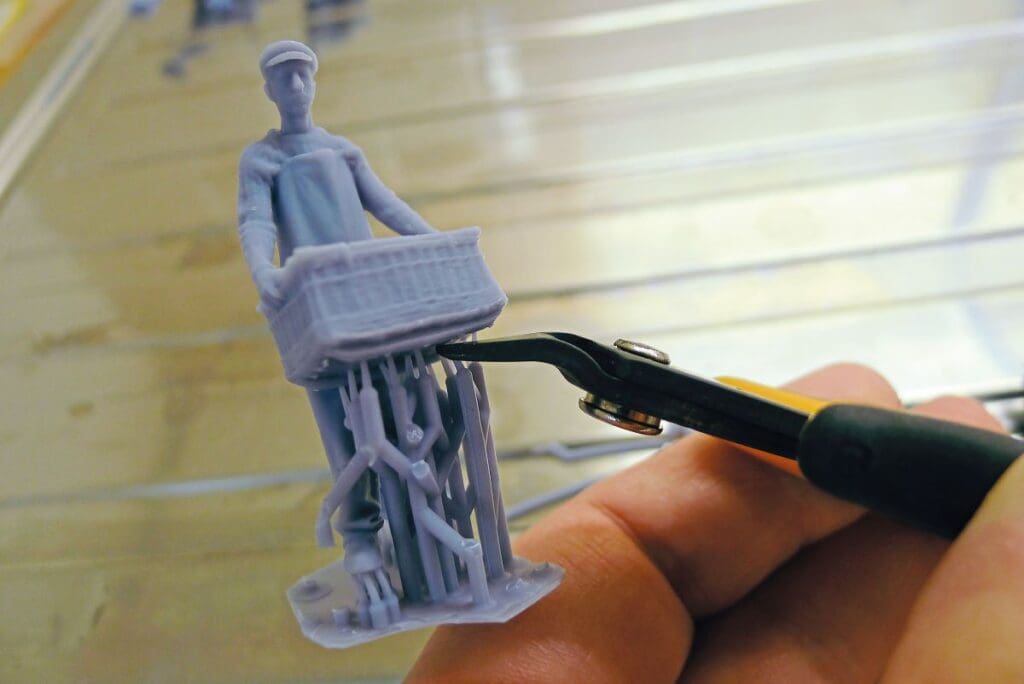
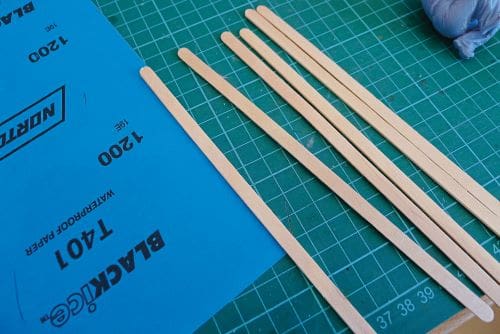
As the figures from ModelU are 3D-printed they arrive with their supports still attached, which can initially look a little daunting (see Photo 2). These are very easy to remove however, and, if this is done carefully, require very little dressing up. The supports are all tapered at the attachment points so actually come away very easily. For most of them I tend to use small electrical flat sided pointed nose side cutters, which can get into the small spaces with the flat side sitting against the surface of the figure. Removing the support completely at both ends on the outer ones might also be useful to help gain access to the ones deeper in the middle of the support cluster, and you might find that some supports simply break away with your fingers if they are small enough. Be very careful when doing this, though, to ensure that no detail is damaged on the figure. Using the cutters is definitely a safer option (see Photo 3). With certain figures you may want to consider temporarily leaving the supports underneath the feet in situ so they can serve as a handle while painting (these can, of course, be removed once the job is done).
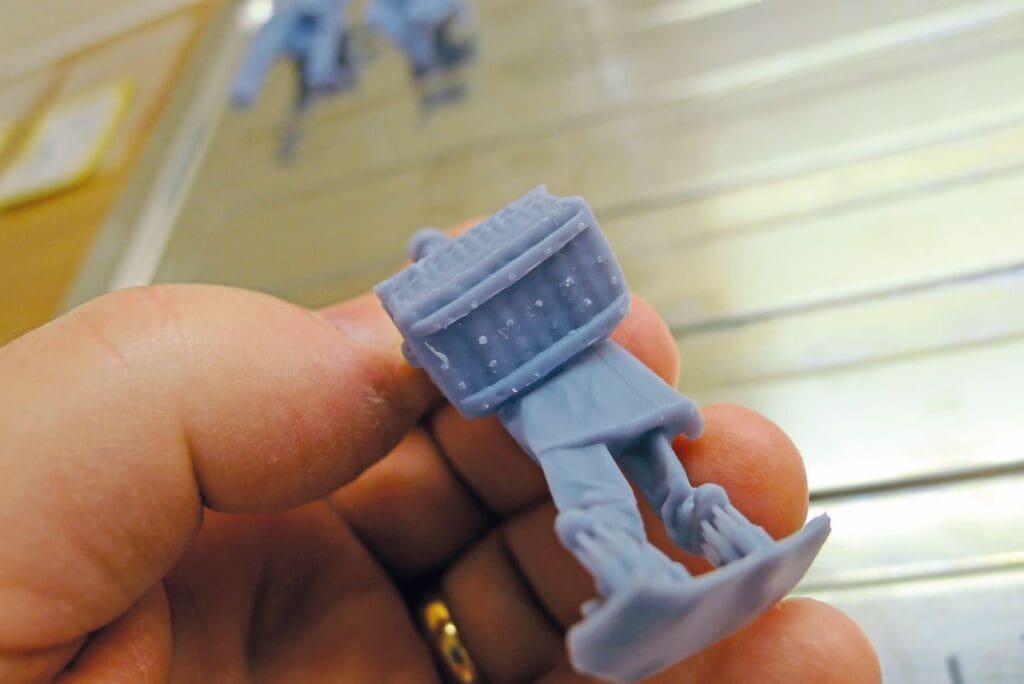
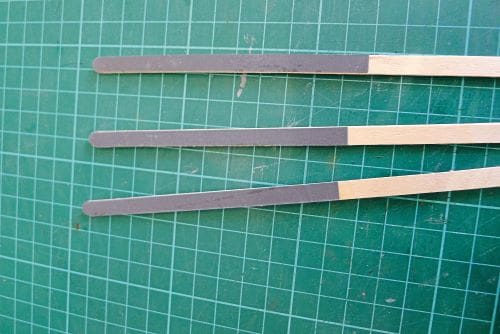
When your supports are removed, you may need to dress up the attachment points (visible under the figure’s basket in Photo 4). This can be done by either gentle cutting or scraping with a sharp scalpel, with needle files, or with fine small abrasive tools made up by gluing abrasive papers to wooden coffee stirrers (see Photos 5 and 6) – these can even then be cut to shape to suit tricky areas. Having dressed up the support connections, your figure will benefit from a wash in warm soapy water to remove any remaining dust or grease from finger contact, thereby giving you the best possible clean surface. I give mine a blast off with air then leave them to dry overnight.
With the preparation work complete, it’s time to decide which of the two following techniques will suit your figure best and break out the paint and brushes.
Painting a 1:20 scale (or larger) figure
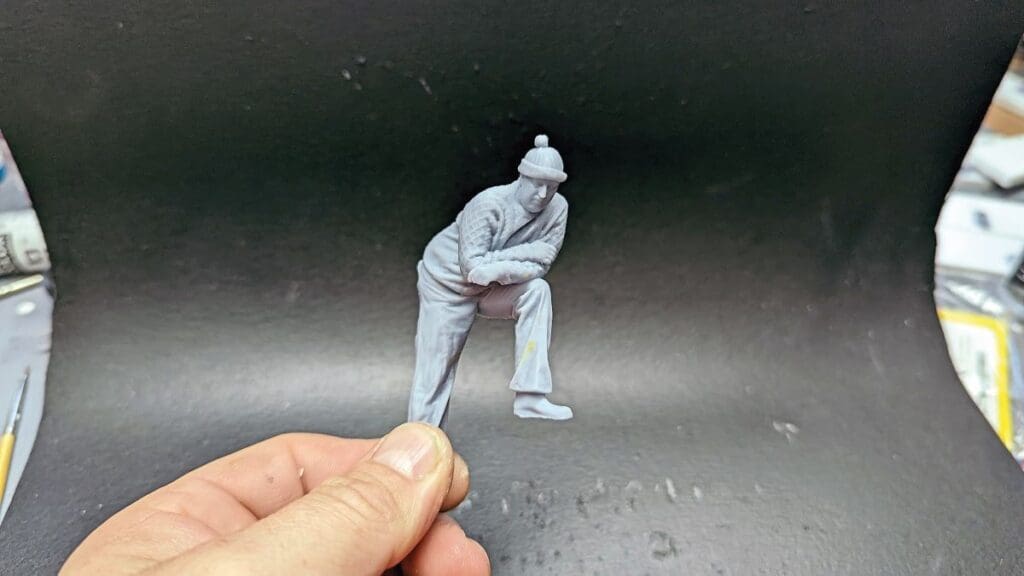
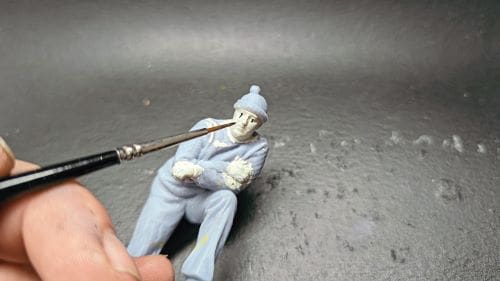
With your figure cleaned up, washed off and nice and dry, he’s ready for the painting process (see Photo 7). The paint used for the 1:20 scale here was Vallejo Model Colour, a water-based acrylic paint that can be quickly and easily watered down, and, as an added bonus, can be cleaned off brushes simply with water. Your first job will be to apply a base of pale flesh colour, lightened with ivory on the faces and hands. You don’t need full opacity at this stage (see Photo 8). The next job is the one that most of us approach with some trepidation: the eyes. A simple fine vertical line with a fine brush is all that is needed at this stage. This will probably make your figure look a little like a French mime artist, but fear not! All you have to concentrate on at this point is making sure the width of the stroke is the same on both eyes and that your lines run right down the middle of the eye (see Photo 9). Don’t worry about anything above or below the eye yet.
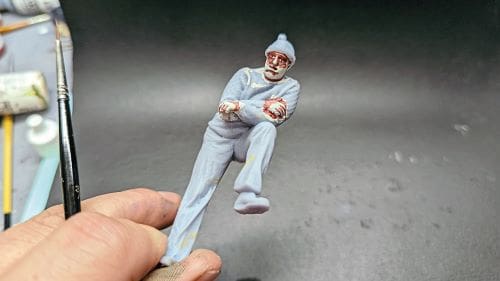
You can now prepare the groundwork for the flesh shading. Medium areas around the hands and face are painted in with a flesh base colour and then, over that, the areas around the upper face, eyes and mouth are filled in with an even deeper flesh tone to give more depth, thereby creating shadow. This is when the shape of the eye can be created by painting over above and below the eye. Note the highlight areas such as the backs of the hands, cheeks and nose are left in the original light flesh tone (see Photo 10).
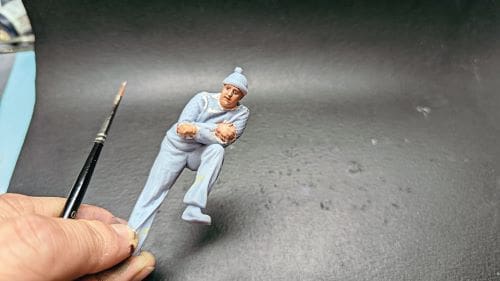
We now come to probably the trickiest part of the whole process: blending in the flesh tones. With the main colours already blocked in, it’s now time to blend them together. It’s best to have a palette with blobs of your three main colours on it so you can dip your brush in and out of each and create a mid-colour quickly and easily. All you are doing here is creating a blending between the blocks of colour. You will find this much easier if your paint remains wet, as this will assist with blending one area with another, so you’ll need to do this all as one process. If you’re not happy with how things are going you can simply wash everything off with a suitable acrylic thinner and start again. You can do this as often as you like until you are satisfied (see Photo 11).
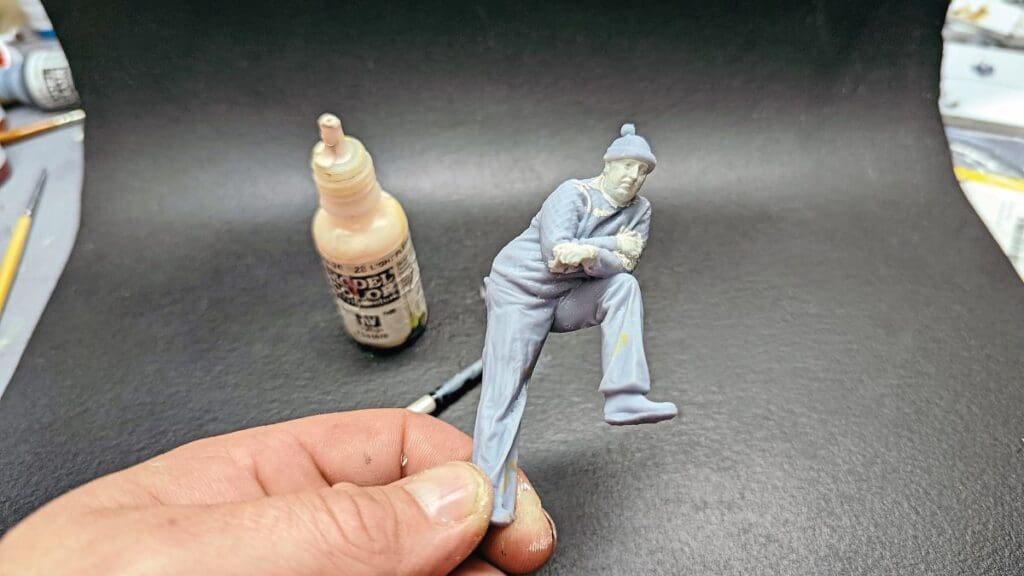
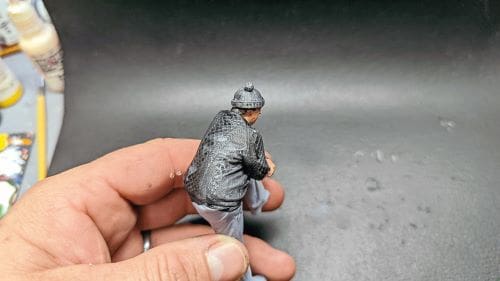
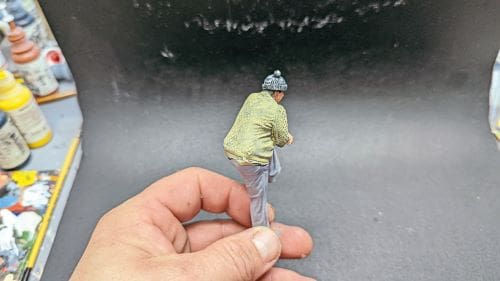
With my flesh areas done it was time to move onto my figure’s jumper and the wooly hat, with the first step being to apply a black wash to the entire area. You will find a wash will conveniently settle into all the nooks, crannies and recesses and enhances the darker areas you’d naturally expect to see there. This needs to be quite a dark wash as you’ll want it to show through the next process (see Photo 12). Following on from this, to emphasise the highlight areas a dry brushing of a much lighter tone should be applied over the wash; this will greatly increase the contrast. As illustrated on the figure (see Photo 13), at this point you will have a pre-shaded base on which to apply the top colour.
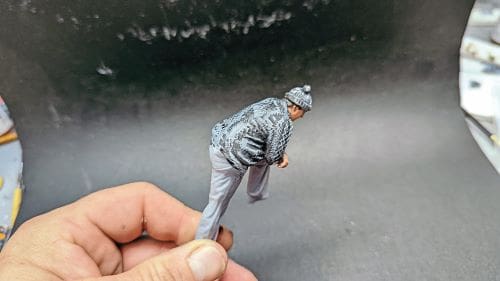
A watered-down colour of a suitable opacity to allow the shading underneath to show through should also be applied to clothing (as per my fisherman’s jumper). This may initially seem too ‘watery’ but don’t get heavy handed here as otherwise you will obliterate your pre-shading and loose the effect. It’s imperative this is built up slowly, so be patient and don’t rush the process of achieving the opacity you require. It may take three or four coats. Take care not to have too much paint on the brush for this part as the paint will try to behave like a wash and settle in the recesses. Keep the brush lightly loaded and gradually build your layers up (see Photo 14).
Using this technique and with my fisherman’s jumper done, his wooly hat was similar painted before attention was turned to painting his waterproof trousers. Interestingly, the hard plasticized surface of such garments requires a much sharper contrast between areas of light and shade. Consequently, the pre-shading technique employed here was not an overall wash, as used on the wooly jumper, but a much more definite and distinct application of paint in the shadow areas only. This gives a stronger contrast when over painted (see Photo 15). As you will see, once the yellow colour had been applied over the pre-shading, the effect was noticeably more contrasty, something assisted by the different texture of the surface, faithfully reproduced by the scanning process (see Photo 16). The next job was simply to apply a matt black to the sea boots, which I painted in full opacity to represent this heavy rubber footwear (see Photo 17). Finally, a very light dry brushing in a pale grey was undertaken to create some highlights on the boots, a technique also used to pick out one or two highlights elsewhere on the figure (see Photo 18).

The treatment of this completed 1:20 figure can now be compared with exactly the same figure but in 1:48 scale, generated of course from the same original scan.
Painting a 1:48 scale (or smaller) figure
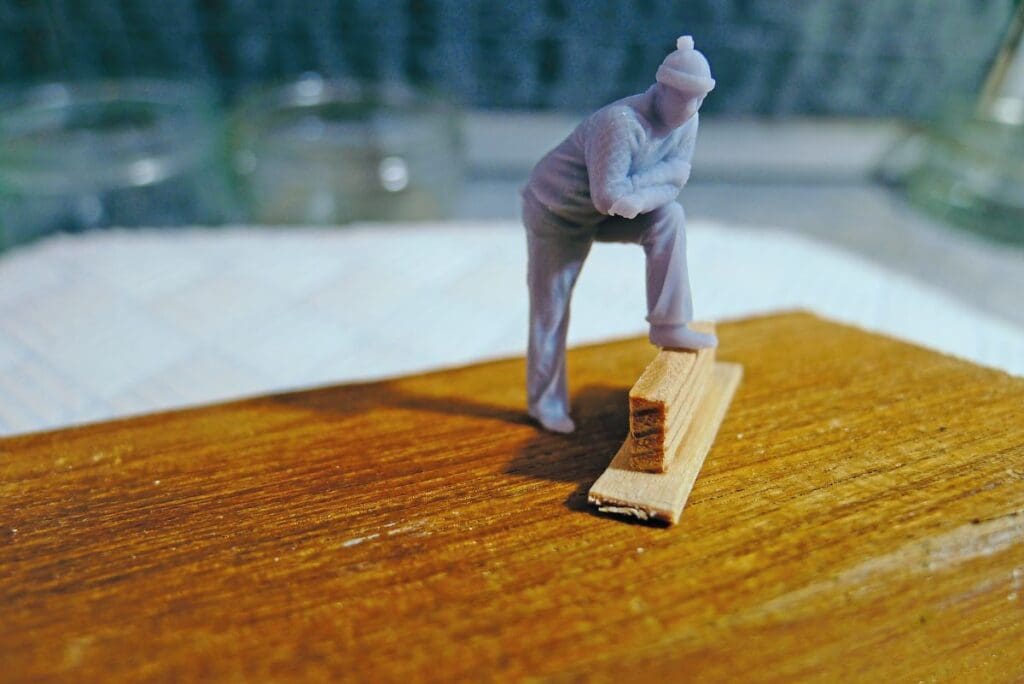
At this size I prefer to have some sort of handle for the figure so that I don’t get greasy fingerprints on him as I paint. Plus, of course, this means the figure is securely held while the paint dries. A bit of scrap anything can be used here but, in this instance a scrap of wood and a couple of very small spots of PVA glue did the job nicely. A word of caution: don’t use too much glue; you will want your handle to break off easily once painting has been completed, (see Photo 19).
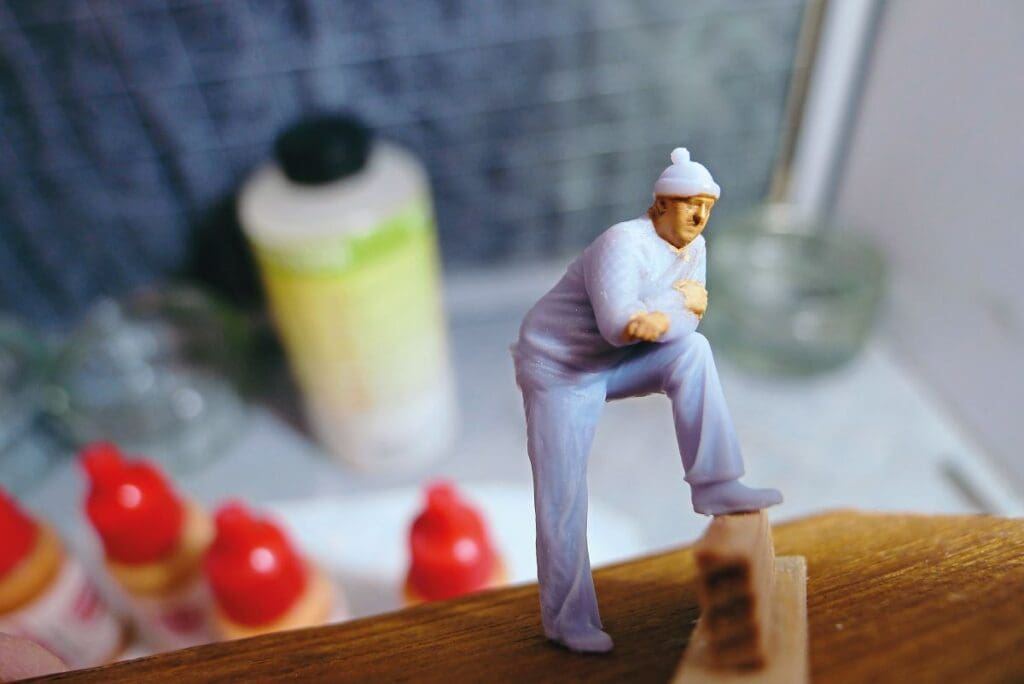
Begin with a mid-base of light flesh colour on your figure’s face and hands. Again, I used Vallejo acrylics for speed and convenience. After the acrylic has thoroughly dried a light wash of medium brown enamel should be applied all over to accentuate the shadow areas (see Photo 20). Once your wash has dried, a lighter shade of the flesh base colour should be dry brushed over your figure’s face and hands. This can just be seen in the picture of my figure on his nose, cheeks and chin. Basically, that’s all that’s need for flesh areas. The technique is quick, simple and perfectly suitable for a 1:48 scale, or smaller, face (see Photo 21).
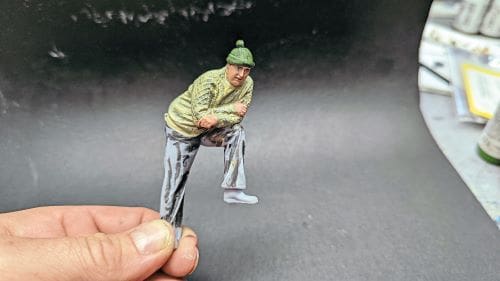
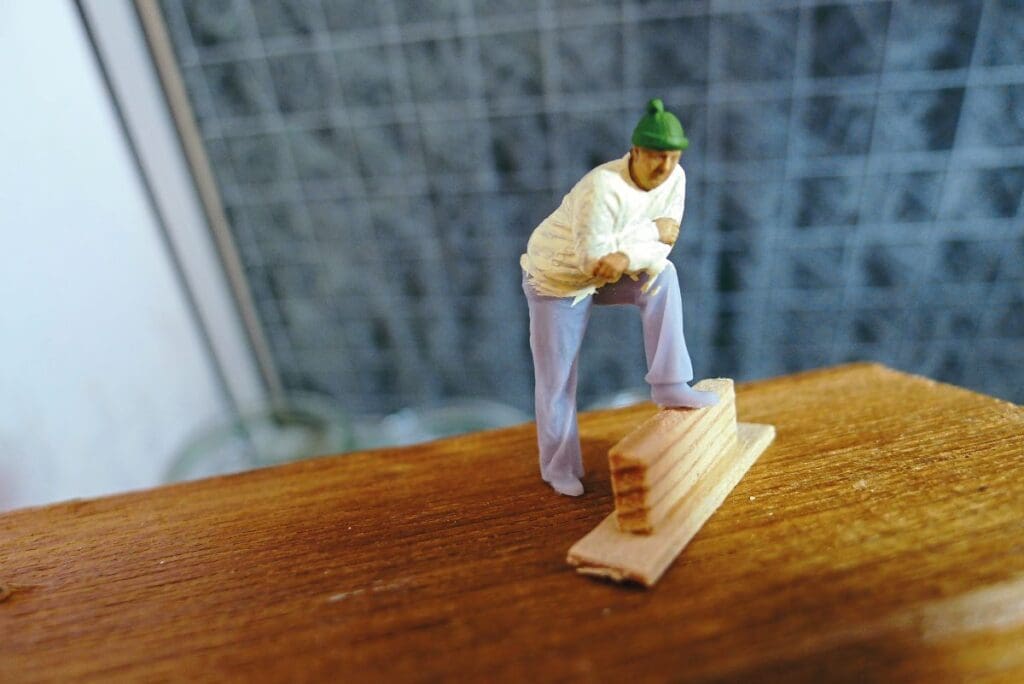
The next stage is the base colour for clothing (in my case the fisherman’s jumper and wooly hat). Again, I used Vallejo acrylics for the base colours, with a green for the hat and an ivory for the jumper; unlike the 1:20 scale figure, however, these were painted in full opacity.
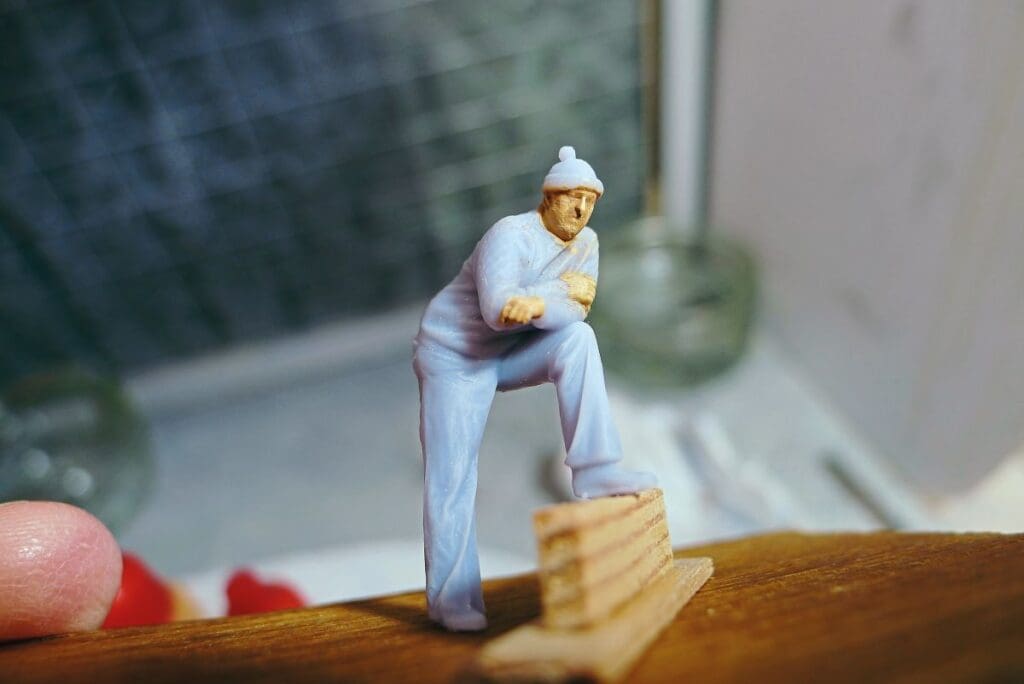
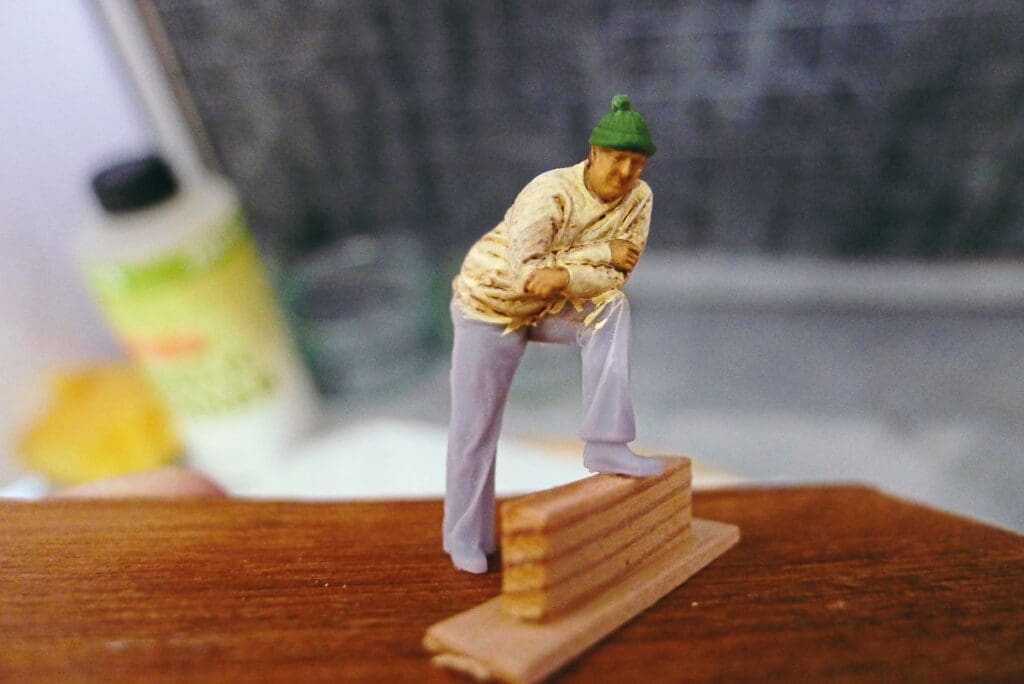
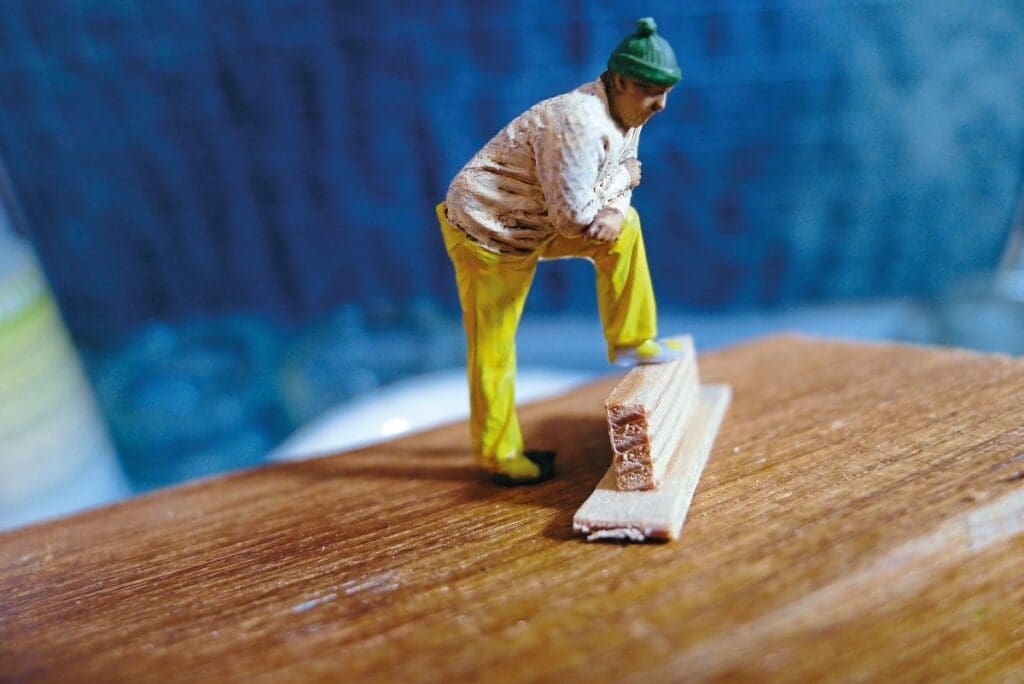
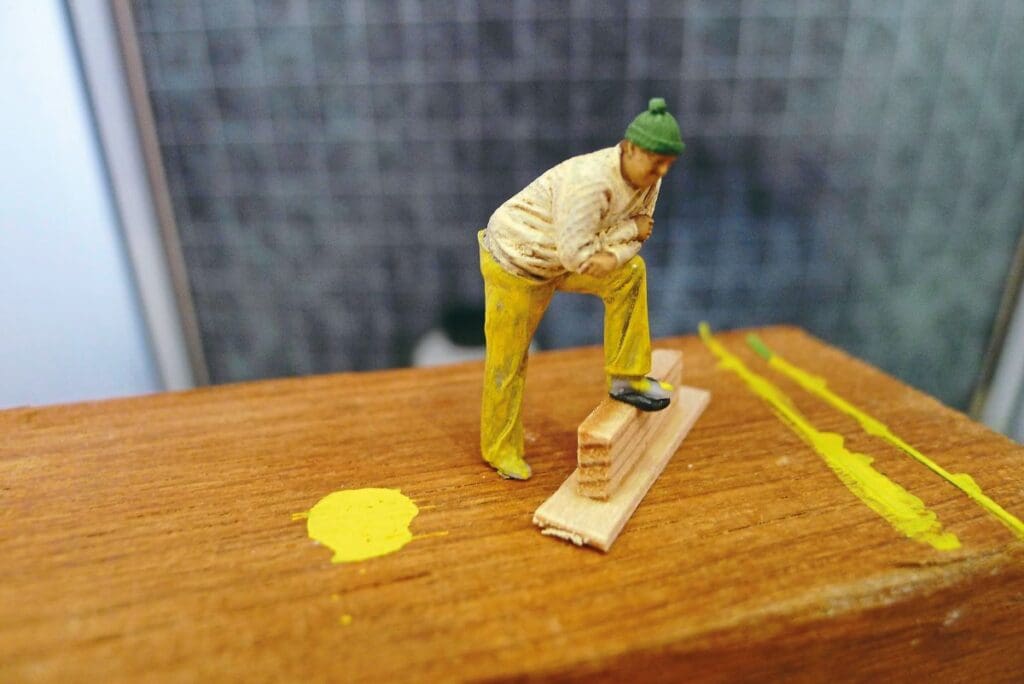
A fine sable brush was used to create a nice fine line around any edges where clothing met flesh (see Photo 22). Once my base colours had dried thoroughly, again a light wash of medium brown enamel was applied. You’ll find when doing same this will sit nicely in all the recesses of the detail and accentuate the shadow areas (see Photo 23). Next, I dry brushed my base ivory colour over the whole jumper area to pick out the highlights and create a contrast between highlights and shadows. While this was drying, a base colour of yellow was applied to my fisherman’s waterproof trousers. Here, three coats were required to achieve the desired coverage (see Photo 24). The waterproofs were then given the same treatment of a medium grey enamel wash, followed by a dry brushing of the base yellow with a spot of the ivory mixed in to lighten it (see Photo 25). The final touch was to paint the sea wellies with a green base, which was then lightly dry brushed with the same green that I mixed with a spot of ivory.
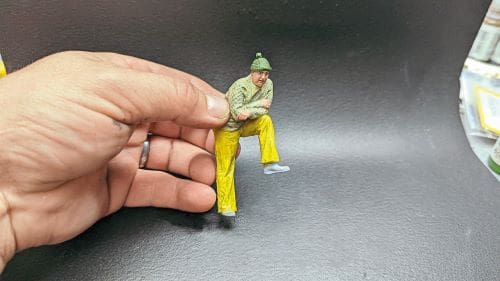
Pose perfect
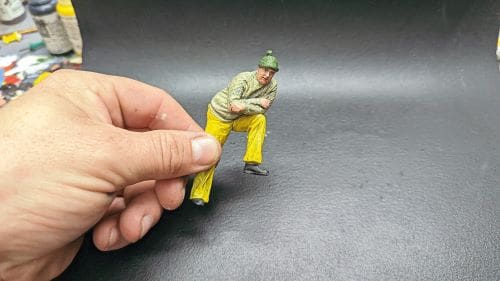
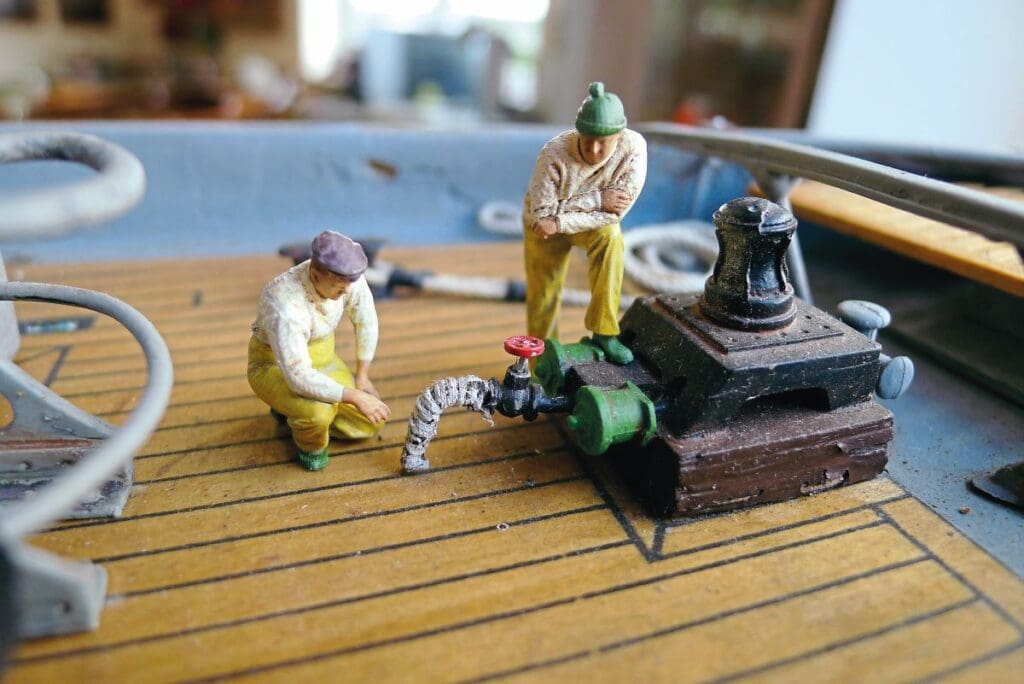
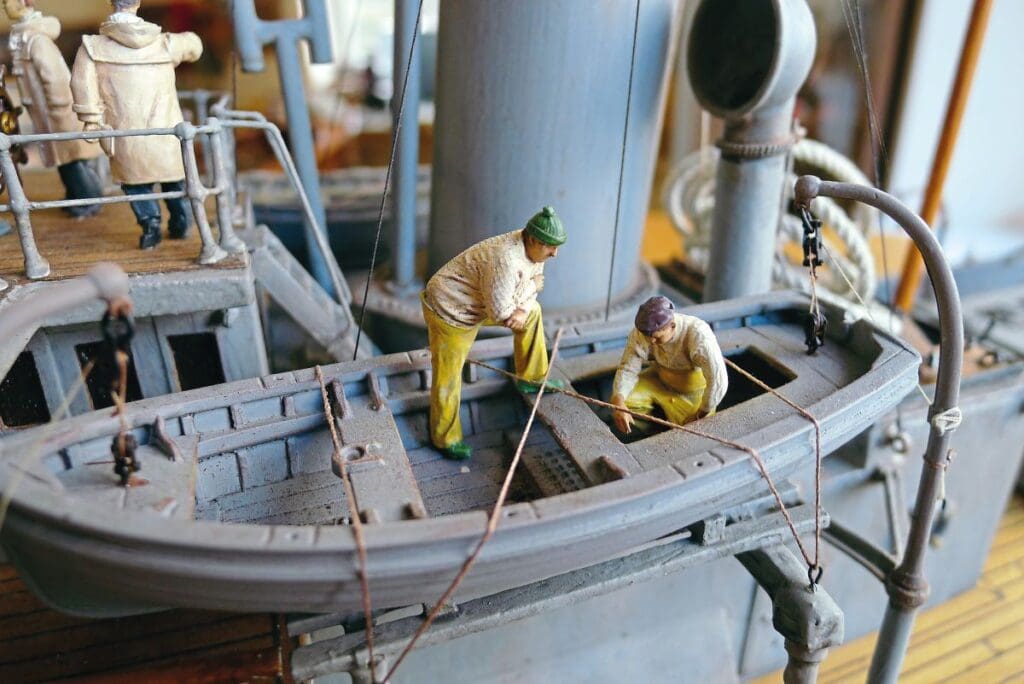
Having completed the painting, the only thing left to do is to play around with the figure on your model until you’ve determined a location and pose that will give him a real sense of purpose. Two figures having a chat usually works quite well, and you can easily paint both simultaneously to speed up the process. Indeed, I did just this (see Photo 26); check out the flat cap of my crouching figure –to credibly paint this I simply used a brown base, accentuated by a little dry brushing with the same colour that I’d mixed a spot of ivory into. Figures working inside a lifeboat also makes for a realistic cameo (see Photo 27).
Endless possibilities
The idea here has been to show two simple methods of achieving credible crew figures for our models boats using the new range of ModelU figures. The detail in all scales is simply superb, which makes painting these figures a joy, as the edges and details are so clearly and crisply defined. Added to that, the idea that you can be scanned, clad in whatever attire you wish to don and in whatever pose you wish to assume, e.g., performing a particular task, means that you can even crew your own model boat (or, more specifically, a miniature version yourself can). The possibilities are endless. I fully intend meeting up with ModelU at one of the shows they will be attending in the future and getting a scan of myself done.
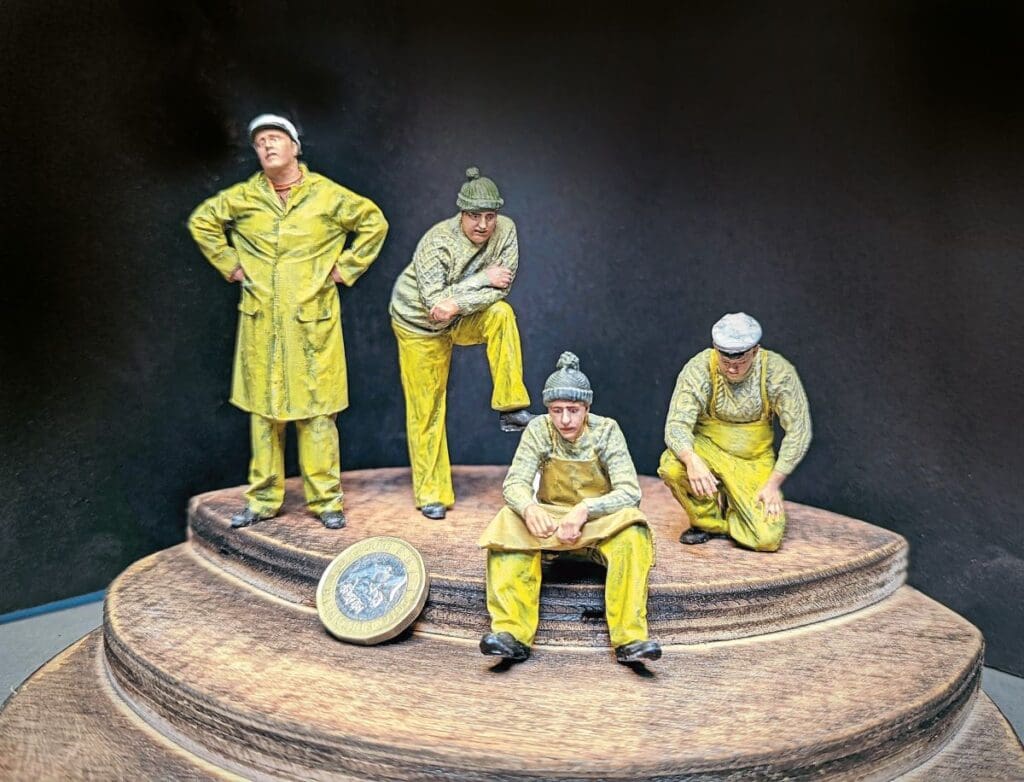
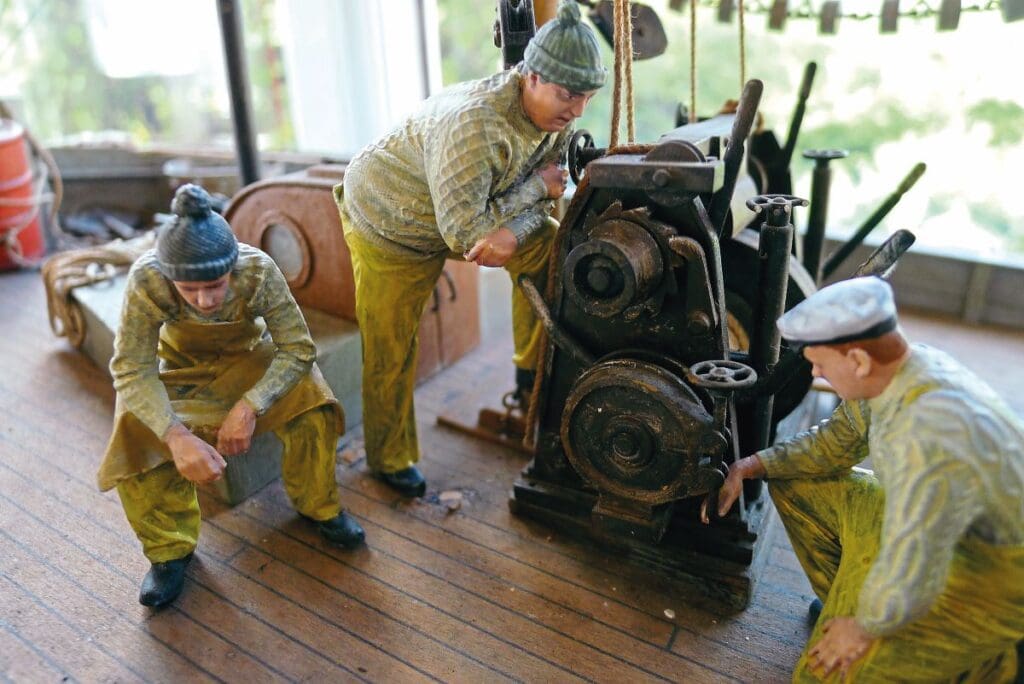
Even with the range of off the shelf figures, though, once suitably painted up (see Photo 28), wonderful little scenarios can be created on your model boat – and, in doing so, you will achieve a level of realism you previously could never even have imagined possible (see Photo 29).
As a final thought, to make your figures that little bit more resilient, a final coat of a clear acrylic matt varnish may be worth considering. This is easily applied from a rattle can.
I thoroughly recommend having a go at adding some ModelU figures to your next build or even having your own scan done and mini-me produced.
If you’re still not feeling confident, as mentioned, ModelU does offer a painting service, courtesy of the aforementioned Dan Evason, whose skills are so ably demonstrated by the four 1:20 figures fitted in the fishing boat featured in this article.
CONTACT DETAILS FOR MODELU
Website: www.modeulu3d.co.uk
E-Mail: [email protected]
Tel: 07887 803737
Address: Unit 21C,
Easton Business Centre,
Felix Road,
Bristol,
BS5 0HE
CONTACT DETAILS FOR MR DAN EVASON MODELU PAINTING SERVICE
Facebook: The Tunnel Lane Model Railways page
Instagram: TUNNEL_LANE_MODEL_RAILWAYS
email: [email protected]
Tel: 07917764931

