CHRIS BROWN, an Australian reader, describes his model
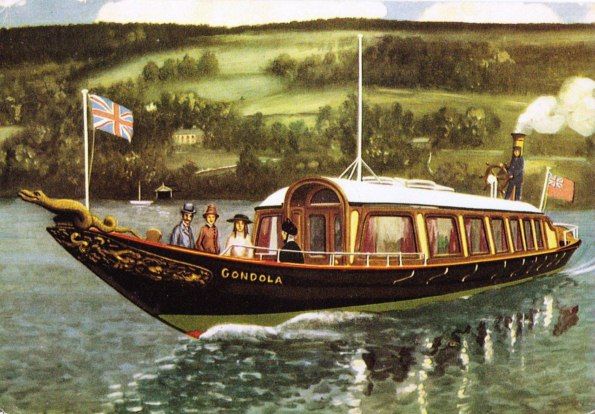
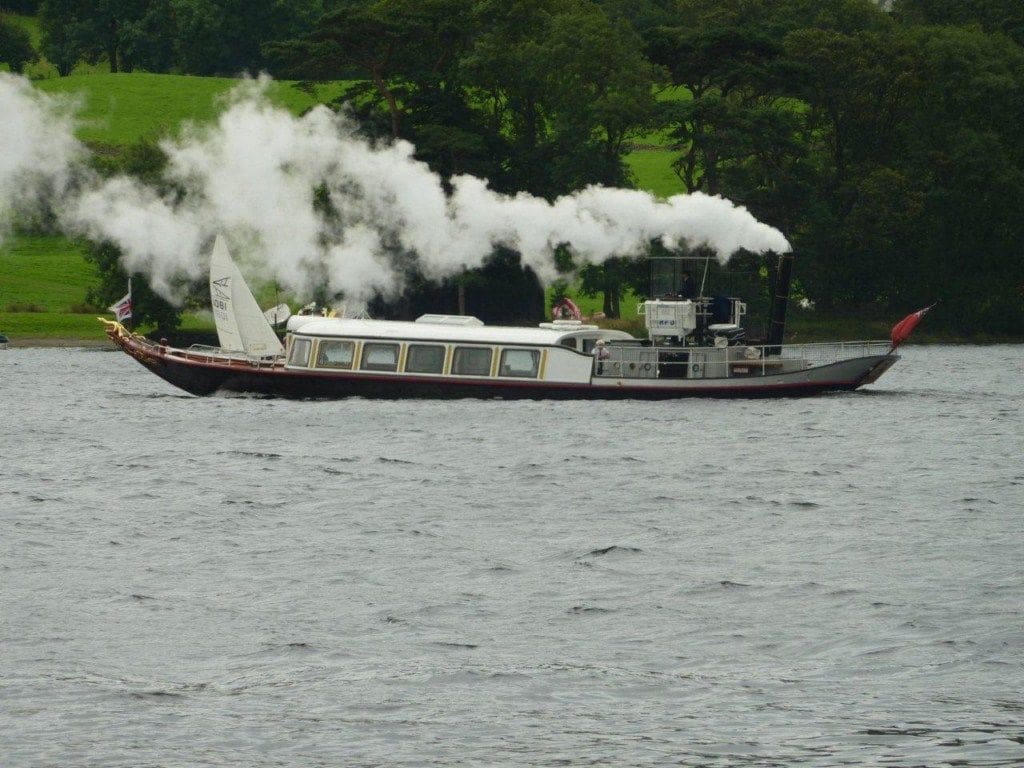
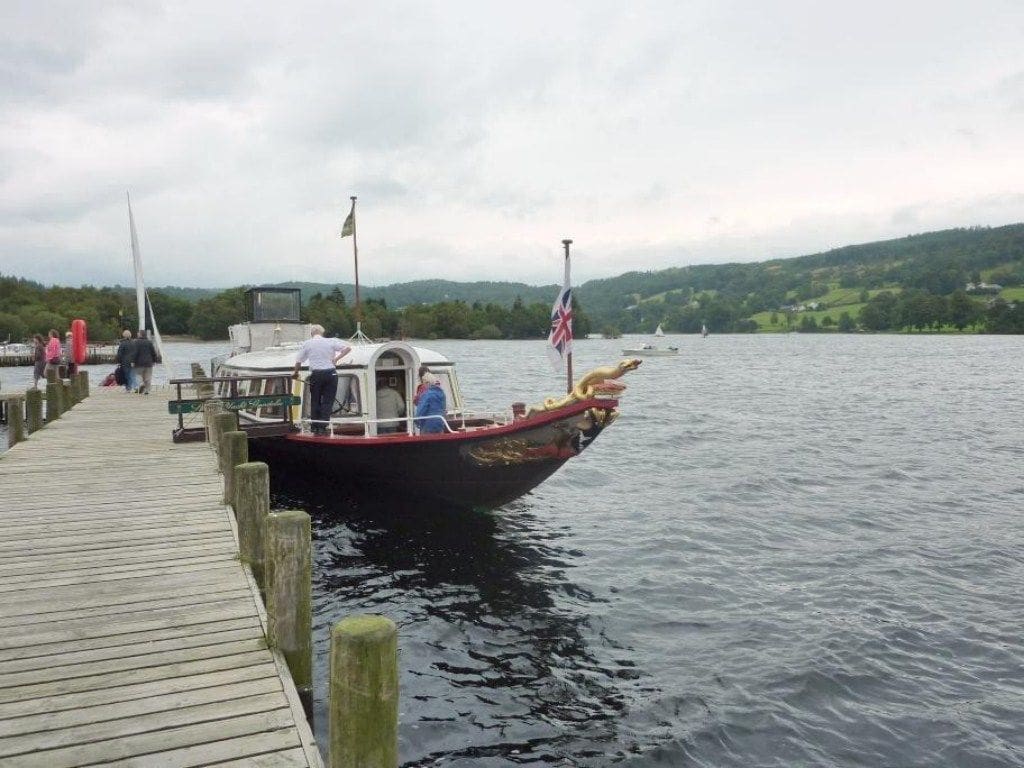
I fell in love with this steam powered launch having had a ride on her when we visited Coniston Water in the UK Lake District in 2009 when I took some pictures, but of course not nearly enough of them. Fortunately I struck up an ongoing contact with the engineer Dennis Whittaker who maintains the steam plant on the boat, which is owned and run by the National Trust. Dennis very kindly sent me numerous pictures to assist in my conception and design of the model.
Enjoy more Model Boats Magazine reading.
Click here to subscribe & save.
Having never attempted to build a model boat like this before, let alone build one from scratch, I launched into the project with lots of enthusiasm and not much else, but I had visions of making her eventually a steam driven project.
I settled on one metre overall length as a suitable size. This is a narrow boat, not dissimilar to a canal boat in overall proportions and there is, not unsurprisingly, a vague touch of a gondola in her lines. You can view her and her wonderful story via the links on the National Trust website: www.nationaltrust.org.uk. There is also a more extensive history by Dennis himself at: www.steamengine.com.au
Getting started
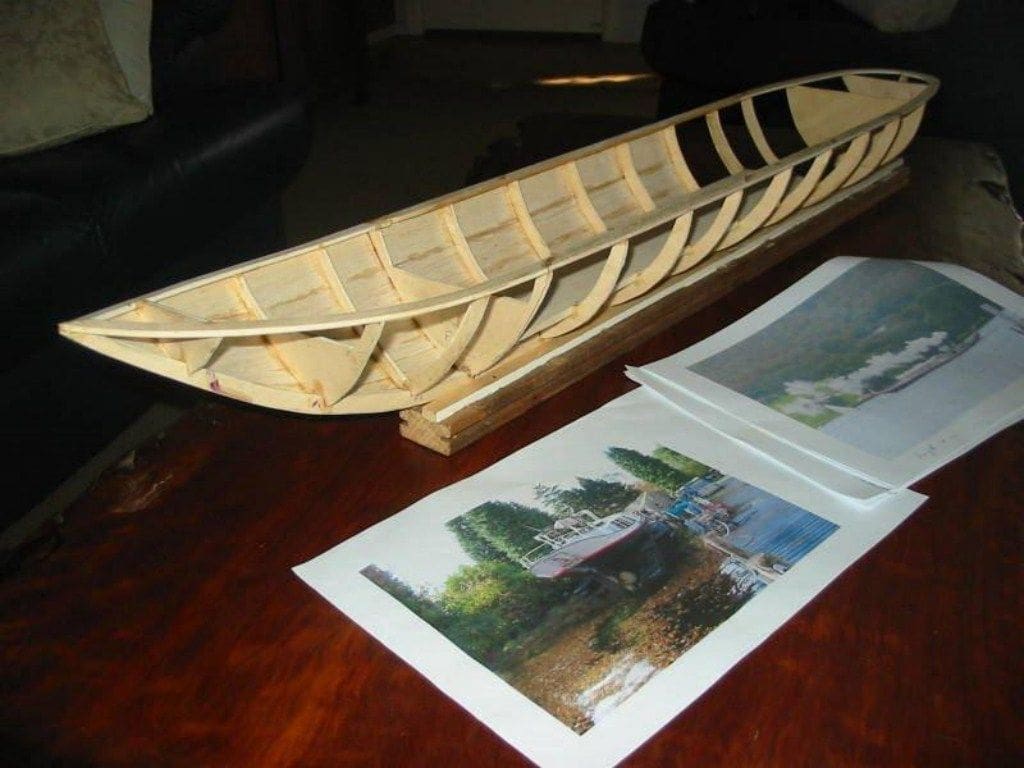
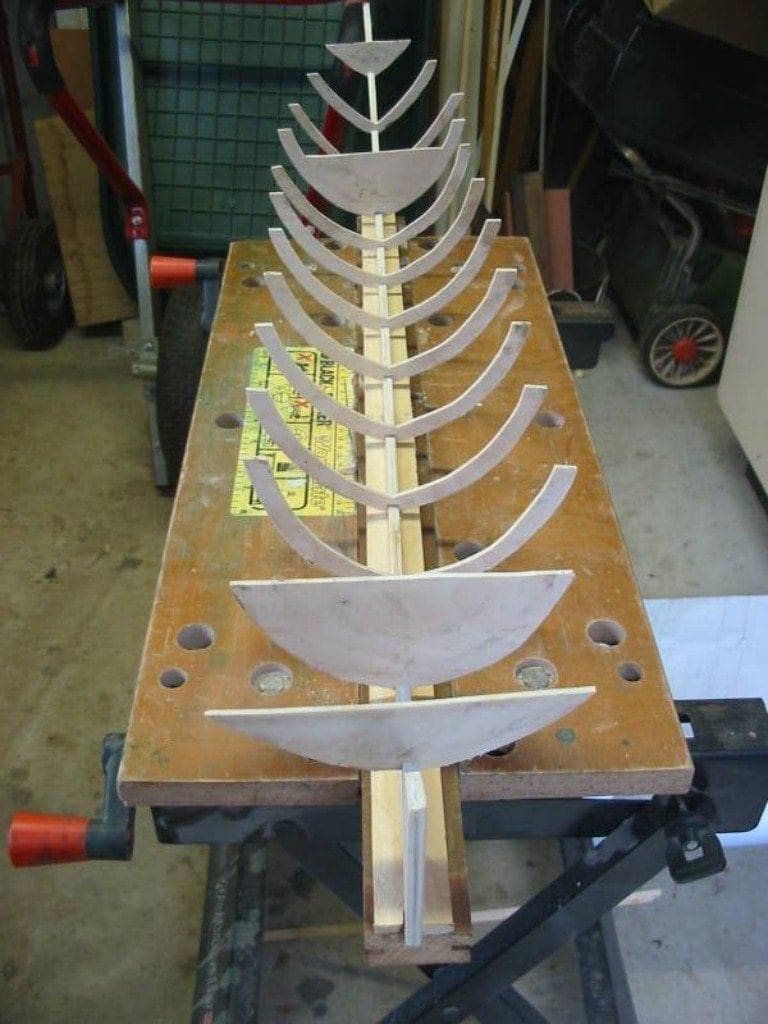
After preparing a drawing based on dimensions taken from the photographs and the overall dimensions data obtained, I had to wait for a Christmas present. I was presented with an electric scroll saw by my wife on the great day and was thus able to start with the keel and formers.
This was the mostly a trial and error phase of the work as there was some ‘suck it and see’ involved in making its shape approximately right from the information I had. At this point I will say that my objective was to build ‘stand off’ scale model. I think my hull came out a little wider and deep in the beam possibly, but I am quite pleased with the lines nonetheless. The hull was built using good quality ply formers with balsa covering for the hull. This was then covered with glassfibre resin inside and out.
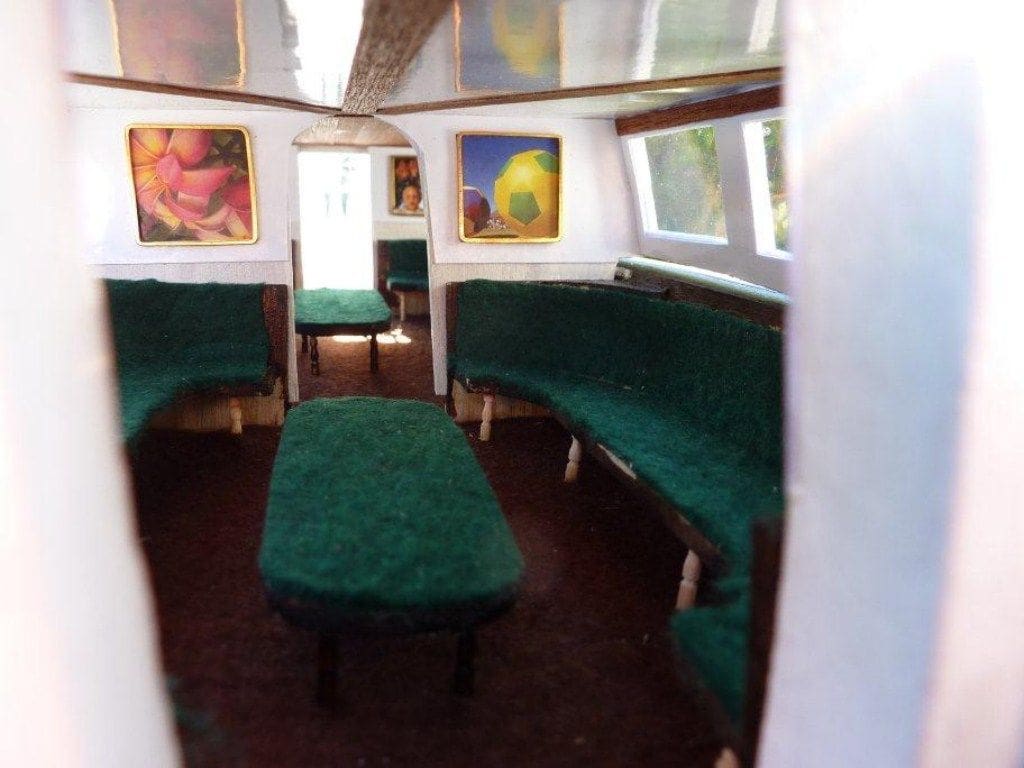
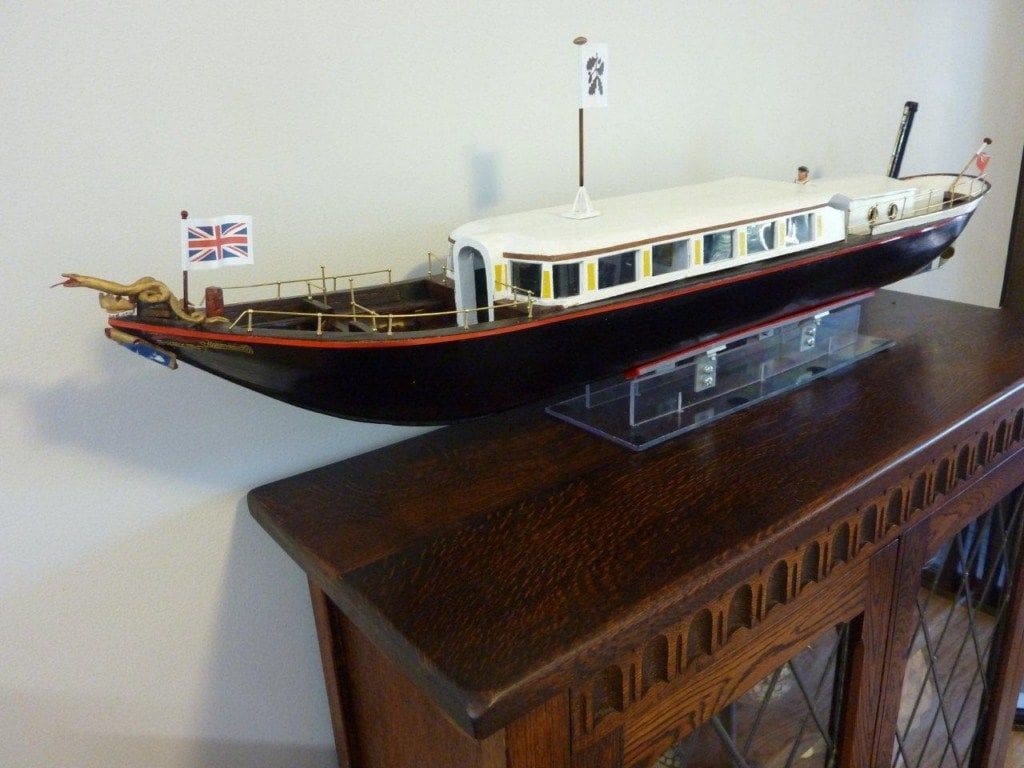
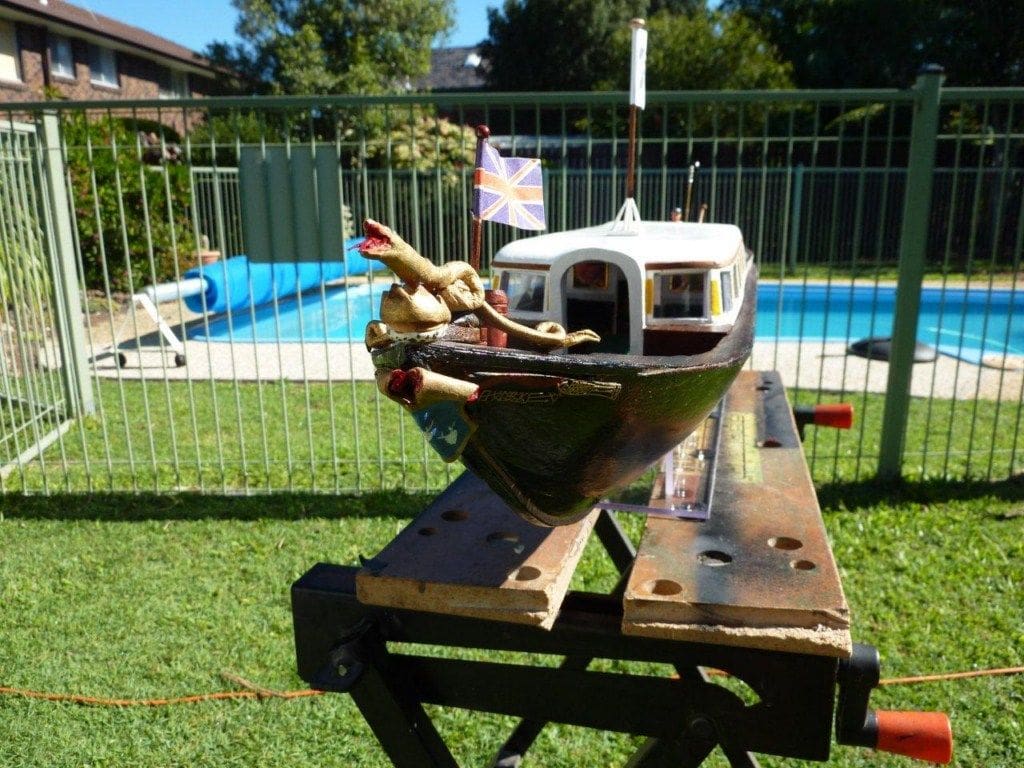
For the running gear, I bought a close to scale three bladed propeller and propshaft. Creating the cabin and engine room was fun, as was using veneer strip for deck planking and other features, but I decided that I didn’t like the current addition of a mini-bridge. This type of bridge is probably necessary to comply with current maritime legislation but does nothing for Gondola’s good looks, so because I had an old picture from years gone by, I put a pulpit and wheel behind the cabin, just like in those days.
Fitting out
I had help from a local shop which caters for those ladies who make their own jewellery. It had amongst other items; little frames for the travel pictures to go in the saloons; beads to make bollards and little brass pins for supporting the whistle pipe on the funnel. I like to find things like this to use rather than shelling out for the more usual (and often quite expensive) model boat bits. The whistle itself is a bullet crimp connector with the insulation cut off and it looks the business! Indeed, I have been asked how much I had paid for a whistle that looks so real.
Problems
Not everything was perfect though!
A 12 volt 540 type electric motor was installed and this caused problems later. The hull resin coating should have been reinforced with glassfibre matt or tissue to impart more strength to the hull. Unfortunately the hull was dropped (just the once!) and it didn’t bounce, but acquired a hole. Also, when I bought the esc, the guy at the shop asked if I wanted a balloon to put it in and I should have agreed there and then, but this failure to follow his advice meant more expense later.
The model was actually too small to change from electric to steam power at a later date, my being advised that there was insufficient width or length to accommodate a practical boiler and engine because of the internal stern layout of the model. A two metre long model would have been better in which to fit a steam plant. On the plus side though, a metre size model is more practical for display in the lounge.
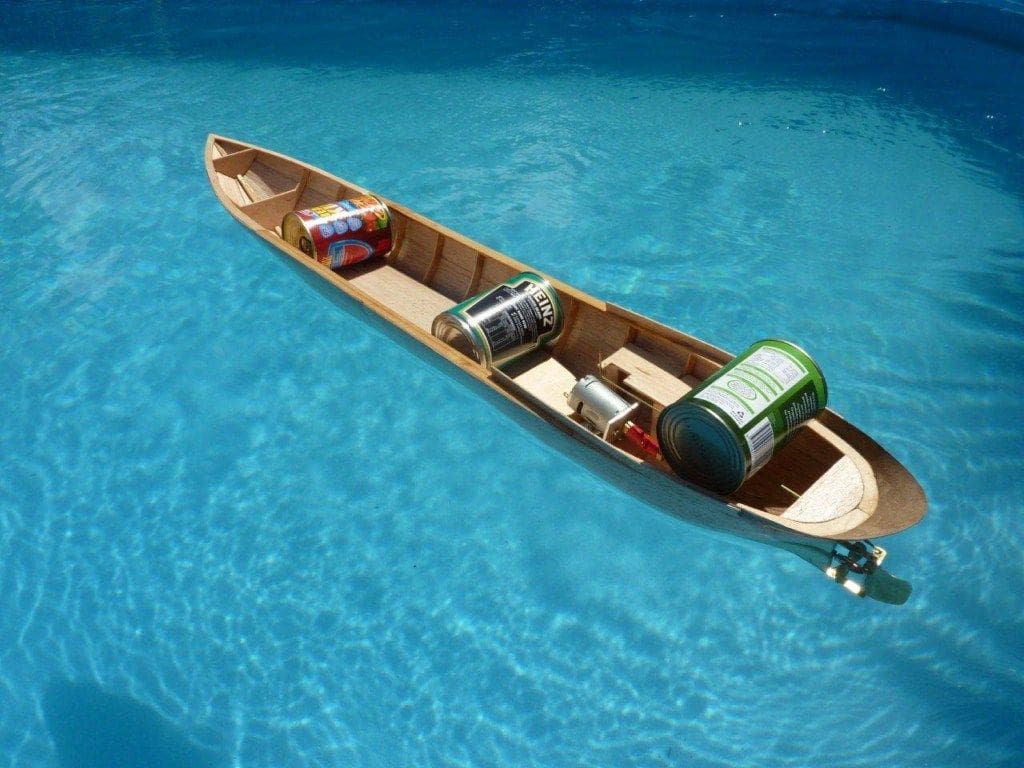
Displacement test
The calculated displacement meant that up to 1.5kg of ballast might be needed, so this was tested in the back yard pool – well I do live in Queensland, Australia! Anyway, using 400gm food tins to check my calculations, it so happened a maximum of 1200gm (1.2kg) would do the job not allowing for other detail items to be fitted. In the end, 1kg of lead sinkers spread along the hull together with the motor, battery and r/c gear was near enough, leaving scope for further adjustments later if need be.
Nearly finished
At about 95% completion, the electrics and radio gear were installed, and once checked on the stand it was time for the water test. The first problem to manifest itself rather noticeably was that the motor that had been installed was far too powerful. A small amount of throttle had the model shooting across the water and likewise when going astern, followed by the accident!
As I endeavoured to check the response to a bit of helm, the model shot across the pool and tried to climb out over the pool edge when it reached the far side. The shapely prow did not help as it caused the bows to rise up over the edge of the pool and consequentially the stern sank under the water surface. Rather rapidly, I legged it round the pool and rescued the model, but the damage was done and the electrics were sadly ‘kaput’ as well as some model damage.
Conclusion
Having dried it out and repaired the damage, the model was finally finished and I was pleased with the overall appearance. On the bows there is a twin tail snake and dragon figurehead and associated bits. One of the wood based modelling compounds, with a fair bit of effort, proved equal to the challenge and can be seen in the pictures.
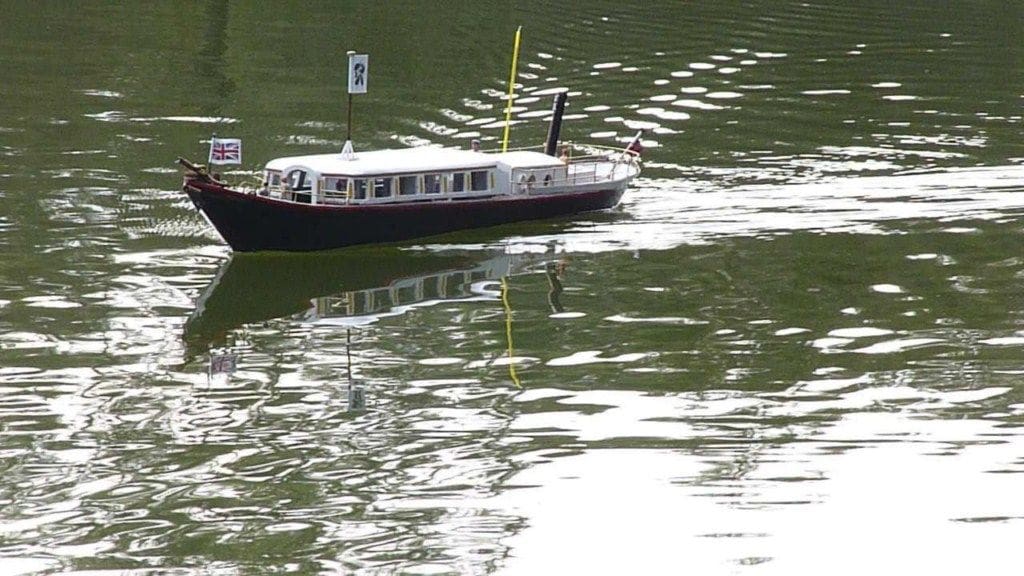
A new motor with a max speed of 5000 rather than 20000rpm was purchased, together with another esc that is automatic and waterproof. The new 2.4GHz receiver is also now installed in a balloon in case of further disasters! Some small scale figures proved to be just right for the model, totally by luck and not judgment on my part and these add a bit of ‘life’ to the model.
So, off for another attempt on the water and this time it ran just right, which actually means steady and slow.
If you find yourself in the Lake District of the UK, allow a couple of hours to treat yourself to a trip cruising in Gondola on Coniston Water as it will be an unforgettable experience.
(Chris Brown is a member of the Triple S Model Boat Club which meets at Boondal Entertainment Centre, Ponds, Brisbane, Australia)

