Brian Roberts refits his Robbe model

Introduction
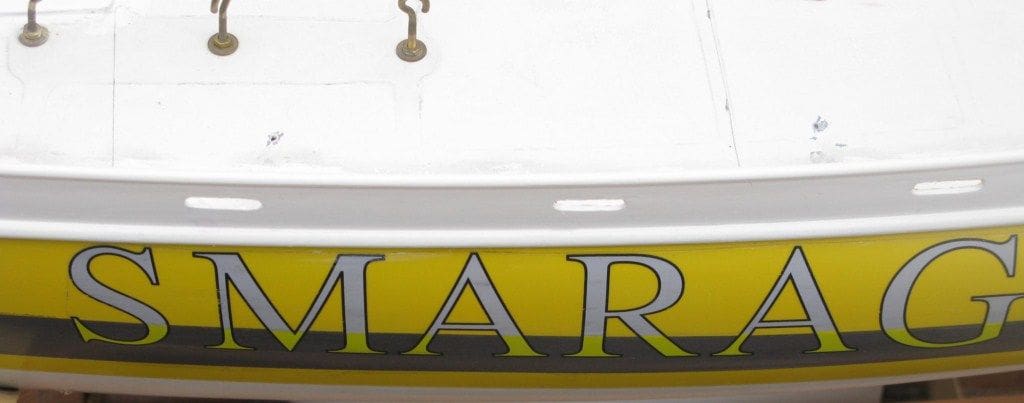
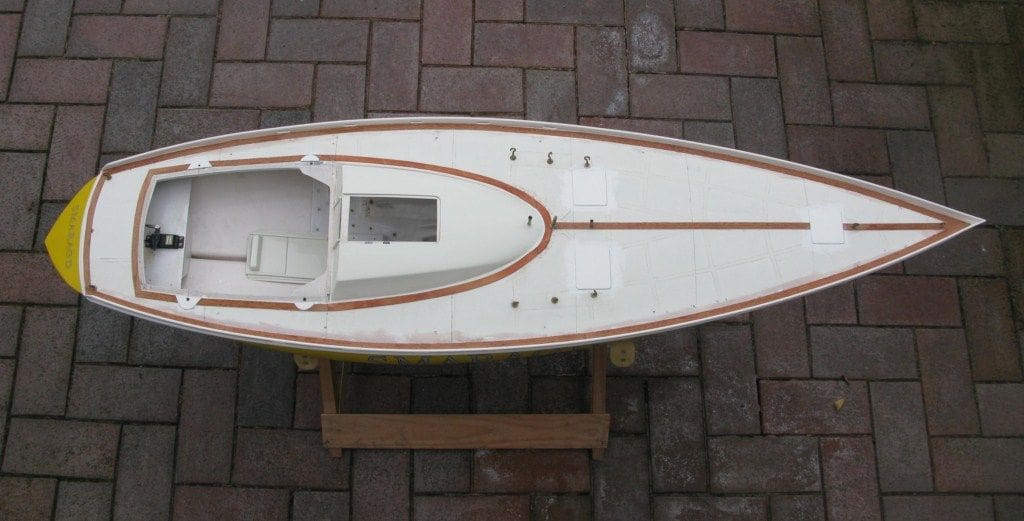
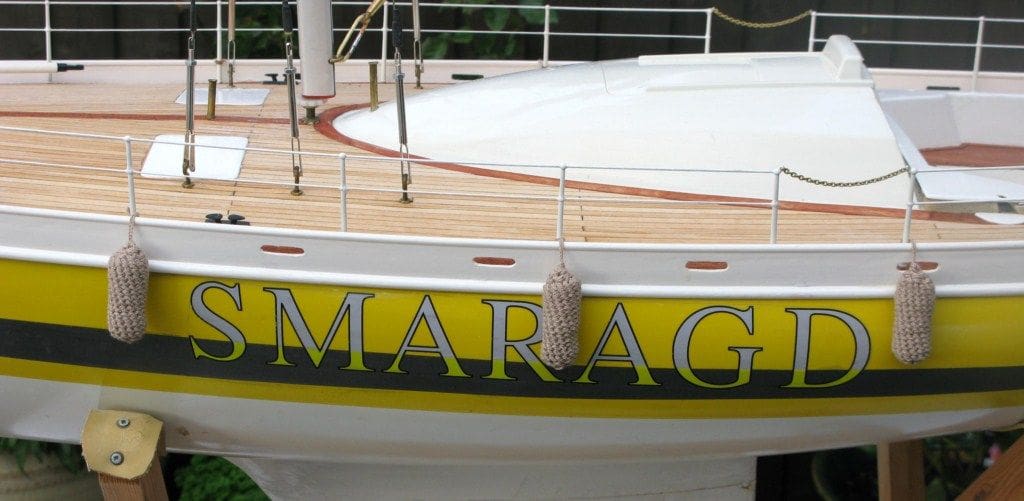
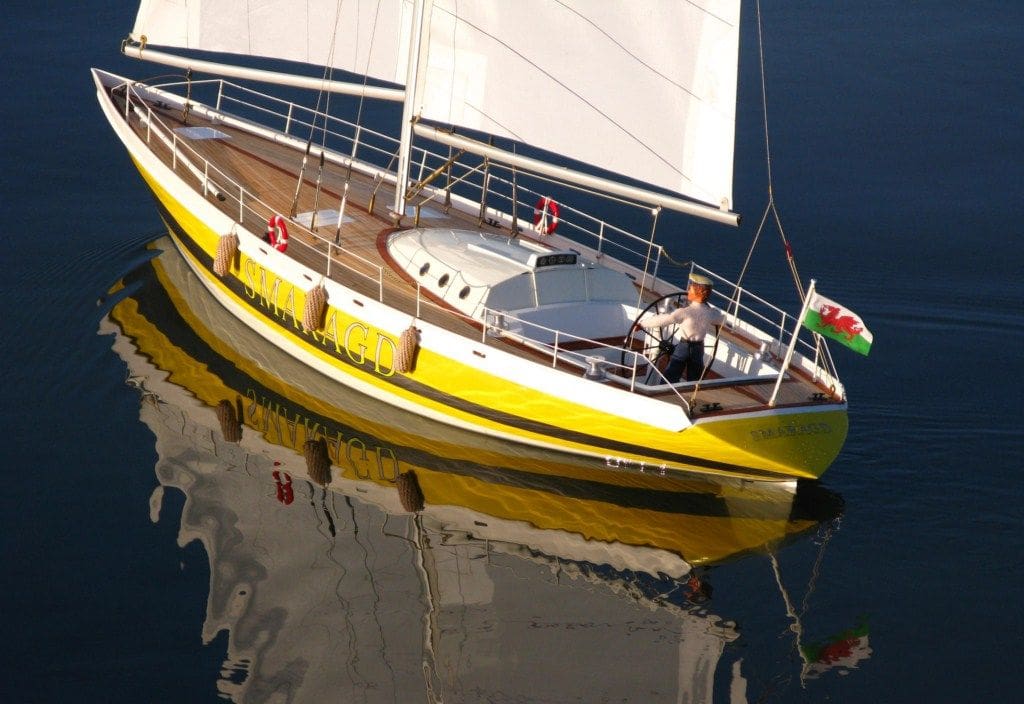
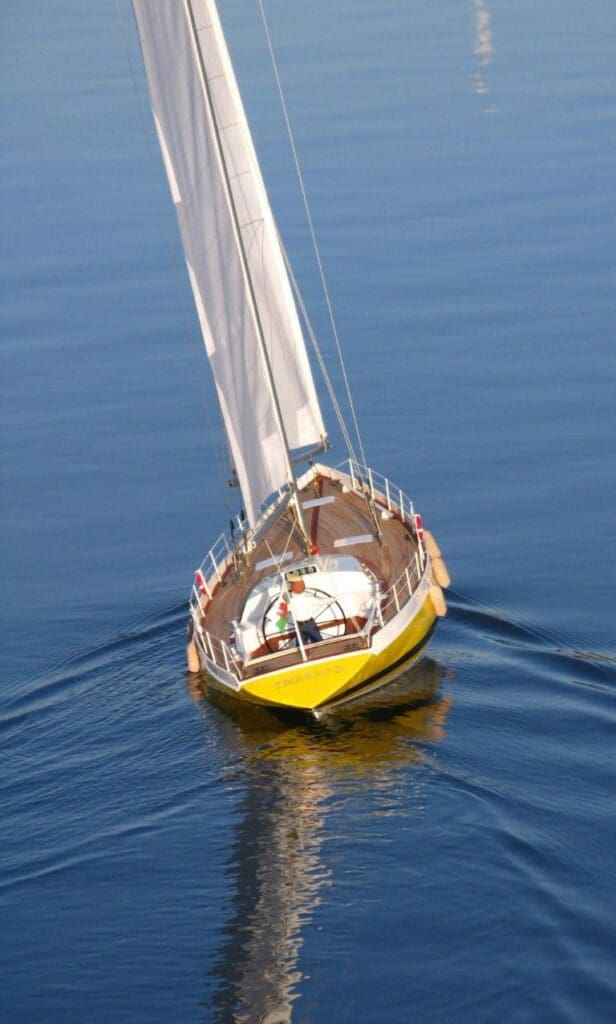
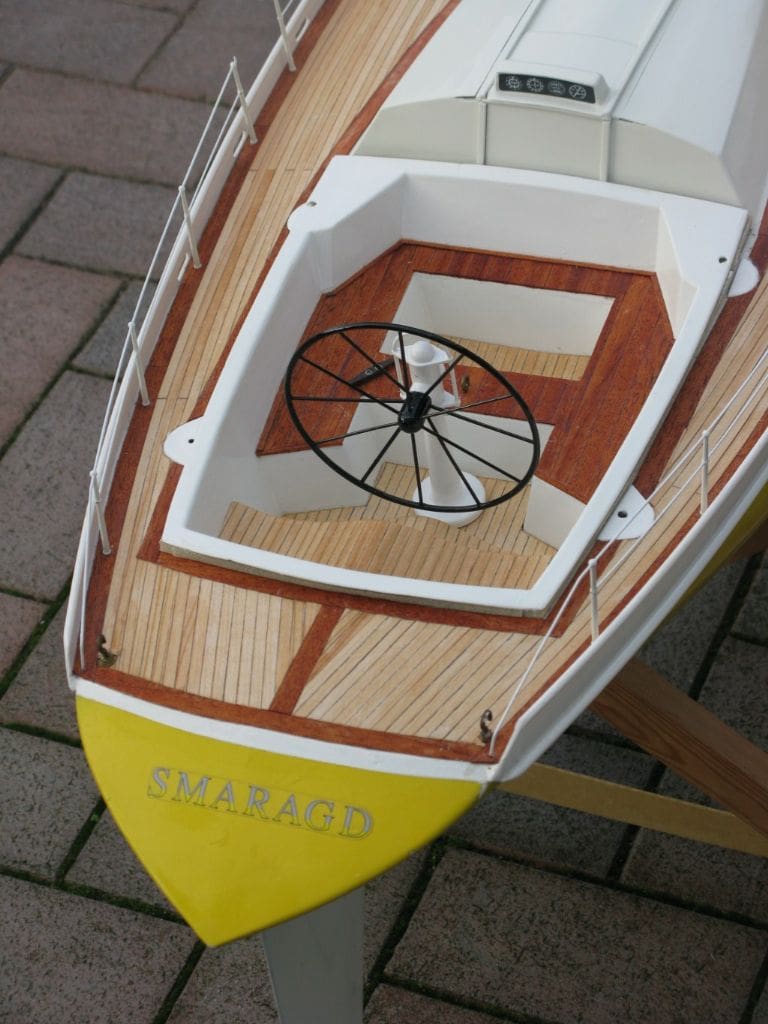
It’s about four years since I built my Robbe Smaragd and after spending many enjoyable hours on the water with her, she was starting to look a little tired and frayed at the edges. She was obviously in need of a makeover and the question was, ‘What to do about it’? There were two main areas of concern, the deck and the removable cockpit which houses the helm, Photo 1.
Enjoy more Model Boats Magazine reading.
Click here to subscribe & save.
The main problem was with the self adhesive deck patches, which I think represent non-slip areas, and the cockpit needed some serious attention. Over a period of time the patches had bubbled and looked very unsightly and the cockpit which was already planked and varnished, suffered the fate of water ingress causing the timber to stain badly, Photo 2.
After a little thought I came up with a solution; clean up the deck, fit bulwarks, remove the old timber from the cockpit and plank ‘em both! I had recently built the Robbe Atlantis and planked her deck successfully, so it seemed to be the ideal solution, but first I needed to order all the materials for the job in hand.
Ordering the materials
I was perfectly happy with the quality of the timber, competitive pricing and the level of service I’d previously received from Jotika/Caldercraft, so I ordered 10mm mahogany and 5mm limewood strips from them.
New brass stanchions, shroud tensioners and bulwark strips would all be needed later in the project, so they were ordered from A Model World with whom I’d had many satisfactory dealings in the past.
The fenders and brass portholes were ordered from Modelling Timbers, having bought quality goods from them before at various shows.
Preparation
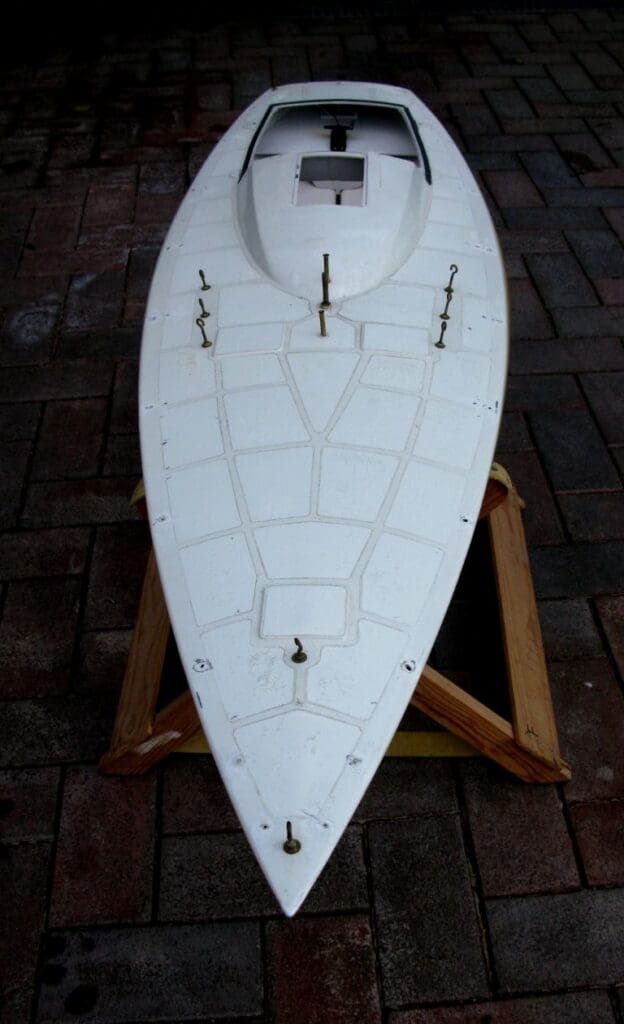
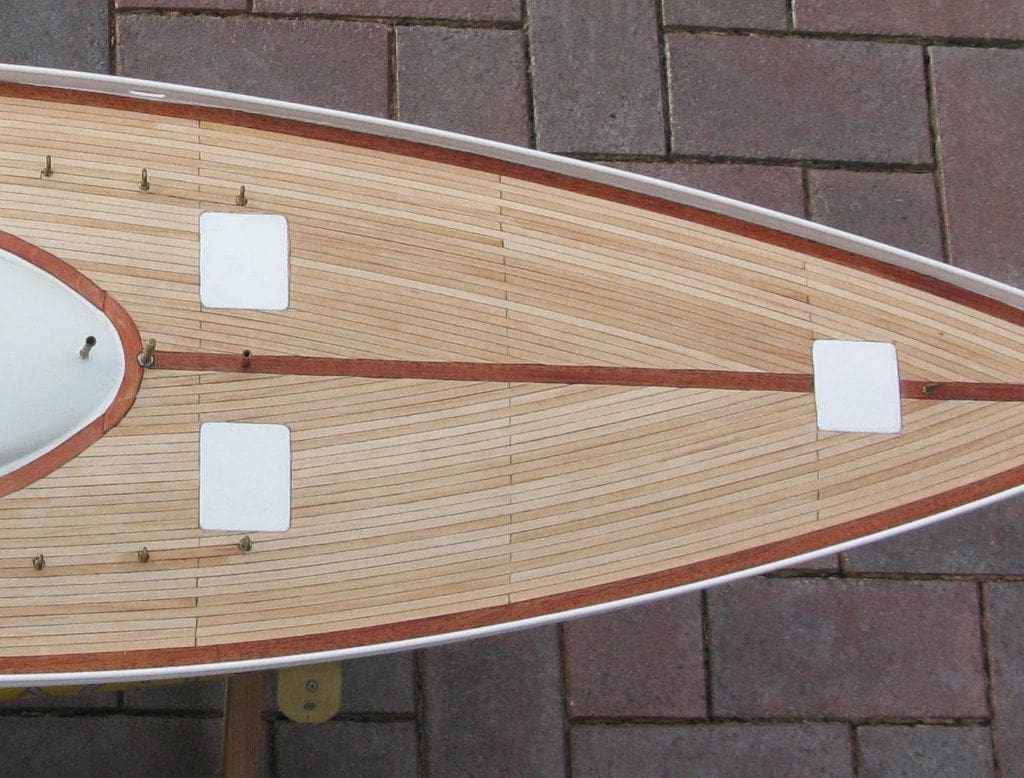
The rails on the Smaragd consisted of white shirring elastic (Robbe’s idea, not mine!) and they were easily disposed of with a pair of scissors, but not so easy were the brass stanchions which were firmly embedded in the deck. After spending some time pulling, twisting and hack-sawing, they were all freed from their stations, followed by the two spinnaker poles, flag mast and bollards. The defective patches were peeled off next leaving the deck looking very much the worse for wear, Photo 3.
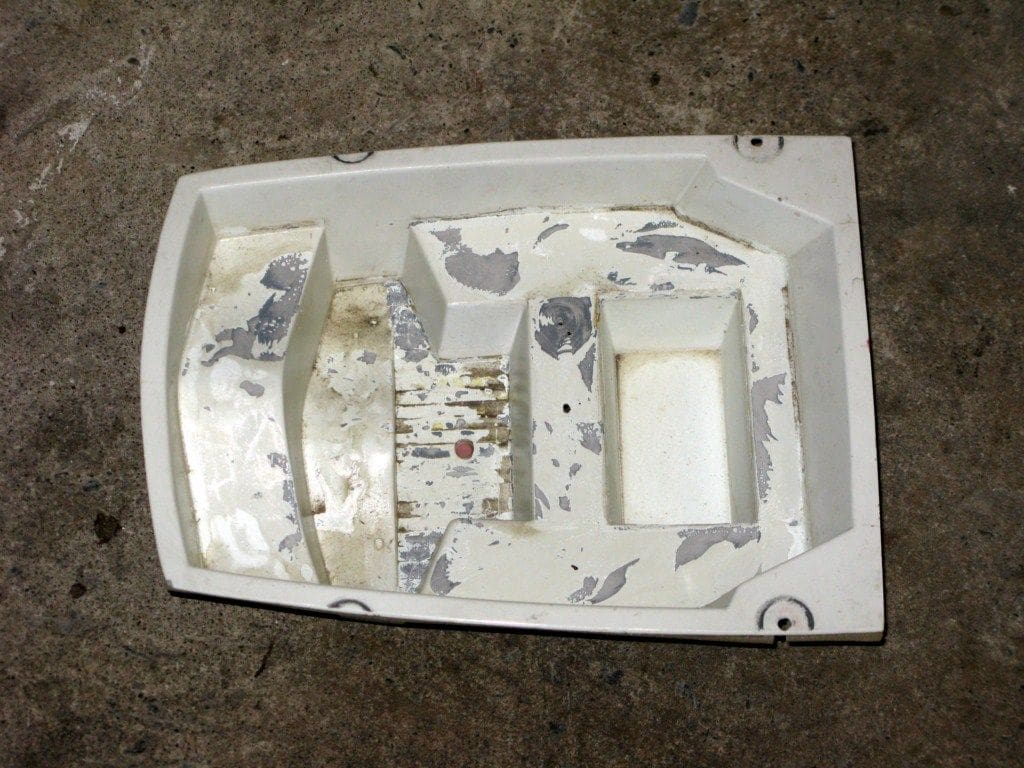
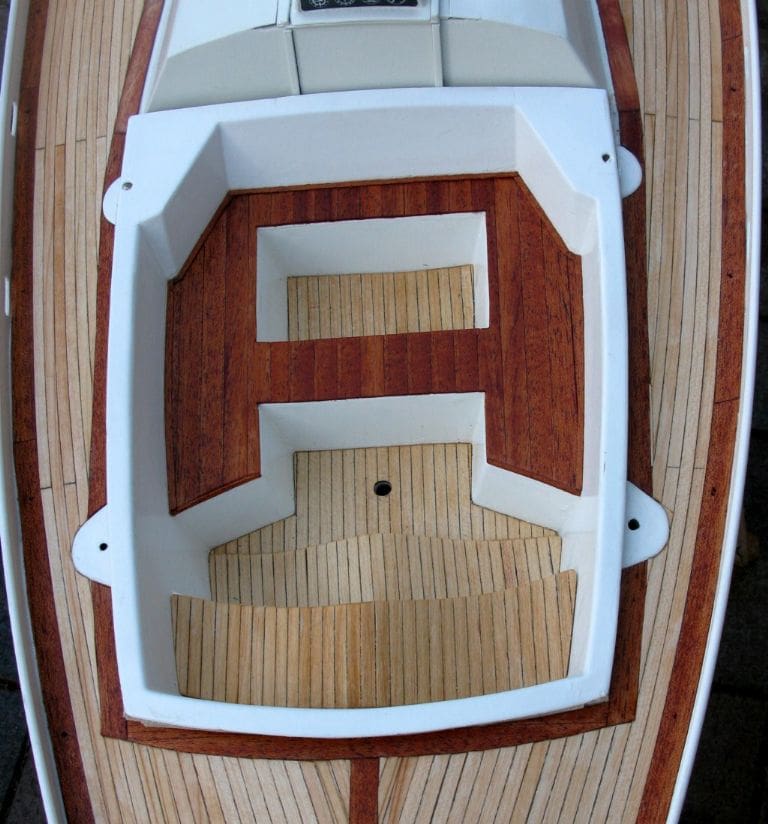
The wheel and its stand were removed from the cockpit together with the stained planks and the whole thing cleaned up prior to the refurbishment process, Photo 4.
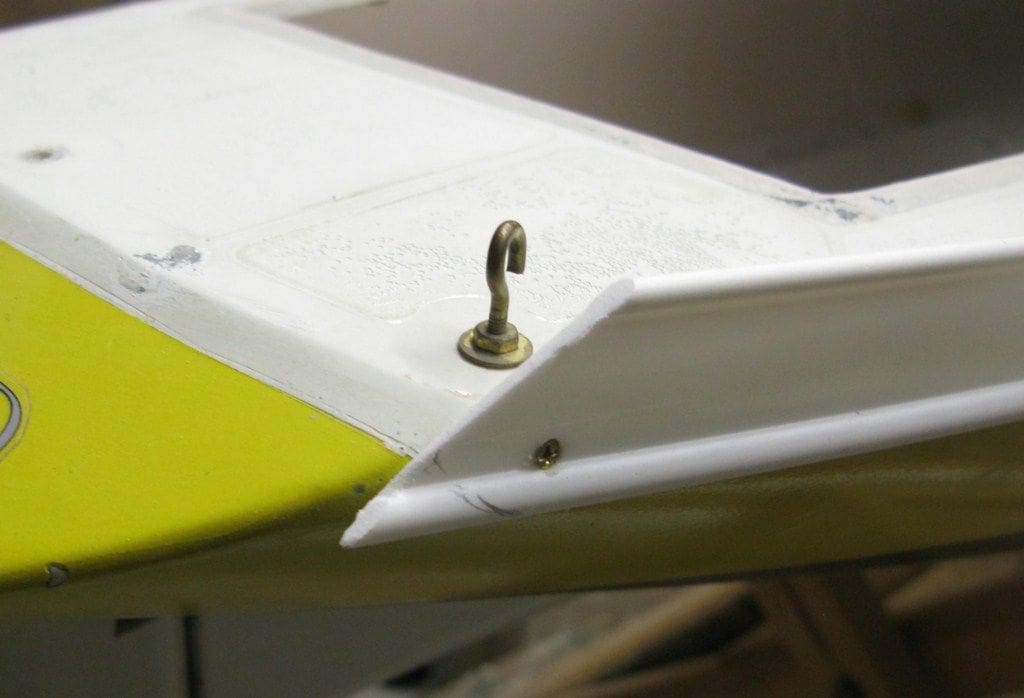
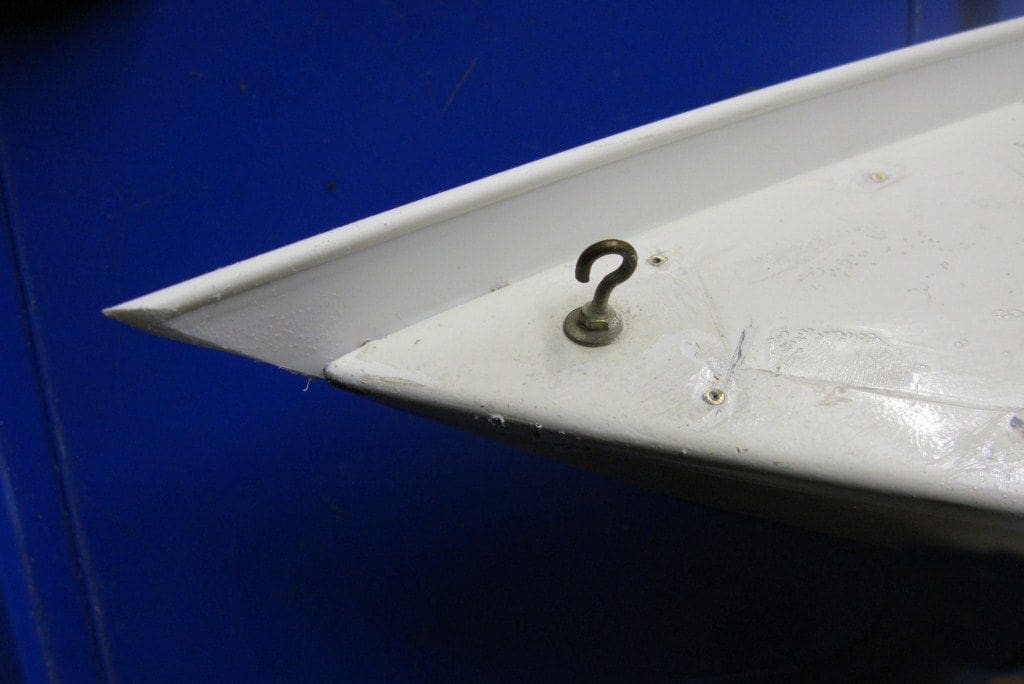
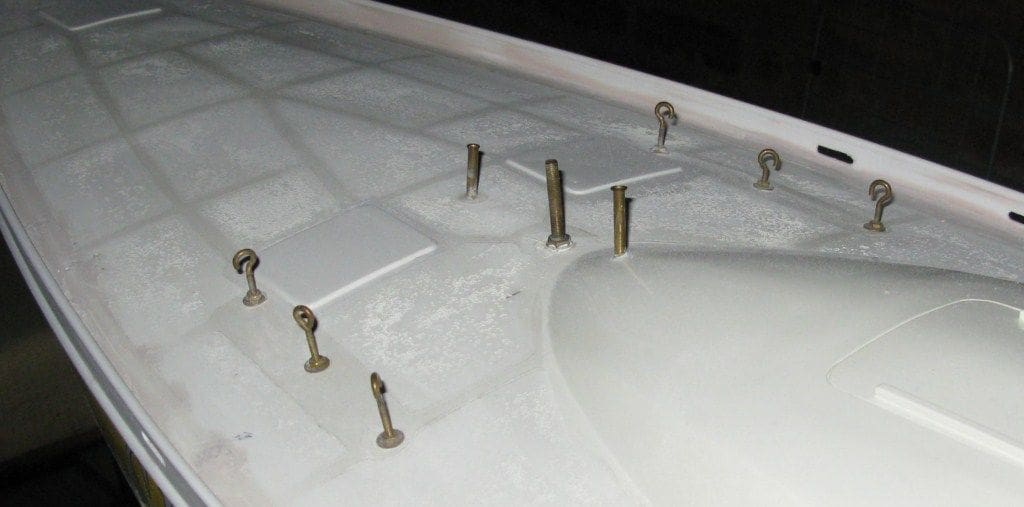
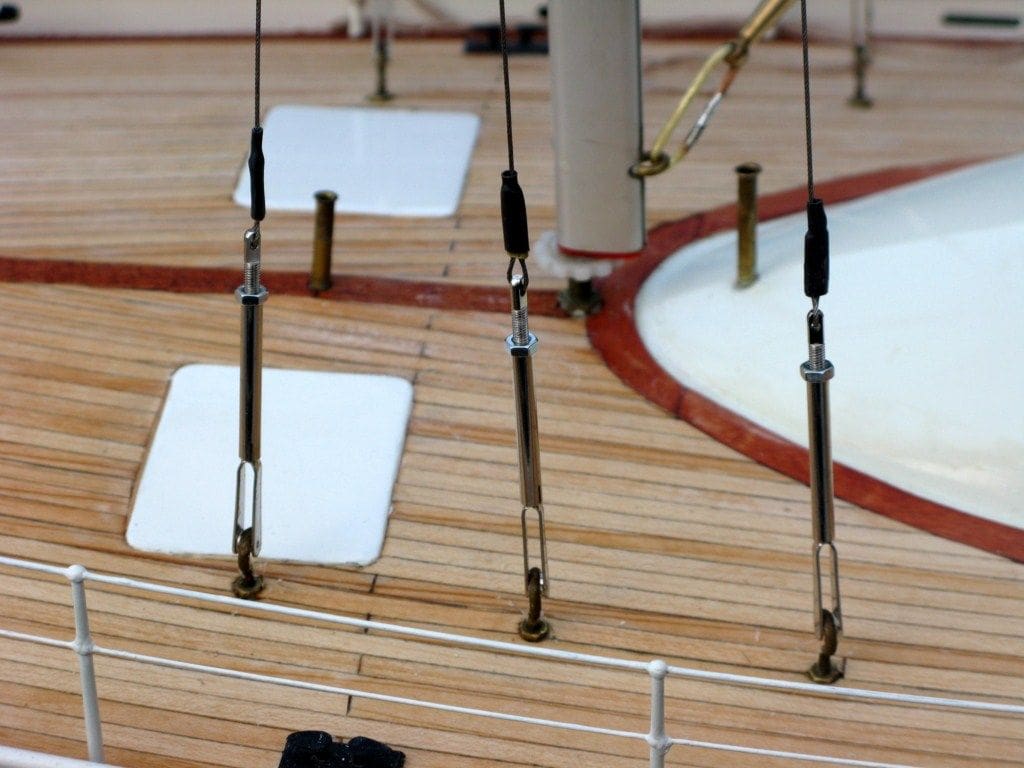
As I sanded the deck down to a smooth finish it dawned on me that I’d possibly bitten off more than I could chew because several issues became apparent. For starters there are six eye bolts which ideally should have been removed before planking, but as they are screwed into nuts embedded into styrene girders which in turn are epoxied under the deck, I deemed it wise to leave them untouched and work around them, Photo 5. Then there were four other hooks on the deck, two on the bow for the jib stay and boom and two at the stern on which to lash the backstay, so as these were all attached firmly to the deck they were also left in position.
To add to my misery there is a threaded brass support on which the mast is located and close to it are two sheet guide tubes, which I suppose could have been removed and relocated after planking, but my thinking at this stage was ‘in for a penny etc.’ so they were left. There are also three raised square sections moulded into the deck, not sure what they represent, but are impossible to remove, so more features to circumnavigate with the planking.
The final straw was the moulded cabin which is oval shaped at the fore end and I had to come up with some idea of how to fashion a 10mm wide strip of mahogany to go around it, but more of that later.
So in summary, to say that I anticipated a few headaches ahead is probably an understatement…….
Fitting the bulwarks
It’s quite rounded where the deck meets the hull on the Smaragd and the deck falls away quite sharply, so it was obvious that it would be difficult if not impossible to get a satisfactory edge to the planking without some means of support. The answer therefore was to fit bulwarks which would enable the outer mahogany plank to have something to fit snugly up against.
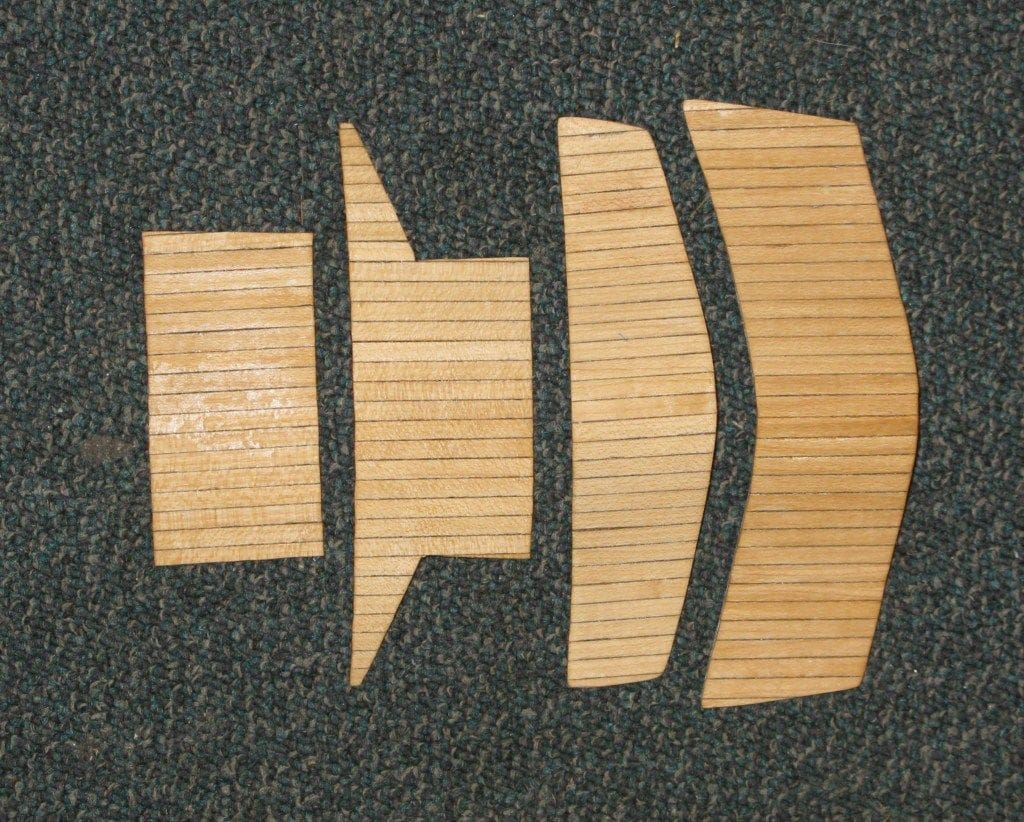
Bulwarks as supplied with the Atlantis kit were used, as the Smaragd hull is of a similar size and so they were carefully measured, cut to length, shaped at each end and temporarily fitted to the hull by means of a couple of small screws, Photos 6 and 7. While they were in position they were matched up at the bow and with the aid of a file and sandpaper were made ready for a permanent join later. Then four slots to act as scuppers were marked on each at appropriate points, the strips were then removed, the slots cut out with the help of a drill and file and then all lightly sanded and made ready for painting. ]
Only the insides were painted at this stage with two coats of primer and three coats of Humbrol white gloss applied by brush. The outer sides were to be painted later when the bulwarks were in their final position because there would be several countersunk screws attaching them to the hull which would then have to be finished off with filler and smoothed down. I considered this to be a better idea than painting everything first and touching up the affected parts later.
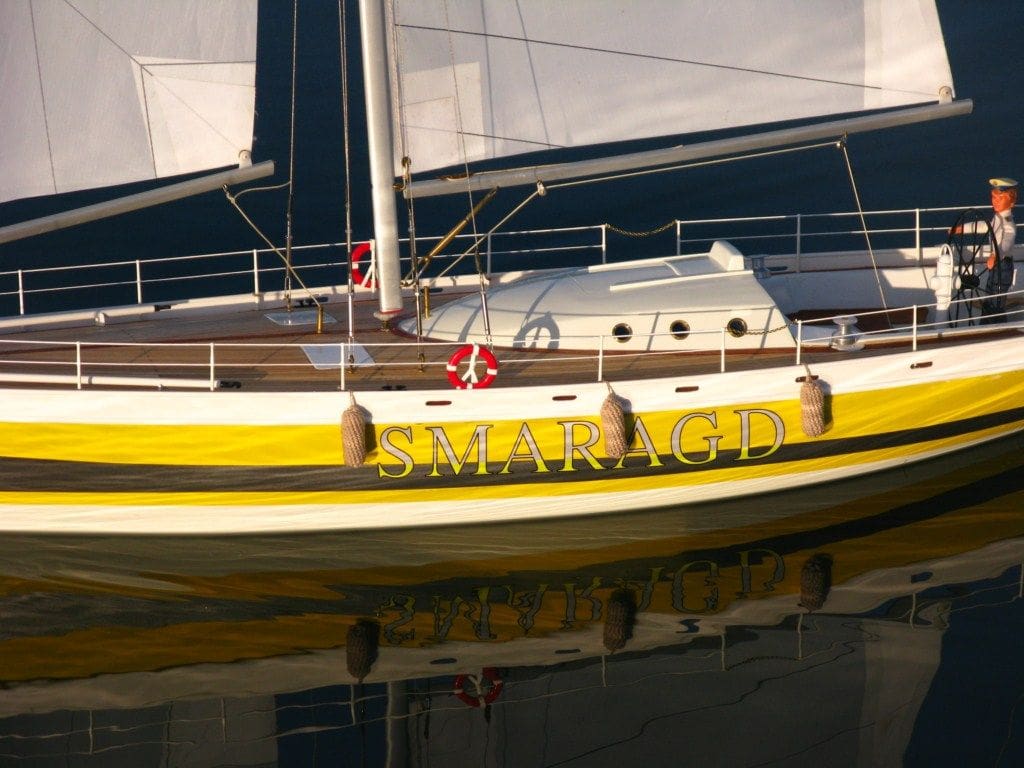
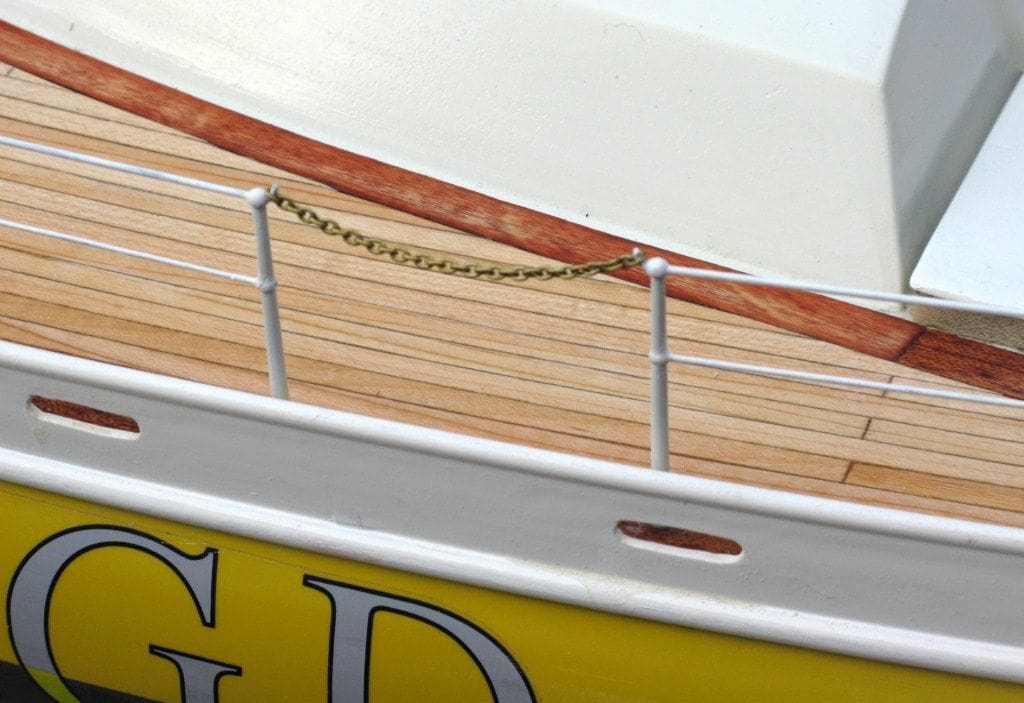
After a couple of days and when the paint was completely dry and hardened, they were re-attached to the hull with a number of small countersunk self-tapping screws. Isopon P38 filler was then applied to the deck up to the bulwarks in order to level it off, Photo 8. This picture also clearly shows the shroud hooks and sheet guides which were not removed for the reconstruction. Filler was also applied to the screw heads and when hard, everything was sanded smooth and level. The join at the bow was also treated with filler to make good the inevitable gaps and sanded to a nice point.
The outer parts of the bulwarks were now ready for their paint job, so more primer followed by three coats of white gloss, Photo 9, and now at last everything was ready for laying the deck planks.
Planking the deck and cockpit
I understand that with yachts, both large and small, the planking follows the curved line of the hull/deck edge, as opposed to power driven craft which have their planks in straight lines. With that in mind, the initial length of 10mm mahogany strip needed to be secured tight up against the bulwark, but because of its width it was nigh on impossible to bend without warping or breaking it. The problem was solved by cutting five short sections and butt jointing them together, thus job done!
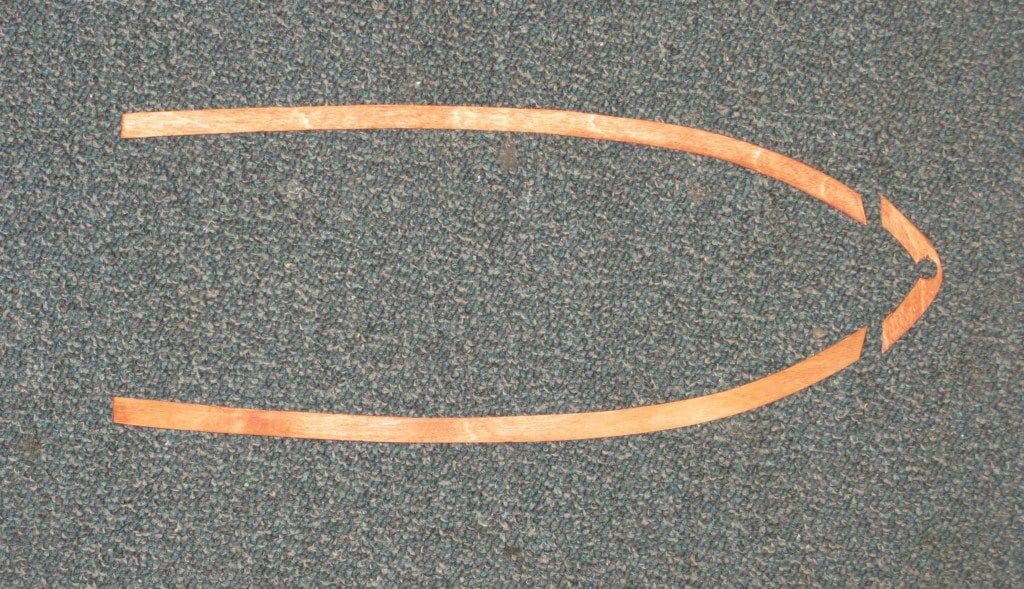
Then there was the question of placing a 10mm mahogany strip around the cabin, which would have been an impossible task due to the sharp curve involved. I did consider making a template, marking it onto a sheet of mahogany and cutting it to shape but I abandoned that idea because due to the extreme thinness of the sheet it would probably break up, or at best splinter, during cutting. After some head scratching I came up with the idea of making a template, marking it on to a sheet of very thin ply, cutting out and staining with mahogany varnish. Not a perfect solution, but adequate under the circumstances, Photo 10.
This was secured around the cabin, then 10mm mahogany strip was applied on the area surrounding the cockpit and so I was all set to get on with the serious job of laying the limewood, Photo 11.
I needed to decide at this point a means of caulking between the planks and since the method of using a soft lead pencil along the edge of each strip had worked well previously, my mind was made up. Using an indelible marker was considered, but there was the danger of the ink bleeding and I think black cartridge paper would have looked too clinical, at least for me.
I should also mention at this point that I used the same adhesive that I used when laying the planking strips on the Atlantis, namely medium cyano (superglue). The big disadvantage is that unless it’s used with caution, bonded fingers become the norm, but in my opinion if used with care it’s probably the best way to glue the strips to the deck. As I mentioned earlier, the planking on yachts follows the curved line of the hull so it’s essential for adhesion to be fairly quick to avoid holding the timbers in place for a long time whilst the glue sets. The medium cyano adheres perfectly well to this type of deck provided it’s roughed up a little first with medium grade sandpaper.
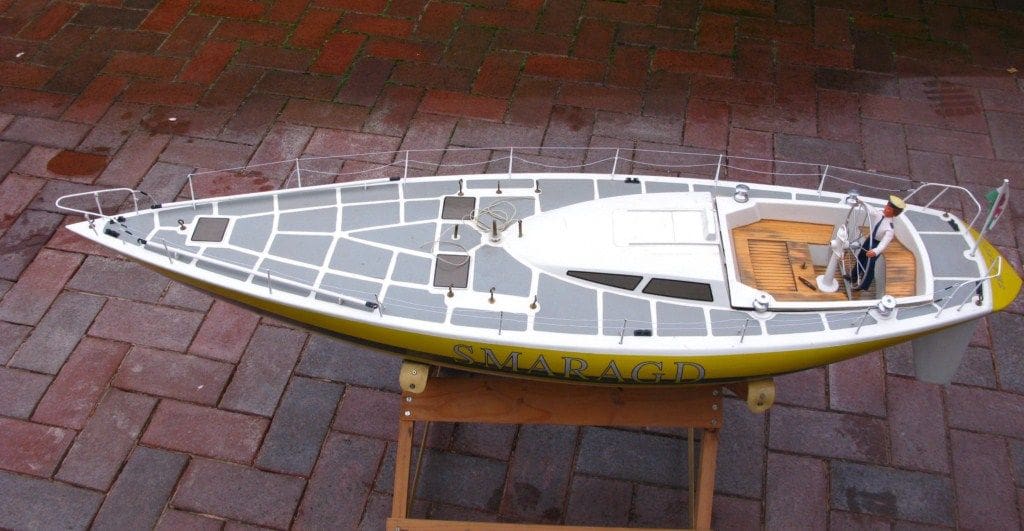
After commencing at the outer mahogany strip, I started to lay the limewood as just described, Photo 12. When I reached the first ‘obstacle’ in the form of one of the hooks at the stern, it wasn’t as daunting as I’d feared, but just a question of a little patient shaping of the strip to fit around it and fill in any gaps remaining with tiny pieces of scrap limewood. The planking continued at a very slow pace (you can’t rush these things) and all the remaining hooks were treated in the same way. The three raised sections presented no problem and they break up what would have been an uninteresting area of deck quite nicely, Photo 13.
The cockpit was fitted out next with a combination of mahogany and limewood which I think made it look more interesting and then it was sanded down as was the deck prior to being treated and I was relieved to see that the sanding didn’t remove any of the caulking effect achieved with the soft pencil, Photos 14 and 15.
Treating the deck
As I mentioned earlier, there was bad staining on the timber in the original steering well, because although it was varnished, water had seeped underneath which caused the permanent damage and discolouring. To prevent this from occurring again, Tung Oil was used instead of varnish to treat the deck and cockpit well, the advantage being that apart from being completely waterproof it can be reapplied at any time when necessary. The first two coats were 50/50 Tung Oil and White Spirit applied by brush with 24 hours between each coat. Then a further five coats of neat oil were applied, again with 24 hours between each coat. What a difference this treatment made to the timber, as the mahogany deepened to a beautifully rich brown and the limewood was lifted from an insipid cream to a lovely pale brown. With that stage of the deck complete my thoughts now turned to the fitting of stanchions and rails.
Rails and stanchions
The 50mm two ball brass stanchions were primed and given three coats of Humbrol White Gloss and left to dry before fitting. In the meantime a series of vertical (or as near as possible) holes were drilled in the deck to accommodate them which were arranged more or less as on the Atlantis, since the hulls are about the same size.
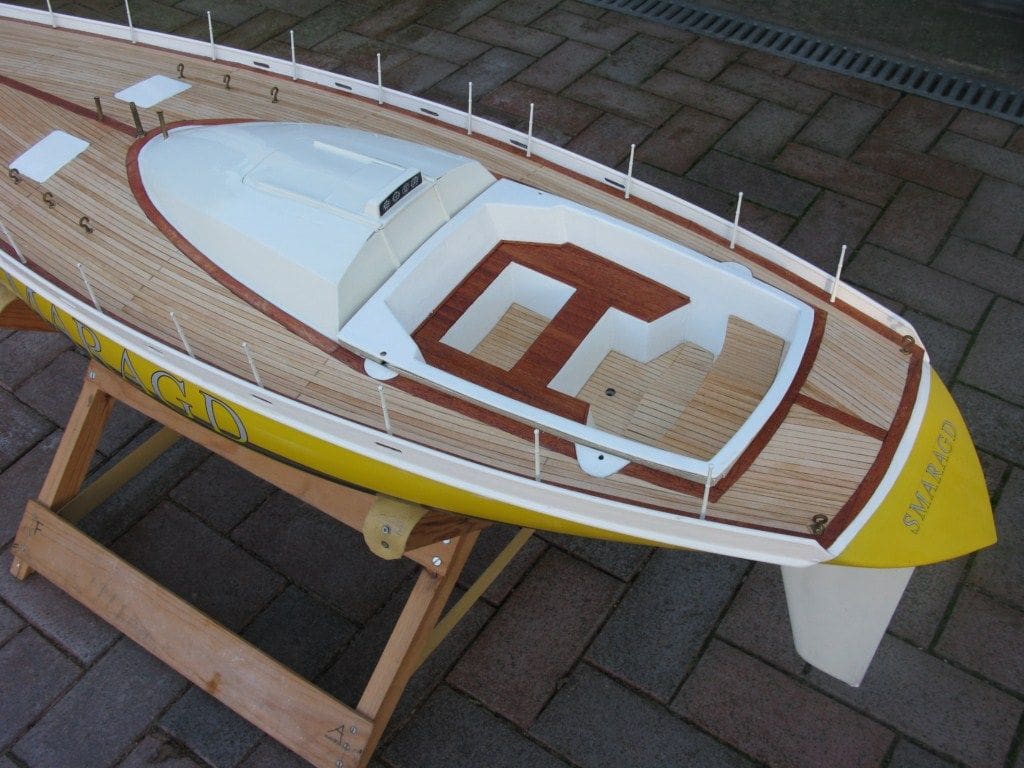
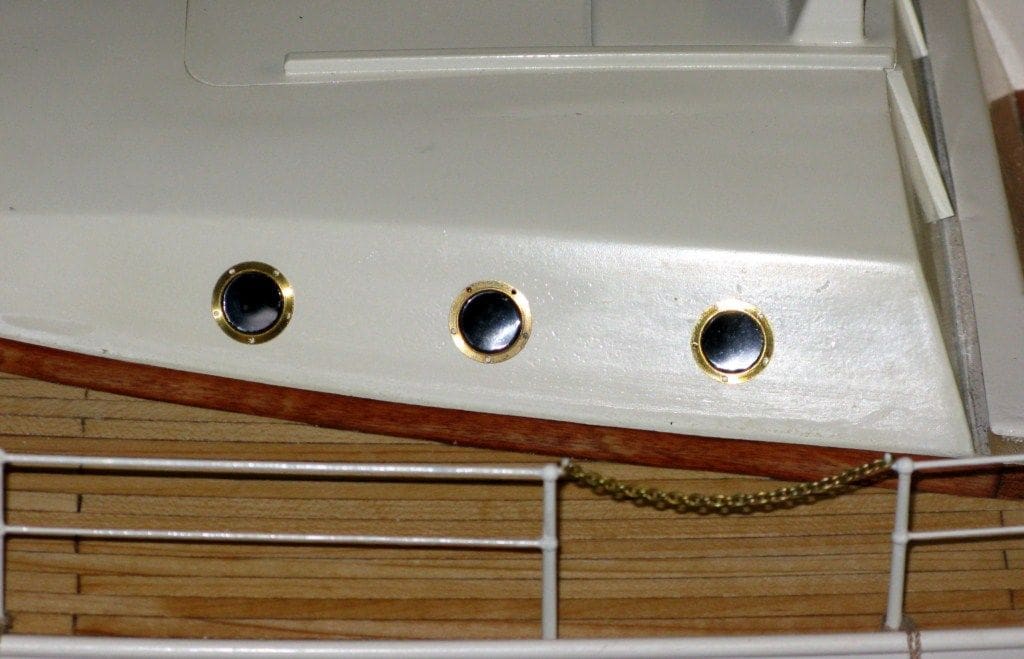
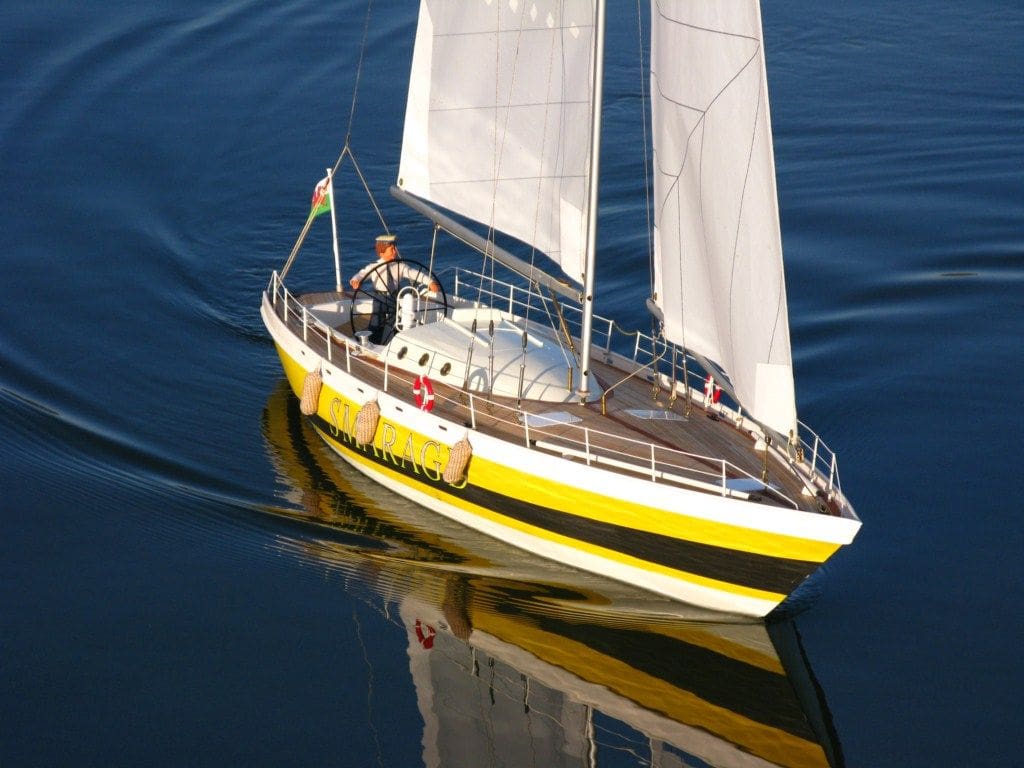
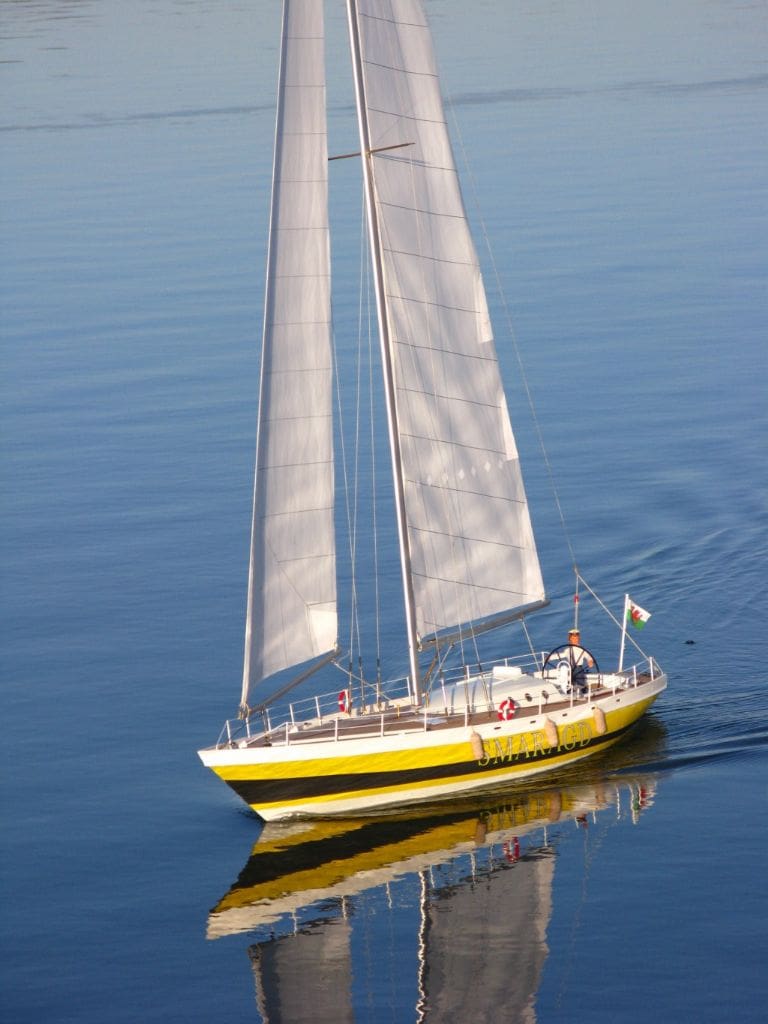
The stanchions were then pushed into their respective holes in the deck, vertically checked with a square and then secured with a drop of thick cyano, Photo 16. Brass wire was introduced into the stanchions to form the rails and again thick cyano was used to keep everything in place. The rails were then treated with primer and painted white gloss and all that now remained was to replace the spinnaker poles, bollards and flagstaff and introduce a few items hitherto unseen, namely brass portholes, a couple of lifebelts, three fenders each side and a chain guard between two stanchions port and starboard to provide access on and off the boat, Photos 17 and 18.
Resetting the shrouds
The shrouds in their original form hooked directly onto the eyebolts on deck, but as shroud tensioners were going to be introduced, some readjustment would be required of the shrouds themselves. The first job was to connect the tensioners to the eyebolts and put the mast in place which was held vertically in position by an extra pair of hands (wives can be very useful for this). This left the shrouds hanging loose, so the small loops at the end of each were snipped off. A little forward thinking was needed here in order to get things in sequence, so a small piece of heat shrink tubing followed by a 15mm section of brass tube were slid up each shroud and temporarily secured. The cut end of each shroud was then passed through the hole at the end of the tensioner and back into the tube, thick cyano was applied and the tube was crimped as tight as possible. The heat shrink tubing was then slid over the brass tube, gentle heat was applied and job done, Photo 19!
The purists among you will probably shrink in horror at this method, but I find it very difficult to solder stainless steel and this method has always worked for me in the past. As long as a liberal amount of cyano and tight crimping are applied, then there should be no problems.
The mast was then adjusted upwards to a predetermined height by a knurled screw at its base, the shrouds were tightened with the tensioners and this part of the exercise was complete.
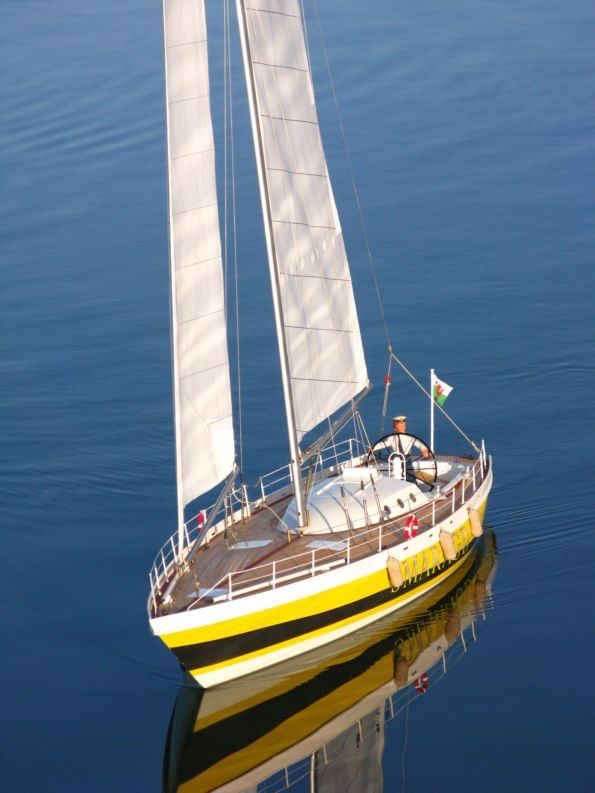
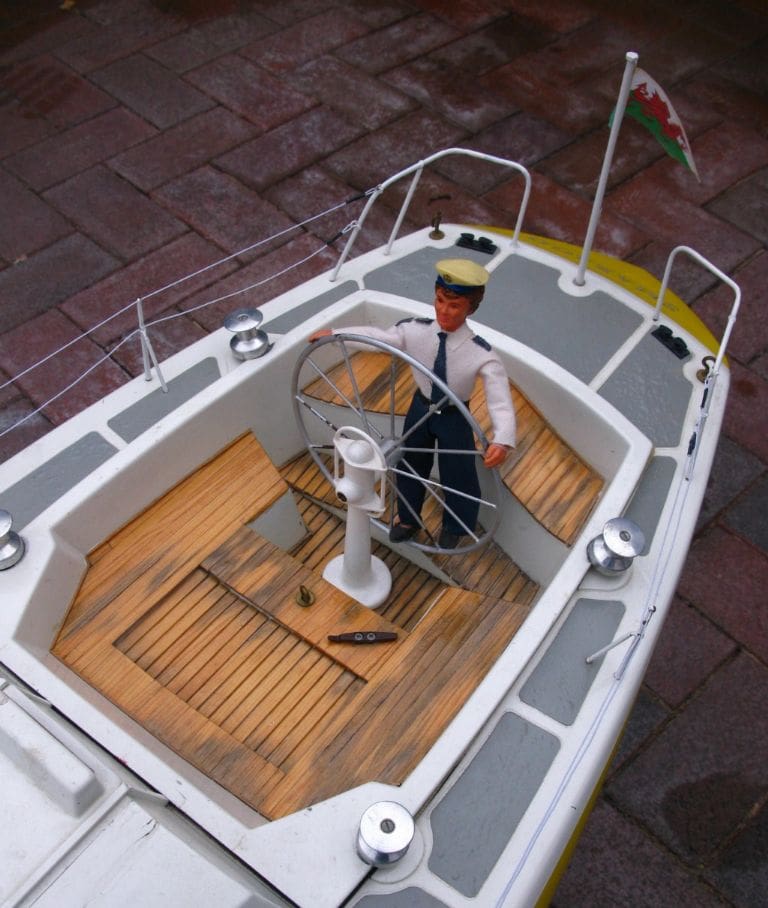
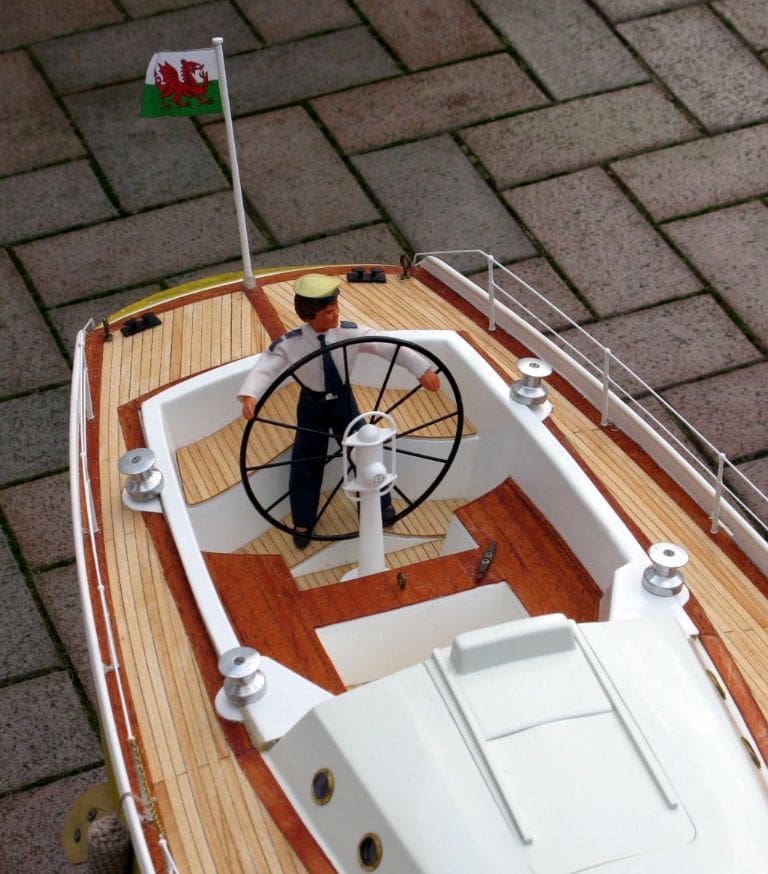
There only remained two more jobs, to reinstate the helmsman from Robbe, who I call Mike, and the Welsh flag at its place on the stern, Photo 20.
Conclusion
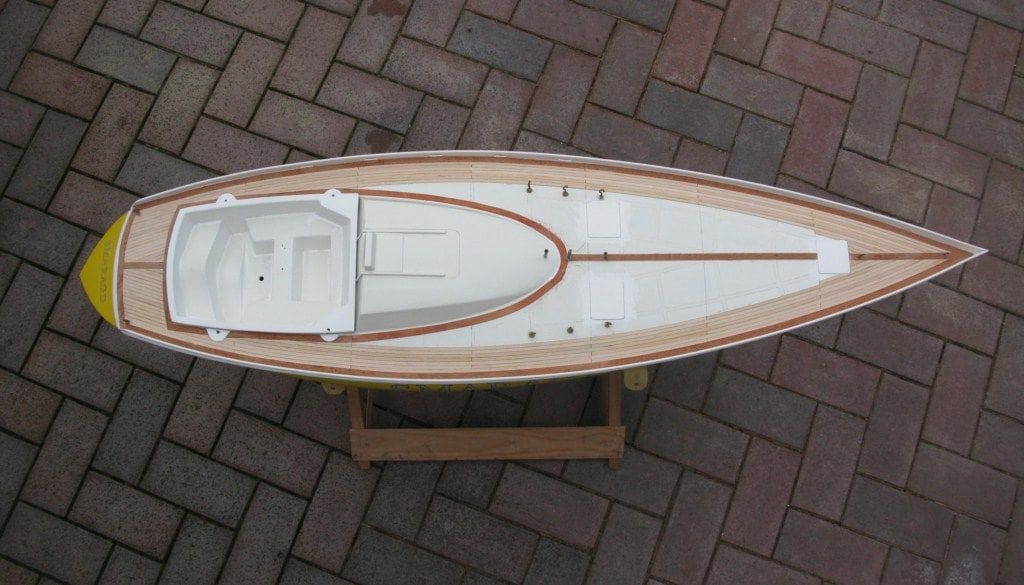
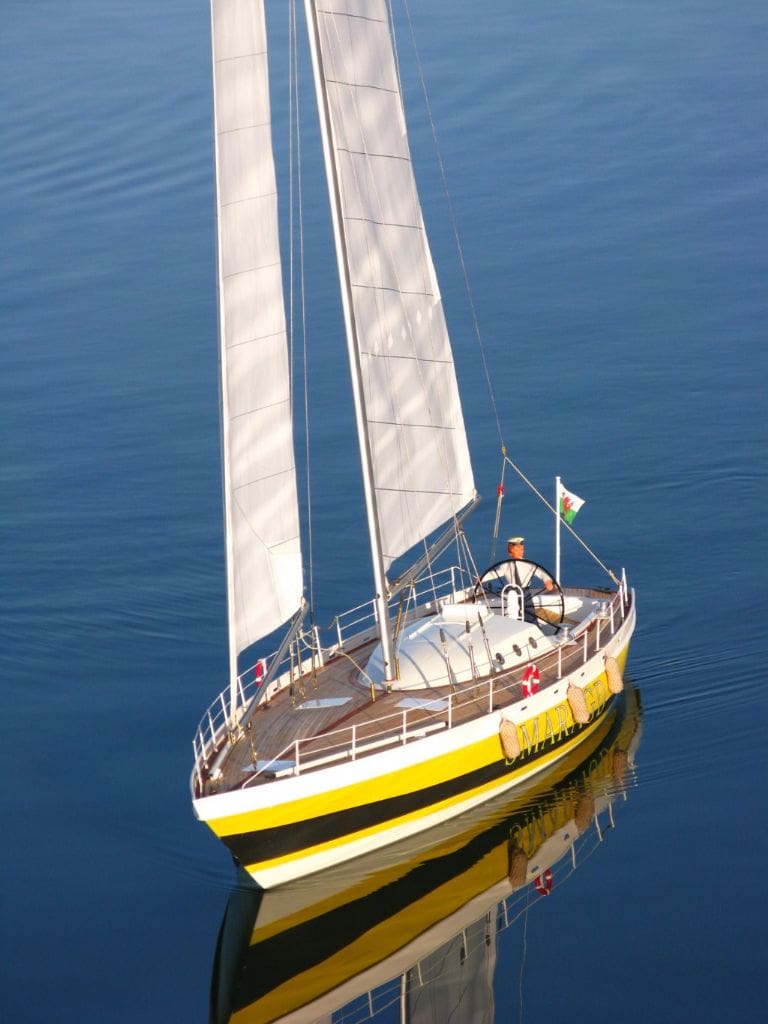
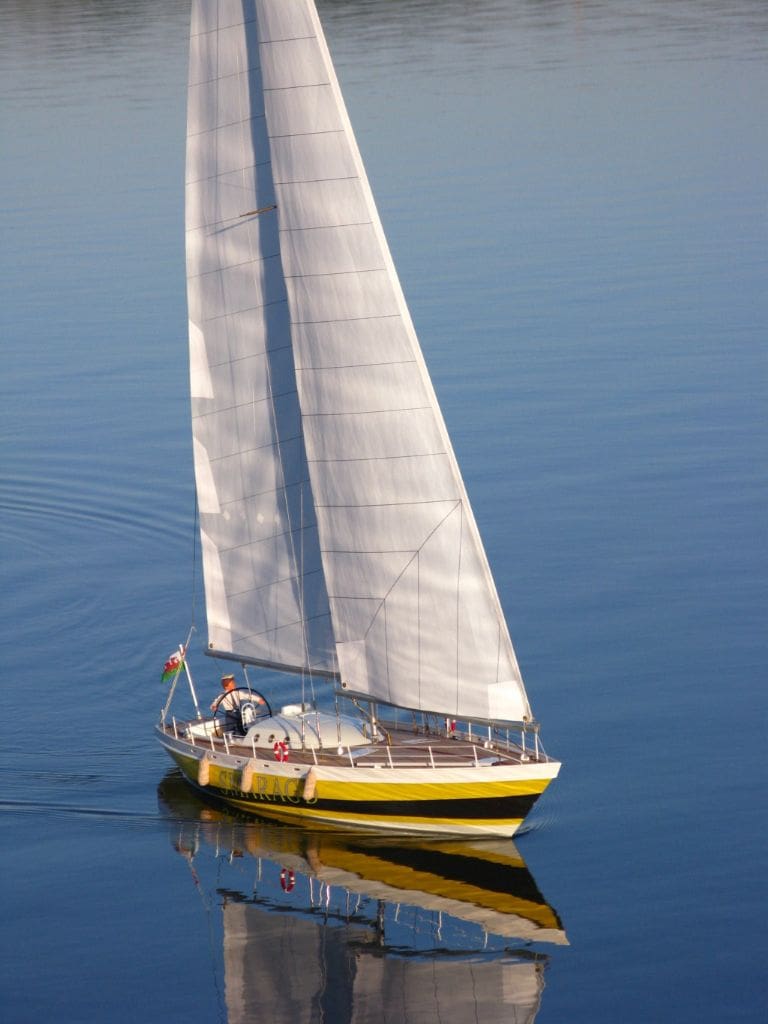
Smaragd in its original brand new state looked very pretty, but after her makeover I think she looks even more appealing with a planked deck and cockpit, and if there are any owners of this model who are interested in giving their craft this treatment I hope I’ve given you some food for thought. It’s been a most enjoyable exercise and inexpensive at around £70 for the materials, with a very pleasing result.

