CHARLIE OATES describes how to make these little devils
I suppose that all the propellers we use on our models should be called miniature, but those we are concerned with here are the ones you can’t buy as far as I know. Why would you want to make your own small propeller? Okay then, I’ll tell you.
Enjoy more Model Boats Magazine reading.
Click here to subscribe & save.
There comes a time when most of us get the urge to make a small model boat, sometimes a very small model, whether ‘Plastic Magic’ or your own creation. This might be because you are running out of space to keep them all or have limited space to do your building or perhaps you just fancy the chance to do something you haven’t done before.
Me? It was all of the foregoing. A recent house move left me with a seven foot long shed to disappear to in the evenings. I have no regrets about the models I’ve made, the challenges are new and as a bonus they are very cheap to make which as a good Yorkshireman with a Scottish mum is an irresistible force. I would be the first to acknowledge that many good modellers like to buy many of the bits that go into their boats, but I don’t. I like to make as much as I can myself; they might not be as good as a professional item but I make these things for myself and not to be judged by others. Making bits and pieces is part of the challenge and most importantly, you can’t always get what you want, even from the best model shops. We are after all, model makers!
Getting started
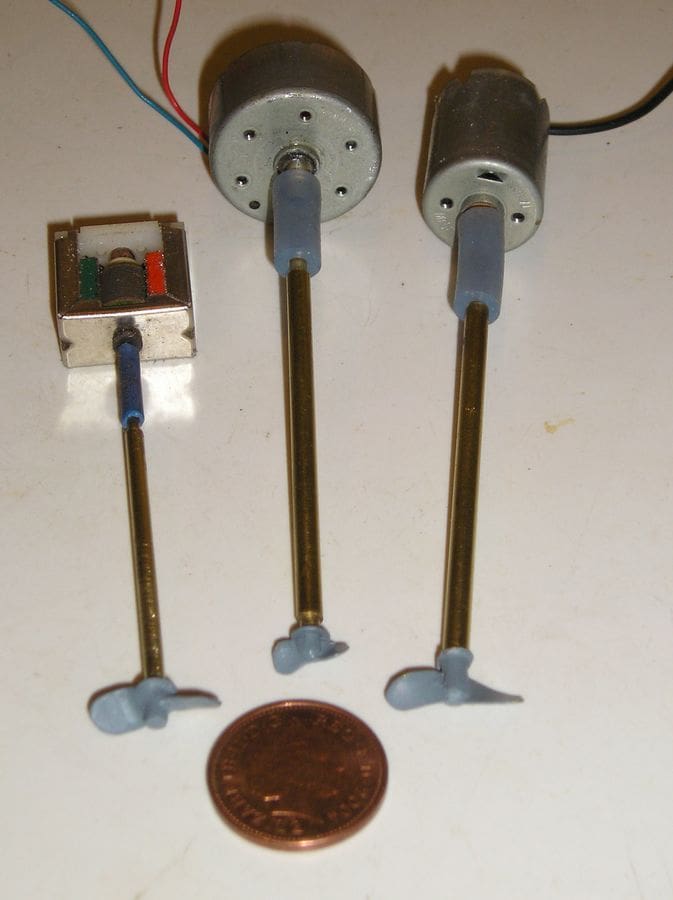
The size of propellers that I’m making here you can see in Photo 1 alongside a one pence piece for size comparison. There are three sizes here and the smallest is as tiny as I’ve managed to make work satisfactorily. We all know that we can’t scale down water so it follows that the smaller a propeller is, then the less efficient it will be.
Before I describe what we are making, I have an important point to make. I am no engineer and would describe myself as a model maker and have been so for many years. My work might make an engineer wince but that’s not important because I make items for my enjoyment and no other reason.
The materials that you will need are mostly sourced from the best friend of a model maker, namely the junk box. I’ll assume you have a few tools including small files, small hacksaw, a soldering iron and that’s about it.
First piece of junk
Last time you bought a servo it probably came with some little brass bushes intended to go in a grommet in the mounting lug. You will need one of these and one more for when you drop it on the shed floor and can’t find it again. If you don’t have any, it’s an excuse to buy a new servo or you can go Yorkshire style and use a tiny piece of tubing about 2mm inside diameter and about 3mm long. Your offcuts did go in the junk box didn’t they?
Second piece of junk
Some shim brass a little wider than the prop blade that you want to end up with. The tag from an old 4.5 volt flat battery will do, or more likely you will have plenty of brass left from that stuff you bought at the last model engineering show you went to, but weren’t sure why. Of course you can buy what you need from most model shops and here I’m showing the materials you will want from a typical metal sales display, Photo 2.

Making the propeller
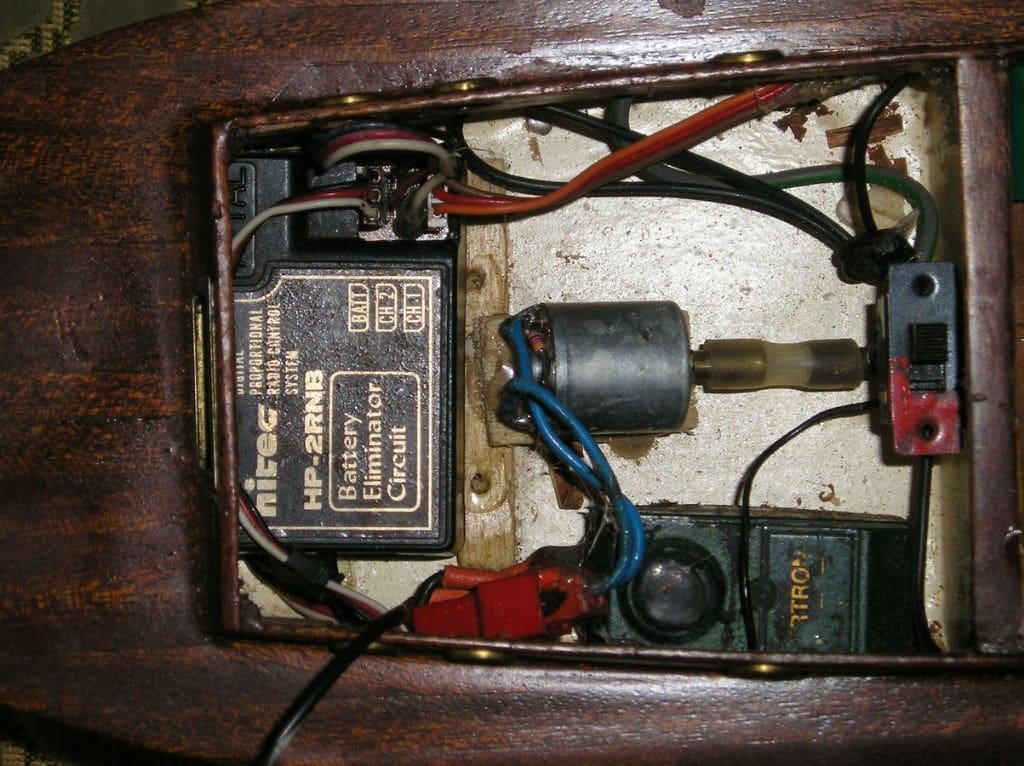
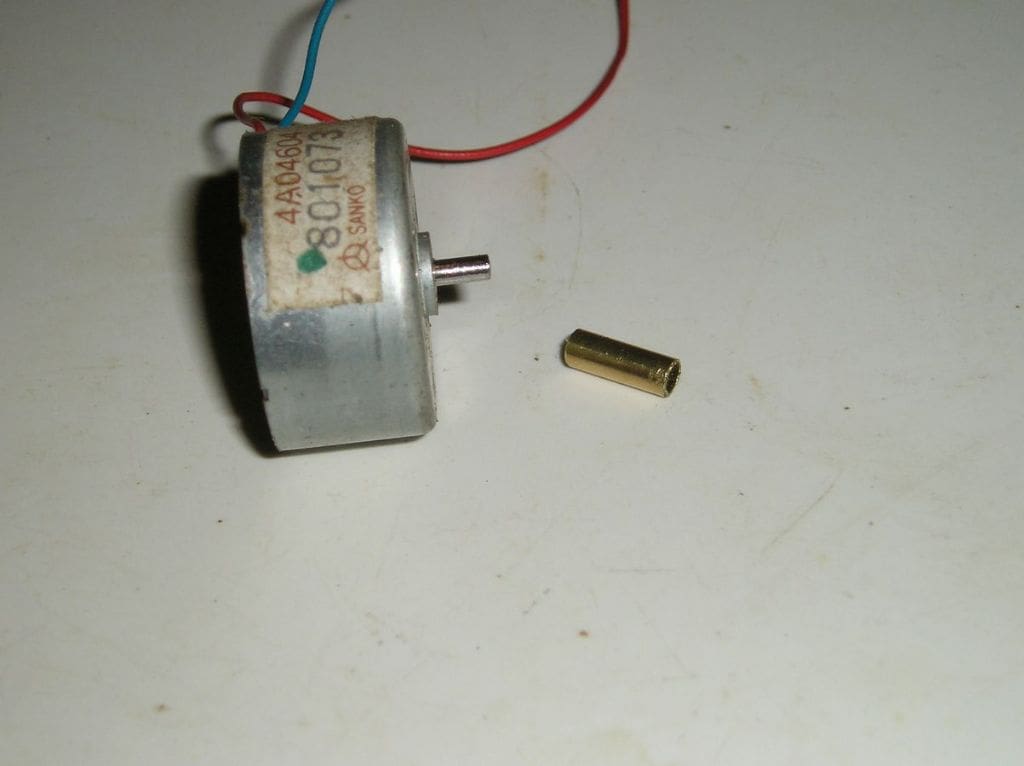
First, work out how long the propshaft needs to be. To do this, temporarily tack the motor you intend to use (probably a servo motor) into the hull and Plasticine does this job very well. Offer up a length of brass rod into the hole you’ve drilled in the hull, leaving a gap between the end of the motor shaft and the propshaft of about 1cm. At this point it is worth remembering that you may need to modify the shaft on the motor to take a coupling which will make the motor shaft longer. I’ll come back to this at the end, but you can see what I did in the picture of my installation, Photo 3.
Looking at the underside of the hull you can judge where the prop should be and mark the rod to the correct length.
Take the rod to a vice, pad the jaws with some cloth to stop them damaging the shaft and cut it to your mark. If you don’t cut it square, a few strokes with a file will improve it.
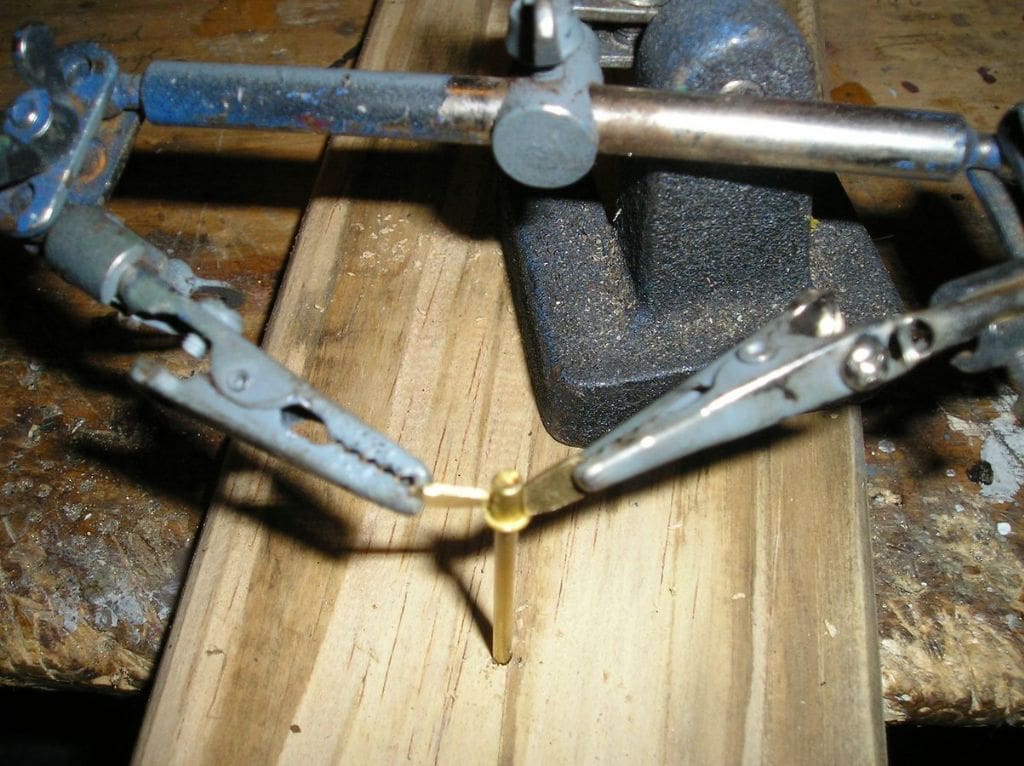
Now for the servo mounting screw bush thingy that came with your servo. We’re going to solder that to one end of the shaft, but first hold it flange down, as best you can without bending it and with a small hammer or the side of your pliers, gently tap the top edge of the bush. This is to stop it sliding down the shaft each time we apply heat at the next stage. I am assuming you know how to solder, but it is important to clean well, tin the shaft and use a good flux. If you haven’t soldered metal before, don’t worry, spend an hour or two practising on some scrap before making the propeller, Photo 4.
Now for the blades. There are two ways of making these; one is easy but doesn’t produce as good a propeller and the second way is more fiddly but looks nicer, and here I’ll show you both.
First, the easy way.
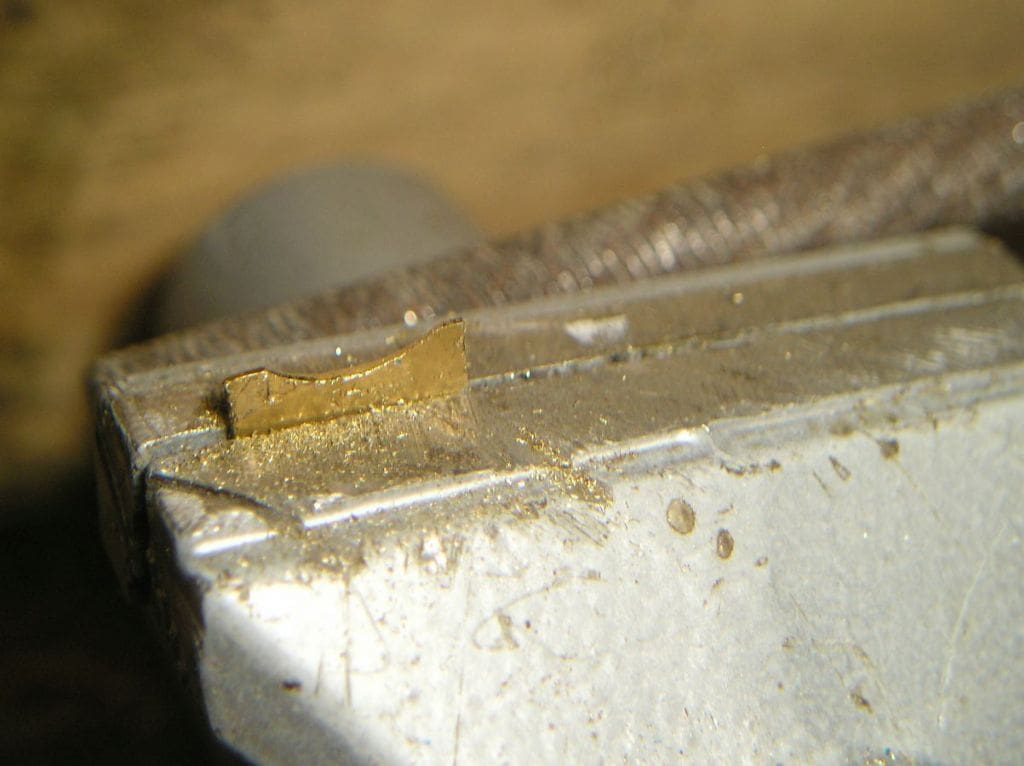
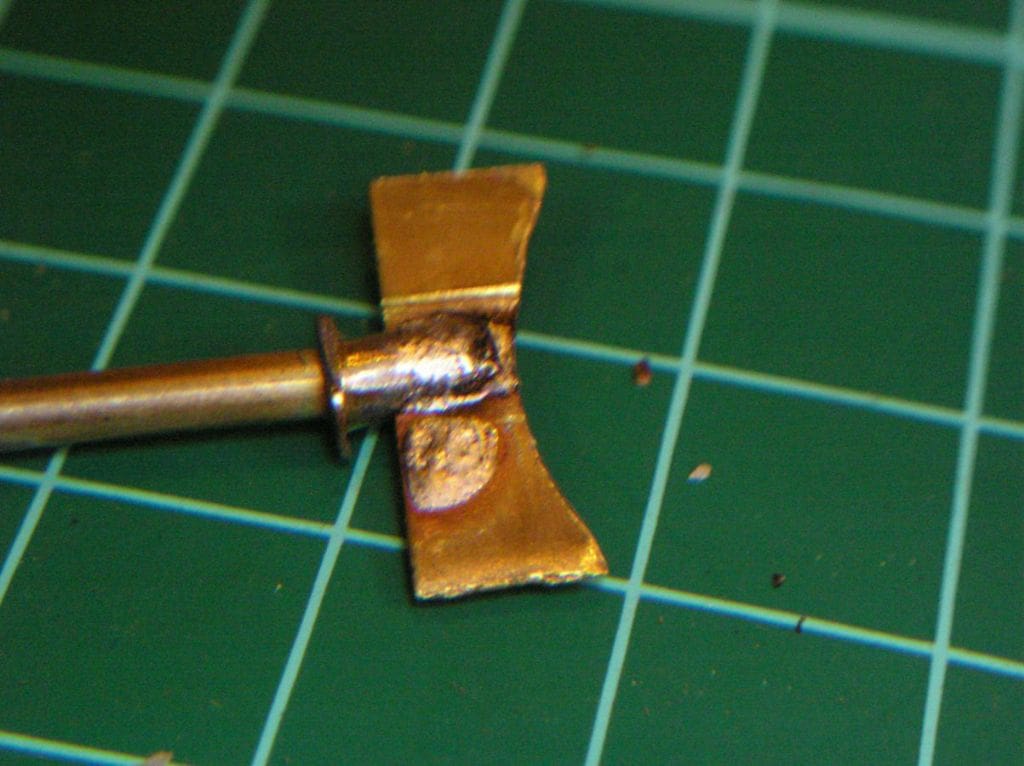
Cut a strip of brass about 1mm longer than the propeller blades overall diameter you want and around the correct width for the finished item. Mine was 15mm by 5mm. Next hold it lengthways in a vice and with a half round file remove a little of the metal to make a gentle curve in the brass, and then put it to one side, Photo 5. Now put the shaft in the vice, bush upwards, and cut a slot in the end down as far as the flange on the bush, Photo 6.
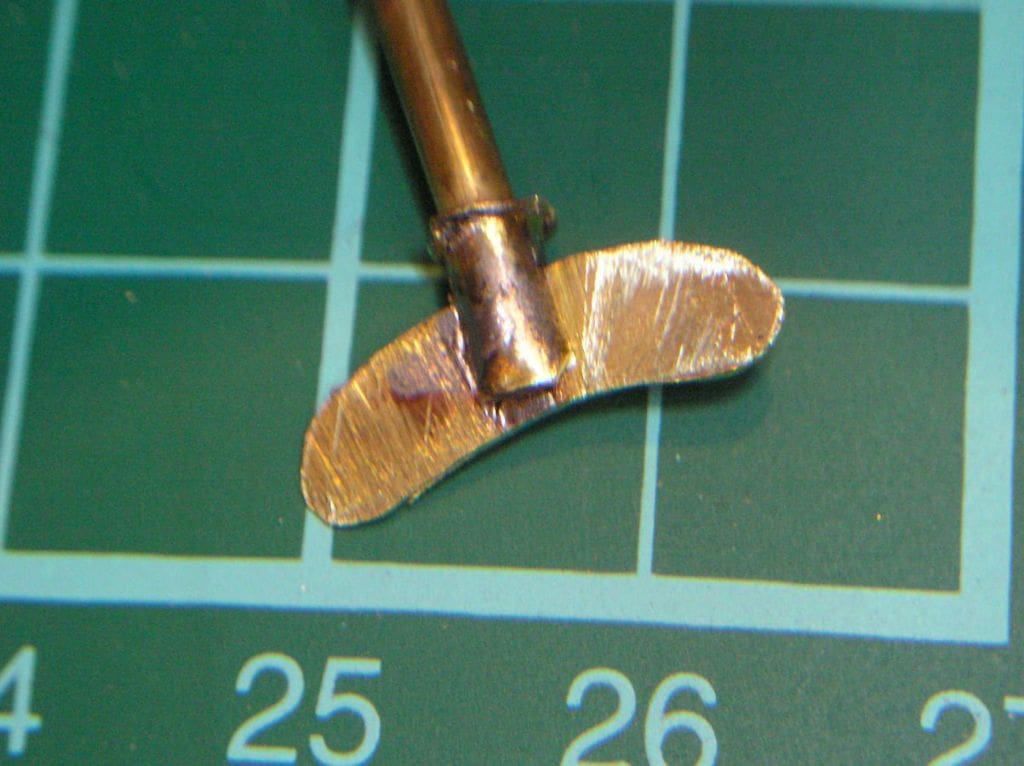
Slide the blade into the slot getting it central and straight and solder into place. You should now have something like the messy thing in Photo 7. A few minutes work with a file and you will have something like Photo 8. The rest is easy, clean it up with files, and emery paper if you have some, then with pliers, give a gentle twist to each blade and you have a propeller.

Second, the fancy way.
Its not that fancy really just a bit more fiddly, but does produce a nicer looking propeller.
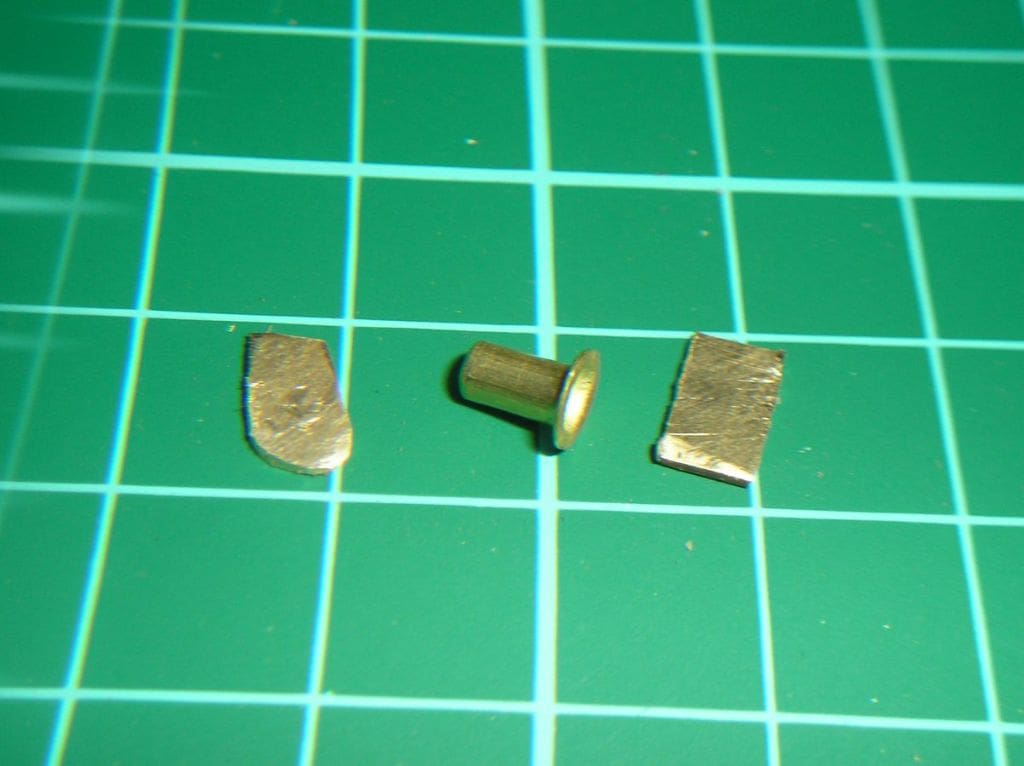
Cut two identical pieces of brass each a little larger than the individual blades you want to make. Mine were 6mm by 4mm, Photo 9. Before soldering these to the shaft, mark the bush on each side with scratches to show you where you want the blades to go. The scratches should be about 45 degrees to the shaft because we don’t want to bend the blades too much after it’s been soldered. Now for a new toy to hold things in place.
I use an invaluable gadget called ‘Helping Hands’ which is just a base with two flexible arms and a crocodile clip at the end of each arm (available from MyHobbyStore for £6.99 through the Model Boats website).
Now to test your soldering skills, prepare the bush and the two blades, I like to tin them with a little solder first. Hold the blades in the clips on your Helping Hands and taking your time, position them carefully and solder. I found one of those mini blowtorches ideal for this task, but have done it with a soldering iron, thought it pays to have a selection of choice swear words and oaths ready before you begin, Photo 10. The rest is as before, filing to shape and cleaning up.
Lastly we go back to the propeller tube. There is no need for bushes in the tube as we would with a larger one, the small size meaning that any power loss is negligible. Just measure the length you need, leaving around 1cm of shaft exposed for the coupling and cut to size.
So, there we have it. A pleasant evening’s metal bashing and you can boast that you made it yourself and if you are really lucky you might even impress your partner.
Connecting
I said earlier that I would return to the motor. If you are using a servo motor the motor shaft will probably end with a small gear. Don’t try to remove this, but just find a piece of tube to go over it, ideally the same outside diameter as the prop shaft. If the gear is too large for the tube to fit over, then a couple of minutes with a file does the job.
If your motor doesn’t have a gear on it, just put two pieces of tube together, one inside the other with the smallest fitting on the motor shaft and the outer being similar in diameter to the propshaft, Photo 11. Clean and tin the inside of the tube and tin the gear and push them together. You will need to have a large soldering iron or a mini blow torch to solder them together because the heat needs to be applied for as short a time as possible to prevent damage to the motor. Lastly install the motor and shaft. finish the boat, go for a sail and you’ll be amazed at your skills.
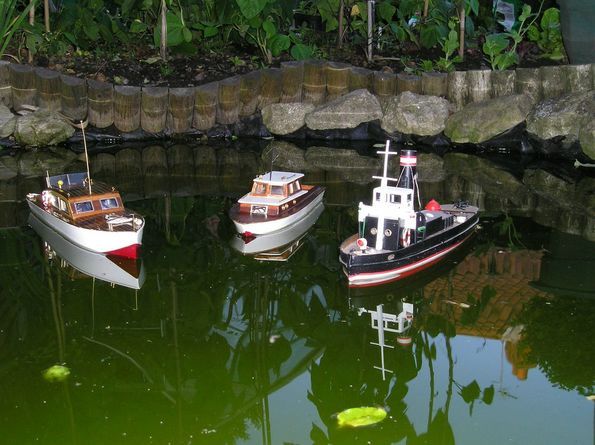
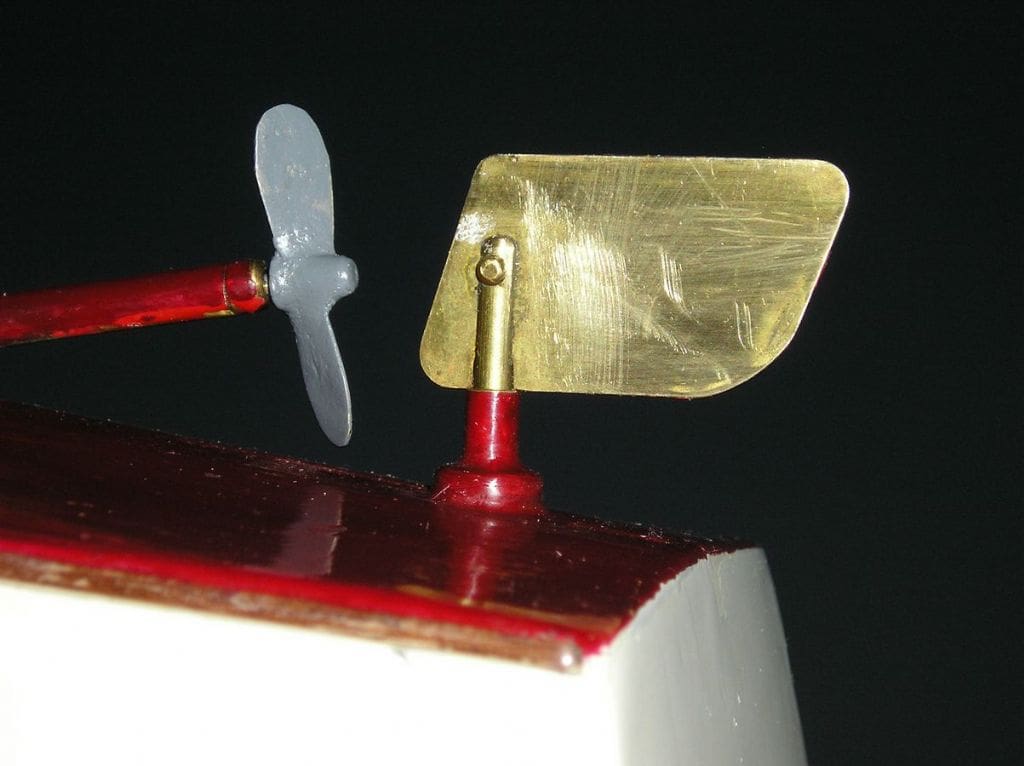
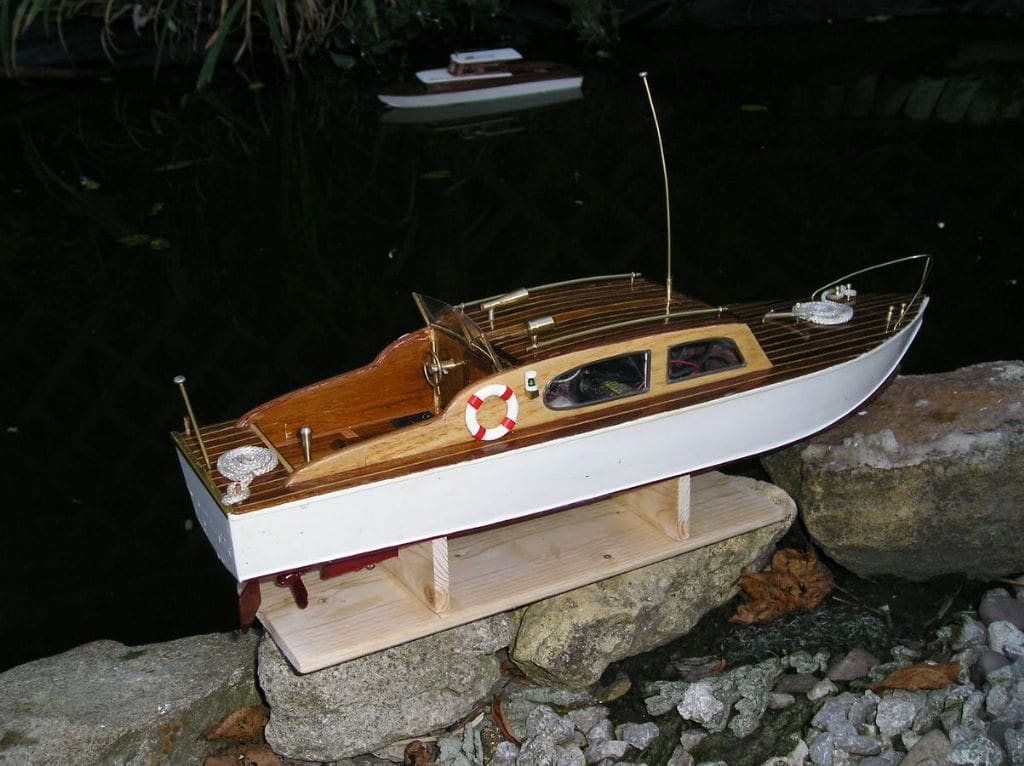
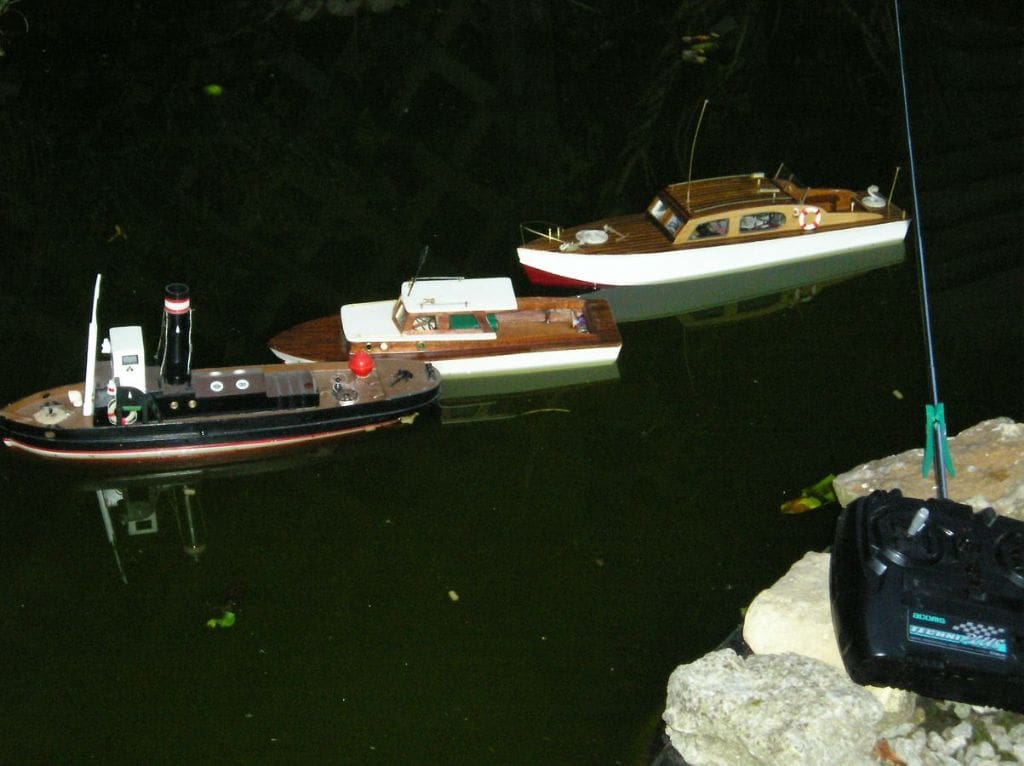
Photo 12 is of the installation in my KeilKraft Neptune. The thin propeller blades actually work very well when driven by a standard servo motor. Photo 13 is of it the right way up and the last picture, Photo 14, is of my mini-fleet on the garden pond.
You may even end up telling your partner that the garden needs a new slightly larger pond. For her birthday you can get a garden bench to go near the pond, so if you then enjoy a sunny evening testing models on it and you are called ‘a big kid’, just smile and agree. My next project, for which I’m drawing up plans, is for a model to be built from one or two standard balsa packs costing less than £2 each from my local model shop. I’m going to power it with a high power servo motor and controller, very cheap from Ebay. If I’m right it should look good, be simple and go rather quickly.
I hope this little article will inspire some readers to have a go at making simple propellers – they do work!

