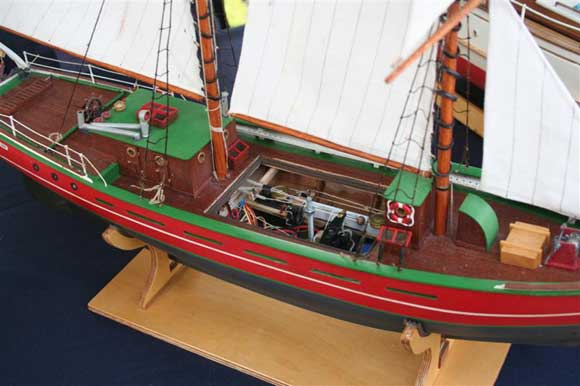
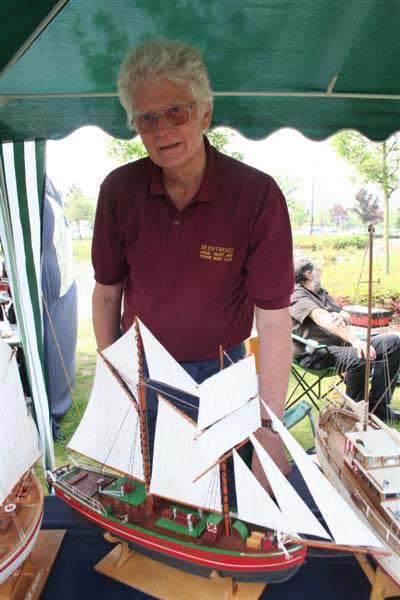
Following my successful conversion of the small static Billings Colin Archer kit to a sailing model (see Model Boats June 2007), I decided to introduce the Billings Lilla Dan static display model to a similar fate. However, one aspect that I thought to be essential, was to provide far more sail movement than a standard servo arm could give.
Having decided on this, it was necessary to give attention to the intended sail winch and its fixing within the hold of the model. There being no commercial sail winch available which is small enough for this size of model I discussed my ideas and the problem with Craig of ACTion (now sadly passed away, but the business is now under new management, see website), when the problem was solved. He supplied me with a miniature servo with no electronics, plus an equally small Pico 1amp speed controller and some diodes.
Sail winch construction
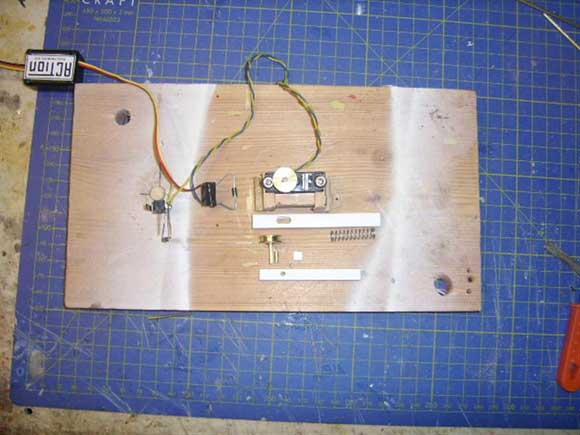
Referring to Photo 1, the component parts are:
1 x 8mm o/d and 1x 6mm o/d Plastistrut square tubing (from any good model shop)
1 x spring (Hobbies of Dereham sell a packet of assorted springs for £1.45p)
1 x mini servo without electronics. (ACTion)
2 x mini micro switches (ACTion)
2 x diodes (ACTion)
2 x small brass pulleys (I made mine on a lathe)
1 x string loop
2 x 5mm wooden beads (obtainable from craft shops – however you might get an odd look from the ladies therein!)
Enjoy more Model Boats Magazine reading in the monthly magazine.
Click here to subscribe & save.
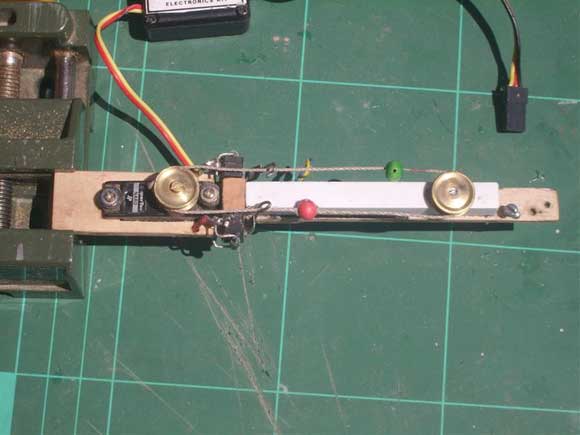
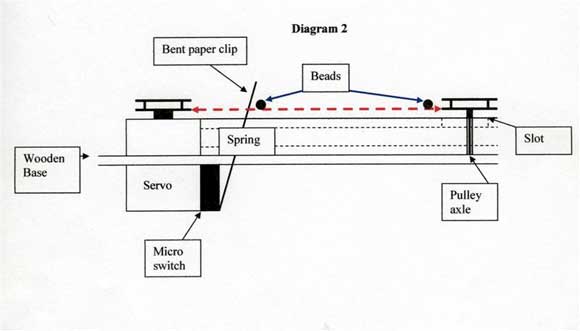
The concept is very simple, the smaller of the square tubing slides inside the larger and is spring loaded so as to provide tension to the string loop which pulls the sails in and out. The smaller tube has a vertical hole drilled through it, into which the axle of the free wheeling end pulley is snugly held. The larger of the tubes has a 10mm long slot (the same width as the pulley axle) cut top and bottom, in which the pulley spigot slides. This allows the smaller inner tube to be tensioned by the spring. The smaller tube needs a block inserted about 6mm up at the servo end, which will house one end of the spring. The larger tube is blocked off at the servo end in order to provide a base for the tensioning spring. The smaller of the tubes is slid into the larger, so that the hole is lined up with the slot of the larger. The end pulley axle is pushed into the hole in the smaller tube, at this point the inner tube will slide 6mm backwards and forwards. The spring will then tension the inner tube and that in turn the string loop. A similar pulley is attached to the servo – a small 10BA bolt cut to length will secure it.
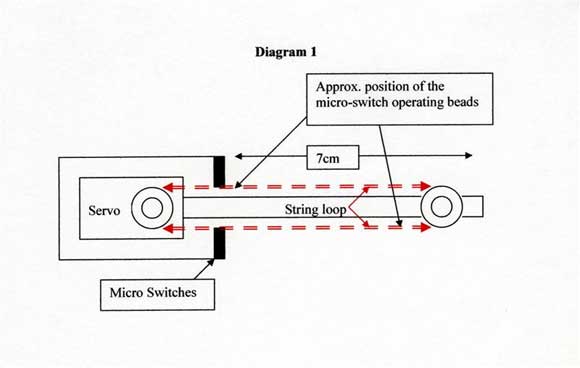
This arrangement is then glued to a 3mm wooden base on which the servo has been mounted, Photo 2. This base should be 13mm(1/2in) oversize each end so as to provide a mounting lug. For my installation in Lilla Dan, the important dimension is as in Diagram 1. Beneath the wooden base and against the servo body, glue a micro switch mounting block. The micro switches will be mounted either side of the block.
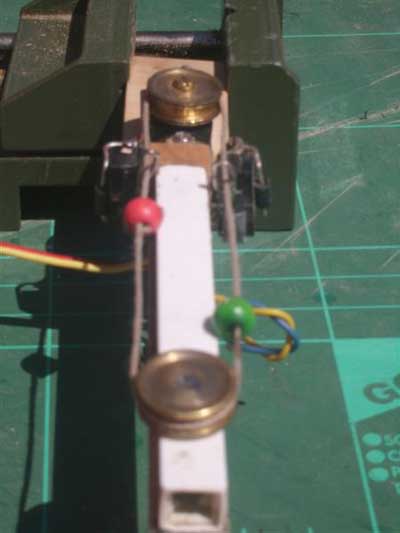
A diode is soldered across the live contacts of each of the micro switches. Remember that a diode only allows the electrical current to flow in one direction, so you may have to re-solder one, or both, the other way around to get them to work properly. On each of the micro-switch operating levers, securely bind and glue a pre bent paper clip (as per diagram) which should allow the string loop to run freely through it, but small enough to catch the incoming bead to cut the circuit and stop the motor. If you have the diode wired the right way round, it will override the micro-switch and allow the servo to reverse. Diagram 2 is a schematic side view of the winch. You do not get strictly proportional control, but by moving the transmitter control stick forward or back and then back to neutral the servo will stop in the desired position.

Tying the string loop and operation
Firstly wrap the string once round the servo pulley and put the two beads on it. Then thread the other end of the loop back through one of the beads. Pull both ends of the string through the bead so that the spring is fully under tension add a touch of super glue to secure it. A virtually non-slip loop is achieved. One bead is sited on either side of the loop to be set in position later to operate the micro switches, Photo 3. The sail sheets are attached to the beads and obviously as they move they pull the sail in and out. The ‘run’ for these sheets can be via fine brass or styrene tubes to the desired outlet points for direct connection to the sail(s). Obviously, the longer the sail winch is, then the greater the sheet movement that can be obtained.
For the non-sailing modellers, of which I am also one, this particular servo should prove equally successful in motorising ships deck machinery. I have in mind a Palfinger hydraulic hoist/crane, when two or more servos could be connected in series, via micro switches to lift or lower each part of the hoist in turn. To do this as, Servo A reaches its limit the micro switch stopping its travel would then operate Servo B etc. Each servo would be connected to one part of the crane thus opening and expanding the hoist in sequence. It could also be developed to rotate gun turrets and to elevate the guns for example. Remember also, the length of the run is determined by the length of the square styrene tubing, so the servo run could for example be almost the length of the model.
I leave these thoughts to the adventurous readers!


