In the March 2008 issue of Model Boats, John who has Parkinson’s Disease described how he successfully overcame his medical problem and continued to gain much pleasure from his hobby. Here follows his description of the construction of his next model from Jotika Nelson’s Navy – Paul Freshney
Brief history
Cutters were designed and built in the latter part of the eighteenth century as fast ships to be used in the English Channel. With their speed and versatility, they became a favourite of smugglers. This soon came to the notice of the British Customs, who in turn commissioned cutters for their own use in countering the smuggling, particularly in the south of England and this led to a design from Sir Thomas Slade. The first one was built and launched in 1763 and after more than twenty years in the Customs Service, she was sold to a private purchaser. The original boat was 54ft long and nearly 20ft wide and weighed 85 tons. With a compliment of 30 men, she had an armament of eight 3pdr. carriage guns and ten swivel guns.
This ship from Nelson’s Navy, was to be my next challenge. A suitable model kit with all the various wood and planking was purchased from Jotika Ltd., who are in my opinion one of the best manufacturers of these classic scale models.
Enjoy more Model Boats Magazine reading.
Click here to subscribe & save.
It was to be an even bigger challenge than I had expected, since the model would be shorter in length than my previous wooden model of a Thames launch, which I had named Saju VI (MB March 2008). This meant that all of the shaping of the hull would be much more acute and difficult to hold with the Parkinson’s tremor in my hand, which of course was slowly getting worse. On top of this, I discovered that the hull itself was to be double planked, so the whole exercise of planking the hull around the ribs would be duplicated. However, like Nelson’s Navy, and also being English, this challenge had to be accepted with the resultant victory!
The hull
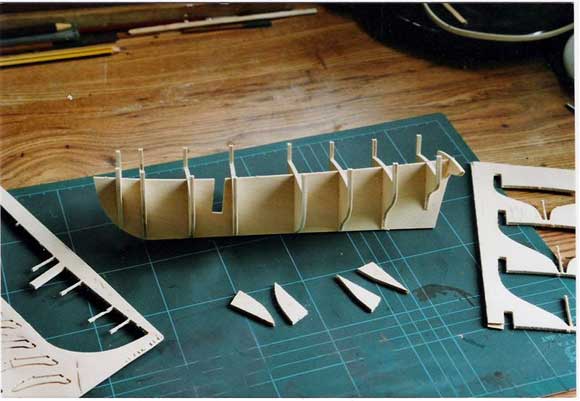
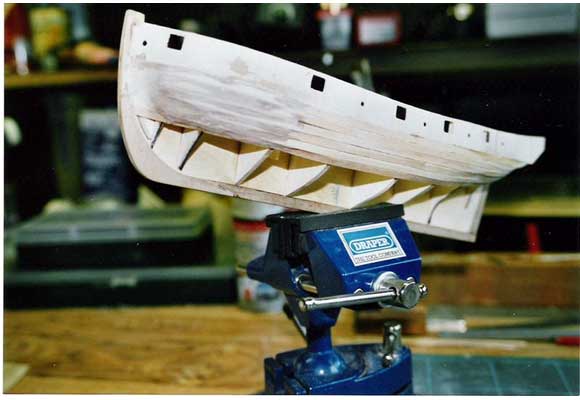
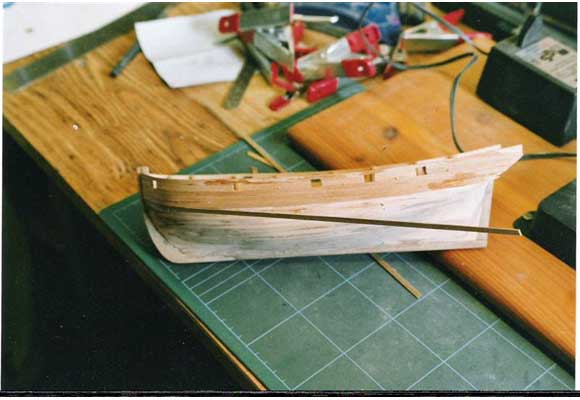
The first job was to open the box and check all the parts against the list and the plans. Jotika kits are always particularly well produced, the instructions are in English, with all the computer laser-cut wooden components being very accurate and a good fit. The keel was therefore cut out, together with the eight bulkheads. Having checked these for fit and position, they were glued with cyanoacrylate medium grade adhesive, Photo 1. This was to be followed by the first stage of planking, starting at the gunwale and working around to the keel. This proved rather difficult with the Parkinson’s tremor in my right hand having increased and I had to resort to using some filler between the planks, a problem which I had not experienced with the Thames launch, Saju VI. It was not until some time later that it was pointed out to me that the planks could be cut into shorter strips, which would make it a lot easier for gluing to the bulkheads. This seemed an obvious course of action, but often the most obvious things can escape the builder. However, I am sure it will be knowledge useful in time to come, Photo 2. Having completed the first stage planking and sanded the hull down, it was time to start the second stage planking, Photo 3.
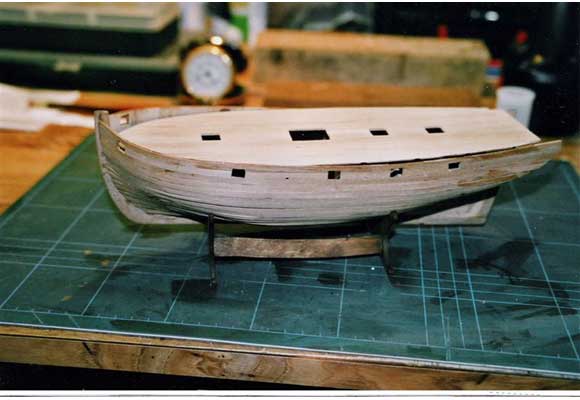
This was largely accomplished using the medium cyanoacrylate adhesive (superglue) going along two or three planks at a time, holding them in place with a wobbly hand. Fortunately, this type of adhesive sets very quickly and may have been helped by the Parkinson’s tremor involuntarily waving the boat around whilst waiting for the adhesive to cure. I timed each of these steps at one and a half minutes, knowing that if I became too impatient the planks could spring out of position. Once the hull was completed, it was time to move on to the deck. However, I elected to plank the deck completely, covering the whole upper face of the plywood sub-deck with individual wooden planks. This enabled me to cut the edge and the holes in the centre of the deck from the underside, making it a lot easier than trying to cut the planks to fit the shape of the basic deck and then fit it to the hull, Photo 4.
The next step was to be rather more exciting, since having sanded the hull down and where necessary using some Ronseal multi-purpose wood-filler (a tip I got from reading Model Boats), I managed to get a reasonably smooth and acceptable shape to the hull. Fortunately, as this was to be painted white, some of the imperfections were concealed. The planking around the outside of the deck area and around the gun-ports, fortunately had been quite a lot easier and this was stained and varnished with a semi-matt varnish.
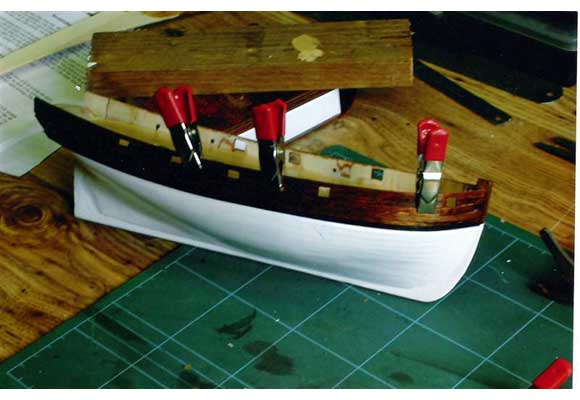
After painting and varnishing, with the deck now fitted and also coated with semi-matt varnish, the time had come to clad the inner side of the gun-ports etc. with the internal planking. This I had expected to be one of the more difficult aspects of the woodwork. However, again, starting at the top and working down, it was easier than expected. In this case, I did not have to worry about the wobbly hand so much, since as can be seen from the picture, Photo 5. small clamps can be used to hold the planks in place while the adhesive sets.
Fittings
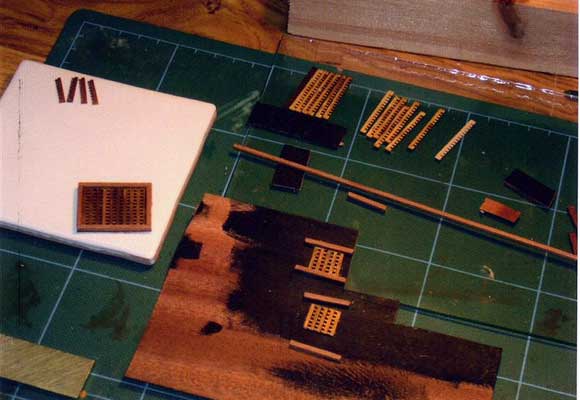
The various ship’s fittings could now be made and put in place. This is always one of the parts that I enjoy most, since each little fitment becomes a small project all on its own. The grating, as can be seen being constructed, had to be made from tiny strips of wood, which I found easier by gluing the strips to a very thin sheet of ply that was painted matt black. When assembled, it was easy to cut out the completed grating ready for fitting to the deck, Photos 6 and 7.
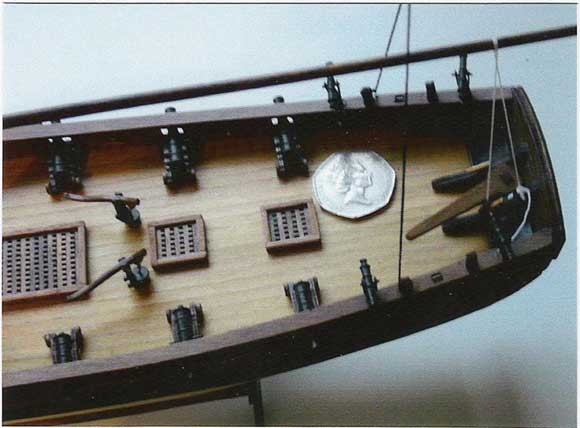
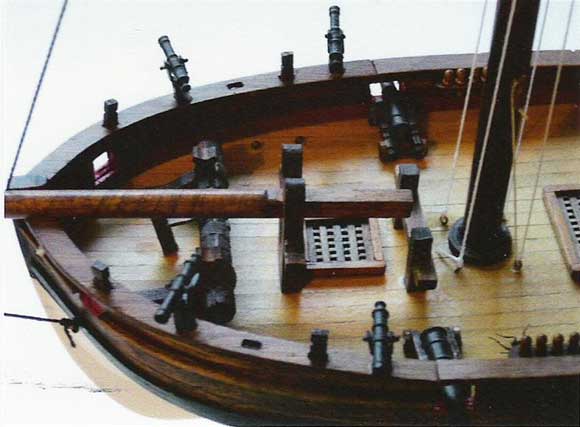
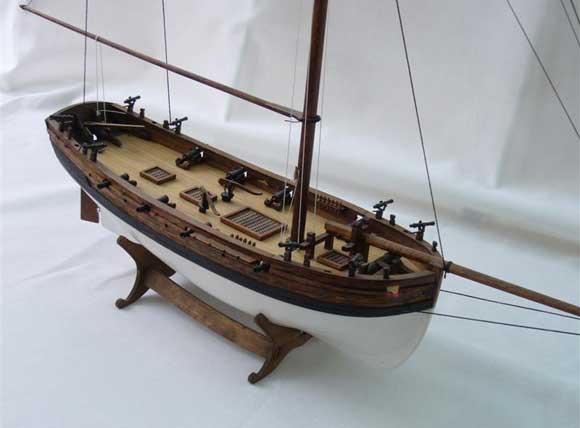
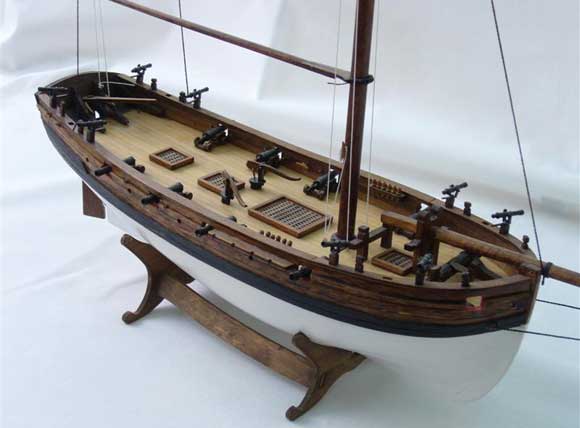
Now the capping rails and winch fittings, which had been pre-stained with teak wood stain, could be fitted. The capping rails had small, rectangular holes cut in them for mounting the swivel guns. Next, the Wobbly Ship Builder had to turn his hand to the construction of the armament, in particular the eight three-pounder cannons. These proved to be very small and extremely fiddly and when the wheels were mounted on to the carriages of the guns, it was found that the guns were slightly too high to be able to be run out through the gun-ports. This made it necessary to cut smaller wheels from a smaller diameter piece of dowel, to reduce the height of the guns, which now allowed them to take up their positions, properly projecting through the gun-ports. The ten swivel-guns to be mounted on the capping rails were rather less of a problem, see Photo 7 again and Photo 8.
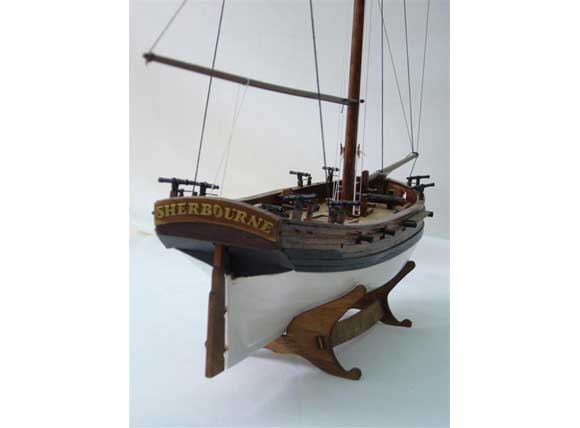
I could now fit the belaying pins and their racks, together with the water pumps. Finally, before I started the rigging, it was most important to fit the stern panel together with the ship’s name, ‘Sherbourne’. The name had come in the kit in small brass letters, which needed to be glued to the additional capping piece I had made for the stern and here I had to request the help of my daughter Caroline, who with her steady hands and artistic talents glued each letter in the exact place. One of the things I have learnt with Parkinson’s Disease is that whilst it is a very good thing to persevere and to be independent, it is also wise to accept help when offered, whether it be completing a very important part of a model, or pouring out a glass of red wine without spilling it.
Rigging
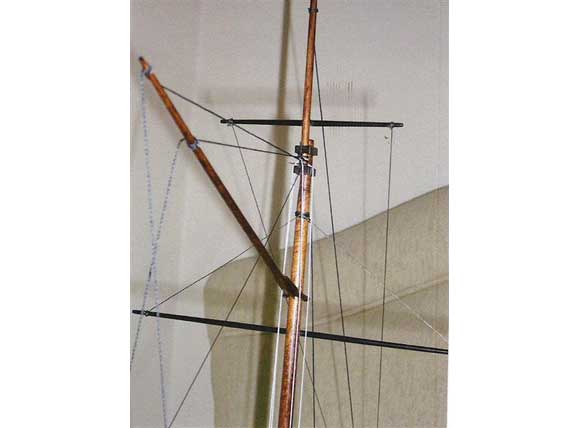
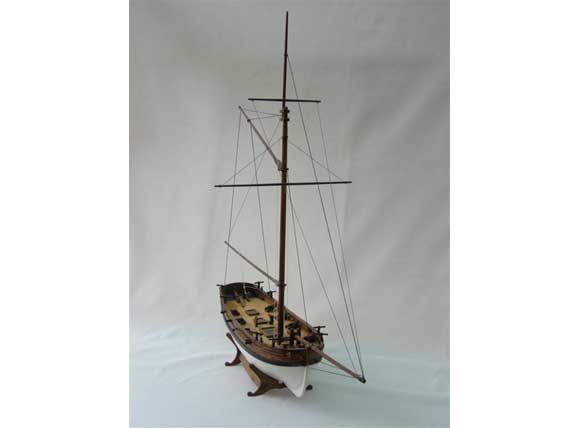
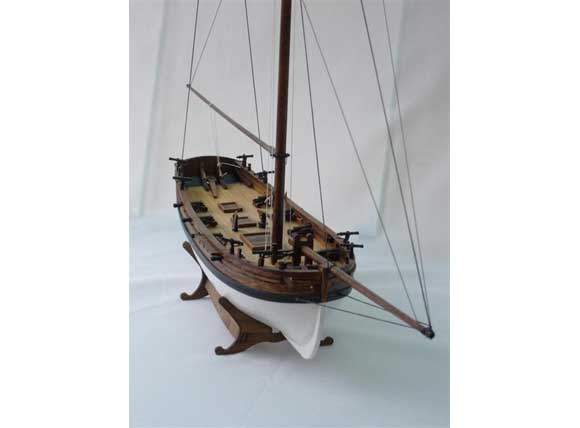
Next, my attention had to be turned to the rigging. The different diameter dowelling supplied for the mast, bowsprit, booms, etc., needed to be tapered and cut to length. Since a wood-turning lathe was not available, an alternative had to be found and this turned out to be the use of a battery powered household drill with a chuck that would accommodate the largest 8mm dowel. When the dowel was then inserted into the drill and the drill switched on, using different grades of sandpaper, the wooden dowelling could indeed be tapered. This could then be painted with a semi-matt varnish. Small holes were drilled for the metal eyes in the mast, spars, hull and decking areas. With the eyes fitted and the assembled spars duly fitted to the mast, the mast itself could then be stepped into the hull. With the black and natural thread supplied in the kit, it now only required me to carry out the actual rigging. This was best done at a time when my wobbly hand was at its best, between doses of medication. I found that having tied the thread to a particular eye, it could then be run up the mast, then a few turns around the woodwork and with a small weight on the other end to keep it taught, I could apply a tiny drop of cyanoacrylate adhesive, which in no time at all kept the lines in place. This procedure was carried out with all the rigging and ended with a very satisfactory result, Photo 9.
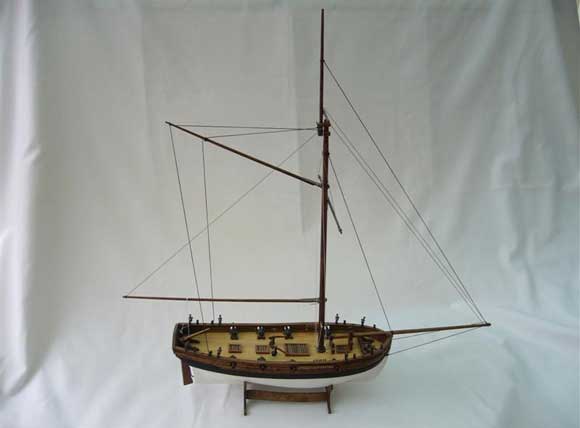
Conclusion
It had taken about two and a half years for The Wobbly Shipbuilder to complete H.M.S. Sherbourne, Photo 10. It had been a hobby which could be taken up whenever time, spirit or indeed the wobbly hands, so allowed. Although it could be frustrating, as any detailed modelling must be from time to time, I am absolutely convinced that it is a very good therapy for anyone suffering from a disability, whatever it may be. It is not necessary to have a special aptitude towards modelling, although taking ones’ time and with a degree of patience (which I am normally very short of), an acceptable result can be achieved. With such a variety of boat models available, i.e. plastic, static, radio controlled, small, medium or large ships etc. and available at generally very modest prices, I would strongly recommend anyone to give it a try. A great deal of pleasure can be gained from overcoming the little problems that inevitably arise, as well as not letting a disability dominate your life.
(John Martin has also pointed out that he is now using a Panasonic Lumix DMC FX8 digital camera with an image stabiliser. This has proved invaluable in overcoming the tremors of Parkinson’s disease and indeed the pictures of HMS Sherbourne have been taken with that camera. So, as he says, this type of camera may well be suitable for anyone with this sort of problem or indeed just simply shaky hands).

