Andy goes Aeronaut!
Andrew Cope builds four Aeronaut power boat kits
Over the last two years I’ve constructed four of these kits and the reason? Well for me, these kits offer maximum result for minimal effort and investment and I would recommend them to anyone, as I think they offer positive rewards for both the experienced and novice modeller alike. The four Aeronaut boats built so far are:
Enjoy more Model Boats Magazine reading in the monthly magazine.
Click here to subscribe & save.
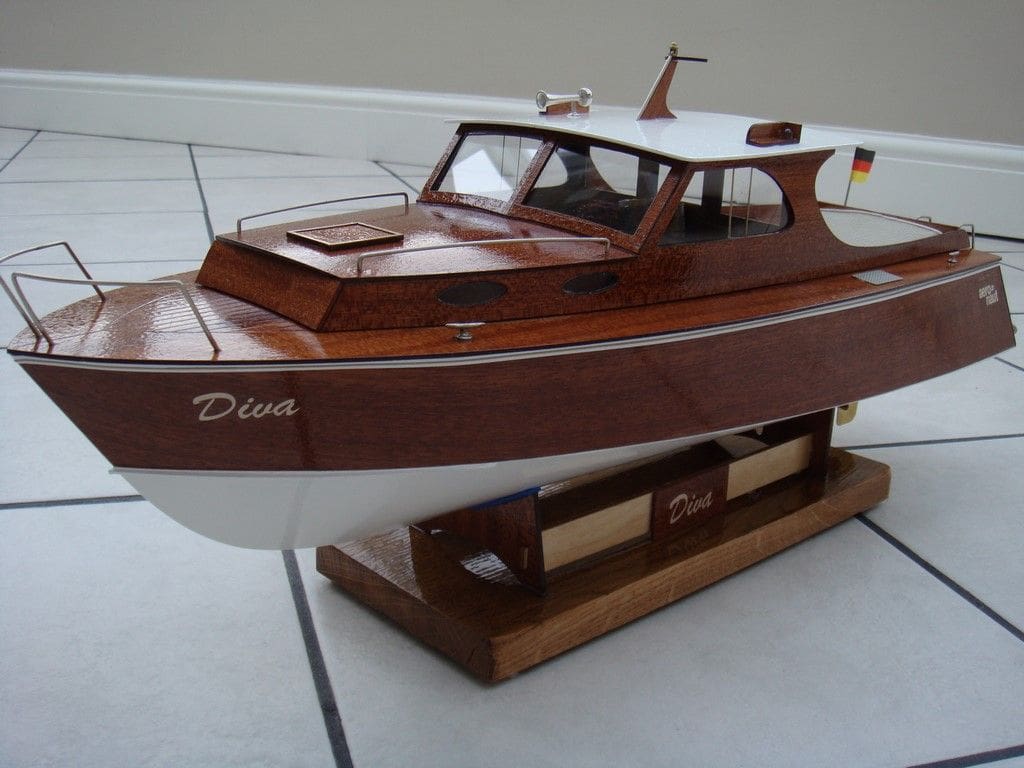
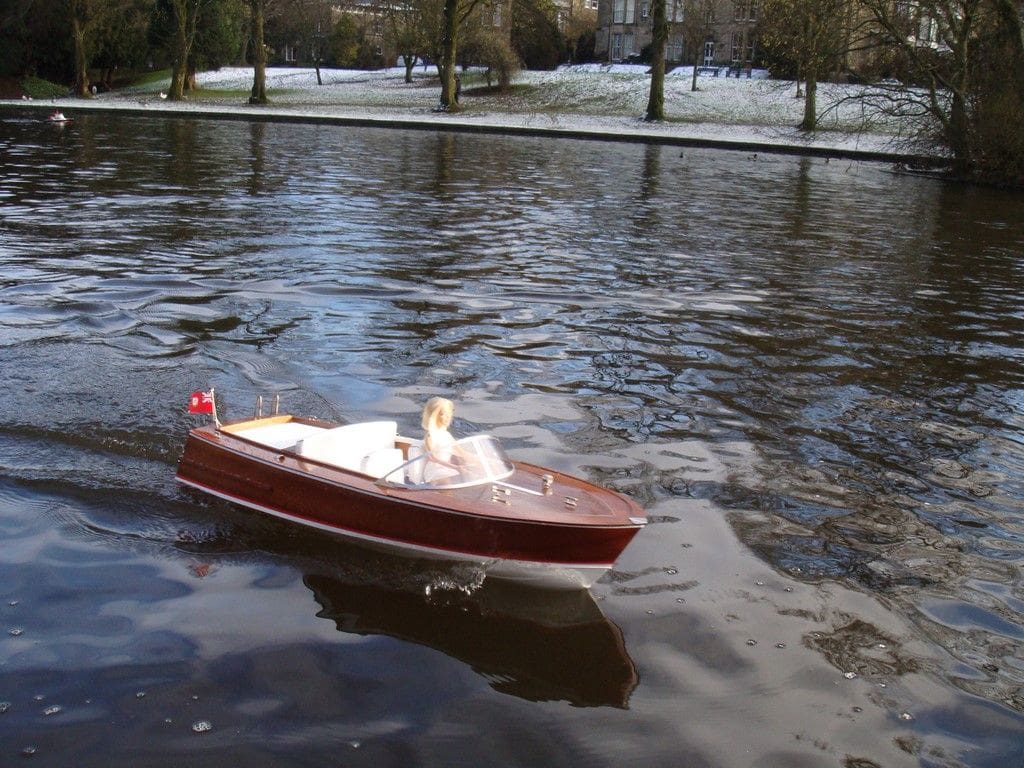
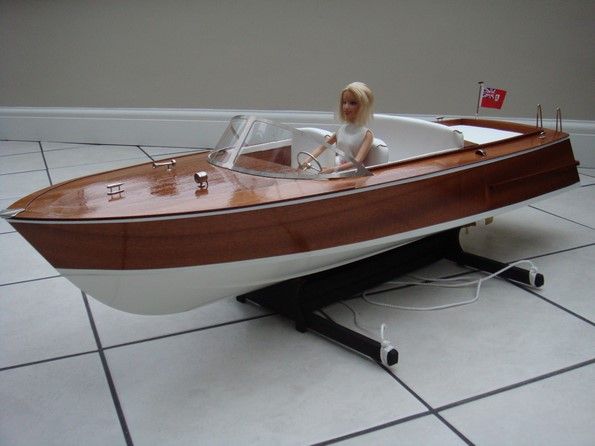
Diva – Photo 1
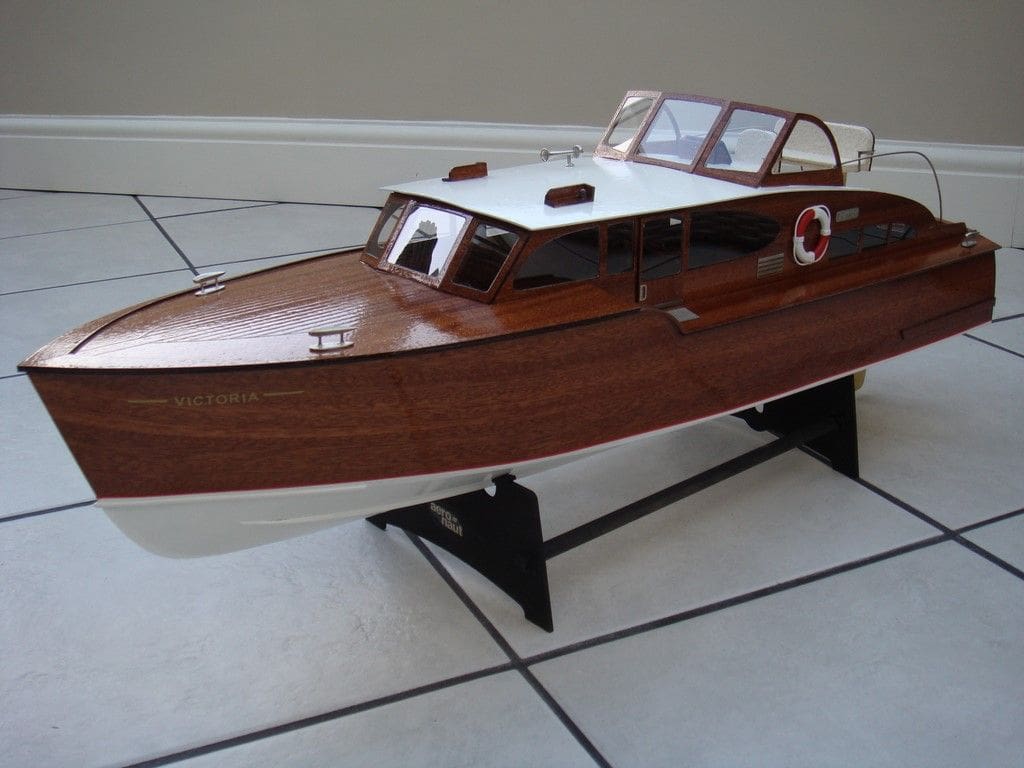
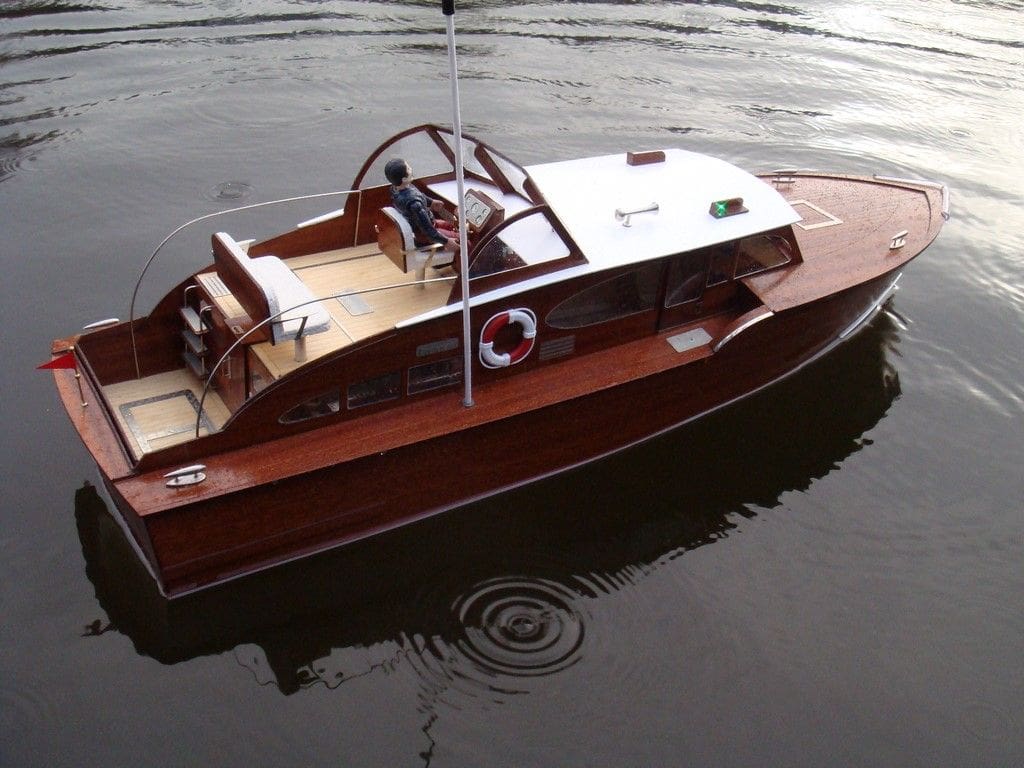
Victoria – Photo 2
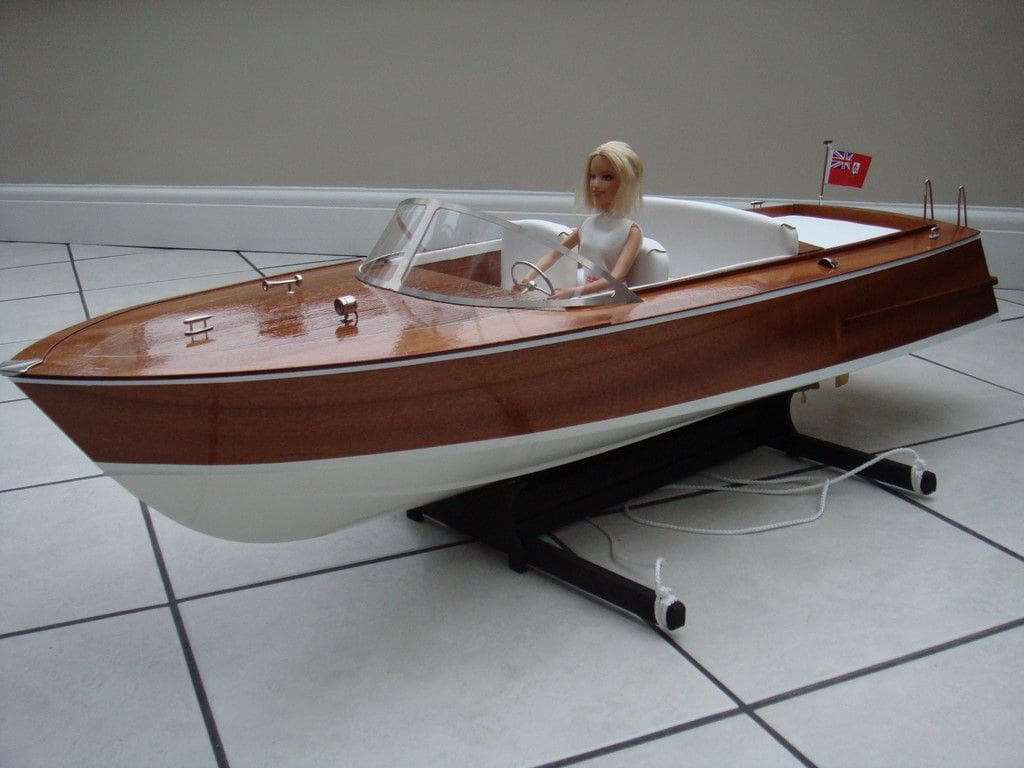
Princess – Photo 3
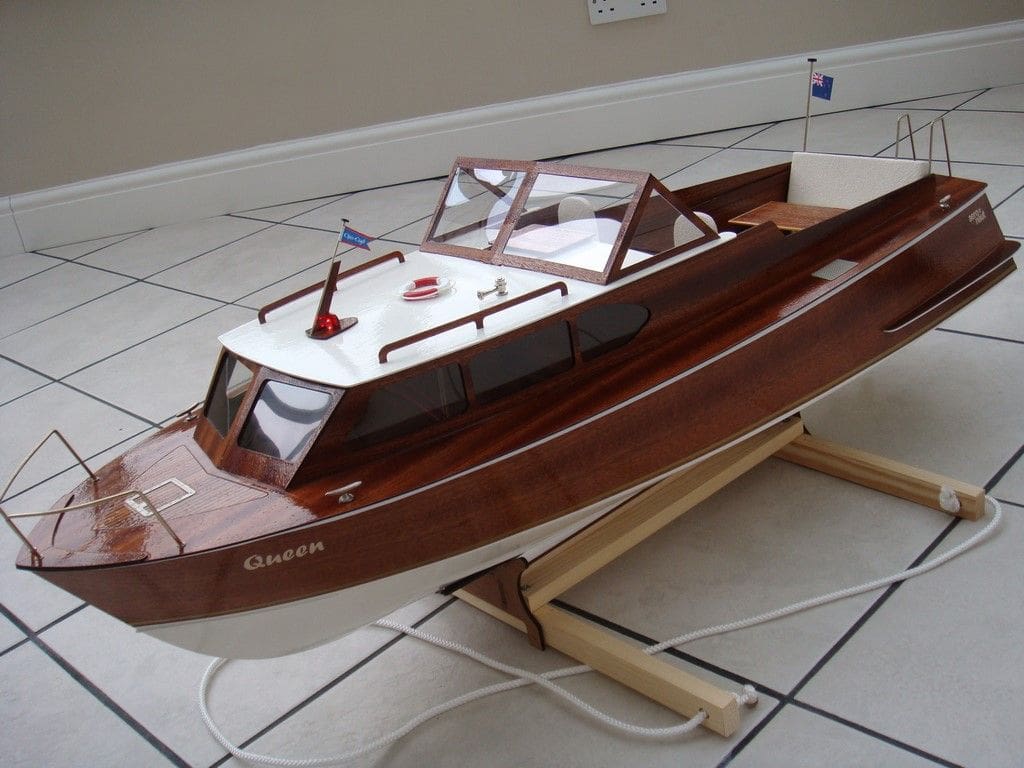
Queen – Photo 4
While these model boats might be different in size and design, the building method for each is exactly the same and I have accumulated some tips for anyone planning to have a go and here is a table showing their prices (as of late-2015) and key dimensions.
Kit Typical Price Length Beam
Diva £65 580mm 180mm
Victoria £129 700mm 203mm
Princess £140 950mm 315mm
Queen £155 950mm 315mm
I have seen the Aeronaut kits advertised as ‘ideal for beginners’ and wouldn’t disagree with that statement from an ‘ease of building it’ point of view, but the first essential point to remember is that the successful construction of anything usually relies on a good working knowledge of adhesives, so always seek advice before choosing the wrong glue. The second minor hurdle is that Aeronaut is of course a German model kit manufacturing company, so the instruction manuals tend to be in that language. Fortunately, most UK suppliers of the kits include an English translation, which can also be downloaded from the Aeronaut website:
The instructions have really good pictures, but it’s important to read the notes before reaching for the glue, or you may just become a little unstuck……
The kits
These contain all the building materials needed, including sheets of laser-cut wood and metal parts, deck fittings and most of the running gear required for completion, but it’s important to budget for the radio gear, motor, rudder servo, paints, glues and varnishes etc. as these can easily double the financial outlay for the cheaper kits.
These model boats are all hard chine construction, which simply means they have just one sharp angle down each side of their hulls. These can therefore be formed from just four sheets of plywood with a fifth forming the stern (transom) at the back. All the parts come pre-cut with German precision millimetre accuracy, which has both a positive benefit and a negative aspect. The positive benefit is that the components fit together perfectly with almost no fettling, so sanding and resulting wood dust is negligible. The negative aspect is that because there is no ‘excess’ material supplied, you need to build the model with millimetre accuracy all the way through, carefully following the instructions, or you will find that components added later during construction won’t fit.
The key thoughts from my experience that I would pass on when building one of these model boats are:
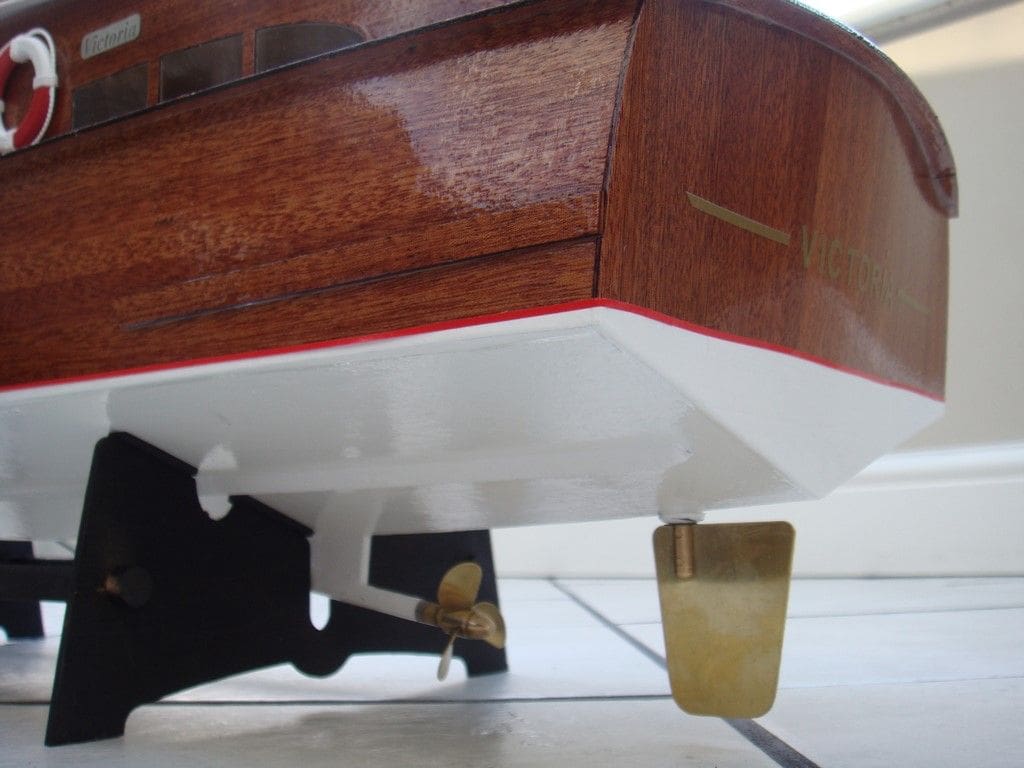
Consider whether you want to use the propshaft and rudder supplied by Aeronaut before you start building. While they are adequate for light use, I think more robust components might be needed for a lifetime on the lake at high speed. Aeronaut propshaft tubes seem to be much thinner than the traditional 8mm diameter versions used on most models, so any adjustments you need to make to the keel piece that sandwiches an after-market propshaft are better done before the model is assembled and likewise, the rudder tiller arms supplied are to be honest, a bit ‘weedy’.
Here we are going to discuss the Aeronaut Victoria in particular, the other kits following a similar construction process.
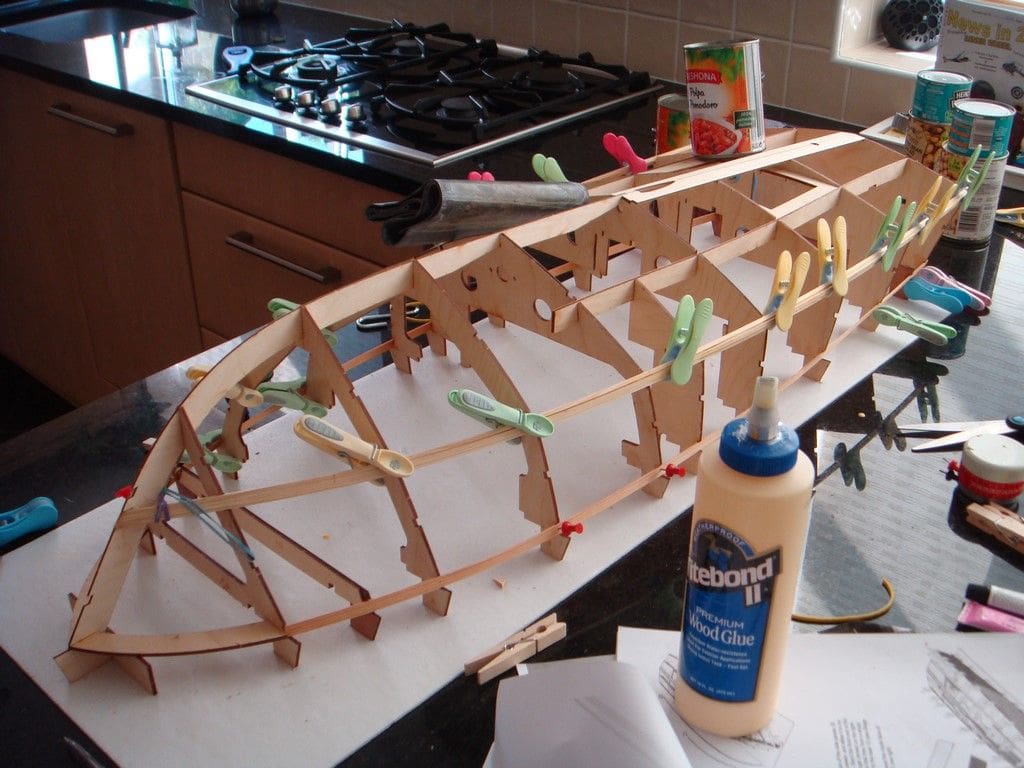
Victoria – basic hull
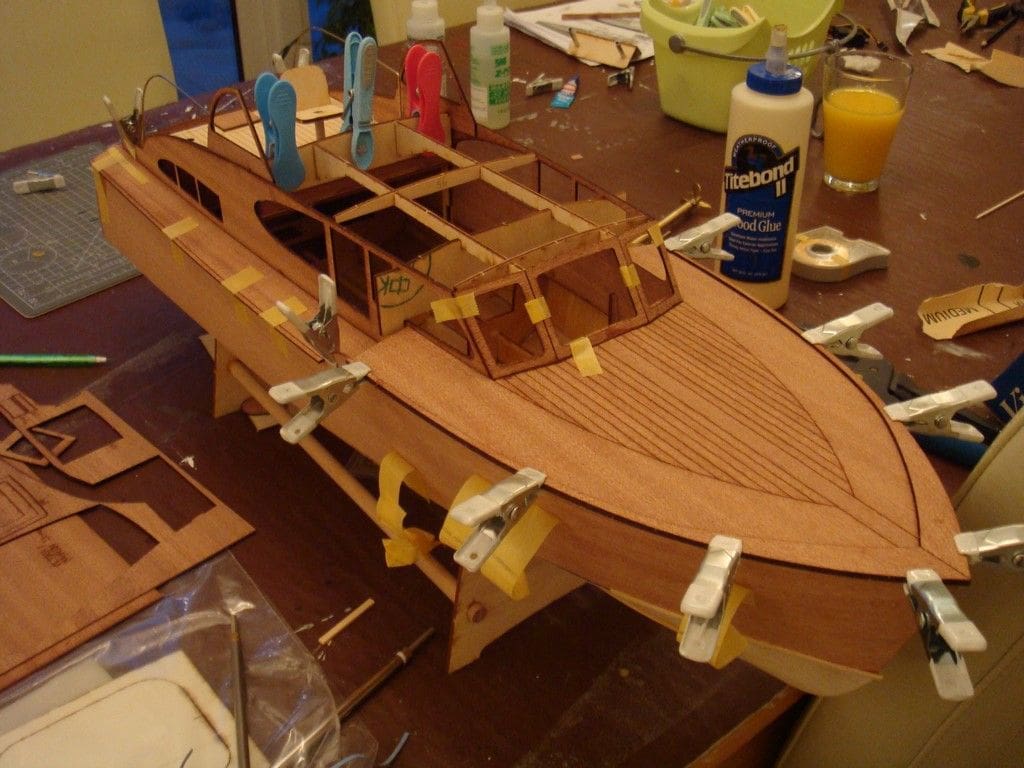
A Depron (thin foam) building jig is supplied to help you assemble the hull components including its framework, Photo 5. It is vital that this is placed on a level surface, and by level, I do mean level. Any distortion introduced at this point will twist the whole hull and make the later addition of the one piece deck very difficult. On the subject of glues, while you could use a range of clear adhesives to build the hull and its superstructure, I think wood glue is best as it remains impact resistant in a way that epoxy and superglues do not. Titebond II Premium wood glue is my favourite, as it dries quickly, but remember, it’s critical not to get any adhesive on any surfaces that are later going to be varnished, as it will then show through and look terrible. Use Tamiya masking tape to hold the components while the glue is drying, this being particularly applicable to the veneered, and later to be varnished, parts. This tape is very tacky and holds together even dusty wooden surfaces quite well, without marking them. It also helps stop the glue creeping on to parts that will later be clear varnished. Tamiya tape is also great for general paint masking as being flexible it can create a crisp line around even the most compound curves.
Remember to chamfer the inside front edge of the two veneered front hull skins, Photo 6, that form the bow cutwater before gluing in place. A fellow modeller forgot, which is easier than it sounds given the thin wooden components, and ended up having to paint the whole hull to cover the mistake. This is because the real wood veneers used on the plywood are very thin and any major sanding of the bow angle will reveal the plain plywood beneath.
The bottom panels are of plain plywood, Photo 7, because this area of the hull is to be painted rather than varnished, but care making sure they fit neatly is time well spent. Pins can be safely used here and of course the inevitable weights to hold everything in place as the glue dries. Once the basic hull is complete and is the right side up, use epoxy resin inside it to reinforce the thin sheets of plywood forming the outer skins.
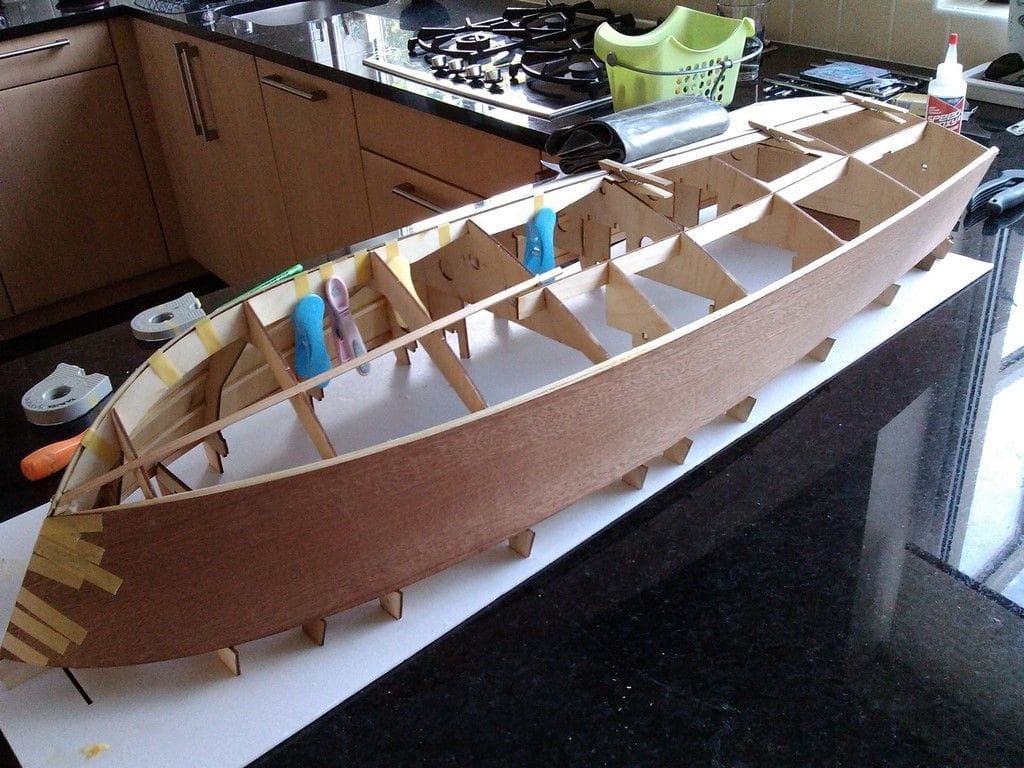
Victoria – deck and superstructure
Photo 8 is of the cabin sides and please note that they are veneered both sides and Photo 9 is of the decks clamped in place, once again taking care NOT to get glue on the mahogany outer surfaces which includes making sure that glue has not got on to the jaws of the clamps. The deck is pre-printed and very nicely it has to be said.
The cabin roof in these kits is usually formed in-situ, glued and bent to shape against the cabin sides, then being later removed for access. In order to prevent glue transferring from the roof to the cabin sides and it getting stuck forever and ruining the mahogany finish into the bargain, use a sheet of food wrapping to prevent the glue escaping and going where it shouldn’t, Photo 10. (not shown)
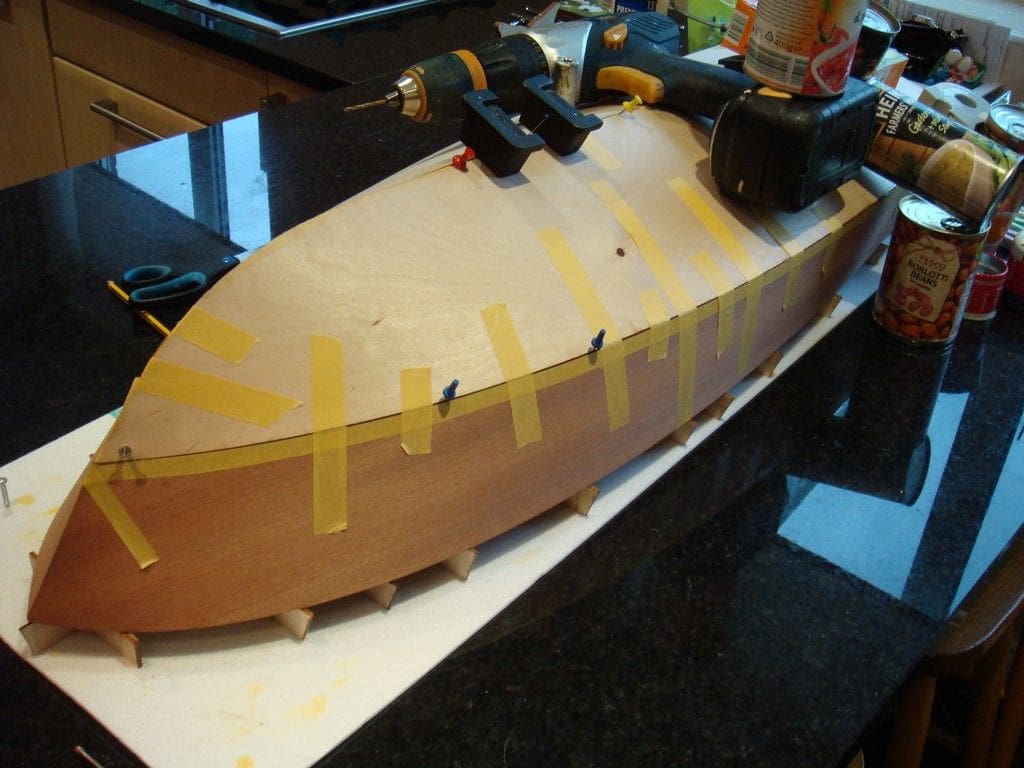
Painting and varnishing?
I used standard yacht varnish to seal and varnish these models and am a big fan of Japlac enamel paint for the coloured hull areas. Japlac enamel paint comes in range of colours and is similar to standard oil based gloss, but it hardens to a much tougher finish and has a very smooth surface, perfect for slipping though the water, Photo 11 and Photo 11a
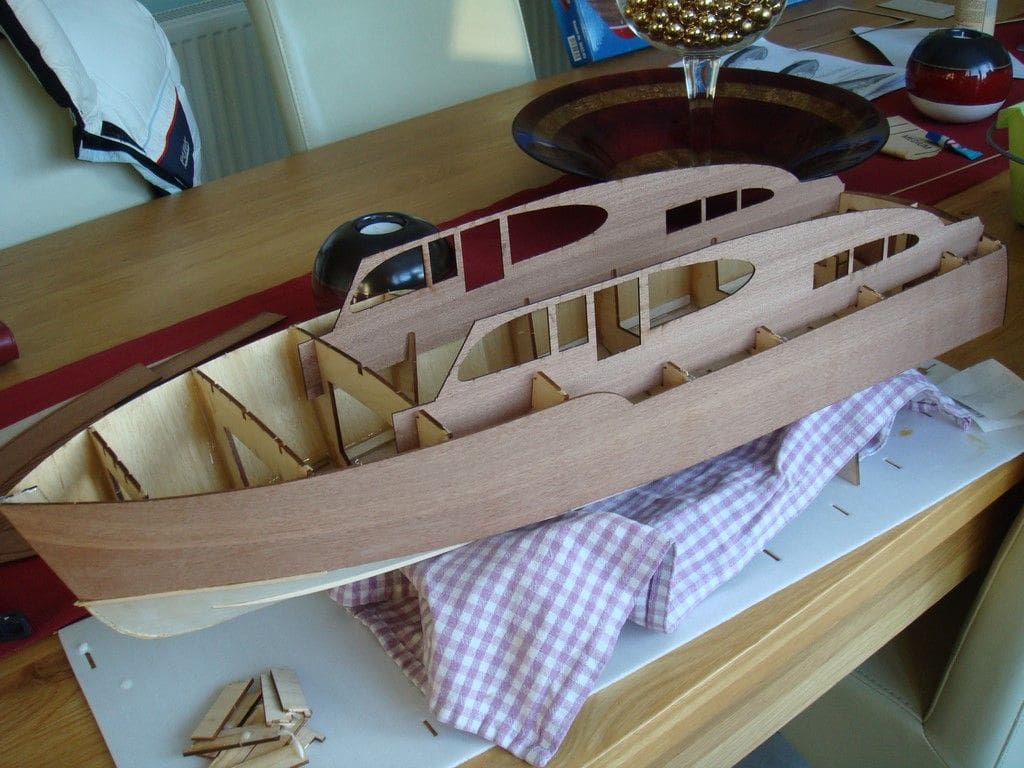
Finishing the model
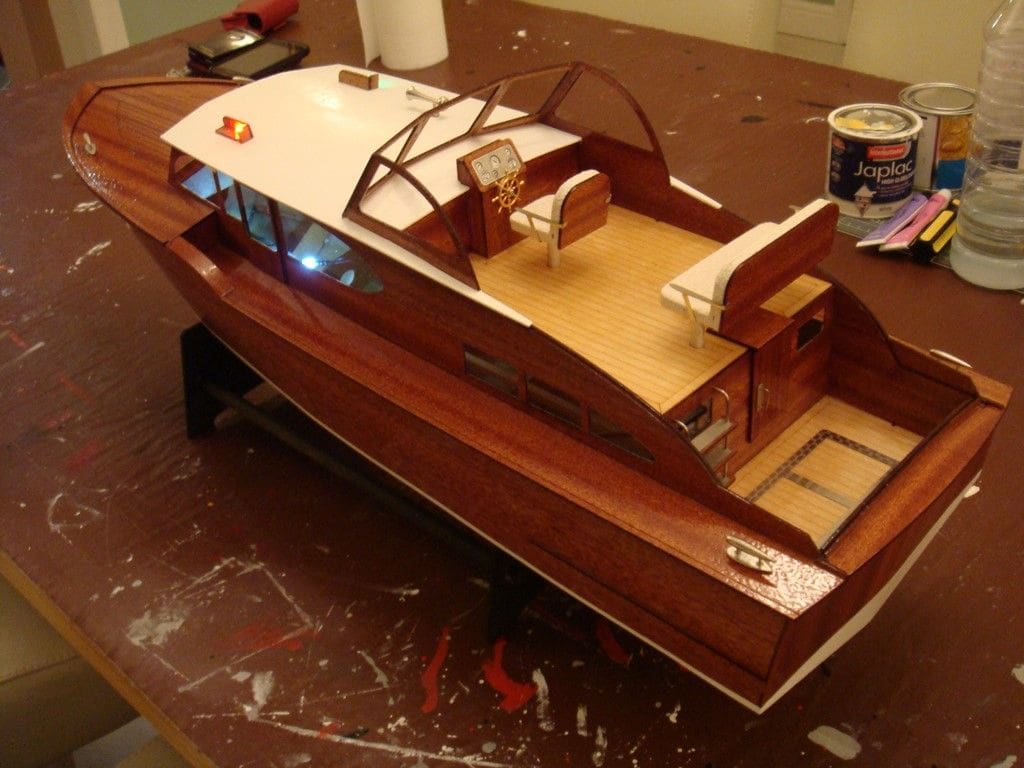
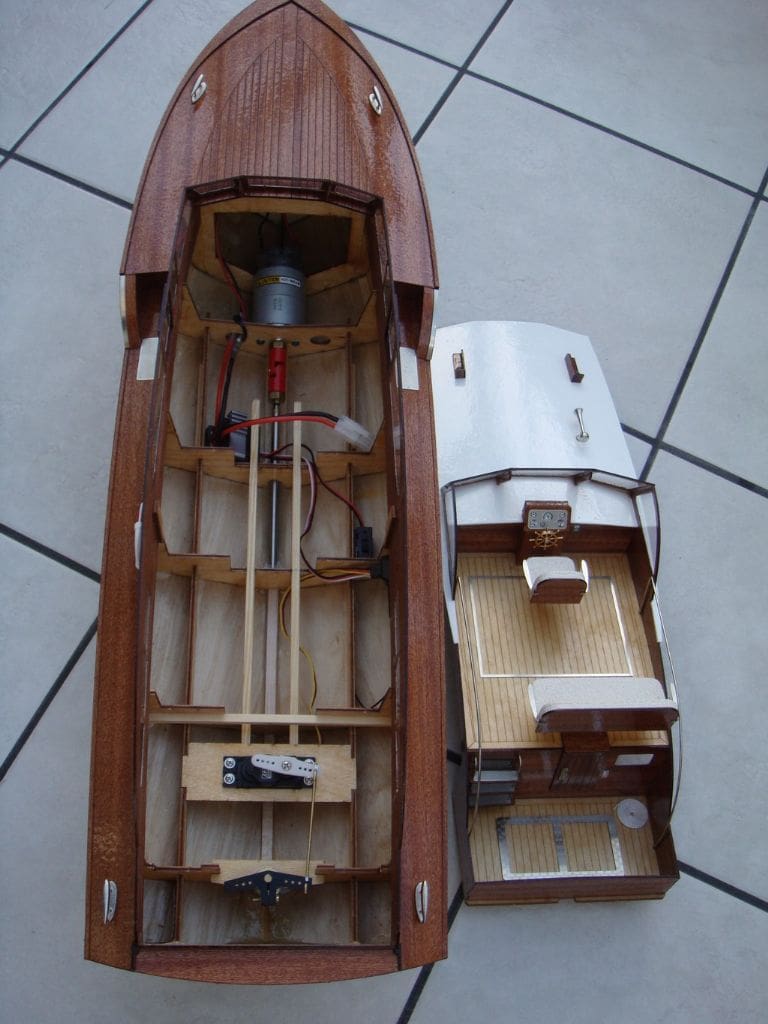
Deck fittings of generally good quality are included in the kit(s) and easily added, once the hull is varnished and painted and here in Photo 12 you can see that some lighting has also been installed in Victoria. Finally for this model, Photo 13 is of its interior, nothing unconventional here it has to be said with a brushed motor and inexpensive 2.4GHz radio system, a control technology that that has transformed our sessions at the pond, as we are no longer are now all carefully checking aerial pennants and the peg board to see who is on what frequency before switching-on.
Conclusion
I guess the point of this little homily is that these Aeronaut wooden kits represent in my humble opinion good value for money, go together well and in an era of GRP and plastic hulls, a nicely varnished mahogany hull looks different and very attractive at the pondside, or indeed on your window sill. I would not have built four of them if they were not good kits!