It doesnt matter how much effort you put into building a model, the finishing touches can still ruin everything. One of the most obvious problem areas is the name. Lets face it, everyones going to look at it and if the lettering is wonky or just not right, then theyll all spot it even if they are too polite to say anything. I pondered this potential pitfall for a long while when finishing my first vessel and eventually came up with a solution that is quick, simple and effective or at least even a bodger like me can do it and get good results.
In common with most people, I use BECC vinyl lettering on my models. Its good stuff, but constantly moving the letters around will reduce the adhesion or distort them. Getting the letter in the right place first time if possible is a good idea. If you are a signwriter then getting the letter spacing is easy, otherwise knowing how much less space to allow for an I as opposed to a W is nearly impossible.
My method
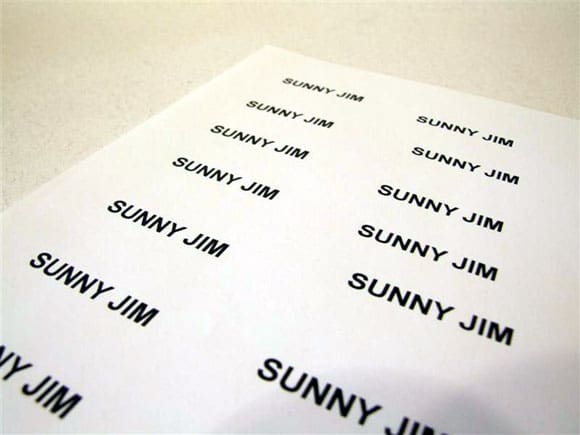
The first step is to use the computer to print off the boat name in the same size and font (usually Arial) as the letters you are using. This takes a bit of experimenting, but a few minutes work will give a sheet of names to work with, Photo 1. Next step is to cut out a name. Make sure the top edge is along the top of the letters. Stick this, with masking tape to the model below where you want the name. Spend time looking along the hull from both ends to make sure the line of text is how you want it, relative to the bulwarks or planking.
Enjoy more Model Boats Magazine reading in the monthly magazine.
Click here to subscribe & save.
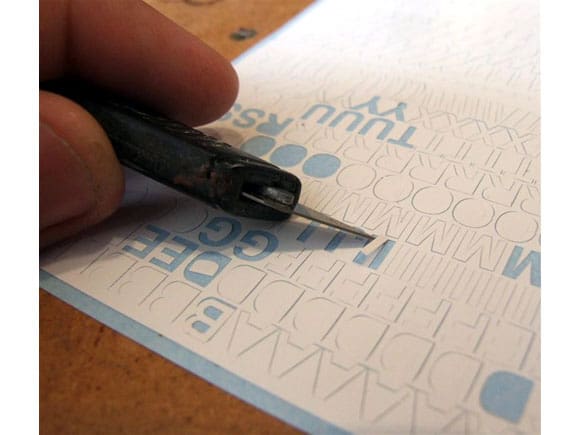
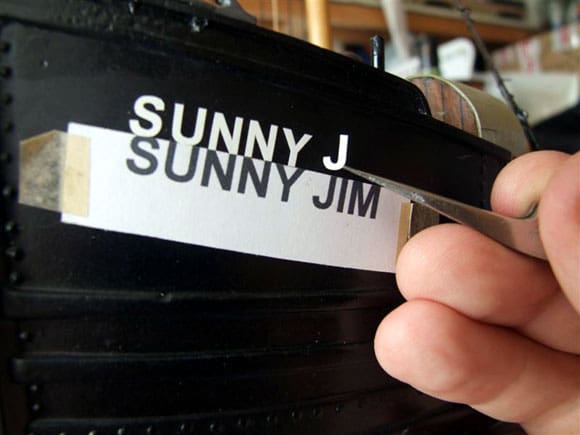
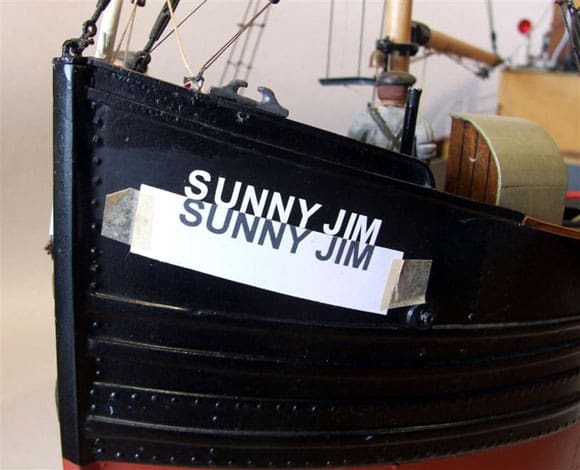
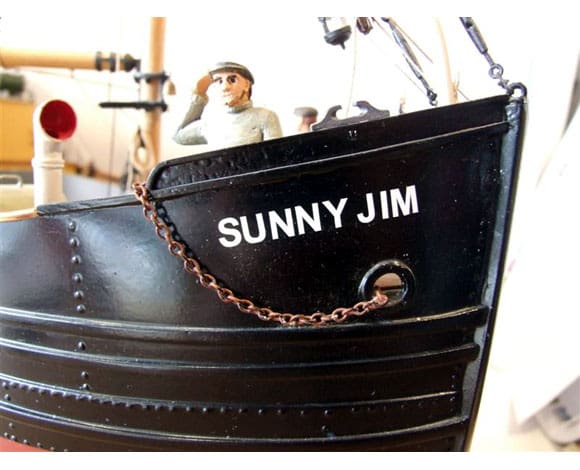
Then remove the letters from the sheet with tweezers or on the tip of a knife blade, Photo 2, taking care not to pull too hard for fear or stretching the vinyl and distorting the character. Lightly place this on the model above the appropriate letter on the printout, Photo 3. The top edge of the printout keeps everything in line and the computer has done the spacing for you, Photo 4. The result should be a perfect bit of model signwriting that any painter would be proud of, Photo 5.
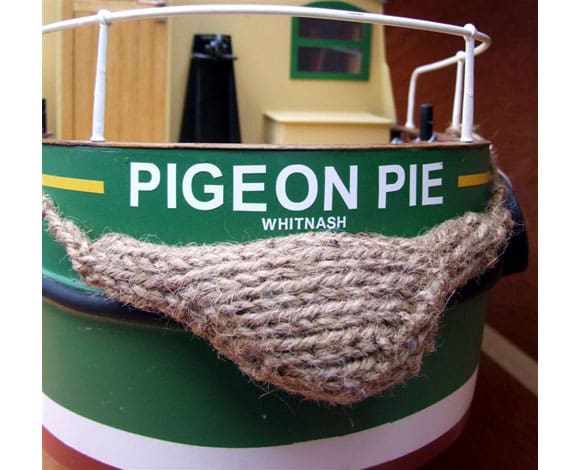
This technique works well for any size of lettering. For the model in Photo 6, I made the entire block of text up and tried it on the boat first to see how it looked. When happy the paper was cut into two and the larger text done first and then the lower wording.
I hope this idea helps someone. Along with inappropriately gloss painted hulls, wobbly text is one of my pet hates, so I certainly dont want to be guilty of it.
(www.modelflags.com or other retail outlets as advertised in the magazine are good sources for BECC lettering and flags – Editor)


